This tutorial introduces you to a few important aspects of Nuxeo Studio so that you can take advantage of this great product as quickly as possible.
Introduction
BigCorp has a very simple workflow on a BCContract document type, called BCContractCancel_WF, allowing any BigCorp employee to cancel a contract. Once launched, the request will pass through a manager to confirm the cancellation.
BigCorp needs a new feature added to this workflow: have someone from Accounting specify the amount to refund to the client, with a full refund automatically granted to cancellations that occur within 10 days of signing.
In the steps below, we will show you how to add custom schemas, automation chains and workflow steps to fulfill this feature request.
Setting Up
First, we'll set up the Nuxeo Platform so it's ready for you to configure.
Nuxeo Platform
DOWNLOAD AND REGISTER THE NUXEO PLATFORM
Download Nuxeo Platform and unzip the archive.
Use your Nuxeo Online Services credentials to register your instance. If you don't have a NOS account yet, you can sign up for your 30-day free trial through the registration page
Create a Nuxeo Online Services token.
Register your Nuxeo Server, using your account ID and NOS token previously generated:
macOS / Linux$ chmod +x ./bin/nuxeoctl $ ./bin/nuxeoctl registerWindows> .\bin\nuxeoctl.bat registerInstall Nuxeo Web UI:
macOS / Linux$ chmod +x ./bin/nuxeoctl $ ./bin/nuxeoctl mp-install nuxeo-web-uiWindows> .\bin\nuxeoctl.bat mp-install nuxeo-web-uiOpen Chrome or Firefox and navigate to
http://NUXEO_SERVER/nuxeo.The server will restart at the end. While you're waiting for your server to restart, install Nuxeo Dev Tools for Chrome or Firefox.
Start Nuxeo.
Template
INSTALL THE GETTING STARTED TEMPLATE
Log into Nuxeo Platform with the credentials Administrator / Administrator.
Open Nuxeo Dev Tools and under Useful Links, click on Go To Studio Project.
Log into Studio with your NOS credentials.
Under the Configuration menu in Studio, select External Templates and install the Nuxeo Training: Getting Started template by clicking on Import this package.
From Nuxeo Platform, open Nuxeo Dev Tools again and click the Hot Reload button to update your instance with configurations from the template.
You must have Administrator access and Dev Mode should be activated to use the hot reload.
Users and Groups
CREATE SAMPLE USERS
Click on Administration
 , then Users & Groups.
Click on New to create two new Users, Jon Doe and Jane Smith, setting passwords that you'll remember.
Create a Group, managers and add Jane Smith to the group, then create a group accounting and add Jon Doe.
Custom Documents
CREATE SAMPLE DOCUMENTS
Nuxeo Studio allows you to create your own document types and customize the metadata for each one. Let's take a look at one of the customized document types that we created for this tutorial.
Click on Browse
 and select Domain > Workspaces in the drawer panel from the side menu.
Click on the Create
 button and create a workspace named BigCorp.
Click on
again to create a BC Portfolio with the following metadata:
| Title | Generic Company |
| Company Size | (Select Medium) |
| Company Industry | (Select Information Technology) |
| First Name | Bob |
| Last Name | Jones |
| Tel | 8765432 |
| [email protected] | Upload | Upload a logo of your choice! |
On the Permissions tab, give both groups the Read & Write permission on this document.
From within your created portfolio, click
again. You'll notice that the only document we can create in a BC Portfolio is BC Contract.
- Create a contract with the following metadata:
| Title | GC Contract 1 |
| Type | (Select Fixed fee contract) |
| Contract Owner | (Select Jon Doe) |
| Signature Date | February 28, 2017 |
| Start Date | March 15, 2017 |
| Expiration Date | March 15, 2018 |
| Amount | 25000 |
You should have something that looks like this:
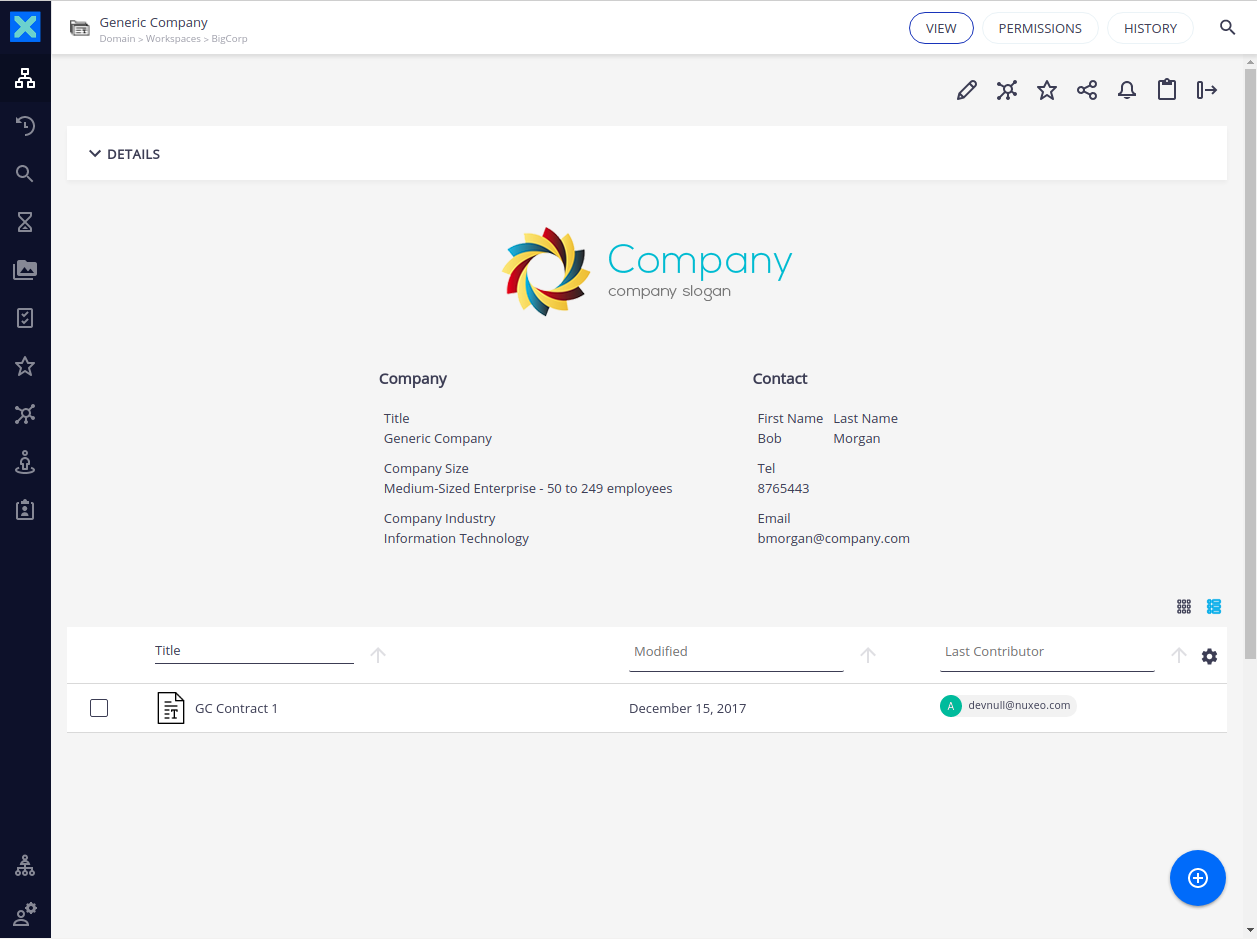
Now we can tinker with our Workflow!
Schemas
CONFIGURE A NEW FIELD ON A CUSTOM DOCUMENT
First we'll need to add a metadatum to our schema to represent the amount to be refunded.
In Studio, under the Configuration menu, select Content Model > Document Types > BCContract, then click on the Schema tab.
Add a new field to the schema:
refundAmountas a Floating point.
Save your changes and click on the Designer button.
Go to Local Types > BCCONTRACT and drag and drop the new property
refundAmountfrom Catalog in the right menu to the view layout, then save.
dom-if template. The one we've created will only appear in the document view layout if the contract has been cancelled.
<template is="dom-if" if="[[document.properties.bccontract:cancelled]]">
  <div role="widget">
    <label>Refund Amount</label>
    <div>[[document.properties.bccontract:refundAmount]]</div>
  </div>
  <div role="widget">
    <nuxeo-tag class="cancelled">Cancelled</nuxeo-tag>
  </div>
  <div role="widget">
    <label>Cancellation Date</label>
    <div>[[formatDate(document.properties.bccontract:cancellationDate)]]</div>
  </div>
  <div role="widget">
    <label>Refund Amount</label>
    <div>€ [[document.properties.bccontract:refundAmount]]</div>
  </div>
</template>
Automation Chains
CREATE A SIMPLE AUTOMATION CHAIN
Now let's create two simple automation chains to handle each refund case.
In Studio under Automation > Automation Chains, click on New to create a new automation chain,
BCContract_CancelFullRefund_AC.Drag and drop the Document > Document.SetProperty operation to the chain.
Reference the property to be set using the XPath,
bccontract:refundAmount.Reference the original contract amount (
@{Document.getProperty("bcsalescommon:amount")}) as the value in order to perform a full refund.Save your automation chain, then create another,
BCContract_CancelPartialRefund_AC. This time instead of the full amount, we'll reference a workflow variable,@{WorkflowVariables["refundAmount"]}which we'll declare in the next step.
Workflows
CONFIGURE A WORKFLOW
Under Workflow > Process Definitions, select BCContractCancel_WF.
On the Variables tab, add
refundAmountas a Floating Point value.On the Graph tab, under the Automated tasks menu, drag and drop a Node to the graph area, then click
 to edit it.
Entitle the node, Check Signature Date.
On the Transitions tab, add the transition
refundFull. We only want to run this transition if the contract was signed 10 or fewer days ago, so we'll add an expression to evaluate that condition:(CurrentDate.time - Fn.calendar(Document["bccontract:signatureDate"]).time) <= 864000000Select the
BCContract_CancelFullRefund_ACautomation chain for this transition.Create a second transition,
refundPartialwith a condition that checks for contracts more than 10 days ago, then save your node definition.From the User Tasks menu, create a Simple Task entitled Enter Refund Amount.
BigCorp wants all partial refund amounts to be determined by someone on their accounting team, so we'll add
group:accountingto the field Assignees.On the Variables tab, ensure that the refundAmount variable is editable in this task.
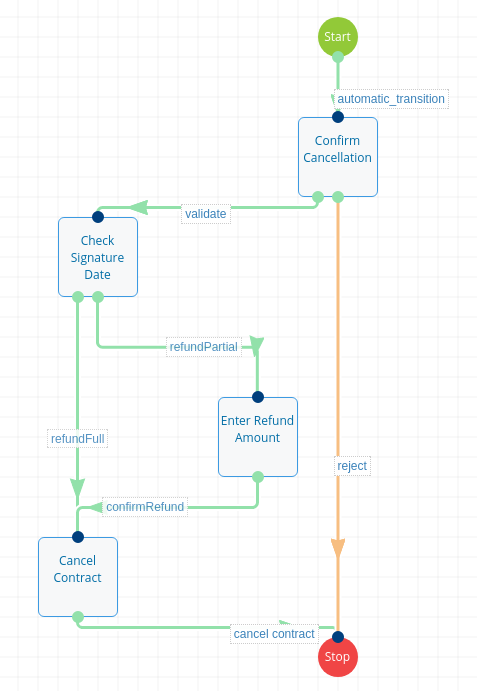
On the Transitions tab, add a
confirmRefundbutton, then link the confirm button to theBCContract_CancelPartialRefund_ACautomation chain.Finally, reorganize the nodes and transitions to implement our new logic, and save. You should have something like this:
Task Layouts
CONFIGURE THE DIALOG FOR EACH TASK
A few final touches to customize user interaction with our workflow.
In Designer, go to UI > Layouts to open up our workflow layouts.
Click on the Enter Refund Amount task layout to configure it.
From the catalog, select task > variables > refundAmount : double > edit to add the input widget, then save.
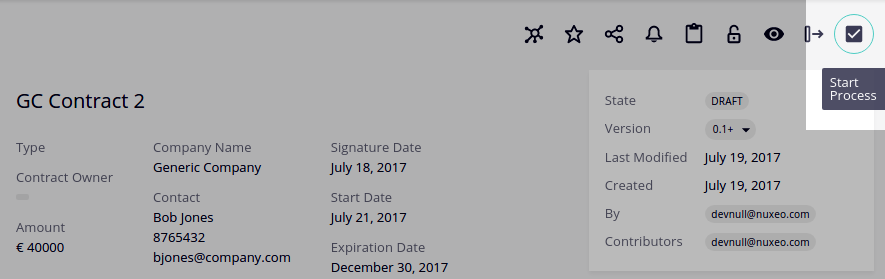
Return to Nuxeo Platform and perform another hot reload to deploy all your changes. Try creating documents with different signature dates and launching the Cancel Contract process from each one. You will have to log in as the other users you've created in order to complete all the tasks.
Search
BigCorp wants to personalize a Search form in order to perform fulltext searches on contracts only and filter the results by size (amount).
Page Providers
CREATE A PAGE PROVIDER FOR A CUSTOM DOCUMENT
In Studio, select Page Providers, then New.
We'll give our page provider the ID
contract. To the existing query filter, we'll add:
AND ecm:primaryType = 'BCContract'
which will filter our custom document type, BCContract.
Under Predicates, click Add. Click on Edit binding and select
schema:system>fulltext.Next to Aggregates, click Add and select Range from the proposed Aggregate Types.
Bind the
bcsalescommon:amountfield to the Aggregate, then add some ranges. For example:Label From To Basic (up to €1,000) 0 1,000 Silver (€1,001 - 5,000) 1,001 5,000 Gold (€5,001 +) 5,001 - Save your Page Provider.
Search Drawer
CUSTOMIZE A SEARCH
In Designer, go to UI > Layouts > Page Providers, select contract and open form to configure the form layout.
Drag the search elements from the menu on the right into the form and modify the labels as needed.
Then open results and drag columns from the menu on the right to customize your search results layout.
From the UI menu, select Left Menu Items and hover over
to select the Search drawer. Then fill in the form:
| Name | Contract |
| Available | enabled |
| Label | Contract Search |
| Icon | Select an icon of your choice. |
| Order | Enter a number to indicate the icon's position in the left menu. |
| provider | contract |
| schemas | dublincore, bcsalescommon, bccontract |
| search-name | contract |
| auto | enabled |
- Finally, select Translations to modify the range labels. Following our previous example:
{
  "label.ui.aggregate.from_0_to_1000":"Basic (up to €1,000)",
  "label.ui.aggregate.from_1001_to_5000":"Silver (€1,000 - 5,000)",
  "label.ui.aggregate.from_5001":"Gold (€5,000 +)"
}
Return to Nuxeo Platform, perform a hot reload and your customized search should be available. Create a few contracts and test your new Search.
Branding
By now, I'm sure you've noticed our custom login page with the ever-conspicuous Big Corp logo. Not a fan? No problem! Let's modify the background image.
Login Page
CUSTOMIZE THE LOGIN PAGE
In Studio, select Branding from the Configuration menu, then New. Enter a name for your theme.
On the tab Login Page, select a background image or a background colors that matches your company's color scheme.
Select a logo to be displayed within the Login box.
Save, hot reload your project and log out of your Nuxeo instance to see the changes.
Application Definition
INSTALL NEW PACKAGES
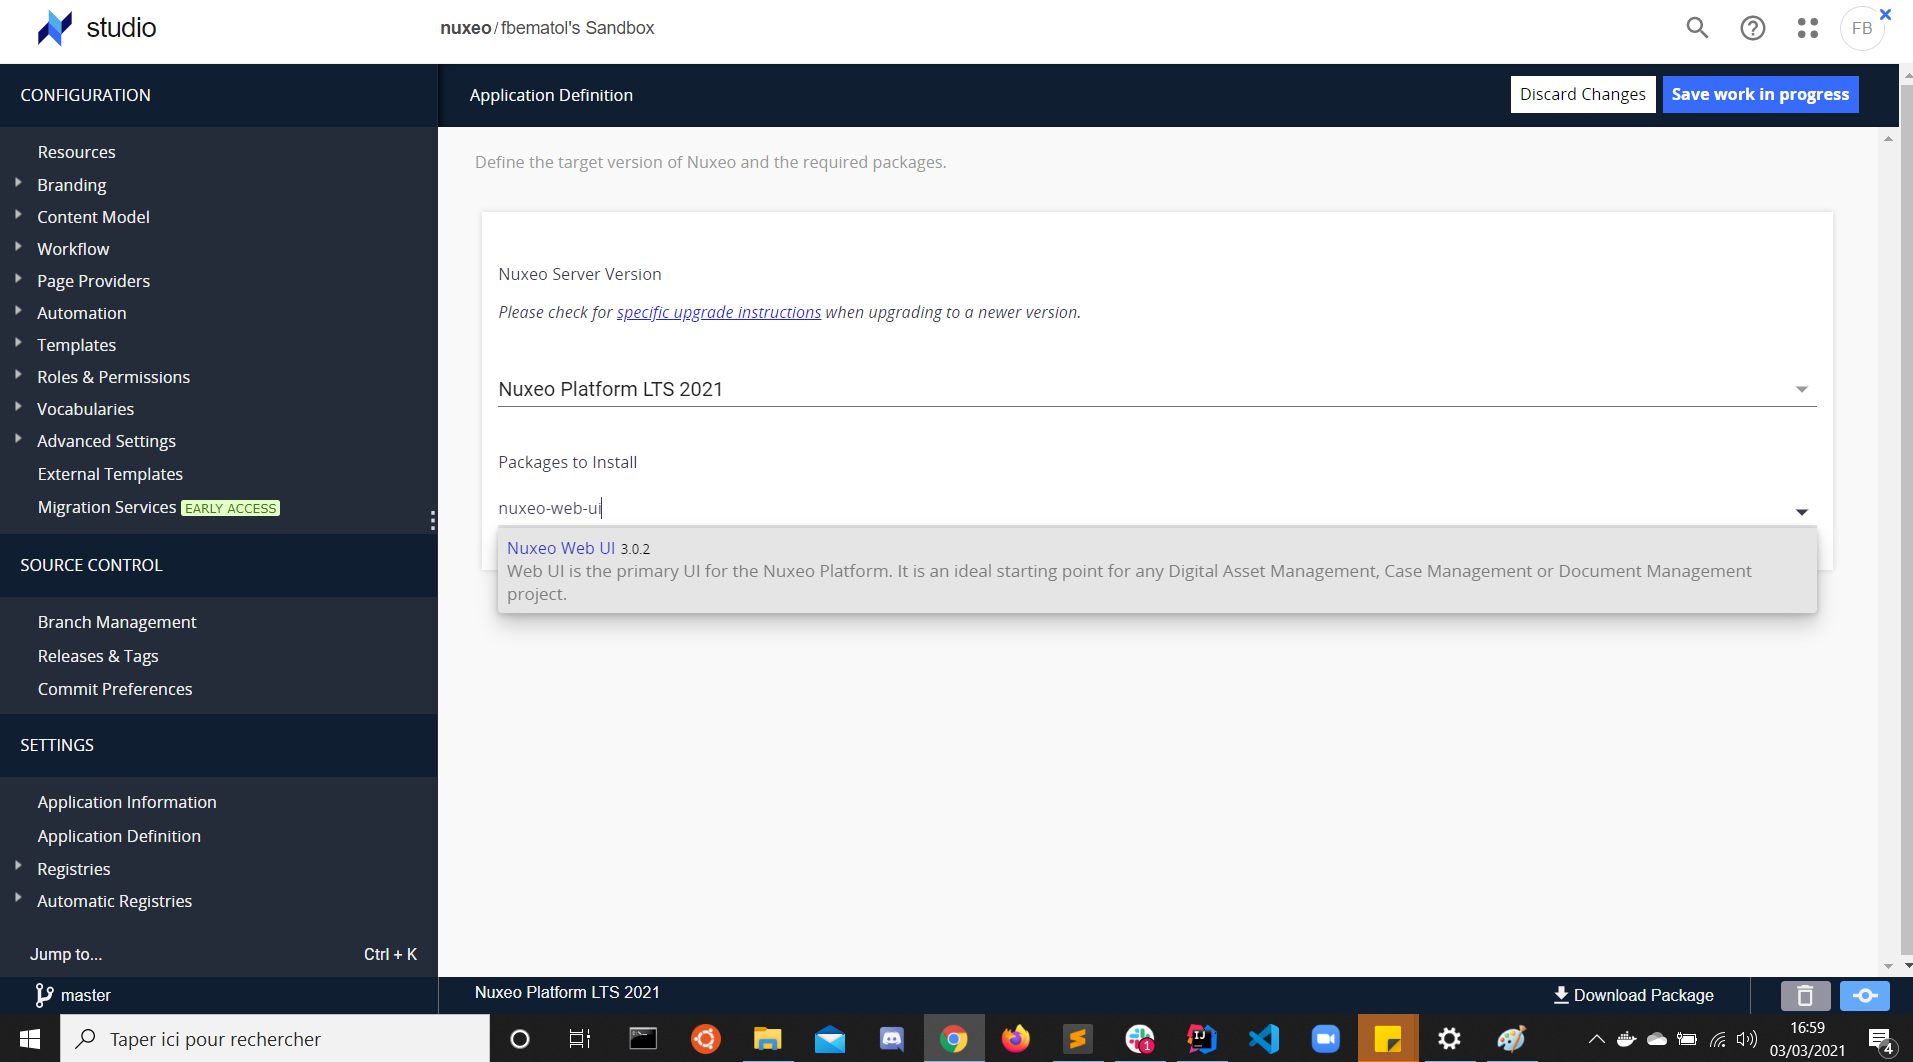
In Studio, select Application Definition from the Settings menu.
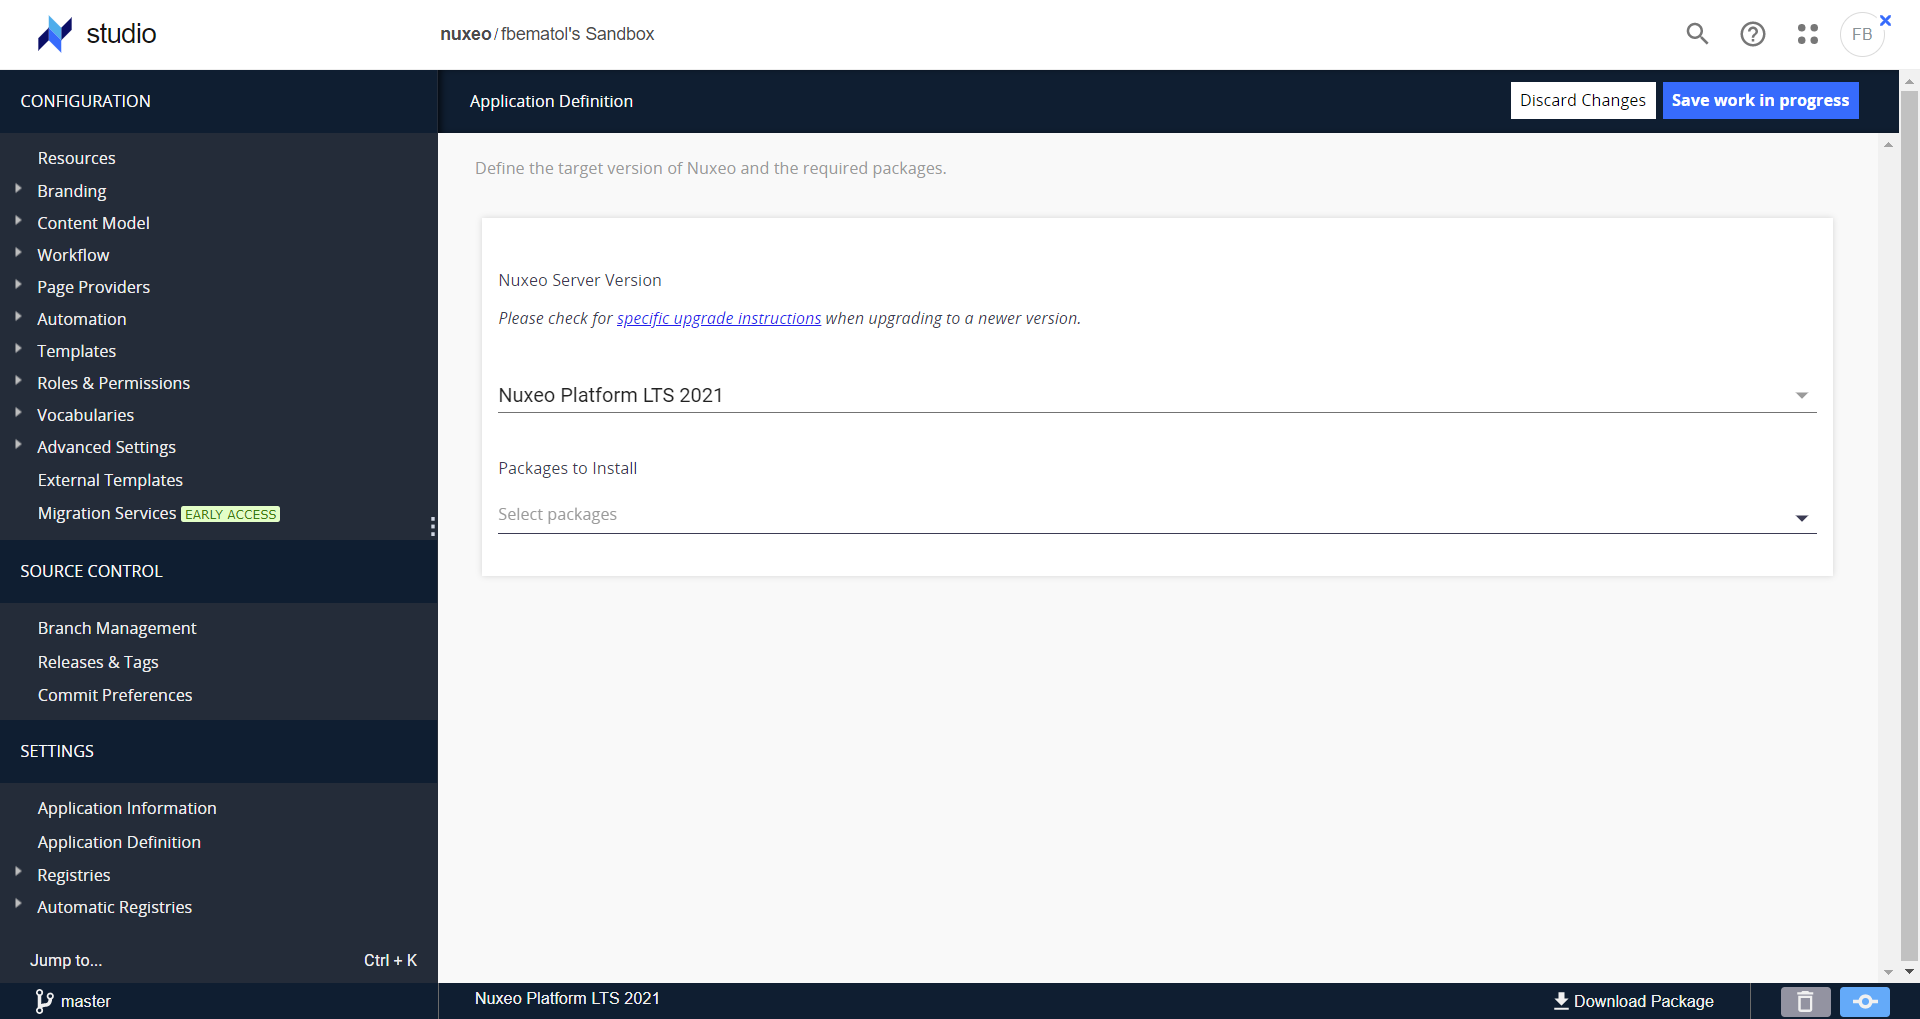
Enter the package name you are looking for in the Package to Install input, and select it. You should have a summary about packages changes.
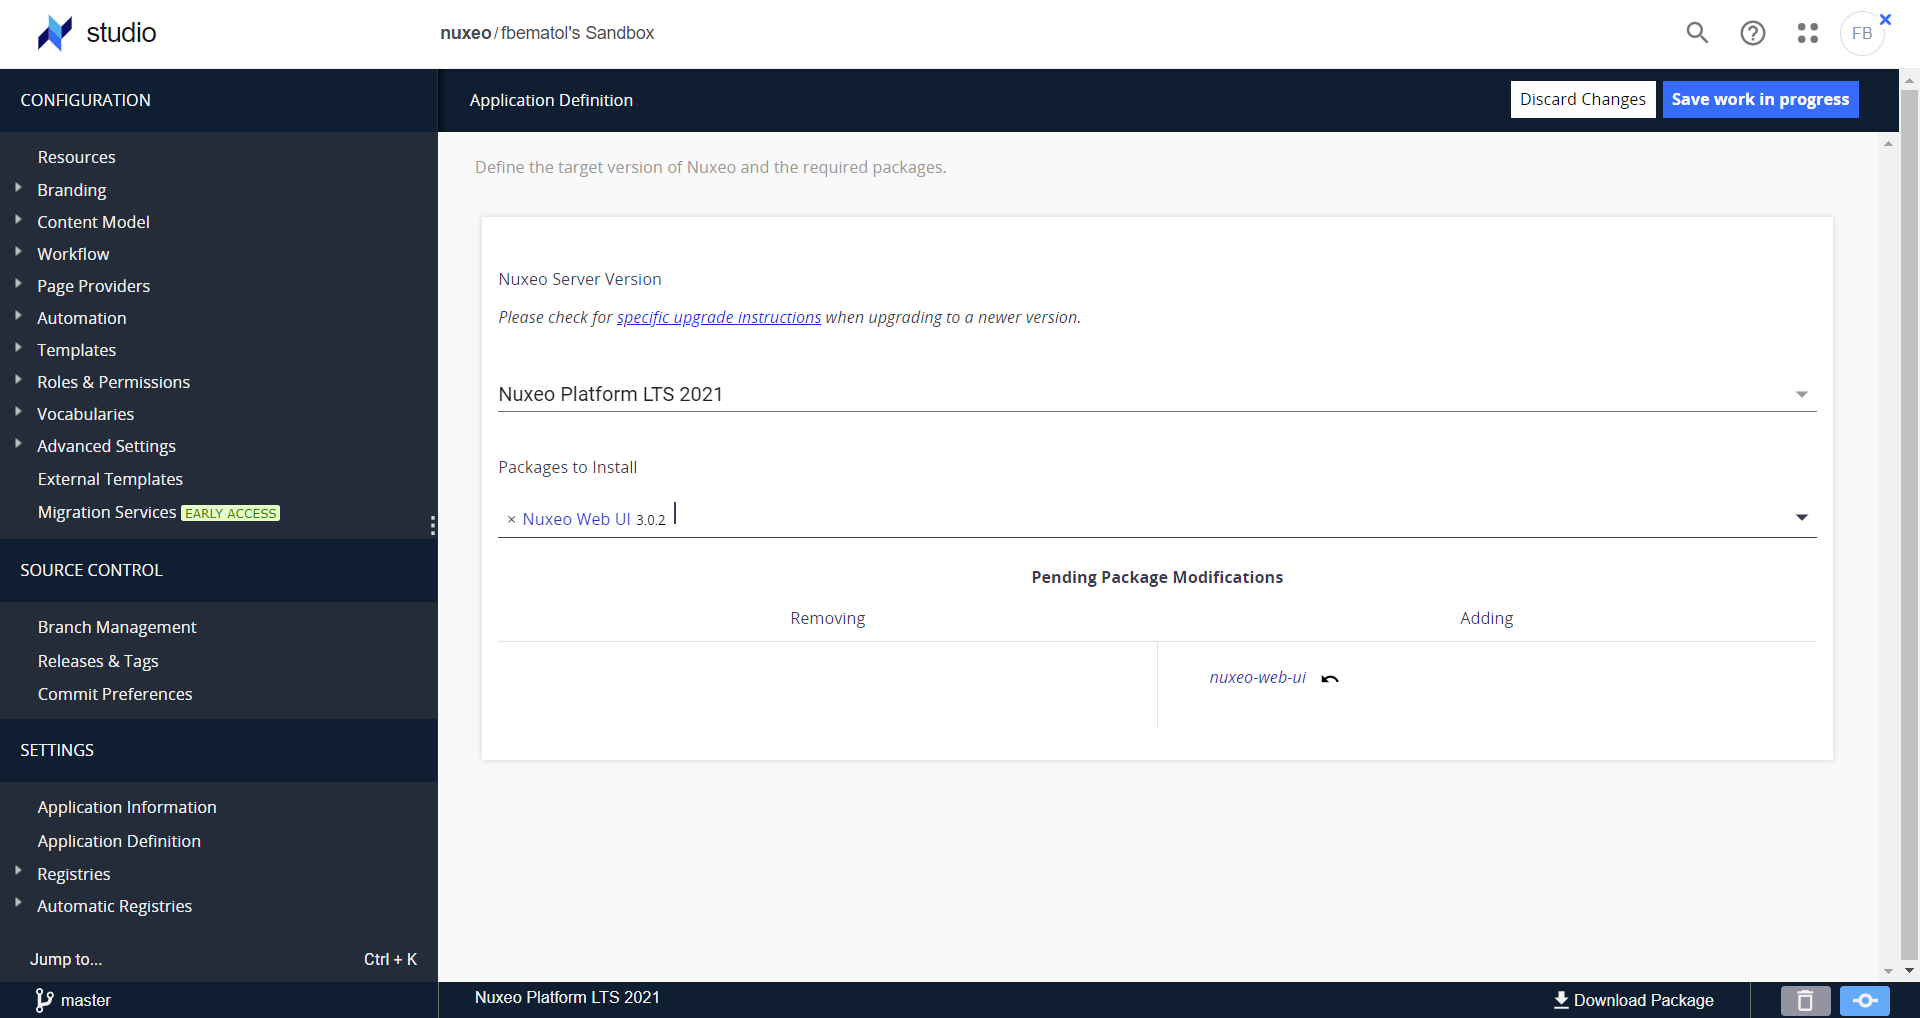
Save your changes. The package will be installed when installing the Studio package and its registries are available in the Studio project.

Going Further
Let's learn how to create your own operation.