Here is the big picture of how Nuxeo Drive works: on the Nuxeo Platform web interface, you mark some workspaces or folders to synchronize. After you installed the Nuxeo Drive client on your computer and bound it to a Nuxeo server, documents are saved on your computer so you can access them and work on them offline. And the next time you have an Internet connection, changes in your local folder are uploaded to the Nuxeo Platform. Changes on the server are also automatically downloaded to your computer. Nuxeo Drive also enables to edit synchronized documents locally from your computer.
To enable Nuxeo Drive, you need to install Nuxeo Drive client on your computer so your computer can communicate with the Nuxeo Platform.
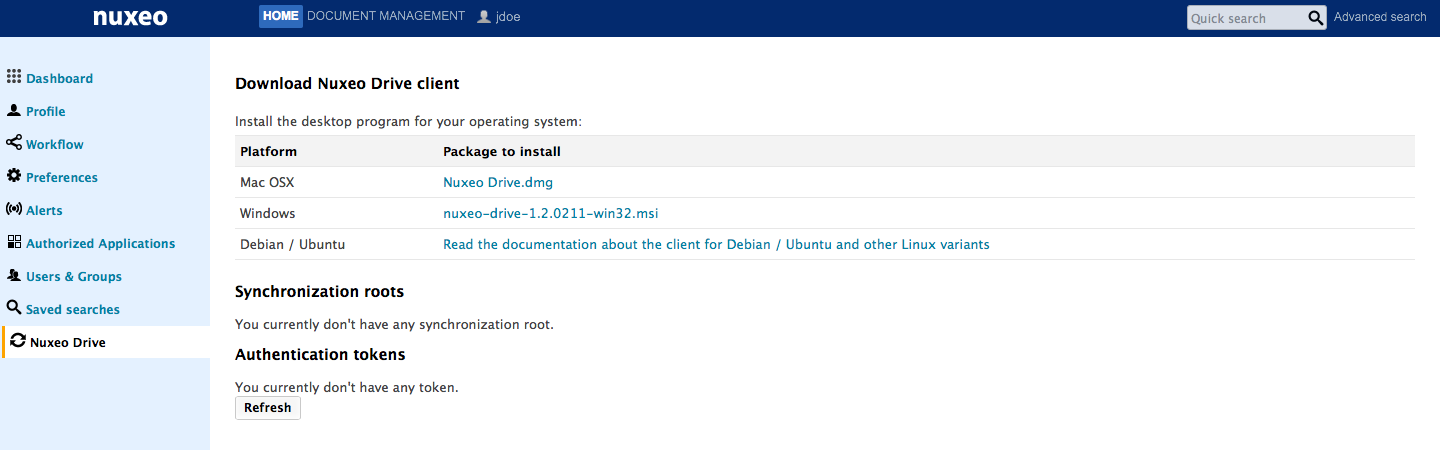
The Nuxeo Drive package adds the following elements to your Nuxeo Platform application:
- a Nuxeo Drive tab in the user Home, from which you can see what Nuxeo spaces are synchronized with Drive,
- a Drive icon
 on folderish document types, to synchronize or unsynchronize spaces.

Installing Nuxeo Drive on Your Computer
To be able to synchronize folders on your computer, you need to install the Nuxeo Drive client on your computer. We provide OS-specific installer for Mac OS X and Windows, available from the Nuxeo Drive tab of the Home. A Linux installer will come shortly.
If you try to synchronize a folder and you haven't installed the Nuxeo Drive client yet or haven't provided your credentials to the Nuxeo Drive client, you are automatically directed to the Nuxeo Drive home tab to install it.
Installing Nuxeo Drive on Mac OS X
To install Nuxeo Drive on your Mac OS X computer:
- Download the installer (.dmg file) from the Nuxeo Drive tab in the Home.
- Run the installer: drag and drop the Nuxeo Drive icon in the Applications directory.
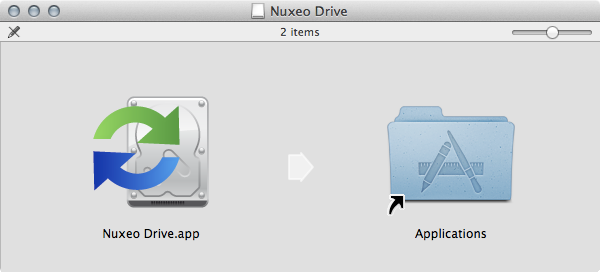 Nuxeo Drive is now installed on your computer.
- You now need to start Nuxeo Drive on your computer. A Nuxeo Drive folder will be created by the system at the root of your local home folder (/Users/jdoe/). This is the place where synchronized documents will be stored on your computer.
Installing Nuxeo Drive on Windows
Nuxeo Drive is known to work on Windows XP, Windows 7.
To install Nuxeo Drive on your Windows computer:
- Download the Windows installer (.msi file) from the Nuxeo Drive tab in the Home.
- Run the installer: indicate where Nuxeo Drive should be installed (typically
C:\Program FilesorC:\Program Files (x86)) and click Next until the installation process is done. Nuxeo Drive is now installed on your computer.If you have any problem due to a previous installlation of Nuxeo Drive you can try using this Microsoft tool to uninstall it properly. - You now need to start Nuxeo Drive to use it.
A new
Nuxeo DriveFolder will be created by the system in your local Documents folder(C:\Documents and Settings\USER\Documents\orC:\Users\USER\Documents\depending on the Windows version). This is the place where synchronized documents will be stored on your computer.
Ubuntu/Debian (and Other Linux Variants)
The .deb package of the client is not yet available. In the mean time you can manually install the development version.
To Install Nuxeo Drive on your Linux computer:
Install pip using your favorite package manager and then use it to grab all the dev dependencies and tools at once:
sudo apt-get install python-pip python-dev python-pyside
sudo pip install -U -r https://raw.github.com/nuxeo/nuxeo-drive/1.4/requirements.txt
sudo pip install -U git+https://github.com/nuxeo/[email protected]
For now, the systray icon is not visible under Unity desktop. As a consequence, the configuration window only appears at the first launch.
If you want to change it, issue the following commands:
pkill ndrive
rm ~/.nuxeo-drive/nxdrive.db
ndrive &
Now configure automatic start:
curl https://gist.github.com/jcarsique/5421710/raw/5621c388f85bf6dda7de6d0f726545d6551b5dde/ndrive.desktop -o ~/.config/autostart/ndrive.desktop --create-dirsYou now need to start Nuxeo Drive on your computer. A
Nuxeo Drivefolder will be created by the system at the root of your local home folder. This is the place where synchronized documents will be stored on your computer.
Updating Nuxeo Drive
When a new version of Nuxeo Drive is available, the Nuxeo Drive icon changes to ![]() and an Update Nuxeo Drive item is available in the Nuxeo Drive menu.
and an Update Nuxeo Drive item is available in the Nuxeo Drive menu.
- Click on that menu item to update Nuxeo Drive to the latest version.
- If you want Nuxeo Drive to update silently the next time, check the box Automatically Update Nuxeo Drive next time?.
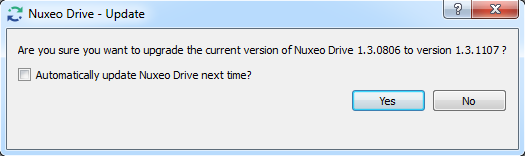
- Confirm update by clicking Yes.
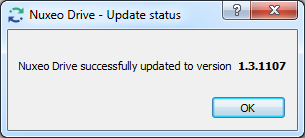
A confirmation pop-up is displayed when update is completed.
Working with Nuxeo Drive
Starting Nuxeo Drive
After you installed Nuxeo Drive, you need to start it manually and provide the address of the Nuxeo application and your credentials on that application.
Start like any other application:
- On Windows, Nuxeo Drive is started from Start > Programs > Nuxeo Drive.
- On Mac OS X, Nuxeo Drive is in the Applications directory.
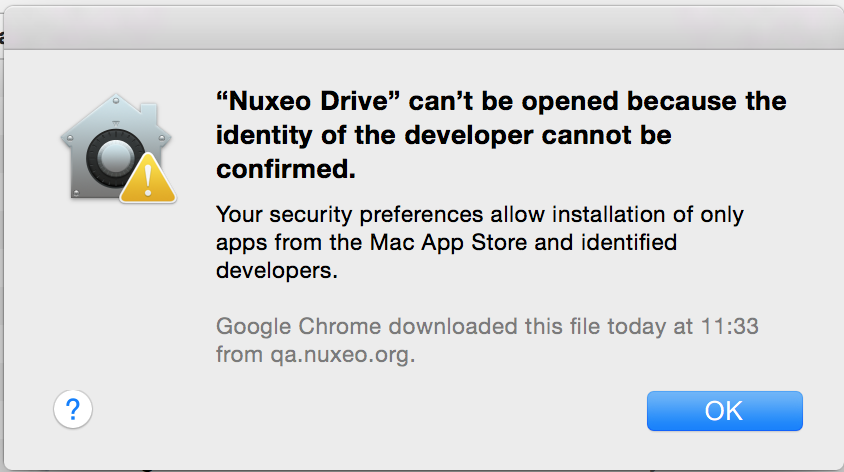
When you double click on the icon, a security message appears. To bypass it, you can modify your security settings or click right on Nuxeo Drive application and click on Open .
- On Linux, press Alt+F2 then enter
ndrive.The Nuxeo Drive icon is displayed:- In the top menu bar on Mac OS X,
- in the system tray on Windows,
- in the system tray on Linux desktops (except Unity).
An authentication window pops up.
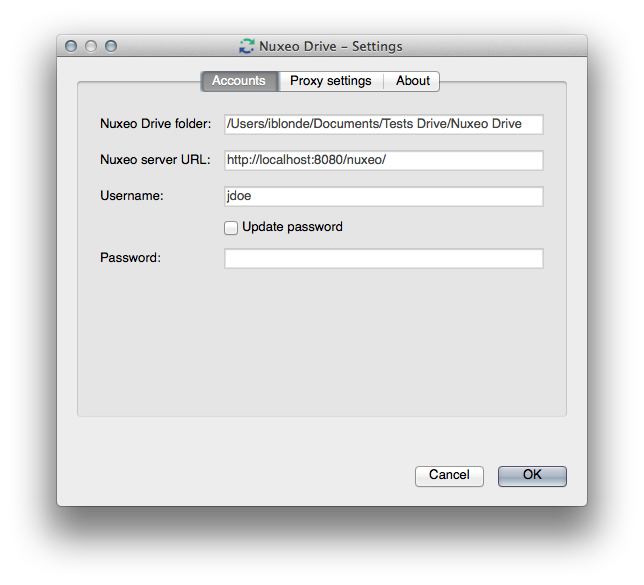
- Type the path where you want your Nuxeo Drive folder to be created.
- Type the URL of your Nuxeo application, with the
/nuxeo/suffix (http://NUXEO_SERVER/nuxeofor instance), your username and your password. - Click on OK.
Nuxeo Drive immediately starts synchronizing the Nuxeo workspaces or folders you indicated as synchronized in the Nuxeo Platform. It will automatically update content when there is a modification on the server.
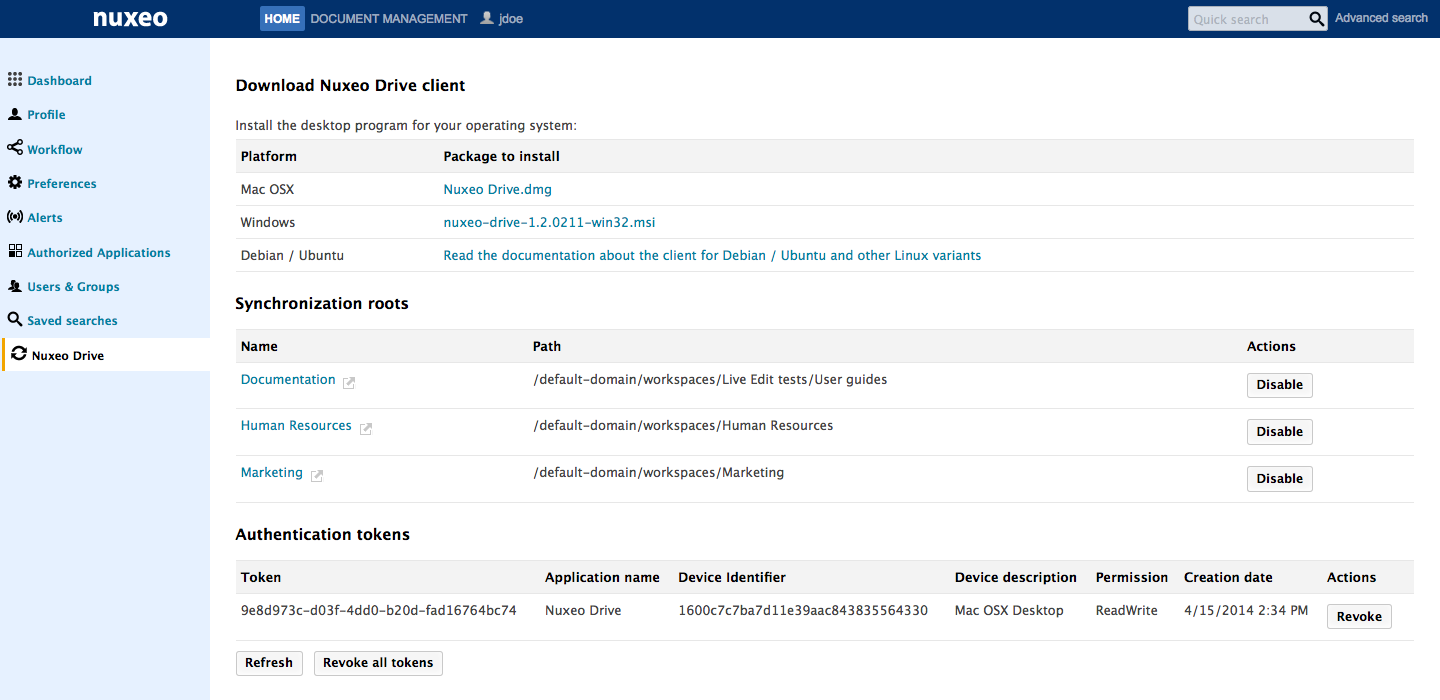
In the Nuxeo Drive tab in your Home, an authentication token corresponding to the computer you are synchronizing from is displayed. The list of synchronized folders is displayed in the Synchronization roots section of the tab.
Nuxeo Drive Synchronization Status
Here are the different statuses of Nuxeo Drive:
| Icon | Status |
|---|---|
| Synchronization is disabled (offline mode or suspended synchronization). |
 | Nuxeo Drive has successfully synchronized. |
| Nuxeo Drive is synchronizing with the Nuxeo Platform. | |
| An update of Nuxeo Drive is available. | |
| Nuxeo Drive is ending the synchronization with the Nuxeo Platform |
Accessing the Nuxeo Drive Folder
When you install Nuxeo Drive on your computer, it creates a "Nuxeo Drive" folder on your computer, from where you will be able to access the synchronized documents. This Nuxeo Drive folder is located:
- in
C:\Documents and Settings\USER\Documents\on Windows, - at the root of your home folder on Mac OS X.
Quick access to this folder is possible at any time using the Nuxeo Drive icon: right-click on the icon (in the top menu bar on Mac OS X, in the system tray on Windows) and click on Open Nuxeo Drive folder. The Nuxeo Drive opens like any folder. You can now browse the Nuxeo synchronized folders.
Marking Workspaces and Folders for Synchronization
Nuxeo Drive enables the synchronization of the document types below and their content:
- Document Management module:
- workspace,
- folder,
- picture book,
- ordered folder,
- Social collaboration module:
- social workspace,
- news folder,
- Digital Asset Management module:
- Asset library domain.
Synchronizing a Folder
Starting from Nuxeo Platform 6.0, you can synchronize spaces on which you have at least Read rights. For older versions of the Nuxeo Platform, you need at least Write rights to be able to synchronize a space.
To synchronize a space, in the Nuxeo Platform, click on the icon .
The icon becomes green. Documents inside the synchronized space have an orange icon  and a Drive local edit icon
  .
.
On your Home Nuxeo Drive folder, the space is displayed in the "Synchronization root" section. This is where you can see all the spaces you have synchronized with Nuxeo Drive.
Suspending Synchronization
If a synchronized folder holds big document or a large amount of documents, synchronization can take some time and some computer resources. It is then possible to suspend synchronization until a more convenient time.
To suspend synchronization:
- Click on the Drive icon in the system tray.
- Click on Suspend synchronization.
Pending synchronization tasks are immediately stopped until you resume synchronization.
The Drive icon becomes grey as long as synchronization is suspended: .
To resume synchronization:
- Click on the Drive icon in the system tray.
- Click on Resume synchronization. Pending synchronization tasks are immediately restarted where they were suspended.
Unsynchronizing a Folder
There are to ways to desynchronize a folder. From the server, when you desynchronize a folder all its content is desynchronized from all the devices where you use Drive. From the client, when you desynchronize a folder you can do it in detail and choose to locally deactivate synchronization of different folders for the current device.
Unsynchronizing Folders from the Client
By default, once you have synchronized a folder all its content (files and folders) are synchronized, but you can decide locally which folders you want to keep. This feature will enable you to manage the storage space dedicated to the synchronization, which is especially useful if you use a device with a low-storage capacity.
- Click on the
 icon (in the top menu bar on Mac OS X, in the system tray on Windows).
 - Go to Settings. A pop-up window appears.
- Click on the Folders tab. You can see all the tree structures of the synchronization root.
- Unselect the folders that you do not want to keep using the checkboxes.
Even if you unselect a folder, it's still visible in your settings, you just have to reselect it to synchronize it.
- Click on OK to confirm.
When you deactivate the synchronization of folders locally, they are still marked as synchronized on your web UI.
Unsynchronizing Folders from the Server
Unsynchronizing a folder is only possible from the Nuxeo Platform web interface. You can only unsynchronize the whole synchronized space, i.e. from the synchronization root : it is not possible to unsynchronize a child . Clicking on this orange icon brings you back on the space from which the synchronization is done (called Synchronization root).
To unsynchronize a space, in the Nuxeo Platform interface, click on the icon .
The icon becomes grey, indicating that the space is no longer synchronized.
The folder and its content is no longer available from your Nuxeo Drive folder and from the Home Nuxeo Drive tab.
Creating Documents
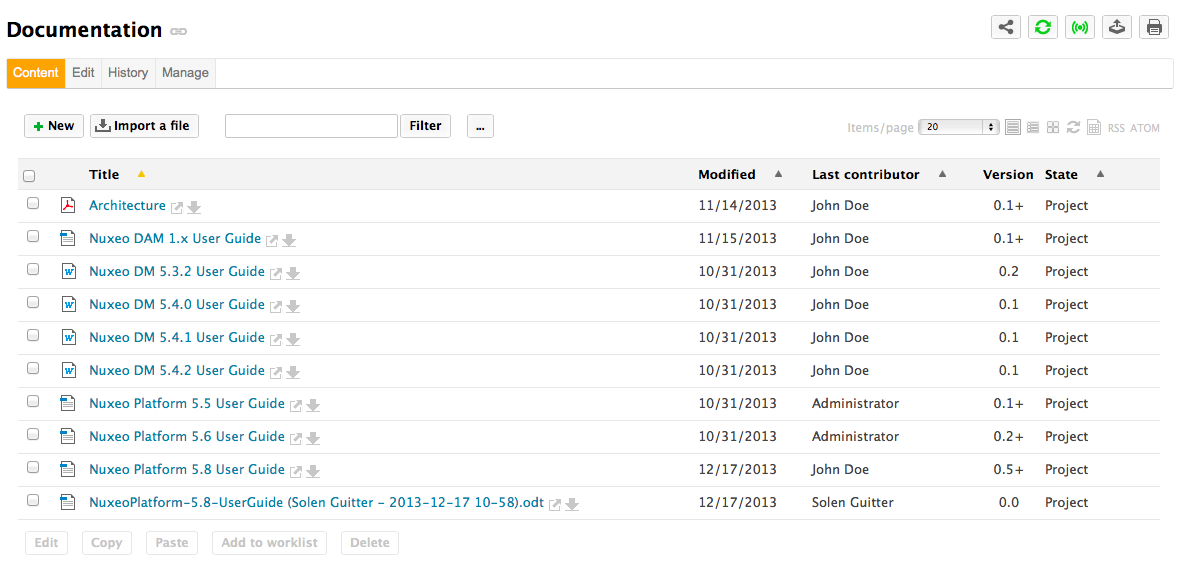
From the Platform
When you create a new document in a Drive-synchronized folder from the Platform, it is automatically created in your Drive folder at the next synchronization. If you created a file or a picture, what is in the Drive folder is the attachment (mydoc.doc for instance for Nuxeo document whose title could be "My document").
From the local Nuxeo Drive folder
Adding a new document in a Drive-synchronized folder from your computer will create the document in the Platform workspace at the next synchronization (immediately if you're connected to the Internet or the next time you're online if you currently don't have an Internet access). The document's title is the name of the original file, and no metadata is filled in.
Here are some examples of most commonly used item types and their output in Nuxeo:
| Item type | Document created in Nuxeo |
|---|---|
| Microsoft Office file | File |
| OpenOffice.file | File |
| .txt file | Note |
| Picture (.jpg, .png, etc) | Picture |
Editing Documents
Versioning
When you edit a document, either from your Nuxeo Drive folder or using the online editing, a new version is automatically created on the Platform and the version number is updated:
- if you are not the last contributor of the document,
- or if your last edit is more than an hour ago.
Then, if your document's version was 1.0 before modification for instance, it automatically becomes 1.1+ after you edited it from the Nuxeo Drive folder and the 1.1 is archived as it is created. Otherwise, a simple modification is done on the document and logged in the document's History.
See the page How to Customize Nuxeo Drive Versioning Policy to change this behavior.
Editing a Locked Document
In the Nuxeo Drive folder, no indication is available if a document has been locked from the Nuxeo Platform interface. Nuxeo Drive won't prevent you from working on a document, but it will not update the locked document on the server if you are not the locker.
Managing Conflicts
It can happen that a document is edited by several users locally at more or less the same time. Or that a user edits a document locally in offline mode, and that the same document is modified during that offline period. When Nuxeo Drive tries to synchronize the document it detects that there may be a conflict between the different modifications of the document. To prevent any loss of information or data, a new document is automatically created for the offline edited document. Its title is composed of the file name, the user's name and the date and time at which the document is created: "my-document (John Doe - 2013-04-01 10-11).odt" for instance. Two documents are now available in the Nuxeo Platform and in the local Nuxeo Drive folder.
Online Editing
Drive Edit enables you to edit any of your document’s content from their summary tab even if they are not synchronised. To be able to use correctly Drive Edit you need the Drive add-on on your server and you must turn on Drive on your computer. This saves you the fastidious steps of opening your document, modify it and reimport it on your platform.
To edit a document locally from the web interface:
- On the document in the Nuxeo Platform, click on the icon in the summary tab.
The document opens in its native application (OpenOffice.org for an .odt file for instance).
- Edit the document and save the modifications. Modifications are saved in the Nuxeo Platform directly.
- Close the document.
Drive Edit Limitations
Under Windows, nothing happens if you try to use Drive Edit without having Drive installed and running.
Renaming Documents
Renaming a document from the server, i.e. changing the document's title, has no impact on the file's name in your Nuxeo Drive folder, which is the document's attachment.
Renaming a document from the Nuxeo Drive folder renames the document and its attachment on the server.
Editing Metadata
This feature works only under Windows, and is available starting from Nuxeo Platform 6.0.
Metadata Edit allows you to edit the metadata of your document from your desktop.
- Go to your Nuxeo Drive folder on your computer,
- Right-click on the name of the document that you want to edit,
A pop-up window appears where you can also locked the document, get the permanent link or add your document to your favorites.
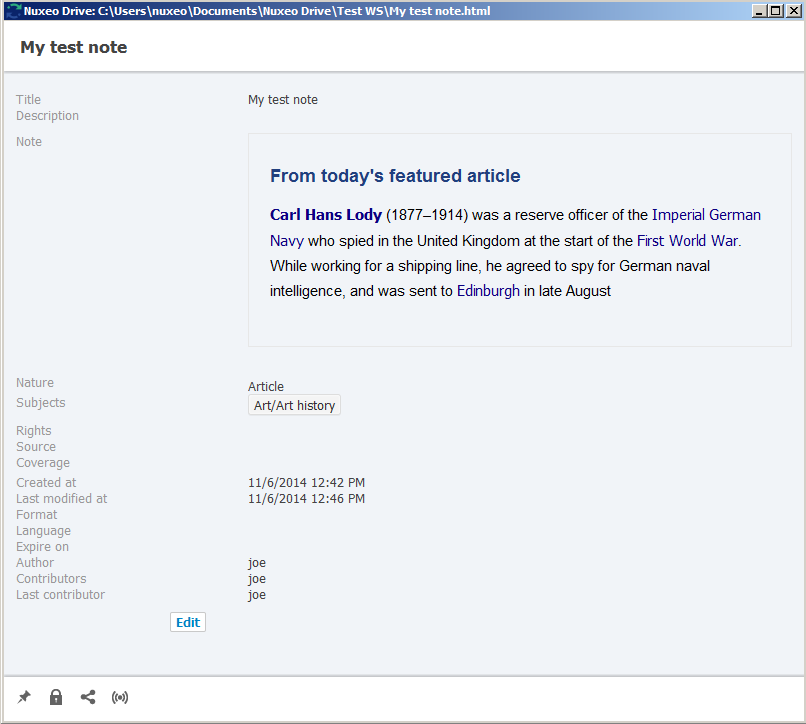
- Click on Edit and modify your document,
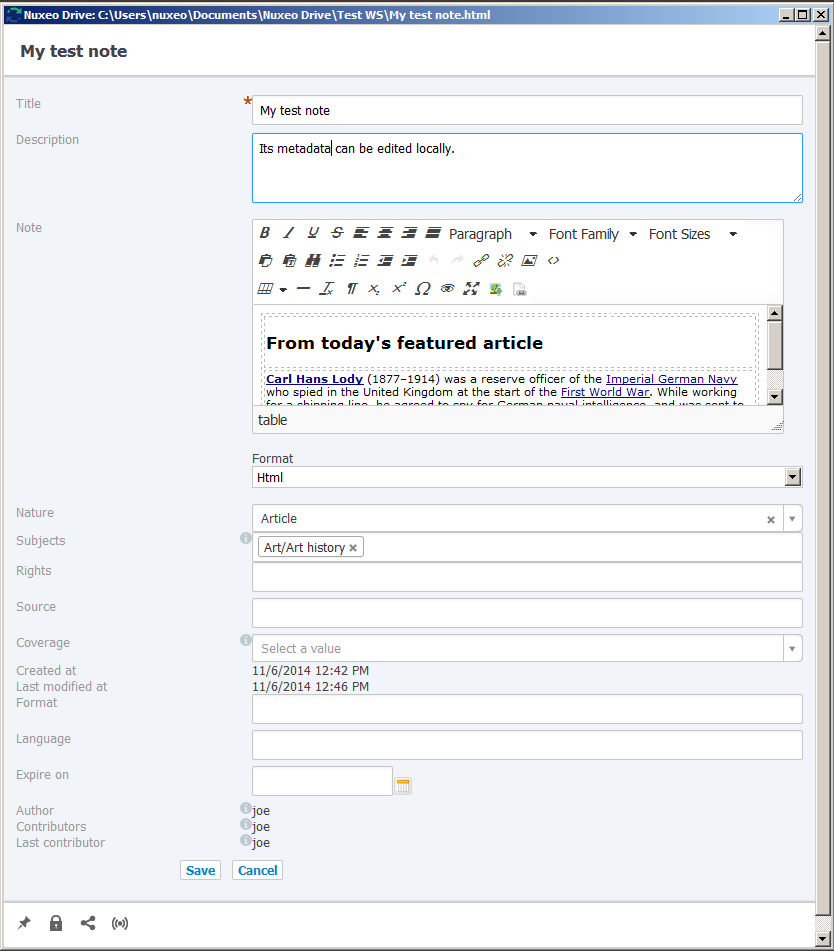
- Click on Save.
Metadata Edit Limitations
This feature doesn't work for now when the file names are accented, but this issue will be fixed soon.
Moving Documents
You can move documents either from your local Nuxeo Drive folder or from the Platform. When you move documents between two synchronized spaces, the move is done on the other side, whether you move documents from the Platform or from your Drive folder.
When you move a document from a Drive-synchronized folder to an unsynchronized one, the behavior is different if you move the document from the Platform or from your local folder.
- If you move the document from the Platform, the document is not available anymore in your local folder.
- If you move the document from your local folder, the document is deleted on the Platform and moved into the folder's trash. In the document's history, the deletion is tagged with the Nuxeo Drive category.
Deleting Documents
When you delete documents from the Platform, they are deleted from your local Drive folder at the next update.
When you delete a document from your local Drive folder, the document is deleted on the Platform and moved into the folder's trash. In the document's history, the deletion is tagged with the Nuxeo Drive category.
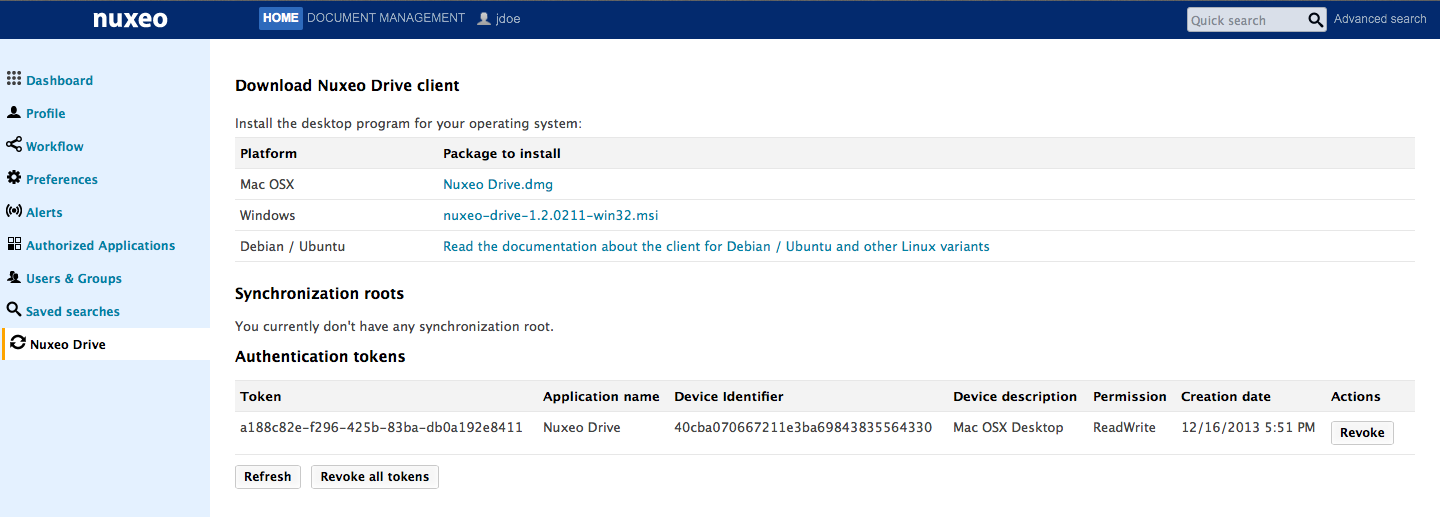
Unauthorizing a Drive Client to Access the Nuxeo Platform
When you start Nuxeo Drive on your computer for the first time, you need to provide your credentials so the Drive client can communicate with the Nuxeo Platform. This creates an authentication token on the Platform, that is displayed on the Nuxeo Drive tab in the Home. If you want to unauthorize a Drive client to access the Nuxeo Platform using your credentials, for instance because you changed your computer, you can revoke this authentication token. The Nuxeo Drive client will then require the credentials to be updated to connect to the Nuxeo Platform.
To revoke an authentication token:
- On the Nuxeo Platform, in the Home tab, click on the Nuxeo Drive tab.
Click on the Revoke button of the token to be revoked. Several elements are displayed to help you identify the right token:
- the device description: whether it is a client, Windows client, Linux client;
- the creation time: date and time at which the token was created, i.e. the date and time at which you provided it with your credentials.
- In the window that pops up, click on OK to confirm. The Nuxeo Drive client cannot communicate with the Nuxeo Platform and switches to offline. When you click on the Drive icon, it says "Update credentials (required)".
Advanced Usages
You can use the command line for some advanced options. For example, you can bind the server to a specific folder of your desktop, instead of the default "\My Documents\Nuxeo Drive'". For example you can use:
ndrive bind-server --local-folder LOCAL_FOLDER username nuxeo_url
Note that ndrive is not in your PATH. You need to go to the folder where Nuxeo Drive was setup (in Program Files with Windows).
Uninstalling Nuxeo Drive
To uninstall Nuxeo Drive from your computer, you need to remove the following items:
- the .nuxeo-drive hidden folder where configuration and logs are stored,
- the Nuxeo Drive client application.
- the Nuxeo Drive local folder, only if you want to get rid of all the synchronized files and folders.
Uninstalling Nuxeo Drive on Mac OS X
To uninstall Nuxeo Drive:
- Quit Nuxeo Drive:
- Click on the icon in the system tray.
- Click on Quit in the menu.
- Open a terminal and execute the following command:
rm -rf ~/.nuxeo-drive - Remove Nuxeo Drive from your applications like you usually remove any application.
- Delete the Nuxeo Drive item from your Favorites in the Finder.
At this point you have uninstalled the Nuxeo Drive program and its configuration. If you want to get rid of the synchronized data you also need to delete the Nuxeo Drive folder like you delete any regular folder.
Uninstalling Nuxeo Drive on Windows
To uninstall Nuxeo Drive:
- Quit Nuxeo Drive:
- Click on the icon in the system tray.
- Click on Quit in the menu.At this point you can check that there are no
ndrivew.exeorndrive.exeremaining processes in the Processes tab of the Windows Task Manager that you can open by typing Ctrl + Shift + Esc. If you find such processes, kill them manually by right-clicking on their name and clicking on End Process.
- Open a command window:
- Open the explorer, type
cmdand validate, - or in the Windows menu, click on Accessories > Command Prompt.
- Open the explorer, type
- Go to your user directory using the
cdcommand. Your user directory would typically be inC:\Users\jdoe.cd C:\Users\jdoe - Remove the .nuxeo-drive folder by executing the following command:
rmdir /S /Q .nuxeo-drive - Uninstall the Nuxeo Drive application like a regular program using the Control Panel.
If you have any problem during the uninstallation process you can try using this Microsoft tool to uninstall Nuxeo Drive properly.
- Waiting for NXDRIVE-270 to be resolved you also need to manually delete the
C:\Program Files (x86)\Nuxeodirectory.
Uninstalling Nuxeo Drive on Linux
To uninstall Nuxeo Drive:
- Quit Nuxeo Drive:
- Click on the icon in the system tray.
- Click on Quit in the menu.
- Open a terminal and execute the following command:
rm -rf ~/.nuxeo-drive Uninstall the Nuxeo Drive application using the following command:
sudo pip uninstall nuxeo-driveAt this point you have uninstalled the Nuxeo Drive program and its configuration. If you want to get rid of the synchronized data you also need to delete the Nuxeo Drive folder like you delete any regular Linux folder.