Creating a Document Using the Create Button
Creating a document using the button ![]() enables you to select the type of document you want to create among all Nuxeo Platform's document types.
enables you to select the type of document you want to create among all Nuxeo Platform's document types.
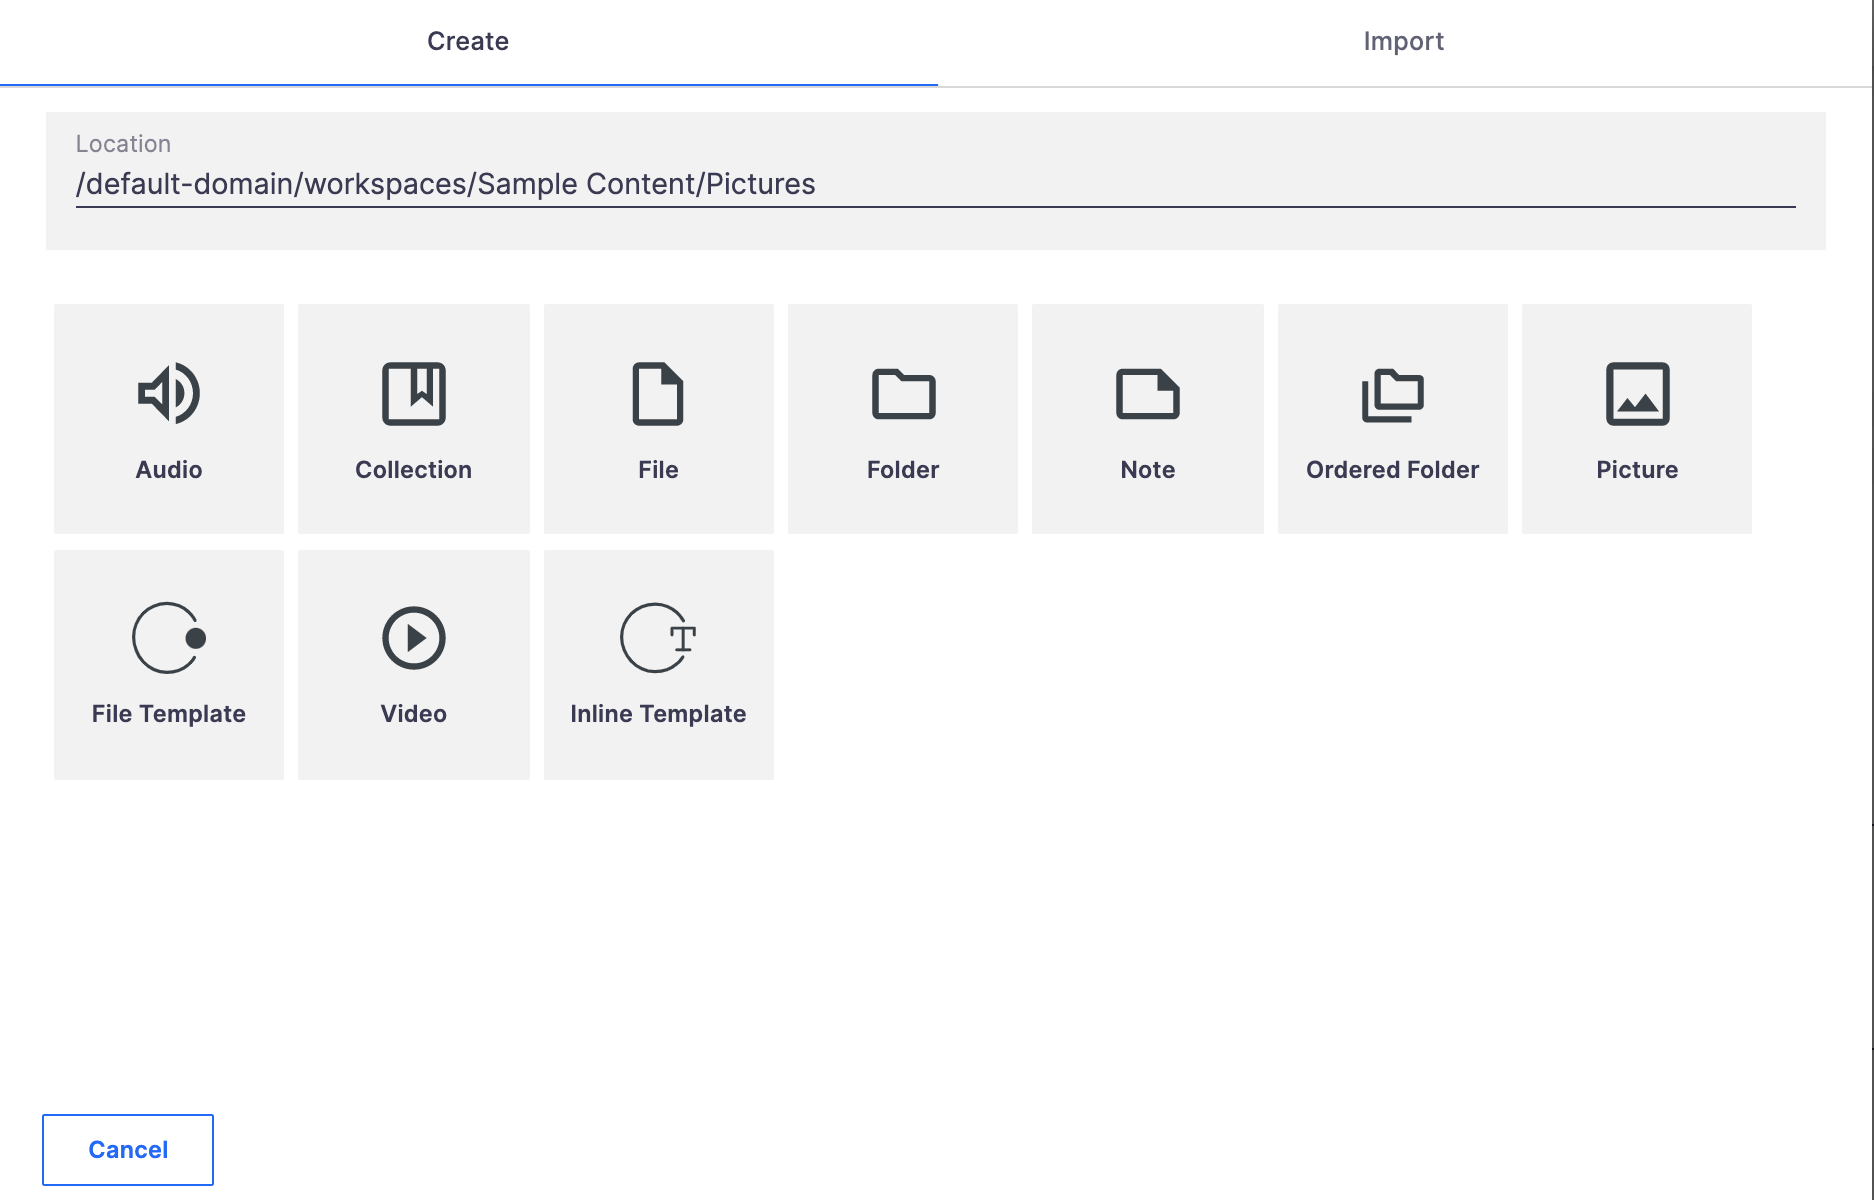
To create a document using the Create button:
- Click on the button
 .
. - Select the desired document.
- Fill in the document's creation form and click on the Create button.
The View tab of the document is displayed.
Importing Documents Using Drag and Drop
Drag and drop is based on the HTML 5 standard and is available on all browsers that support the HTML 5 Drag and drop, without extension. Basically, this includes all browsers supported by the Nuxeo Platform and the Web UI:
- Google Chrome
- Microsoft Edge
- Mozilla Firefox
- Safari 11+
- Safari Mobile
- Chrome Android
See the complete requirements.
You can use drag and drop to easily import content into a workspace or just to create one document at a time. Two types of import are available:
- Quick import, that enables to quickly create documents in workspace
- Import with properties, that enables to fill in metadata of the document(s) before they are created in the workspace
Quick Import of Documents
To import content into Nuxeo, drag an item from your computer and drop it into a workspace. The document is then automatically created in the workspace and its title is the name of the original file, and no properties are filled in.
- You can drag and drop one or more files of any type in Nuxeo, directly in the workspace concerned.
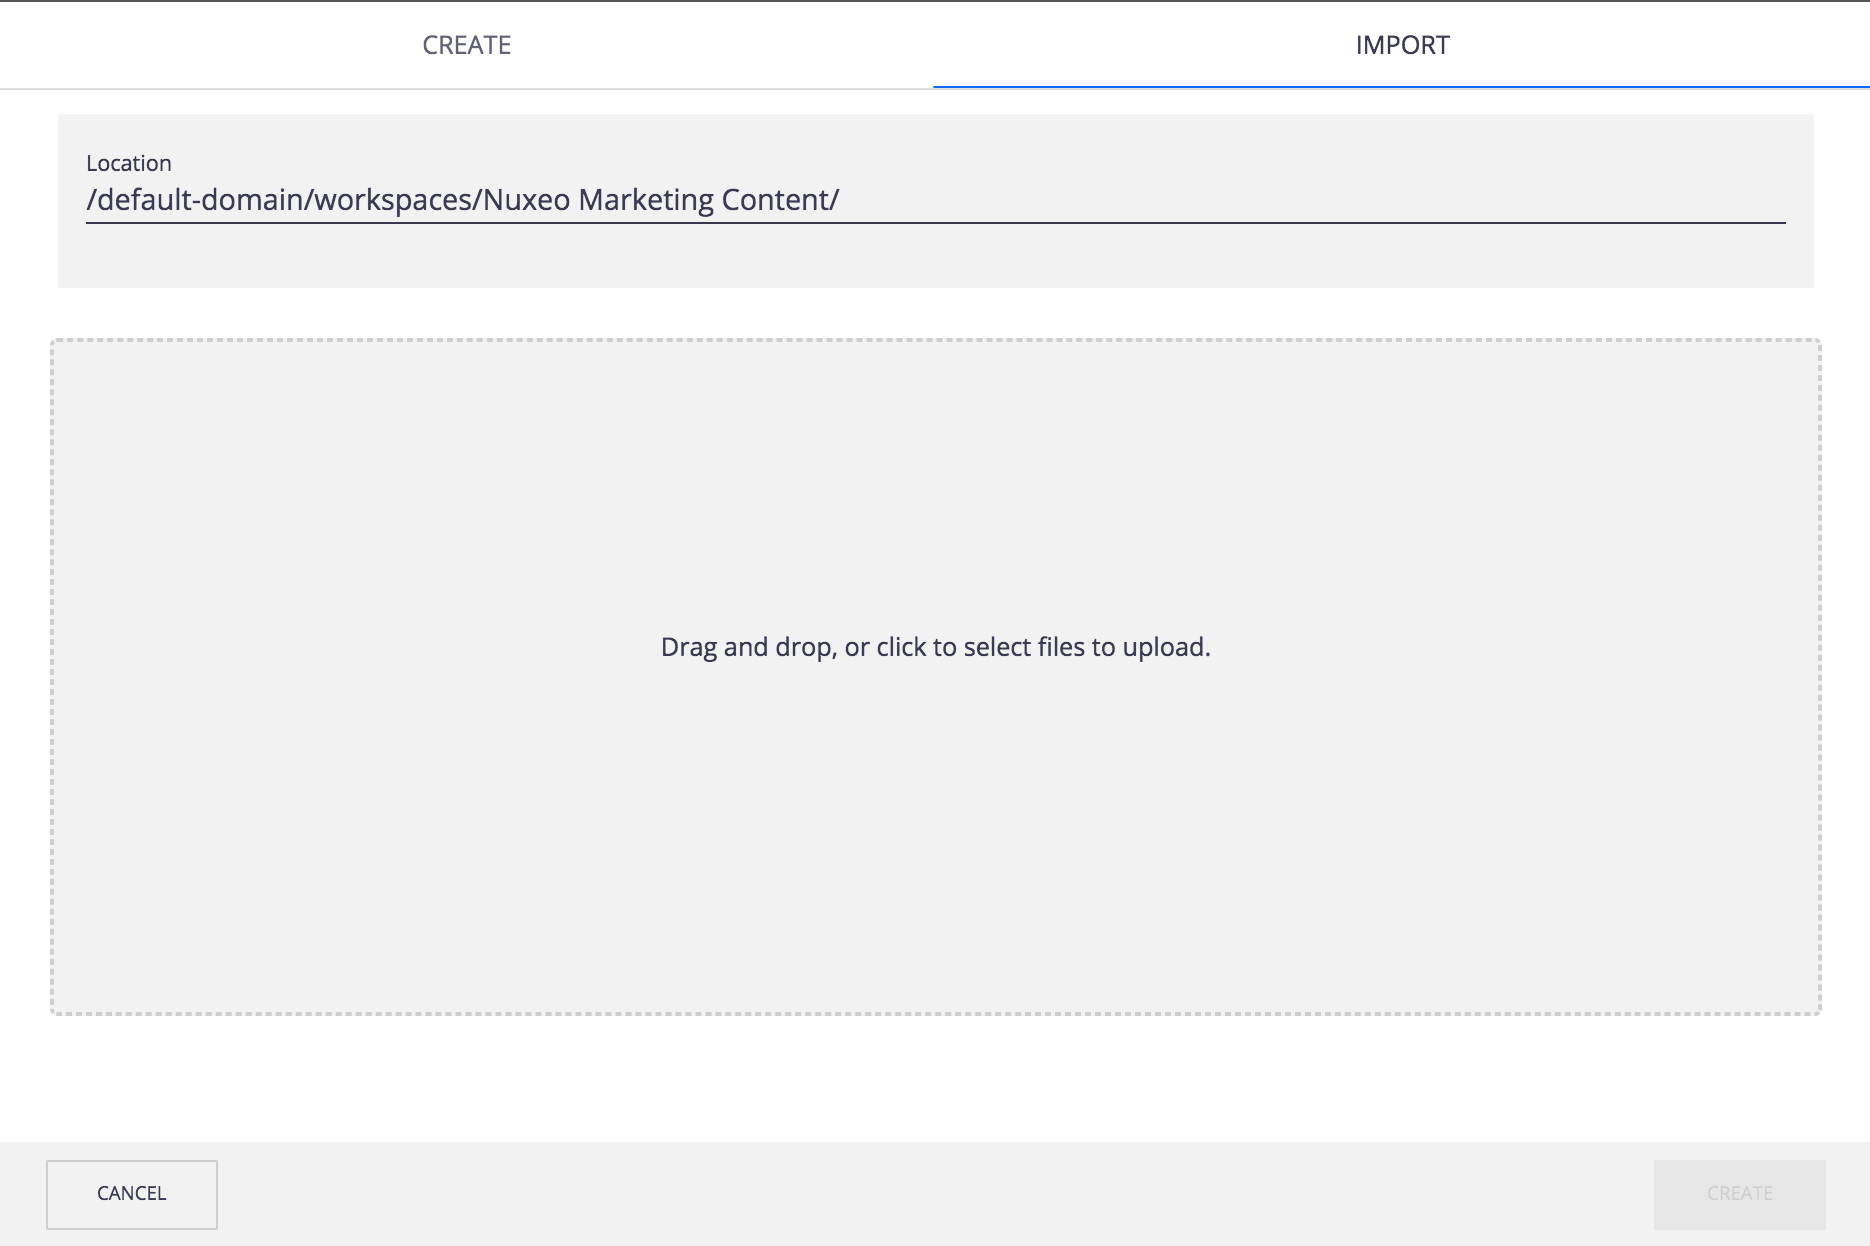
- You can also drag and drop one or more files of any type from the Import tab of the creation popup. On this popup you can also edit the Location of your import.
Import with Properties
It is possible to do a drag and drop import of documents with an additional step to fill in some properties. This prevents you from editing the documents after the import is done.
To import documents with metadata:
Drag your file from your desktop to the workspace main area in the browser. The file is uploaded. When the upload is done, the creation popup on the Import tab is displayed.

Click on ADD PROPERTIES.
- Fill in the properties that you need and then decide if you want to EDIT NEXT or APPLY TO ALL your modifications.
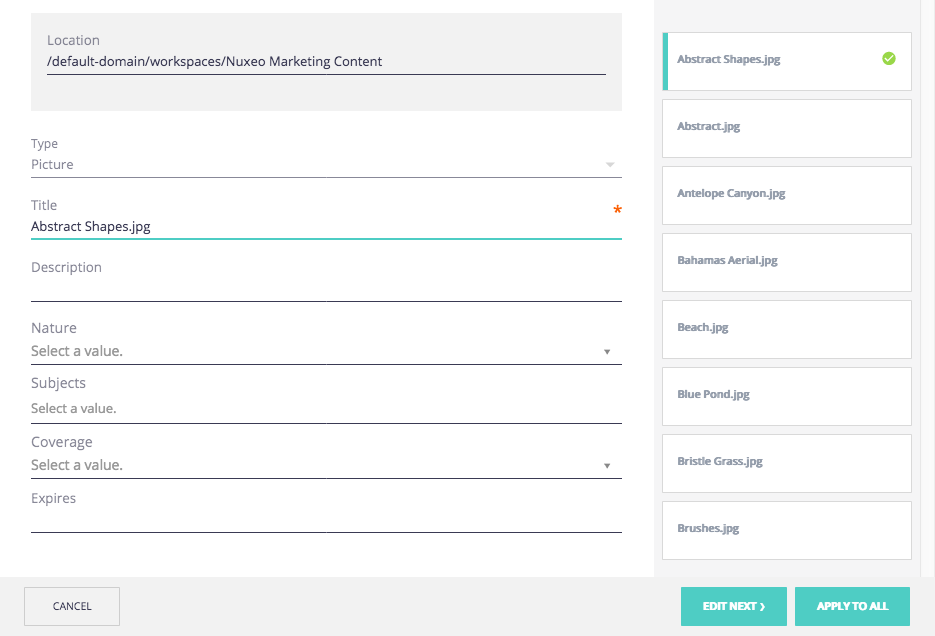
- Once it's done click on CREATE.
The file is created with the filled in properties.
Creating Content Using Nuxeo Drive
You can very easily import document by moving them from a desktop folder to a Nuxeo Drive folder, or creating office files directly in a Nuxeo Drive folder. Read the Nuxeo Drive documentation for more information.
Automated Metadata Extraction
Read the Binary Metadata documentation for more information.
Nuxeo Live Connect
Live Connect allows you to create a content application that handles cloud files (Dropbox, Google Drive, Box, OneDrive...) as if they were local files. Files remain in the cloud but they are referenced in the Nuxeo repository as if they were stored within it. This allows the user to benefit from thumbnailing service, full text, conversions, etc.
Live Connect for Google Drive also brings the "Cloud Edit" mode. Your application based on the Nuxeo Platform can provide the users with a direct link to the SaaS applications that you can use for editing Google Drive files (Google Docs, Office 365, Pixlr, etc.).
Read the Live Connect documentation for more information.
Creating Personal Documents
The personal workspace menu gives you a direct access to your collections and personal documents. Personal spaces can only be accessed by their owner, by default. You can of course share the access to your personal space with other users.
Content creation and edition, as well as management, works the same way in personal space as in workspaces.
To create personal documents, follow the same steps as for any other documents and it will be displayed in your personal space.