This page explains how picture conversions are structured, and provide instructions to perform the standard picture conversion operations.
Concepts
Picture conversions are used to fill the picture views (stored in the picture:views field of a document having the Picture facet). The default ones are: Thumbnail, Small, Medium, FullHD, OriginalJpeg.
Picture conversions are simple XML contributions done on the pictureConversions extension point of the org.nuxeo.ecm.platform.picture.ImagingComponent component.

Picture conversions are working only on documents having the Picture facet.
Common Conversion Contributions
Register a New Converter
As a sample, let's see how we can retrieve a text to use as a watermark from the picture document.
- Contribute an XML extension to register a command line that will watermark the image:
<extension target="org.nuxeo.ecm.platform.commandline.executor.service.CommandLineExecutorComponent"
        point="command">
  <command name="watermarkWithText" enabled="true">
  <commandLine>convert</commandLine>
  <parameterString>#{sourceFilePath}  -gravity #{gravity} -fill #{textColor}
    -stroke #{strokeColor} -strokewidth #{strokeWidth} -pointsize #{textSize}
    -annotate #{textRotation}x#{textRotation}+#{xOffset}+#{yOffset}
    #{textValue} #{targetFilePath}</parameterString>
  <installationDirective>You need to install ImageMagick.</installationDirective>
  </command>
</extension>
- Contribute an XML extension to register a converter that uses our new
watermarkWithTextcommand line.
<extension target="org.nuxeo.ecm.core.convert.service.ConversionServiceImpl" point="converter">
  <converter name="watermarkWithText" class="org.nuxeo.ecm.platform.convert.plugins.CommandLineConverter">
    <sourceMimeType>image/*</sourceMimeType>
    <destinationMimeType>image/*</destinationMimeType>
    <parameters>
      <parameter name="CommandLineName">watermarkWithText</parameter>
    </parameters>
  </converter>
</extension>
Since Nuxeo 10.10 (LTS 2019), it is required to specify the source mime-type(s) the converter can handle (all the <sourceMimeType>image/*</sourceMimeType> in the example, but you can specify more than one). This can be disabled (not recommended) by setting the nuxeo.convert.enforceSourceMimeTypeCheck configuration parameter to false. (See this JIRA ticket for more details)
- Create the
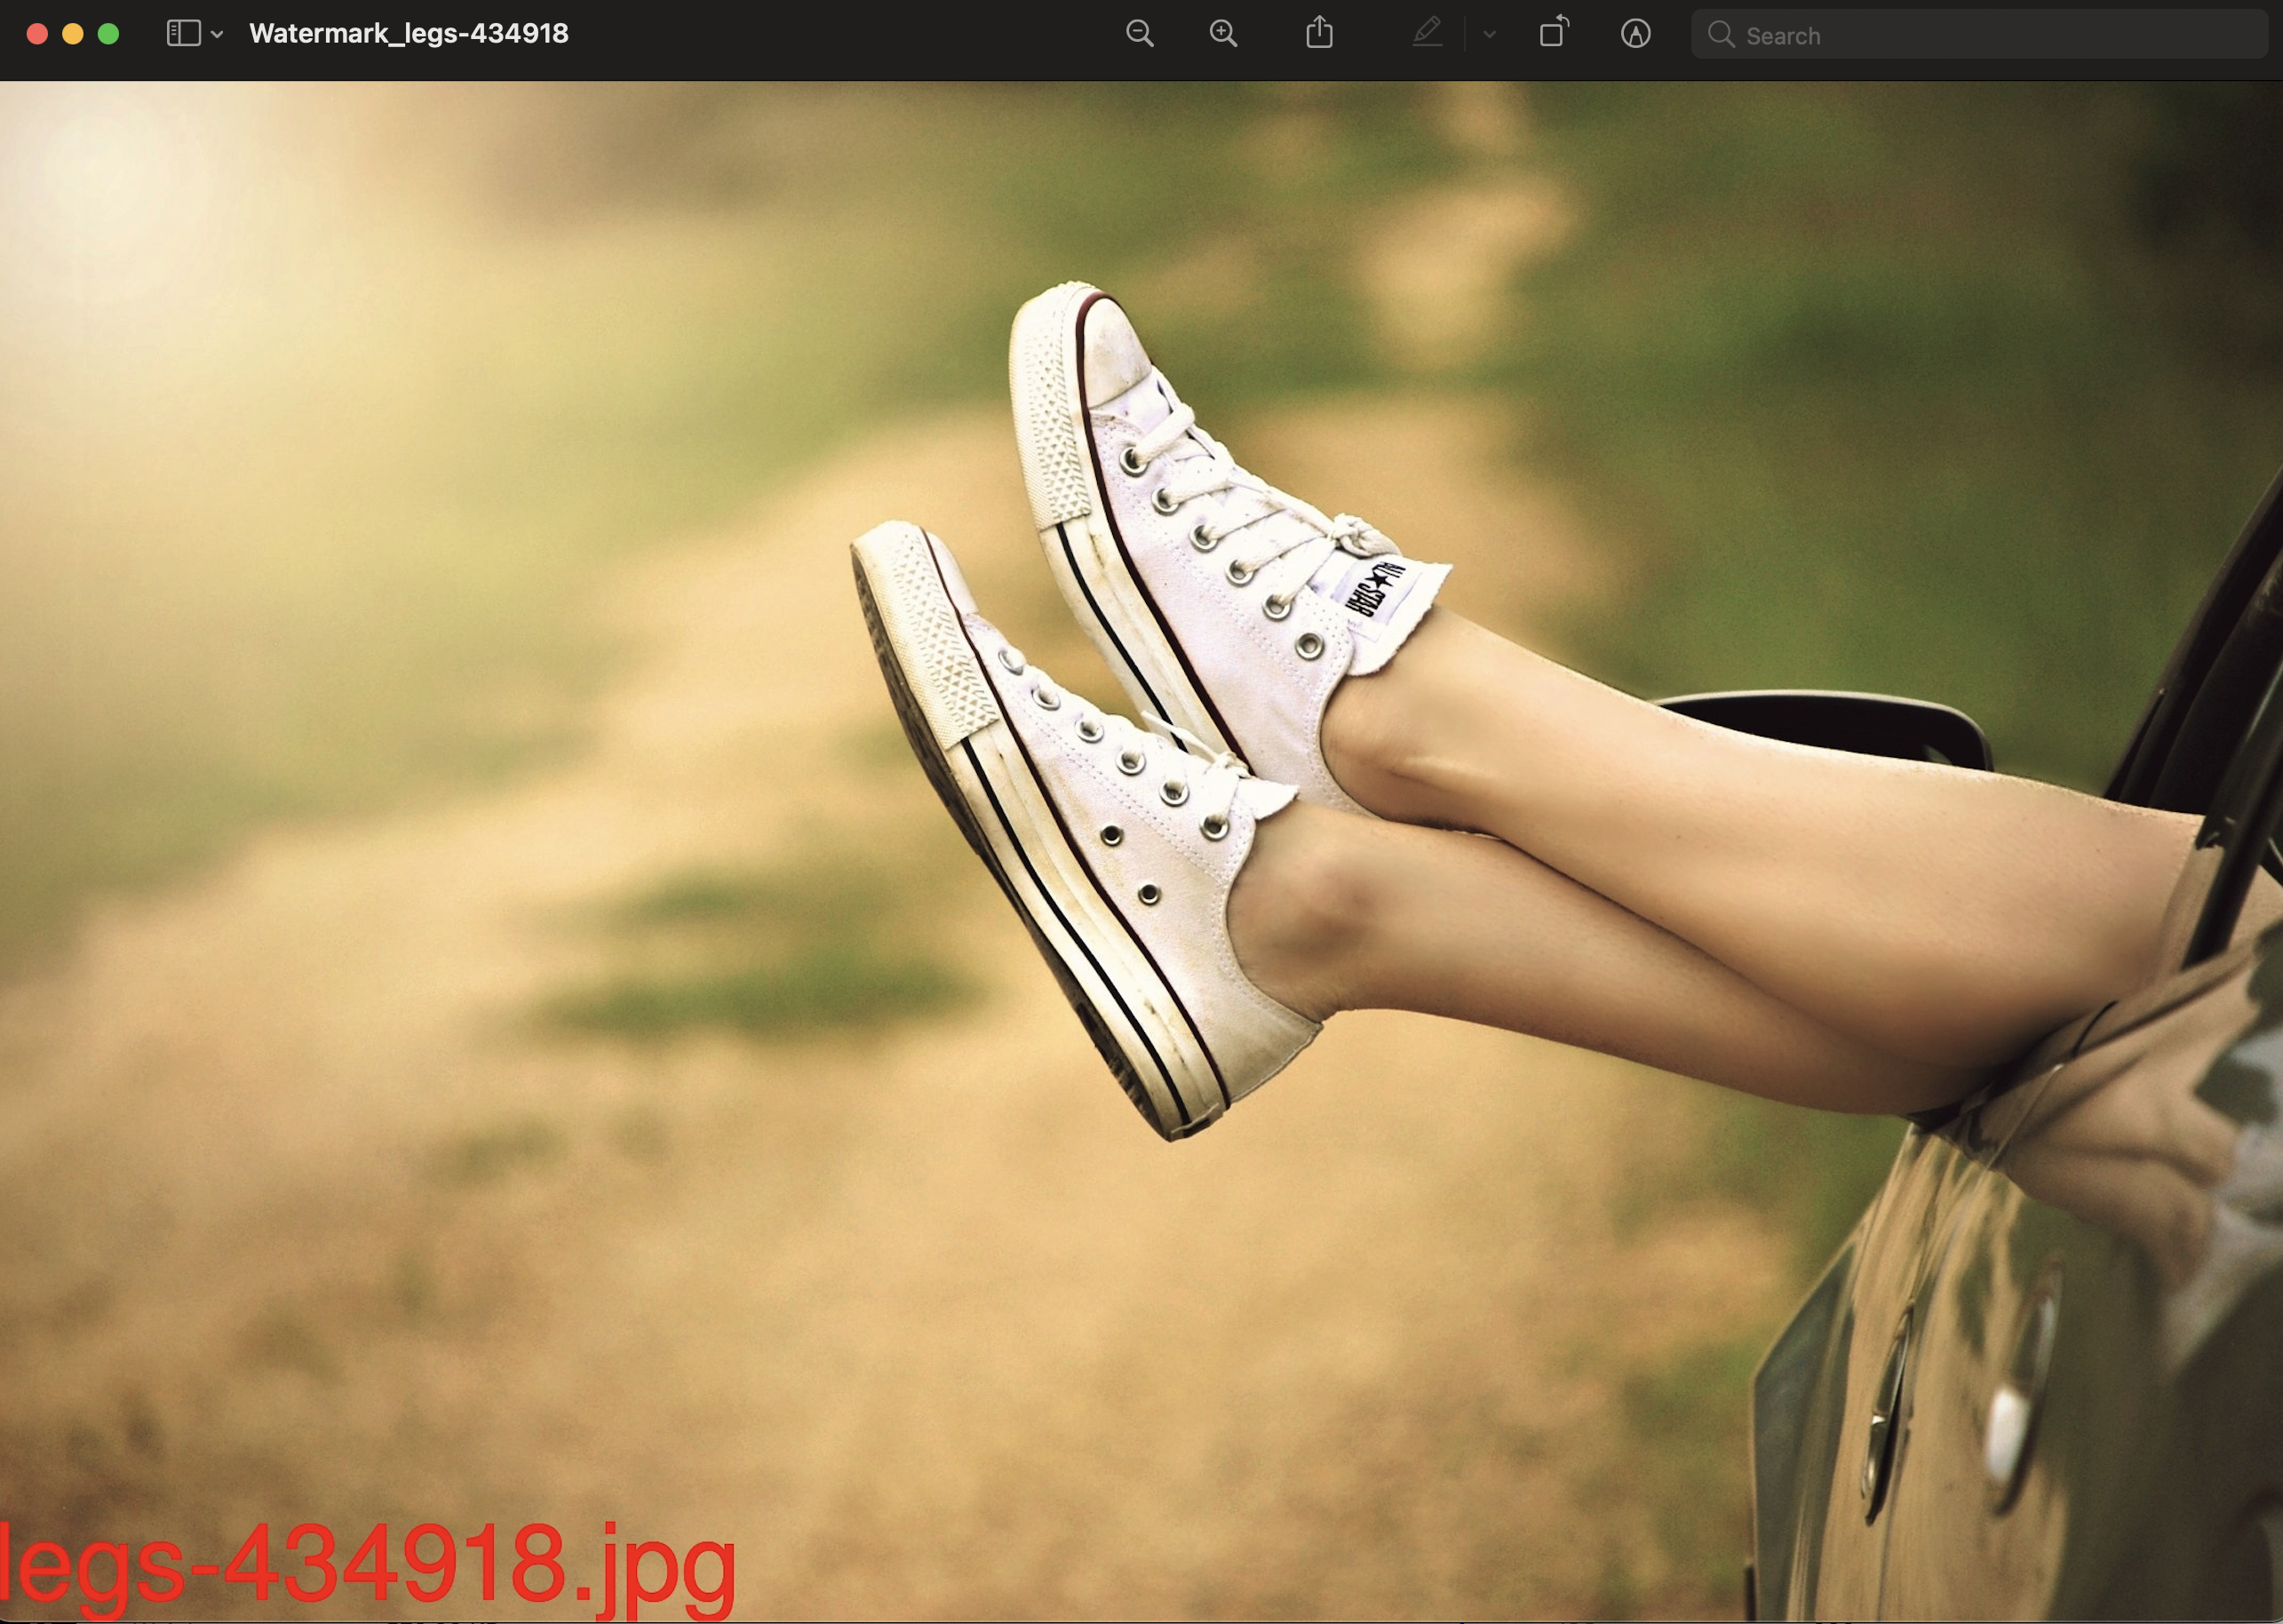
WatermarkChainautomation chain that will be used for the picture conversion, getting the text from thepictureDocumentand call the registeredwatermarkWithTextconverter to watermark the image. Here, for the example, we watermark the title of the document on the image:
- Blob.RunConverter:
  converter: watermarkWithText
    parameters:
    textValue: "@{Context[\"pictureDocument\"].getPropertyValue(\"dc:title\")}"
    targetFileName: Watermarked
    gravity: SouthWest
    textColor: Red
    strokeColor: Red
    strokeWidth: "1"
    textSize: "100"
    textRotation: "0"
    xOffset: "0"
    yOffset: "0"
Notes on the chainId attribute
You can put your own chain here to do whatever you want. Just note the following:
- The chain must take a
Blobas input and return aBlobas output (this one will be saved as the generated picture view). - The chain takes a
parametersparameter which is a map containing the expected values computed by theImagingService(width,height,depthandconversionFormat). - The picture document, if any, on which the conversion is done is stored in the
Contextas thepictureDocumentvariable. - The chain is run outside any
Transaction/CoreSessionbecause a conversion could be long and should be done outside anyTransactionto avoid timeouts. If you need to open aCoreSessionyourself, you can use theContext.RunFileOperationoperation with the parameternewTxset totrueto start a new Transaction, and then theAuth.LoginAsoperation to open aCoreSession.
Add a New Picture Conversion
Let's declare a new picture conversion, which uses the new picture converter, by contributing on the pictureConversions extension point:
<extension target="org.nuxeo.ecm.platform.picture.ImagingComponent" point="pictureConversions">
  <pictureConversion id="Watermark" description="Watermarked image"
    tag="watermark" order="0" chainId="WatermarkChain" />
</extension>
Noteworthy Attributes
order: The order of this picture conversion in the final list of picture views, smaller first.chainId: the Automation chain associated to this picture conversion. Here we use theWatermarkChainautomation chain. Another possible option would be to use the defaultImage.Blob.Resizeautomation operation (If you need for exemple to just resize the image). If thechainIdattribute is not filled, the originalBlobwill be returned and use for the generated picture view.maxSize: The maximum size of the width or height of the image (depending of the bigger one on the original image). Not setting themaxSizewill put the original width and height as expected values.
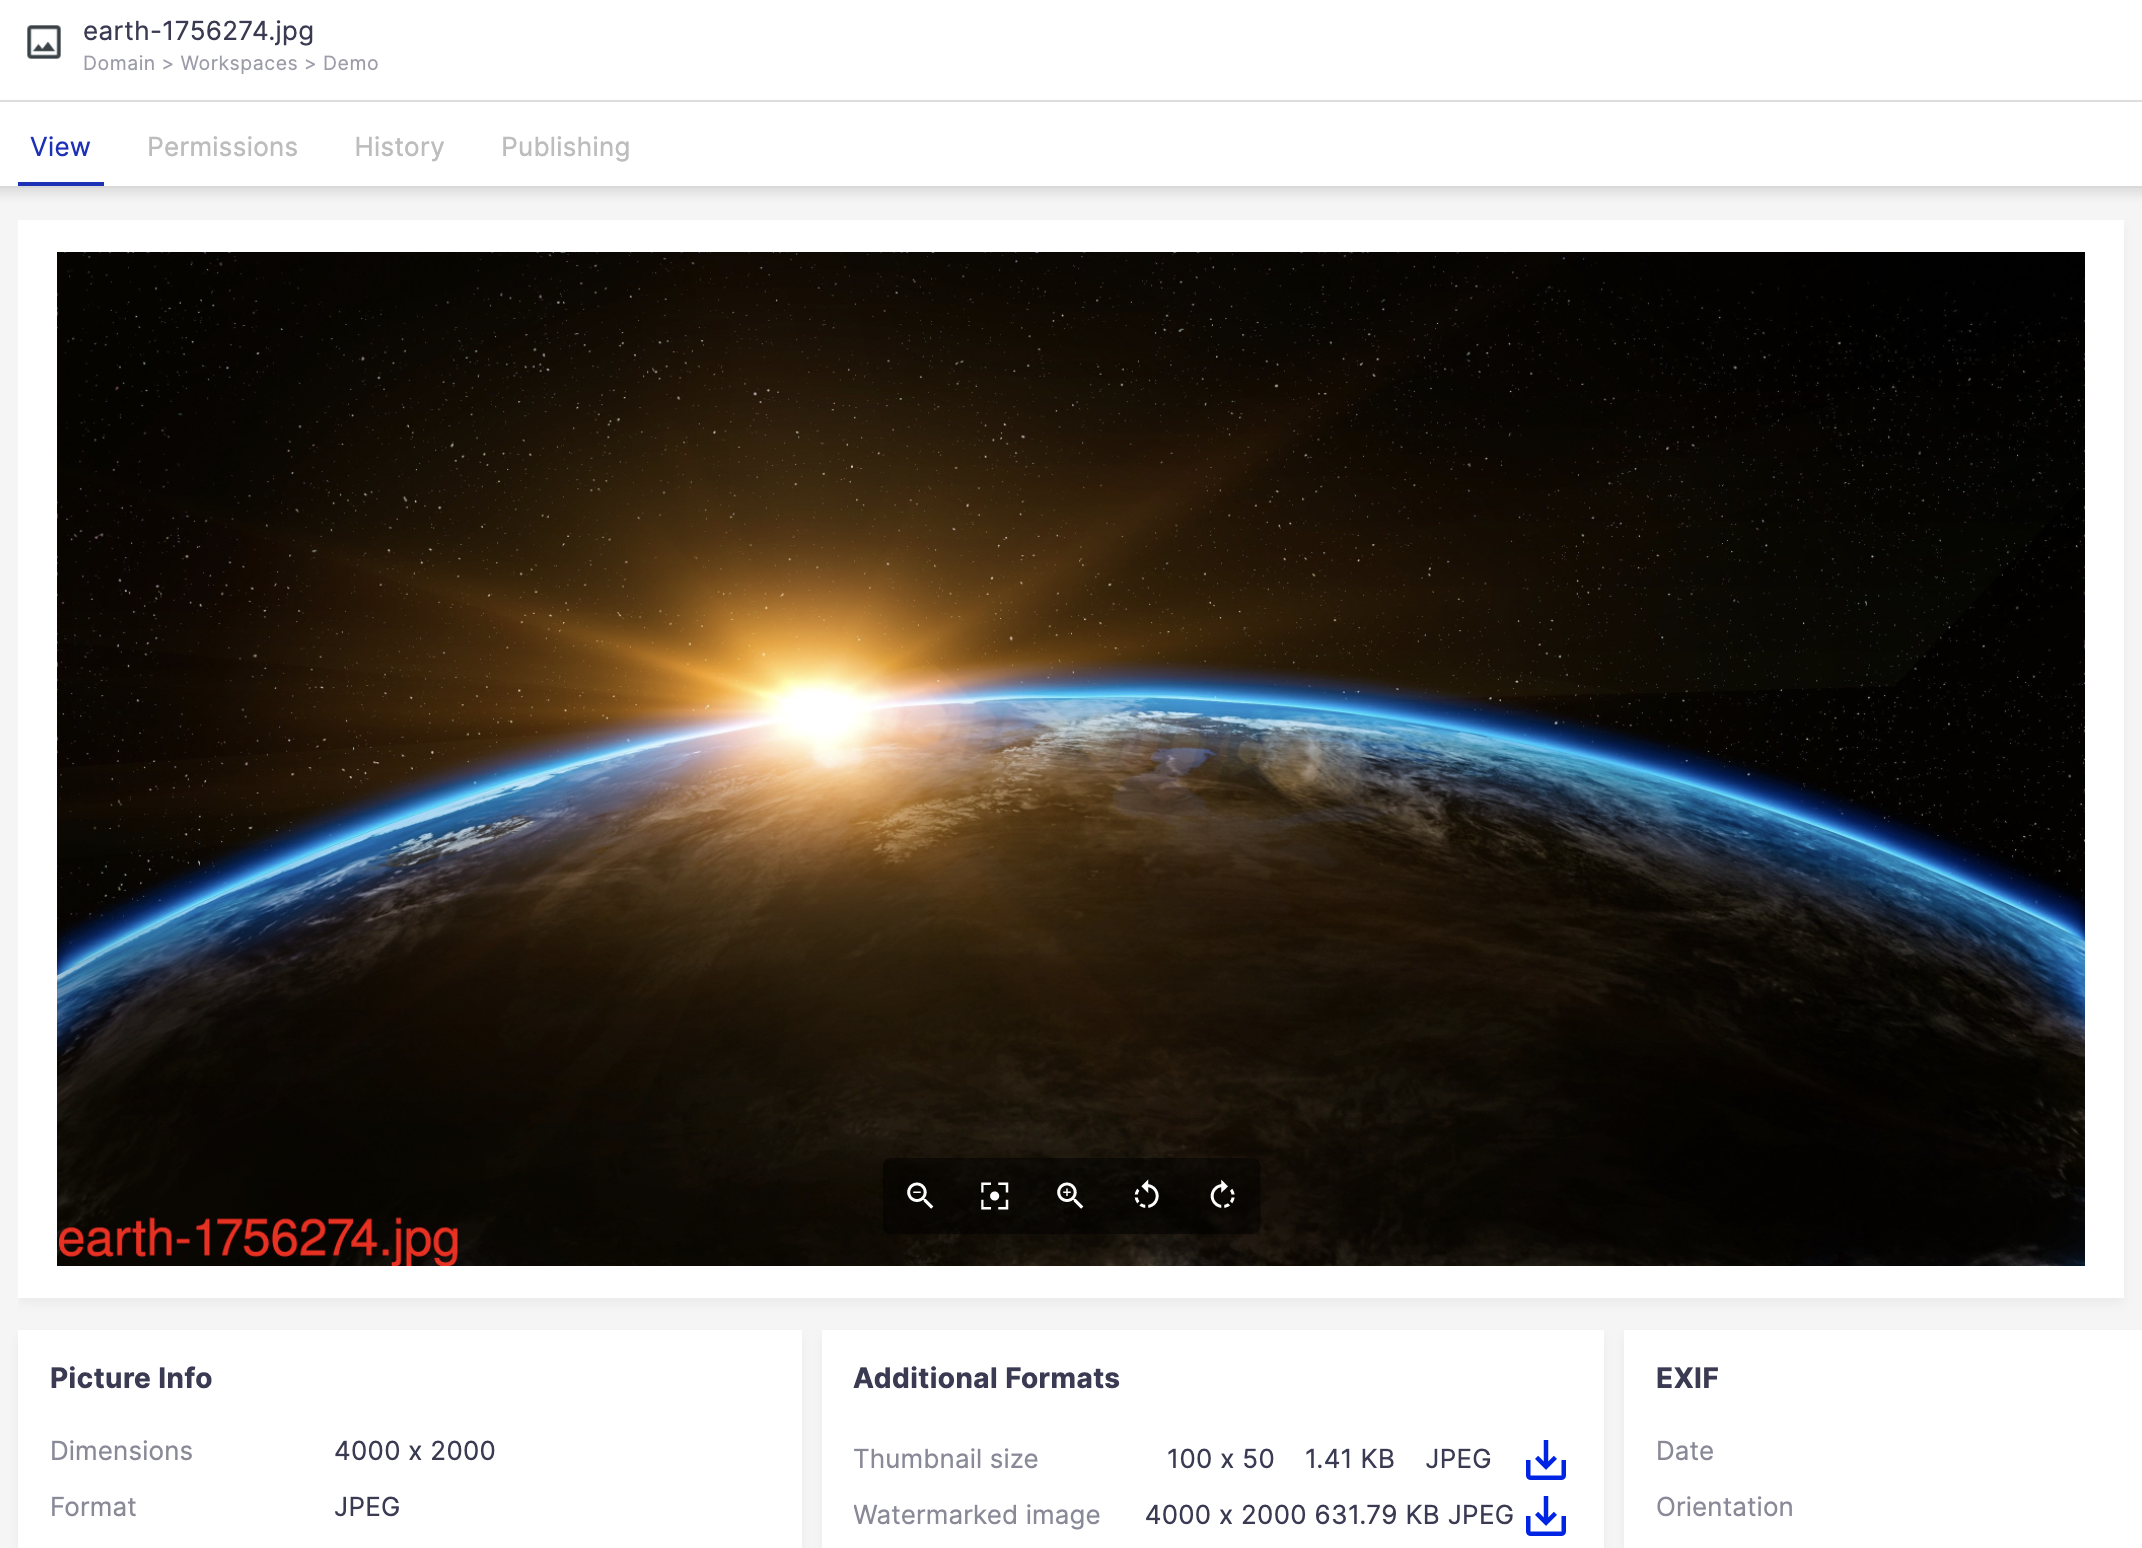
You should end up with something like this on your instance:
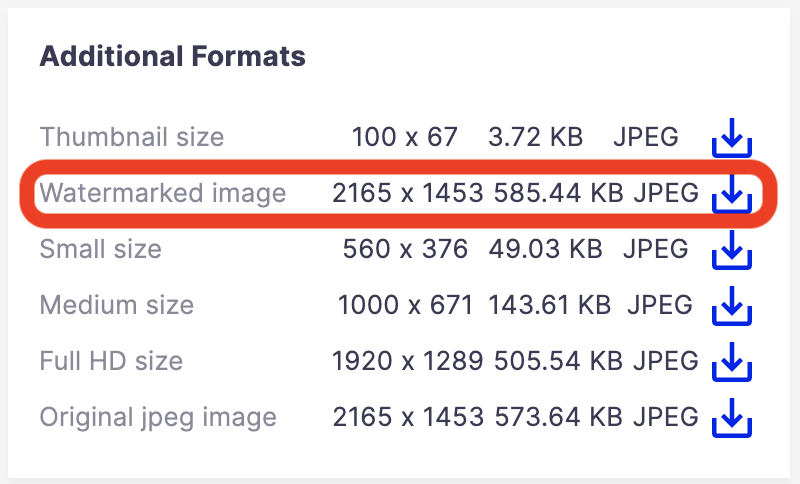
You can now click on the Watermark line to download the watermarked picture:
Run a Converter in a New CoreSession
If you need to open a CoreSession to retrieve a document, for instance the parent document which will hold the watermark text, you will need two chains, one opening a Transaction / CoreSession, and another one doing the watermarking.
- First, create the
GetWatermarkTextChainautomation chain that will retrieve the text, and put it in theContext:
- Blob.Push
- Auth.LoginAs: {}
- Document.Fetch: value: "@{Context[\"pictureDocument\"].parentRef}"
- Context.SetVar:
    name: watermarkText
    value: "@{Document[\"myparentschema:watermarkText\"]}"
- Blob.Pop
- Now, we need the
WatermarkChainchain that will be used for the picture conversion, getting the text from theContextand call a custom operation that will watermark the image:
- Context.RunFileOperation:
    id: GetWatermarkText
    isolate: "false"
    newTx: "true"
    rollbackGlobalOnError: "true"
- WatermarkOperation:
    watermarkText: "@{Context[\"watermarkText\"]}"
Filter Picture Conversions
Picture conversions can be filtered so that you can choose which picture conversions should be executed on a given document. The filtering is done through standard filters we already use in the Nuxeo Platform.
principal, currentUser or coreSession. You cannot access the Seam beans as the conversion is done in a worker.
Let's say we want to execute the previous Watermark picture conversion only on documents that have their dc:source value to MyCompany and their dc:language value not equals to english.
- First, contribute the filters:
<extension target="org.nuxeo.ecm.platform.actions.ActionService"
point="filters">
  <filter id="grantMyCompany">
    <rule grant="true">
      <condition>#{currentDocument.dc.source == "MyCompany"}</condition>
    </rule>
  </filter>
    <filter id="denyEnglish">
      <rule grant="false">
        <condition>#{currentDocument.dc.language == "english"}</condition>
      </rule>
  </filter>
</extension>
- Then associate the filters to the picture conversion by updating the
picture conversion contribution:
<extension target="org.nuxeo.ecm.platform.picture.ImagingComponent"
point="pictureConversions">
  <pictureConversion id="Watermark" description="Watermarked image" tag="watermark"
  order="0" chainId="WatermarkChain">
    <filters>
      <filter-id>grantMyCompany</filter-id>
      <filter-id>denyEnglish</filter-id>
    </filters>
  </pictureConversion>
</extension>
Disable or Update a Default Conversion
If you need to disable a default conversion, just override the pictureConversions extension point, and add the enabled=false attribute:
<extension point="pictureConversions"
  target="org.nuxeo.ecm.platform.picture.ImagingComponent">
  <pictureConversion enabled="false" chainId="Image.Blob.Resize"
    default="true" description="Medium size"
    id="Medium" maxSize="1000" order="200" rendition="true"/>
</extension>
In this scenario, the Medium conversion won't be automated anymore and won't be displayed as available conversion in Nuxeo Web UI.
Display a Custom Conversion in the Preview Section
The default document view layout of Nuxeo Web UI displays the main file preview (i.e. the binary stored in file:content). To display a specific conversion, you need to edit the view layout by
- Commenting the default previewer
<!-- comment this section -->
<nuxeo-document-viewer role="widget" document="[[document]]"></nuxeo-document-viewer>
- Add the
nuxeo-document-previewelement to fetch a specific rendition.
<nuxeo-card>
  <nuxeo-document-preview document="[[document]]"
  xpath="picture:views/1/content">
  </nuxeo-document-preview>
</nuxeo-card>
The 1 value in the xpath attribute corresponds to the order of the picture conversion in the list of picture views.
This is what should be expected:
Set Security on a Specific Conversion
If you need to grant or deny access to a specific rendition, the simplest way is to use the File Download Security Policies. This could be helpful is you want to restrict access to a high resolution to a specific user group.
In this exemple, only members of the human_ressources_department group can access the Watermark picture.
<extension target="org.nuxeo.ecm.core.io.download.DownloadService" point="permissions">
    <permission name="myperm">
      <script>
        function run() {
        if (!CurrentUser.getGroups().contains("human_ressources_department")
              && XPath == "picture:views/1/content") {
          return false;
          }
        return true;
        }
      </script>
    </permission>
  </extension>