The Nuxeo CSV addon enables users to proceed to a bulk import of documents in the Nuxeo Platform using a CSV file. This addon enables users to create documents with their metadata filled in, to import files with their main attachment or to create a tree structure.
Installing this addon adds a button "Import a CSV file" for all users that have at least the Edit permission on any document in which it is possible to import a file. By default, this means workspaces and folders. If you configured other documents types in which it is possible to import files, then the button "Import a CSV file" can also be available (see the page How to Enable CSV Import on a Custom Document Type).
This page gives all the necessary steps to import content with the CSV addon from JSF UI and Web UI.
Installation
This addon requires no specific installation steps. It can be installed like any other package with nuxeoctl command line or from the Update Center.
With Web UI
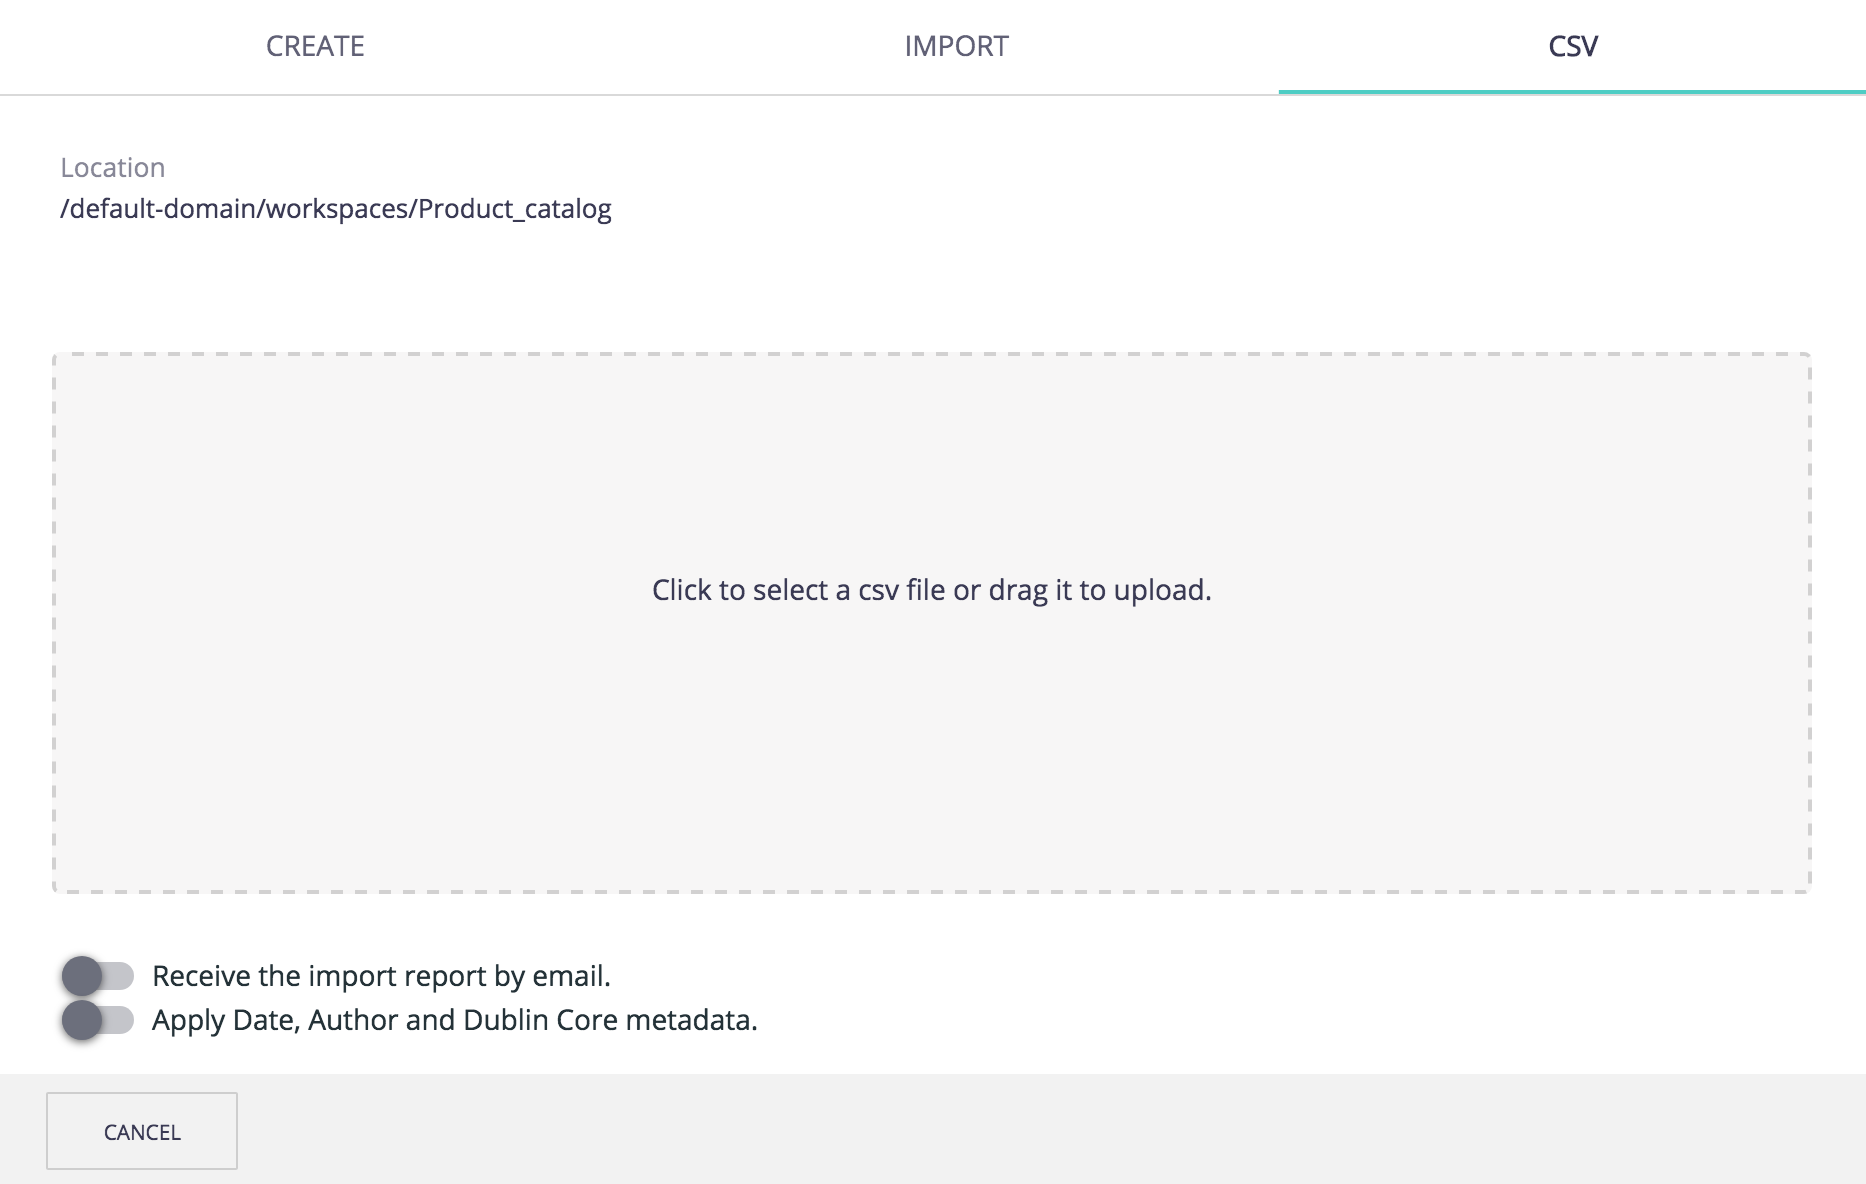
After the package is installed, a new tab called CSV is available on the default creation form.
With JSF UI
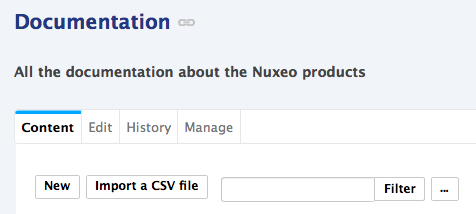
Users have an Import a CSV file button available in the folder toolbar of the workspaces, folders and in any document where they can import files.
Configuration
The Nuxeo CSV addon enables users to create file documents and upload their main attachment at the same time. This requires to configure where the server will take the attachments. This is done adding the parameter nuxeo.csv.blobs.folder in the server nuxeo.conf and giving it a value that is a local path to a folder that can be accessed by the server.
CSV File Definition
The CSV file used to import documents in the Nuxeo Platform must respect the following rules:
- First line defines the properties that will be filled in
- Other lines define the documents to be imported
- Use a comma to separate properties
- Values must be between quotes
- Dates must use the format MM/dd/yyyy
- For multi-valued metadata, such as contributors, use a pipe character (
|) to separate the different values - For vocabularies values, use their id
- Lines defining the documents to import must define all properties specified on the first line, even empty ones (by using empty values)
Here is a simple example of the structure of a CSV file:
"name","type","dc:title","dc:description"
"my-file","File","My file","This is my file's description"
In the example above:
nameis the id of the document (used in the URL)typeis the id of document type (see the page How to Override Existing Document Types for some default types properties)dc:titleanddc:descriptionare the title and description fields of the document from the Dublin Core (dc) schema. They follow theschema:fieldformatting.
To have new lines in a field value (like dc:description), just write them as in the following CSV file example:
"name","type","dc:title","dc:description"
"a-file","File","A File","description with
some new
lines"
"another-file","File","Another File","description without new line"
In the example above:
namemust be a unique value. If a CSV file contains more than one line with the samenameonly a single document with that name will be imported.
Using Nuxeo CSV
Basic Import
To import documents using Nuxeo CSV:
- Prepare the CSV file that defines the documents to import, following the rules explained in the CSV file definition section. Some specific use cases are explained below.
- In the Nuxeo Platform, go on the workspace or folder you want to import documents into.
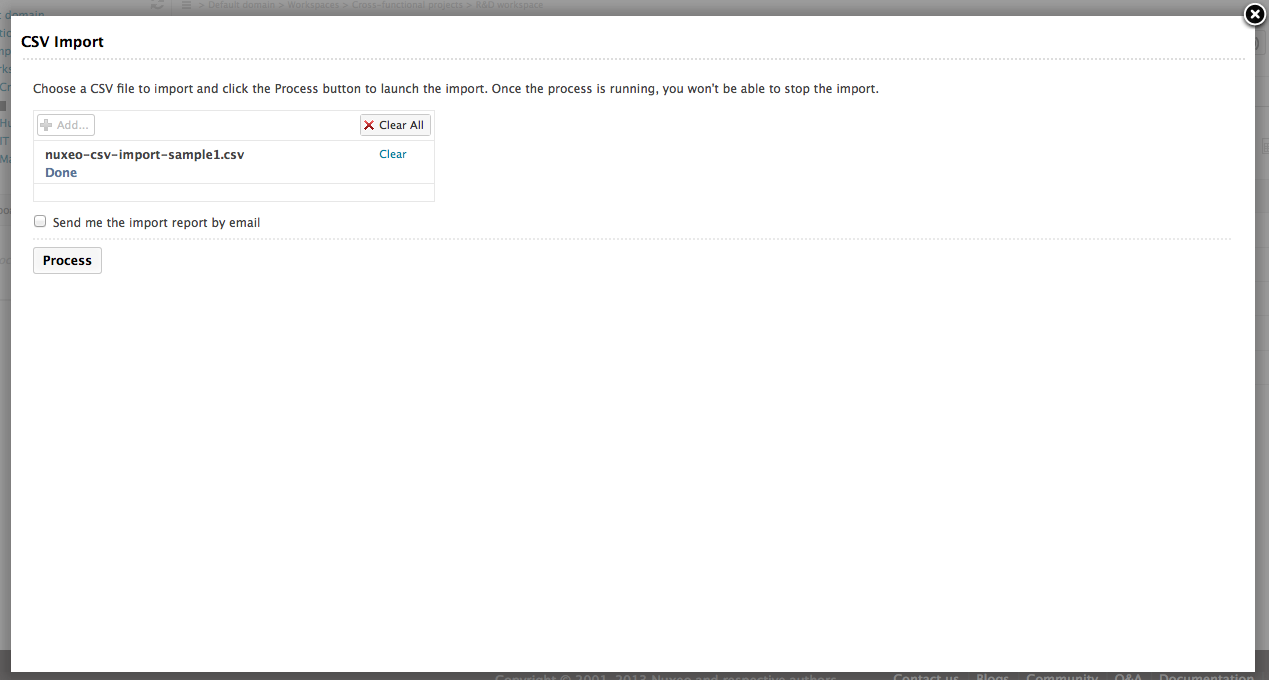
- To select the CSV file:
- With Web UI, click on the Create displayed on the bottom right side, and open the CSV tab. Then you can either drag n drop your CSV file of select it manually.
- With JSF UI, click on the Import a CSV file button in the workspace or folder you want to import documents into.
- With Web UI, click on the Create displayed on the bottom right side, and open the CSV tab. Then you can either drag n drop your CSV file of select it manually.
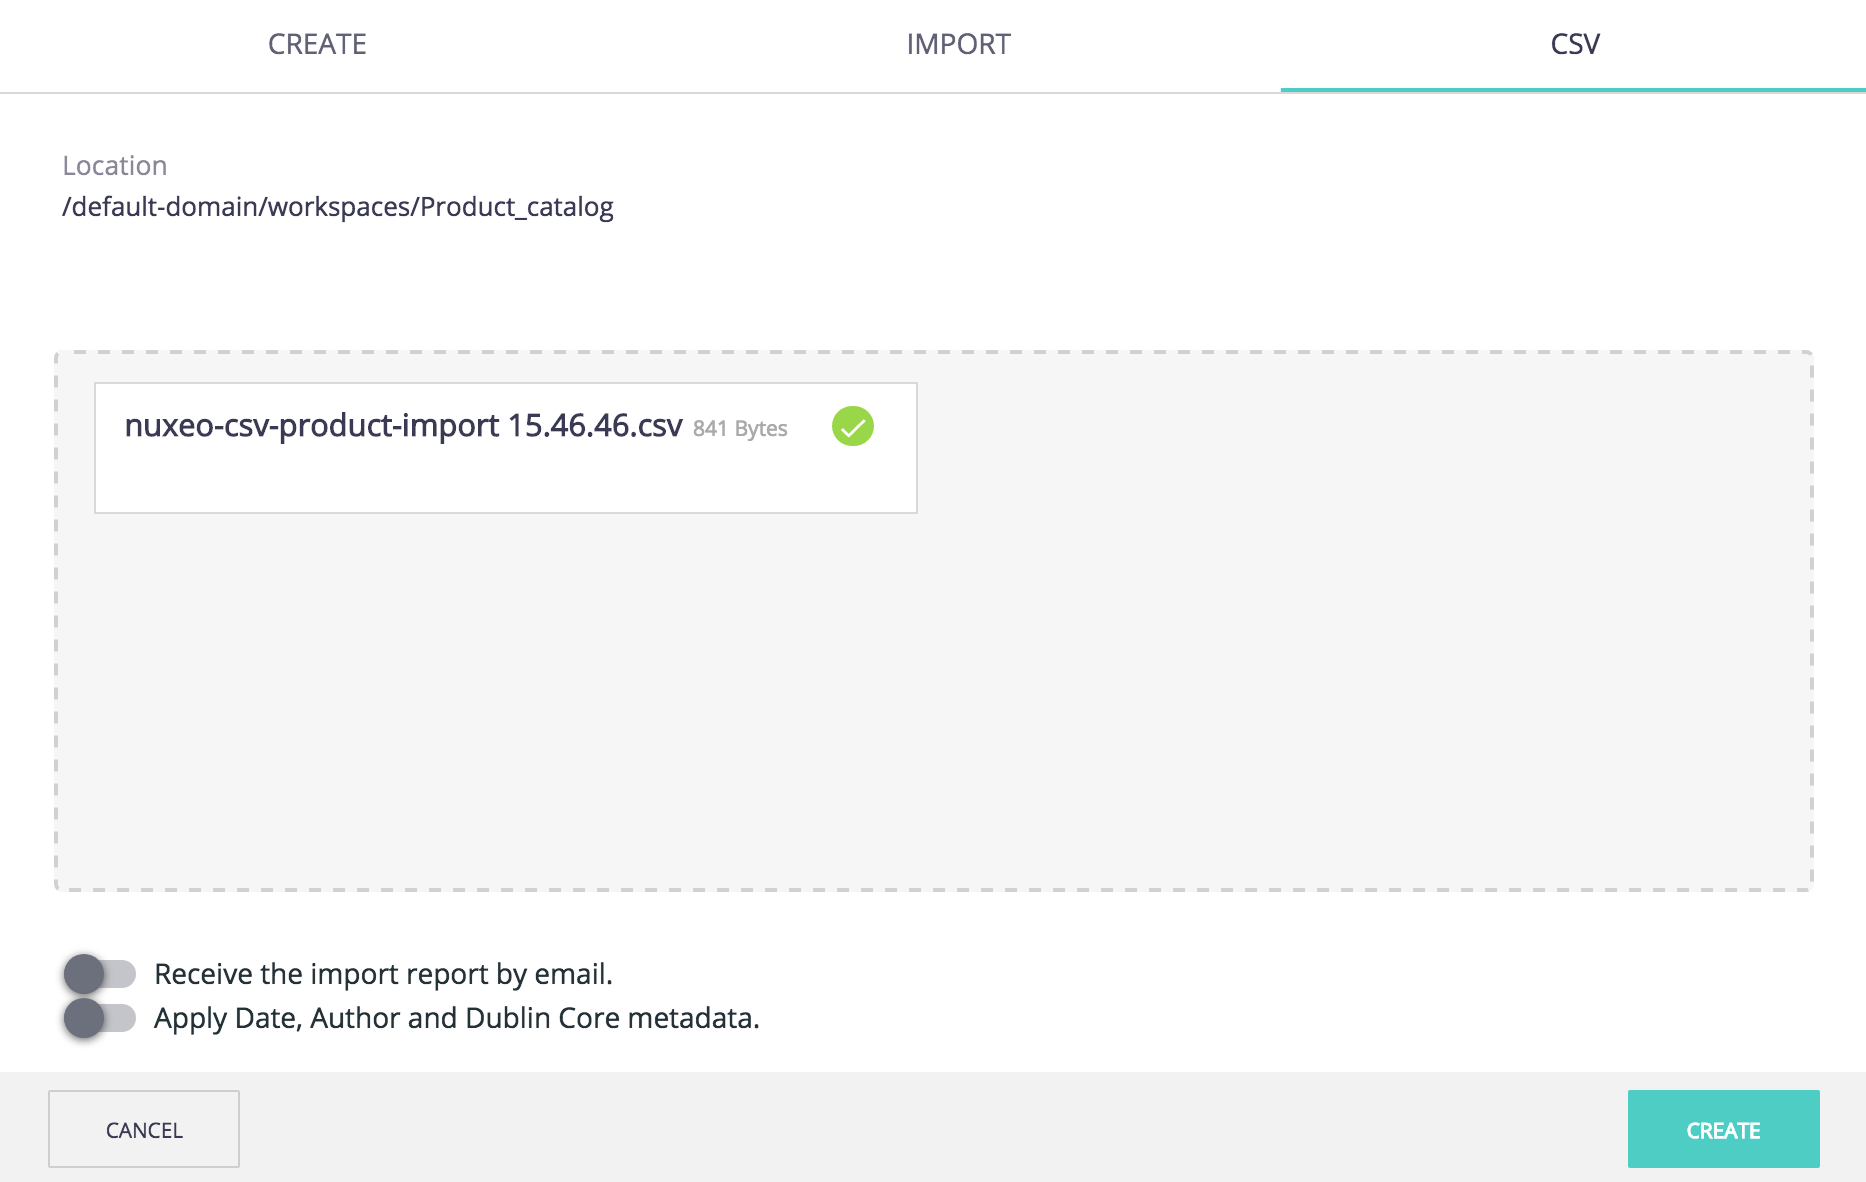
- Browse and select your CSV file.
| Web UI | JSF UI |
|---|---|
|
|
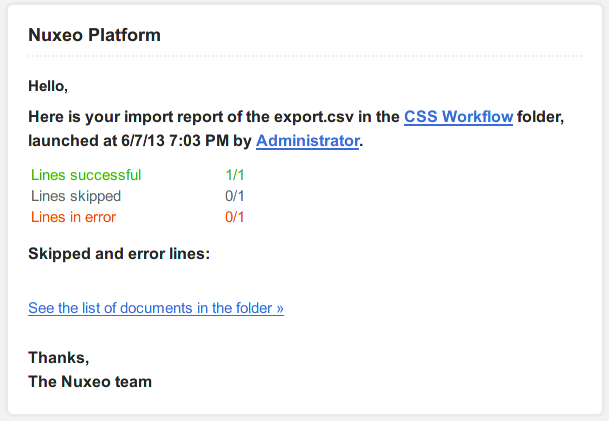
- Optionally check the box Receive the import report by email if you want to receive an email when the import is done which shows how the import went. This is useful in case of imports that take a long time.
- Optionally check the box Apply Date, Author and Dublin Core metadata if you want to import documents while maintaining original UUID, creation date, modification date, author and contributors.
Click on the Process button. The import starts. You can either:
Wait for the import to be completed. When it is completed, a report of the import is displayed;
Web UI JSF UI 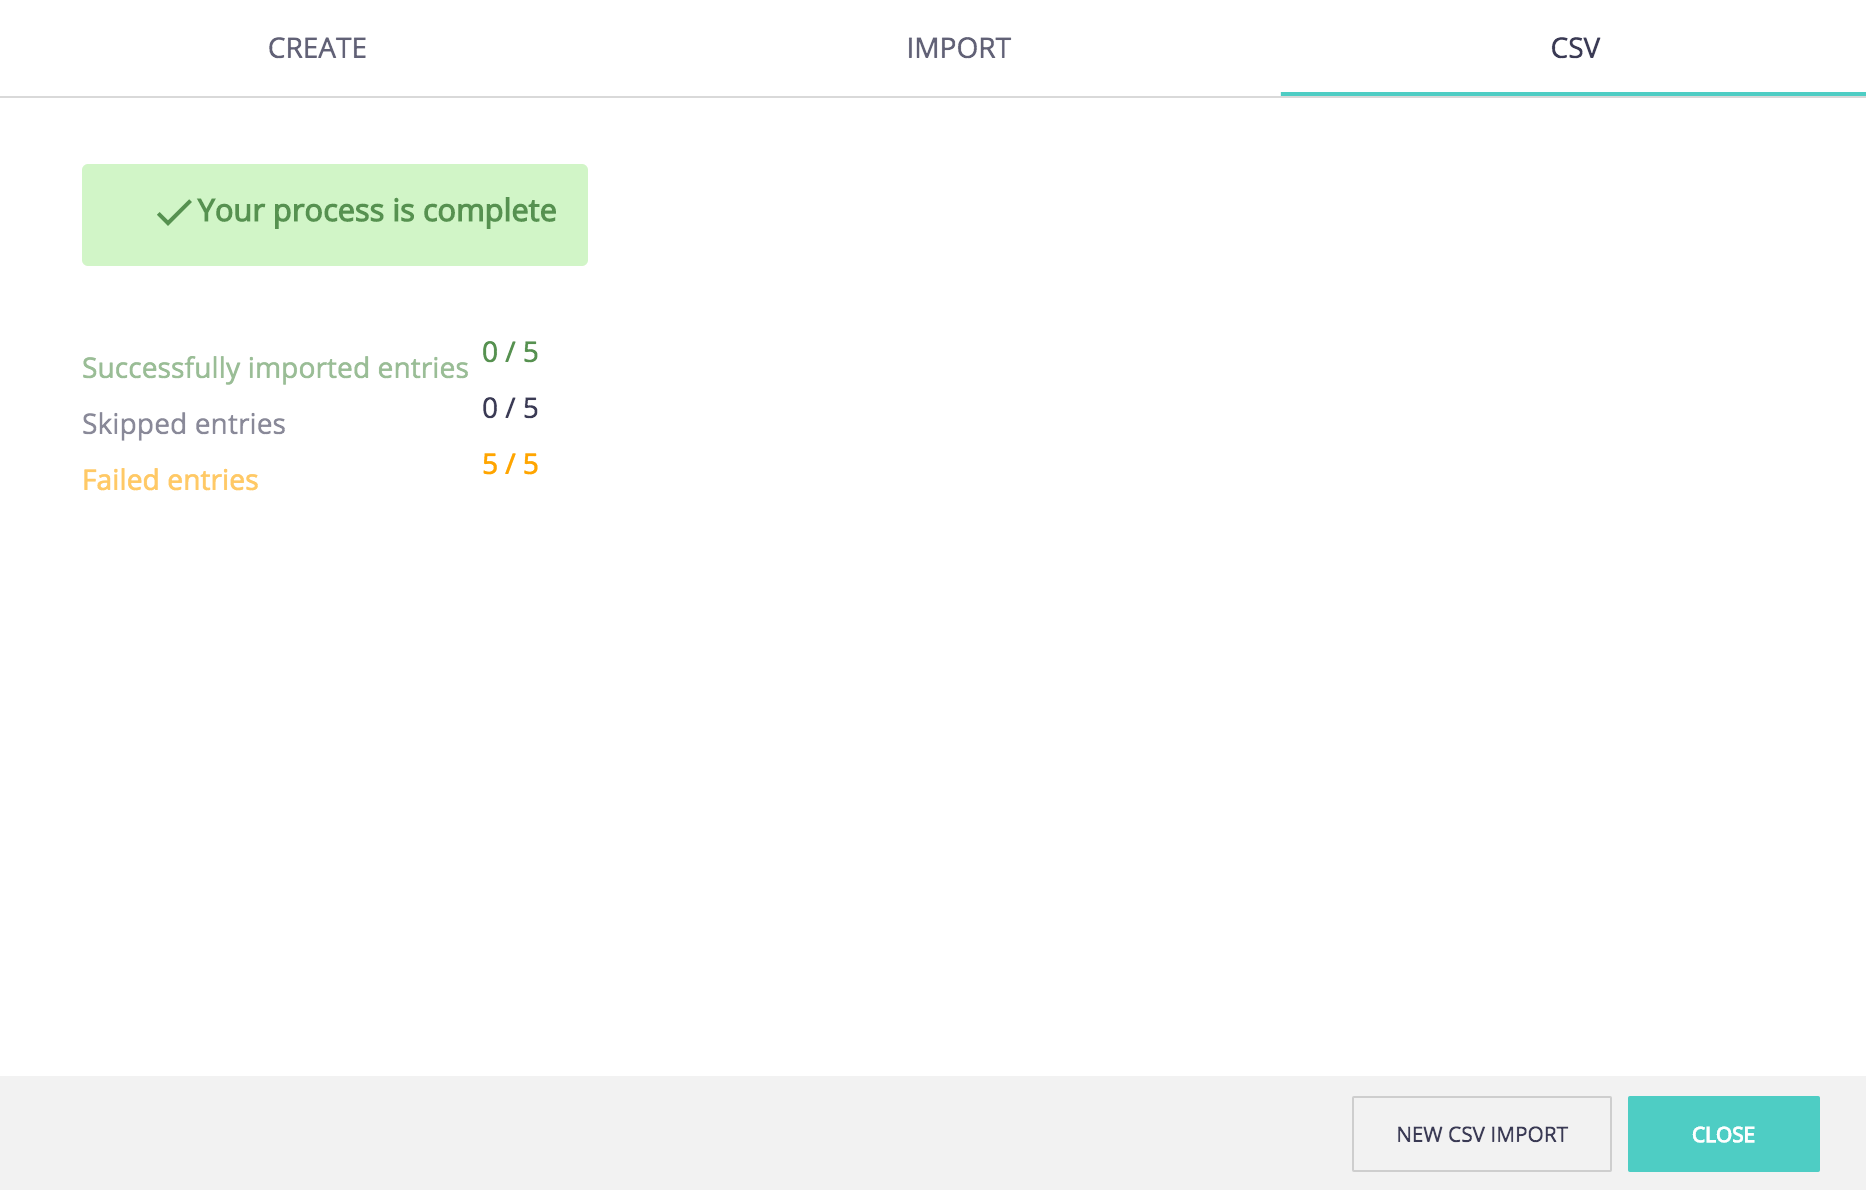
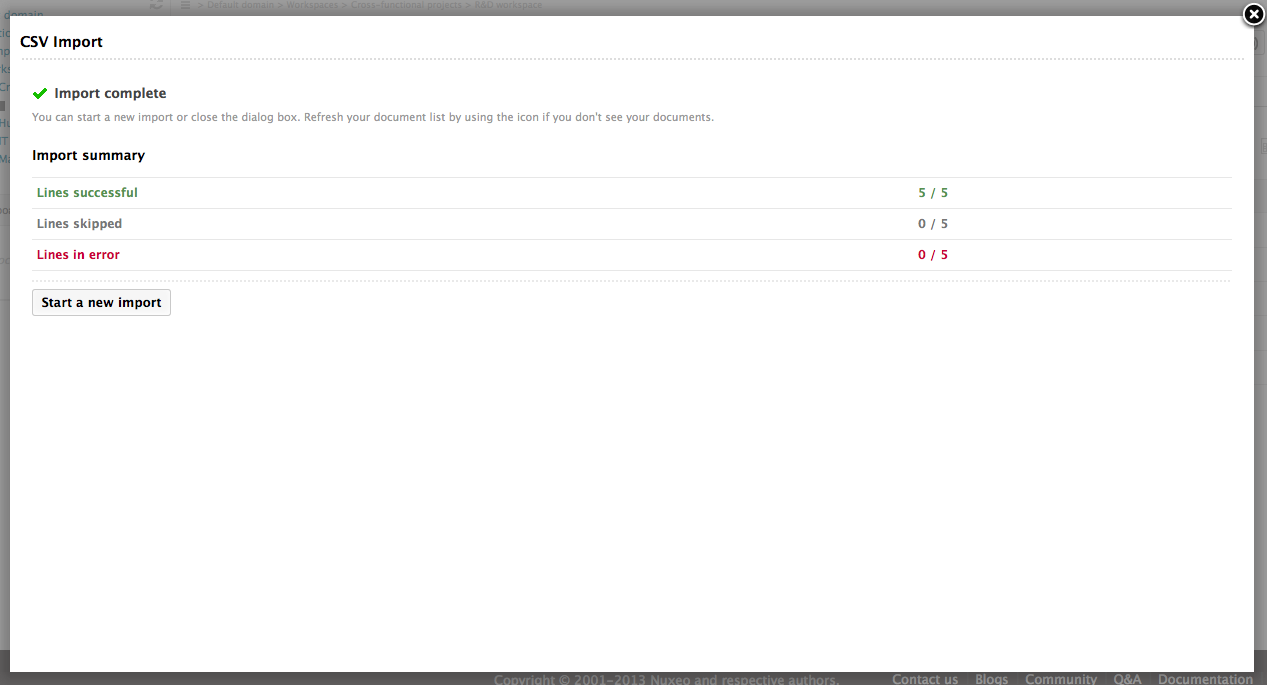
Start a new import;
- Browse the application. If you checked the box Send me the import report by email, you receive an email once the import is completed.
If you get an error with the CSV import, Web UI doesn't currently display the detailed report table in the CSV import result interface. This feature is currently being developed by the Nuxeo development team in order to homogenize the interface between Web UI and JSF UI.
Import a Document Tree Structure
It is possible to import a hierarchy of documents using Nuxeo CSV. To do that, the name property is used to determine where the document should be created in the hierarchy of documents you are importing: its name is composed of the names of its parents separated by /, forming a path.
Since the importer creates the documents in the order they are listed in the CSV file, you have to be careful about the order in which you declare the documents to import so as to be sure to create the workspace or folder before the documents it will hold.
Here is an example of a CSV import that creates documents at the root of the workspace from which the import is started and in a child folder:
"name","type","dc:title","dc:description"
"folder","Folder","Folder in the workspace","The description of the folder created by CSV import"
"folder/doc-created-in-folder","File","Document created in a folder","The description of a file imported in a folder created by the import"
"doc1","File","Document 0","A document created directly in the workspace in which the import is started"
"doc2","File","Doc 1","A file document description, created at the same location as doc1"
"doc3","Note","Doc 2","A note document, created at the same location as doc1 and doc2"
You can use the attached file to test Nuxeo CSV to import a tree structure.
Import Complex Property Values
Complex properties (mono and multi-valued) need to be JSON formatted. To do so, we advise you to use the JSON Export action from the Nuxeo Dev Tools Extension.
Let's illustrate it with a multivalued complex property called product:composition with two items (material and percentage as string fields). Then the CSV file should be structured like:
"name","type","dc:title","product:price","product:reference","product:year","product:season","product:colors","file:content","product:composition"
"shoes/shoes-428608_640","product","Shoes #1","67$","DTYIUUB","2013","spring","black|green","Shoes/shoes-428608_640.jpg","[{\"material\":\"coton\",\"percentage\":\"89\"},{\"material\":\"jean\",\"percentage\":\"11\"}]"
\ when using JSON format with complex properties
In this case, the JSON export of the imported document is:
 (...)
 "product:composition": [
     {
       "material": "coton",
       "percentage": "89"
     },
     {
       "material": "jean",
       "percentage": "11"
     }
   ],
   "product:year": "2013",
   "product:colors": [
     "black",
     "green"
   ],
   "product:season": "spring",
(...)
Import Files
Importing files through Nuxeo CSV requires that your administrator enabled it in the server configuration and to put the binary files in a folder that can be accessed by the server.
Main Attachment
It is possible to create documents of type File and to upload their main attachment using Nuxeo CSV.
On your CSV file, use the file:content property in the first line and the name of your file on the document definition line.
"name","type","dc:title","dc:description","file:content"
"my-file","File","My file with uploaded attachment","This is a file with its attachment, created using Nuxeo CSV","my-file.doc"
You can use the attached ZIP sample to test the import of files.
Files Attachment
Since 9.3, it is also possible to create documents and set their files attachment using Nuxeo CSV.
Setting the files attachement requires you to write a JSON formatted complex property. The JSON format is the following:
[
    {
        "file": {
            "mime-type": "text/plain",
            "content": "first_file.txt"
        }
    },
    {
        "file": {
            "mime-type": "application/pdf",
            "content": "my_pdf.pdf"
        }
    },
    {
        "file": {
            "name": "custom_name.pdf",
            "content": "another_pdf.pdf"
        }
    }
]
In the JSON above:
contentis the relative path of the File to import, located in the configured folder.nameoverrides the name of the Blob, by default the name of the imported File. Optional.mime-typeset the mime type of the Blob. Optional.
On your CSV file, use the file:files property in the first line and the JSON formatted complex property, such as:
"name","type","dc:title","file:files"
"my-file","File","My file with files attachment","[{ \"file\": { \"mime-type\": \"text/plain\", \"content\": \"first_file.txt\" }}, { \"file\": { \"mime-type\": \"application/pdf\", \"content\": \"my_pdf.pdf\" }}, { \"file\": { \"name\": \"custom_name.pdf\", \"content\": \"another_pdf.pdf\" }}]"
Complex Property
Since 9.3, it is also possible to create documents and import a File in a complex property.
For instance, assuming you have a schema named foo with a complex property named complex containing a string property str and a content property file:
<?xml version="1.0"?>
<xs:schema xmlns:xs="http://www.w3.org/2001/XMLSchema"
  targetNamespace="http://nuxeo.ecm.csv.test/schemas/foo/"
  xmlns:foo="http://nuxeo.ecm.csv.test/schemas/foo/">

  <xs:include schemaLocation="core-types.xsd" />

  <xs:complexType name="complexType">
    <xs:sequence>
      <xs:element name="str" type="xs:string"/>
      <xs:element name="file" type="foo:content"/>
    </xs:sequence>
  </xs:complexType>

  <xs:element name="complex" type="foo:complexType"/>

</xs:schema>
The JSON formatted property will be:
{
    "str": "a string",
    "file": {
        "mime-type": "text/plain",
        "content": "first_file.txt"
    }
}
On your CSV file, use the foo:complex property in the first line and the JSON formatted complex property, such as:
"name","type","dc:title","foo:complex"
"my-foo-file","FooFile","My file with complex property","{ \"str\": \"a string\", \"file\": { \"mime-type\": \"text/plain\", \"content\": \"first_file.txt\" }}"
Set Lifecycle State When Creating Documents
It is possible to set the lifecycle state when the document is created through Nuxeo CSV, using the ecm:currentLifeCycleState property. This property is ignored when updating documents.
"name","type","dc:description","dc:title","ecm:currentLifeCycleState"
"myfile","File","a simple file","My File","obsolete"
Events
Note that the event raised by this CSV import is a creation event, not an import one. An import event means that for the Nuxeo Platform, a full and ready Nuxeo document is imported. Here based on some data, a new Nuxeo document is created.