Live Connect allows you to create a content application that handles cloud files (Dropbox, Google Drive, Box, OneDrive...) as if they were local files. Files remain in the cloud but they are referenced in the Nuxeo repository as if they were stored within it. This allows the user to benefit from thumbnailing service, full text, conversions, etc.
Live Connect for Google Drive also brings the "Cloud Edit" mode. Your application based on the Nuxeo Platform can provide the users with a direct link to the SaaS applications that you can use for editing Google Drive files (Google Docs, Office 365, Pixlr, etc.).
Live Connect is designed to allow many implementations. Default implementations are:
- Live Connect for Google Drive
- Live Connect for Dropbox
- Live Connect for Box
- Live Connect for OneDrive & OneDrive for Business (since Nuxeo Platform 8.2)
Live Connect Features
Live Connect provides a set of features described below.
- File download: File download is made by redirecting the user's browser to the native download URL of the considered backend.
- Full-text indexation: The text of the content is extracted and sent to the Elasticsearch index so as to be able to perform native Nuxeo Platform search using NXQL and standard search screens of the UI.
- File conversion in PDF, using the provider's conversion system: When a PDF conversion is asked for a Live Connect file, the user's browser is redirected to the provider's direct URL for getting the PDF version.
- File preview, using native provider's preview.
- Thumbnail generation, using provider's thumbnail.
- Apps link: Links that can be used to edit the file in the cloud.
- Update of the document: If a document is updated on the backend, the reference will be updated (full-text index, thumbnail, filename...)
- Native versioning: When a version of the document is created in the Nuxeo Platform, a versioning order is sent to the backend so as to make a version of the file on the backend and make sure to be able to get back the file in the future.
Depending on the backend capabilities of the provider, not all features are available.
The table below shows the available features for each default implementation.
| Feature | Available for Google Drive | Available for Dropbox | Available for Box | Available for OneDrive |
|---|---|---|---|---|
| Download URL | Yes | Yes | Yes | Yes |
| Full-text indexation | Yes | Yes | Yes | Yes |
| PDF conversion | Yes | Yes | Yes | Yes |
| Preview | Yes | Yes | Yes | Yes |
| Thumbnail | Yes | Yes | Yes | Yes |
| Link to cloud app | Yes | No | No | Yes |
| Versioning | Yes (non-native Google Drive documents) | Yes | Yes | Yes* |
| Update of the document | Yes | Yes | Yes | Yes |
* Provided by the Nuxeo Platform
Functional Overview
Creating New Live Connect Documents
The Live Connect Upload action is available for the following Nuxeo document types:
- File
- Picture
- Video
- Audio
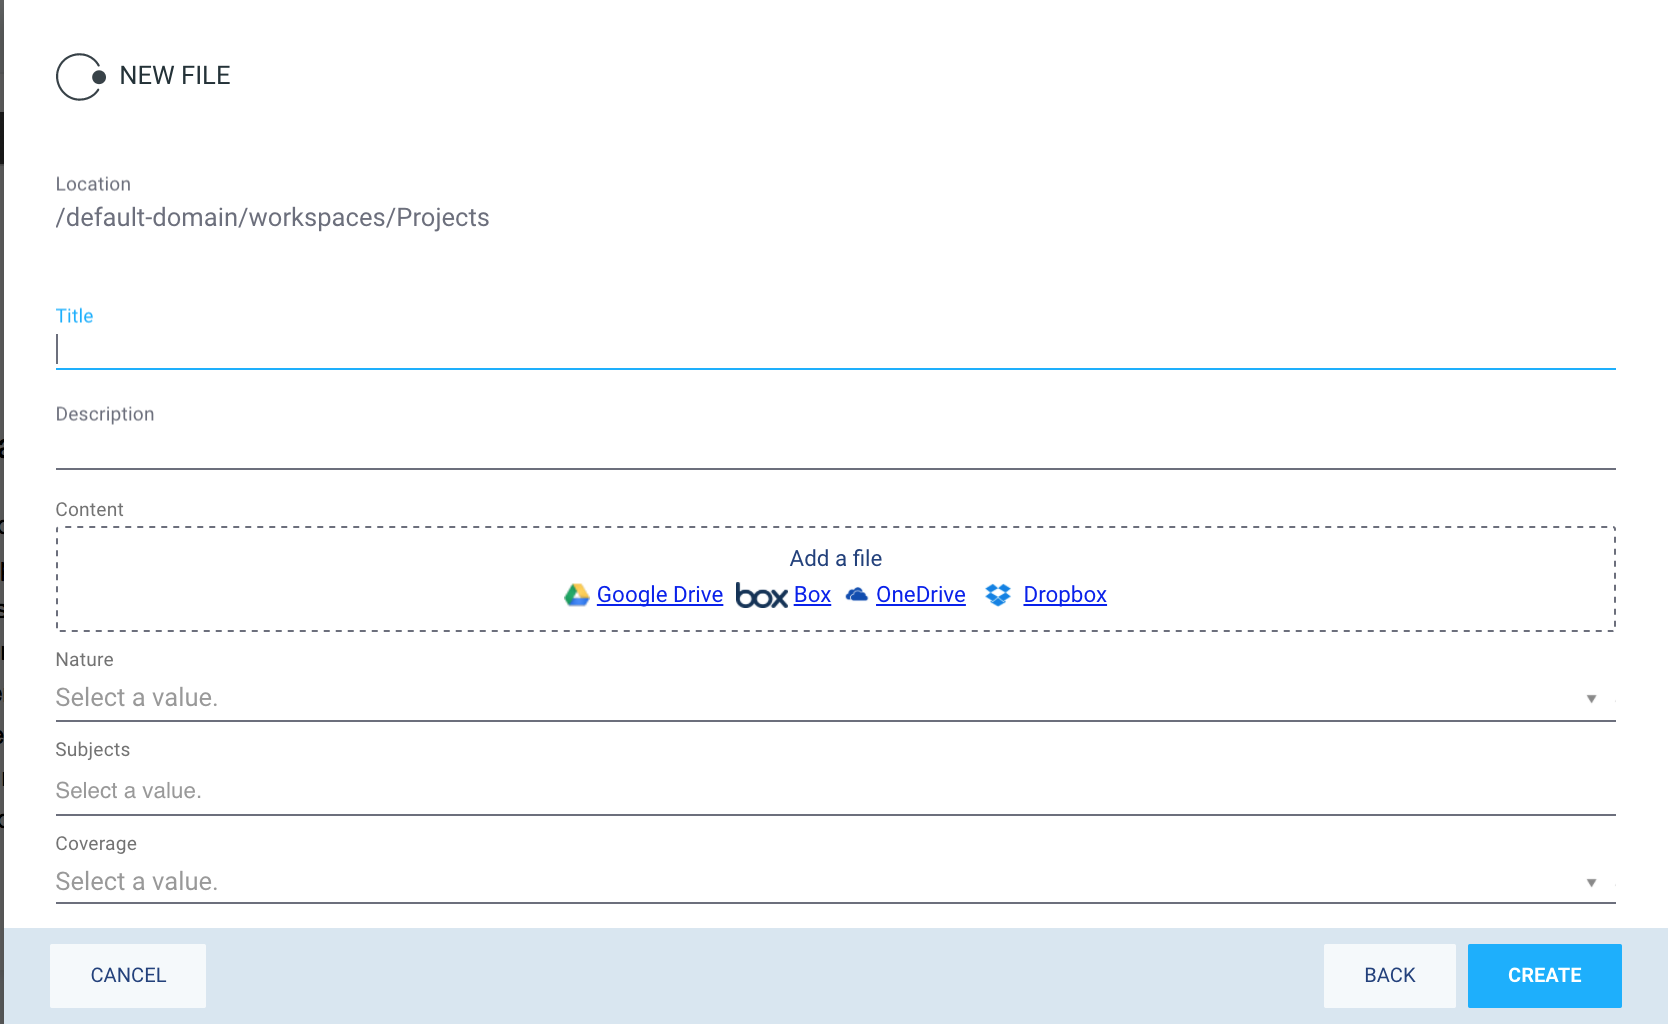
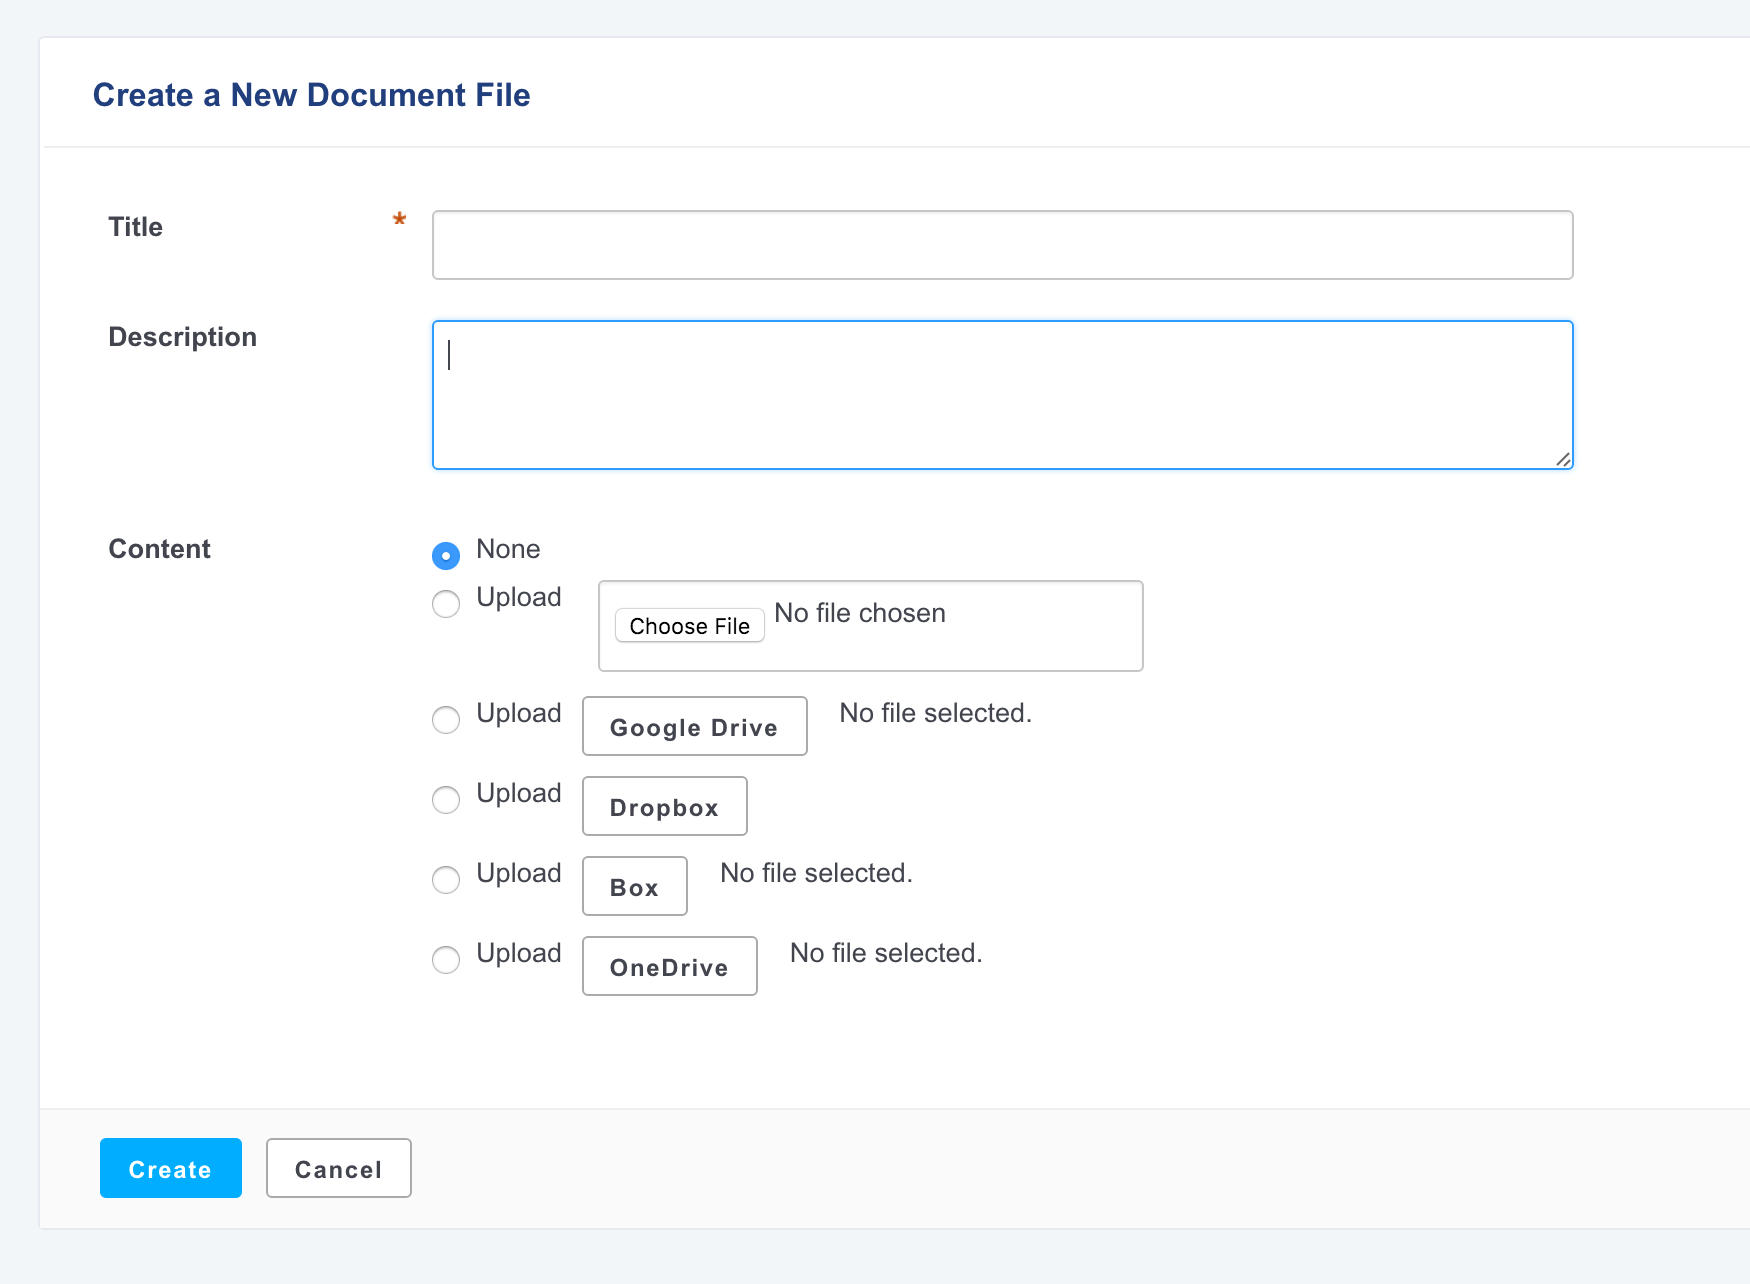
On the document creation form, a button with the provider name enables you to browse your content and select a document stored there.
Web UI
JSF UI
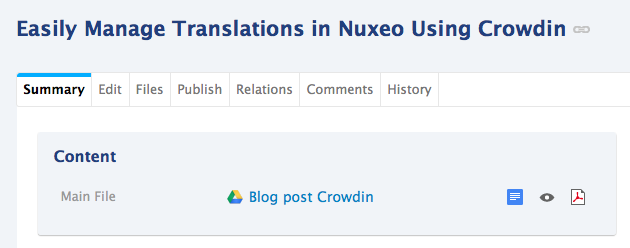
Editing Content
For some provider on some file, you can edit document stored on your provider using its native application.
For example, Google Drive provides Google docs, Pixlr... for its native documents type. Native documents stored on Google Drive can be edited using the native Google Drive application: Google docs, Pixlr, etc.
Browsing and Searching Content
Live Connect documents can be searched in the Nuxeo Platform like any other document: their content is indexed in the platform, as well as their metadata. They are displayed in search results like a Nuxeo document. Their thumbnail is provided by the provider (when feature is available).
Configuration
Setting Up Live Connect for Google Drive
Step 1: Preparing your application accounts on the Google developer console
- Go to https://console.developers.google.com/apis/dashboard.
- On the right of Google APIs logo, click on selector in order to create a new project
- Enable Drive API: In Library > Google Apps APIs click on Drive API and then on the Enable button at the top of the page.
- Edit your consent screen: In API Manager > Credentials click on OAuth consent Screen, fill the product name (the name of your application). You can also upload a logo, etc. This is what is displayed when the user authenticates through Google.
Create a new OAuth Client ID: In APIs & auth > Credentials click on Create credentials and select OAuth client ID.
- Choose Web Application.
- For Authorized JavaScript origins set the URL of your server. Ex: http://localhost:8080
- For Authorized redirect URIs set the following URL, adapting the hostname and port to your case:
http://NUXEO_SERVER/nuxeo/site/oauth2/googledrive/callback
The console redirects you to a page where you can see the client id and secret id values. You will need them in the next steps.
Step 2: Configuring the Nuxeo Platform
- Install the package Nuxeo Live Connect if it is not already installed.
- In the Administration, go to Cloud Services > Service providers.
- In the OAuth2 Service providers section, click on the Modify button of the googledrive service provider.
- Set the client id and client secret values with the one you got on the previous step.
- Make sure the Enabled box is checked.
- Save.
- Now just create a new Google Drive document
You are ready to use it, just go in the workspace section and create a file object: you can use the Google Drive file picker.
Setting Up Live Connect for Dropbox
Step 1: Preparing your application accounts on the Dropbox App console
- Go to https://www.dropbox.com/developers/apps.
- Click on Create app.
- Select Dropbox API.
Select the permission Type Full Dropbox.
The App folder permission won't work due to limitations in Dropbox API.Enter the name of your application.
- Click on the button Create app.
- From the Settings tab, copy the App key and App secret.
In the OAuth 2 > Redirect URIs set the following URL, adapting the hostname and port to your case:
http://NUXEO_SERVER/nuxeo/site/oauth2/dropbox/callback.Please note that Dropbox only allows http for localhost. For all other sites https must be used. See HTTP and HTTPS Reverse-Proxy Configuration.Fill in your Chooser/Saver domains with your domain name.
Step 2: Configuring the Nuxeo Platform
- Install the package Nuxeo Live Connect if it is not already installed.
- In the Administration, go to Cloud Services > Service providers.
- In the OAuth2 Service providers section click on the Modify button of the dropbox service provider.
- Paste the Dropbox App key in ClientID.
- Paste the Dropbox App secret in Client Secret.
- Make sure the Enabled box is checked.
- Now just create a new Dropbox document
Setting Up Live Connect for Box
Step 1: Preparing your application accounts on the Box App console
- Go to https://app.box.com/developers/services.
- Click on Create a Box Application.
- Select the Custom App application type.
- In the Authentication Method screen, select Standard OAuth 2.0 (User Authentication).
- Enter the name of your application and select Create Application.
In redirect_uri set the following URL, adapting the hostname and port to your case: http://nuxeo-server:8080/nuxeo/site/oauth2/box/callback .
Please note that Box allows HTTP only for localhost. For all other sites HTTPS must be used. See HTTP and HTTPS Reverse-Proxy Configuration.Copy the client_id and client_secret.
- Click on button Save Application.
Step 2: Configuring the Nuxeo Platform
- Install the package Nuxeo Live Connect if it is not already installed.
- In the Administration, go to Cloud Services > Service providers.
- In the OAuth2 Service providers section, click on the Modify button of the box service provider.
- Paste the Box client_id in ClientID.
- Paste the Box client_secret in Client Secret.
- Make sure the Enabled box is checked.
- Save.
- Now just create a new Box document
Setting Up Live Connect for OneDrive
Live Connect for OneDrive is compatible with Nuxeo Platform 8.2+.
Step 1: Preparing your application accounts on the OneDrive App console
- Go to https://account.live.com/developers/applications/index.
- Click on Add an app.
- Enter the name of your new application and click on Create application.
- Copy the Application ID.
- Application Secrets: Click on Generate New Password and copy it.
- On Platforms, click on Add Platform and then select Web. In Redirect URIs set the following URL, adapting the hostname and port to your case:
http://nuxeo-server:8080/nuxeo/site/oauth2/onedrive/callback. - In the Application permissions section, activate
Files.Read.Allto your security profile, - Click on Save.
Step 2: Configuring the Nuxeo Platform
- Install the package Nuxeo Live Connect if it is not already installed.
- In the Administration, go to Cloud Services > Service providers.
- In the OAuth2 Service providers section, click on the Modify button of the onedrive service provider.
- Paste the OneDrive client_id in ClientID.
- Paste the OneDrive client_secret in Client Secret.
Default values for
- Authorization Server URL: https://login.live.com/oauth20_authorize.srf?response_type=code
- Token Server URL: https://login.live.com/oauth20_token.srf
- Make sure the Enabled box is checked.
- Save.
- Now just create a new OneDrive document
Setting Up Live Connect for OneDrive for Business
Step 1: Preparing your application account for OneDrive for Business
For OneDrive for Business follow steps here:
- Get an account from your Office 365 subscription: `[email protected]
where **username** is your username and **tenant** corresponds to your new domainhttp://{tenant}.sharepoint.com`.
- Get an account from your Office 365 subscription: `[email protected]
- You will need to subscribe to a Microsoft Azure Directory offer.
- Register your app with Azure Active Directory
http://nuxeo-server:8080/nuxeo/site/oauth2/onedrive/callback - APP ID URI: http://nuxeo-server:8080/nuxeo/site/oauth2/onedrive
If you don't get the pop-up, you need to add a new Web Platform under Platform.
While setting your application delegated permissions, you need to check:
Files.ReadFiles.Read.AllFiles.ReadWriteFiles.ReadWrite.AllNotes.ReadWriteNotes.ReadWrite.AllSites.Read.AllSites.ReadWrite.AllUser.ReadUser.ReadBasic.AllUser.ReadWriteUser.Read.AllUser.ReadWrite.All
Step 2: Configuring the Nuxeo Platform
- Install the package Nuxeo Live Connect if it is not already installed.
- In the Administration, go to Cloud Services > Service providers.
- In the OAuth2 Service providers section click on the Modify button of the onedrive service provider.
- Paste the OneDrive client_id in ClientID.
- Paste the OneDrive client_secret in Client Secret.
- Replace Authorization Server URL by
https://login.microsoftonline.com/common/oauth2/authorize?response_type=code - Replace Token Server URL by adapting the tenant (
nuxeoin the URL provided bellow) in resource parameter to your case:https://login.microsoftonline.com/common/oauth2/token?resource=https%3A%2F%2Fnuxeo-my.sharepoint.com%2F - Make sure the Enabled box is checked.
- Save.
- Now just create a new OneDrive document
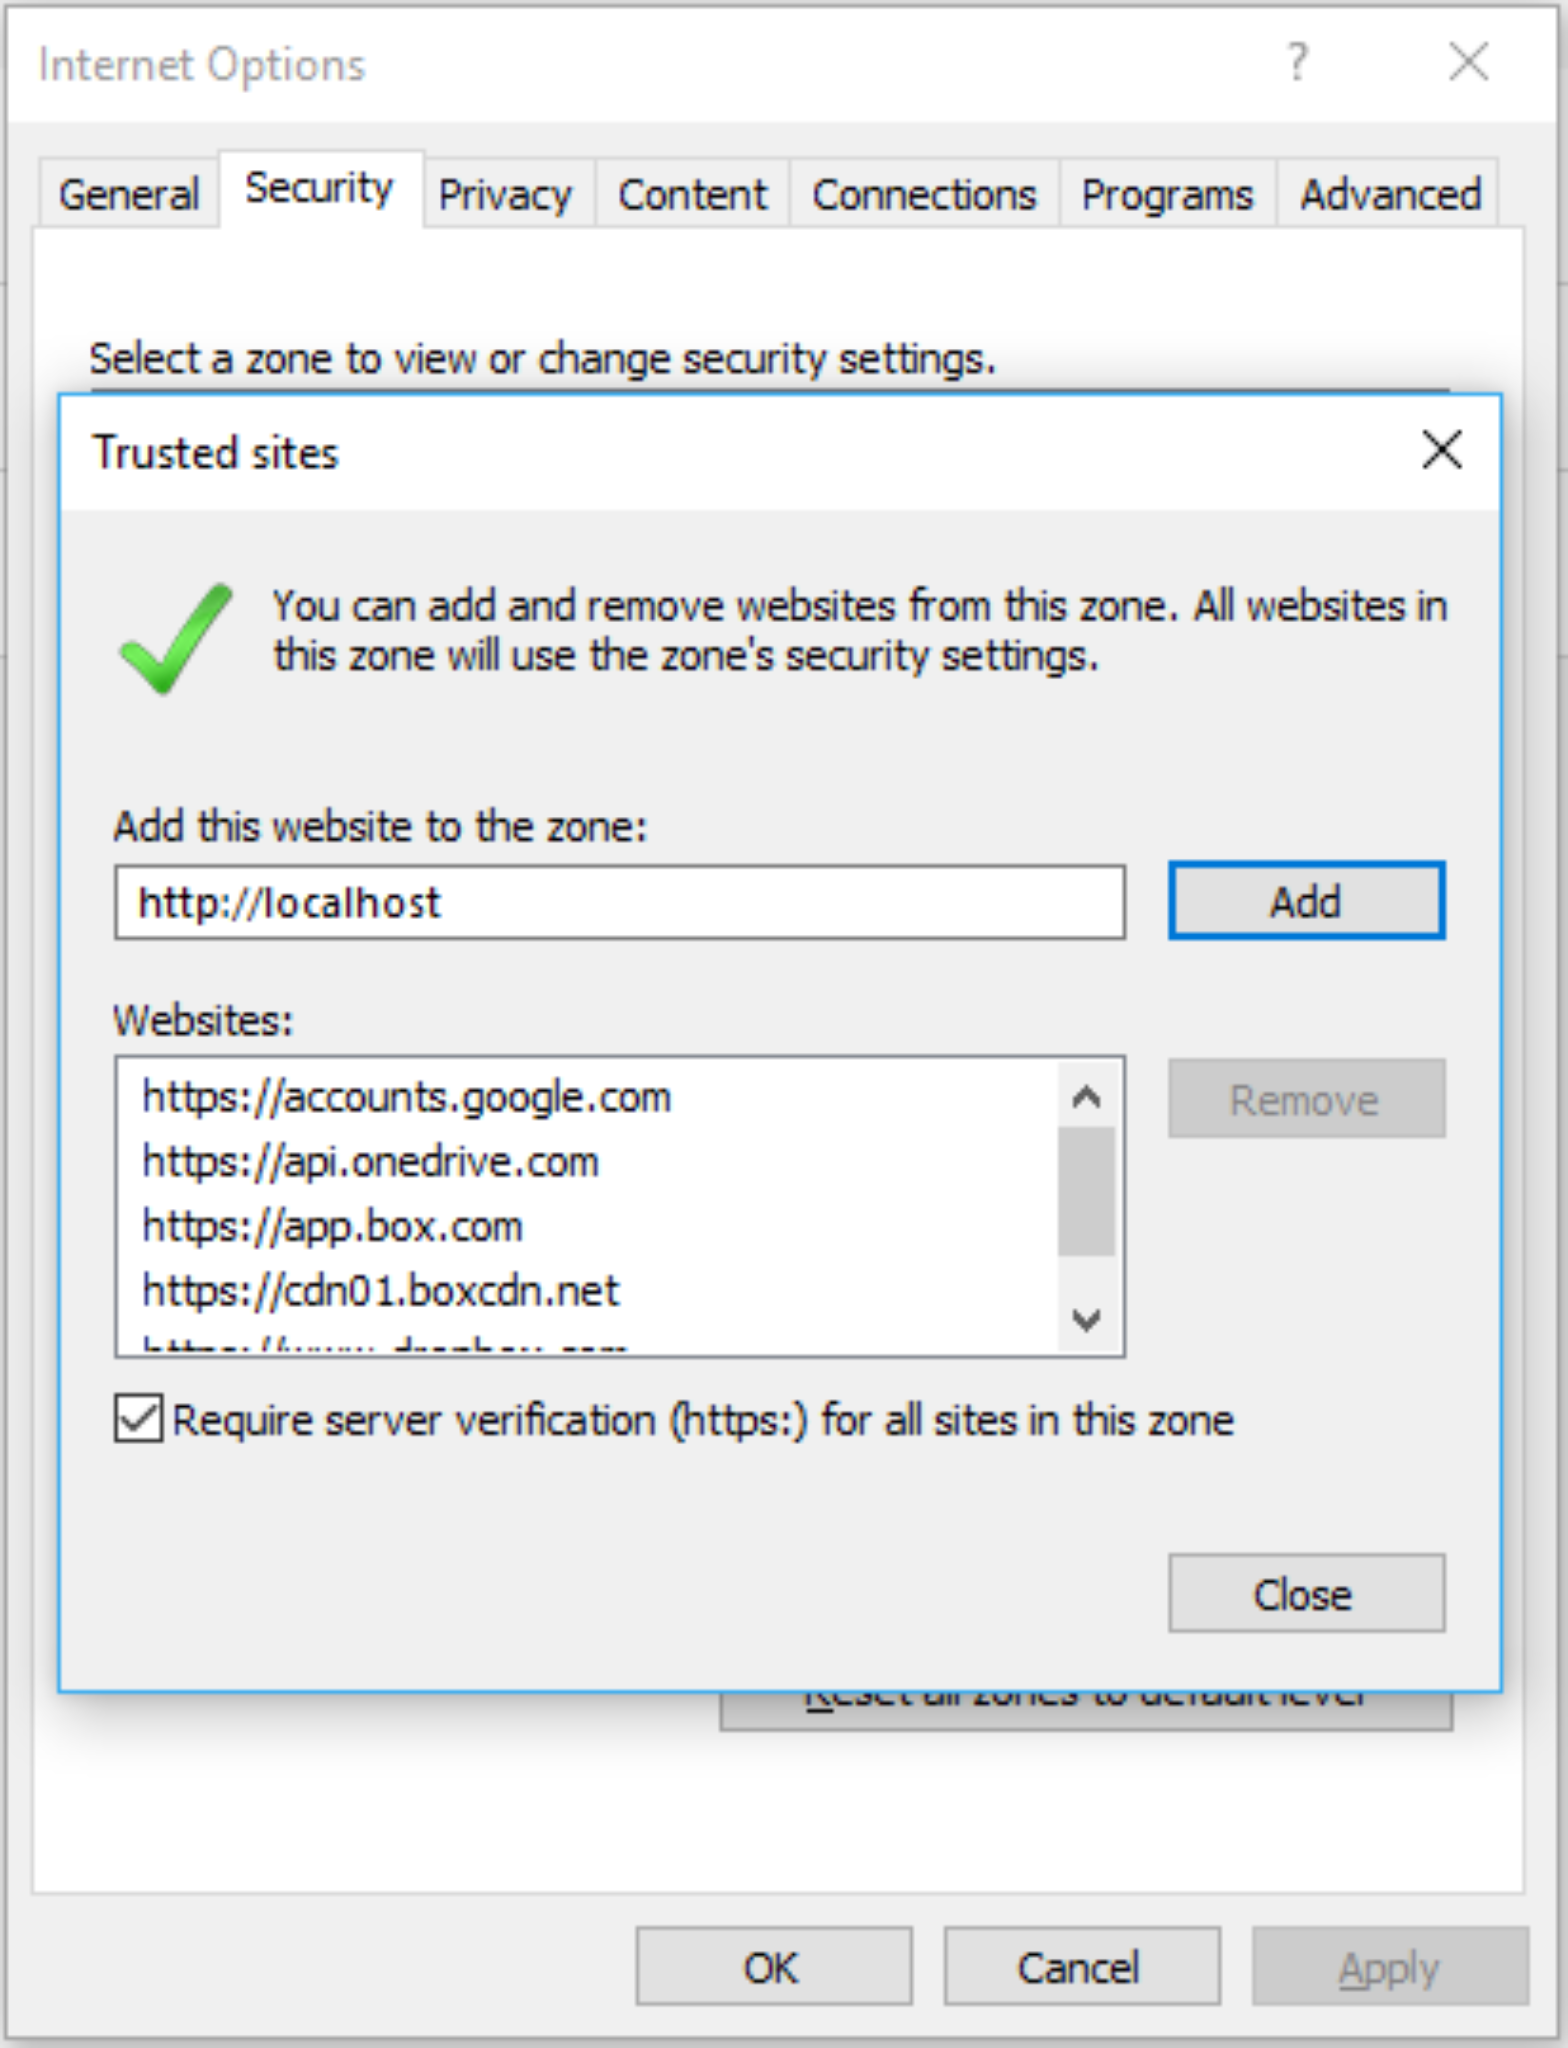
Adding Trusted Sites to Internet Explorer 11
In order to be able to use the external file pickers provided by Live Connect, certain URLs must be added to the list of trusted websites. This can be done as follows:
- Go to Settings
- Click the Internet Options menu entry
- Go to Security > Trusted sites
- Click on the Sites button and add your URL
Advanced Live Connect Configuration
Synchronization
Since cloud files can be changed externally Nuxeo Live Connect relies on a scheduled synchronization process to ensure local metadata is kept up to date. Things like the document's title, thumbnail, full text for indexing, etc, are not updated in realtime since they rely on this regular synchronization job which is set to run every 5 minutes by default.
To change this interval users can override the default contribution:
<component name="org.nuxeo.ecm.liveconnect.scheduler.override">
  <require>org.nuxeo.ecm.liveconnect.scheduler</require>

  <extension target="org.nuxeo.ecm.core.scheduler.SchedulerService" point="schedule">
    <schedule id="blobProviderDocumentUpdate">
      <event>blobProviderDocumentUpdateEvent</event>
      <!-- default is 0 0/5 * * * ? (every 5 minutes)  -->
      <!-- change it to run every 30s -->
      <cronExpression>0/30 * * * * ?</cronExpression>
    </schedule>
  </extension>
</component>
Note Synchronization requires service calls that might be subject to quotas and/or limits. Please refer to each provider's documentation for further information.
Known General Limitations
- Nuxeo Drive is not compatible with files that are stored on a Live Connect backend: files will be downloaded, but it won't be possible to update them.
- Native versioning: Only non-native Google Drive documents have revisions created on the Google Drive side.