The purpose of the Direct Transfer feature is to add a third core capability to Nuxeo Drive: one-time transfer of content between the user desktop and the Nuxeo server.
Direct Transfer allows users having installed Nuxeo Drive to upload new content to the server, as opposed to using the traditional document creation from Nuxeo Web UI. This will be particularly useful in the case of big files.
This is also different from what is done in the core of Nuxeo Drive: transfers are not tight to synchronization roots but everywhere on the server (depending on user access rights).
Nuxeo Drive upload capability provides a productive and network resilient way of transferring the content and leverage chunking capabilities of the platform to send content to the server.
Create a Transfer
Direct Transfer Integration in Web UI
Starting with Web UI 3.1.21 for LTS 2023 and 2025.6.0 for LTS 2025, the Direct Transfer functionality has been natively embedded within the Web UI. This integration allows users to initiate document uploads directly from the Web UI interface, removing the requirement to manually launch the Nuxeo Drive desktop application.
Functional Enhancements: A new Direct Transfer action is now available on all folderish documents. When triggered, this action opens a pre-populated Direct Transfer dialog, automatically setting the target path based on the currently viewed folder. Users are only required to select the file(s) for upload and confirm the transfer operation.
Benefits:
- Eliminates the need for context switching between Web UI and Nuxeo Drive.
- Reduces user interaction overhead and streamlines the document upload workflow.
- Enhances operational efficiency and improves the overall user experience.
System Requirements:
- Nuxeo Drive: Version 5.6.0 or higher
- Web UI: Version 3.1.21 for LTS 2023 and 2025.6.0 for LTS 2025
- Permissions: Edit rights on the target folderish document
From the Nuxeo Drive Interface
- Open Nuxeo Drive from your desktop and click on Upload Content button.
The Direct Transfer popup opens.
- Click on New transfer at the top right of the popup.
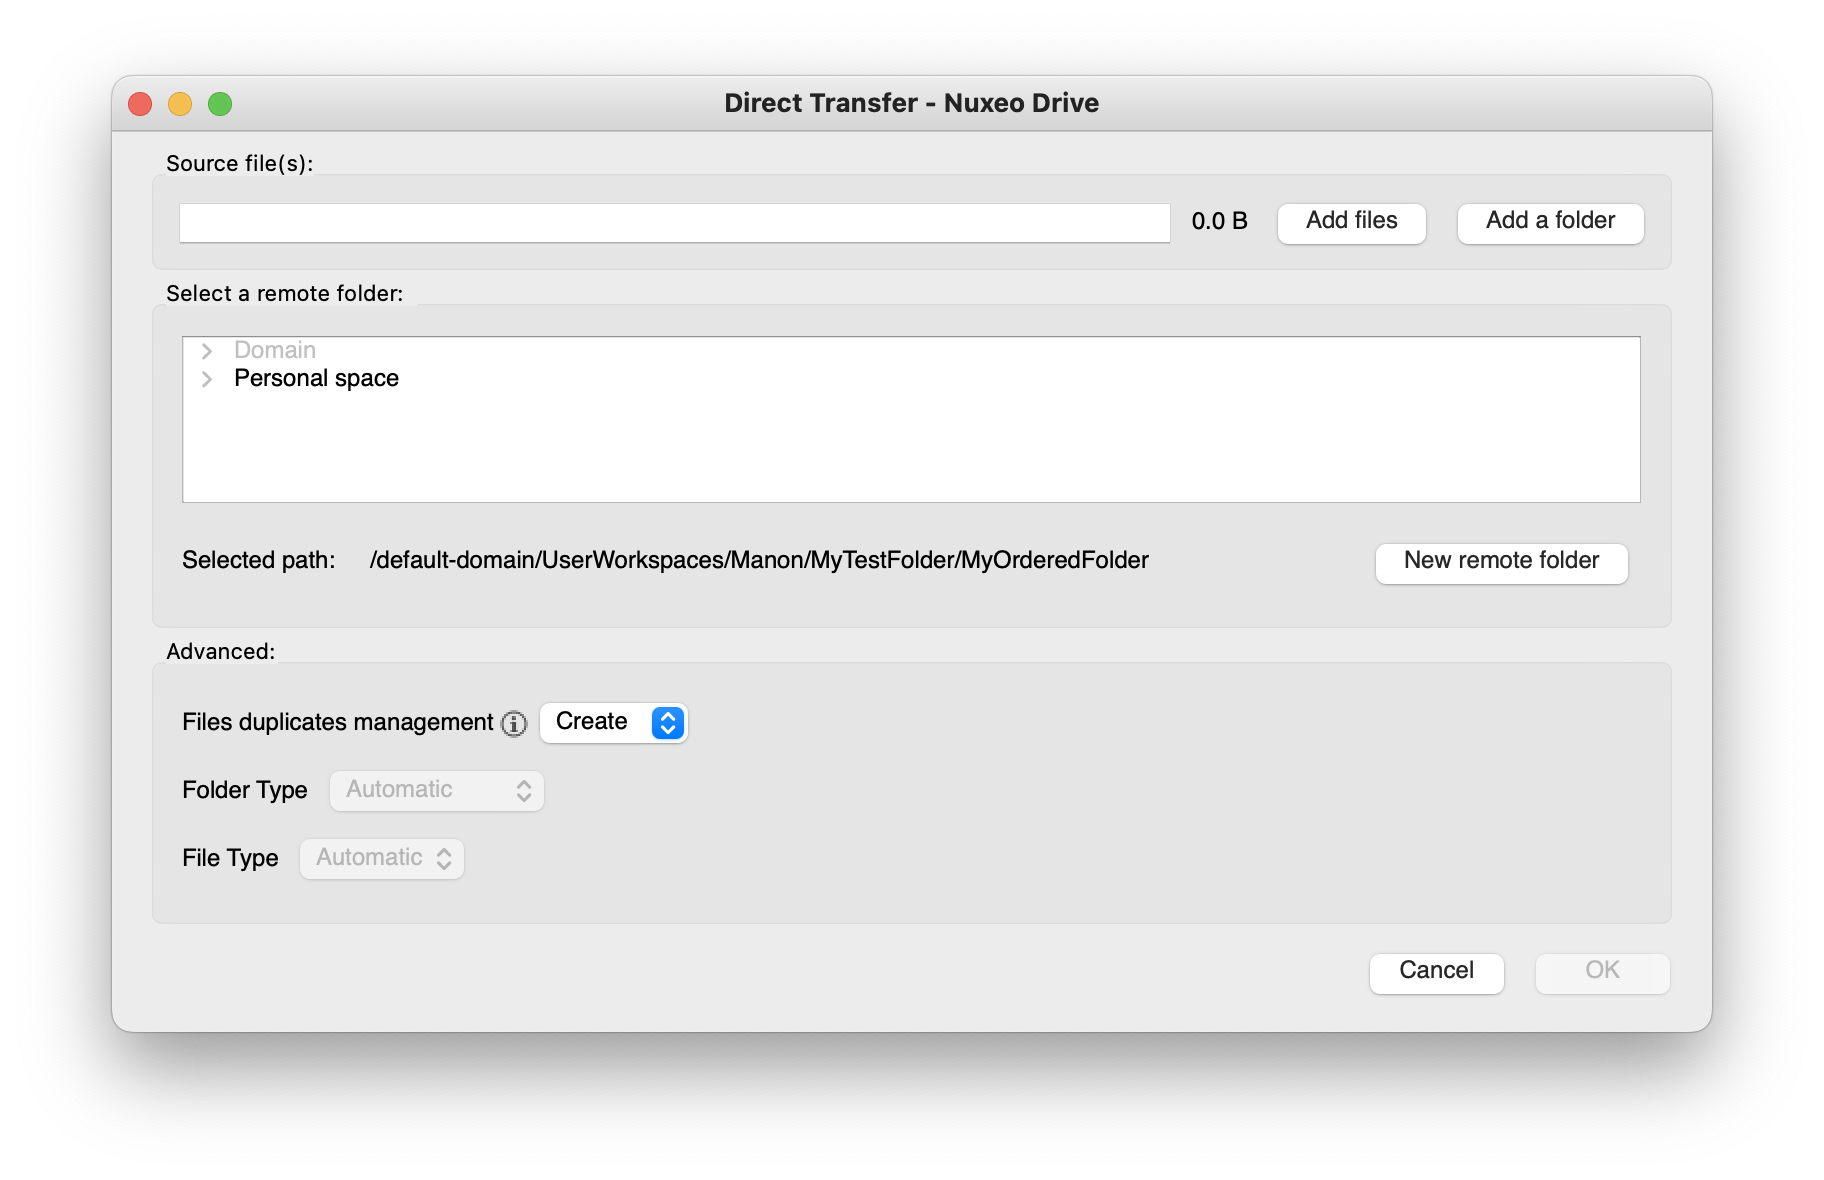
- From this view, you can decide to Add files or Add a folder. The files selection popup opens.
- Select the document(s) you want to transfer and click on Open.
- Select the remote folder where you want the document(s) or folders to be uploaded. The selected path will update depending on the remote folder selected.
Options
Files Duplicate Management
On this section you need to choose what to do when a transfer would create a duplicate document on the server. The setting is effective for all files that will be sent at the same time (it is called the session). Each session has its own duplicates behavior.
Available options are:
- Create: this is the default option. A duplicate document will be created, this is the same behavior as when adding a new file from Web UI.
- Ignore: the transfer will be cancelled, preventing the duplicate creation.
- Override: the document will be replaced on the server.
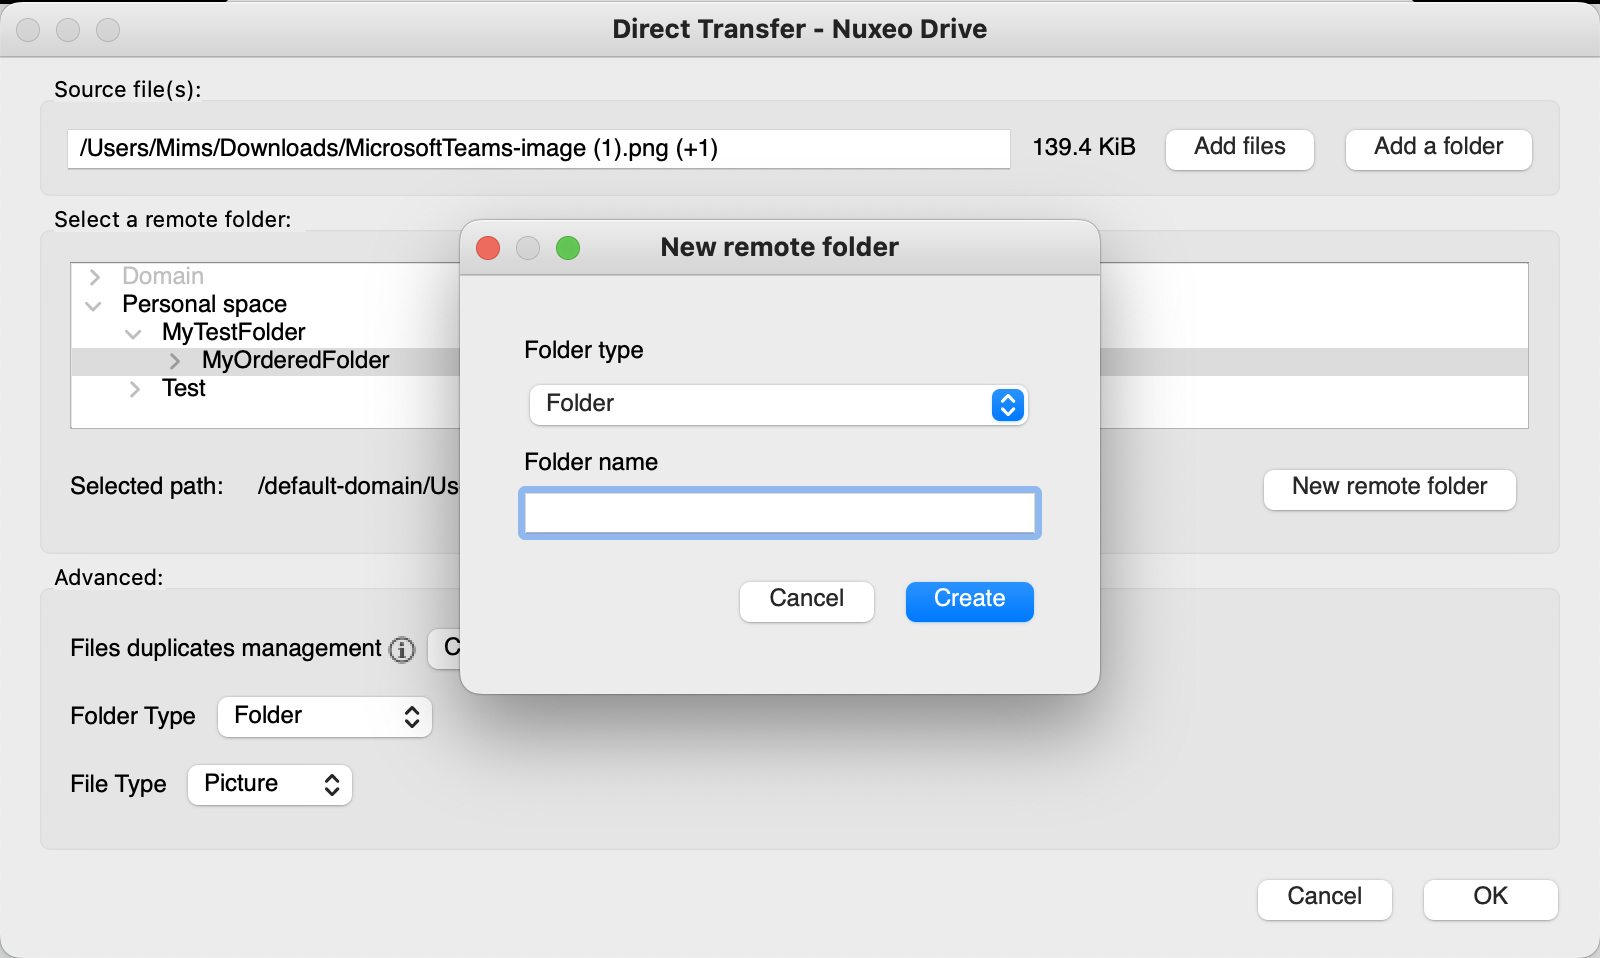
New Remote Folder
This field lets you create your remote folder directly from the Direct Transfer popup. You don't have to go back to your instance to create it, you can handle everything at the same place. To do so:
- Click on New remote folder A popup opens.
- Select the type of folder from the drop down list.
- Type your new remote folder name and click OK.
- Once you've set your new remote folder click on OK to launch your transfer.
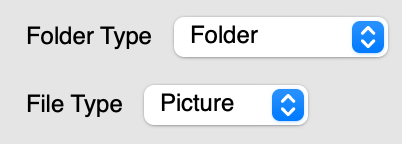
Document Type
Once you've selected your files and/or folders, 2 drop down lists are available at the bottom of the direct transfer popup. These drop-down lists work like when you create new documents on Web UI and therefore depend on your access rights and will be updated according to the file you want to transfer your documents to.
You will be able to select the folder and/or file types of the documents you are transferring, even custom ones.
Manage Sessions
The Direct Transfer popup displays 3 tabs that will help you manage your transfers.
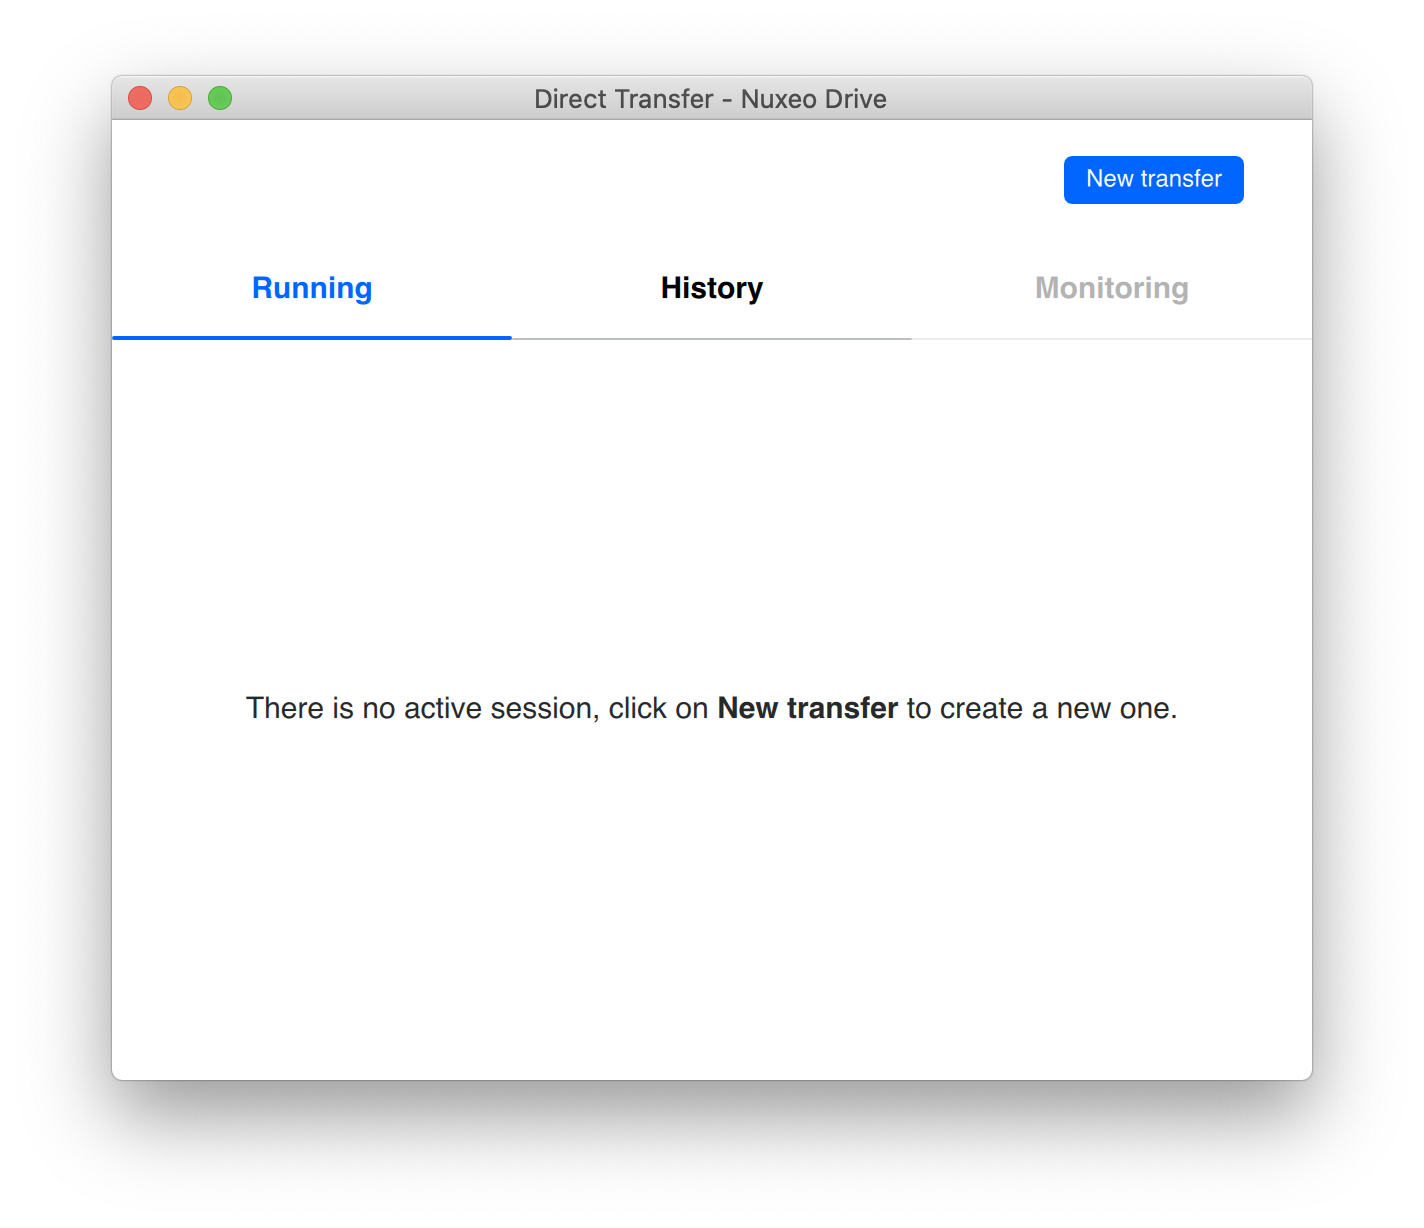
Running Tab
Once a transfer is launched, you'll be redirected to the Running tab where the current running session(s) are displayed.
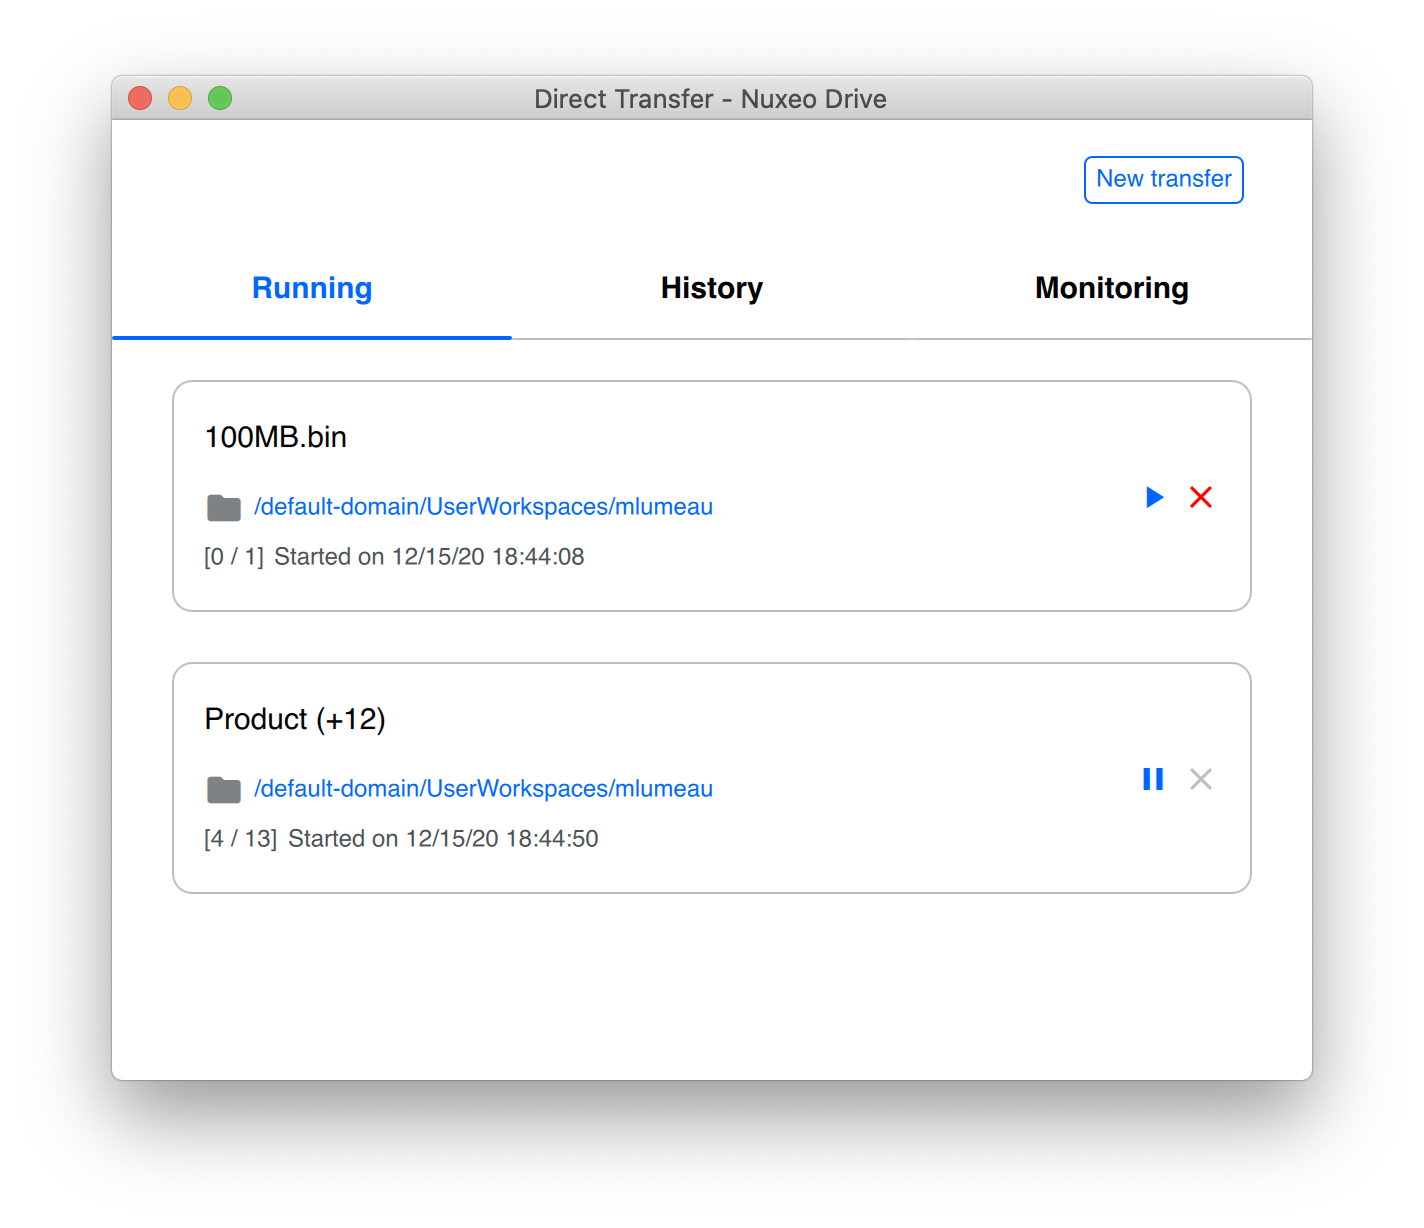
From there you have full control on your session(s), you can pause/resume or cancel any upload. Some information is displayed: filename(s), date and time, number of files, and target remote folder.
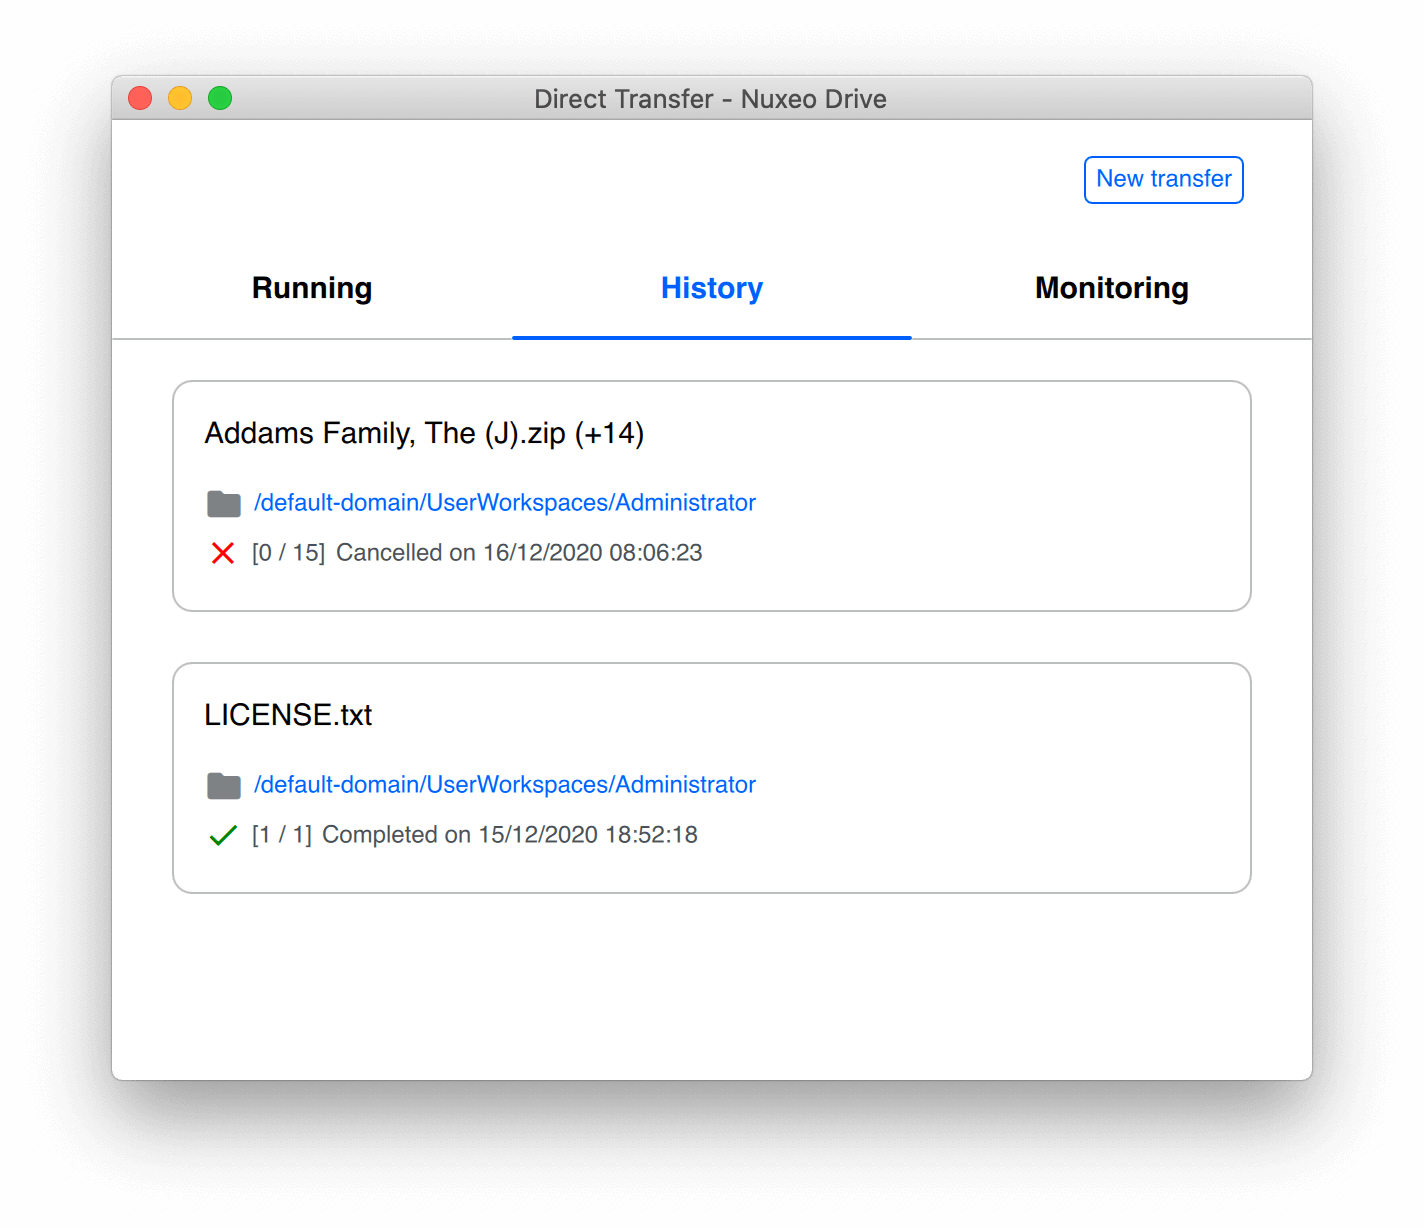
History Tab
Once the session is uploaded, it goes to the History tab and appears as "Completed". If you decided to cancel the session it will also be displayed there as "Cancelled".
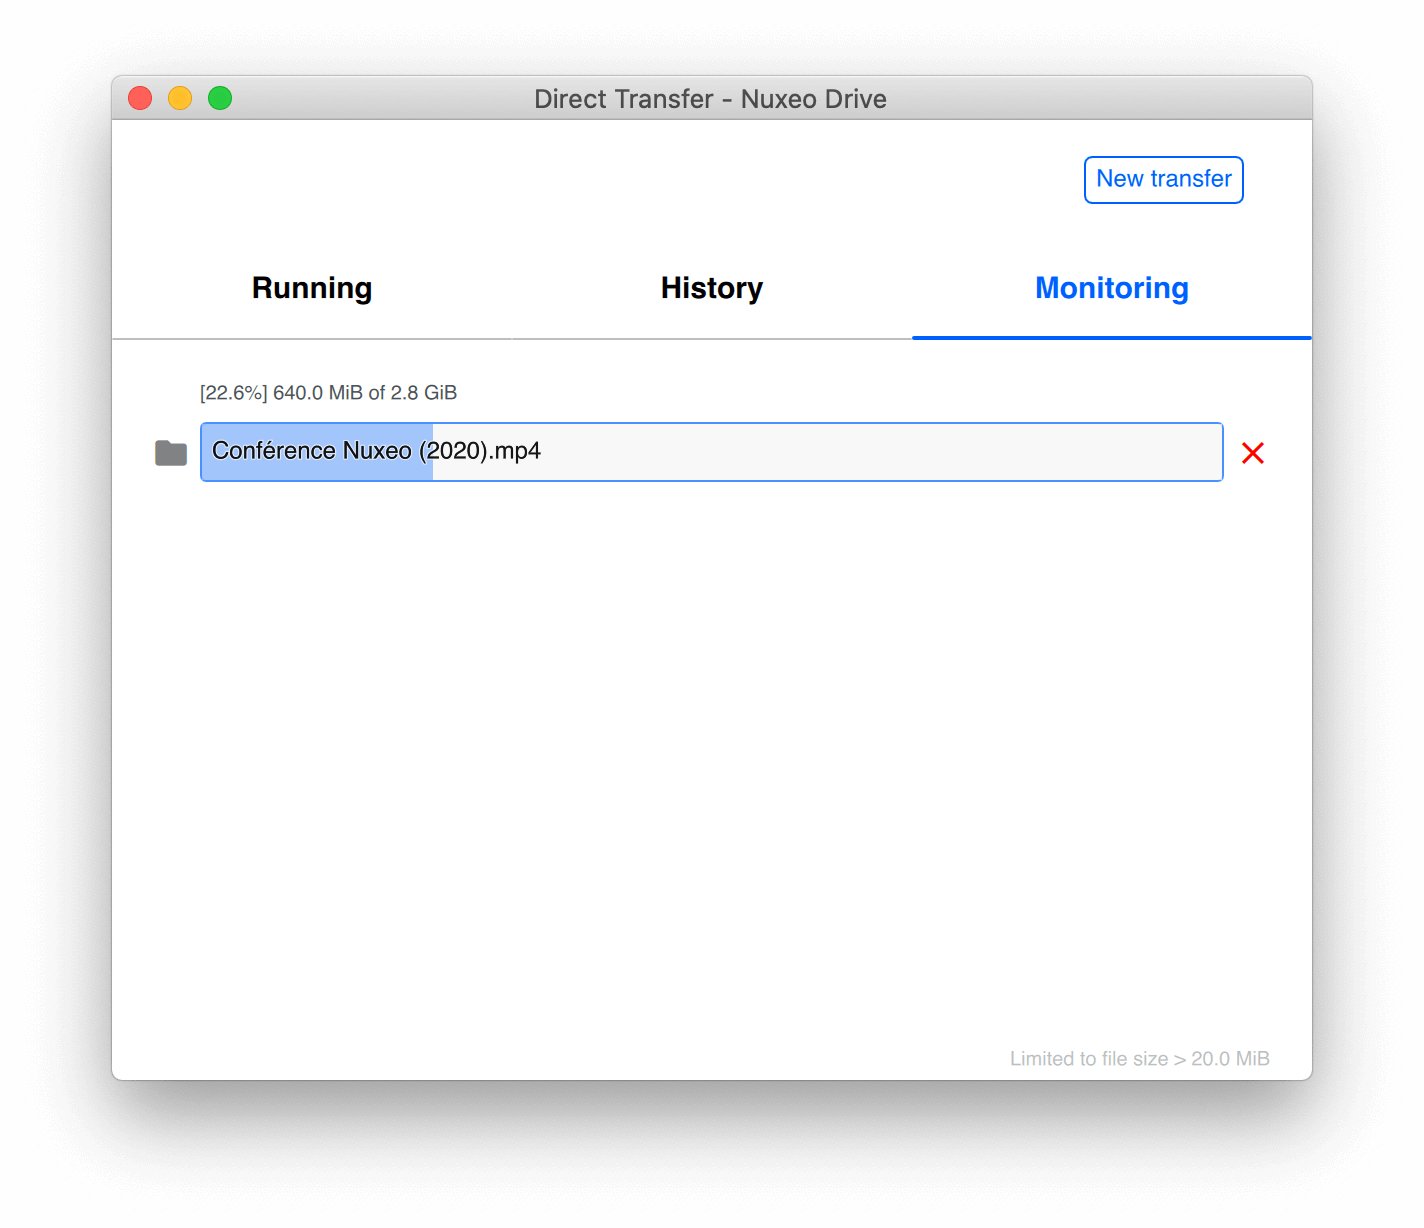
Monitoring Tab
When a session is running you can navigate to the Monitoring tab, it displays the upload progress of each file. From there you can decide to cancel some transfers.