You can use any OpenID / OAuth2 identity provider in the authentication chain. The default behavior is to display a sign-in button per identity provider to start the authentication challenge, then building the expected UserIdentificationInfo with the provided UserInfo.
By default, the username resolved with the identity provider user information must be in the user directory to allow it to access the Nuxeo Platform.
Configuration
Declaring a New IdentityProvider
Target: org.nuxeo.ecm.platform.oauth2.openid.OpenIDConnectProviderRegistry
Extension Point: providers
      <provider>
        <name>GoogleOpenIDConnect</name>
        <label>Google</label>
        <description>Login using your Google account</description>
        <authorizationServerURL>https://accounts.google.com/o/oauth2/auth</authorizationServerURL>
        <tokenServerURL>https://accounts.google.com/o/oauth2/token</tokenServerURL>
        <userInfoURL>https://www.googleapis.com/oauth2/v1/userinfo</userInfoURL>
        <userInfoClass>org.nuxeo.ecm.platform.oauth2.openid.auth.google.GoogleUserInfo</userInfoClass>
        <userResolverClass>org.nuxeo.ecm.platform.oauth2.openid.auth.EmailBasedUserResolver</userResolverClass>
        <scope>https://www.googleapis.com/auth/userinfo.email</scope>
        <icon>/icons/google.png</icon>
      </provider>
This first contribution only defines the provider, but not the client name or client secret to prevent them to be in the base contribution file.
Appending Provider Secrets
There are two ways to handle it.
Using a Second Contribution
This contribution is only read the first time you register a provider.
Require: org.nuxeo.ecm.platform.oauth2.openid.google
Target: org.nuxeo.ecm.platform.oauth2.openid.OpenIDConnectProviderRegistry
Extension Point: providers
      <provider>
        <name>GoogleOpenIDConnect</name>
        <clientId><!--enter your clientId here --></clientId>
        <clientSecret><!--enter your clientSecret key here --></clientSecret>
      </provider>
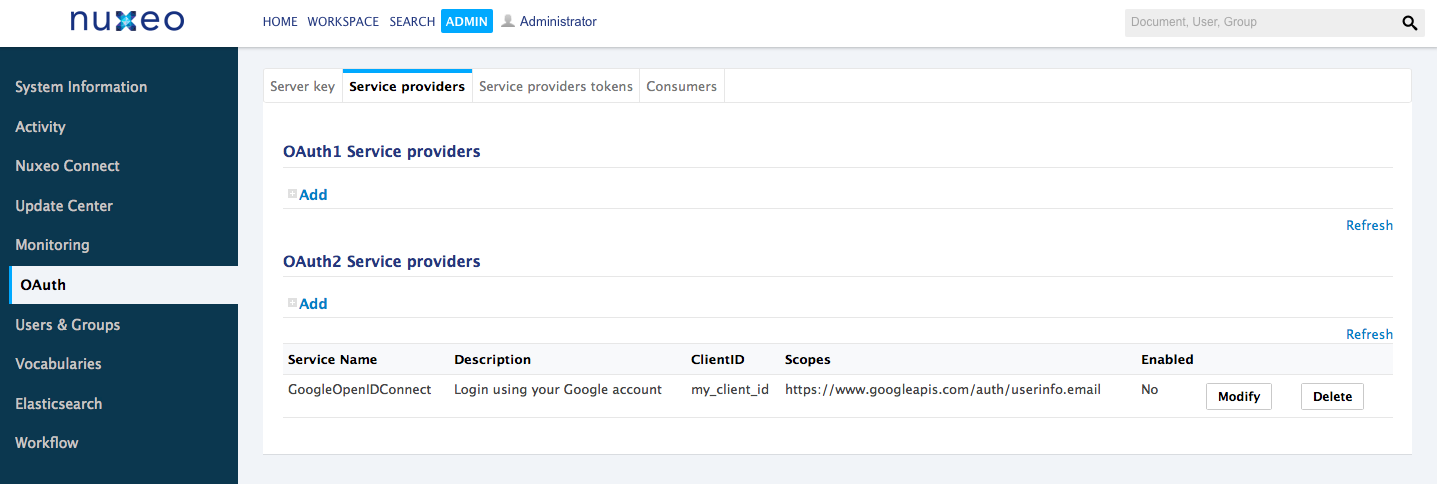
Using the Admin Tab
Once registered, you should be able to view/edit it though the Admin tab to set your client id, secret, scopes, etc.
UserInfo Mapping
Each identity provider has its own way to handle user identity in his UserInfo endpoint. You may need to add your own mapping class.
You just have to extend the org.nuxeo.ecm.platform.oauth2.openid.auth.OpenIDUserInfo class with the expected fields. Do not forget to set it in your provider contribution.
You can take a look to our implementation like org.nuxeo.ecm.platform.oauth2.openid.auth.google.GoogleUserInfo or org.nuxeo.ecm.platform.oauth2.openid.auth.DefaultOpenIDUserInfo .
Username Resolution
By default we provide two username resolvers.
One is based on the email field (org.nuxeo.ecm.platform.oauth2.openid.auth.EmailBasedUserResolver). The second one that handles username by concatenating the provider id and the user's subject field (org.nuxeo.ecm.platform.oauth2.openid.auth.StoredUserInfoResolver).
You can easily add your own by extending theorg.nuxeo.ecm.platform.oauth2.openid.auth.UserResolver class.
Others Parameters
You have the possibility to change some behaviors by adding the following parameters in your nuxeo.conf:
nuxeo.skip.oauth.token.state.check(default:false): Whether to skip checking if the provider response contains the correct OAuth2 state. Default value if recommended for security.nuxeo.oauth.auth.create.user(default:false): Create user on request if not exists.