Registering your Nuxeo application with Nuxeo Online Services will give you access to the Update Center, so that you can easily install patches and bug fixes, install addons from the Nuxeo Marketplace, or update your application with your Nuxeo Studio customization, all that directly from the Nuxeo Platform.
The registration process only copies a file on your file system. This enables the Nuxeo Connect portal to identify the instance among all the registered instances. You can register multiple instances.
How to Register
To be able to register, you need to have an Online Services account.
Registration can be done during the installation steps, using the configuration wizard or at anytime later, through the Admin tab. Registration doesn't require an Internet access. If your server cannot connect to the Internet, follow the offline registration steps. Otherwise, follow the online registration steps.
For development instances on which you may need to remove your data, you may need to re-register your instance.
Creating your Nuxeo Connect Account
If you already have an account for Nuxeo Online Services, either because you are a Nuxeo customer, or because you created a trial account, you can continue to the undefined step. If not, follow those steps to get credentials to Online Services.
To subscribe to a Nuxeo Online Services trial:
- Go to the Nuxeo Platform trial registration form.
- Fill in the form. Provide a valid email address or else registration will not be completed.
- Confirm registration by clicking on the link sent to the email address in the previous step. You can now download the Nuxeo Platform.
Registering Online
- Start your Nuxeo instance and connect as an administrator (Administrator/Administrator by default).
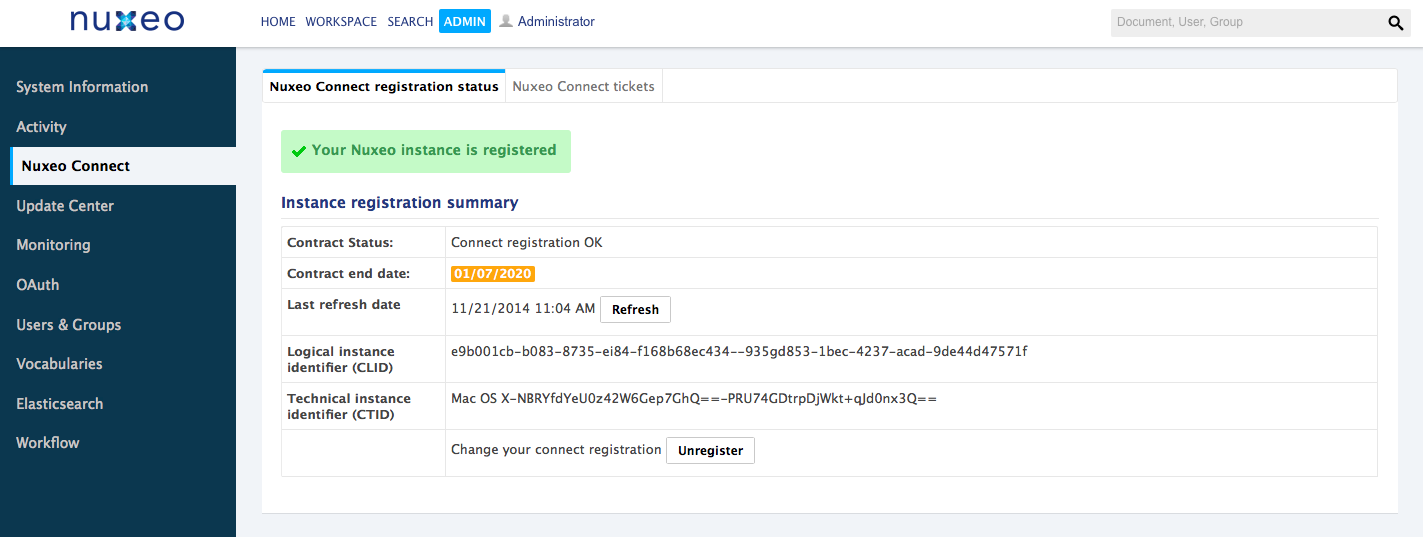
- Click on the Admin tab. The Nuxeo Connect tab is displayed.
- Click on Register this instance. A Nuxeo Connect login window pops up.
- Authenticate to Nuxeo Connect portal by giving your credentials.
- Select the project to associate with your instance. The pop-up closes. Your instance is now registered. You can now browse the various tabs of the Update Center area, and set up add-ons from the Nuxeo Marketplace (see the page Installing a New Package on Your Instance).
Registering Offline
Offline registration can be used when the server doesn't connect to the Internet. It enables to remove the Connect registration footer.
To register your instance for the first time:
On the offline server:
- Start your Nuxeo instance and connect as an administrator (Administrator/Administrator by default).
- Click on the Admin tab. The Nuxeo Connect tab is displayed.
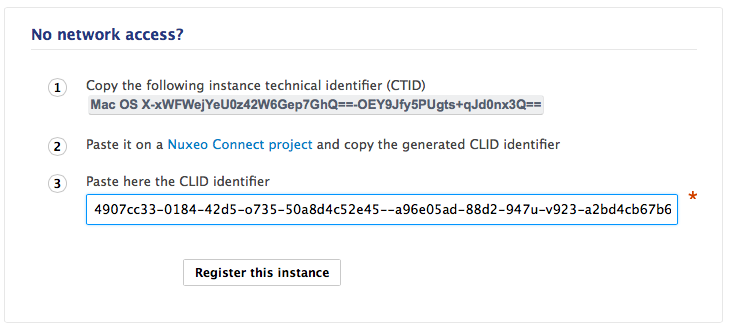
- Copy the instance technical identifier called CTID (ex:
Mac OS X-EbMKUsirT9WQszM5mDkaKAp=-BhnJsMDaabDHAQ0A300d6Q==) displayed in the No network access? box.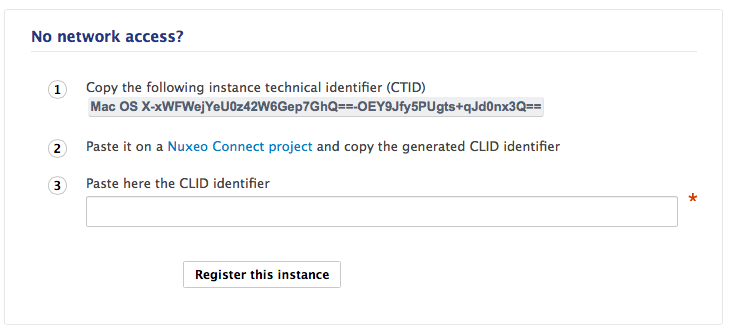
- Store the CTID in a file that you can use from another computer that can connect to the Internet.
From an Internet-connected computer:
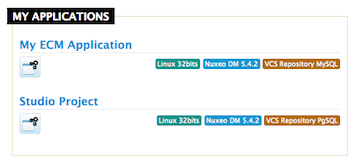
- Go to the Nuxeo Connect portal.
- Click on the Connect application for which you want to register your Nuxeo Platform.
- Put your mouse over the icon
 and click Add a new instance.
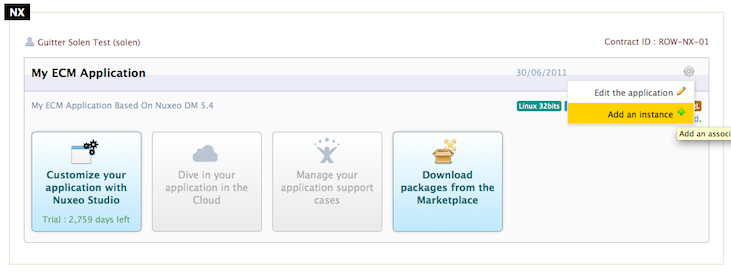
- Fill in the registration form and submit it. The instance is registered. You are given an identifier (CLID) to validate registration from Nuxeo Admin Center.
- Copy this identifier.
- On the offline server:
- In the Admin Center, fill in the instance description, paste the CLID from Nuxeo Connect and click on the Register this instance button.
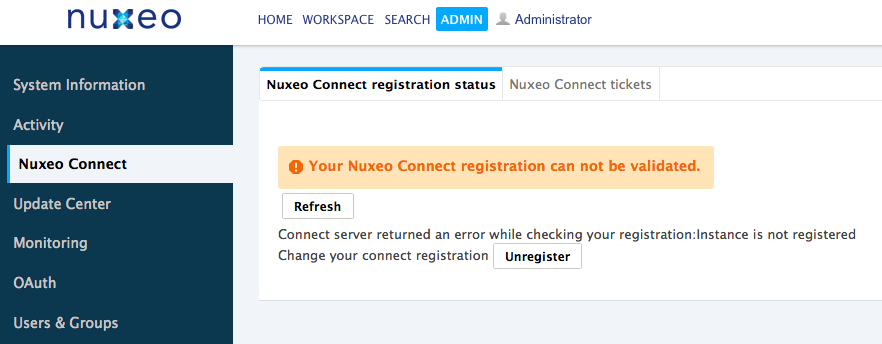
 The registration is approved and the registration summary is displayed. The Connect registration footer is not displayed anymore after you browse the application, although registration cannot be validated on the Connect server.
- In the Admin Center, fill in the instance description, paste the CLID from Nuxeo Connect and click on the Register this instance button.
Re-Registering your Nuxeo Instance
If you have removed your data from your Nuxeo application, in case of a development instance, for example, you will need to register your instance again.
To re-register your instance:
- Log in to Nuxeo Connect.
- In the associated instances, click on your Nuxeo instances link. The page listing the associated instances for your project opens.
- Copy the Identifier of the instance you want to register (Identifier is of the form "fdedaf21-be00-412e-b0ab-f2394479d5f8--885dcf60-5a4a-46e8-a904-0123456789ab").
In Nuxeo Admin Center, paste this identifier in the CLID field and click on the Register this instance button.
Your instance is registered again and the registration summary is displayed.