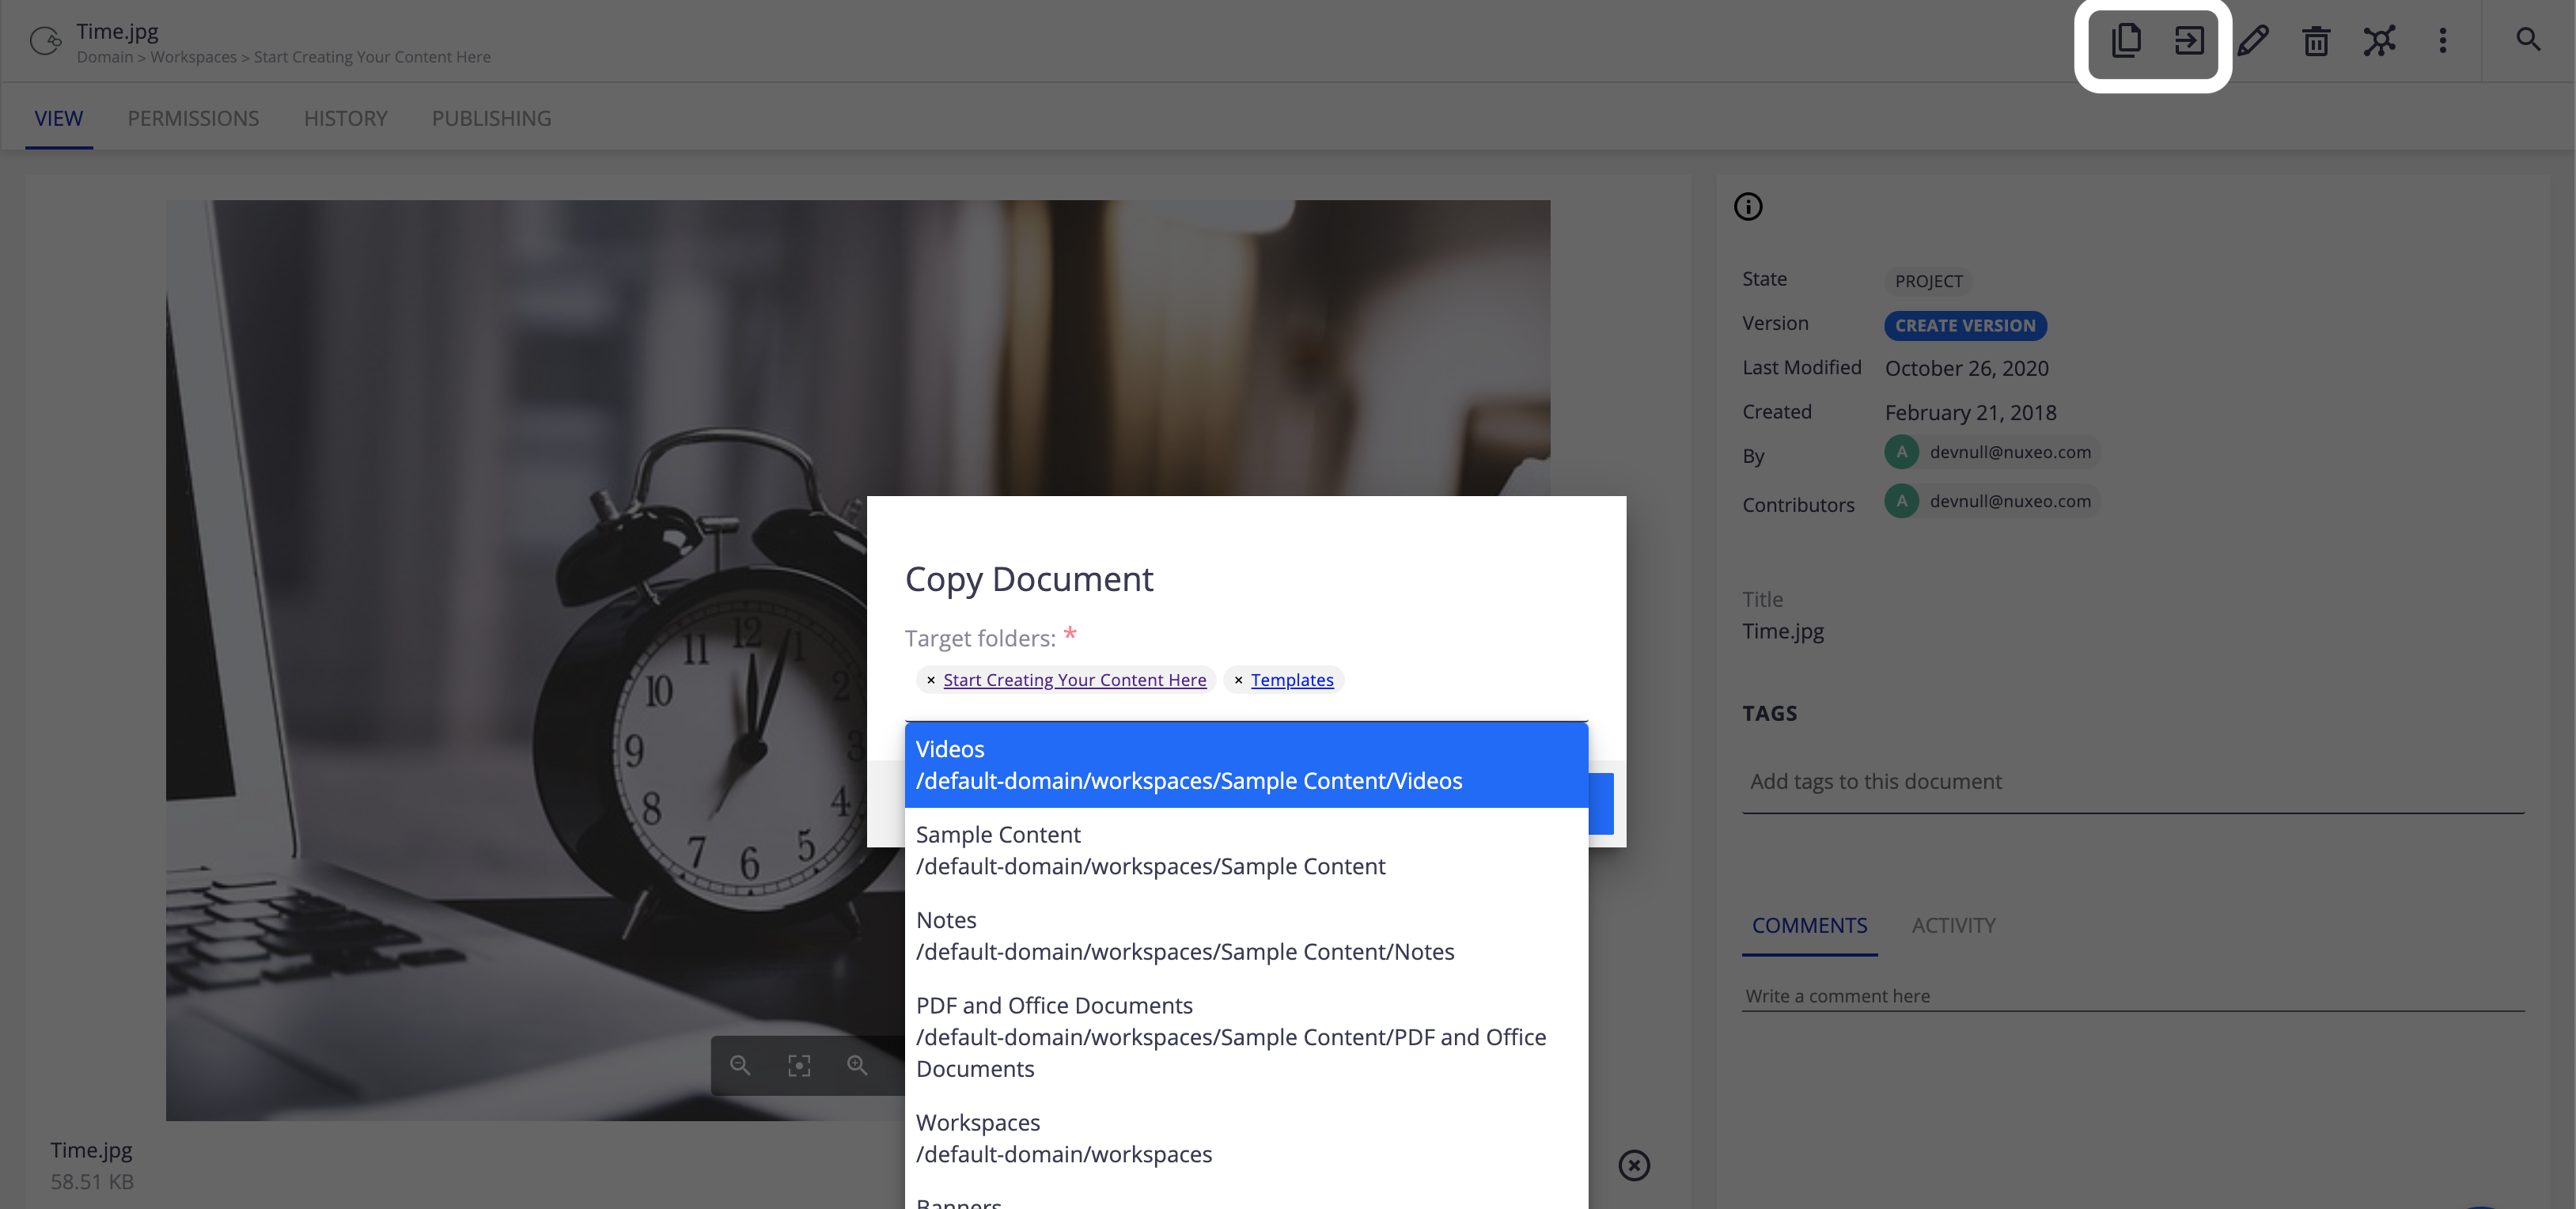
This tutorial will teach you how to trigger an automation chain or an automation scripting from a Web UI Dialog.
Concepts
Two components are necessary:
- A visual element (aka dialog) to display information, input fields, and buttons to validate or close the dialog.
- A business logic, implemented in automation scripting preferably.
The main challenges are:
- Handling parameters from the frontend to the backend.
- Creating the dialog element skeleton from a template, easily integrated into Nuxeo Studio Designer.
Use Case Description
For this tutorial, we will illustrate the Copy feature from the Nuxeo Studio Community Cookbook: the goal is to copy a document without using the clipboard.
Step-by-Step Instructions
Create the Business Logic
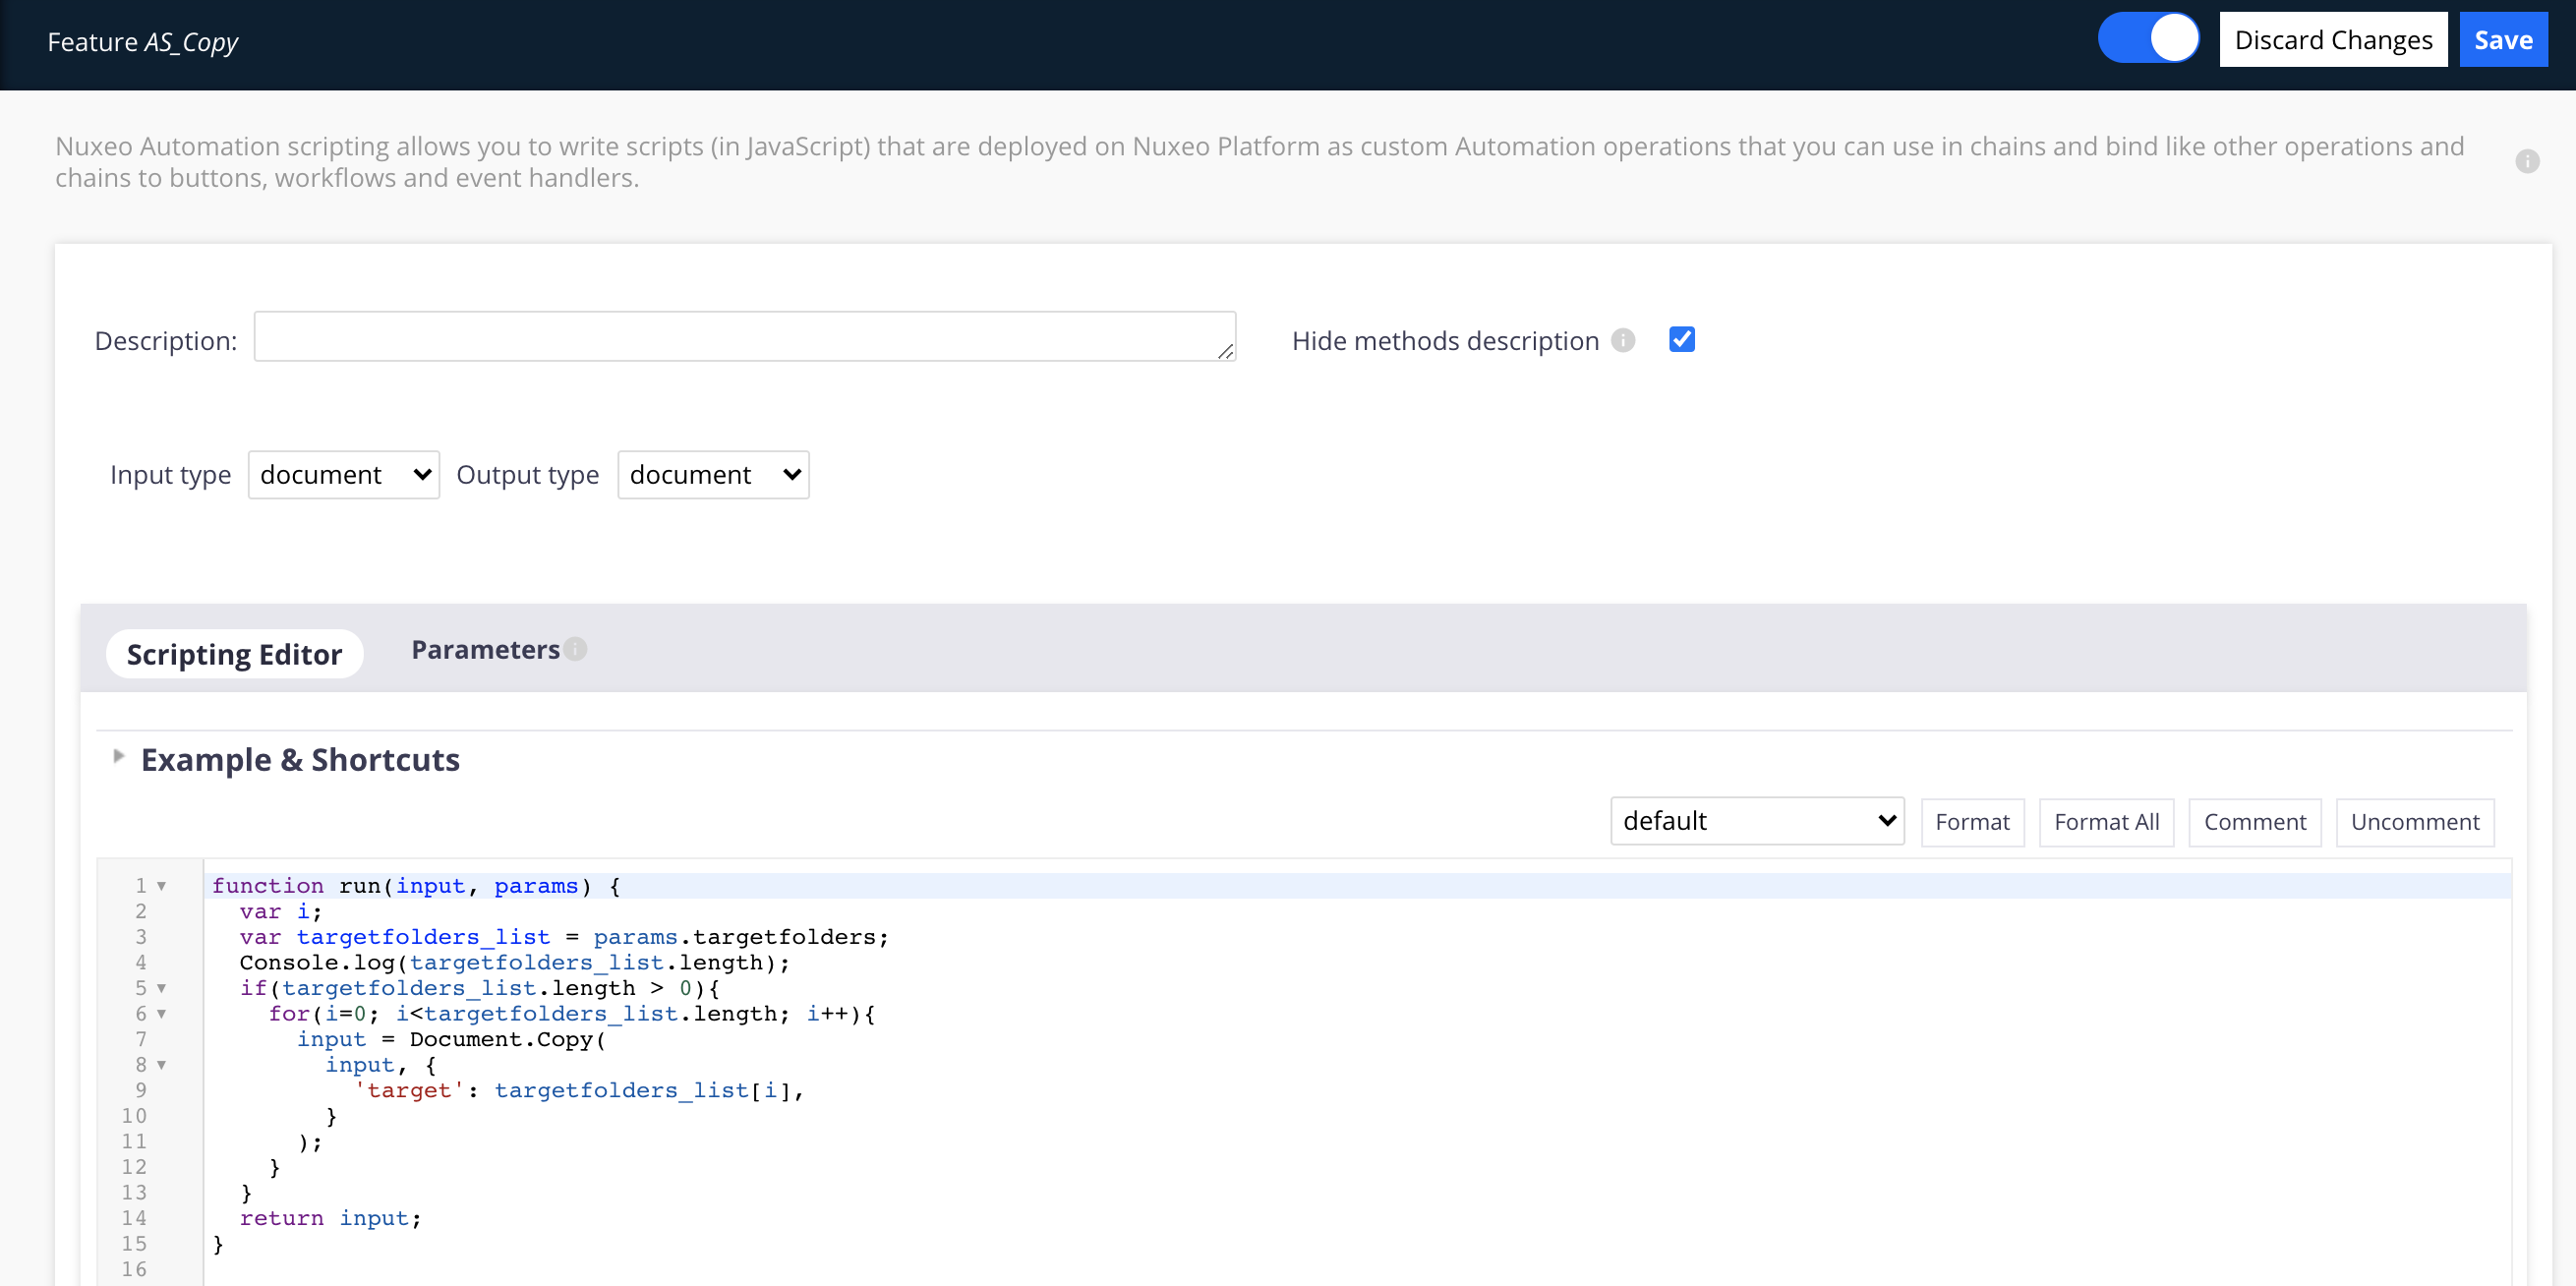
First, we need to express the business logic, implemented in Nuxeo Automation Scripting:
Go to Studio Modeler > Configuration > Automation > Automation scripting and create an automation scripting called
AS_Copy.The input has to be
Documentas we target to copy the current document. The output will return the same Document (so it must be as wellDocument).As we know the end-user is going to select several target folders, we need to create a parameter to send the information from the UI to the backend.
- Create a parameter in the Parameters tab of the automation scripting, called
targetfolders: It will receive an array of values, corresponding to the ID of the target folders (you don't need to specify if the variable contains a single value or several).
Let's add some comments to the automation scripting content:
function run(input, params) {
  var i;
  // We retrieve into the targetfolders_list variable the values of the parameters fed by the parameter.
  var targetfolders_list = params.targetfolders;
  // Just a little logging information to make sure we have the right number of target folder.
  Console.log(targetfolders_list.length);
  // Only execute the process if there is a value (i.e. the user has entered at least one value).
  if(targetfolders_list.length > 0){
    // Let's loop every value of the targetfolders_list.
    for(i=0; i<targetfolders_list.length; i++){
      // Copy the current document to the selected target folder.
      input = Document.Copy(
        input, {
          'target': targetfolders_list[i],
        }
      );
    }
  }
  return input;
}
Here is what you should see:


Prepare Searches
In our example, we would like to select target folders. It is therefore a good practice to prepare the search in a Page provider, and filter the results according to a specific document type, a location, a property value etc.
Here, we target all folderish documents, identified by ecm:mixinType IN ('Folderish').
So, create a page provider called PP_Target_Folder with:
- Query filter:
ecm:mixinType != 'HiddenInNavigation' AND ecm:isVersion = 0 AND ecm:isTrashed = 0 AND ecm:fulltext = '?*' AND ecm:mixinType IN ('Folderish') - In Advanced Configuration, uncheck the Quote parameter property.
Create the Dialog
Generate the Dialog Skeleton
The Dialog must be created in Nuxeo Studio Designer, in the Resources tab.
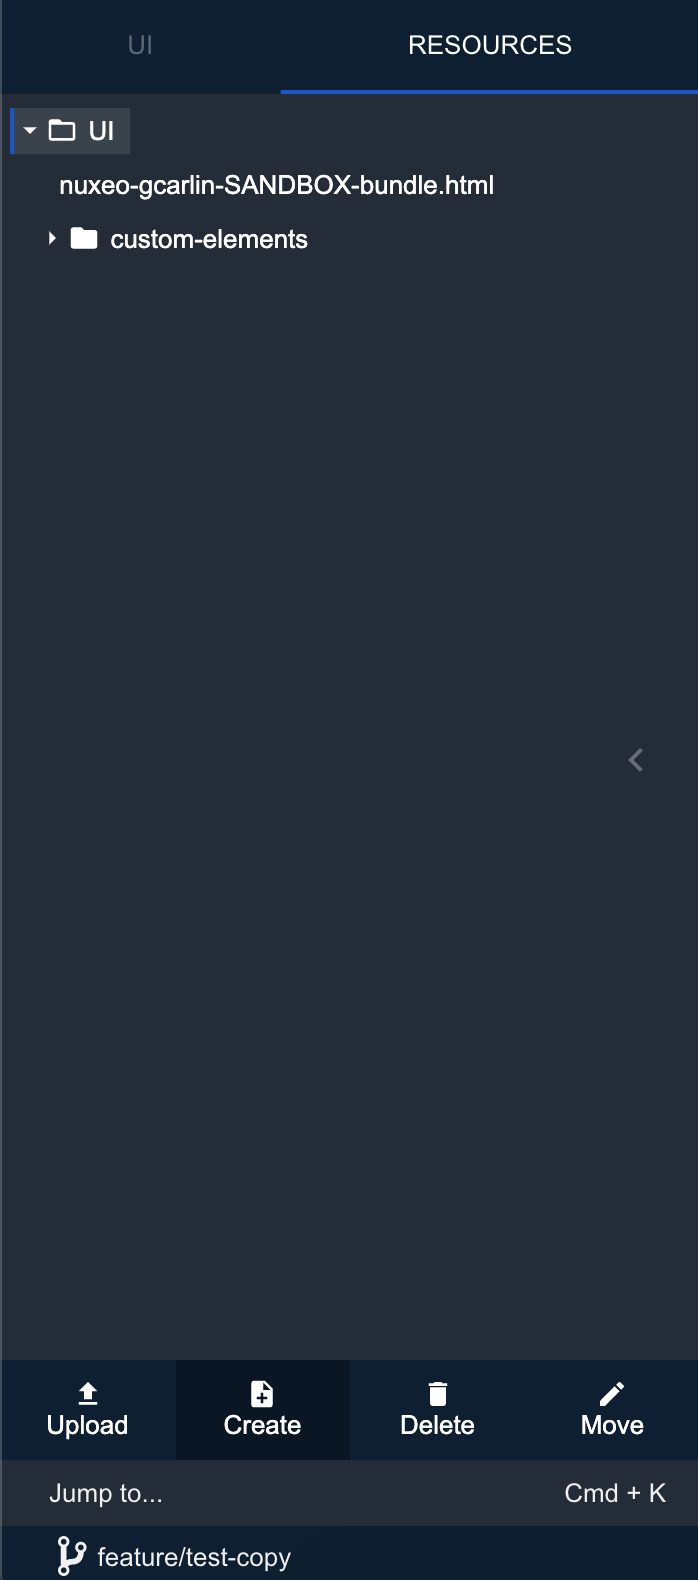
For better code readability, it's better to isolate your custom elements in a specific folder. So let's create a new folder by clicking on the UI folder: Four buttons should appear at the bottom of the side panel: Click on the Create button and generate a folder called custom-elements.

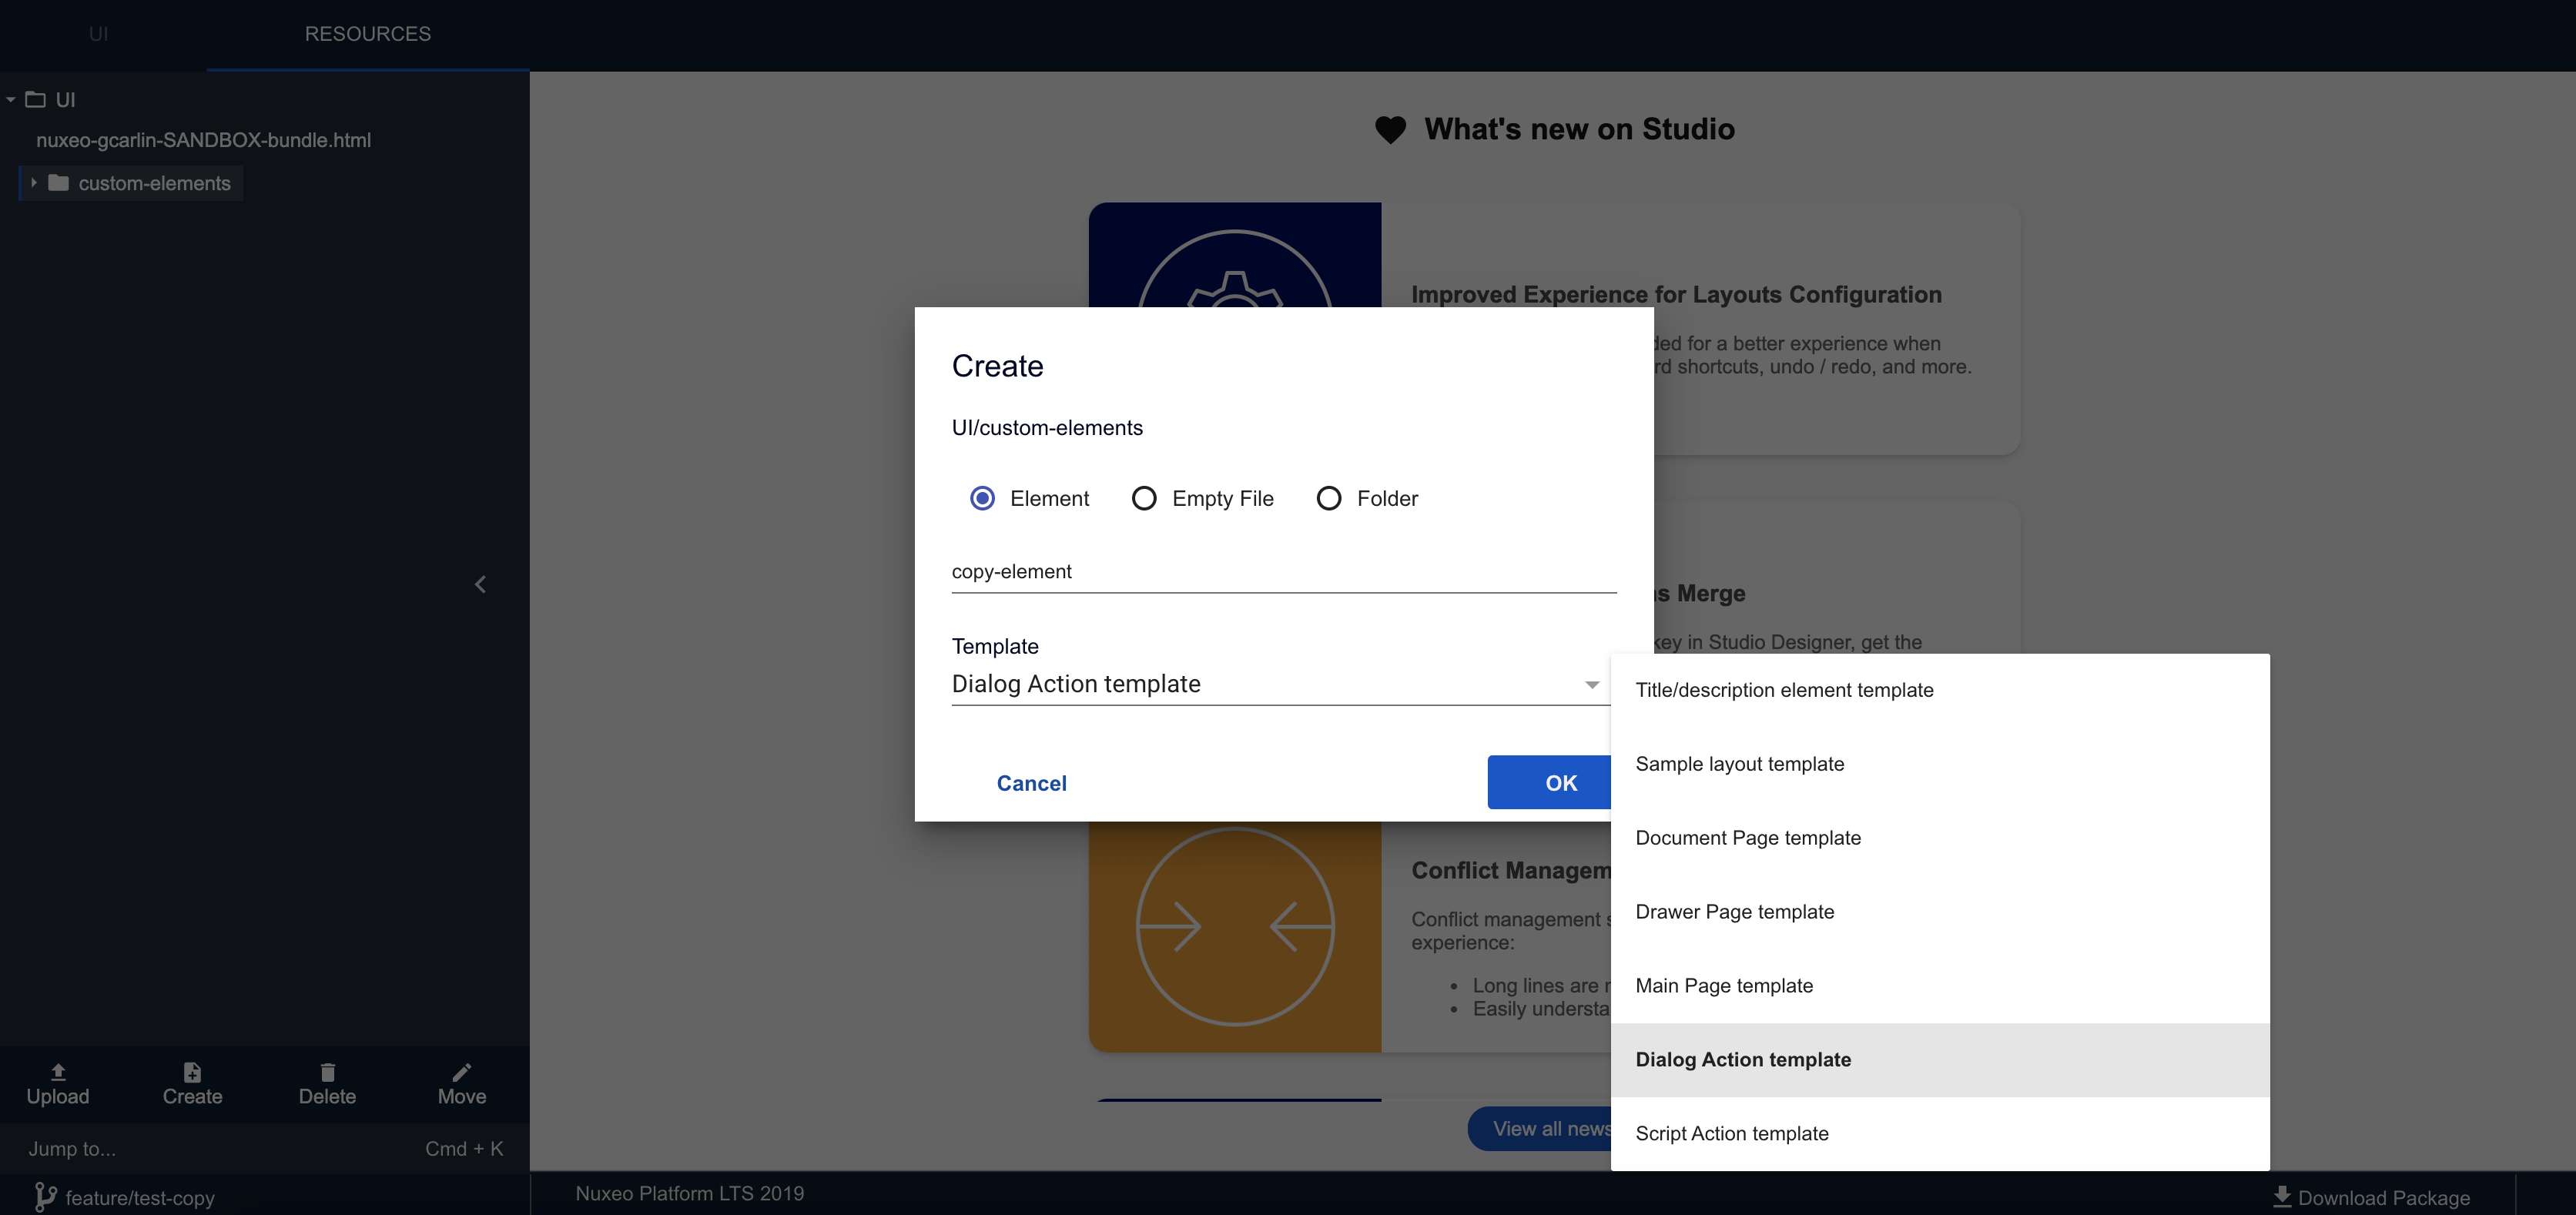
We need now to create the dialog: Nuxeo Studio offers the ability to generate elements from templates, including dialogs. So click on the new folder, and create the dialog element:
- Item type:
Element - Element name:
copy-element(Nuxeo Studio Designer will automatically adds thehtmlfile extension on the generated element) - Template:
Dialog Action Template

The new element will automatically be declared in your bundle file so you're sure the element will be loaded on the next deployment:
<link rel="import" href="custom-elements/copy-element.html">
Write the Dialog Content
The code of the element is available in the Nuxeo Studio Community Cookbook. Now, let's focus on the main import points:
First, we inherit the default style of the Nuxeo branding by adding nuxeo-styles in the style declaration:
<style include="nuxeo-action-button-styles nuxeo-styles">
Then, declare the automation scripting operation so that you can call it in the UI:
<nuxeo-operation id="AS_Copy" op="javascript.AS_Copy" input="[[document]]" params="[[params]]"></nuxeo-operation>
As you can read, we have a params value, which will store the target folders selected to the users so that it can be processed by the automation chain. Consequently, we need to declare this new property in the properties in the Polymer section:
params: {
       type: Object,
       value: {}
     },
Then, we declare a paper-toast element to notify the user about the result of the operation:
<paper-toast id="toast"></paper-toast>
To feed this element, we write a generic method we can call with the message which should be displayed:
_toast: function(text) {
  this.$.toast.hide();
  this.$.toast.text = text;
  this.$.toast.open();
},
Now, let's work on the content of our nuxeo-dialog element. After adding the text which should be displayed, you need to insert a selection of the target folder. We will use the nuxeo-document-suggestion element:
<nuxeo-document-suggestion
            role="widget"
            enrichers="thumbnail"
            id="copyElement"
            label="Target folders:"
            name="copyElement"
            value=""
            page-provider="PP_Target_Folder"
            min-chars="0"
            required="true"
            multiple="true">
</nuxeo-document-suggestion>
value=: The selected target folders will be stored intargetfoldersdynamically. We will need in the next step to send the content of this variable to the parameters of the operation.page-provider=PP_Target_Folder: to use the page provider we have defined in the previous steps.min-chars="0": so the user doesn't have to enter any character to list the potential target folders.required="true": to ensure we have at least one value.multiple="true": because the current document can be possibly copied in several folders.
Let's now actually do something when the user validate the form.
We will use the default on-tap parameter of the paper-button:
<paper-button dialog-confirm="" class="primary" on-tap="_doCopy">Copy</paper-button>
Here, we're calling a function called _doCopy so let's code this in the Polymer part:
_doCopy: function() {
      // that's how you transfer values from the dialog form to the automation scripting parameters
      this.params.targetfolders = this.targetfolders;
      // Call the automation scripting using the ID of the nuxeo-operation element
      this.$.AS_Copy.execute().then(function(result) {
        // Display a message to the user to tell him it went well
        this._toast("Document copied");
      }.bind(this))
        .catch(function(error) {
        alert("Error:\n" + error);
      }.bind(this))
      }
Create the Document Action Button
The last step is to create a button which will open the dialog.
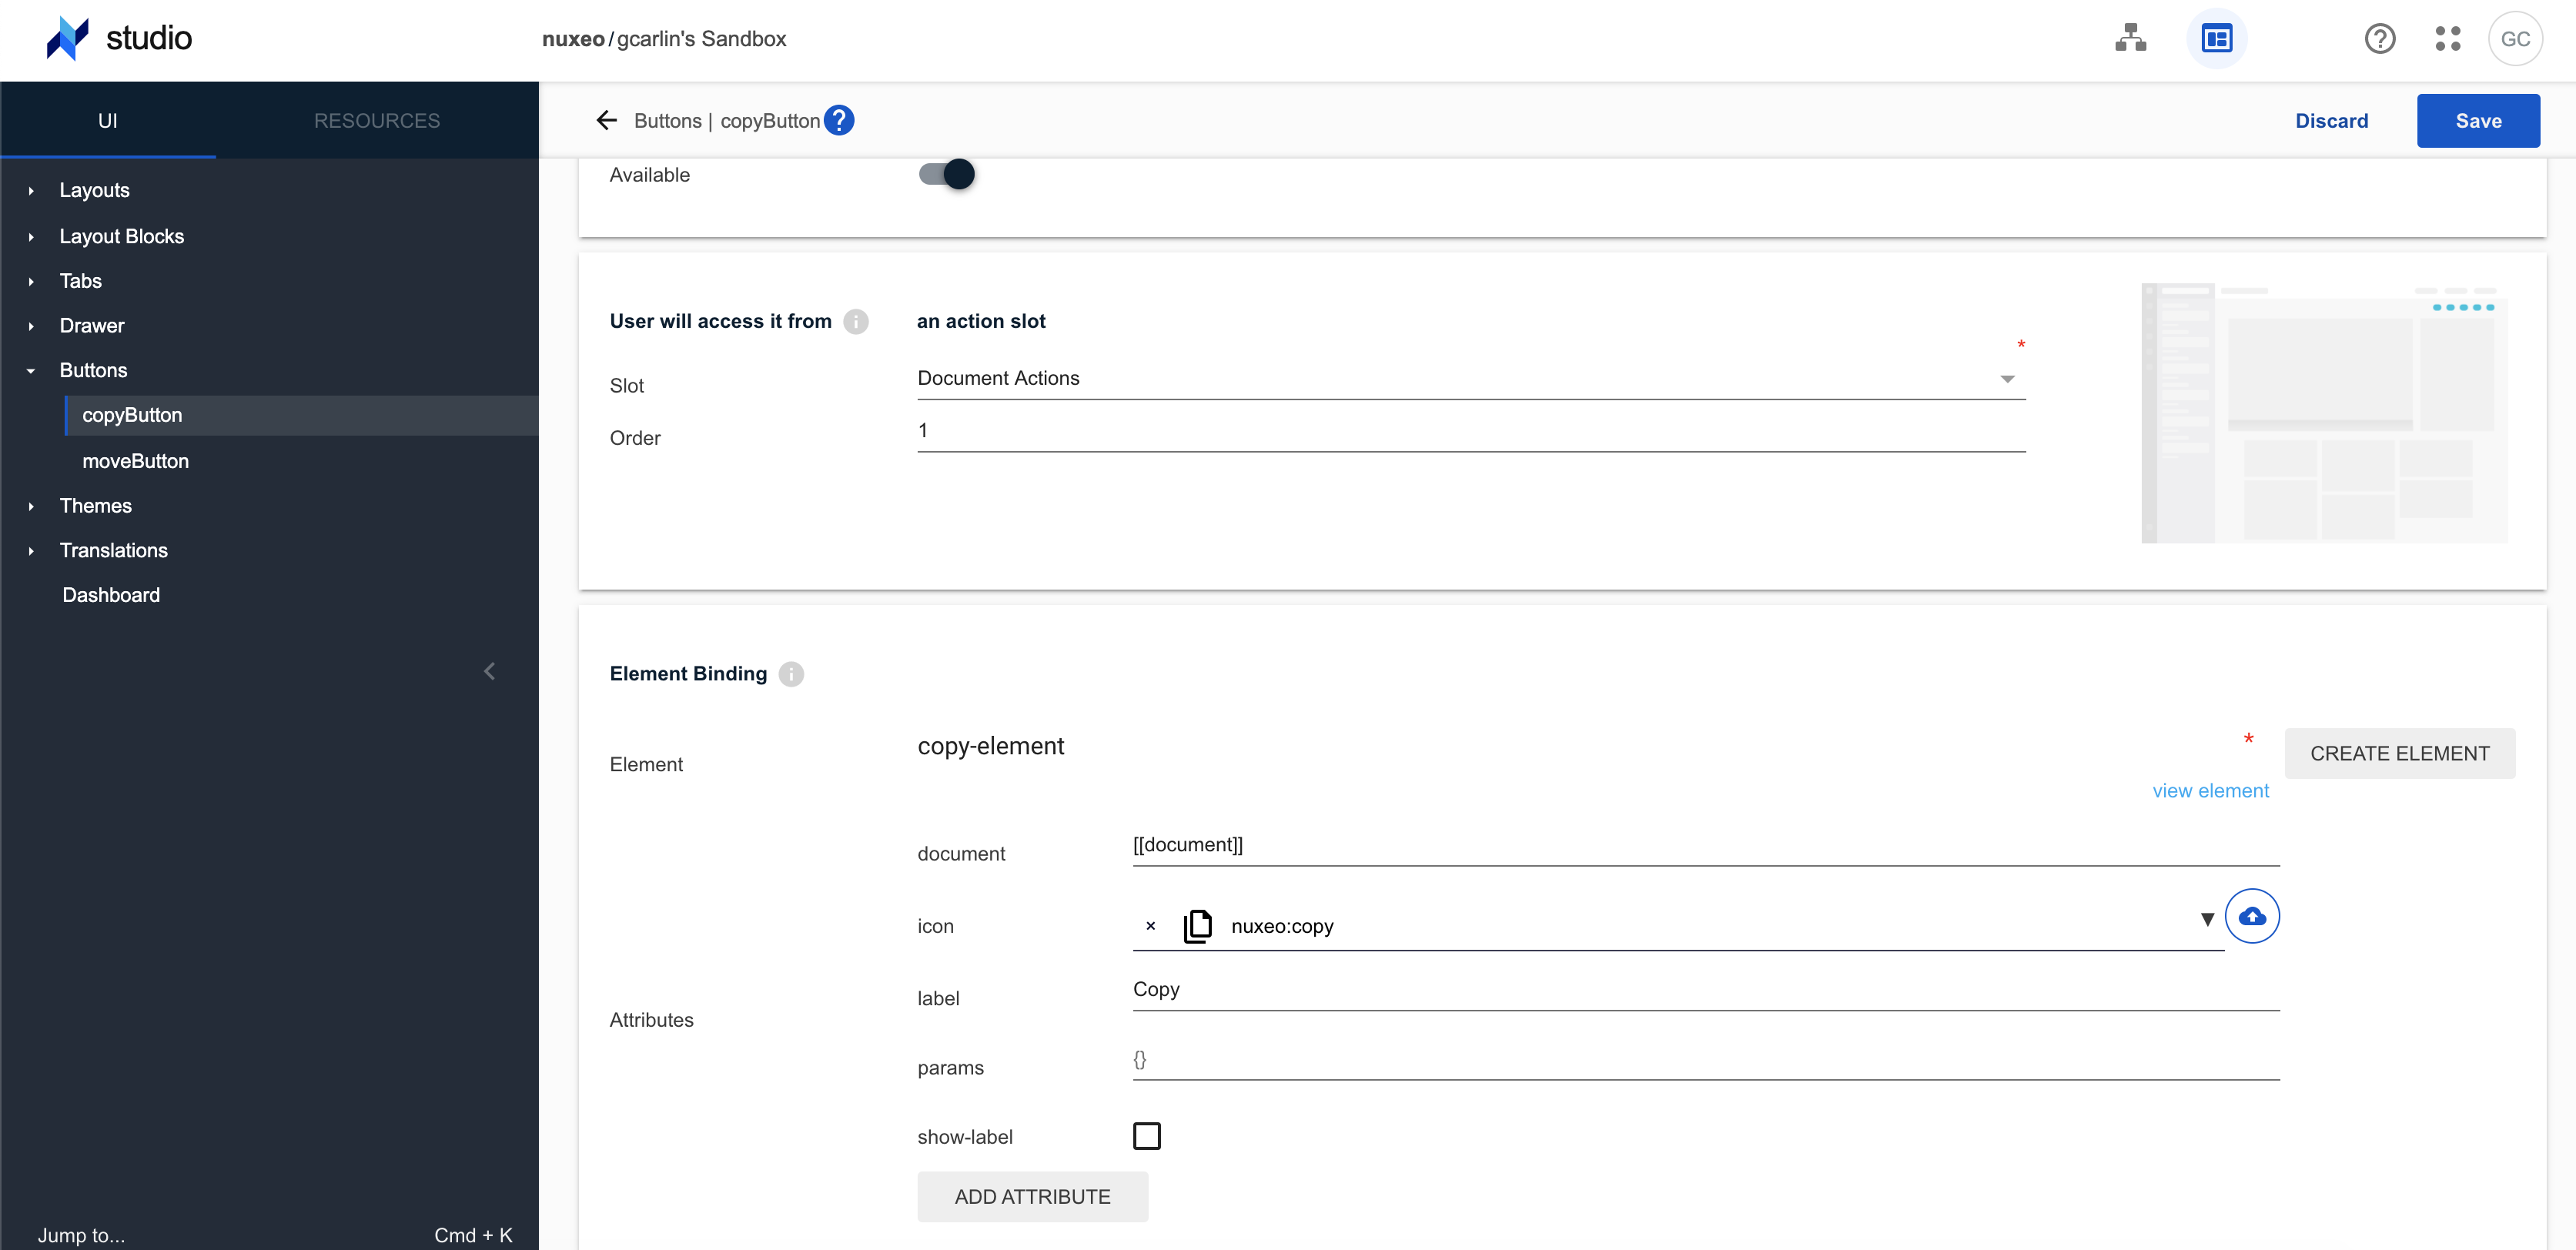
Go to UI > Buttons and create a button of type "Custom Button" (not "Button" as it only list automation chains and automation scripting contributions).
Select Document Actions as target slot with
1as priority: the copy button will be displayed on the top right part of the screen in first position.Select the
copy-elementin the element attribute: once selected, all the element attributes will magically be displayed. The most important parameter in the document parameter, because it identified the input document: it must be[[document]].
You should end up with the following contribution:

Check Result
