By default, we only display the label of the user on a document. Here we will create an element to display all the information that we have on the related user.
Create the Element
- On Studio Designer, go to Resources.
- Click on the UI directory and then on Create.
- Name it
elements. - Click on your new
elementsfolder and then on Create. - On the popup, select:
- Type: Element
- Name:
nuxeo-user-info(the .html extension will be added automatically) - Template: Sample layout template
Studio Designer generates the default structure for our web element automatically.
We must recover the user's information. We are going to use the web element nuxeo-connection:
<nuxeo-connection role="widget" user="{{user}}"></nuxeo-connection>
The User object that retrieves the nuxeo-connection has the following properties:
- id: Alias of the user
- isAdministrator: Indicates if it is an administrator user
- isAnonymous: Indicates if it is an anonymous user
- properties
- firstName: User's first name
- lastName: User's last name
- email: User's email
- groups: List of groups to which the user belongs
The final version of our nuxeo-user-info element should look like this:
<!--
`nuxeo-user-info`
@group Nuxeo UI
@element nuxeo-user-info
-->
<dom-module id="nuxeo-user-info">
  <template>
    <style>
      *[role=widget] {
        padding: 5px;
      }
    </style>

    <nuxeo-connection role="widget" user="{{user}}"></nuxeo-connection>

    <nuxeo-card role="widget">
      <div role="widget">
        <label>[[i18n('label.user')]]</label>
        <nuxeo-user-tag user="[[user]]"></nuxeo-user-tag>
      </div>

      <div role="widget">
        <label>[[i18n('label.user.id')]]</label>
        <div name="id">[[user.id]]</div>
      </div>

      <div role="widget">
        <label>[[i18n('label.user.firstName')]]</label>
        <div name="firstName">[[user.properties.firstName]]</div>
      </div>

      <div role="widget">
        <label>[[i18n('label.user.lastName')]]</label>
        <div name="lastName">[[user.properties.lastName]]</div>
      </div>

      <div role="widget">
        <label>[[i18n('label.user.email')]]</label>
        <div name="email">[[user.properties.email]]</div>
      </div>

      <div role="widget">
        <label>[[i18n('label.user.isAdministrator')]]</label>
        <nuxeo-tag>[[user.isAdministrator]]</nuxeo-tag>
      </div>

      <div role="widget">
        <label>[[i18n('label.user.isAnonymous')]]</label>
        <nuxeo-tag>[[user.isAnonymous]]</nuxeo-tag>
      </div>

      <div role="widget">
        <label>[[i18n('label.user.groups')]]</label>
        <nuxeo-tags type="tag" items="[[user.properties.groups]]"></nuxeo-tags>
      </div>
    </nuxeo-card>

  </template>

  <script>
    Polymer({
      is: 'nuxeo-user-info',
      behaviors: [Nuxeo.LayoutBehavior],
      properties: {
        /**
         * @schema dublincore
         */
        document: {
          type: Object
        }
      }
    });
  </script>
</dom-module>
Add Labels Translation
Now that we have our element, we need to add the translation of each label, in order to display them correctly on the interface.
- In Designer, go to UI > Translations.
- Create a new
messages.jsonfile. - Add the following lines to the file:
{ "label.user.firstName":"First Name", "label.user.lastName":"Last Name", "label.user.email":"Email", "label.user.id":"ID", "label.user":"User", "label.user.isAdministrator":"Administrator", "label.user.isAnonymous":"Anonymous", "label.user.groups":"Groups" } - Click on Save.
Use the Element
Now that we have our web element we just have to use it in the view of our choice. In this example, we will add it in the view of the documents of type File:
- In Designer, go to Layout > Built-in Document Types > File.
- Configure the View layout.
Replace the existing content with the following one:
<!-- `nuxeo-file-view-layout` @group Nuxeo UI @element nuxeo-file-view-layout --> <link rel="import" href="../../elements/nuxeo-user-info.html"> <dom-module id="nuxeo-file-view-layout"> <template> <nuxeo-document-viewer role="widget" document="[[document]]"></nuxeo-document-viewer> <nuxeo-user-info role="widget"></nuxeo-user-info> <nuxeo-document-attachments role="widget" document="[[document]]"></nuxeo-document-attachments> </template> <script> Polymer({ is: 'nuxeo-file-view-layout', behaviors: [Nuxeo.LayoutBehavior], properties: { /** * @doctype File */ document: { type: Object } }, }); </script> </dom-module>- Save your changes and deploy your project.
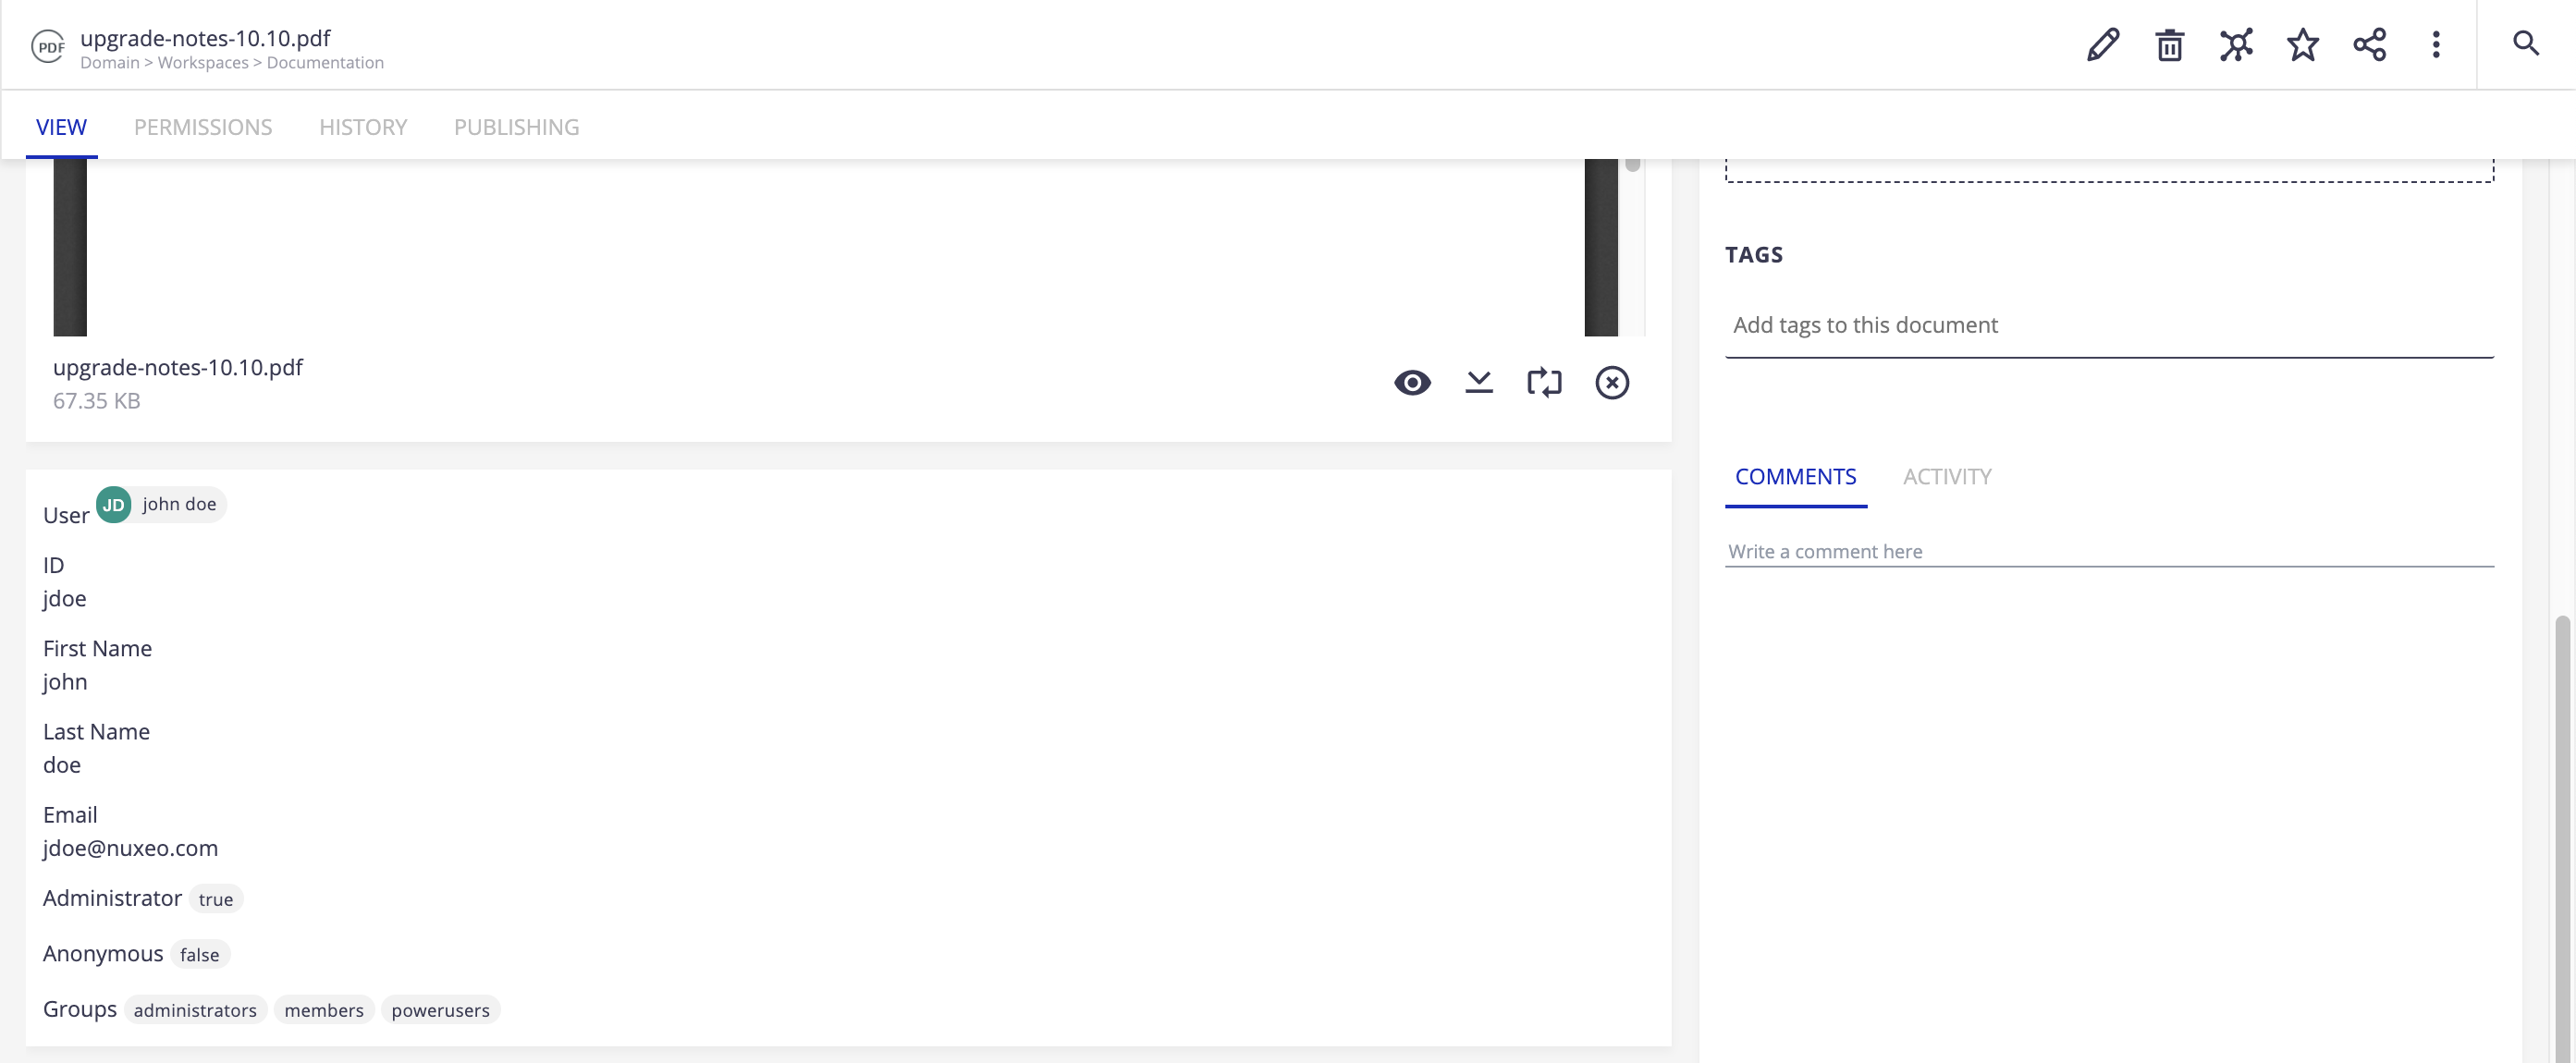
The final result should look like this: