In Nuxeo Web UI, if you want to build a custom page provider to retrieve children documents, for a folderish document type for example, you should use predicates instead of query parameters that were used on JSF UI side.
In this tutorial, you will learn to display interesting business properties when listing the children documents of a contract portfolio:
- Owner
- Policy
- Start date
- End date
Prerequisites
- A Contract document type
- The Nuxeo Web UI addon is installed on your instance.
- In Studio Modeler > Settings > Application Definition, make sure that Nuxeo Web UI is in the Packages to Install list.
Create a Contract Portfolio
- In Studio Modeler, go to Configuration > Content Model > Document Types. Click on the New button.
- Fill in the creation form as follows and click on Next:
- ID: contractsPortfolio
- Extends: Folder
- Label: Contracts Portfolio
- Fill in the Definition tab:
- Select an icon for your portfolio, from your resources or from your desktop
- Accepted Children Types: contract
- Document Facets: Document is folderish
- Save your changes by clicking on Save at the top right corner of the page.
Now click on Configure layouts in Designer at the top right of the page and configure the 5 layouts under your contractsPortfolio document type by clicking on Configure Missing Layouts at the bottom of the list and save your changes.
Optional: You can configure the table layout of your folderish document:
- In the view layout, click Edit.
- Select nuxeo-results and click Edit
 .
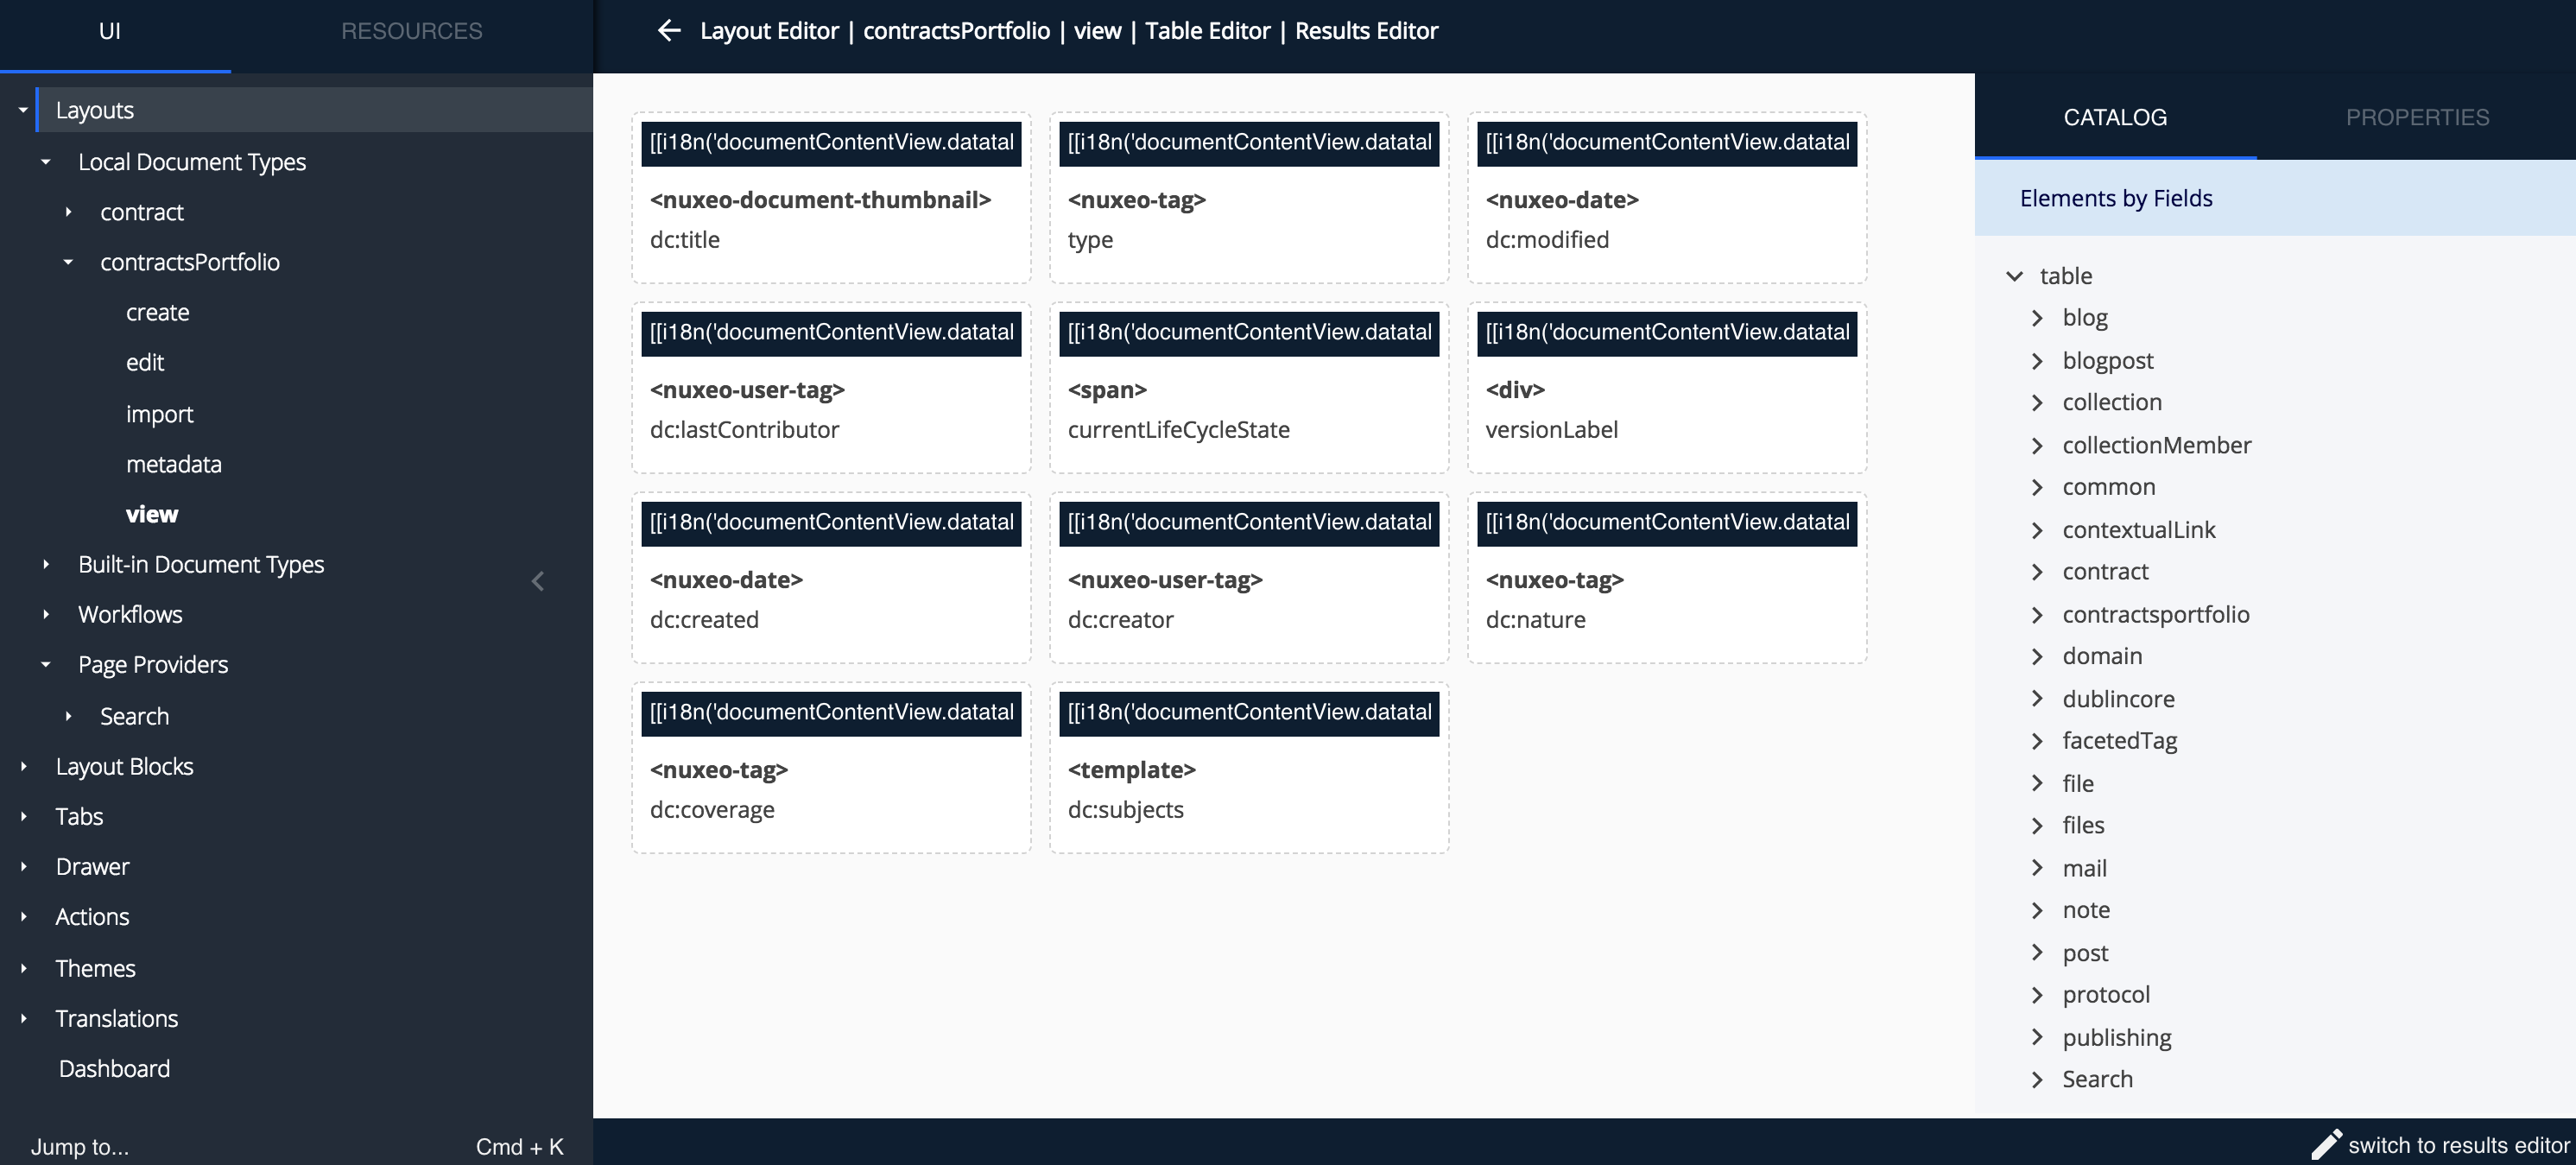
You are now in the Results Editor, where you can configure the table and the grid layouts for your document.
.
You are now in the Results Editor, where you can configure the table and the grid layouts for your document. - In table, click Edit.
- At the bottom-right of your screen, click Switch to table editor.
- Drag and drop in the Main View the properties your want to see as table headers.
- Click Save.
Create a Page Provider
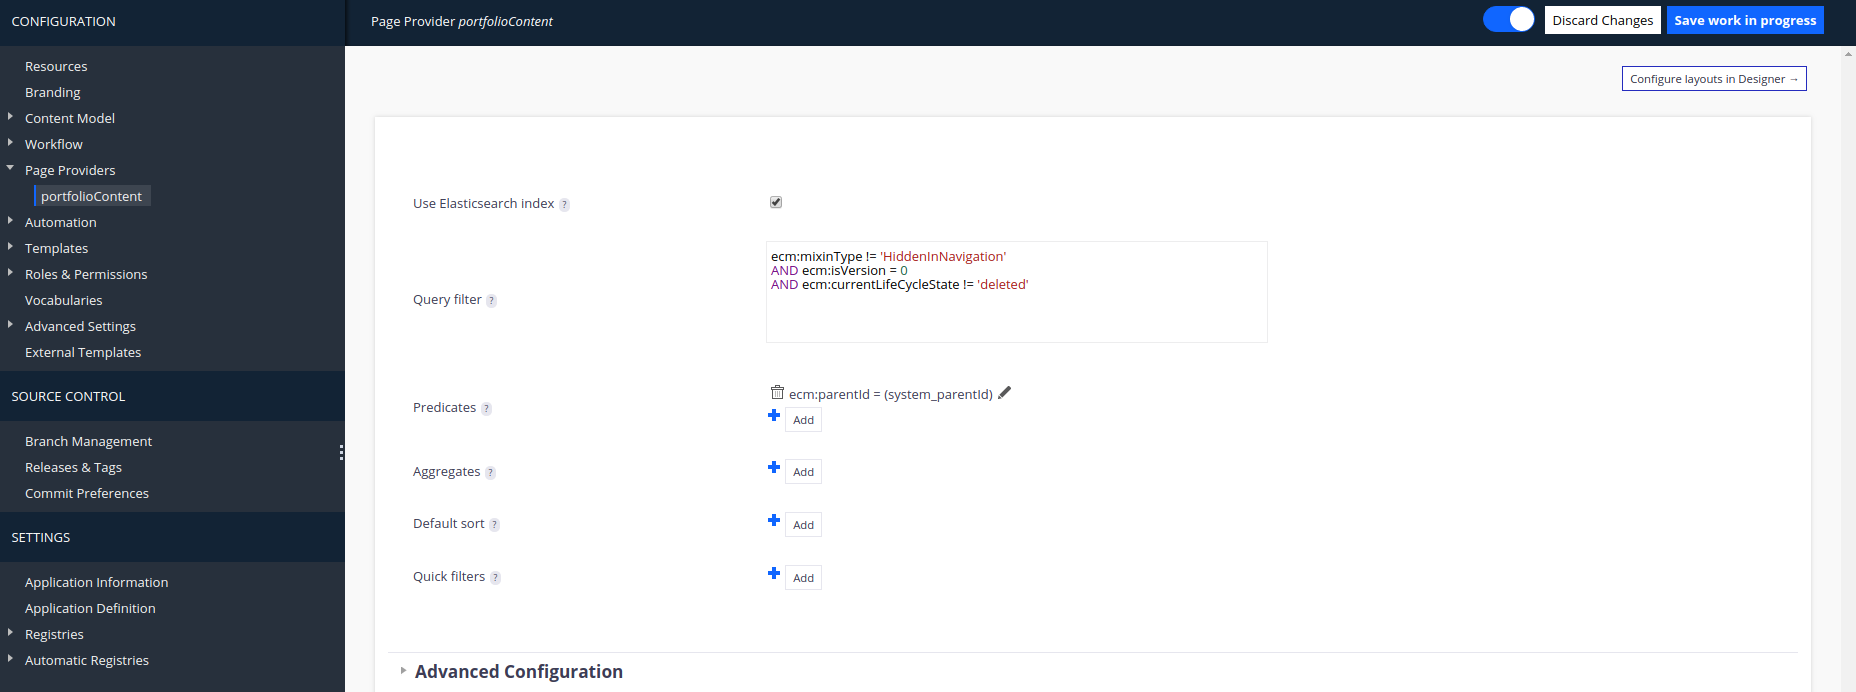
- Now in Studio Modeler, under Configuration, Click on Page Providers, then on New button.
- Fill in the creation form as follows and click on Next:
- Feature ID: portfolioContent
- Use ElasticSearch Index: Yes
- Fill in the query filter like this:
ecm:mixinType != 'HiddenInNavigation' AND ecm:isVersion = 0 AND ecm:isTrashed = 0 - Add a predicate on field:
Schema>System>ParentIdand take note of the name that has been given to it (likely to besystem_parentId)
Configure a Listing
- In Modeler, on your portfolioContent page provider, click on Configure layouts in Designer at the top-right of the screen. You are now in Studio Designer.
- On the results field, click on Configure.
- On the table results listing, click on Edit.
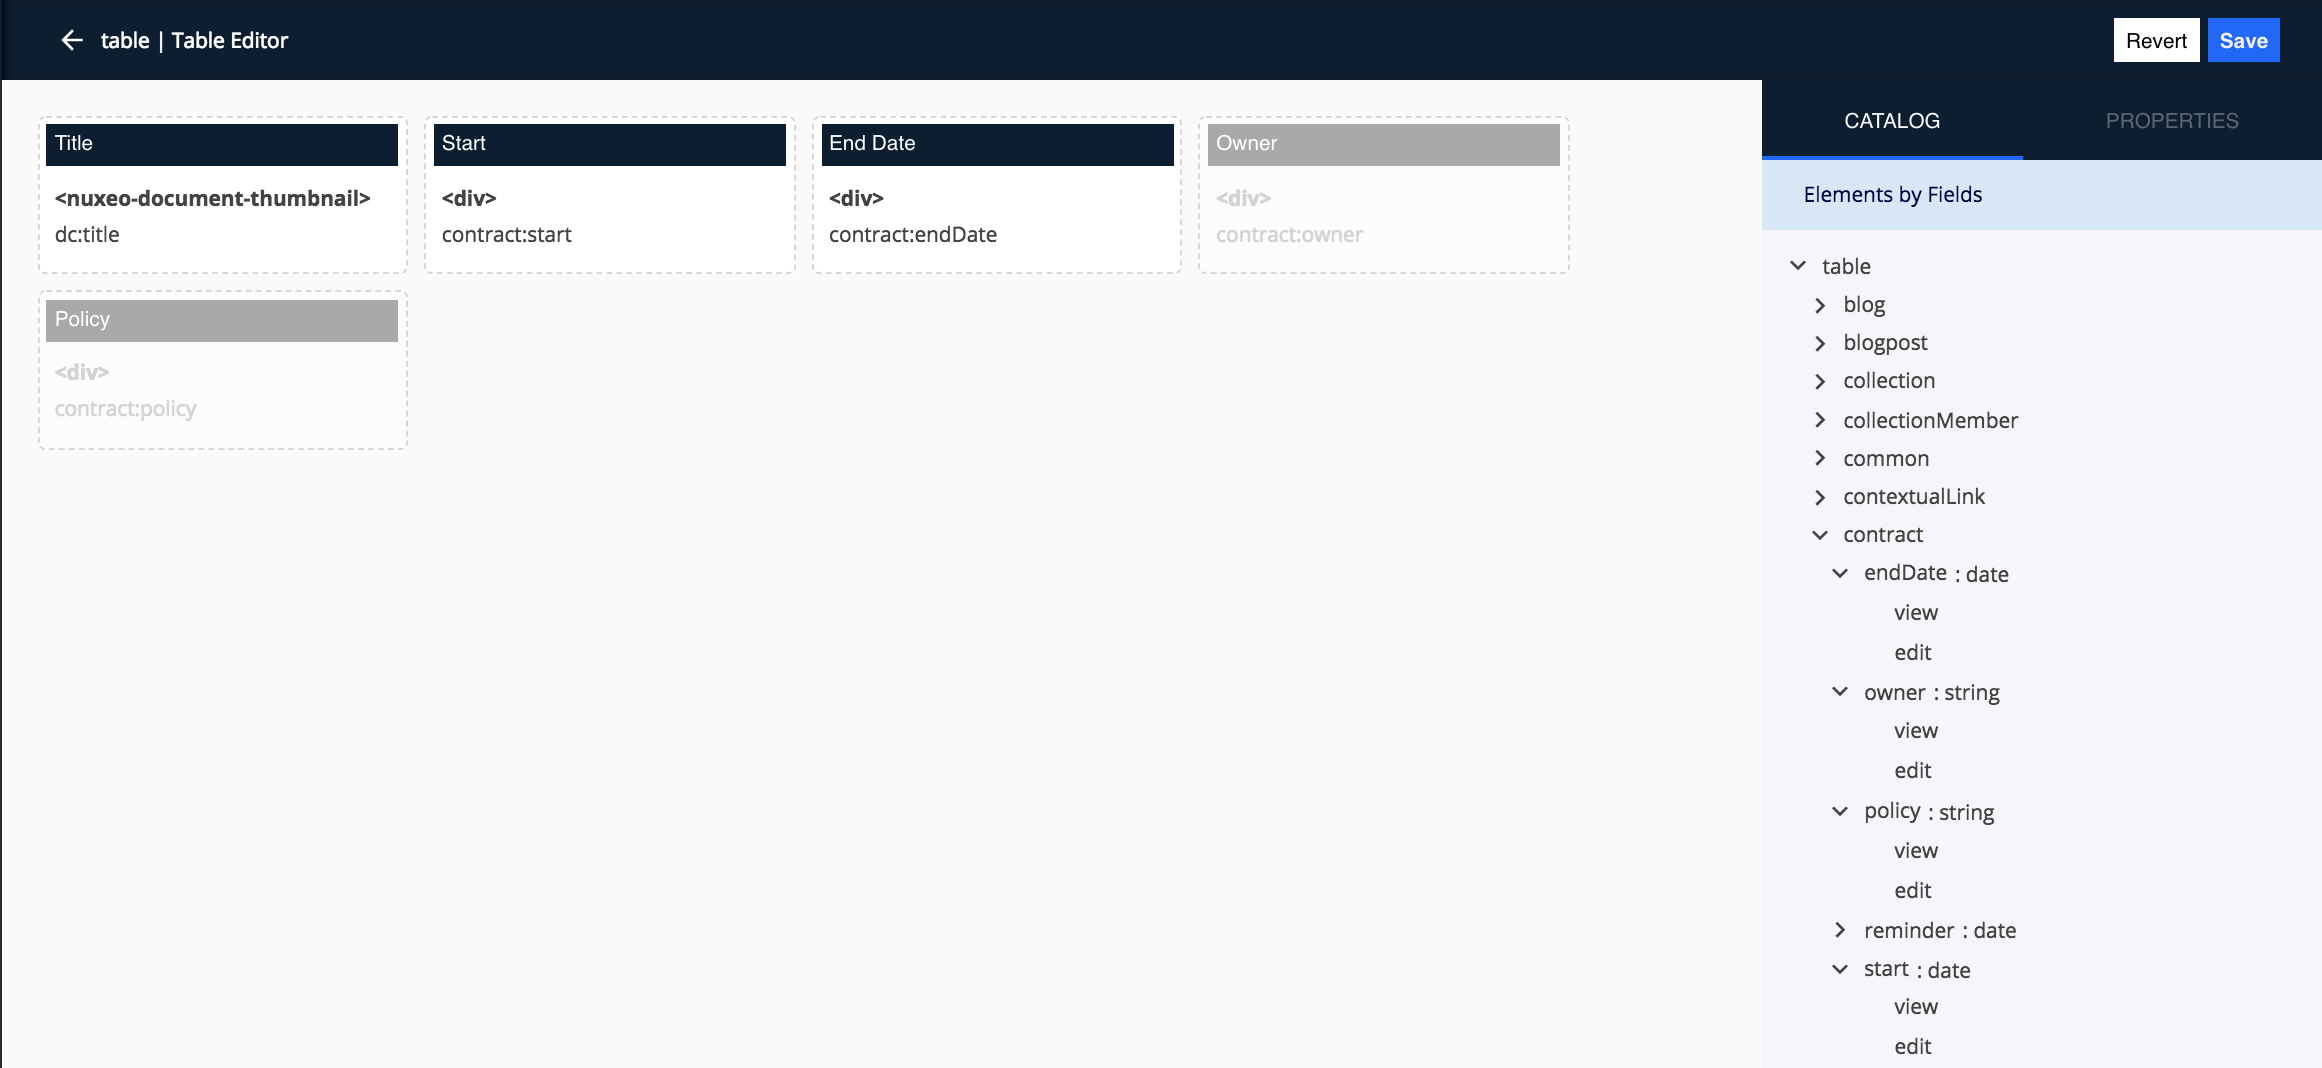
- At the bottom right of the page, click on Switch to table editor.
- Remove the Modified and last Contributor columns by clicking on the delete icon
 .
. - In the right column, select contract > owner : string in view mode and drag and drop it after the title column.
- Do the same with the contract > policy : string, contract > start : date and contract > endDate : date.
On the Owner and Policy column, click on the eye icon
 .
The 2 columns become grey. We will see after the deployment what this feature does.
.
The 2 columns become grey. We will see after the deployment what this feature does.You should end up with the following screen:
Save your changes by clicking on the Save button at the top right of the page
Create a Tab
- In Designer, on your portfolioContent page provider screen, in Bind more elements, select Tabs.
- Fill in the page like this:
- Name: portfolioContentListing
- Label: Content
- Order: 1
- Provider: portfolioContent
- Schemas: dublincore, contract
- Search-name: portfoliocontent
- Unfold the down arrow at the bottom of the Elements & Attributes section.
- Add the following line next to the params >
system_parentIdfield:[[document.uid]]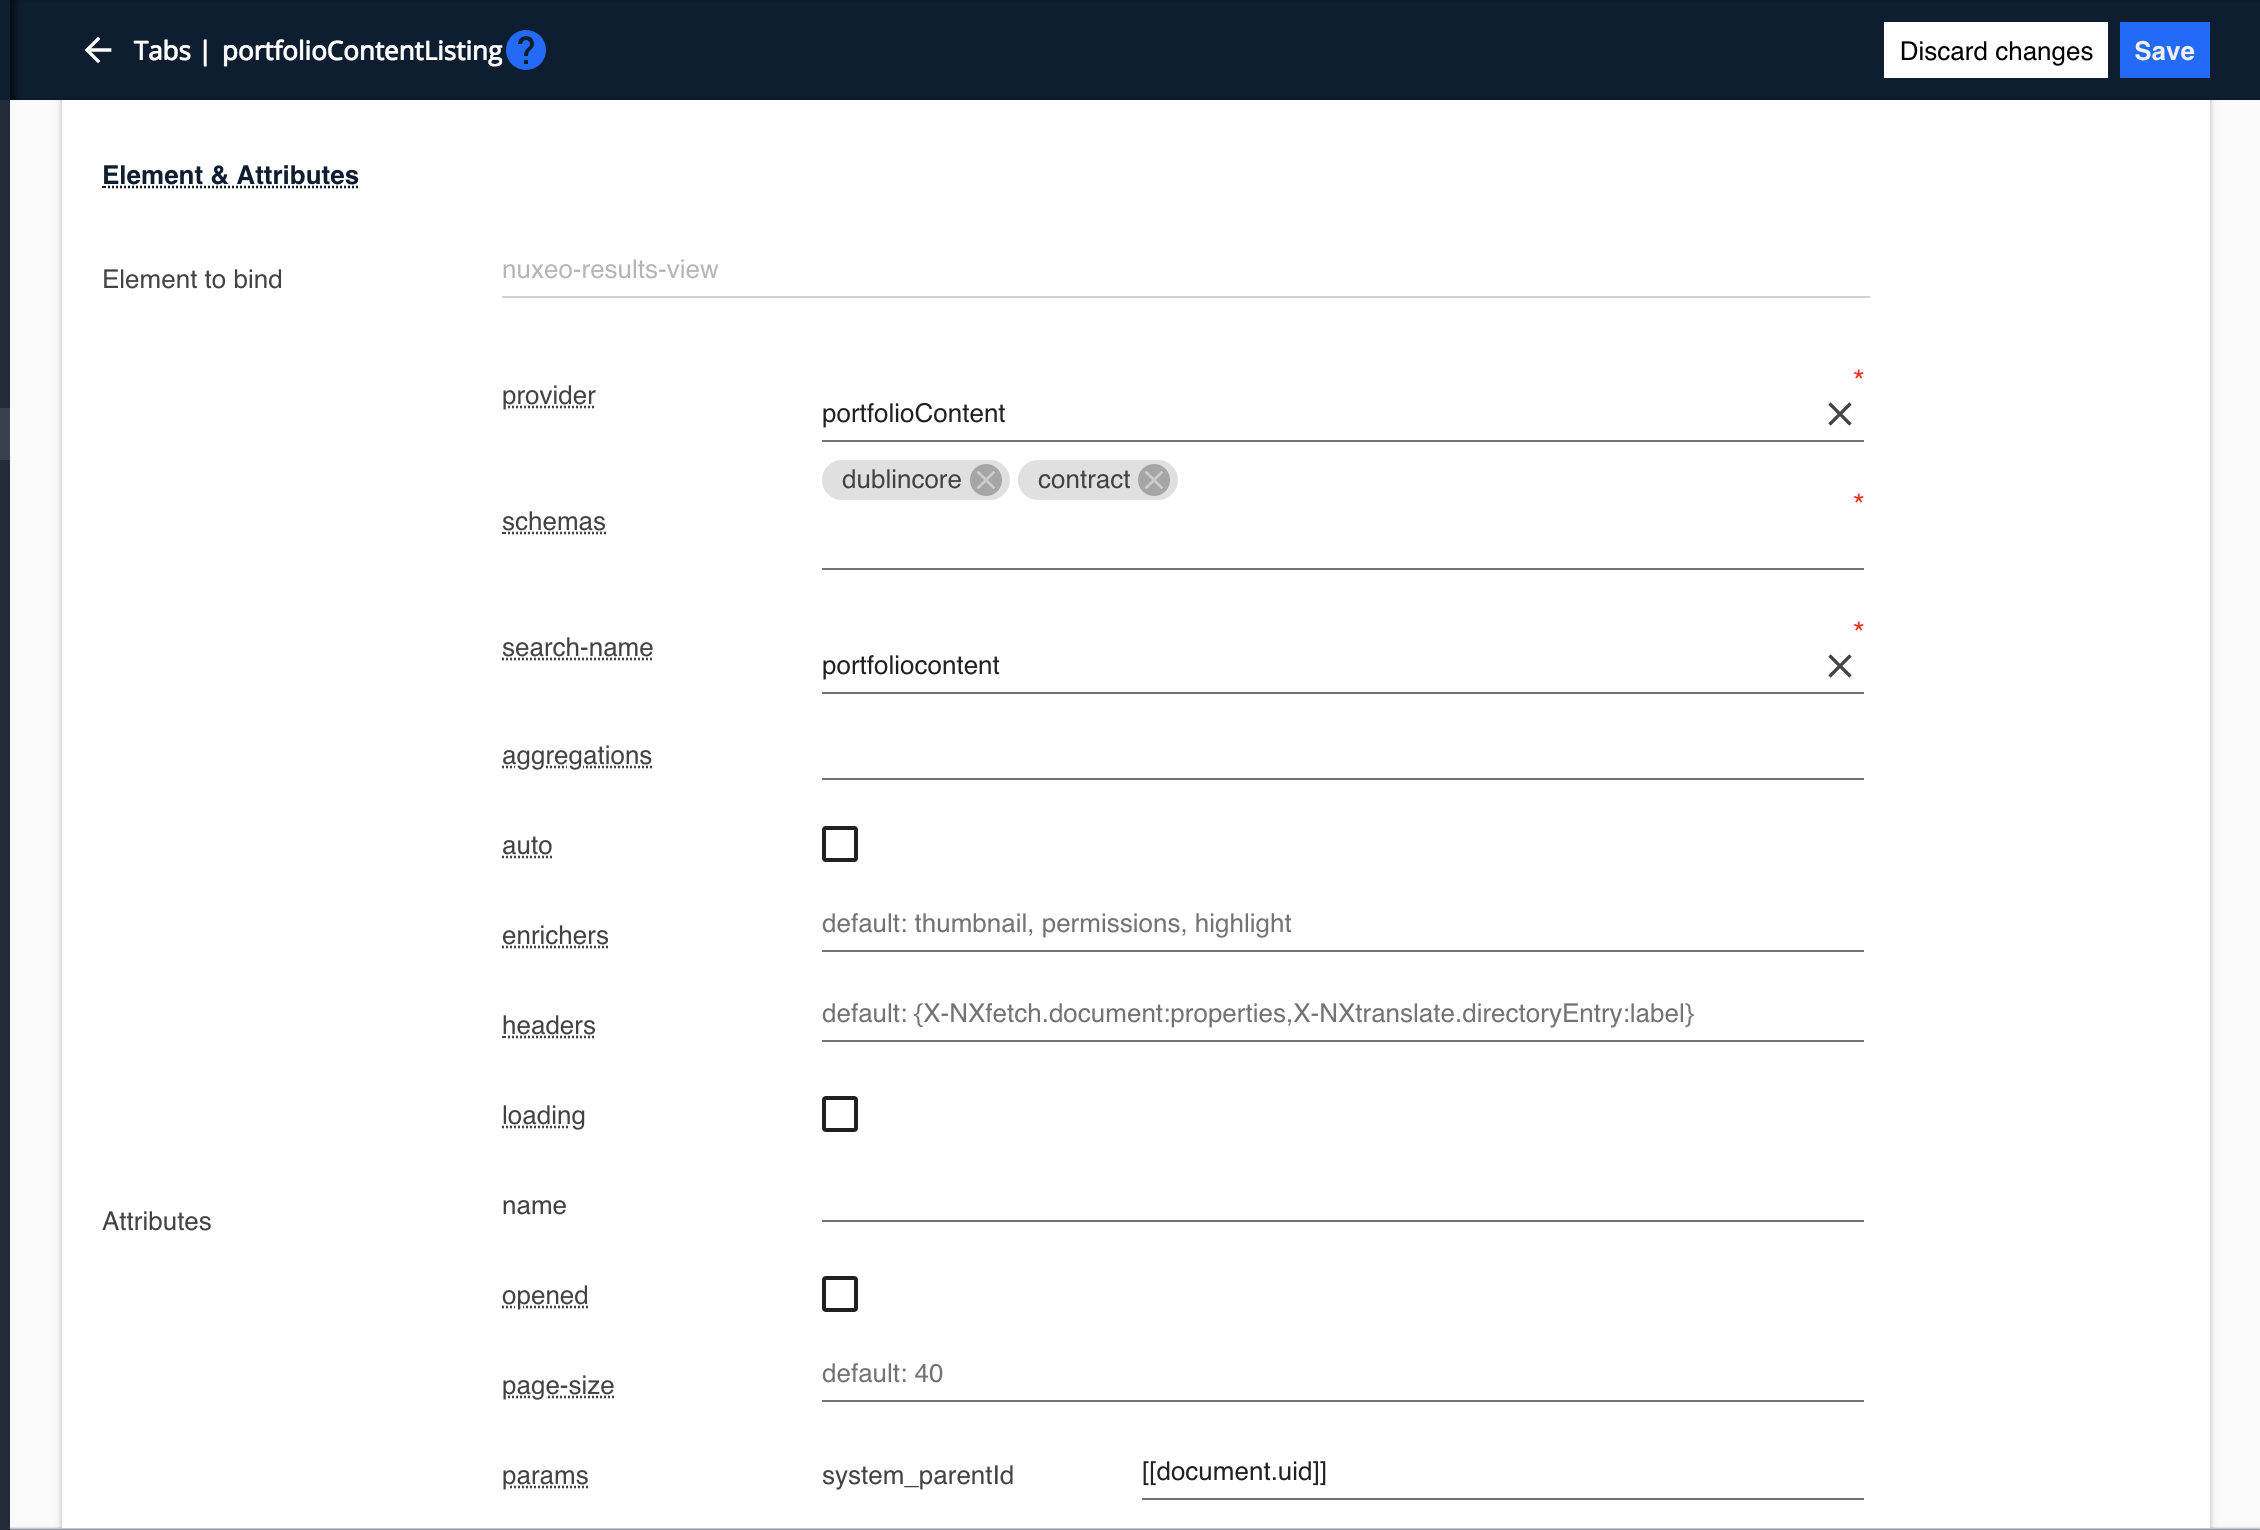 Some explanations for paramsElements are configured using JavaScript (JS). We are putting a JS object here (
{"key": "value", "anotherKey": "anotherValue"}) that will be inserted in the element.system_parentIdis the name of the predicate we defined in Modeler. We are saying here that we want to assign a value to it.[[document.uid]]is the value we assign to our predicate. In this case, we are using one way binding (symbolized by the double square brackets) to forward a value dynamically. Thedocument.uidvariable can be guessed easily once you know that you are parsing a document entity-type using JS. - At the bottom of the page, define the activation filter:
Document has one of the type:
contractsPortfolio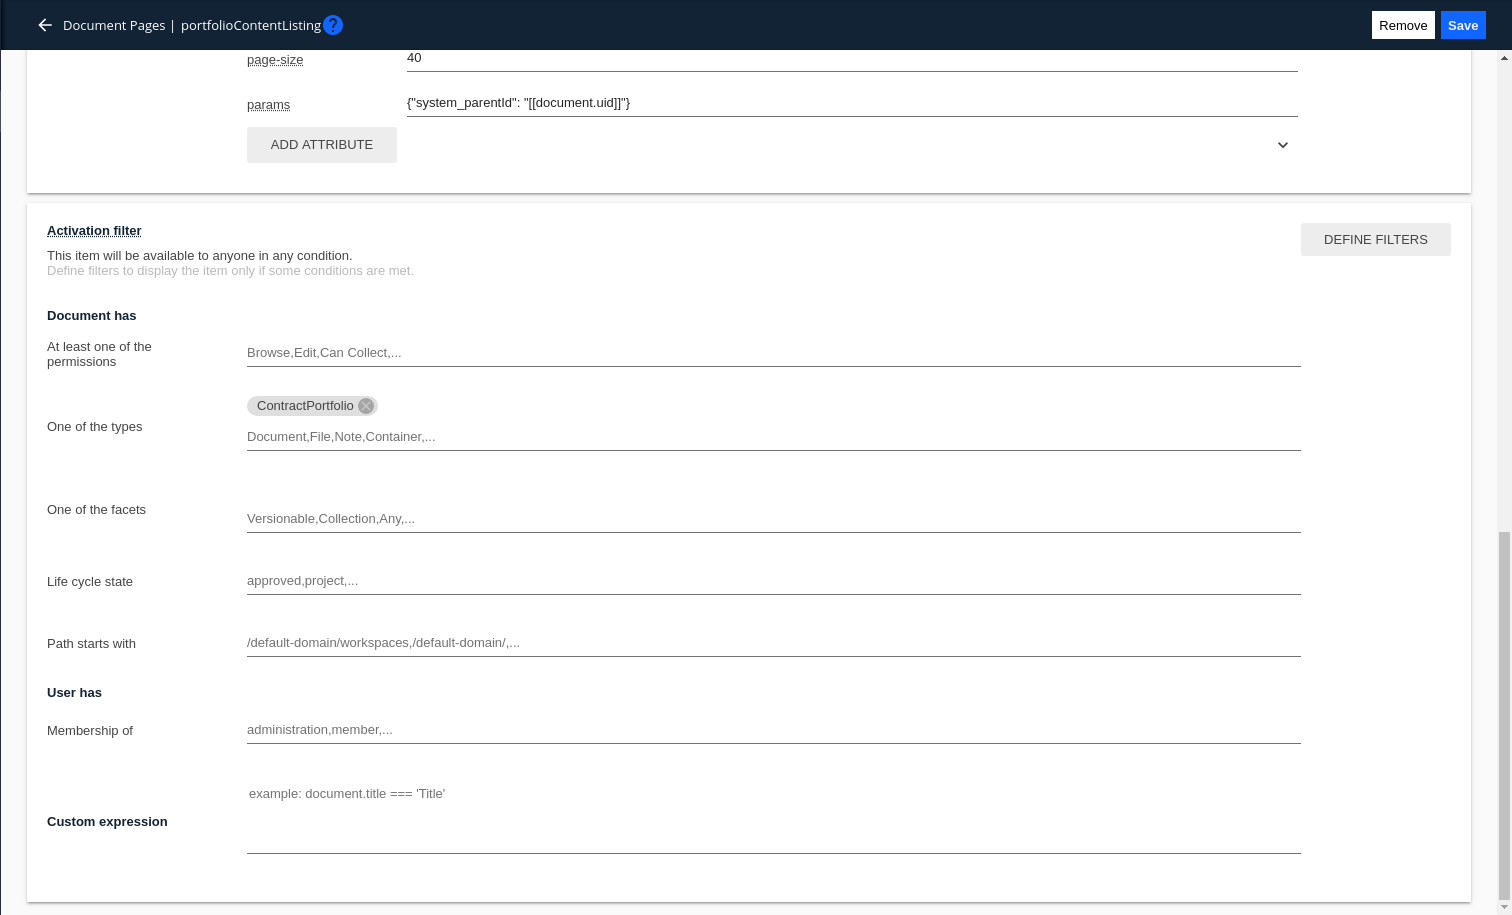
- Save your modification and deploy your Studio project.
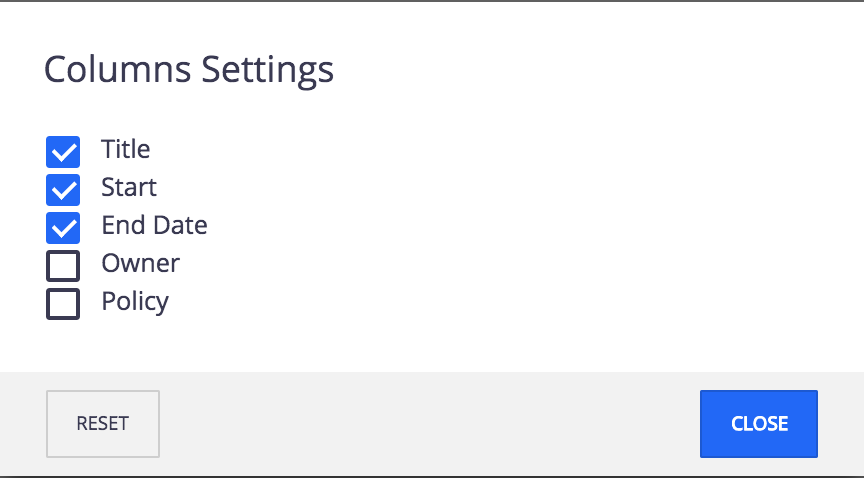
As we modified the Owner and Policy columns, they are optional. By clicking on Columns Settings icon, you can decide to display them or not.