Permissions Overview
| Permission | Actions in Workspaces | Actions in Sections |
|---|---|---|
| Read |
|
|
| ReadWrite |
|
|
| Everything |
|
|
| Can ask for publishing | Submit documents for publishing |
Granting Permissions to the Application Users and Groups
Granting Permissions to External Users (Instant Share)
Granting permissions via Instant Share makes it possible to share content with external users who do not have access to the platform.
An existing user can give permissions to external users on a workspace, folder, document, etc. Therefore, external users receive an email with a link to access a specific document or space. When users click the link and access the content that was shared with them, they can act on it depending on the permissions set for them.
To grant permissions to external users via Instant Share:
- Open the workspace, folder or document you want to share.
- Open the Permissions tab.
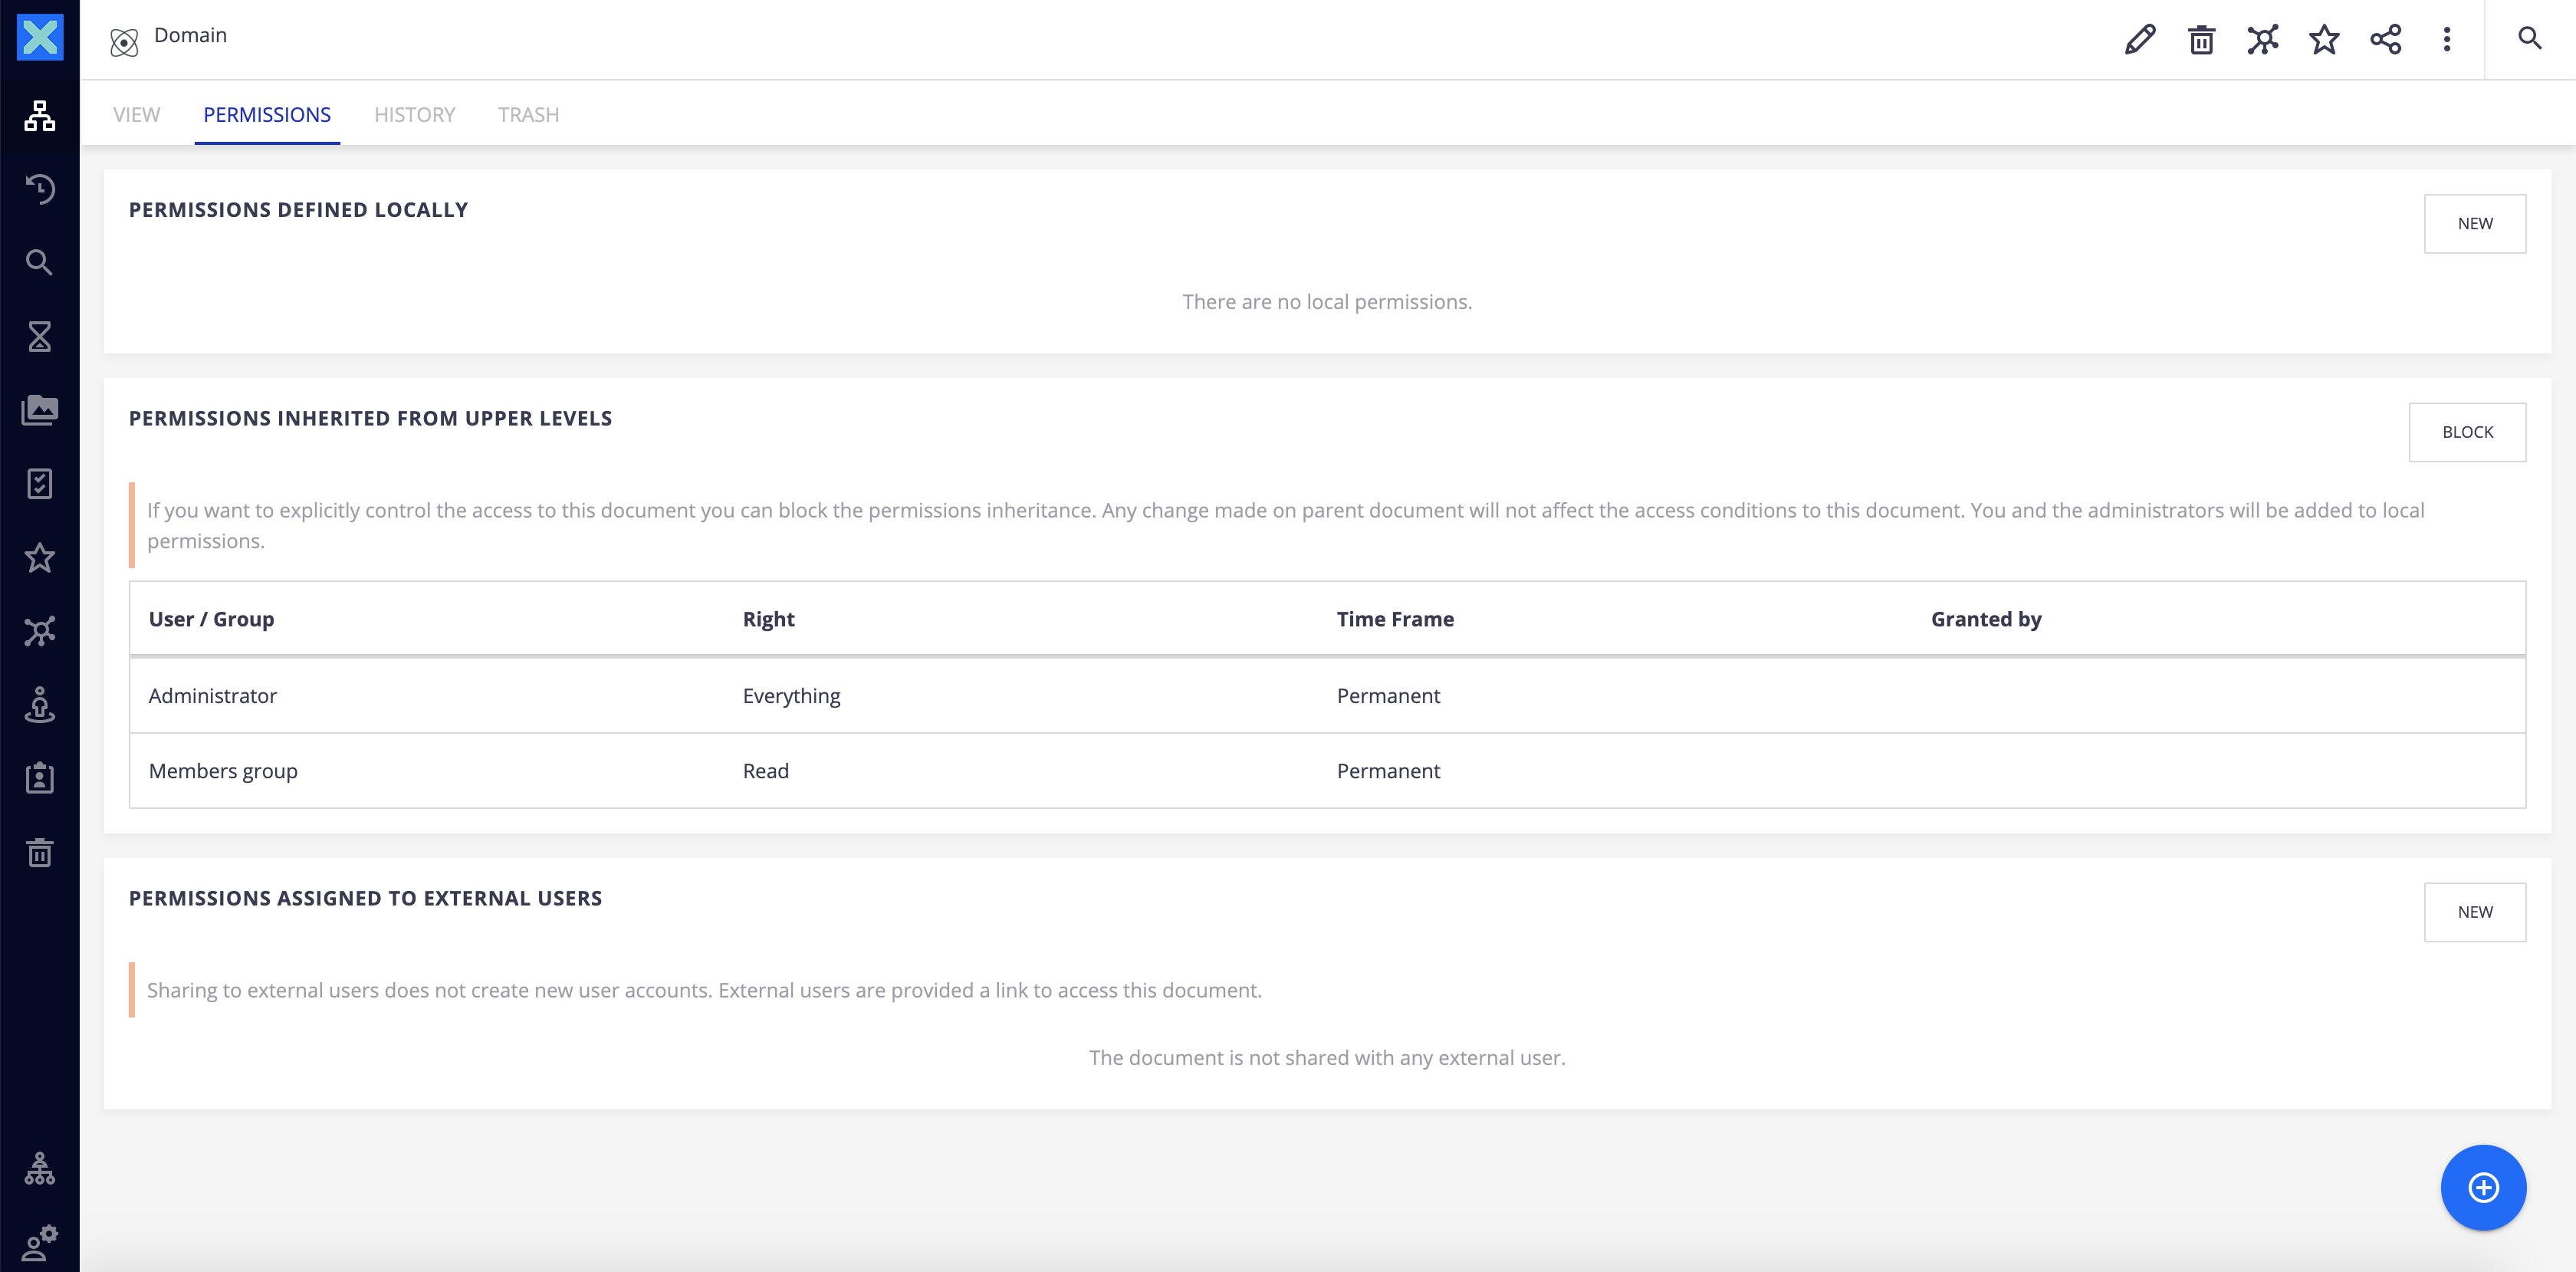
From the Permissions assigned to external users section, click on the New button.
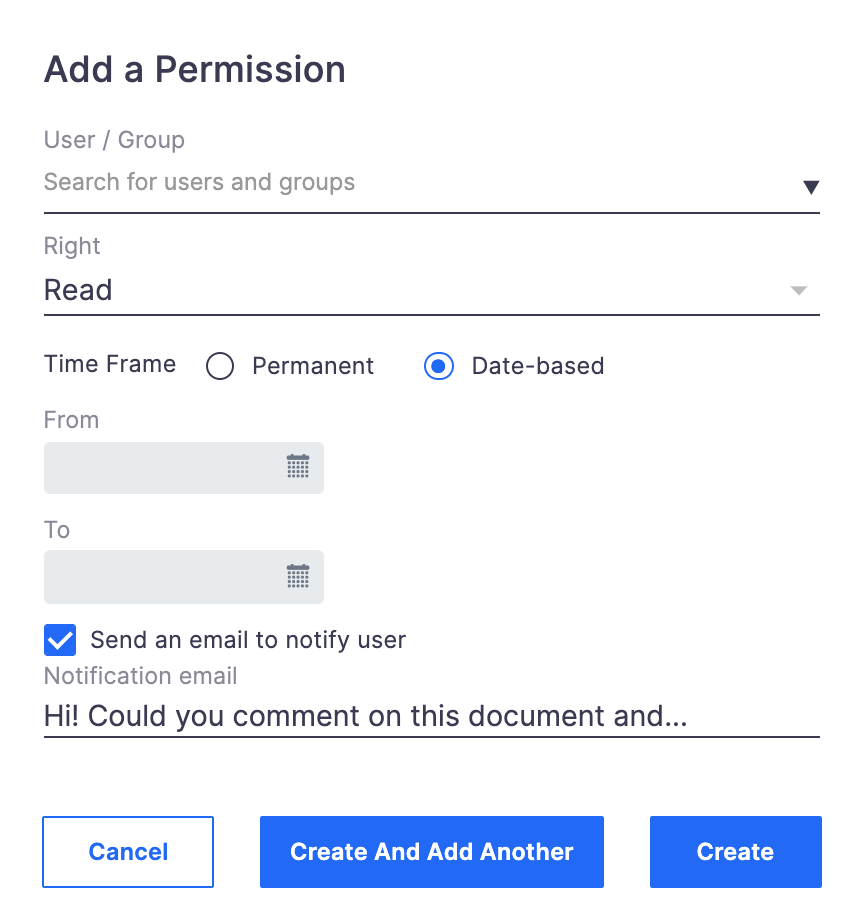
Permissions already set to external users display in this area.Fill in the following information:
- Email of the external user (directly type it over the example)
- Right granted (Read, ReadWrite or Everything: see Permissions for more information)
- From/To: start and end dates of the granting
- Notification email: you can leave the message by default or customize it here. (optional)
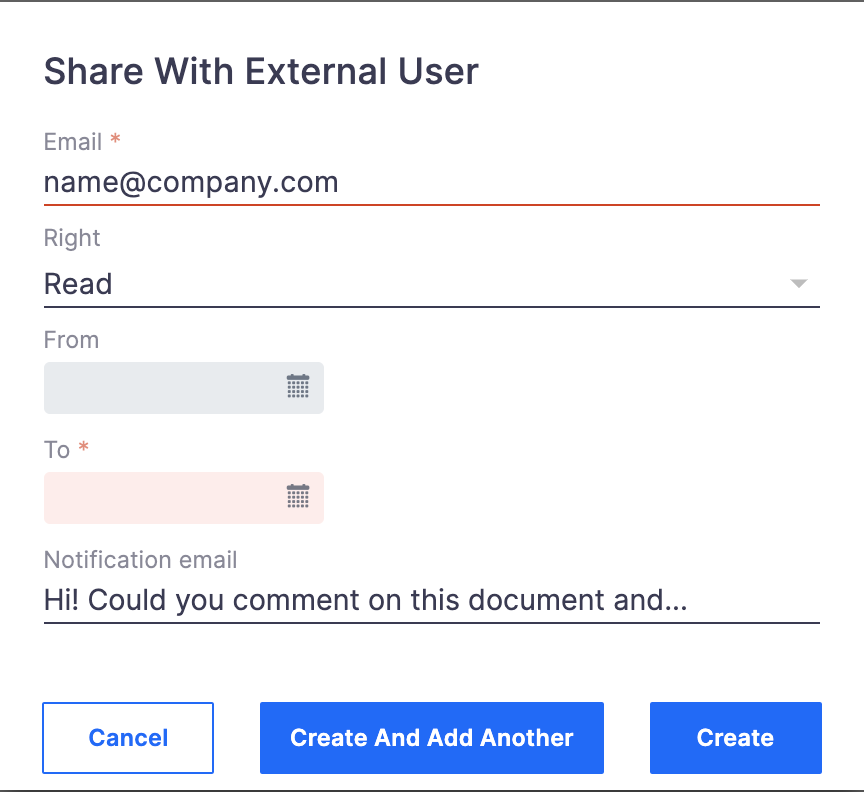
- Click on the:
- Cancel icon to cancel the granting of the access
- Create icon to grant access to the external user
- Create and add another icon to grant access to the user and directly re-open the popup for granting access to another user
When created, the granted access is saved and displayed in the Permissions assigned to external users section. The external user you granted permissions to receives an email with a link to access the desired document(s).
At this stage, you can click on the:
- Edit icon to display the Update Permission popup and update the needed information .
- Send again icon to send the permission again to the external user .
- Delete icon to remove the already recorded permission of the external user.

To access the Nuxeo Platform as an external user:
Open your mailbox.
There you can find an email sent by a Nuxeo user granting you access to a specific document/space.Click on the hyperlink to access the platform and the content.
At this stage, your web browser opens on the Nuxeo Platform and directly places you on the content you have permission on. Depending on the set permissions, you can now view and/or act on the content and use the Search menu to navigate through the documents you have access to.
Editing Permissions
To edit a permission click on ![]() next to it, from there you can modify the permission and/or the date frame.
next to it, from there you can modify the permission and/or the date frame.
Deleting Permissions
To delete a permission click on ![]() next to the permission you want to delete, click Ok on the confirmation popup.
next to the permission you want to delete, click Ok on the confirmation popup.

Blocking Rights Inheritance
The rights that are granted or denied in a space are applied to the space's content, including its sub-spaces. You thus have the same rights in the sub-spaces as in the parent space. That is called rights inheritance.
You can block this inheritance. It enables you to block the access of a sub-workspace to the workspace's users, for instance, or to deeply modify the access rights in the sub-workspace.
To block rights inheritance:
- Click on the Permissions tab of the space of which you want to the access rights. The Access Rights sub-tab is displayed.
Click on the Block button located under the PERMISSIONS INHERITED FROM UPPER LEVELS table.
Now that only local permissions are applied, any change made on parent document won't affect the access conditions to this document. You and the administrators will be added to local permissions.
You can now grant access rights to specific users.