The more people involved on a document, the more difficult it becomes to collaborate and communicate because every participant has their own device (PC, mobile, tablet, etc.) and their own tools, which means different formats to preview.
The Nuxeo Enhanced Viewer addon allows users to preview and annotate any document stored in the Nuxeo repository: Office documents, PDF, images, videos, etc., on any device with the ARender previewer from Arondor.
ARender software comprises two parts:
- previewer
- rendition
ARender previewer is extended by Nuxeo to integrate the ARender Previewer with the Nuxeo REST API, it corresponds to code/arender-nuxeo-connector in ARender Connector.
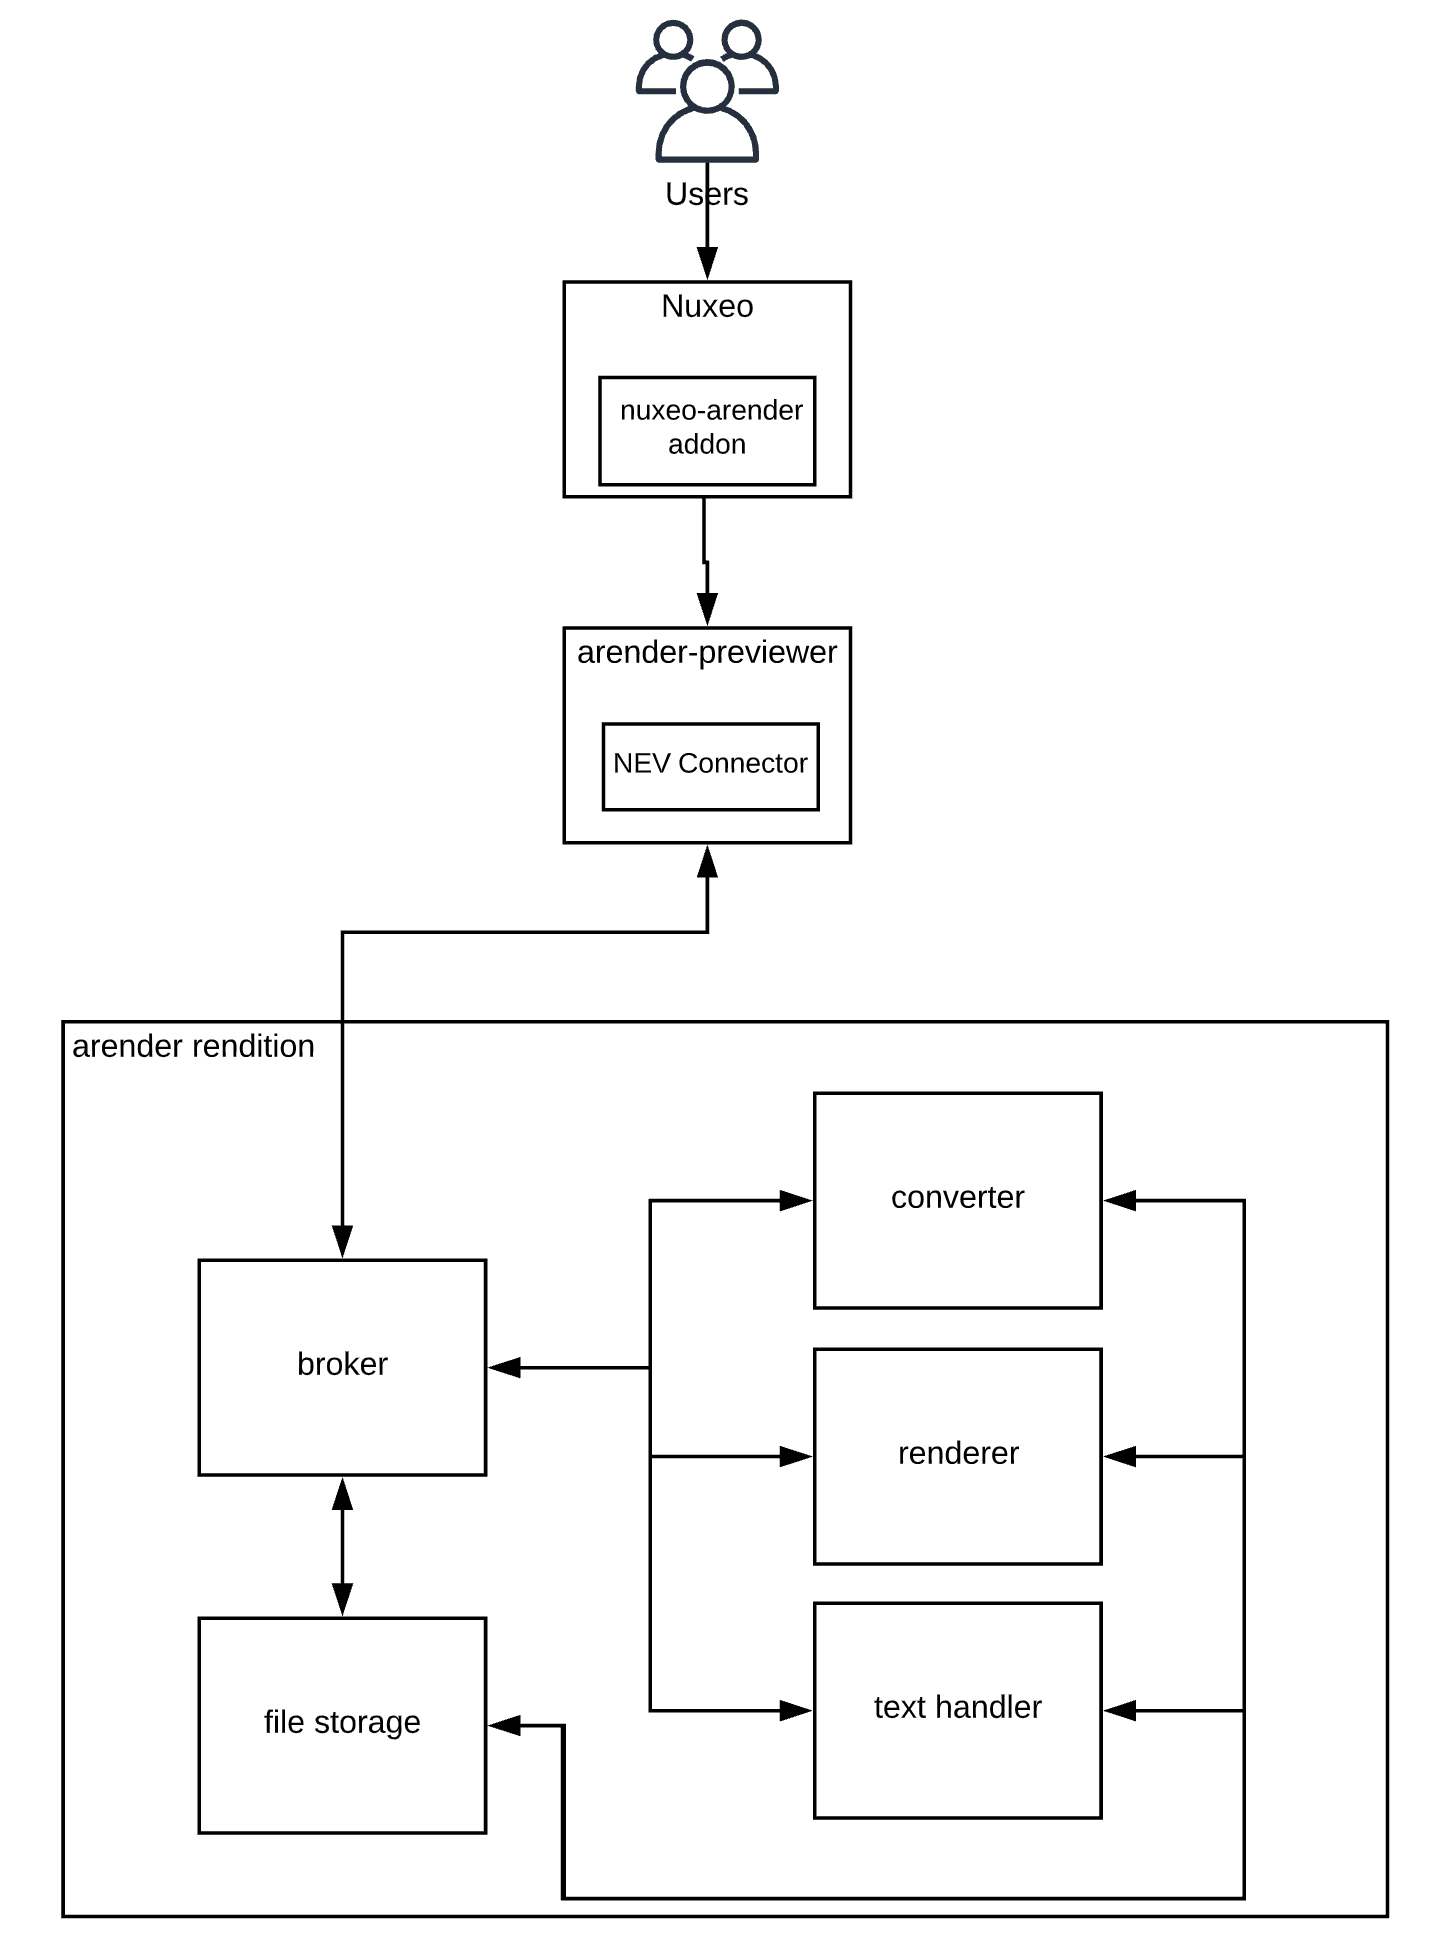
Since Nuxeo Enhanced Viewer 10.1, the rendition part is now divided into 5 micro-services:
- arender-document-service-broker
- arender-document-file-storage
- arender-document-converter
- arender-document-renderer
- arender-document-text-handler
Here's a chart illustrating the ARender micro-services:
Functional Overview
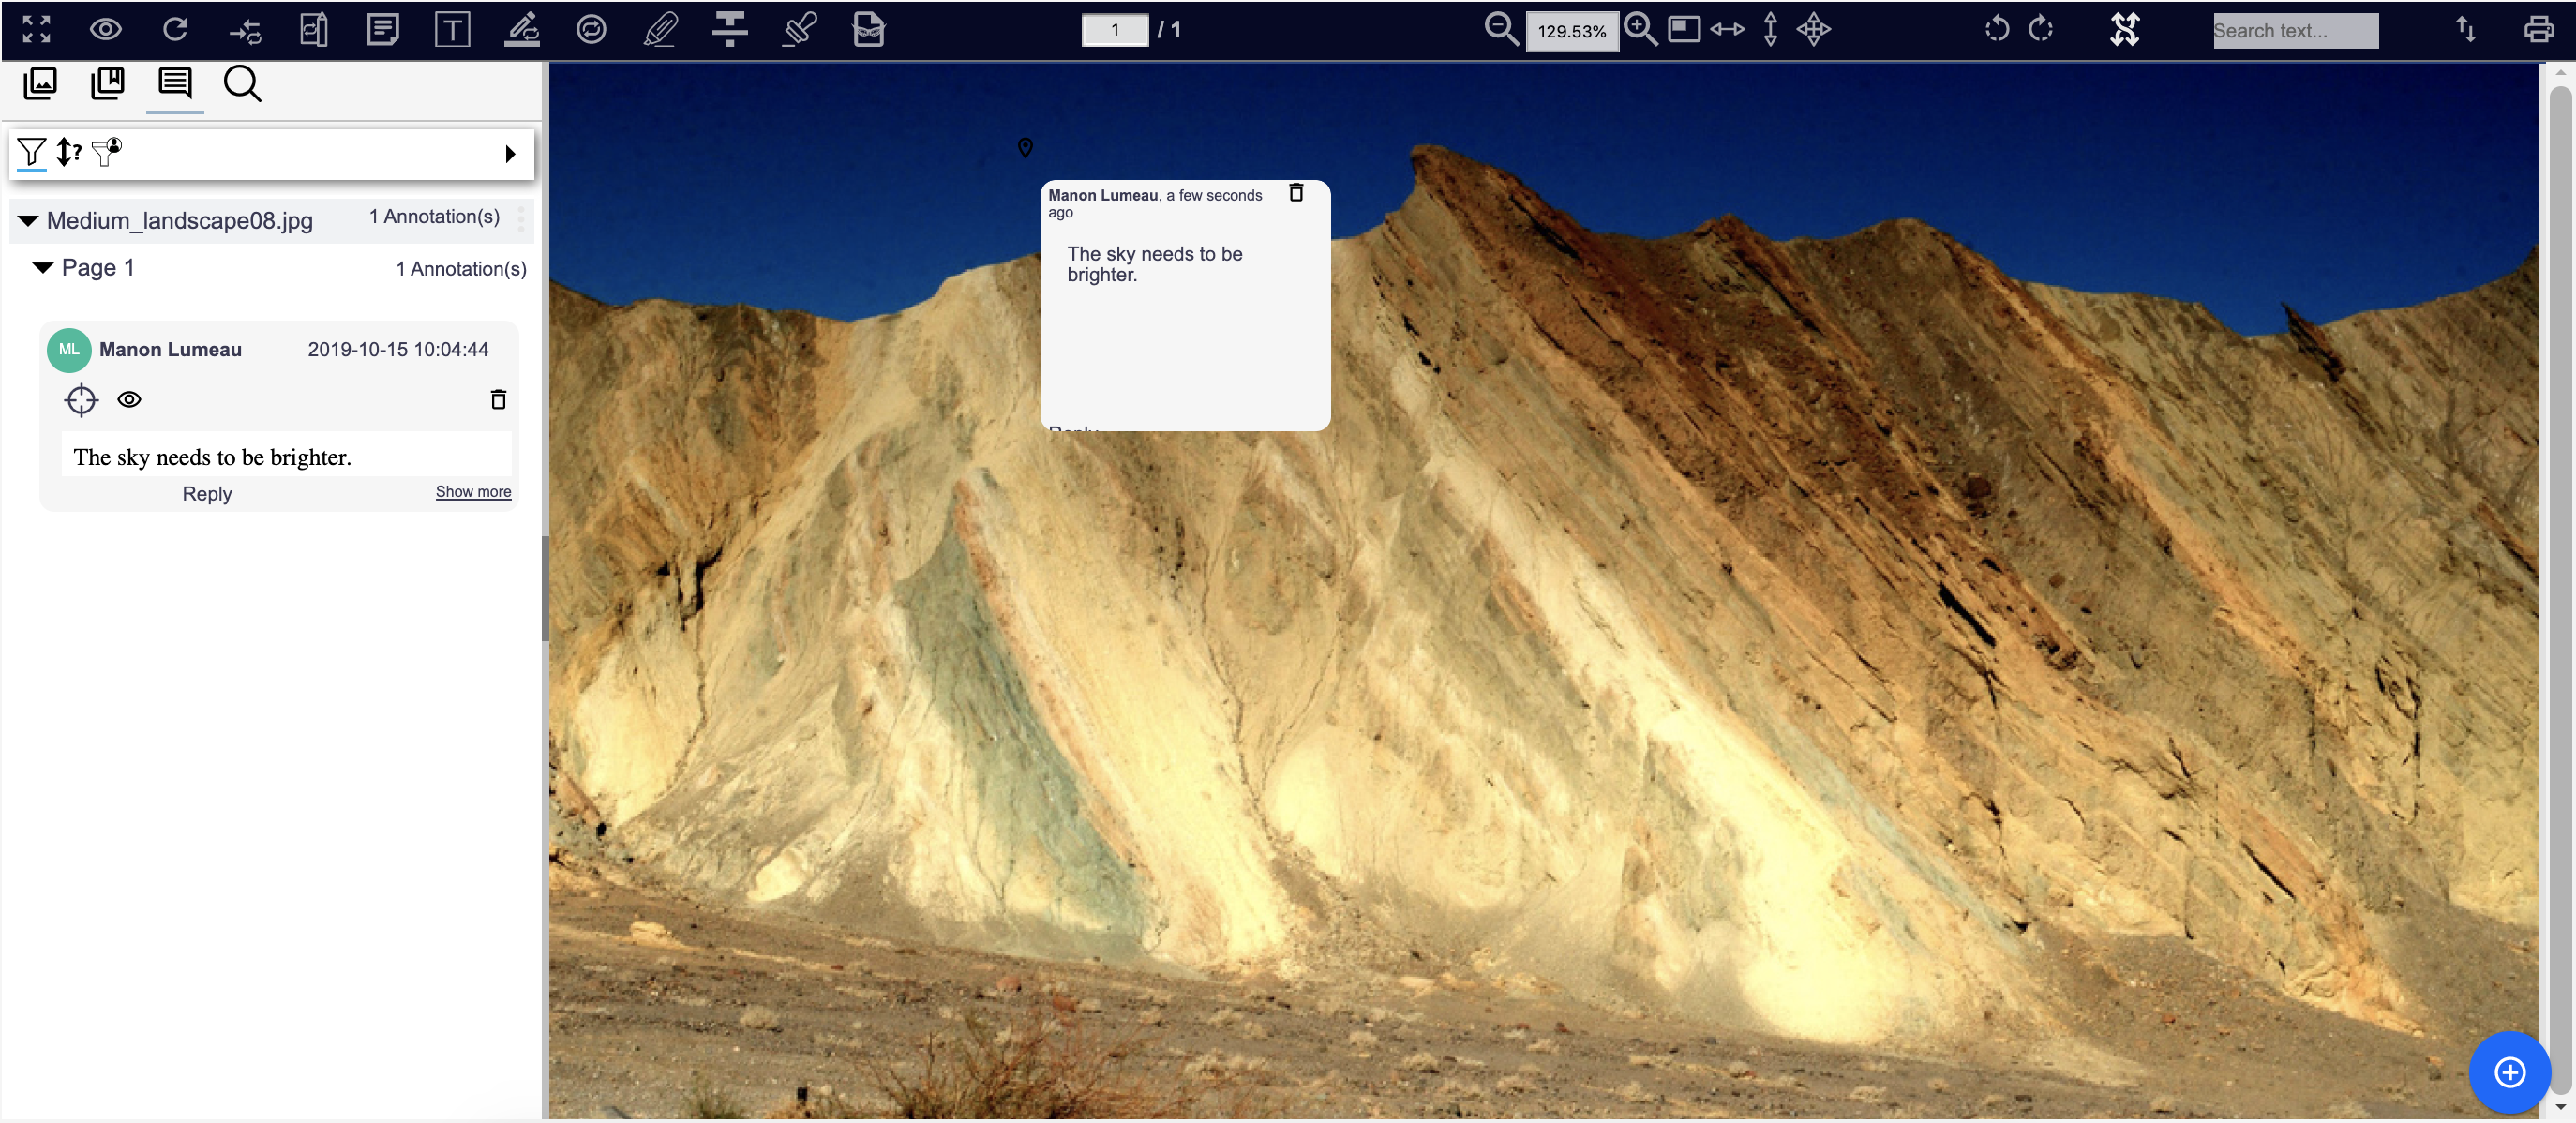
Once the Nuxeo Enhanced Viewer is properly installed and configured a new Annotations tab is available on each document with the picture or video facet:

Annotations
You can access the different types of annotations available by default directly from the top bar:

|
Add an arrow. Repeat mode available. |

|
Draw different shapes with the Freehand. Repeat mode available. |

|
Add a sticky note. |

|
Add a text box. |

|
Add a highlighted rectangle. Once your rectangle is created you can modify the color and opacity of the highlight. Repeat mode available. |

|
Add a circle. Repeat mode available. |

|
Highlight text. Once your text is selected you can modify the color and opacity of the highlight. |

|
Add strikethrough text. |

|
Annotate over text, hiding its contents. This annotation is only available on text documents. |
Repeat mode: Once the annotation is selected, 2 blue arrows are displayed
![]() meaning that you can add several annotations in a row. To disable the repeat mode, click on the annotation icon again.
meaning that you can add several annotations in a row. To disable the repeat mode, click on the annotation icon again.
Other buttons are available on the top bar to optimize the visualization of the document: zoom, rotation, full screen, pagination, height and width adjustment, etc.
To add an annotation:
- On the top bar, click on an annotation type, like the sticky note.
An empty box is displayed on your document.
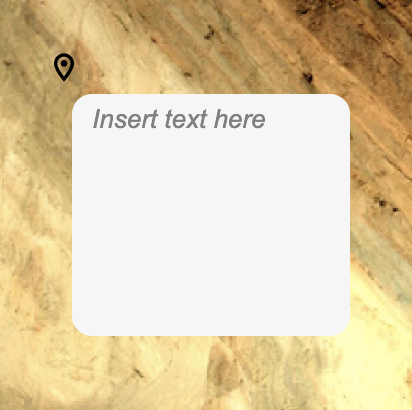
- Write your annotation and press Enter
Your annotation is directly displayed, the autosave is enabled by default.
To access annotations:
Three views are available on the left panel:
-
 : Document page thumbnails, opened by default
 -
 : Annotations Browser
 -
 : Advanced Search
From the annotations browser, you can see the list of all the annotations made on the document you are viewing, grouped by document pages.
From this view, you can delete annotations by clicking on the delete icon ![]() next to it.
next to it.
Still from the annotations browser view, 2 icons are available on each annotation:
-
 : This action will localize the annotation, for example, if you have a PDF of several pages, it will directly lead you to the annotation but won't hide the other annotations.
 -
 : This action will only display the annotation concerned and hide the others.
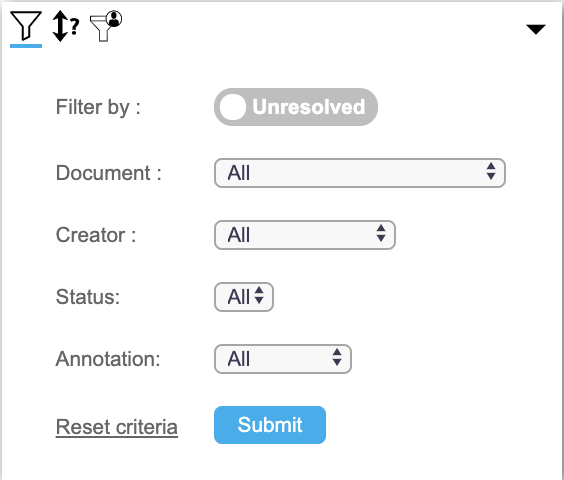
Different filters are available, you can search for and filter any annotation by metadata (status, document, annotation type, etc.), and also filter annotation by the current user, that means that only the annotations that the current user created will be displayed on the left panel.
You can also manage annotations by:
- Adding a comment
- Replying to a comment
- Deleting a comment
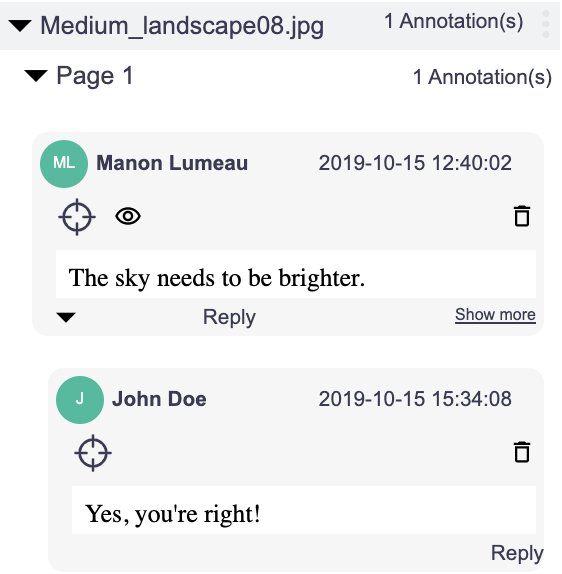
Once added, these comments are available from the view tab of your document.
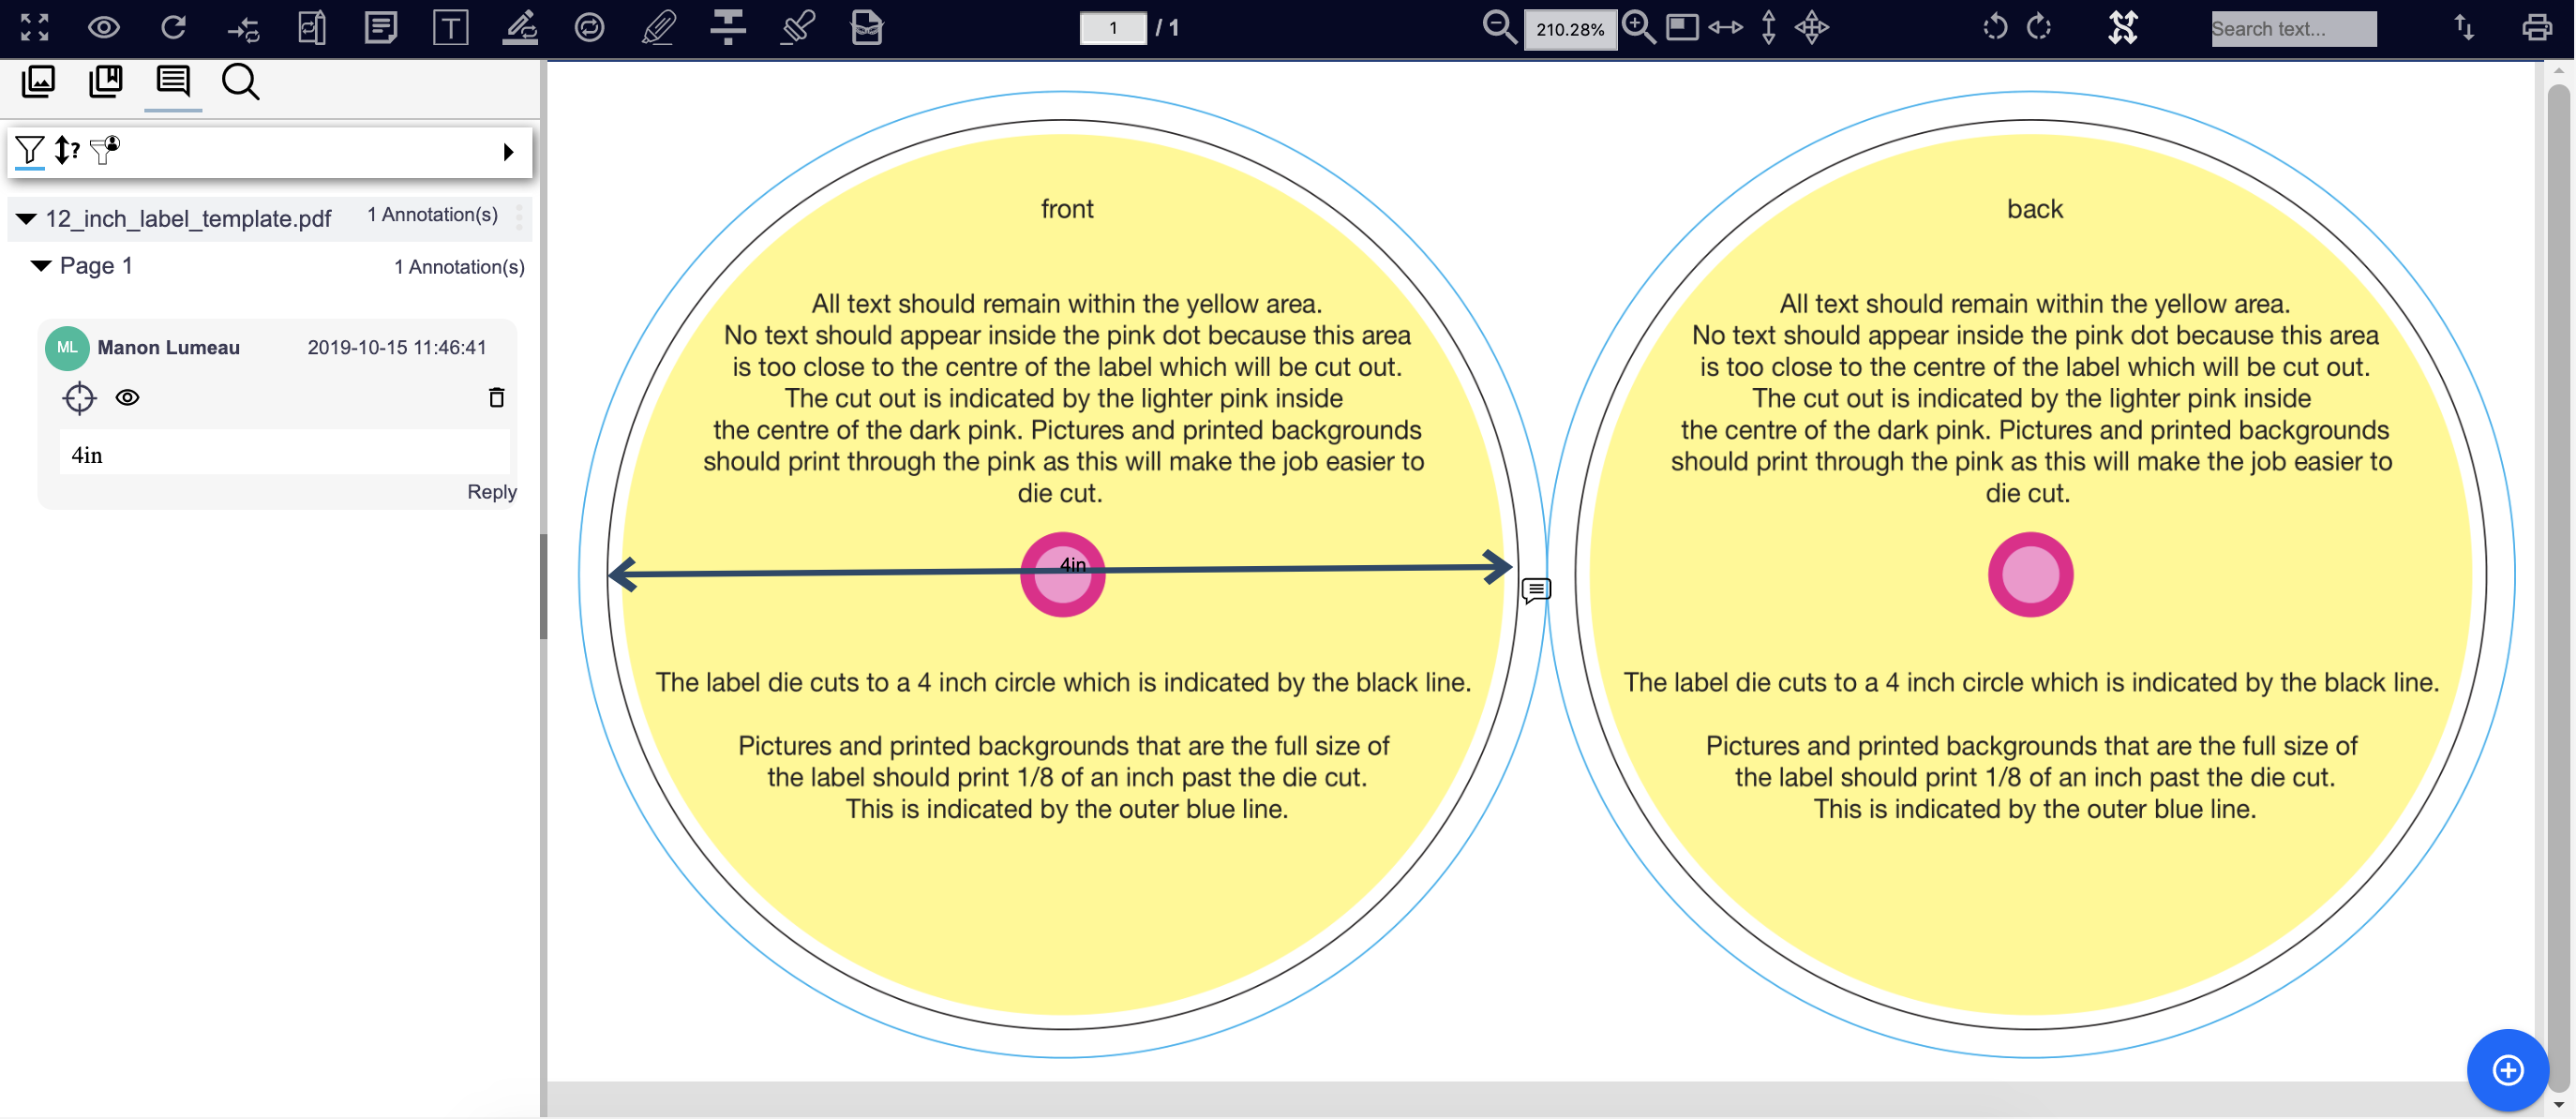
Arrow
- To create an arrow, click on the Add arrow button
then click and drag to draw an arrow.
Once your arrow is drawn, you can customize its direction, color, opacity, style, etc.

Arrows can also be used to take measurements on a document. To do so, once an arrow is drawn, click on Show measurement on the customization top bar and the measurement will be displayed in your preferred unit (inches, centimeters or pixels).
Watermark
To watermark a document, two solutions are available: Add a watermark to each page before printing, as explained in the section below or use a stamp annotation.
To add a stamp annotation, click on the stamp button
![]() .
A popup window is displayed:
.
A popup window is displayed:
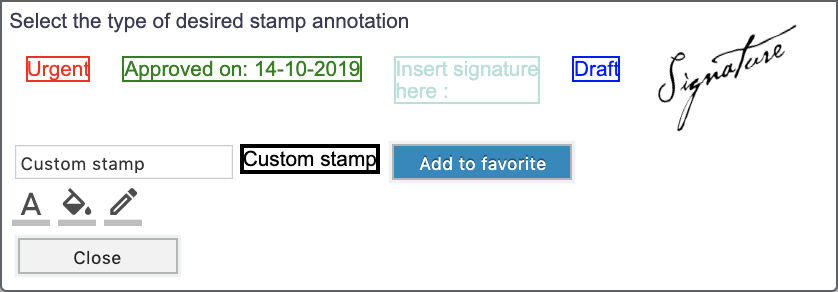
Different options are available: "Urgent", approved on the current date, "Insert signature here:", "draft", or a signature.
Download
Hover over the download icon
![]() to display the file menu with several available actions:
to display the file menu with several available actions:
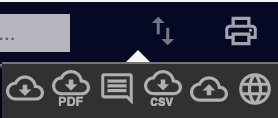
- Download current file
- Download current file as PDF
- Download current file with annotations
- Download CSV annotations
- Open a local file
- Open an URL
Click on the Print button
 at the top right of the screen.
A popup window appears with several print options:
- Print the current document
- Print all documents
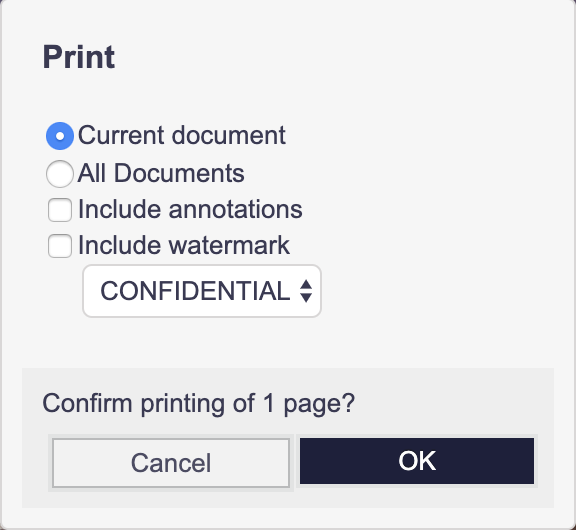
You can select “Include annotations” to print all annotations on a document, or select "Include watermark" to display the selected watermark on all pages of the document.
Once your choice is made, click on “Ok” button, and the page(s) will be printed.
Document Comparison
With the Nuxeo Enhanced Viewer, you can compare the text of two different versions of a file. By default, the addon compares the binary stored in the file:content property corresponding to the main file. You can access this feature from the Compare Versions Screen by clicking on the eye icon.
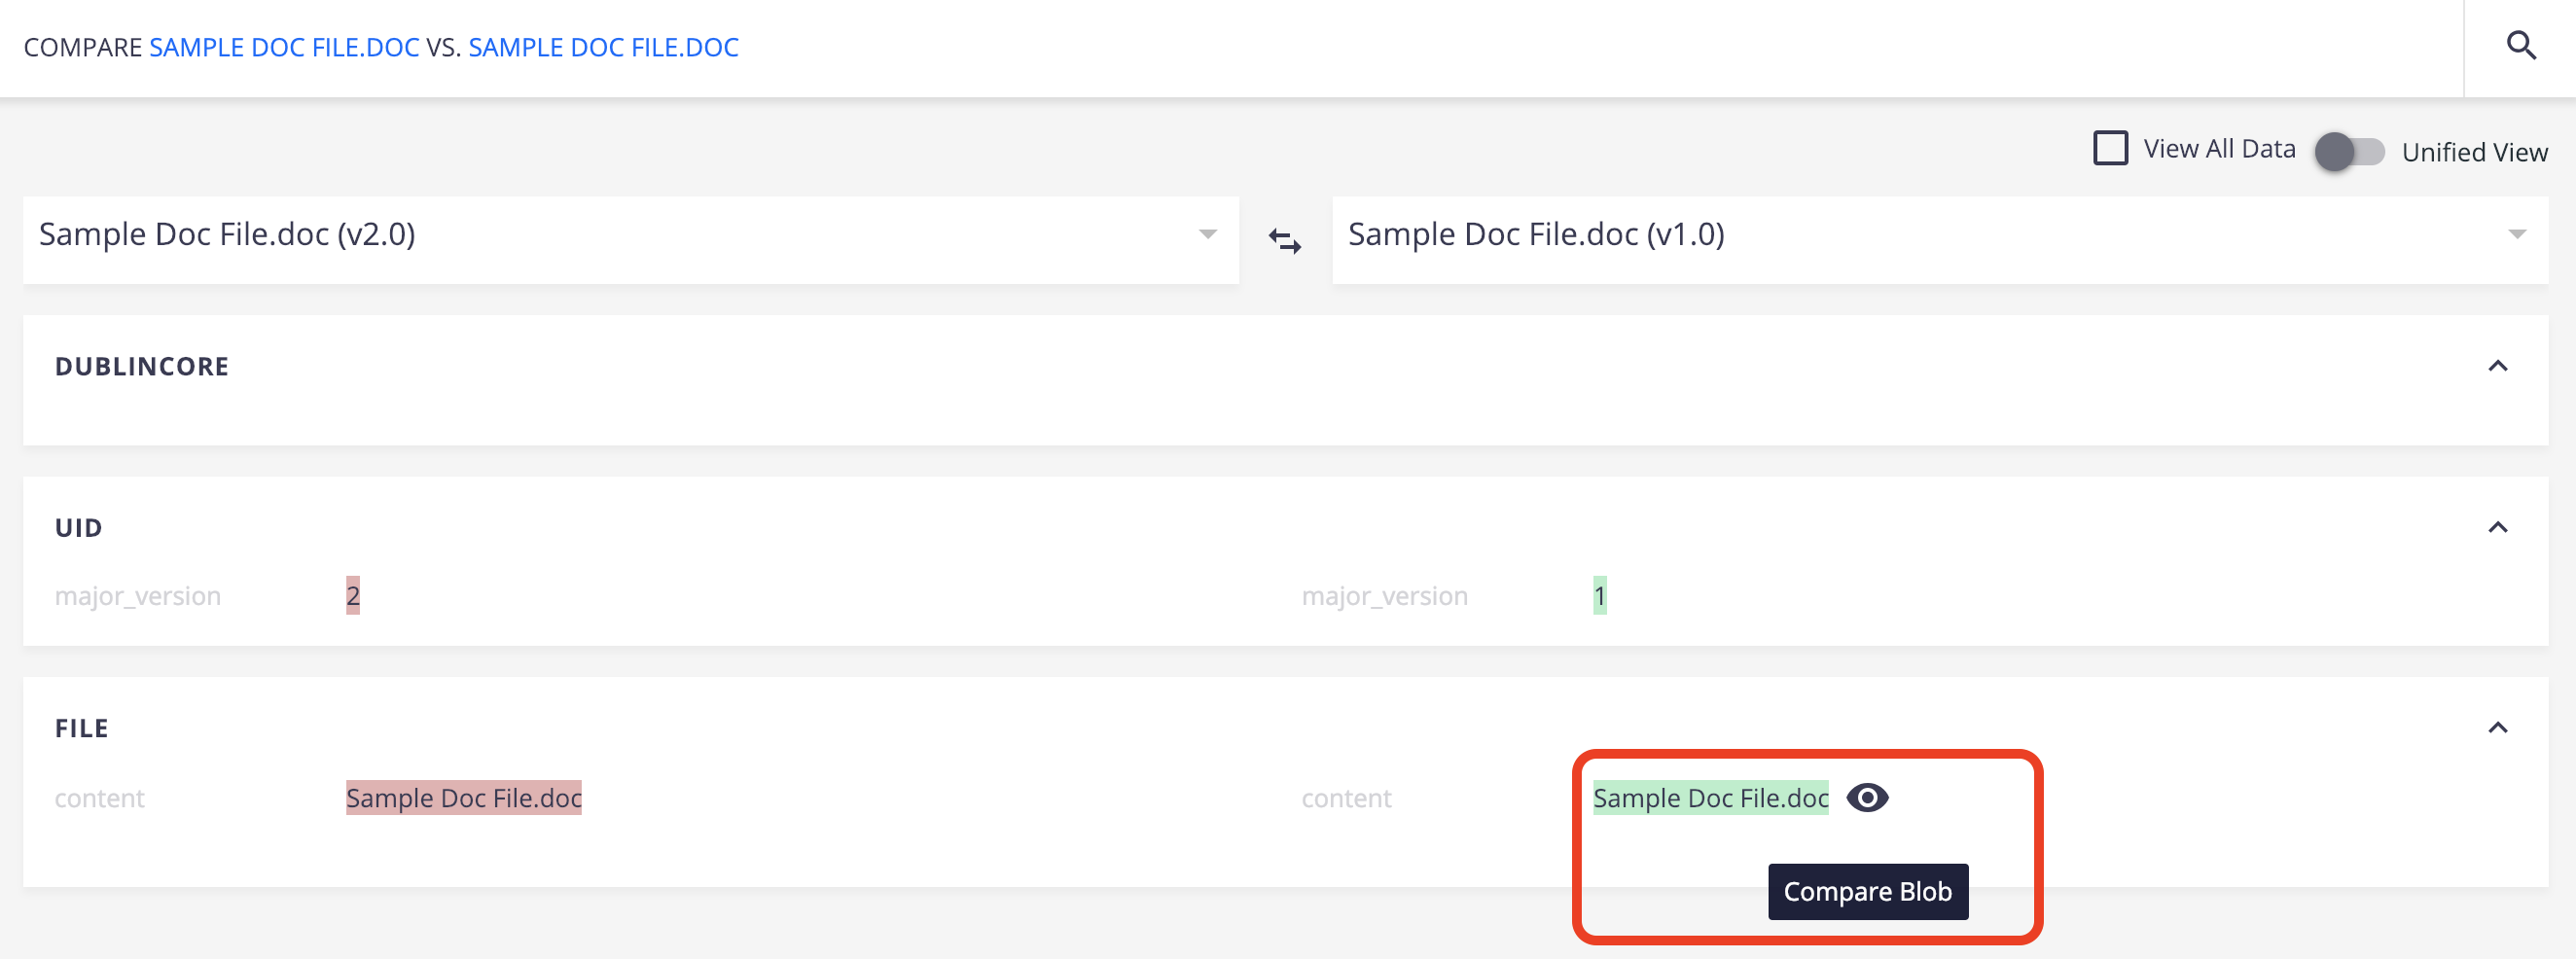
A new window is opened with the two documents side-by-side, highlighting text which has been deleted, modified or added.

You can see the annotations linked to each version on the same screen, and even annotate one file from this view.
Installation / Configuration
We assume you have a working Nuxeo on which you have installed the Nuxeo Enhanced Viewer Connector package.
Nuxeo Configuration
The package requires you to define several properties in your nuxeo.conf.
Before 10.3
The Nuxeo Enhanced Viewer relies on a JWT token to request an OAuth 2.0 token for authentication (See OAuth 2.0 documentation page for more information). Thus, you need to define a JWT secret in your nuxeo.conf, which will be used to generate a JWT token.
You also need to configure an OAuth 2.0 shared secret, between the two applications, with the property nuxeo.arender.secret in your nuxeo.conf.
In the end, you should have the following properties in your nuxeo.conf:
arender.server.previewer.host=https://arender-previewer-url
nuxeo.jwt.secret=JWT_SECRET
nuxeo.arender.secret=OAUTH2_SECRET
Since 10.3
The Nuxeo Enhanced Viewer relies on a complete OAuth 2.0 challenge for authentication (See OAuth 2.0 documentation page for more information). Thus, you need to define an OAuth 2.0 client, with a shared secret and a redirect URI, under the nuxeo.arender.oauth2.client. prefix.
In the end, you should have the following properties in your nuxeo.conf:
arender.server.previewer.host=https://arender-previewer-url
nuxeo.arender.oauth2.client.create=true
nuxeo.arender.oauth2.client.id=arender
nuxeo.arender.oauth2.client.secret=OAUTH2_SECRET
nuxeo.arender.oauth2.client.redirectURI=/login/oauth2/code/nuxeo
nuxeo.domain.org and nev.domain.org.
ARender Configuration
Nuxeo Enhanced Viewer involves installing the ARender services. You can install the ARender services using Kubernetes and Helm 3 by following the ARender Documentation.
Common
After getting the ARender Helm Chart, you need to customize some parts in order to deploy the Nuxeo connector and add configuration. You can find below an example of values.yaml:
web-ui:
  image:
    repository: docker-arender.packages.nuxeo.com/nuxeo/arender-previewer
    tag: [NEV_VERSION]
  environment:
    # required values
    ARENDERSRV_NUXEO_SERVER_URL: http://nuxeo-host:8080
    ARENDERSRV_NUXEO_SERVER_ARENDER_SECRET: OAUTH2_SECRET # Same than the one in nuxeo.conf
    # optional values with their defaults
    ARENDERSRV_NUXEO_CLIENT_TIMEOUT: 30
    ARENDERSRV_NUXEO_SERVER_CONTEXT_PATH: /nuxeo
rendition:
  broker:
    image:
      repository: docker-arender.packages.nuxeo.com/arender-document-service-broker
      tag: [ARENDER_VERSION]
  converter:
    image:
      repository: docker-arender.packages.nuxeo.com/arender-document-converter
      tag: [ARENDER_VERSION]
    environment:
      TKC_TOOLS_IMAGEMAGICK_OPTIONS: "-quality,100,-density,72x72,-units,PixelsPerInch,-auto-orient,+repage"
      TKC_IMAGE_CONVERSION_TIMEOUT: "120"
  dfs:
    image:
      repository: docker-arender.packages.nuxeo.com/arender-document-file-storage
      tag: [ARENDER_VERSION]
  renderer:
    image:
      repository: docker-arender.packages.nuxeo.com/arender-document-renderer
      tag: [ARENDER_VERSION]
  handler:
    image:
      repository: docker-arender.packages.nuxeo.com/arender-document-text-handler
      tag: [ARENDER_VERSION]
ARENDERSRV_NUXEO_SERVER_URL was named ARENDERSRV_NUXEO_URL
ARENDERSRV_NUXEO_SERVER_ARENDER_SECRET was named ARENDERSRV_NUXEO_ARENDER_SECRET
You can find a release matrix in the repository's wiki.
Ingress
The Helm Chart doesn't deploy an Ingress by default, you can enable it and customize it regarding your setup with the following values:
web-ui:
  ingress:
    enabled: true
    annotations: {}
      # kubernetes.io/ingress.class: nginx
      # kubernetes.io/tls-acme: "true"
    hosts:
      - host: chart-example.local
        paths: []
   tls: []
    #  - secretName: chart-example-tls
    #    hosts:
    #      - chart-example.local
High-Availability
You can configure the ARender stack to make it highly available, for that, a couple of settings needs to be added and a database backend is required in order to store OAuth 2.0 tokens and HTTP sessions.
Currently, the only available backend is MongoDB, the HTTP sessions and OAuth 2.0 access and refresh tokens are stored in the sessions and oauth2Authorized collections.
See below the possible values to configure HA:
web-ui:
  replicaCount: 2
  autoscale:
    enabled: true
    cpuLimit: 80
    maxReplicas: 4
  environment:
    # required values
    ARENDERSRV_NUXEO_OAUTH2_STORAGE_BACKEND: mongodb
    ARENDERSRV_NUXEO_OAUTH2_STORAGE_MONGODB_SERVER: mongodb://mongodb-host:27017
    # optional values
    ARENDERSRV_NUXEO_OAUTH2_STORAGE_MONGODB_DBNAME: arender
    ARENDERSRV_NUXEO_OAUTH2_STORAGE_MONGODB_SSL: false
rendition:
  broker:
    replicaCount: 2
    autoscale:
      enabled: true
      cpuLimit: 80
      maxReplicas: 4
  converter:
    replicaCount: 2
    autoscale:
      enabled: true
      cpuLimit: 80
      maxReplicas: 4
  renderer:
    replicaCount: 2
    autoscale:
      enabled: true
      cpuLimit: 80
      maxReplicas: 4
  handler:
    replicaCount: 2
    autoscale:
      enabled: true
      cpuLimit: 80
      maxReplicas: 4
The MongoDB server setting supports the connection string.
Customization
ARender Previewer Customization
You can customize the ARender Previewer interface to fit specific UI and UX needs.
Examples of possible configurations:
- Add or remove buttons from the ARender interface,
- Modify ARender behaviors on specific user actions (like entering a comment when the user clicks on "Enter"),
- Reference a new theme (by creating your custom CSS file),
- etc.

The UI customization is done through two files to be put in the /docker-entrypoint-init.d directory inside the Previewer container.
arender.cssto customize the stylearender.propertiesto customize the behavior
Please follow the ARender configuration guide for more information about available properties and style.
. by _, and prefix it with ARENDER_.
For instance, topPanel.widgets.beanNames will become ARENDER_TOPPANEL_WIDGETS_BEANNAMES.
Supported File Formats
The annotations module supports a large number of file formats.
- PDF - all versions, XFA not supported
- Images: JPEG, PNG, TIFF, GIF, BMP, JNG, PBM, PSD, EPS, PS, DCM (Format DICOM) and all formats supported by ImageMagick
- Microsoft Office (97-2013): Word (.doc, .docx) , PowerPoint (.ppt, .pptx), Excel (.xls, .xlsx), WordML (.xml), Visio (.vsd)
- Composite files: ZIP, EML, MSG
- Others: TXT, OpenDocument (LibreOffice or OpenOffice)
Roadmap
The Nuxeo Enhanced Viewer is constantly improved. You can monitor its roadmap below. You can also submit your feedback on the Nuxeo Server feedback portal.
Going Further
The connector can be customized in many different ways, such as adding new watermark stamps, displaying different actions/tools etc.