In this tutorial you will learn how the rich text editor in Nuxeo Web UI and the associated elements can be leveraged to use Nuxeo as a content repository for articles.
Use Case Introduction
As a company doing heavy content publishing, you can have various websites to handle: in different languages, each with its own distinct layout and way to handle the content.
In such situations, you can use Nuxeo to centralize all your content in a single place. Make use of the content services like renditions to retrieve your content in various formats and sizes, or workflows to manage your content publishing process. Nuxeo will not replace your existing CMS. Rather, it integrates with it to make your content CMS agnostic and will be used by your content authors to write articles in Web UI using the rich text editor it provides.
In this page we will give you an overview of how you can use the rich text editor and configure it to fit your needs. You will also find some ideas to configure or extend it further.
Using the Rich Text Editor
To test the default behavior of the rich text editor:
- In a Workspace or a Folder, create one or several Picture documents.
- In a Workspace or a Folder, create a new Note document and keep the
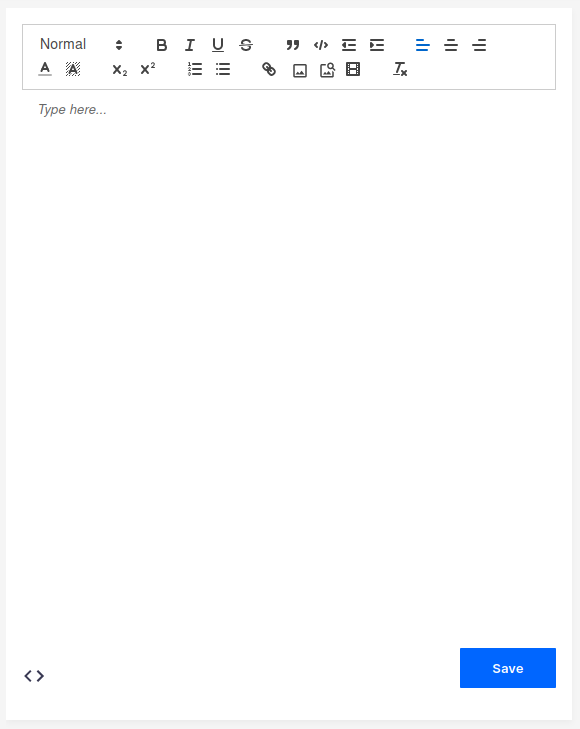
HTMLformat. - Type your content and save it directly while being in the document view. Use the rich text editor toolbar to leverage the various options.
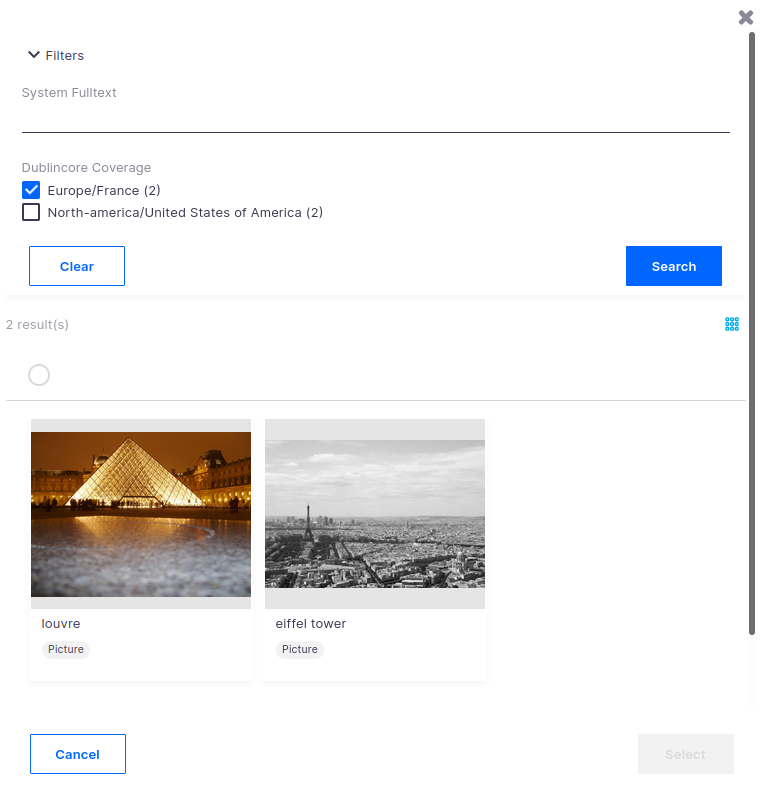
To reference one or several pictures stored in Nuxeo:
- Click on the insert images from existing documents
 toolbar icon.
 - Search for your content using the quick filter (fulltext search) option, select as many images as you want and press the Select button.
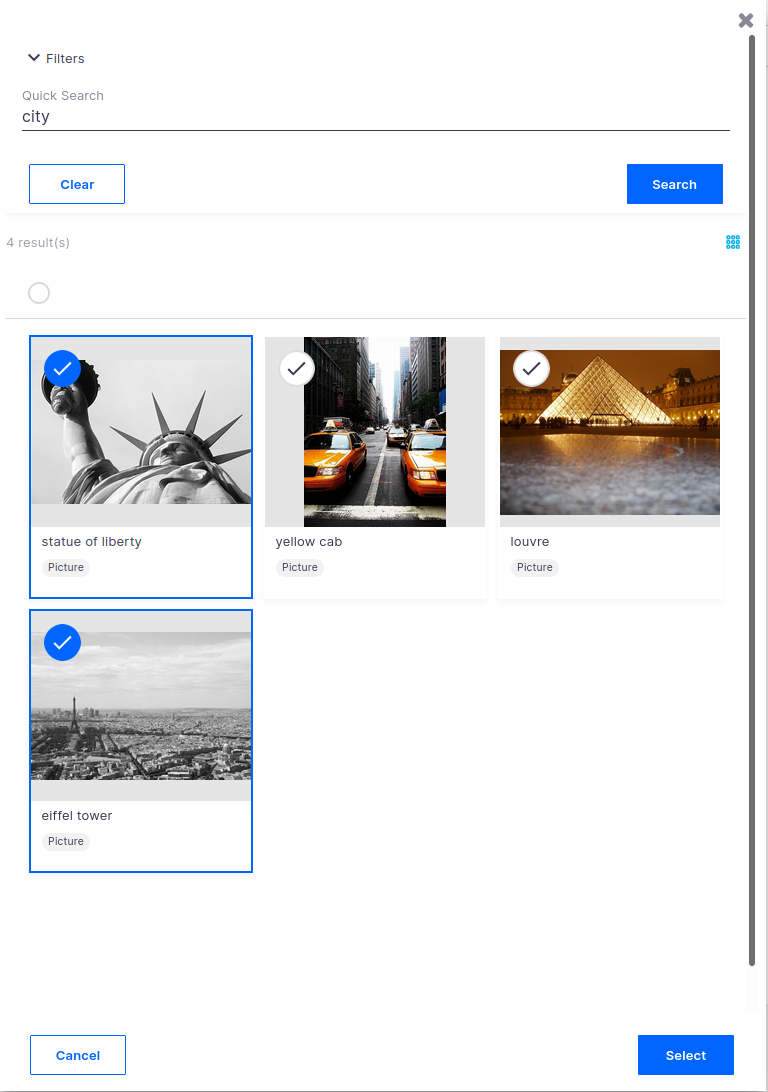
The search form, the query used to filter pictures and the results presentation are all configurable using Nuxeo Studio.
Accessing the Content of the Rich Text Editor
As usual with Nuxeo, anything in the UI can be accessed through an external system by using the REST API.
When retrieving a Note document, the content will be referenced in the corresponding document property, e.g.:
[...]
"properties": {
"note:note": "Some text and now an image <img src=\"https://nuxeo-server-url.nuxeo.com/nuxeo/nxfile/default/793dc397-2ecc-46ee-8840-92d1d88faed6/file:content/Beach.jpg\">"
[...]
Any image you referenced is stored in a way that lets you parse the content and adapt it to your needs. Your own tool can easily adapt that URL to call further Nuxeo services, for example to request a particular rendition.
Configuring the Query
By default, inserting images in the rich text editor will reference the current content stored in any document having the Picture facet. This is achieved by calling the document_picker page provider, which you may want to change to retrieve specific document types, documents in a specific state (e.g. only return approved images). You may even want users to pick only the latest version available for greater control.
Here's a quick example to retrieve only the latest version of an image.
- In Studio Modeler, go to External Templates; import the Rich Text Editor Default Configuration template.
- Go to Configuration > Page Providers; select the
document_pickerpage provider. - Replace the query filter with the following:
ecm:mixinType != 'HiddenInNavigation' AND ecm:mixinType = 'Picture' AND ecm:isTrashed = 0 AND file:content IS NOT NULL AND ecm:isVersion = 1 AND ecm:isLatestVersion = 1
Save and deploy your configuration to see the result. Make sure you have created a version for your pictures to see them appear in the list.
Configuring the Search Form or the Results Presentation
Two options are available to configure the image picker:
- Configuring the search form: to provide additional/different search criteria for the images to reference.
- Configuring the results form: to replace/provide alternate views to the default grid results display.
Let's add an additional search criteria to find images related to a particular area.
- In Studio Modeler, go to Configuration > Page Providers; select the
document_pickerpage provider. - Add a new
aggregate. Choose the terms aggregate type, and map it to the dublincore > coverage field.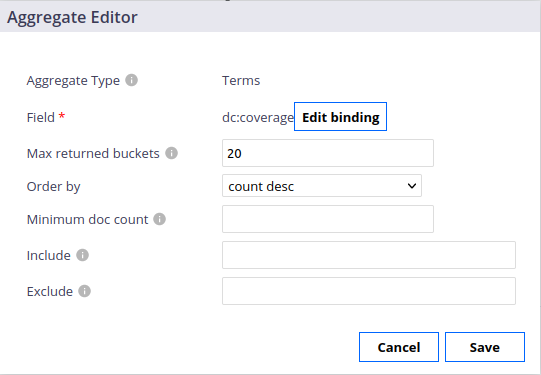
- Save your configuration.
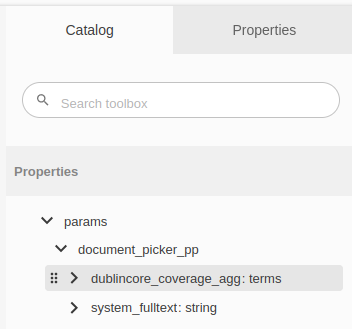
- Click on the Configure Layouts in Designer button in the top right corner of the screen. You will be taken to the layout configuration for the document_picker page provider in Studio Designer.
Now we will configure the layout to take advantage of it.
- Click on the Form option to configure its search form.
- Drag and drop the dublincore coverage aggregate to the form, leave it in edit mode and confirm using the generate button.
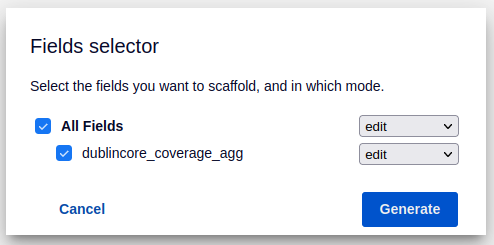
Save and deploy your configuration to see the result. This time you should edit your picture to add a coverage to it, then create a version to see it appear in the list when picking it from the rich text editor.
To configure the search results listing, configure the Results option in Nuxeo Studio Designer for your document_picker page provider instead.
Going Further
The following examples will be covered from a high level perspective only.
Using Multiple Rich Text Editors
Let's assume you want to add a field to put a summary of your article. Or that you want to separate the introduction, the main content of the article and the conclusion to adapt your content more easily to a wider variety of website layouts.
In this kind of situation, it is possible to use multiple rich text editors and to map them to different properties of your documents. Here's a summary of how you could proceed.
- Create a custom document type.
- Add a custom schema to it, and add your new fields using the
Stringtype. - In Nuxeo Studio Designer, configure the edit layout for your document type.
- Drag and drop a
nuxeo-html-editorelement and bind it to the corresponding field. Repeat that operation for every additional field you created.
Tracking Relations Between Documents
When referencing pictures in the rich text editor, Nuxeo won't keep track of which images were used for which article. To make overall maintenance and tracking easier, you may want to implement a relation system.
Here's a summary of how you could proceed. Note that implementing this feature requires coding knowledge.
- Add an event handler that will be triggered on the following events for your custom document type: About to create, Before document modification.
- Associate an automation script or a custom operation to it.
It should roughly follow this logic (many variations are possible):
- Parse the content of the properties where you reference images.
- Detect referenced images and extract the document id.
- Store these document ids in the current document (relations from the article to the images).
- Store the id of the current document in each referenced image (relations from the images to the article).
From there, all you need is to display the information in your document layout: using a document suggestion widget will map the document id to its title and provide a link to it.
Of course, additional logic may be necessary depending on how you implemented your logic for the image picker in the first place. You may also want to plug logic to some additional events so that references in the images are deleted if you delete the article for example.