As a Record Manager
As a record manager, you are responsible for the proper organization and management of the documents on the platform. You have to make sure that the retention rules are properly written, implemented and used.
Once the module is installed, different menus, sub-menus and actions are available throughout Nuxeo.
Retention Menu
A new retention menu
![]() is available on the left side menu, including the following sub-menus:
is available on the left side menu, including the following sub-menus:
A retention search that lets you search through all the documents under retention and/or legal hold.
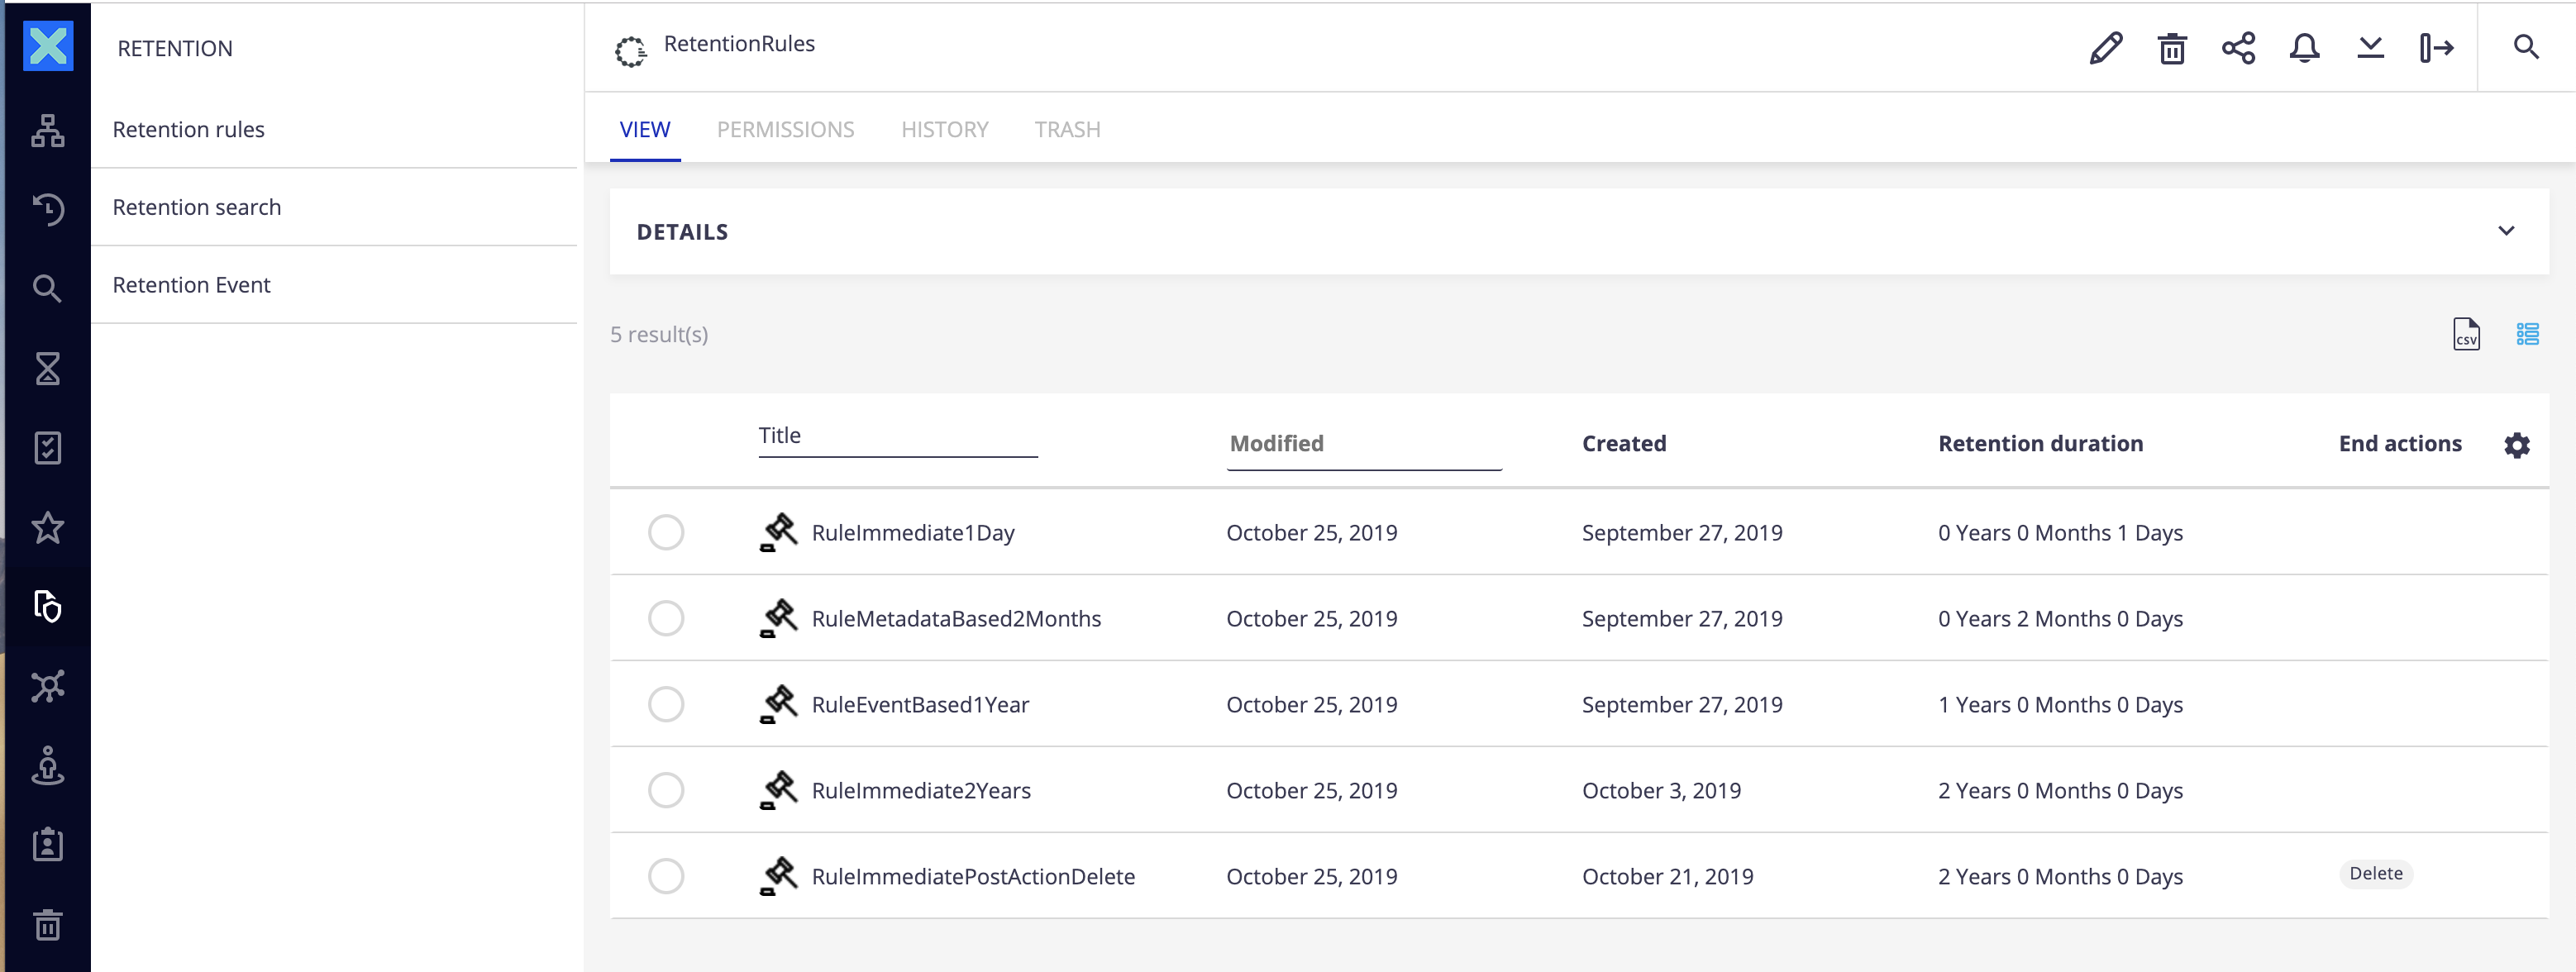
A retention rules menu that displays the list of retention rules defined on your instance.
A retention events menu that lets you create a retention event.
Retention Actions
New actions are displayed on documents and result list:
 apply a retention rule to the document.
 apply/remove a legal hold to the document.
 override the retention of a document already under retention.
Retention Rule Document Type
A retention rule document type is available, it can only be created under the retention rules menu.

Permissions
Regarding access rights, this addon includes:
- A
RecordManagergroup. - A new
Manage Recordpermission that allows users to create/edit retention rules, apply a retention rule to a document or a list of documents and override the retention of a document already under retention. - A new
Manage legal holdpermission that allows granted users to apply/remove a legal hold to a document or a list of documents.
Create a Retention Rule
To create a new retention rule:
- Go to the Retention menu.
- Click on Retention rules.
- Click on the Create button
 .
.
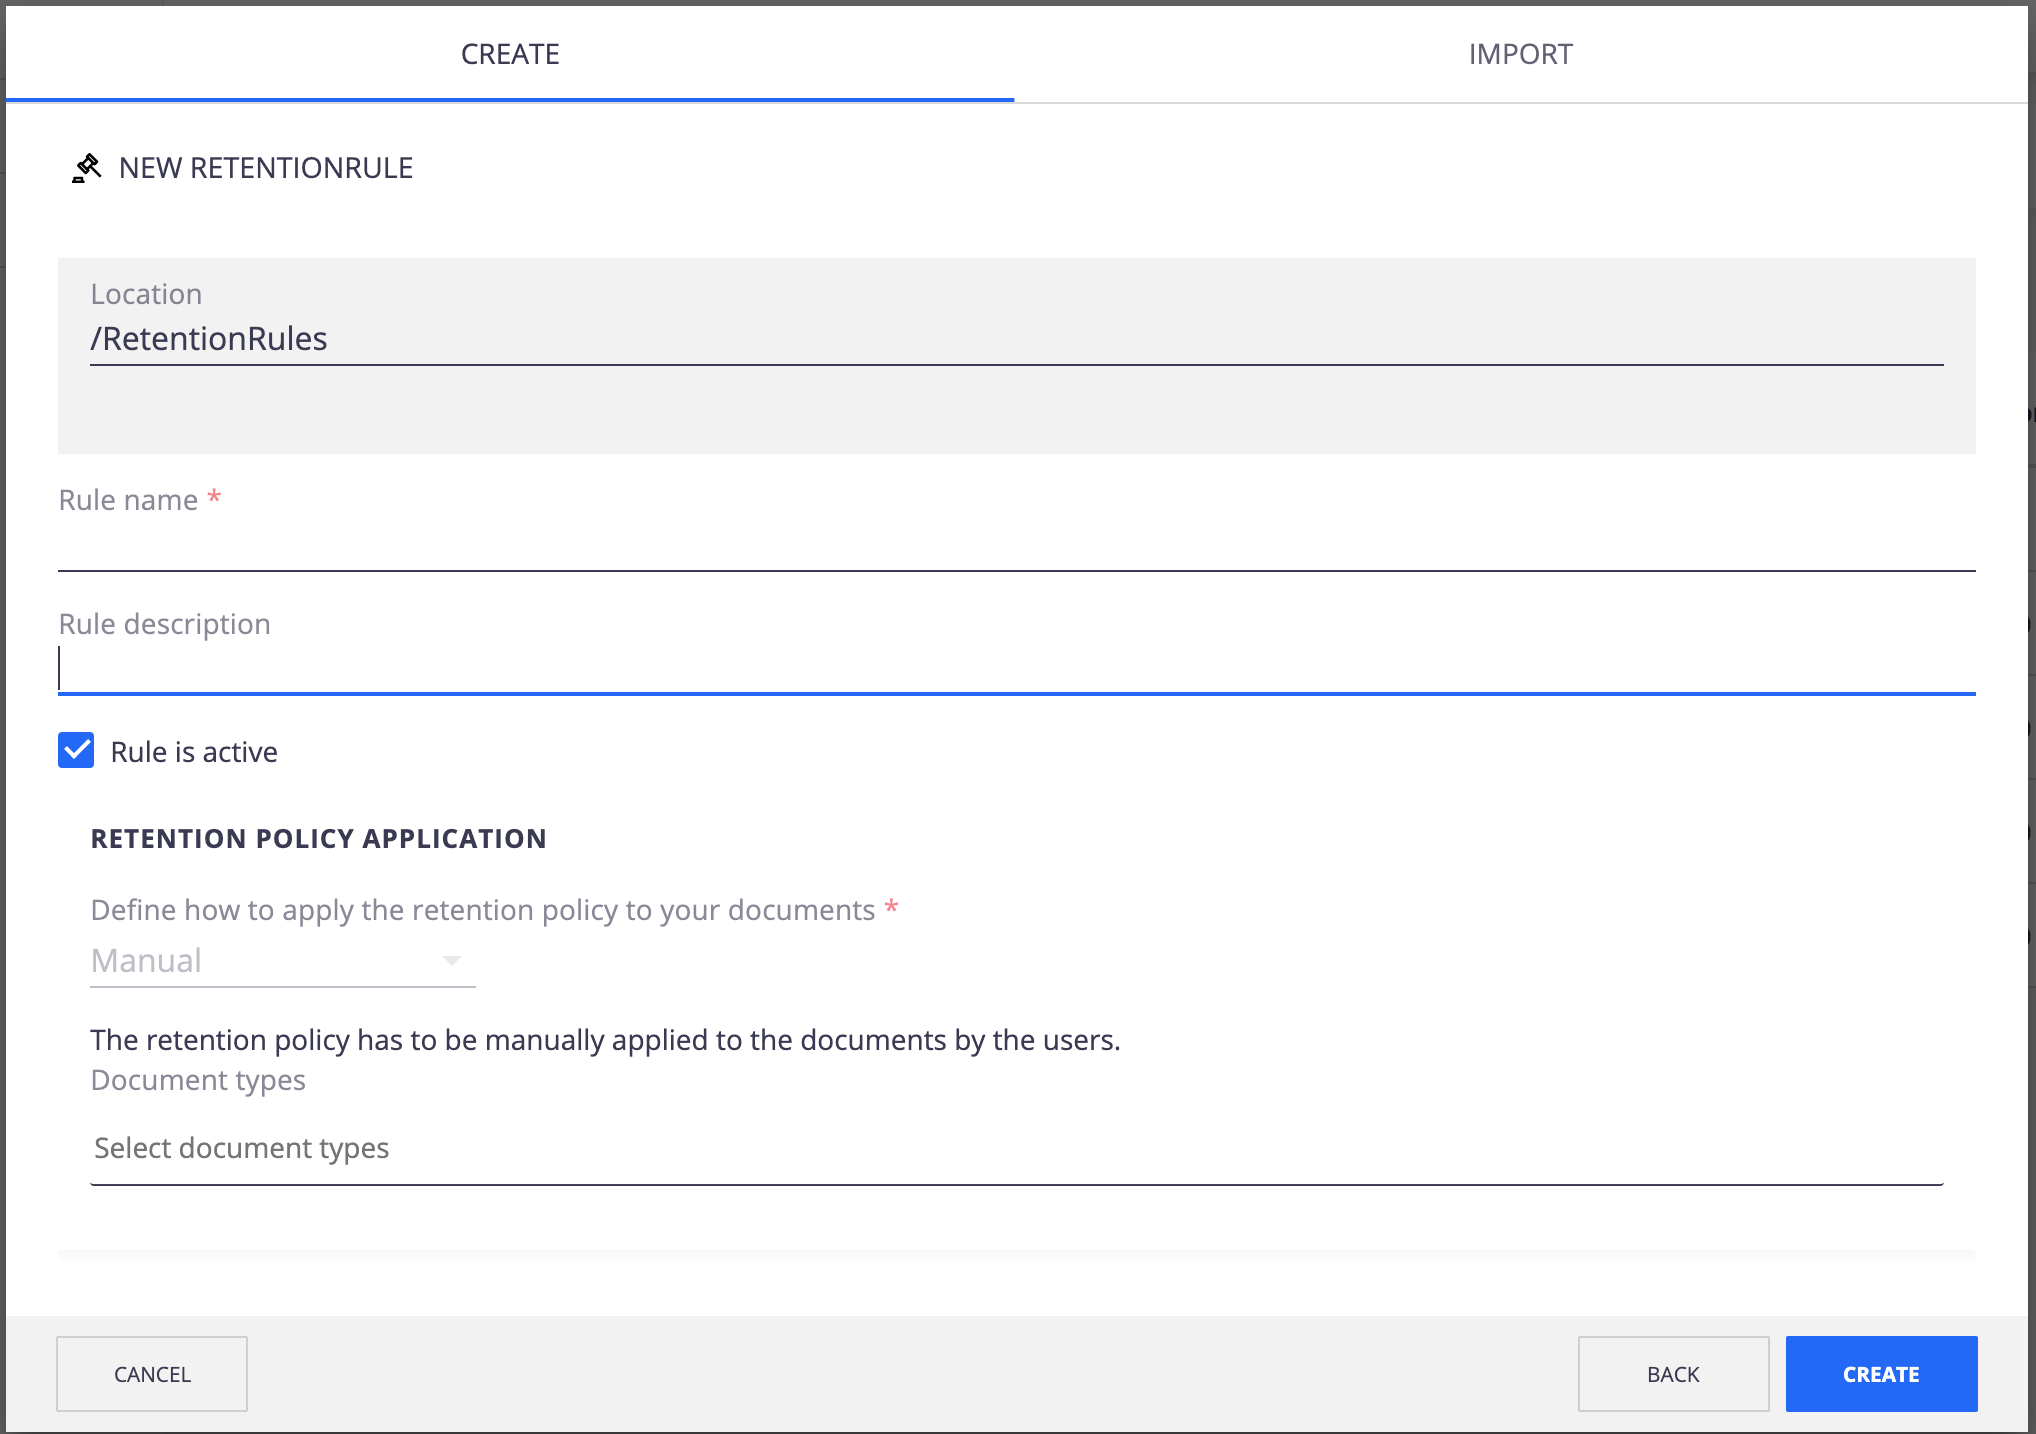
The following creation popup is displayed.

| General Information | |
|---|---|
| Rule name | Name of the rule displayed in the retention rules menu and when selecting a retention rule to apply to a document. |
| Description | Description of the retention rule. |
| Status | Select if the rule can be applied to the documents ("active") or not ("inactive"). |
| Rule Application | |
| Document types | Filter for which document types the retention rule is applicable. If left empty, the retention rule will be available for all document types. |
| Period Starting Point | |
| Immediate | The retention period will start once you apply the retention rule to the document. More details on the Focus on the retention types section. |
| Based on an event | The retention period will start once the defined event occurs (after the retention rule has been applied to the document). More details on the Focus on the retention types section. |
| Event type | Select the type of event that will trigger the retention period. The list of available event types is defined using a dedicated vocabulary. |
| Event field value | Fill in the value related to the event (contract number, employee identifier, loan reference, etc.) Example: If I apply a retention rule to a document on January 1st, 2020 with the event "contract terminated", a retention period of 2 years, and the contract is closed on August 10th, 2020, then the retention will expire on August 10th, 2022. |
| Based on a metadata | The retention period will start based on a defined metadata, once you apply the retention rule to the document. More details on the Focus on the retention types section. |
| Metadata | The path of the metadata to use. All date metadata from all schemas are available (default and local ones). |
| Retention Duration | |
| Duration | You can select the duration of the retention in years, months or days. The fields are aggregated to define the total retention duration. |
| Post Retention Actions | |
| Actions | You can select one or several actions to be automatically executed once the retention expires. Examples: delete the document, notify specific users, export, etc. |
Focus on the Retention Types
Immediate
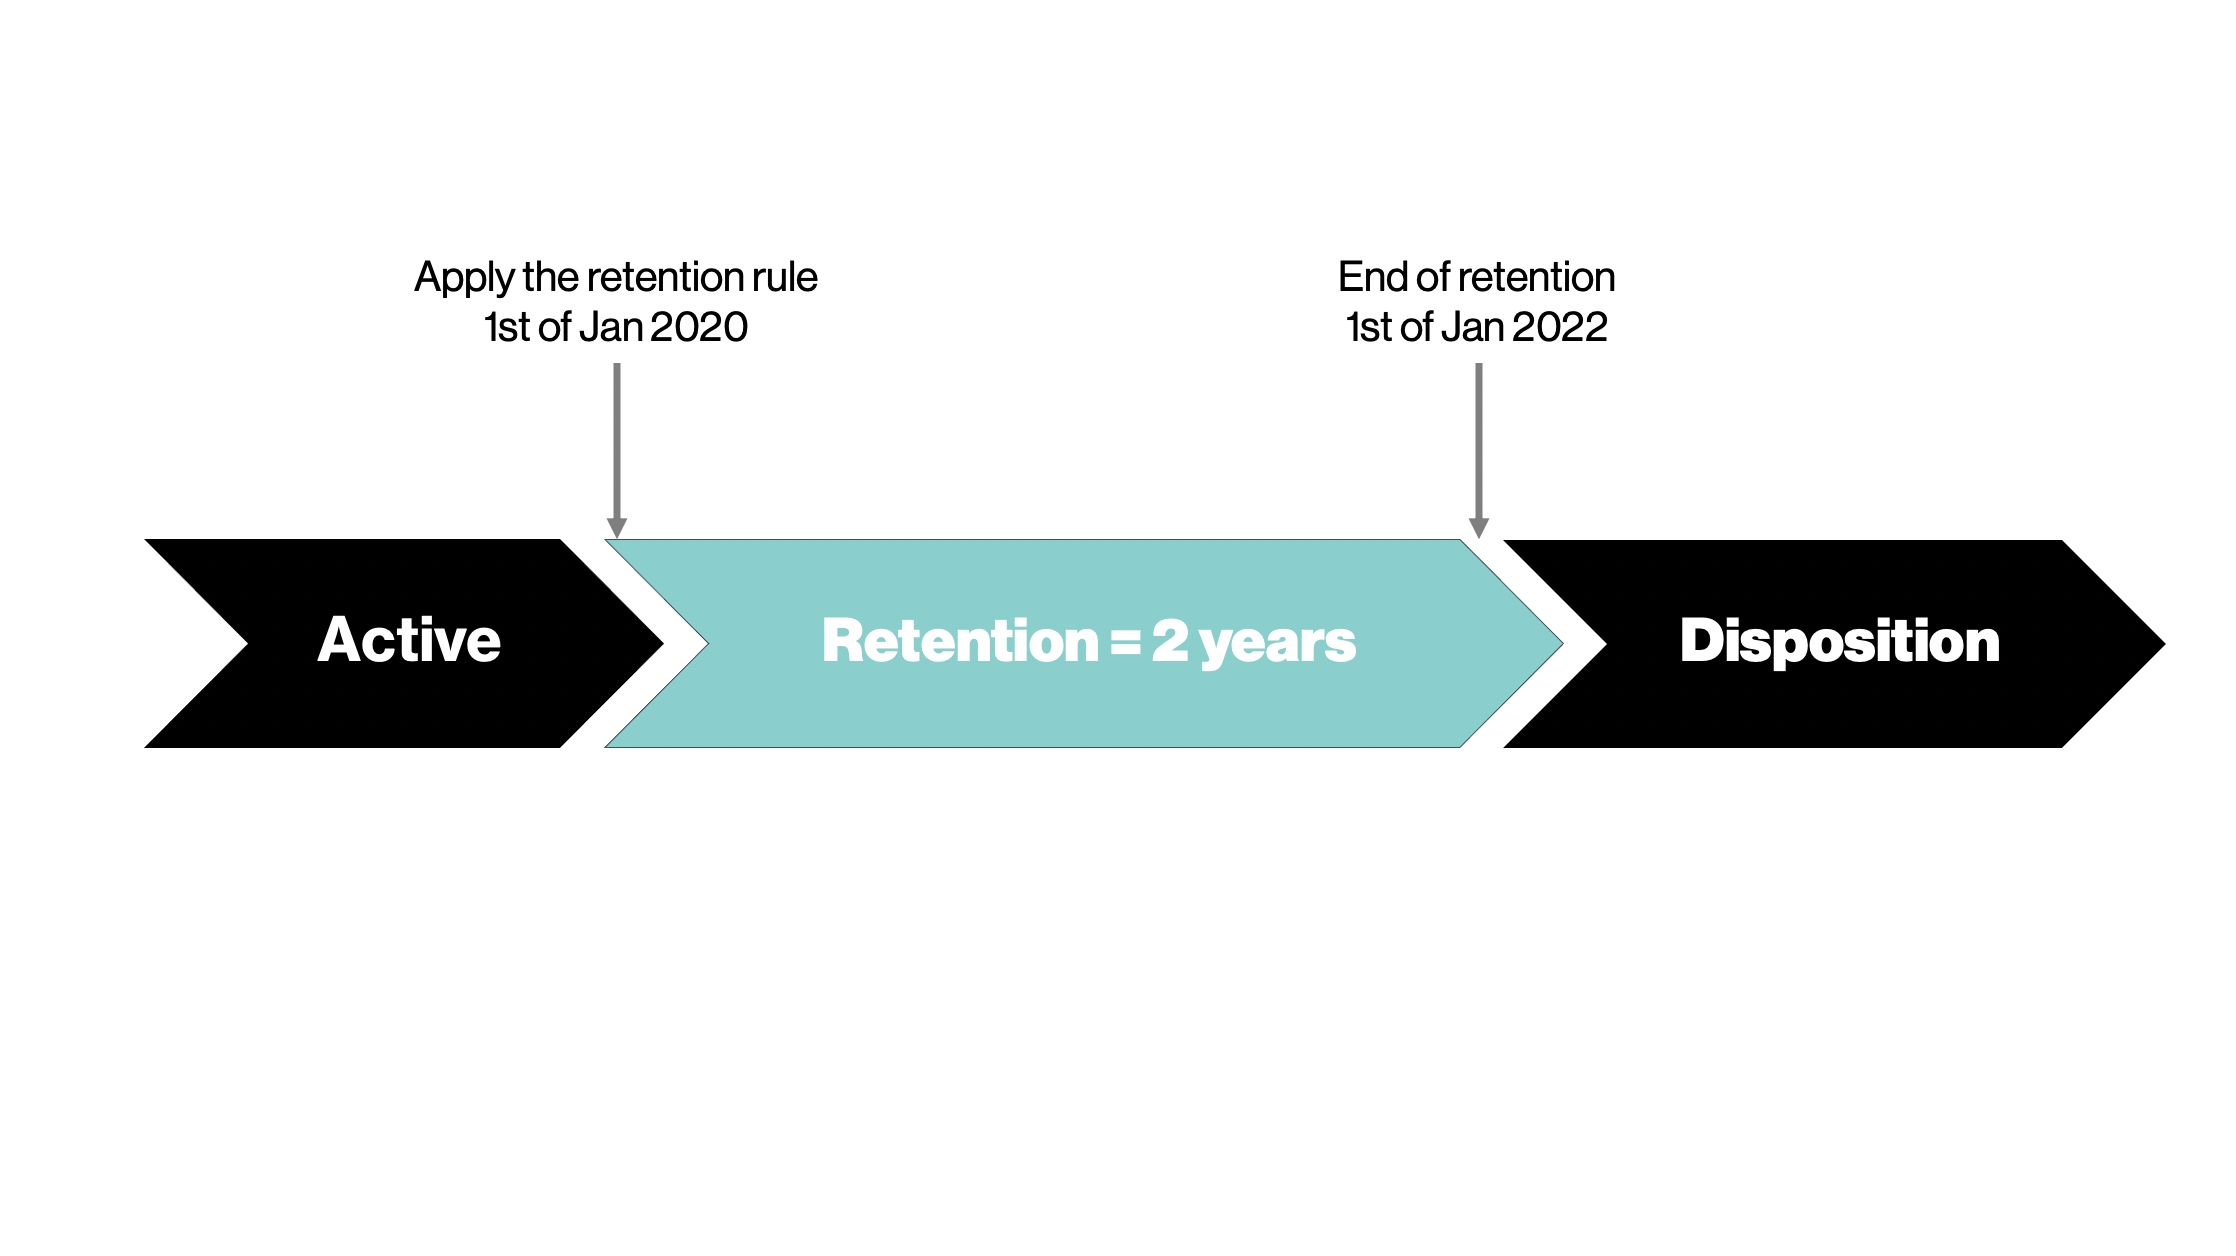
The retention period will start once you apply the retention rule to the document.
Example: If I apply a retention rule to a document on January 1st, 2020 with a period of 2 years, then the retention will expire on January 1st, 2022.

Based on a Metadata
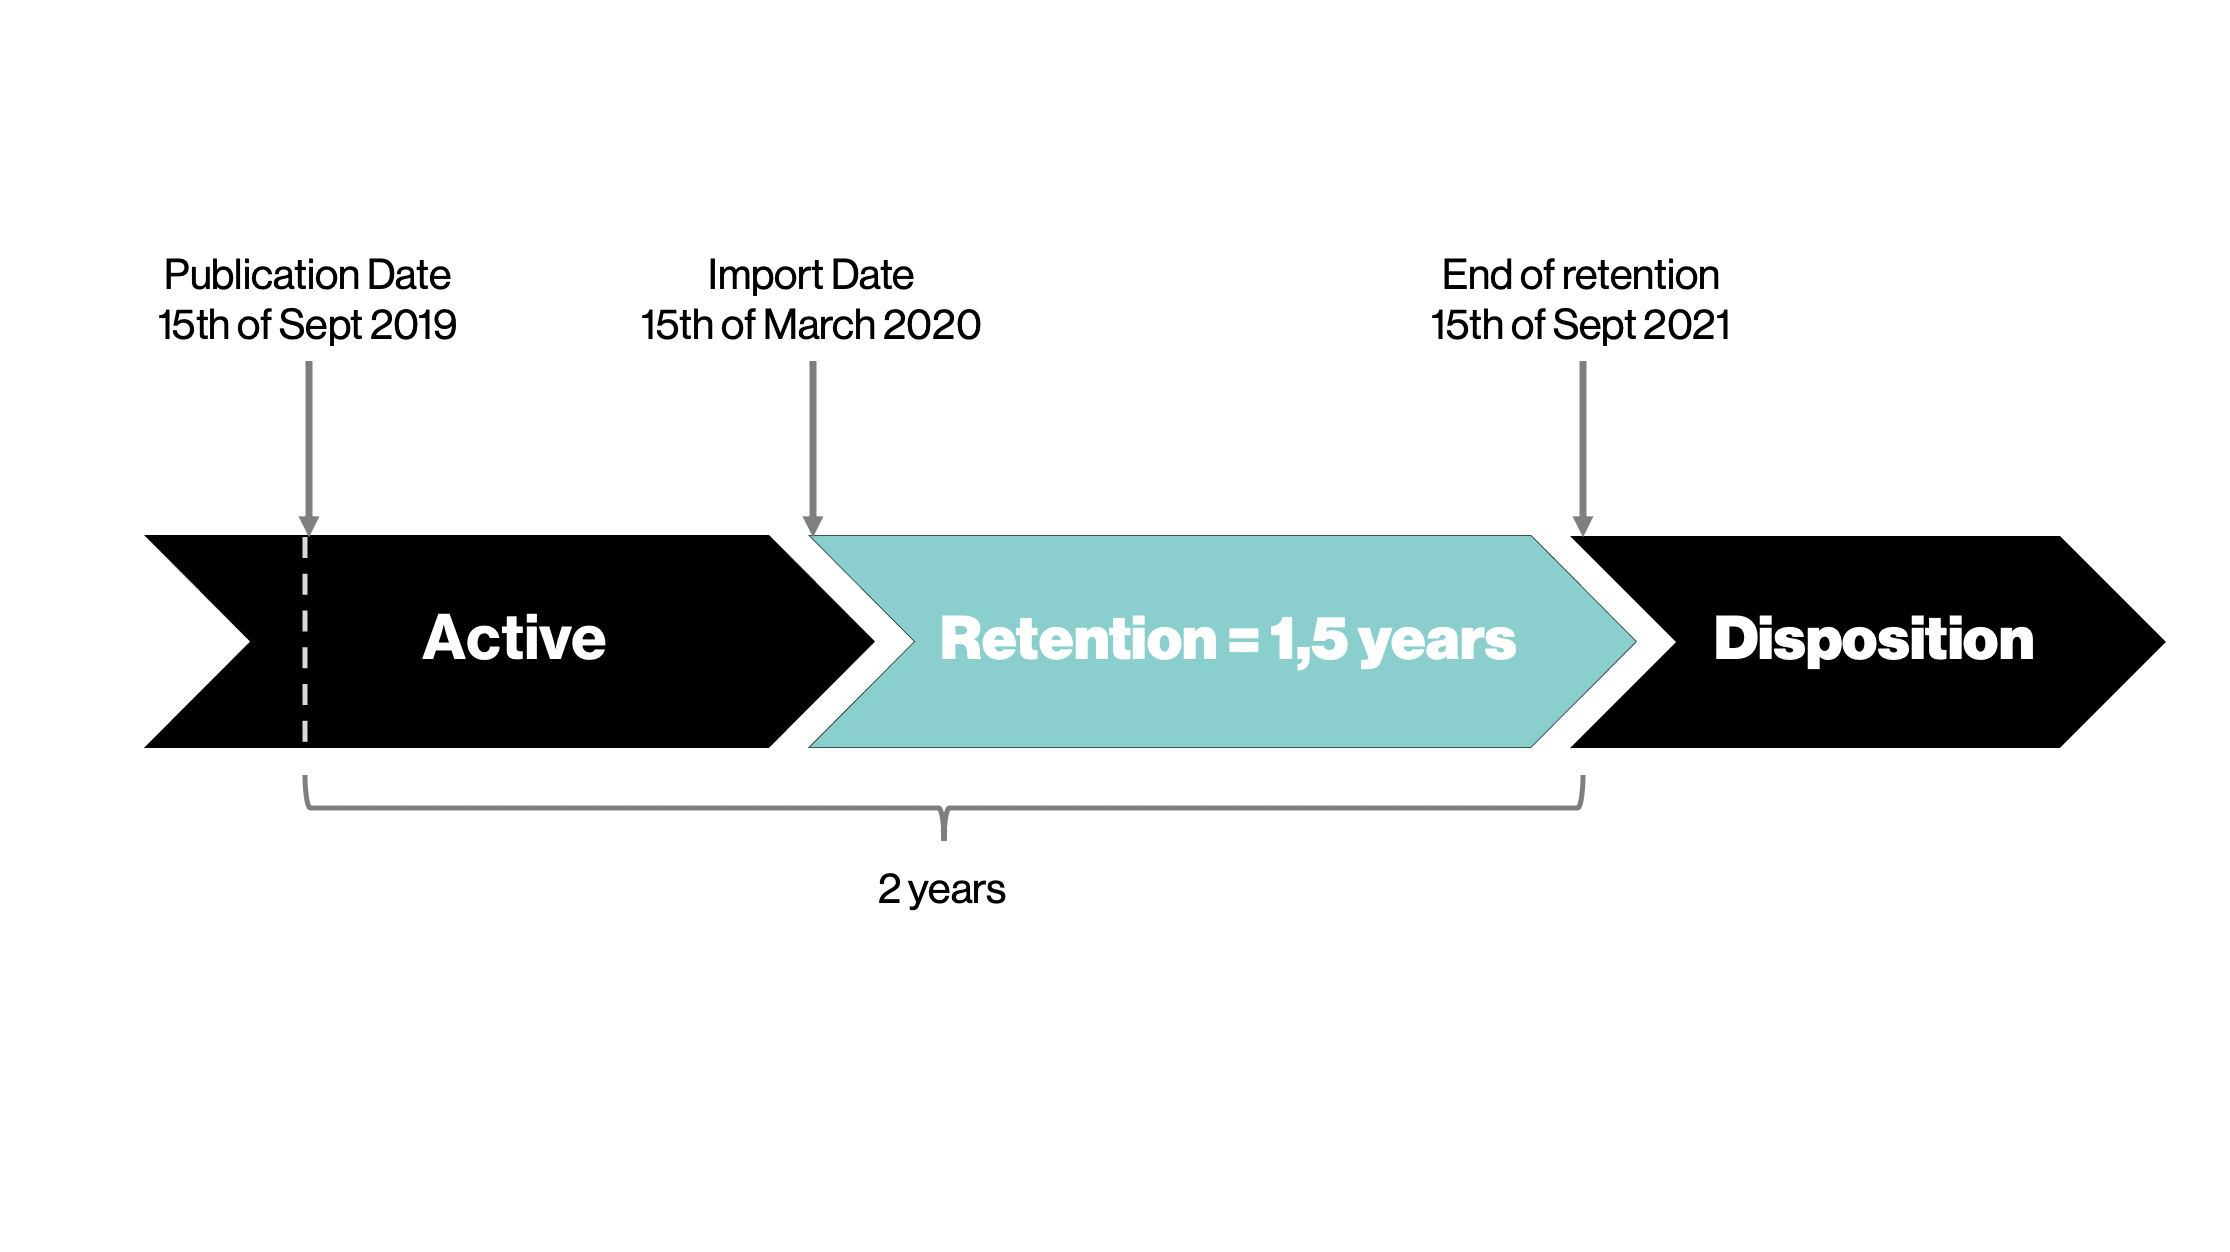
The retention period will start based on a defined metadata, once you apply the retention rule to the document.
This retention type is useful when the retention period depends on a past and external event. It can also be used for migration purpose (moving from a legacy records management system to Nuxeo).
Example: If I apply a retention rule to a document on March 15th, 2020 with the metadata "publication date", a retention period of 2 years, and the "publication date" is September 15th, 2019, then the retention will expire on September 15th, 2021.

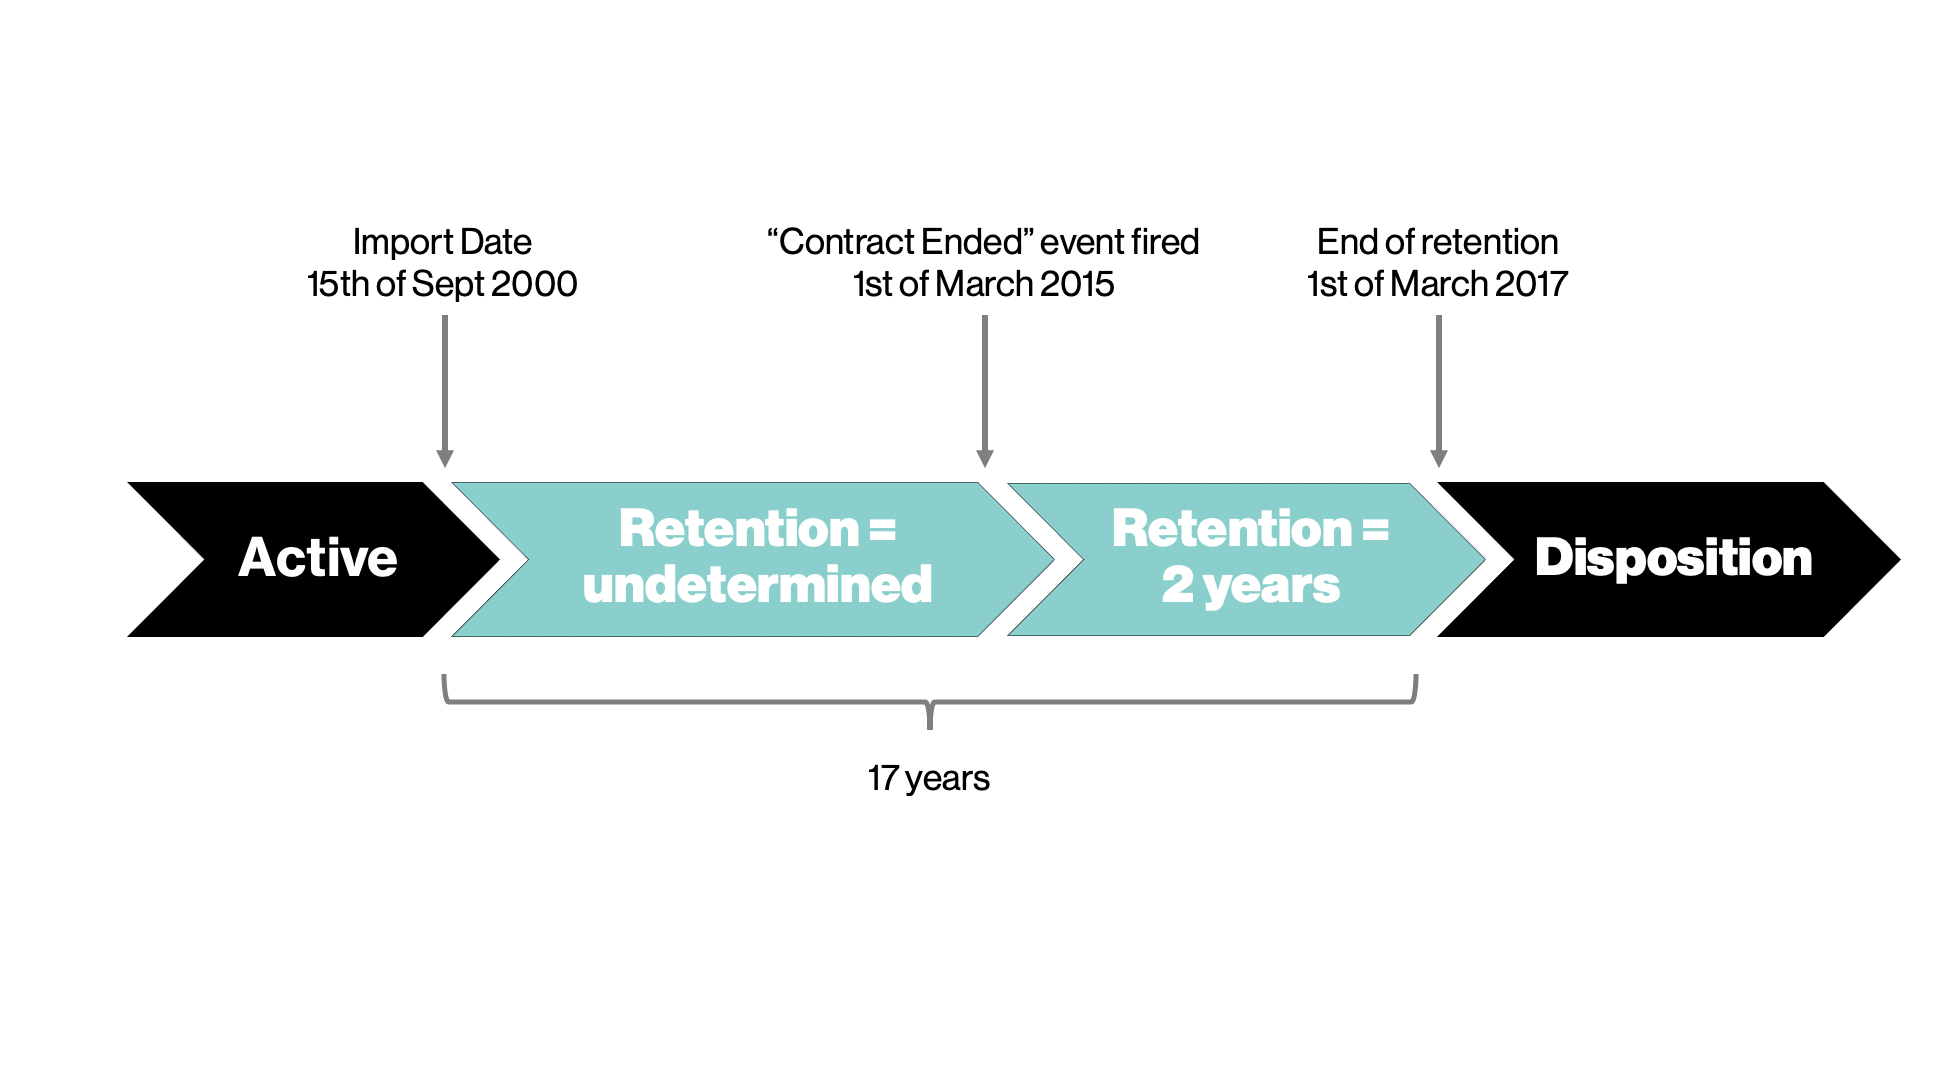
Based on an Event
The retention period will start once the defined event occurs (after the retention rule has been applied to the document).
This retention type is useful for all cases where a document needs to be preserved from any deletion or change but the retention starting point is unknown at the beginning.
Examples: Contract terminated, Employee left the company, loan repayment, etc.

Edit a Retention Rule
You can edit an existing retention rule to change its status or settings.
They won't be applied to the documents previously linked to the retention rule.
Once on the View tab of the retention rule:
- Click on the
 Edit button.
A popup window is displayed. - Update the rule.
- Click on Save button.
Delete a Retention Rule
You can delete an existing retention rule.
On the View tab of the retention rule:
- Click on the
 Delete button.
A popup window is displayed. - Click Confirm to delete the retention rule.
Put a Document Under Retention
To put a document under retention, you have to link the document to a retention rule.
By doing so:
- The document will be automatically tagged as a record
- The retention rule's settings will be applied to the document
After having linked a retention rule, the only available action is to extend the retention.
There are different ways to put a document under retention. You can attach a retention rule to a single document or to several documents in a row.
From a Document View
On the View tab of your document:
Click on the More
 button and select Attach retention rule.
A popup window is displayed.
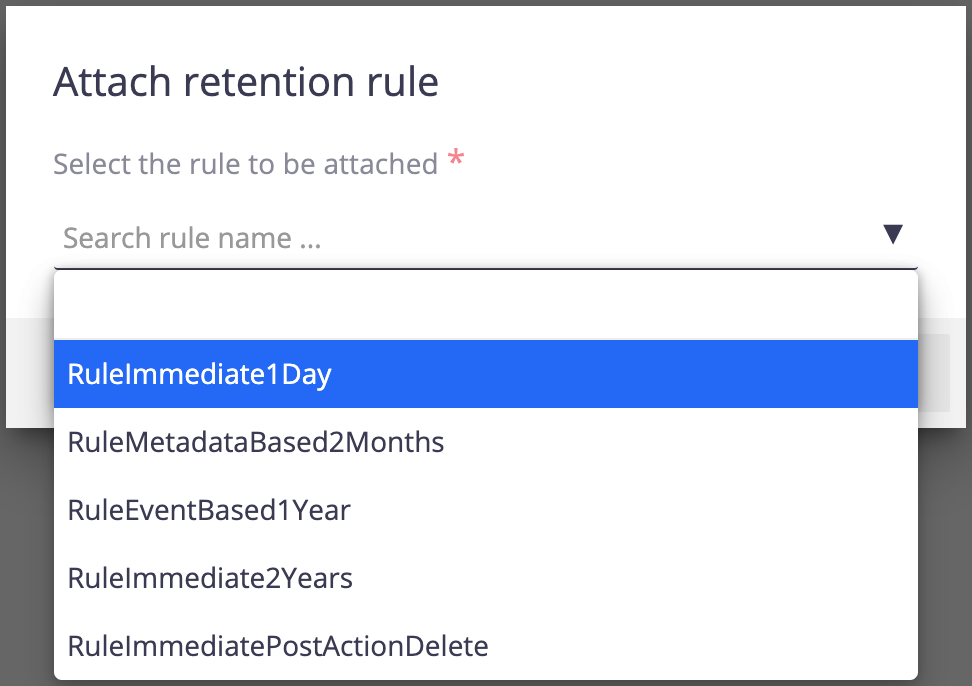

Select the retention rule needed from the drop-down list and click on Attach retention rule.
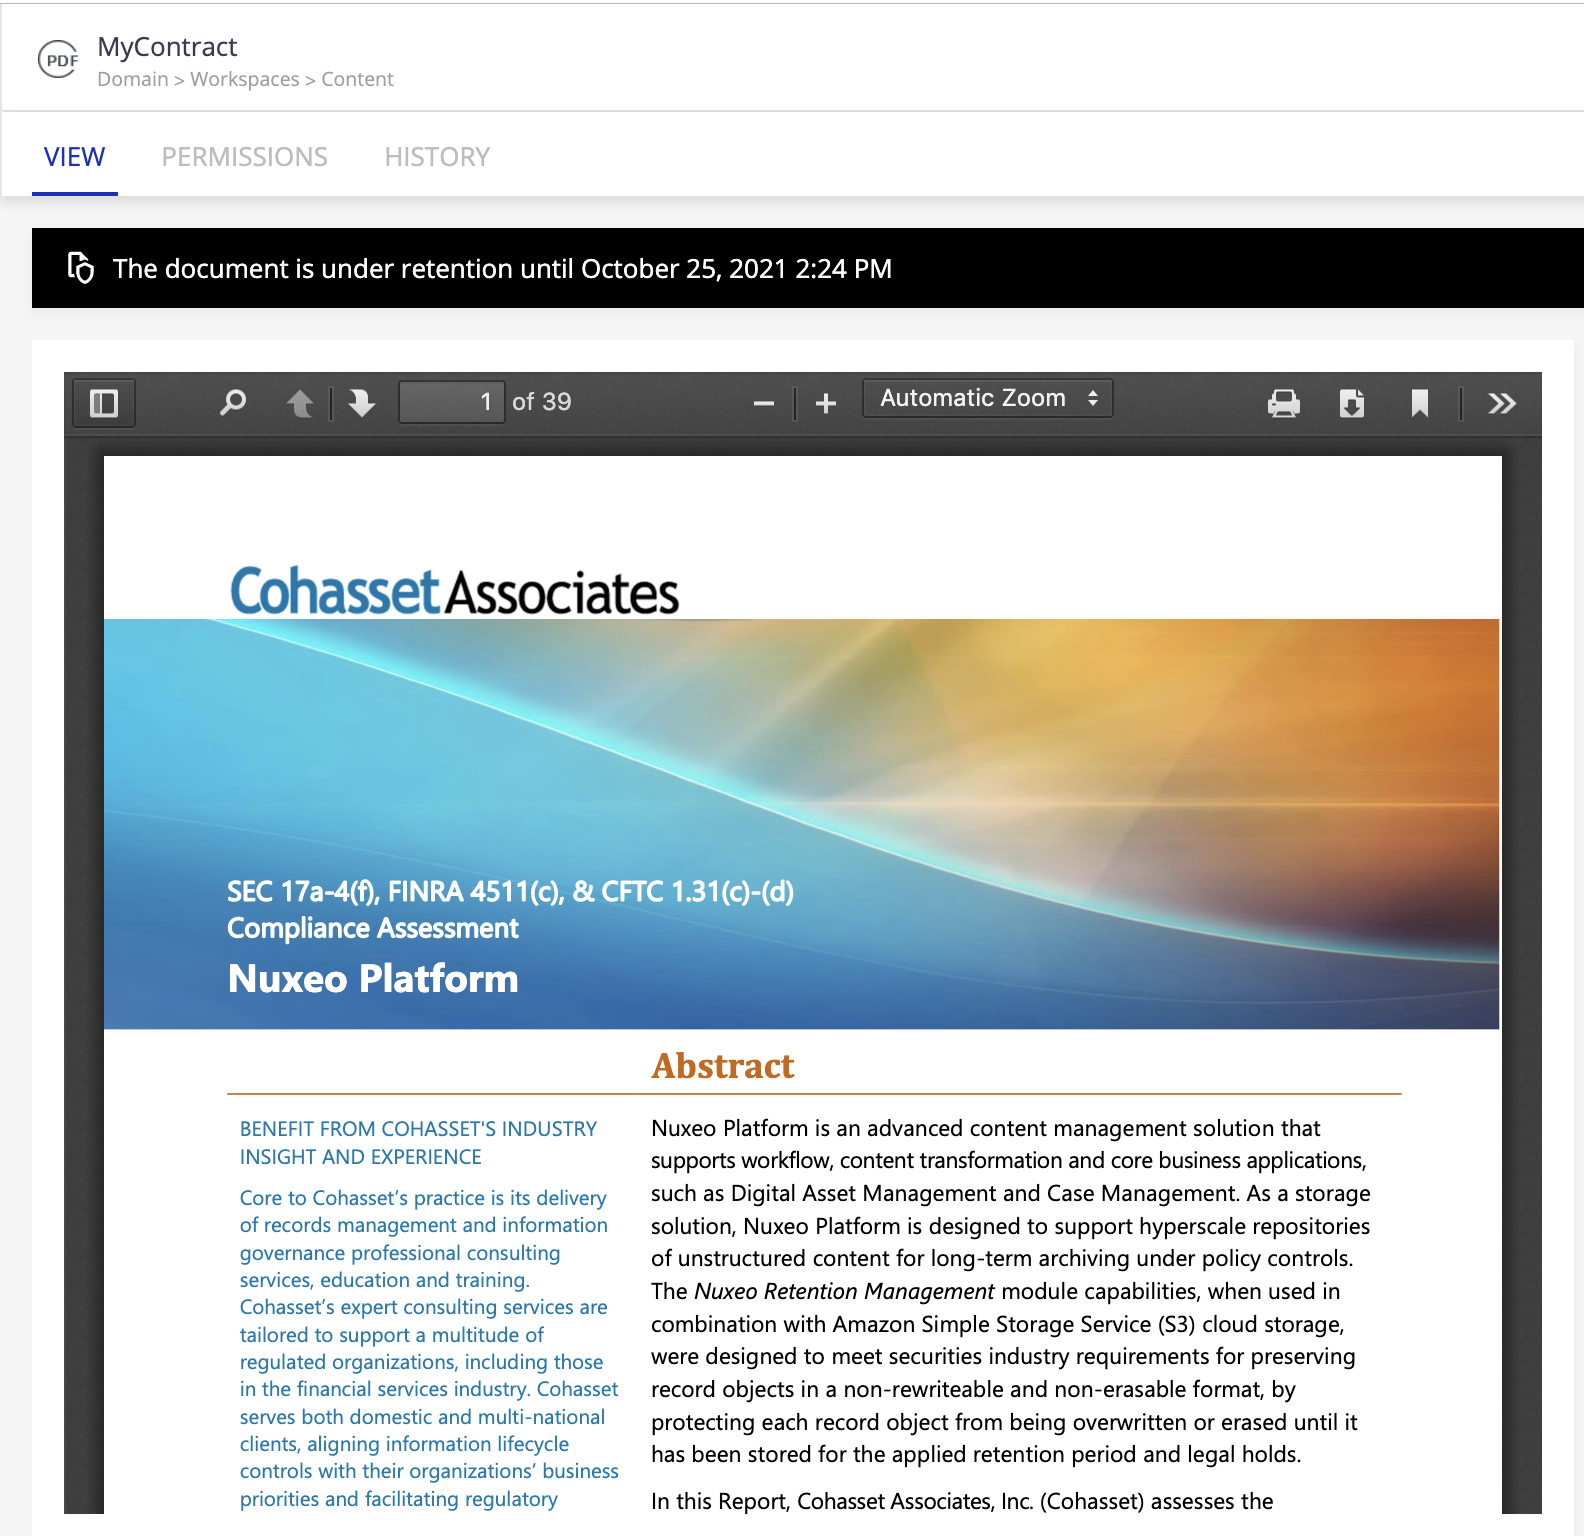
A top bar is displayed at the top of your document to notify users that the document is, or will be, under retention.

From a Result List
After having performed a search from the retention search menu, a list of documents is displayed. Then, if you click on the Without attached rule quick filter, you can click on Attach retention rule icon
![]() at the top-right of the screen.
at the top-right of the screen.
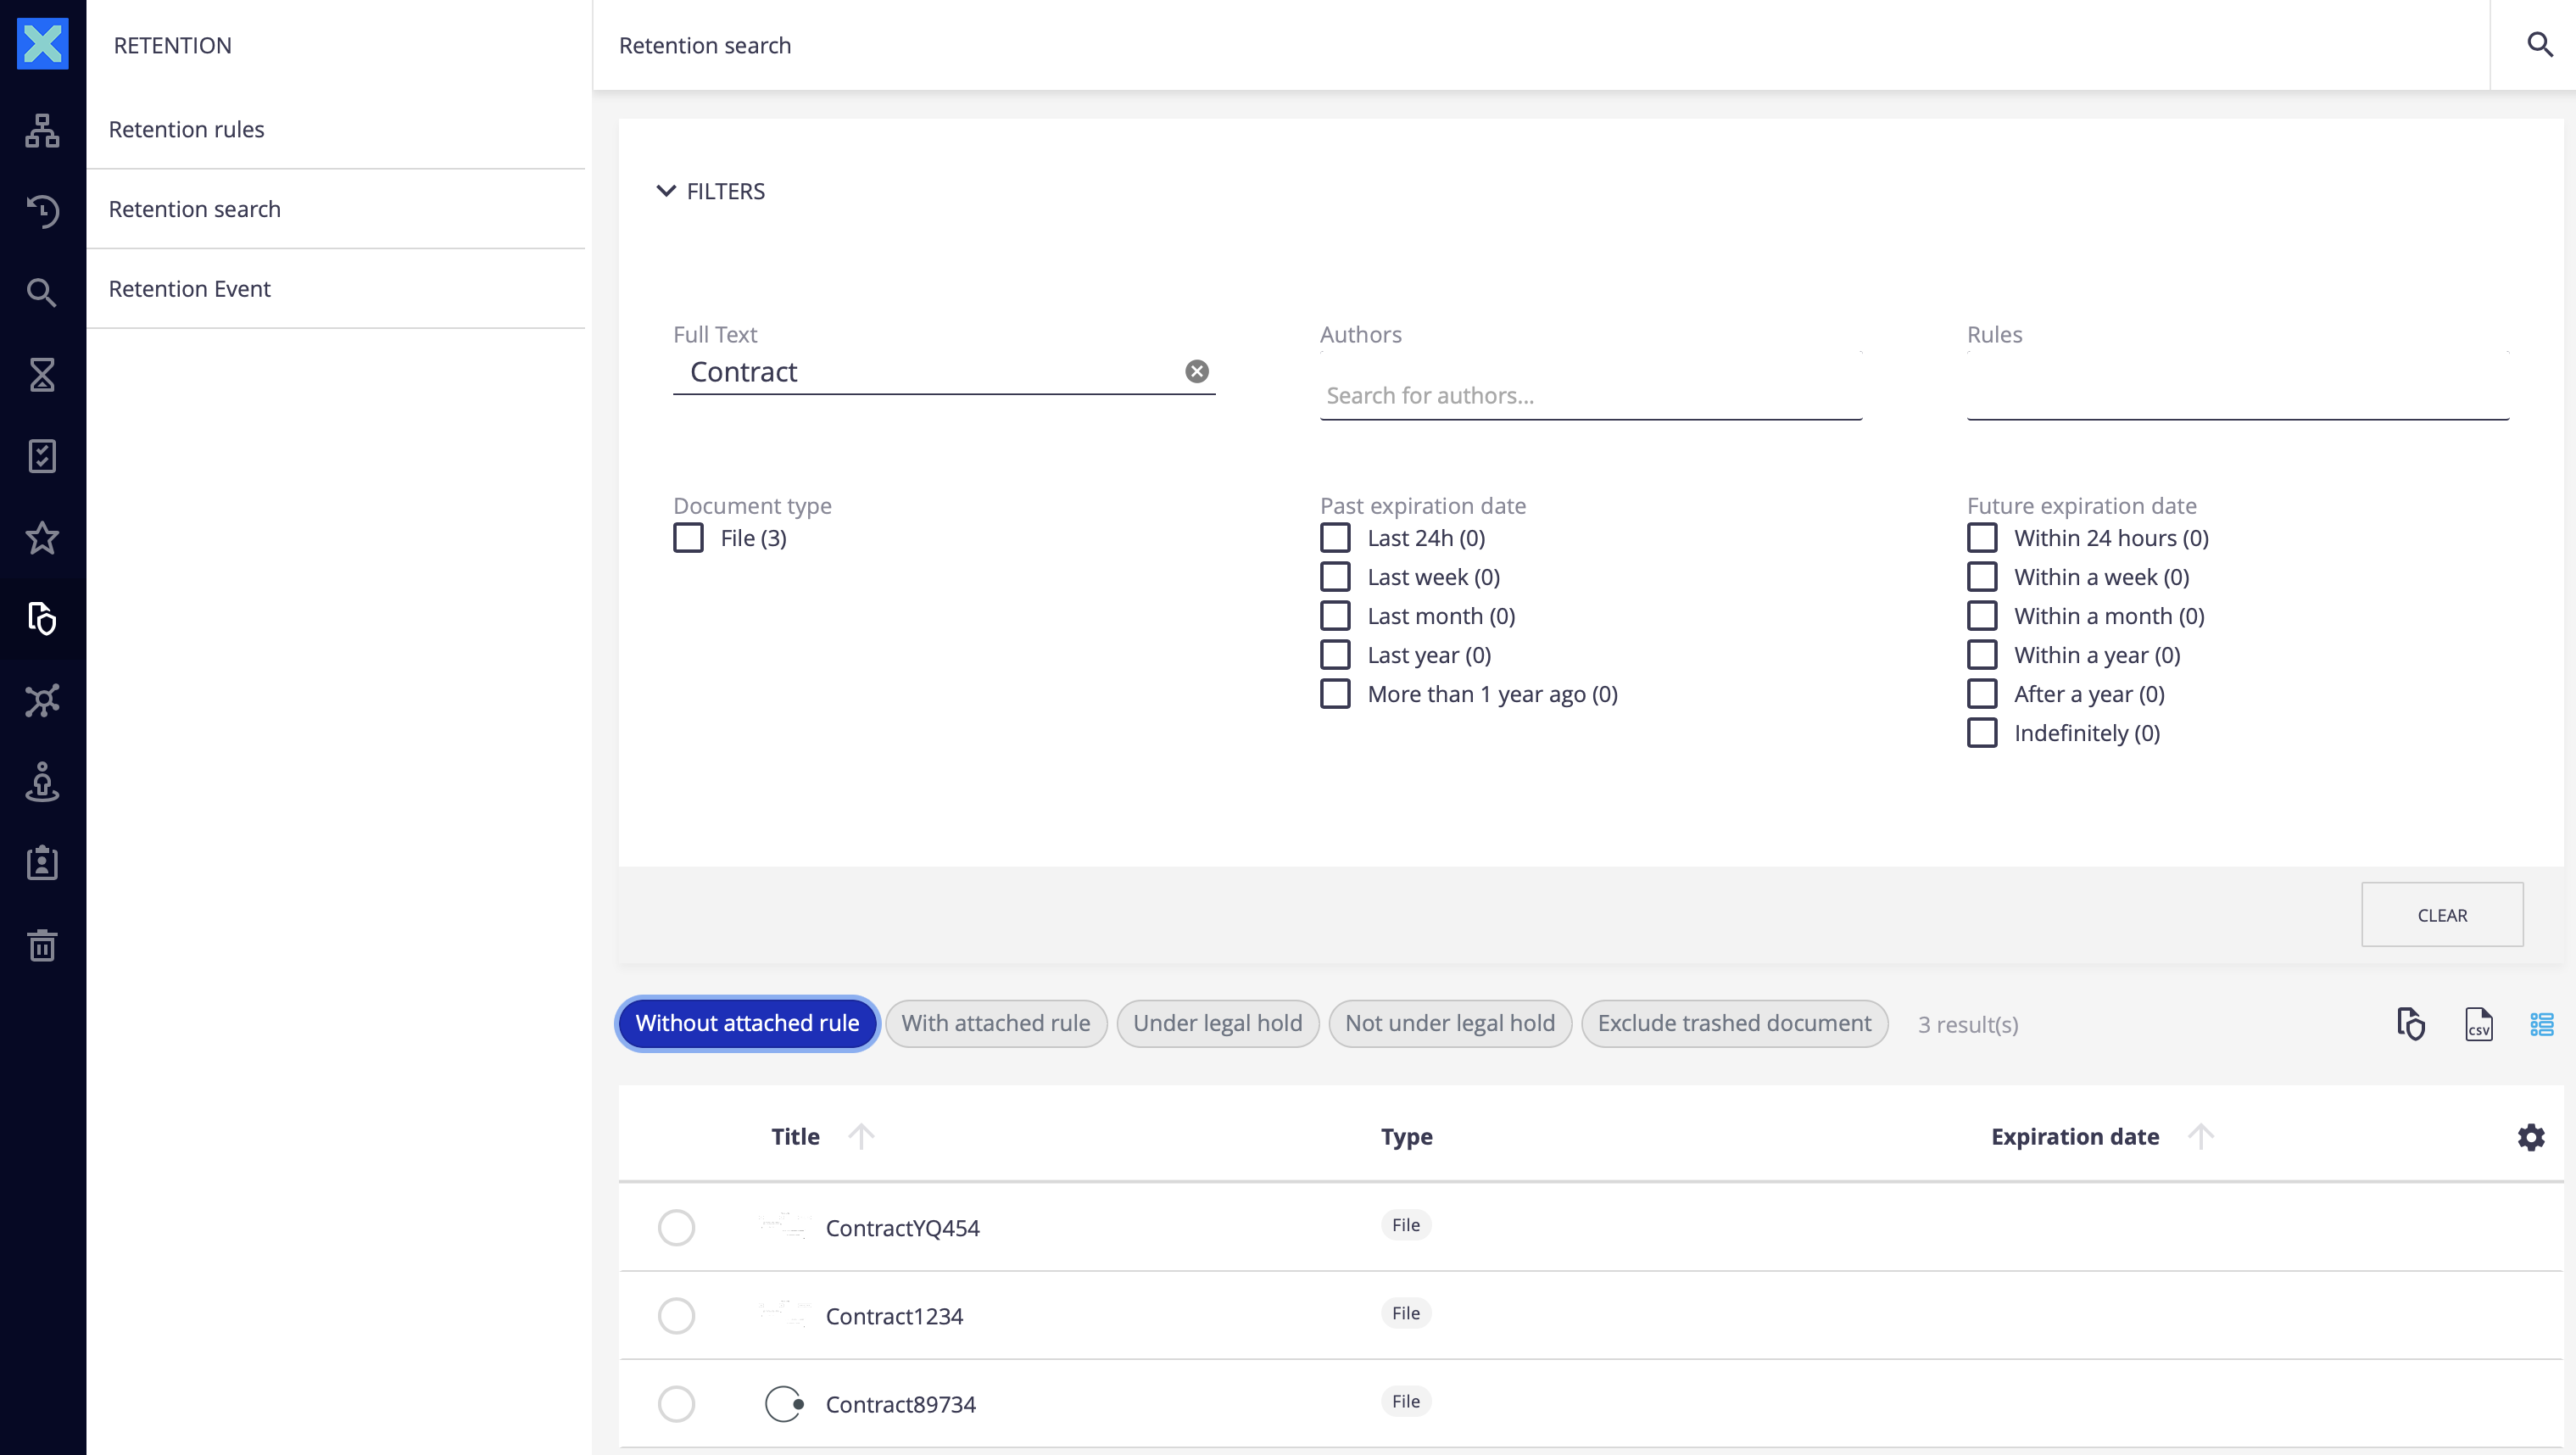

Select the retention rule that you want from the popup window and confirm.
Extend the Retention of a Document
When a document is under retention, you can lengthen the retention of the document.
On the View tab of your document:
Click on the More
 button and select Extend retention.
A popup window is displayed.
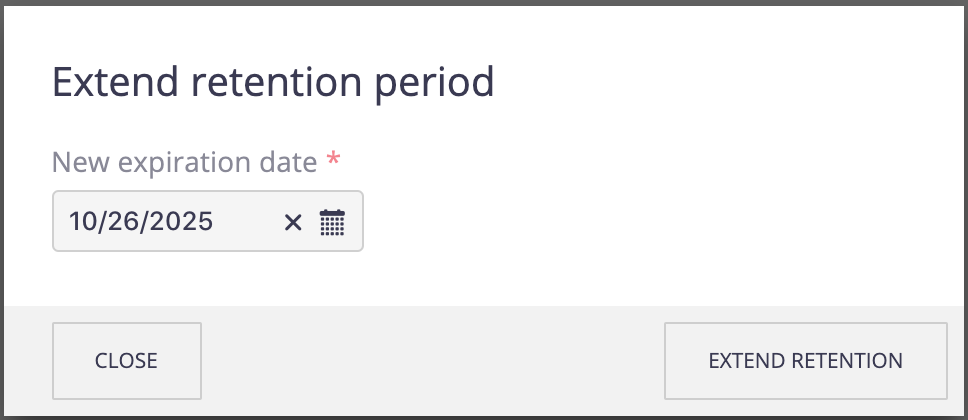

Select the new expiration date (end of retention period) and confirm.
A top bar is displayed at the top of your document to notify users of the new expiration date.


Create a Retention Event
To create a new retention event:
- Go to the Retention menu.
- Click on Retention events.
Fill the fields on the Fire event section:
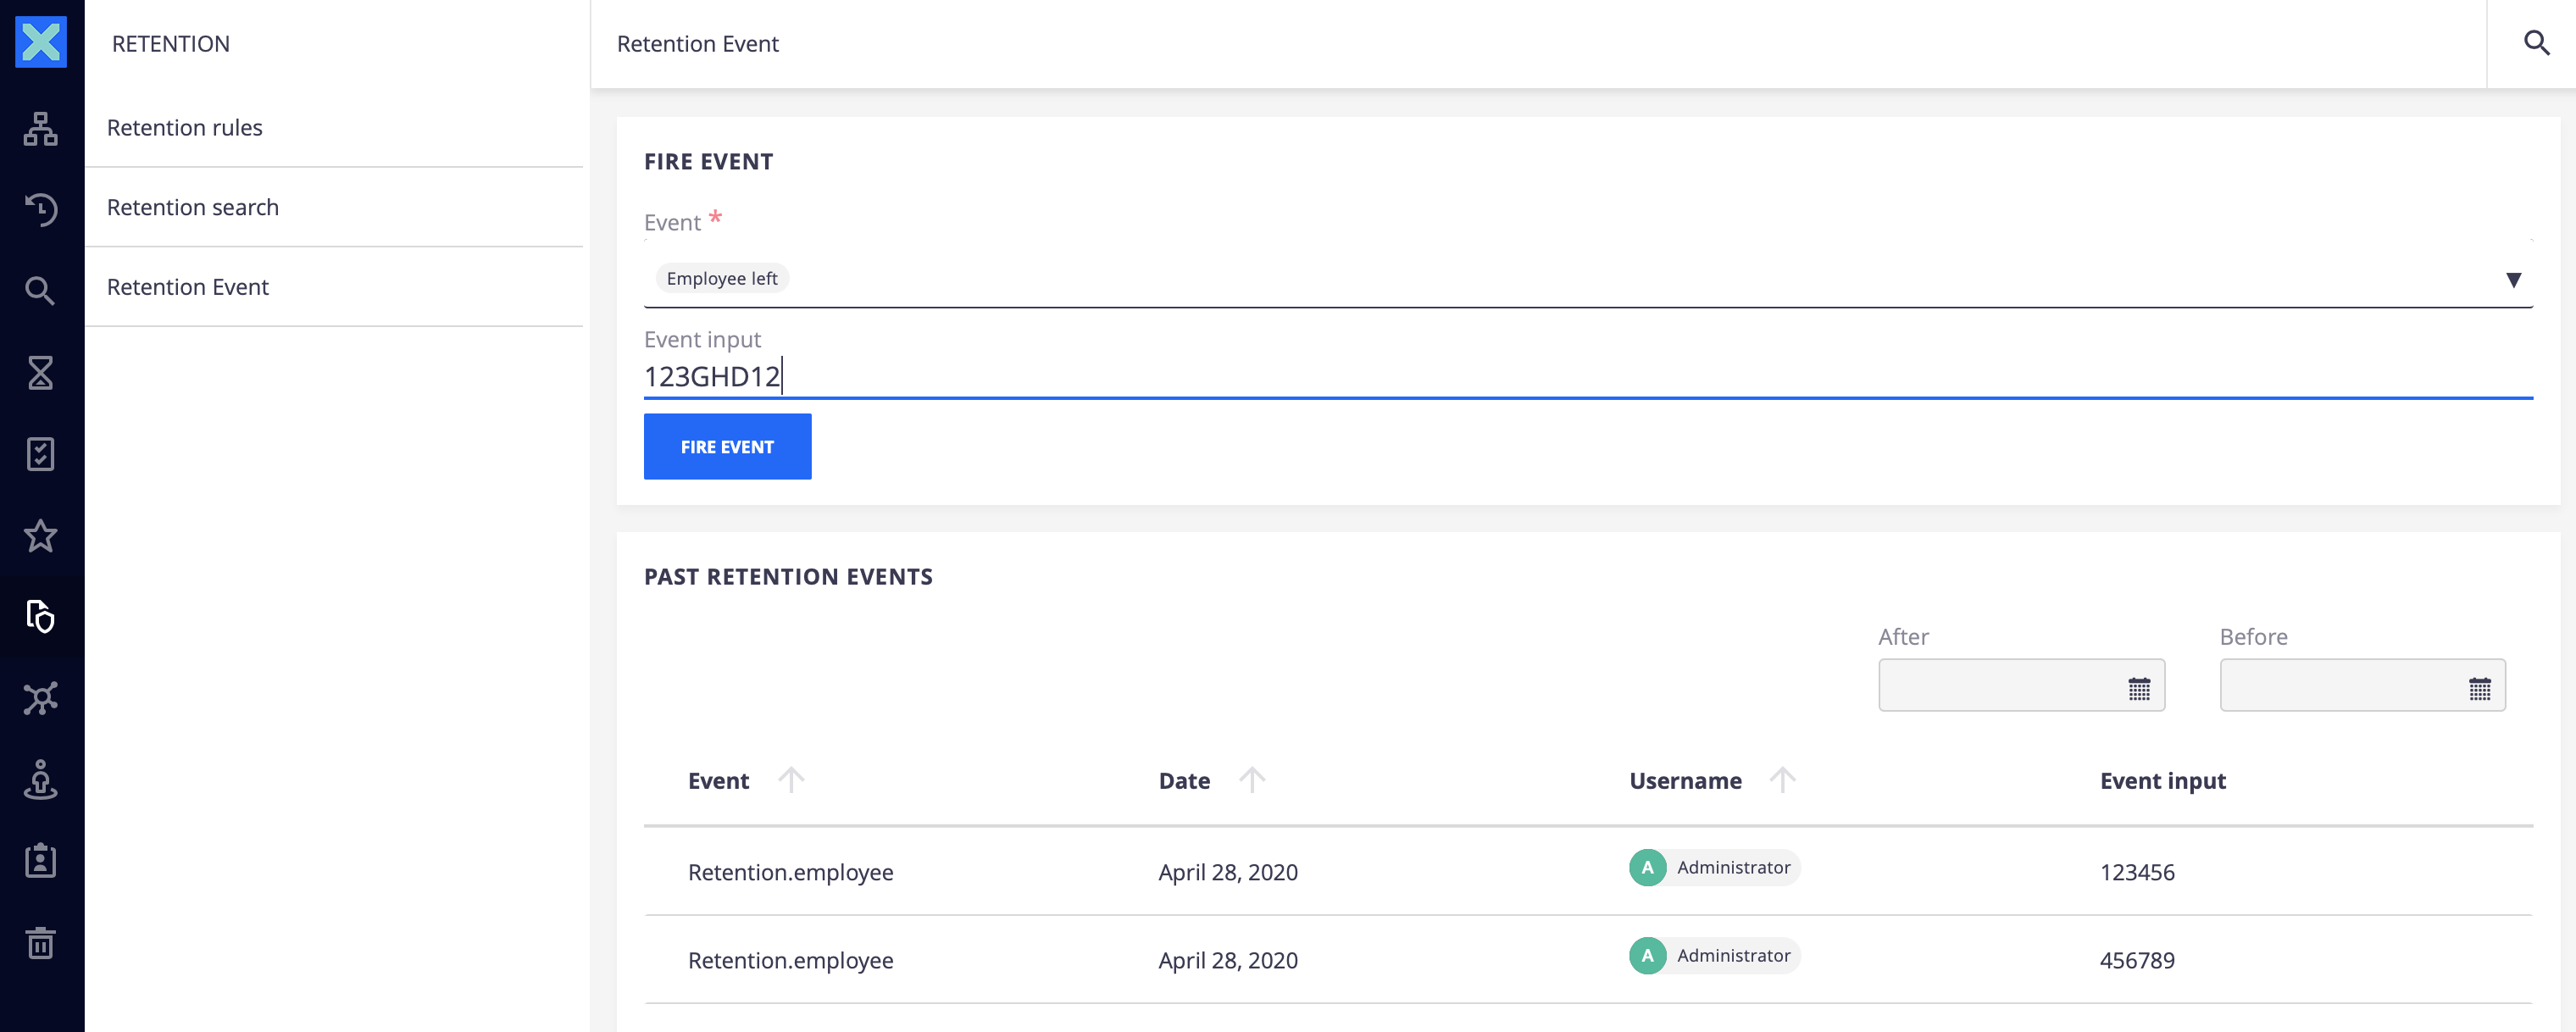

- Click on Fire event.
At this stage, the event is created on Nuxeo Platform, and the retention rules fitting with this event will trigger the retention period for the involved documents.
Retention Search
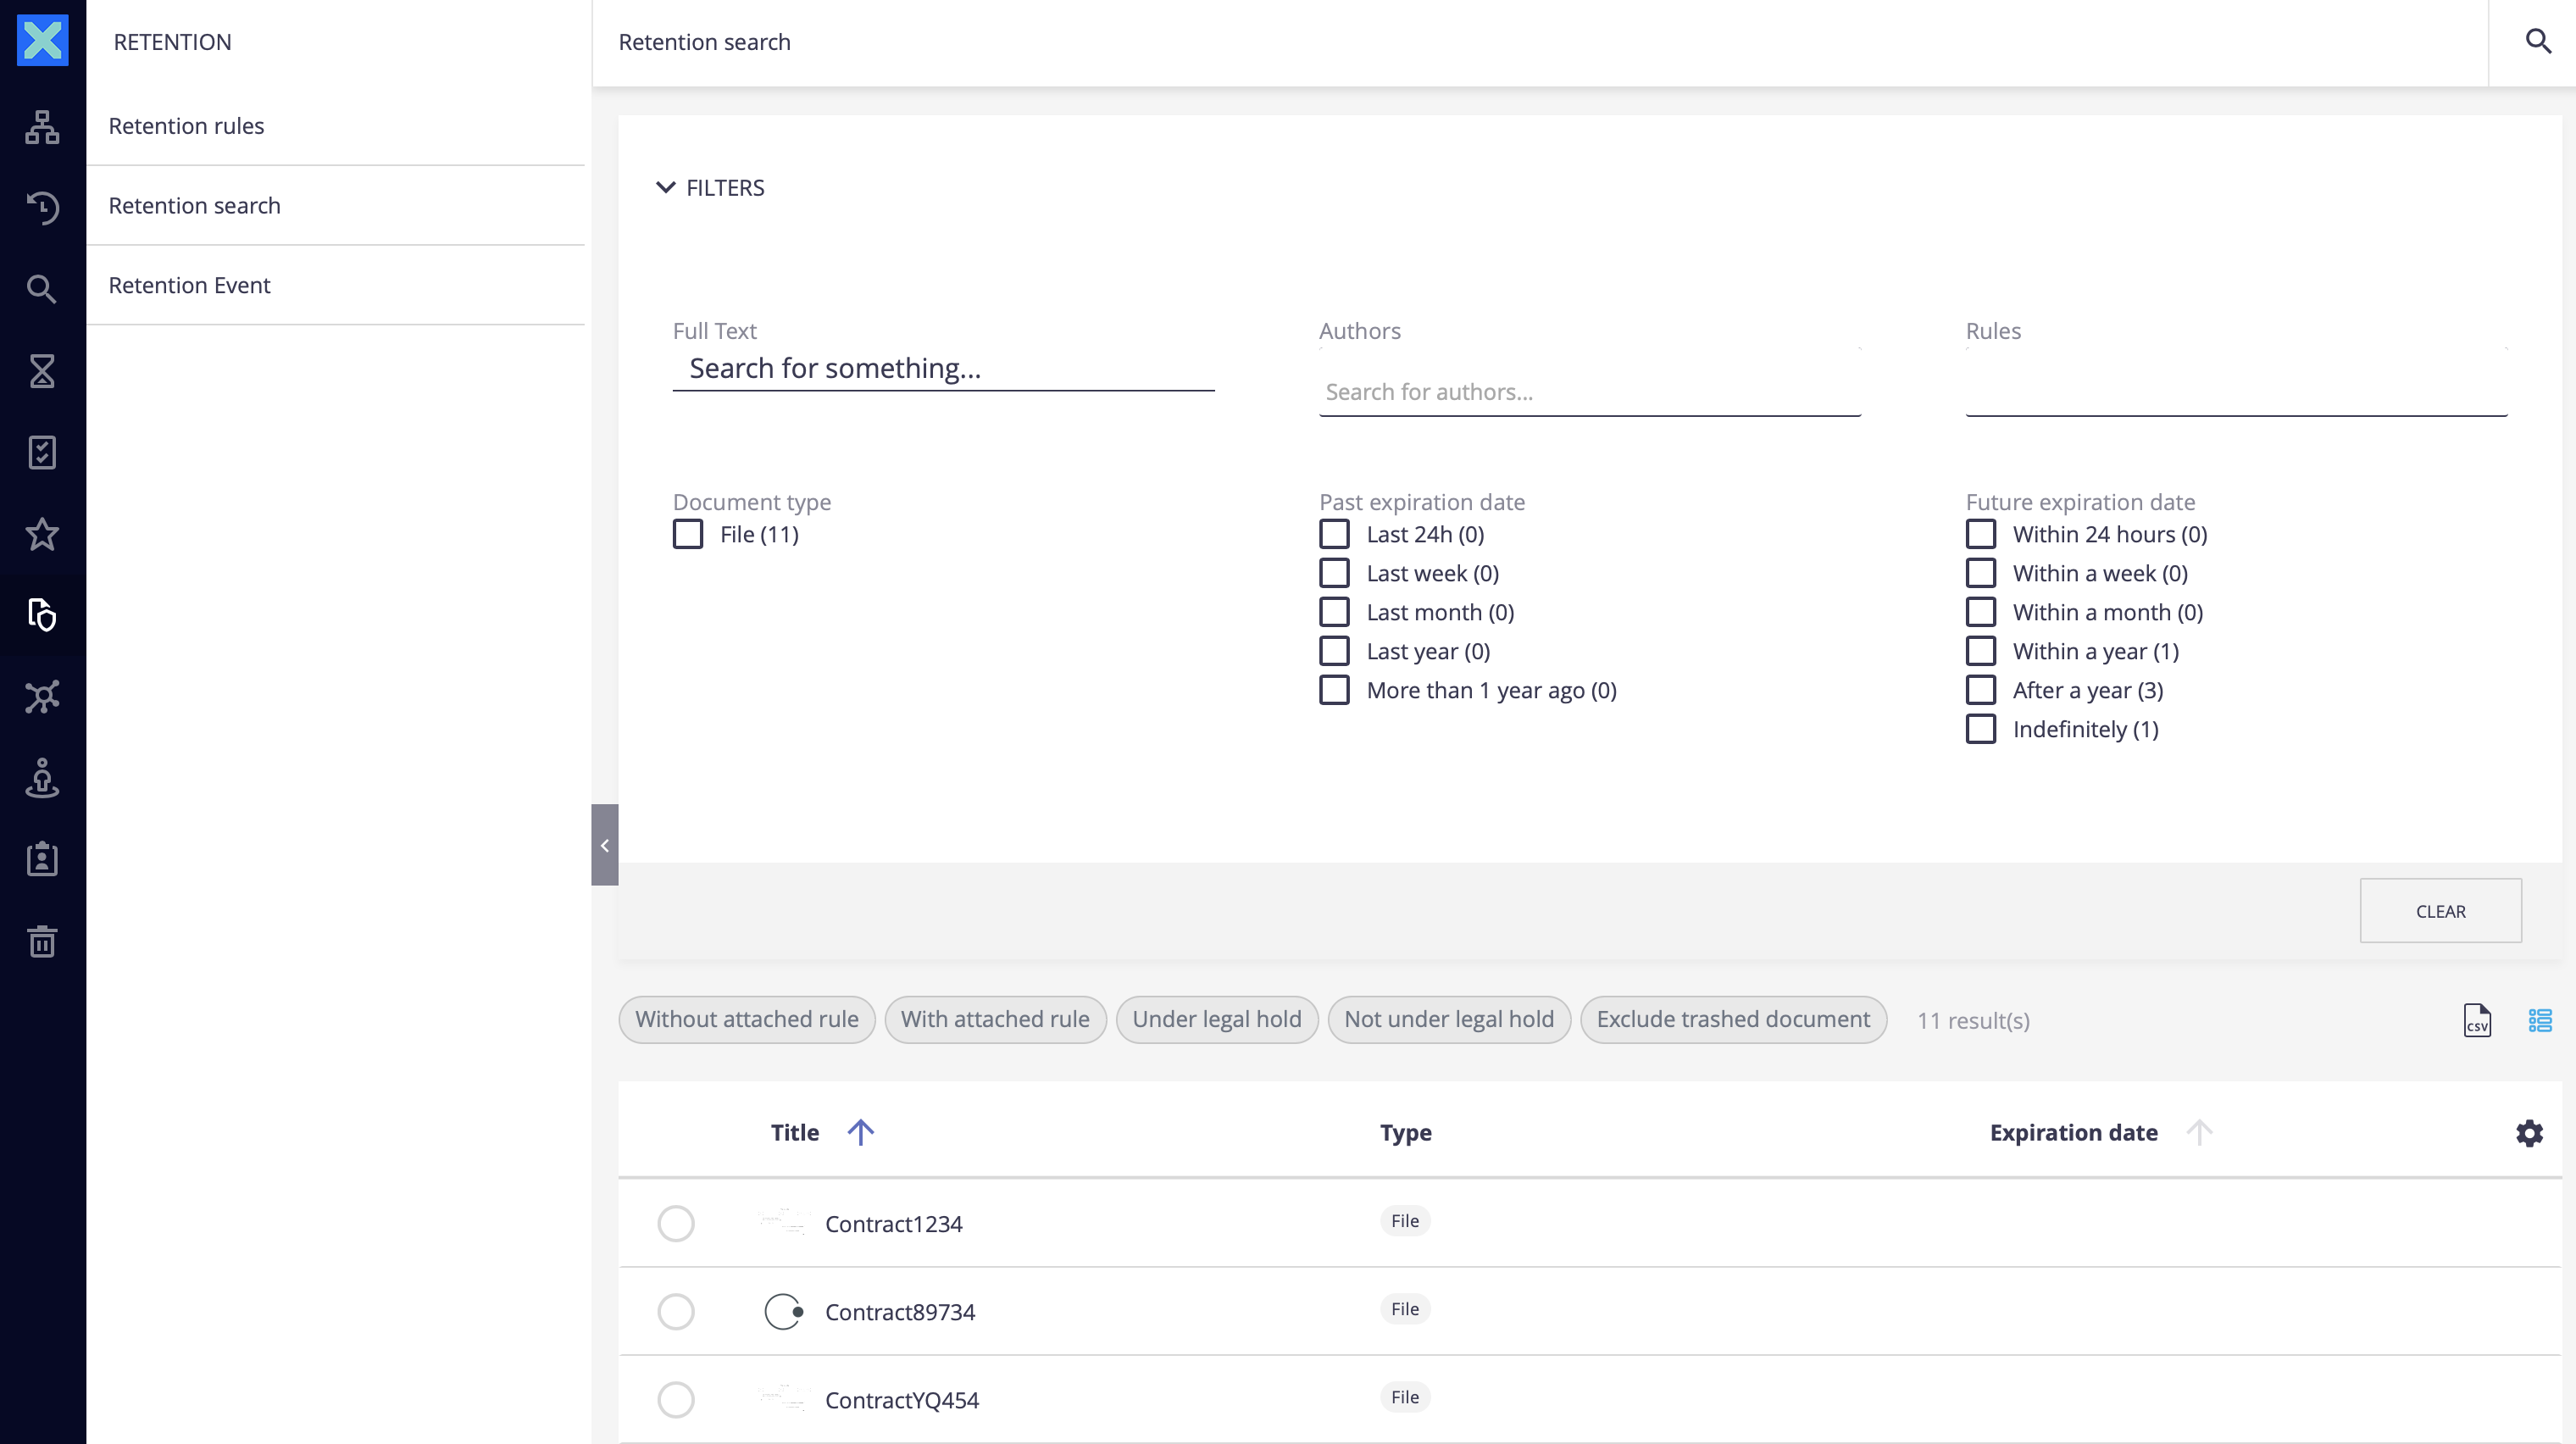
The retention search is a dedicated search with criteria related to the retention management.
This search contains filters on:
- The attached retention rule.
- The expiration date (past and future).
- The retention status (active retention, expired, not under retention).
- The legal hold status.
- The full-text content.

History Related to Retention Actions
History on a Document
On the History tab of your document, you can see all the events related to the retention including:
- Application of a retention rule to the document.
- Beginning of the retention period.
- Overriding of the retention period.
- Application of a legal hold on the document.
- Removing of a legal hold on the document.
General History
On the Administration > Audit page, you can see all the events related to the retention, including the retention events that have been created on the platform.
Put a Document Under Legal Hold
There are different ways to put a document under a legal hold. You can apply a legal hold to a single document or to several documents in a row.
From a Document View
Once on the View tab of your document:
Click on More
 and select Apply legal hold.
A popup window is displayed.
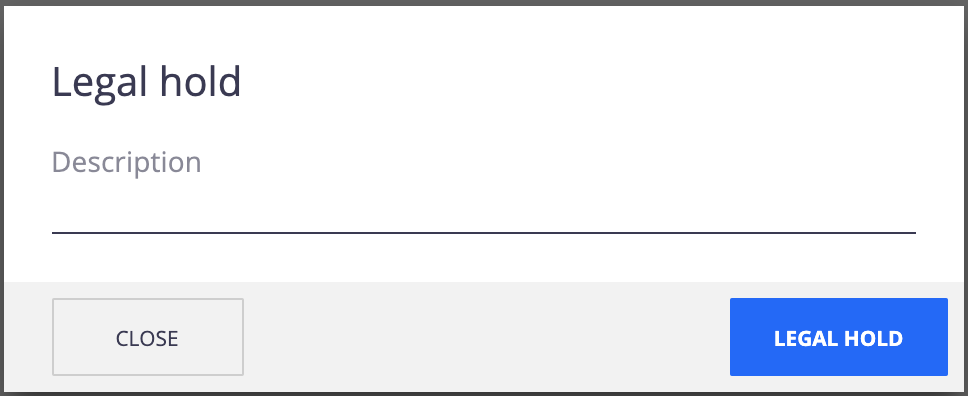

Fill in the description and click on Apply legal hold.
A bar is displayed at the top of your document to notify users that the document is under a legal hold.
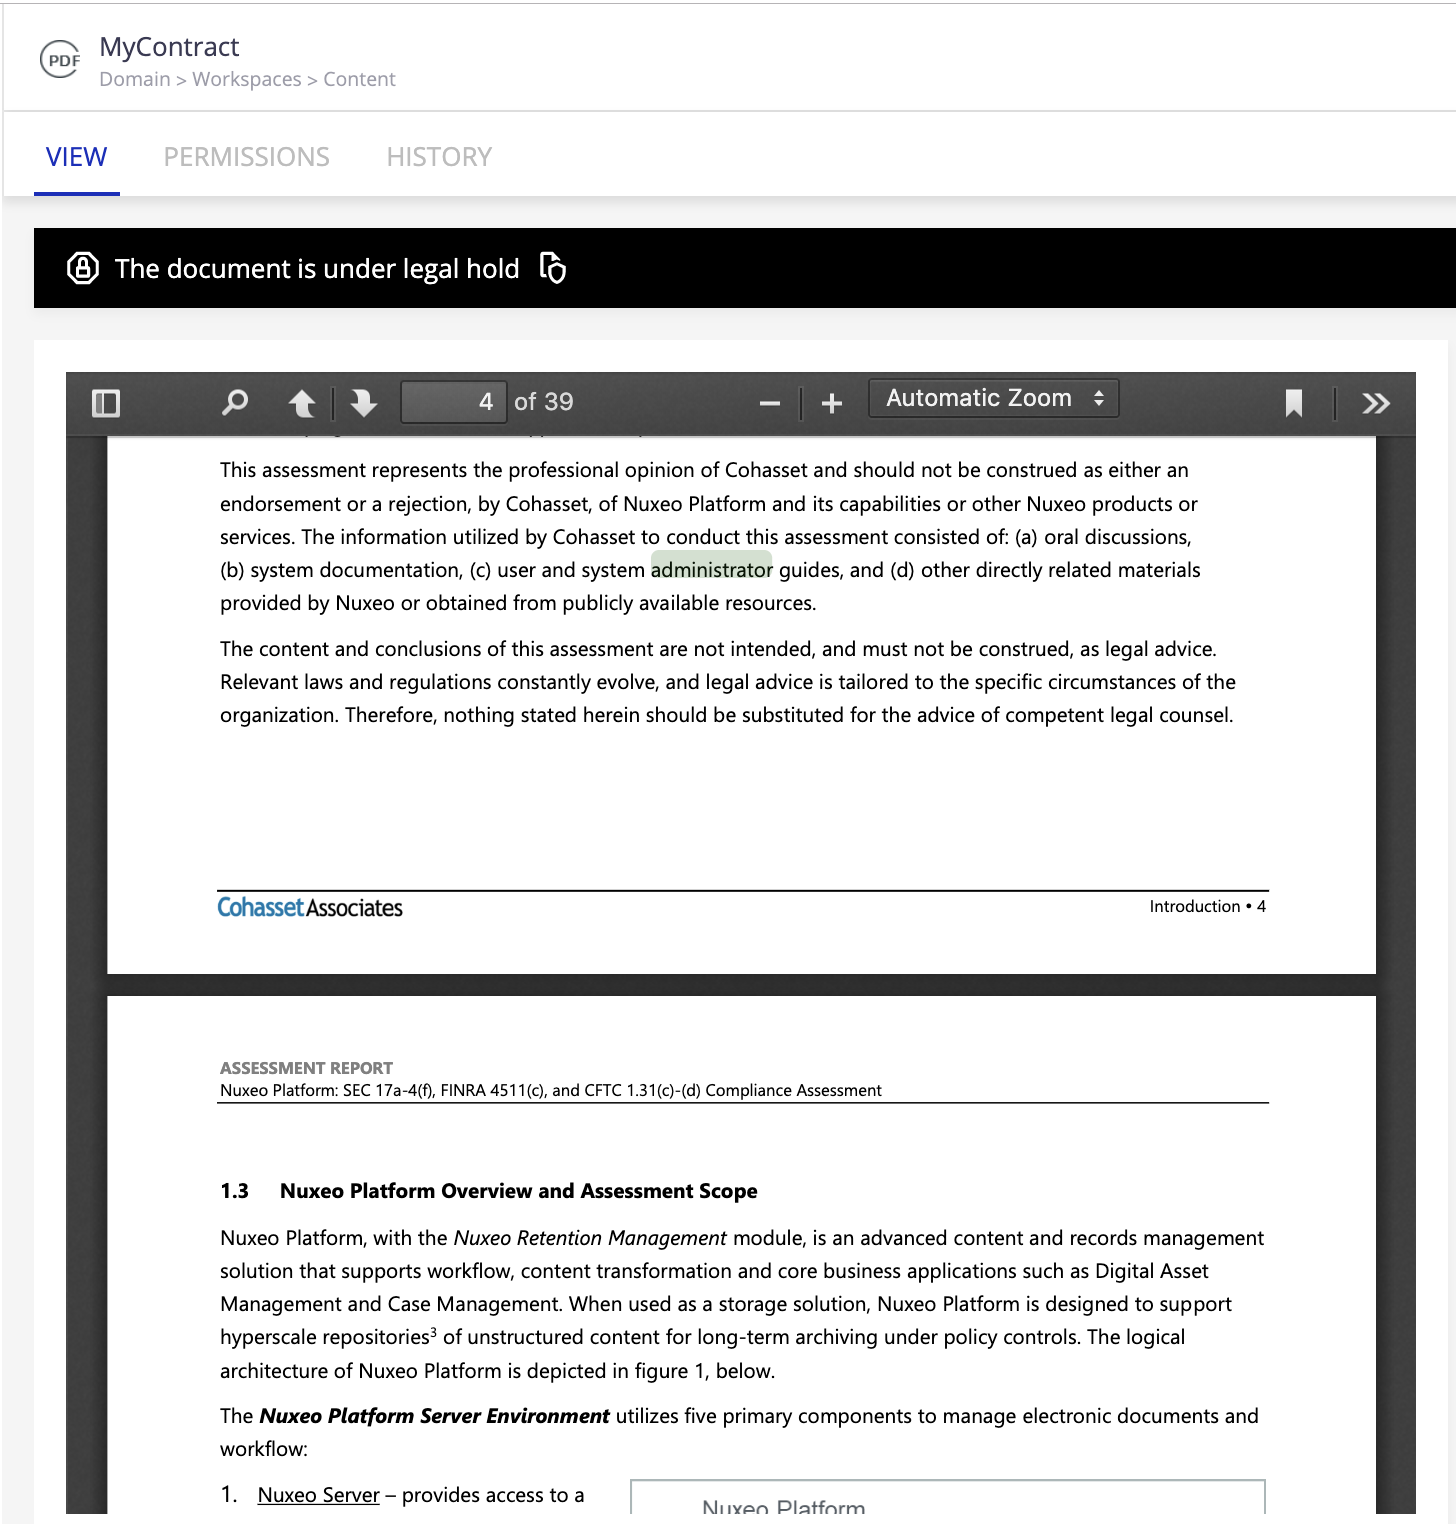

From a Result List
After having performed a search from the retention search menu, a list of documents is displayed. Then, if you click on the Not Under legal hold quick filter, you can click on Apply legal hold icon
![]() at the top-right of the screen.
at the top-right of the screen.
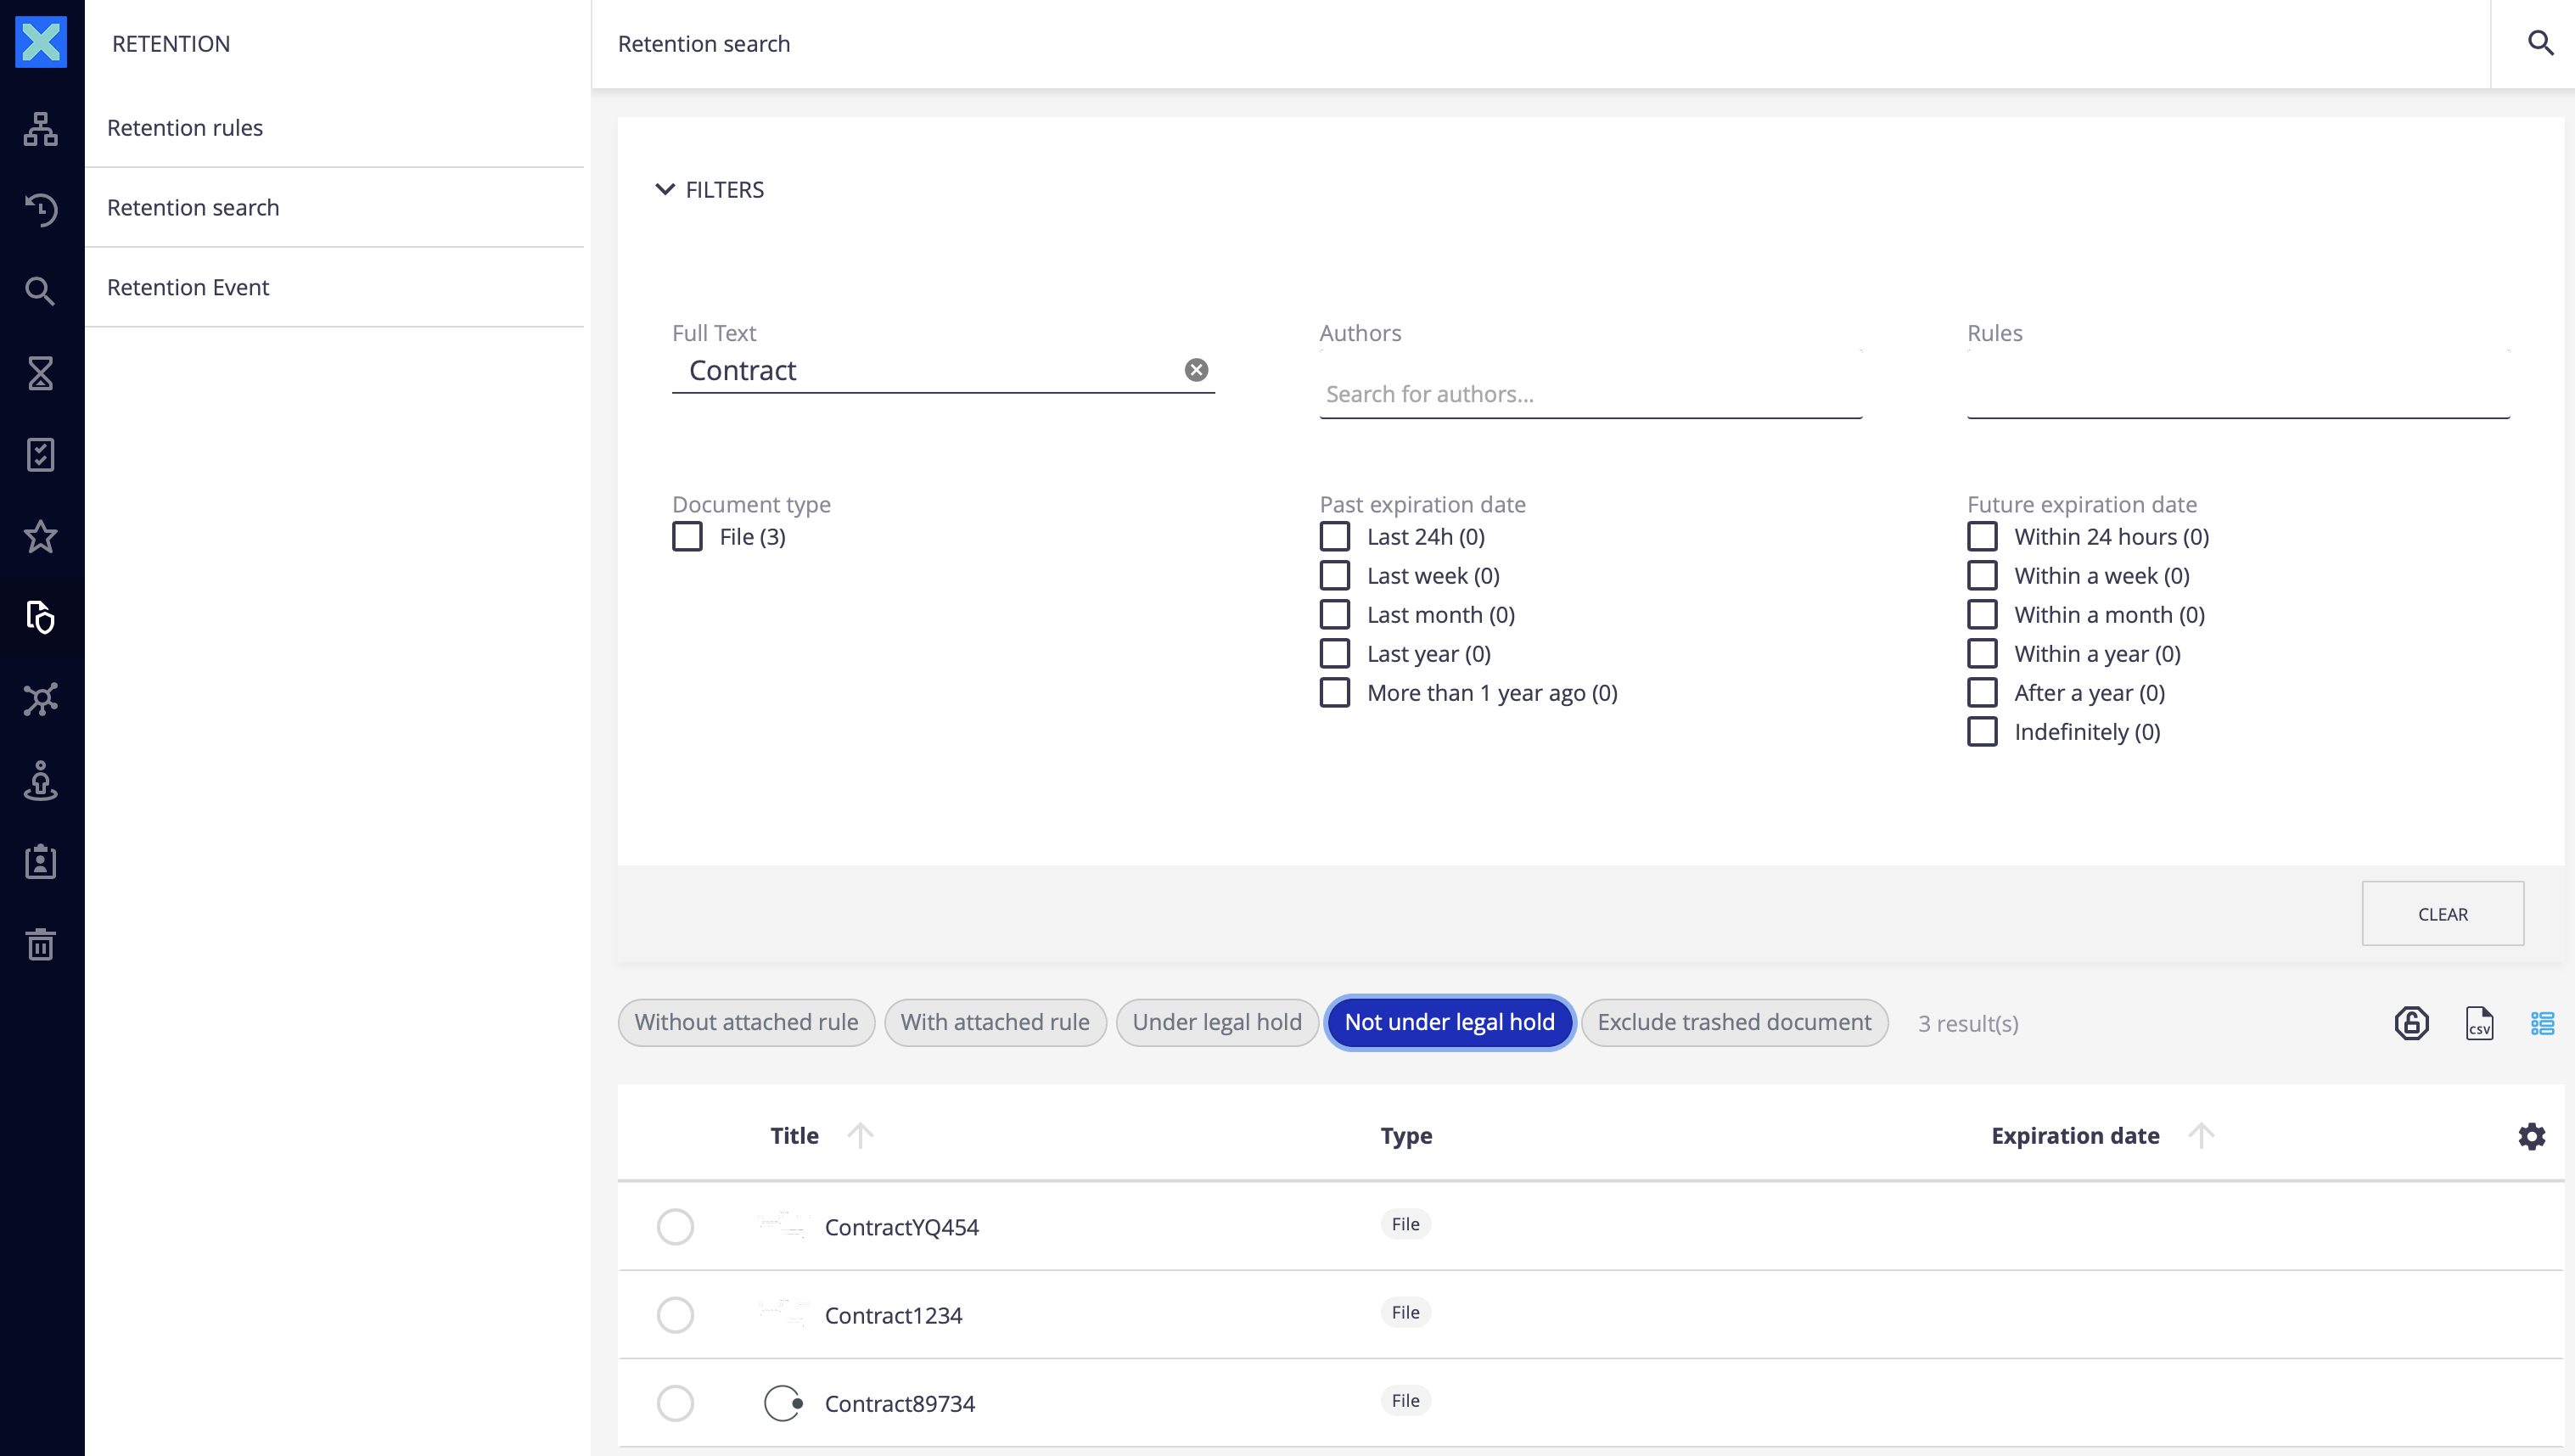

Fill in the description field from the popup window and confirm.
Remove a Legal Hold
There are different ways to remove a legal hold. You can remove a legal hold for a single document or for several documents in a row.
From a Document View
Once on the View tab of your document:
Click on More
 and select Remove legal hold.
A popup window is displayed.
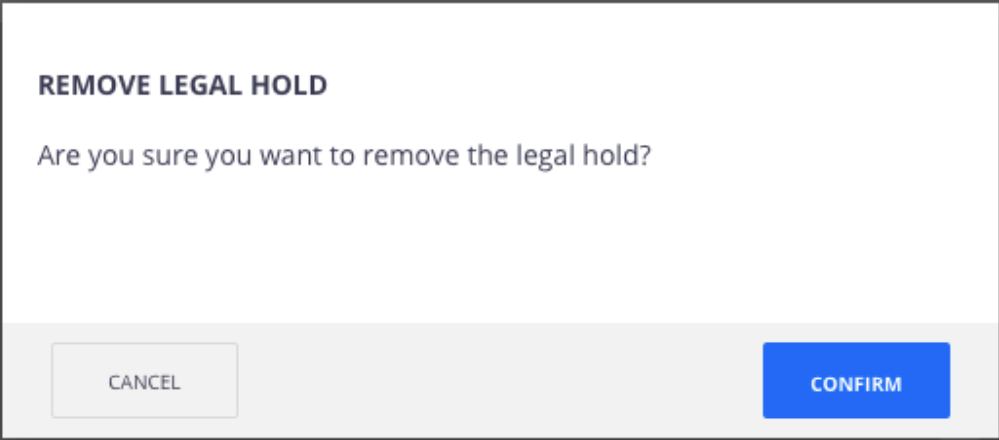

Click on Remove legal hold.
The top bar displayed on top of your document doesn't display the legal hold anymore.


From a Result List
After having performed a search from the retention search menu, a list of documents is displayed. Then, if you click on the Under legal hold quick filter, you can click on Remove legal hold icon
![]() at the top-right of the screen.
at the top-right of the screen.
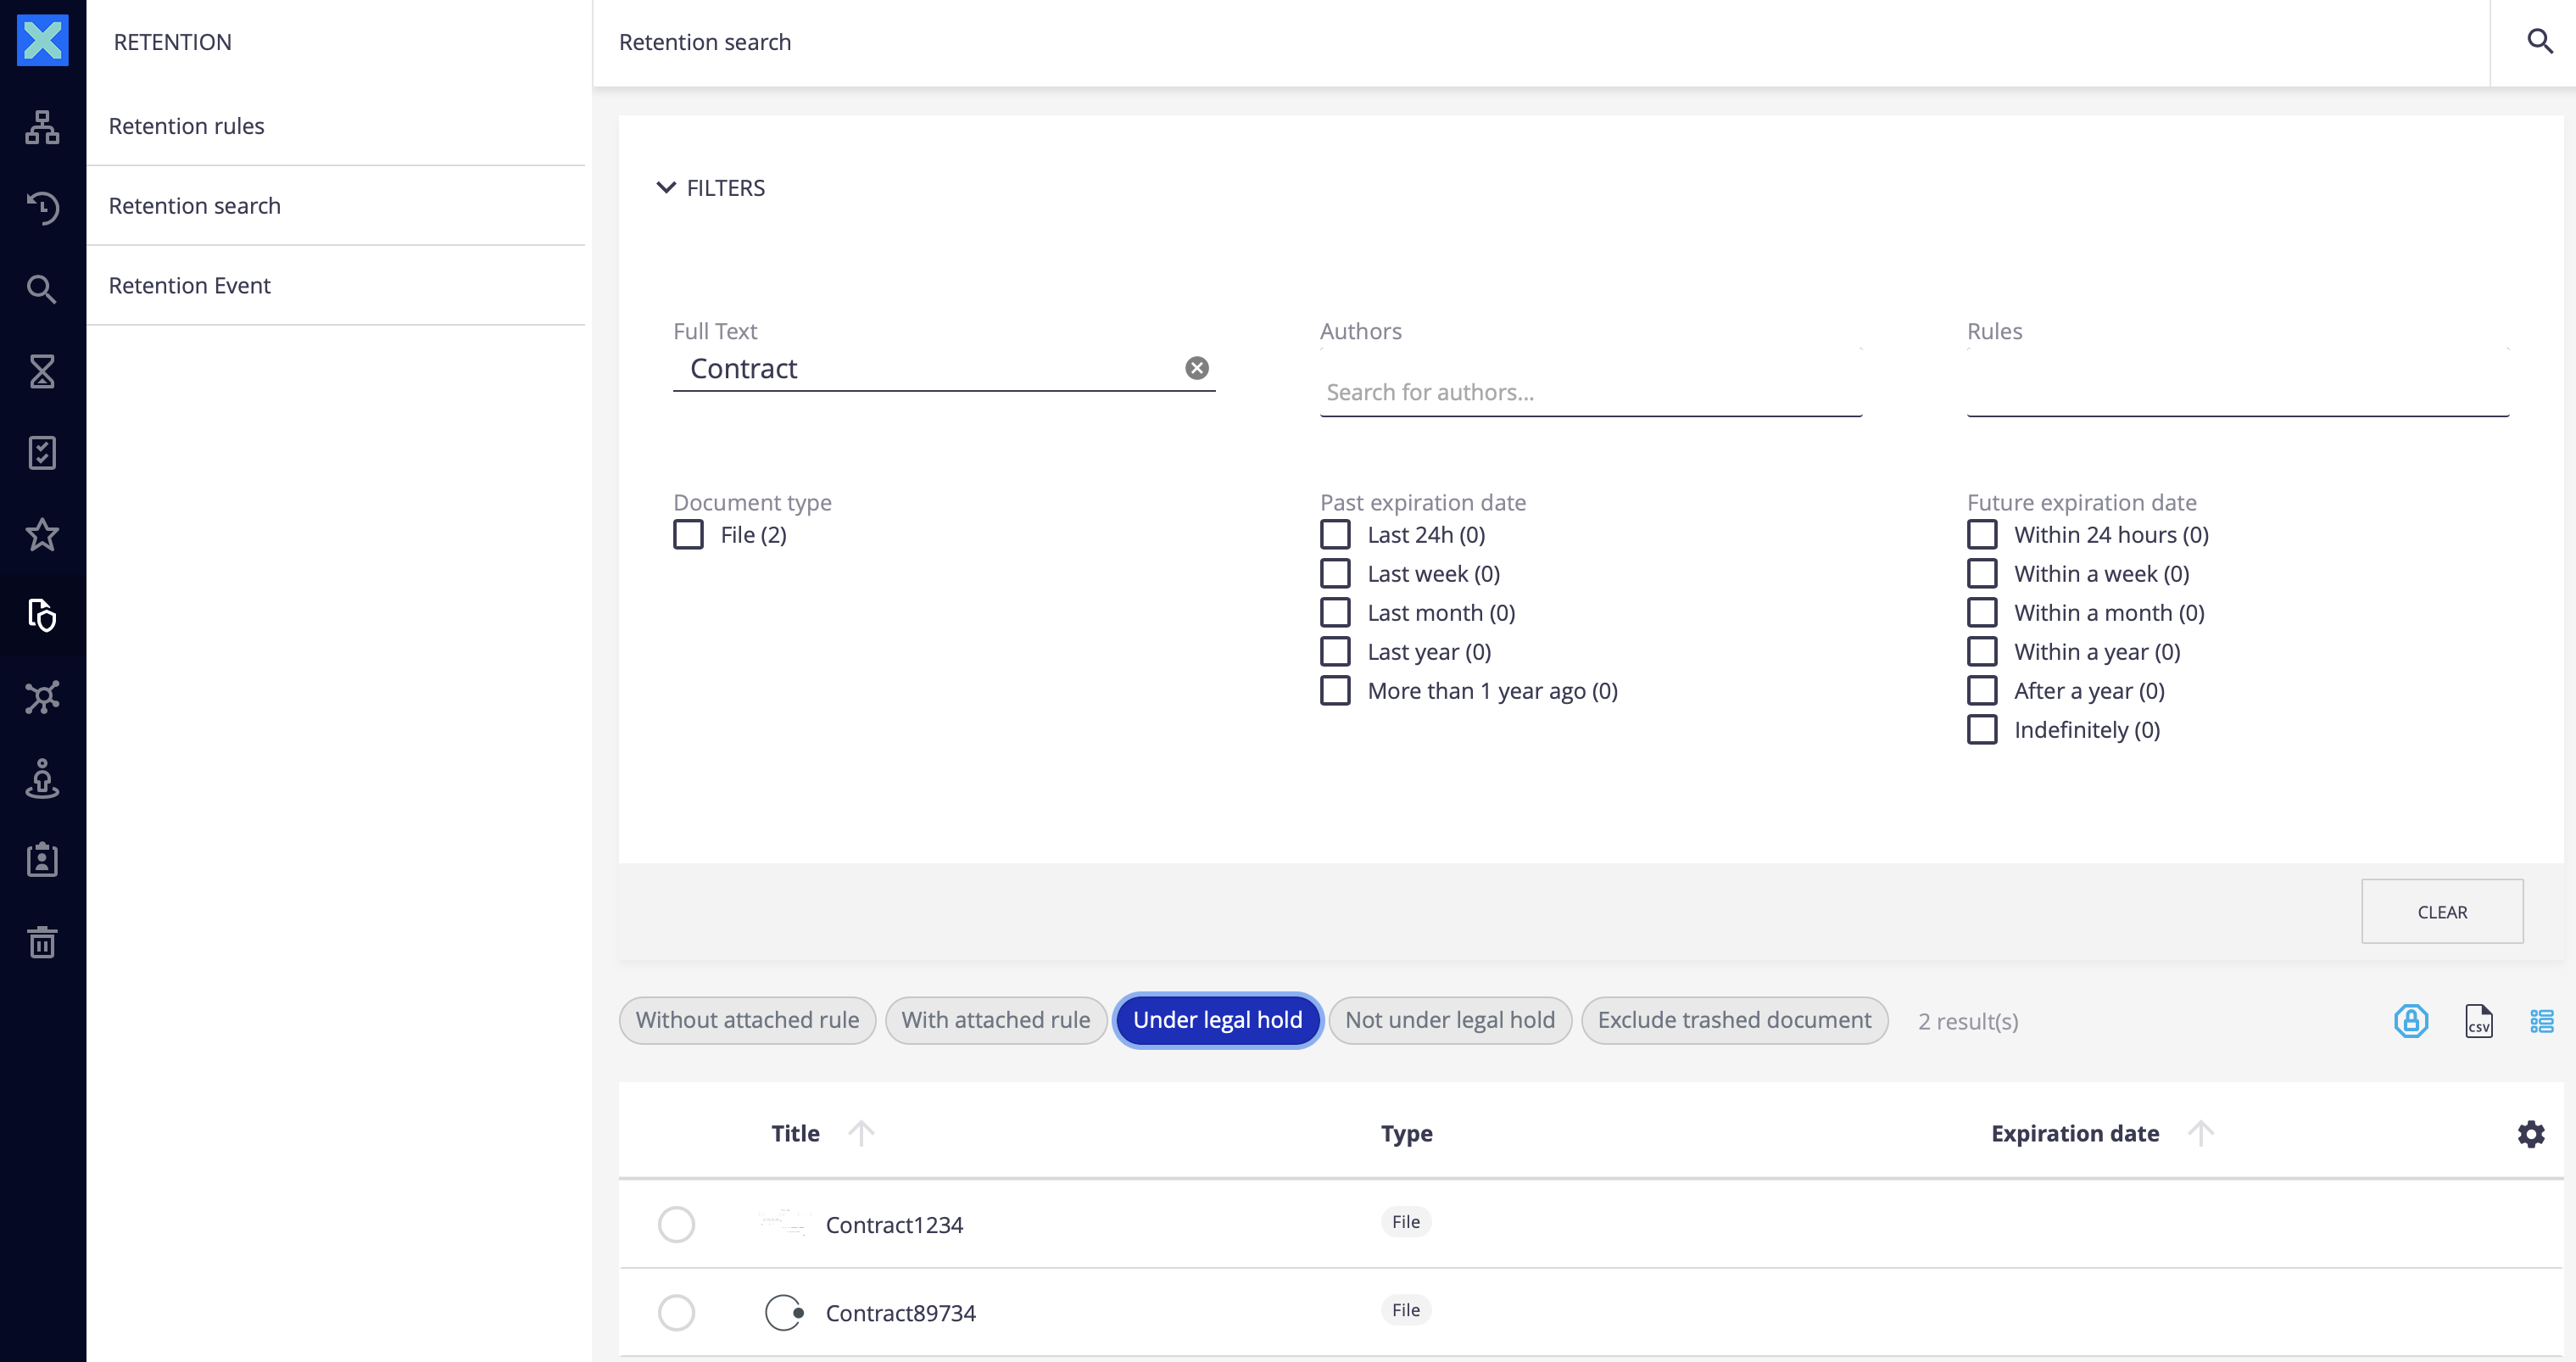

Confirm from the popup window.
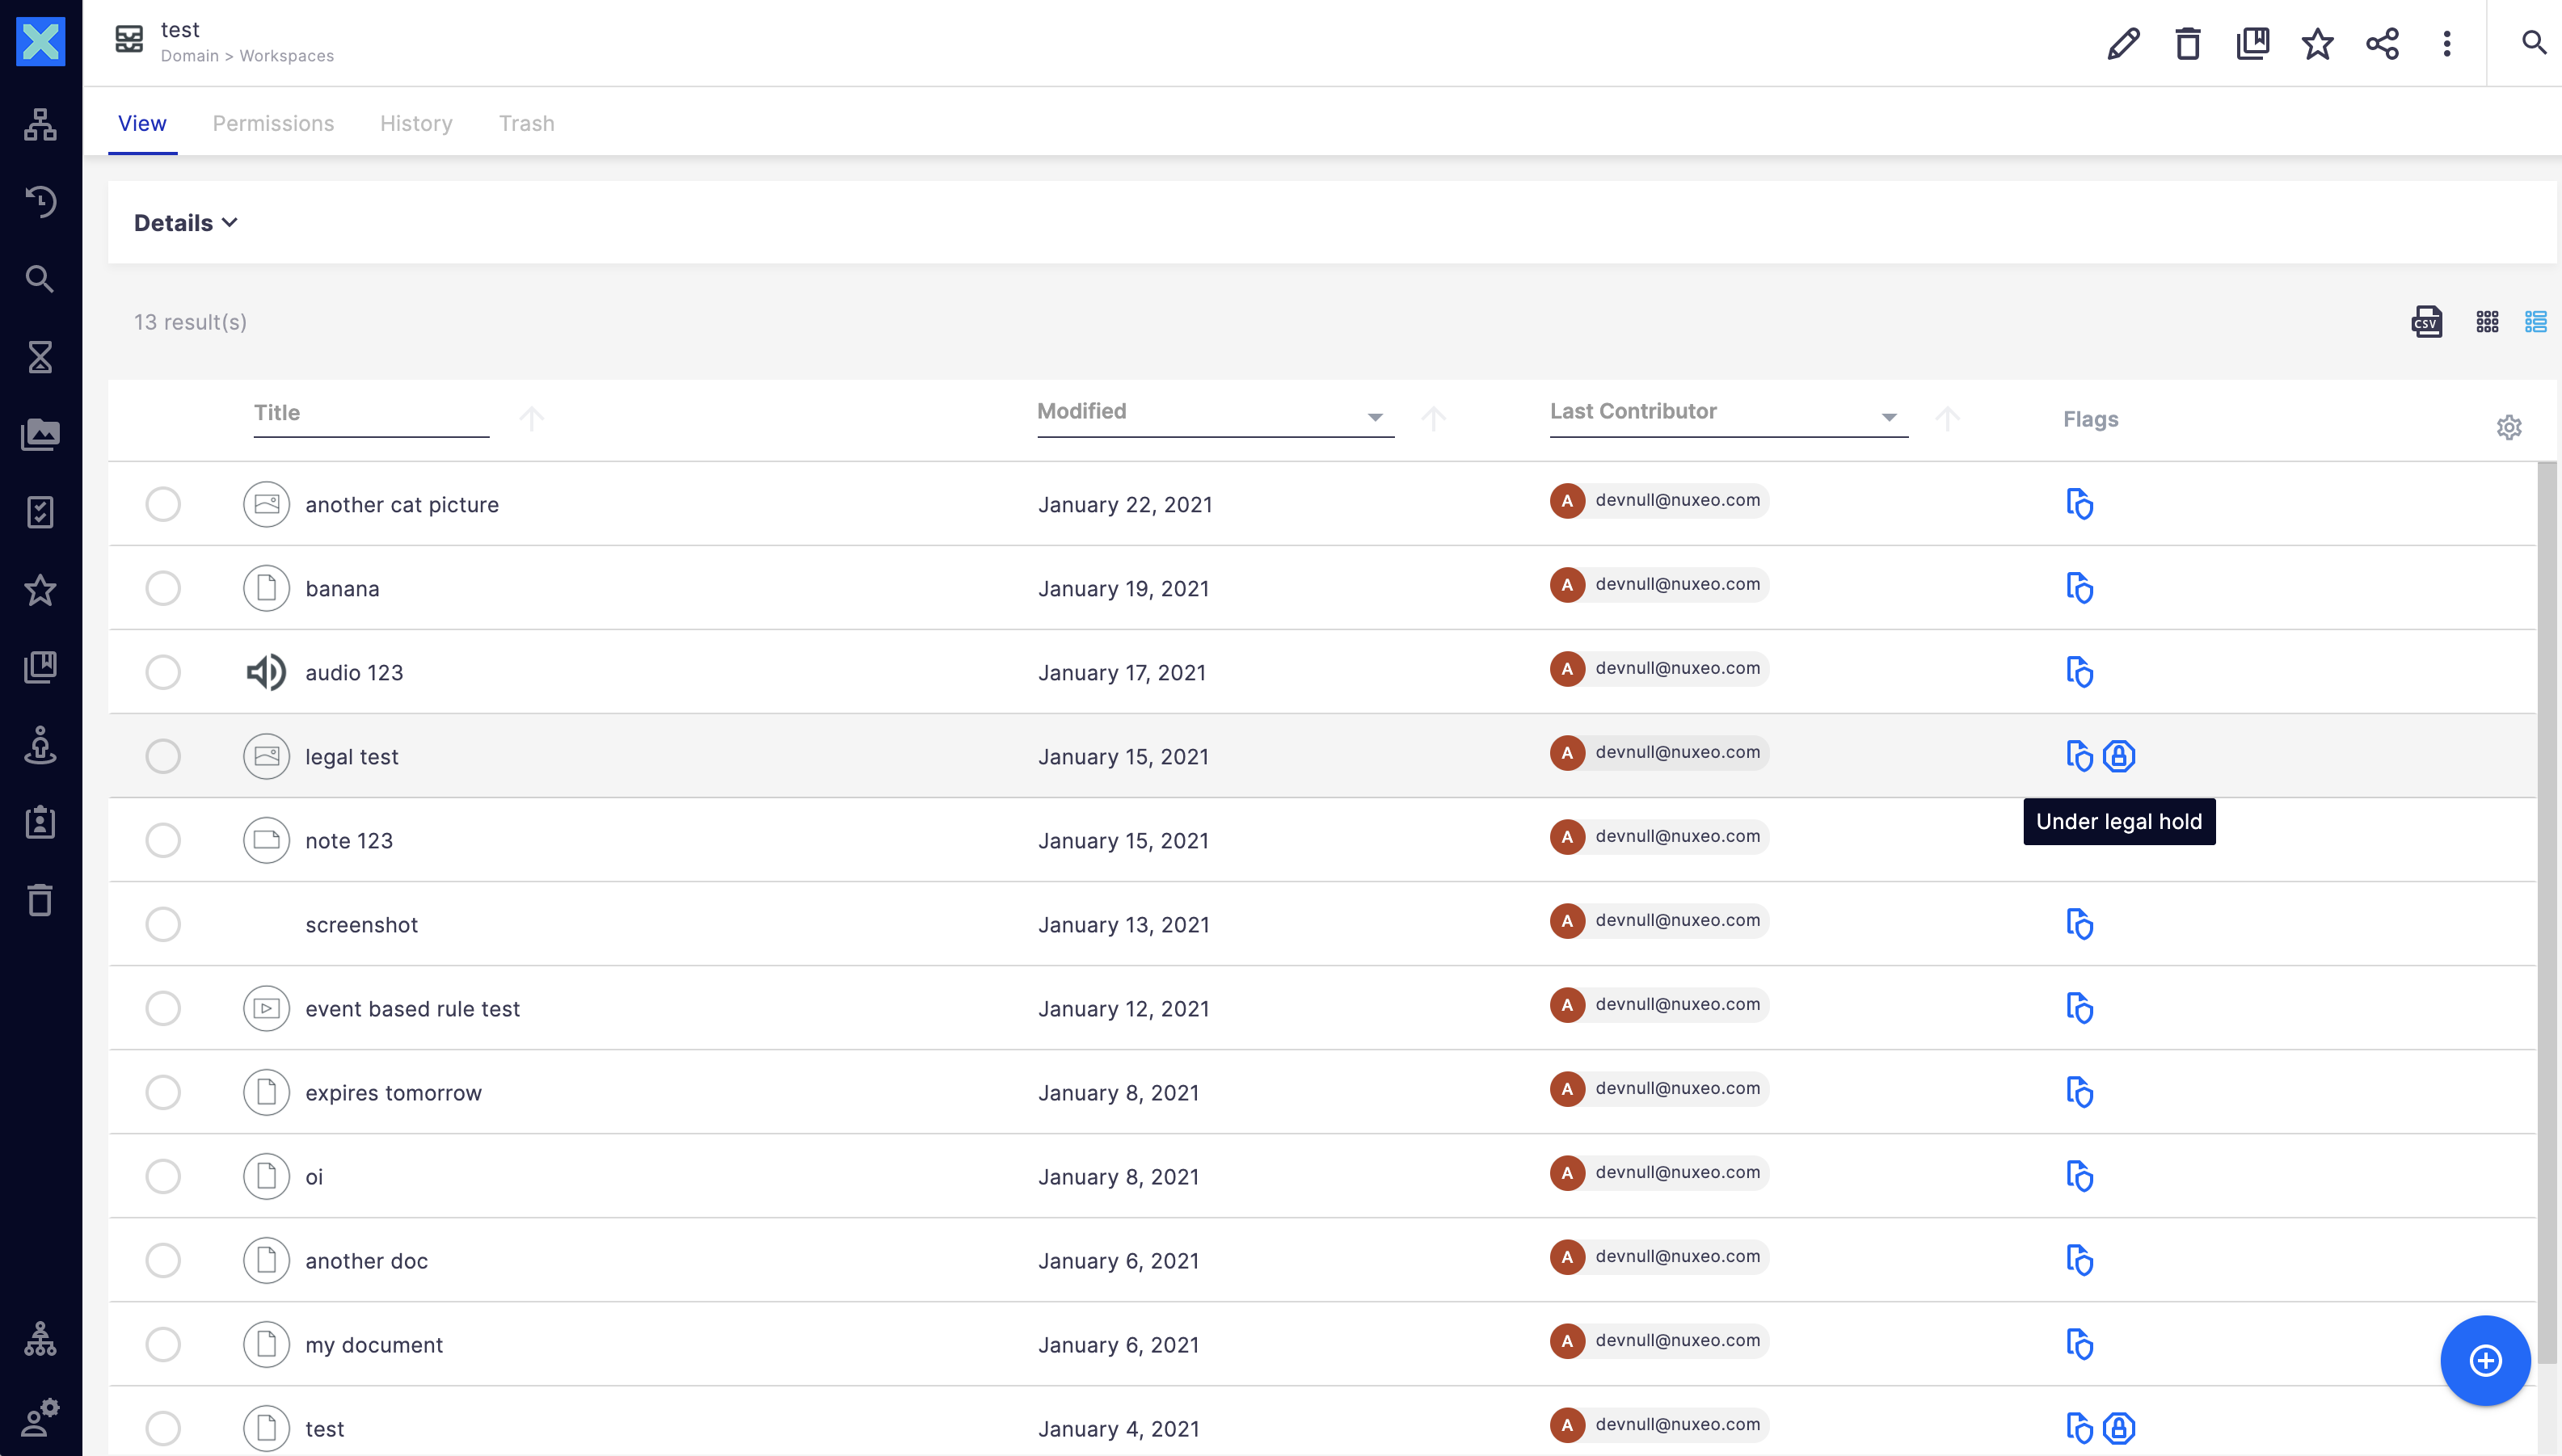
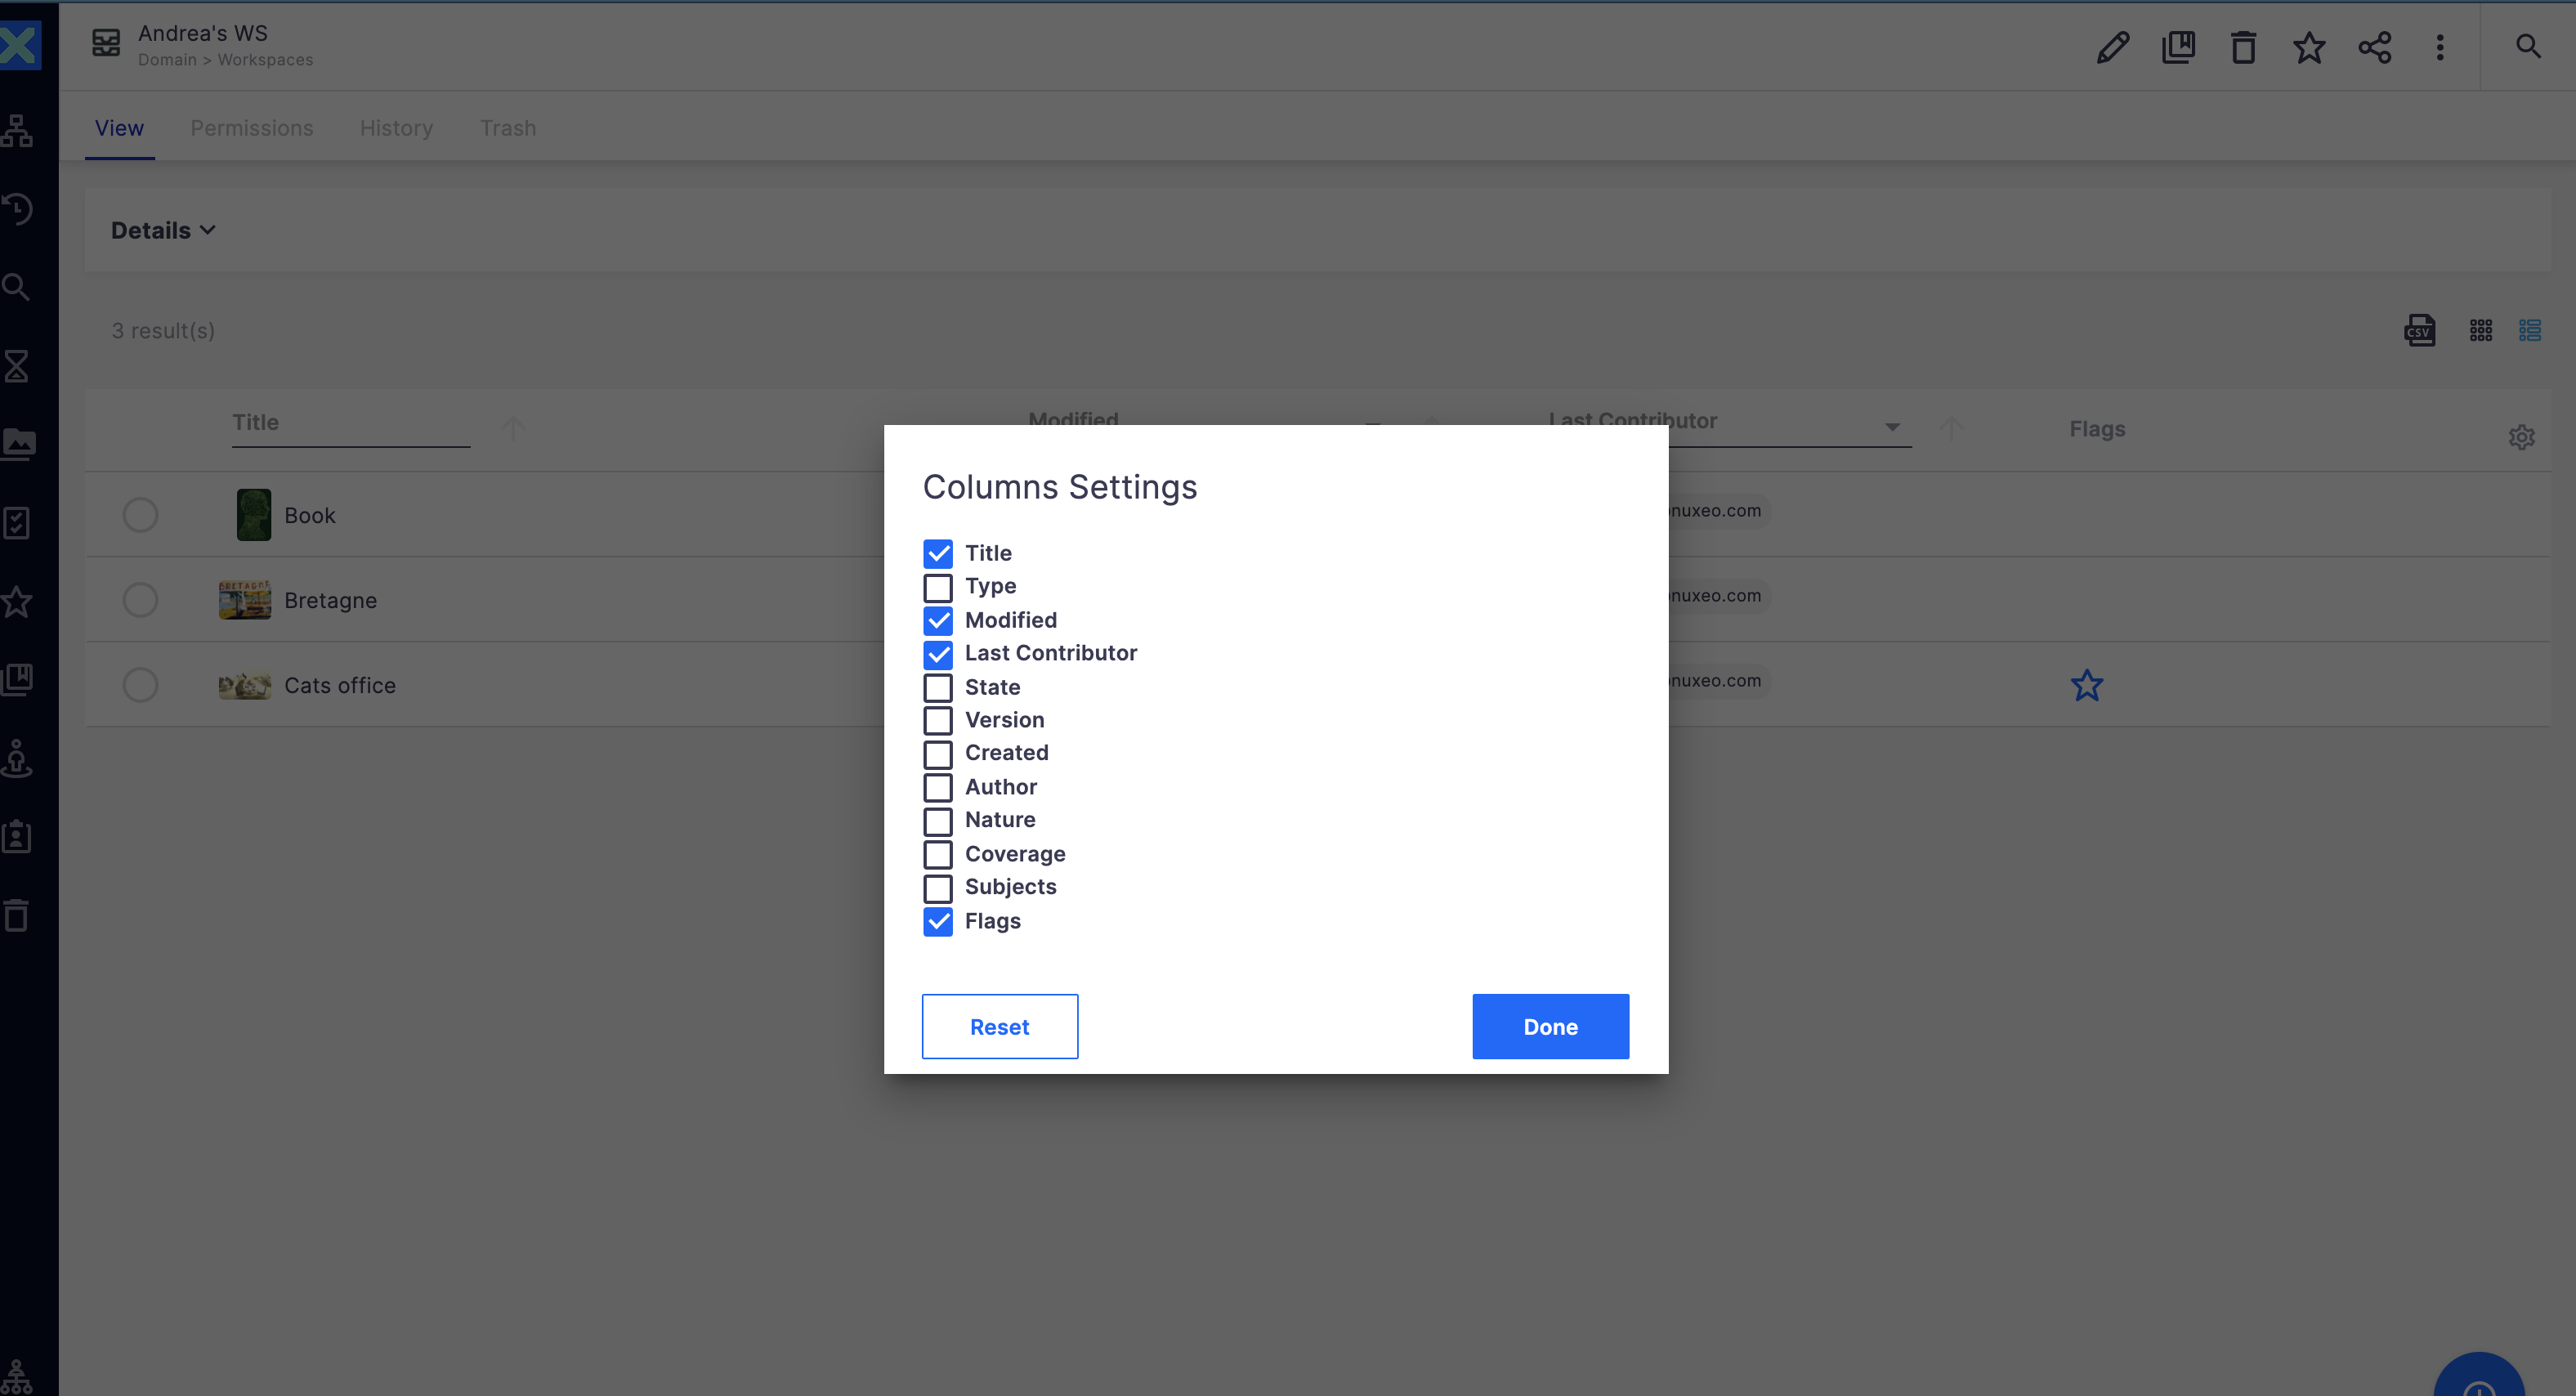
Visualising Retention/Legal Hold Status
To help to easily visualize if any documents are under retention or legal hold when browsing, we added a - hidden by default - column named "flags column".
This column gives some extra details about the documents, such as if the document is a favorite, is under cold storage or if it's under retention or legal hold.
As a User
As a user, you will see some differences on the View tab of your documents:
- There is an info header displaying Retention information or legal hold.
- Some actions can be unavailable due to the nature of a document under retention or legal hold, or due to the functional limitations involved by the Nuxeo Retention Management addon.
The following tables describe the availability of document actions:
- The action is available (depending on the user permissions) as for a standard Nuxeo instance,
- The action is disabled for records, meaning the action is disabled only when the document is under retention or legal hold,
- The action is disabled on instance, meaning it's disabled for all documents on the Nuxeo instance, due to some limitations coming from the Nuxeo Management addon.
With Standard Mode
| Feature | |||
|---|---|---|---|
| Available | Disabled for records | Disabled on instance | |
| Preview | |||
| Download | |||
| Export | |||
| Add to collection | |||
| Add to favorites | |||
| Add to clipboard | |||
| Notify me | |||
| Share | |||
| View permissions | |||
| Change permissions | |||
| View history | |||
| View publishing | |||
| Add tags | |||
| Start process | |||
| Lock | |||
| Edit metadata | |||
| Publish document | |||
| Replace main file | |||
| Delete main file | |||
| Delete document | |||
| Comments | |||
| Versioning | |||
| Add attachment |
With Compliance Mode
| Feature | |||
|---|---|---|---|
| Available | Disabled for records | Disabled on instance | |
| Preview | |||
| Download | |||
| Export | |||
| Add to collection | |||
| Add to favorites | |||
| Add to clipboard | |||
| Notify me | |||
| Share | |||
| View permissions | |||
| Change permissions | |||
| View history | |||
| View publishing | |||
| Add tags | |||
| Start process | |||
| Lock | |||
| Edit metadata | |||
| Publish document | |||
| Replace main file | |||
| Delete main file | |||
| Delete document | |||
| Comments | |||
| Versioning | |||
| Add attachment |