The info-view pop-up displays the metadata of a selected document. You can customize it by Studio or an XML extension. The default info layout is used on the info view for documents that don't specify a specific info layout.
Modifying the Info-View Pop-up by Default
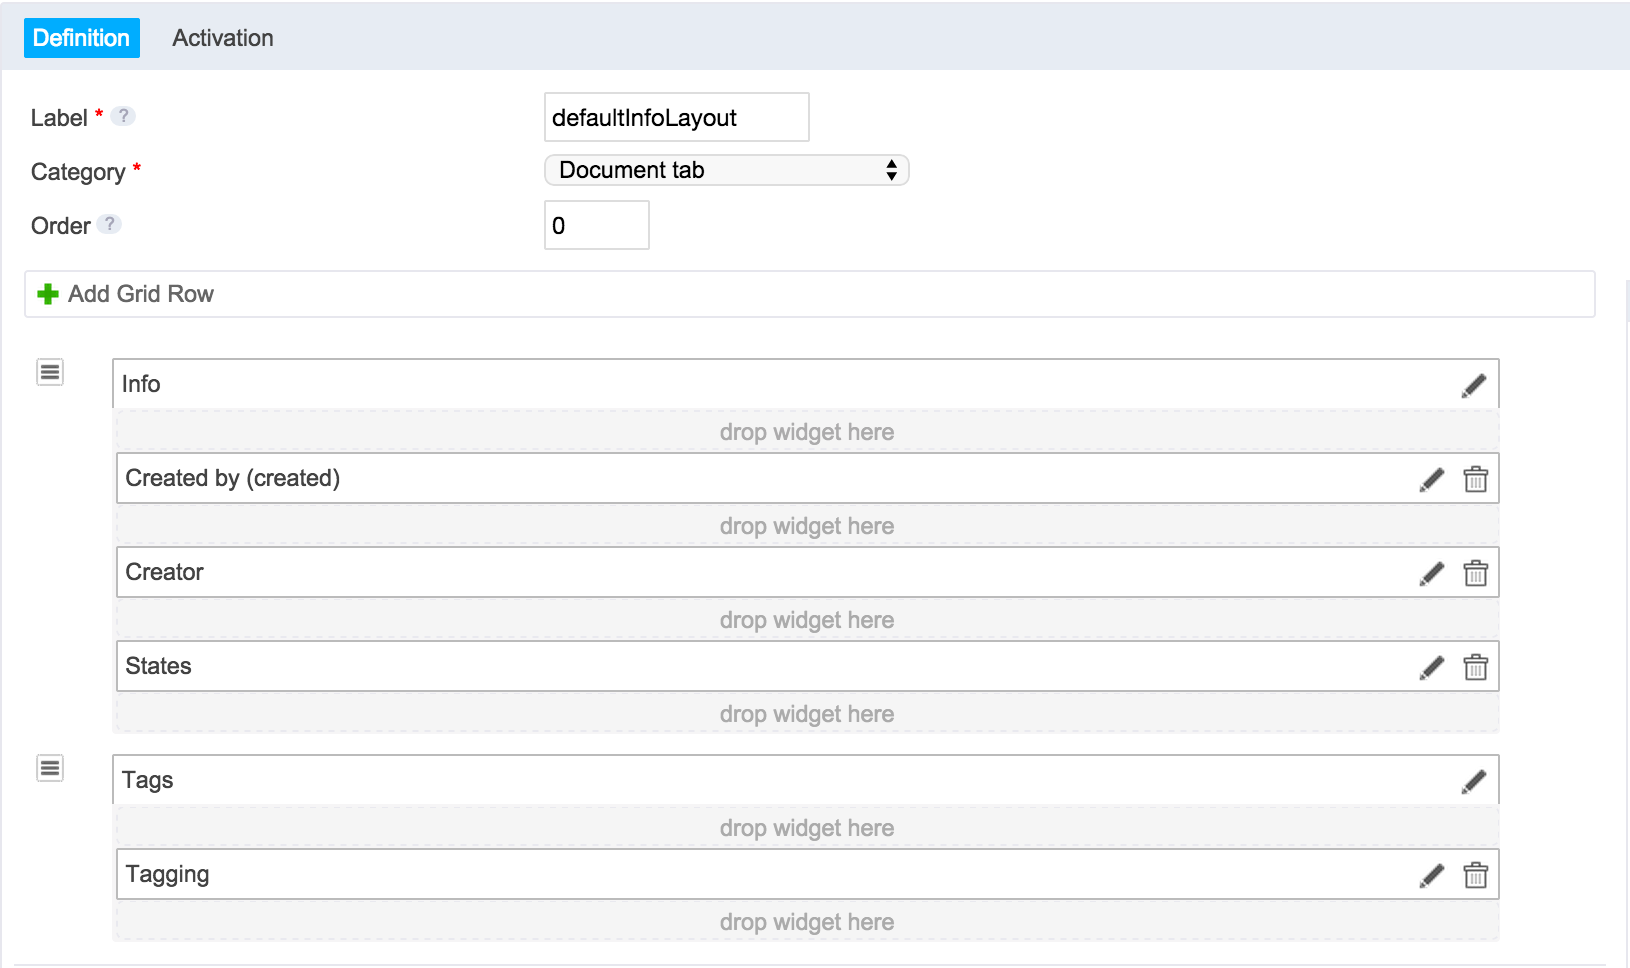
Through Studio, the default info layout (the layout between the document title and the actions, on the right) can be easily customized.
- In the Listings & Views item of the Studio tree, click on Tabs and click the New button.
On the creation form, fill in the Feature ID:
defaultInfoLayoutMake sure to name your tab
defaultInfoLayoutto override the default one.On the Definition tab, a default grid with two columns is available by default.
Click on
 and select Remove next to the default grid with the two columns.
Click on Add Grid Row, and select the row type that displays only one column.
If you use more than one column in the grid this will potentially break the style of the popup.
Drag and drop widgets from the right to the grid that you want to display on your info-view, The widget editor window pops up.
You can put one widget or more by row to regroupe them and create a container with a title.


In the Activation tab, on "Current document has one of the types" select Nothing to hide your custom tab from the content view,


- Click on Save to save your modifications, both in the widget editor and in the main window. You can now deploy your changes on your platform.


Creating a New Info-View Pop-up for a given Document Type
You can customize the info layout for a document type by adding layouts to the info mode with a contribution on the UI type.
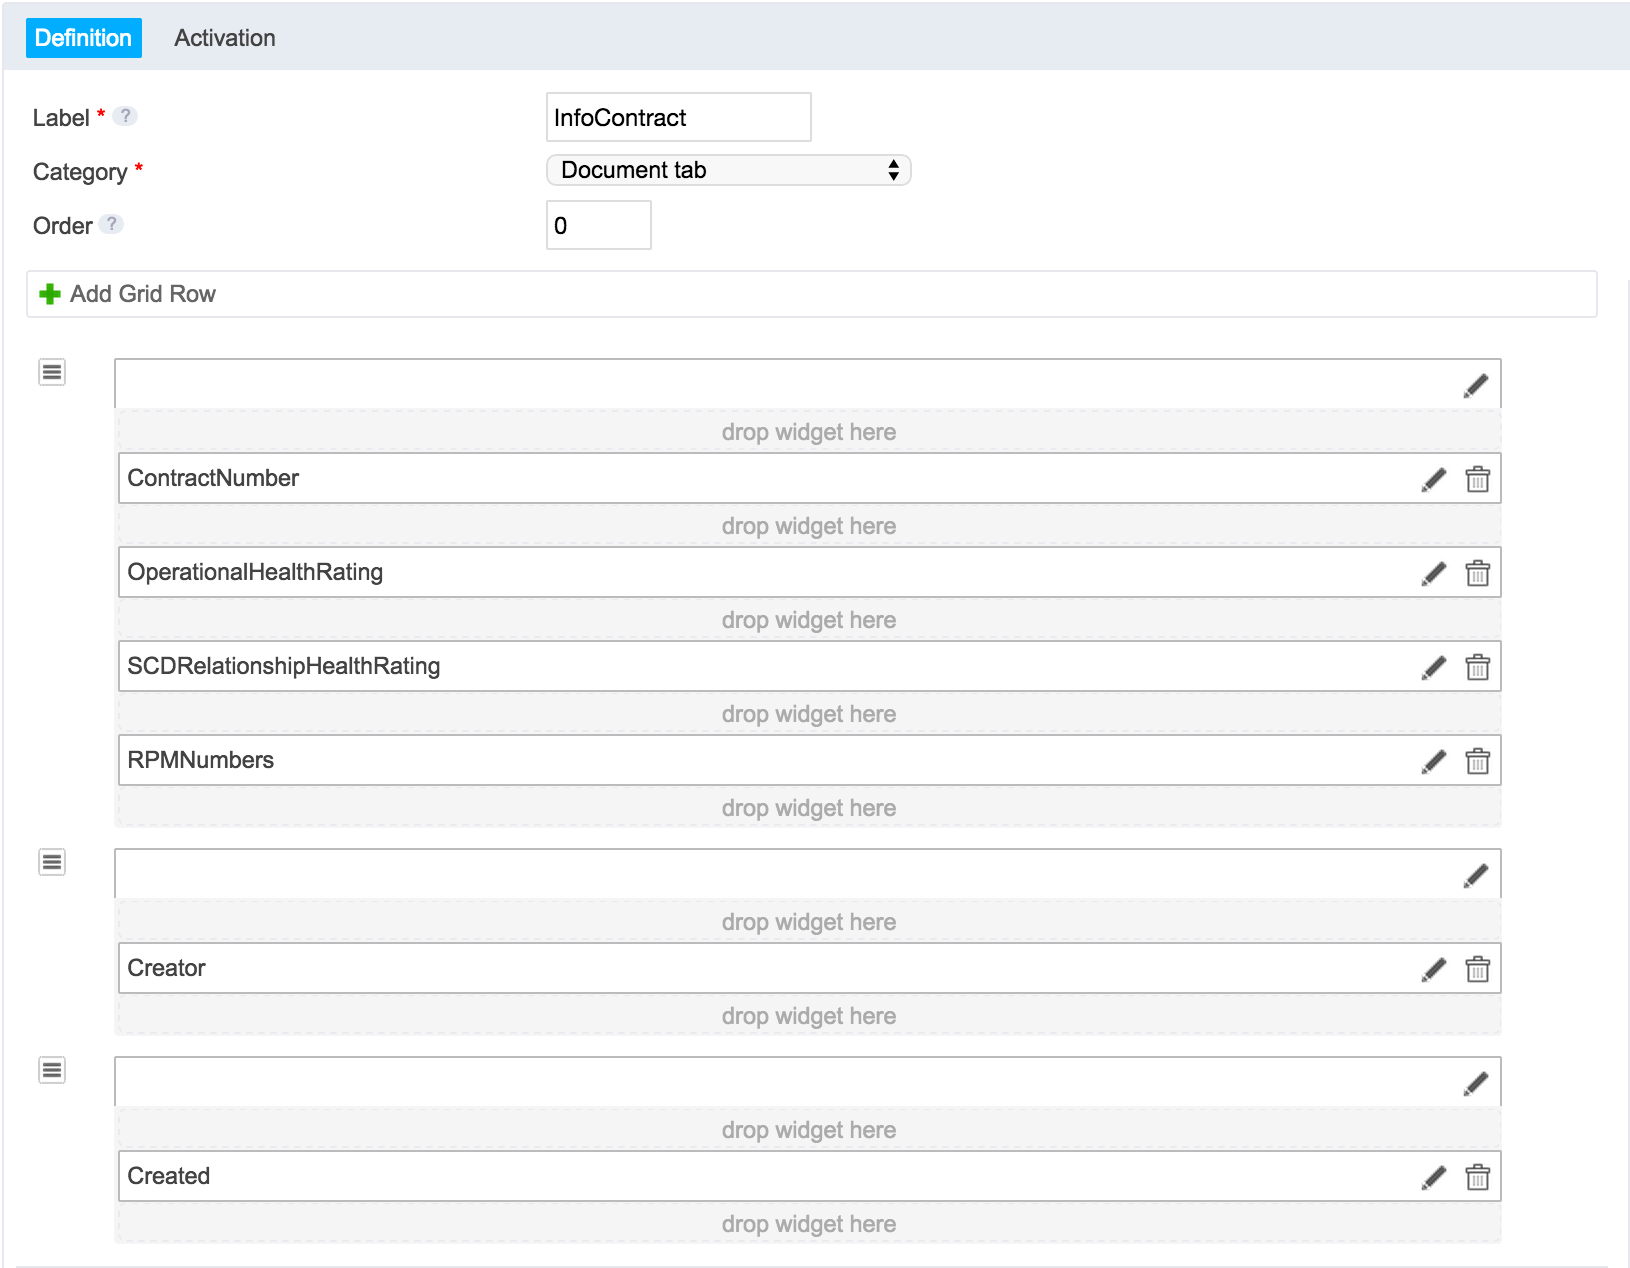
- For example for a document type Contract, in Studio we create a tab named
InfoContract,

- Create an XML extension in the advanced settings to reference the tab layout. The generated layout is always of the form
FeatureID@tabLayout.
<extension target="org.nuxeo.ecm.platform.types.TypeService" point="types">
  <type id="Contract">
    <layouts mode="info">
      <layout>InfoContract@tabLayout</layout>
    </layouts>
  </type>
</extension>
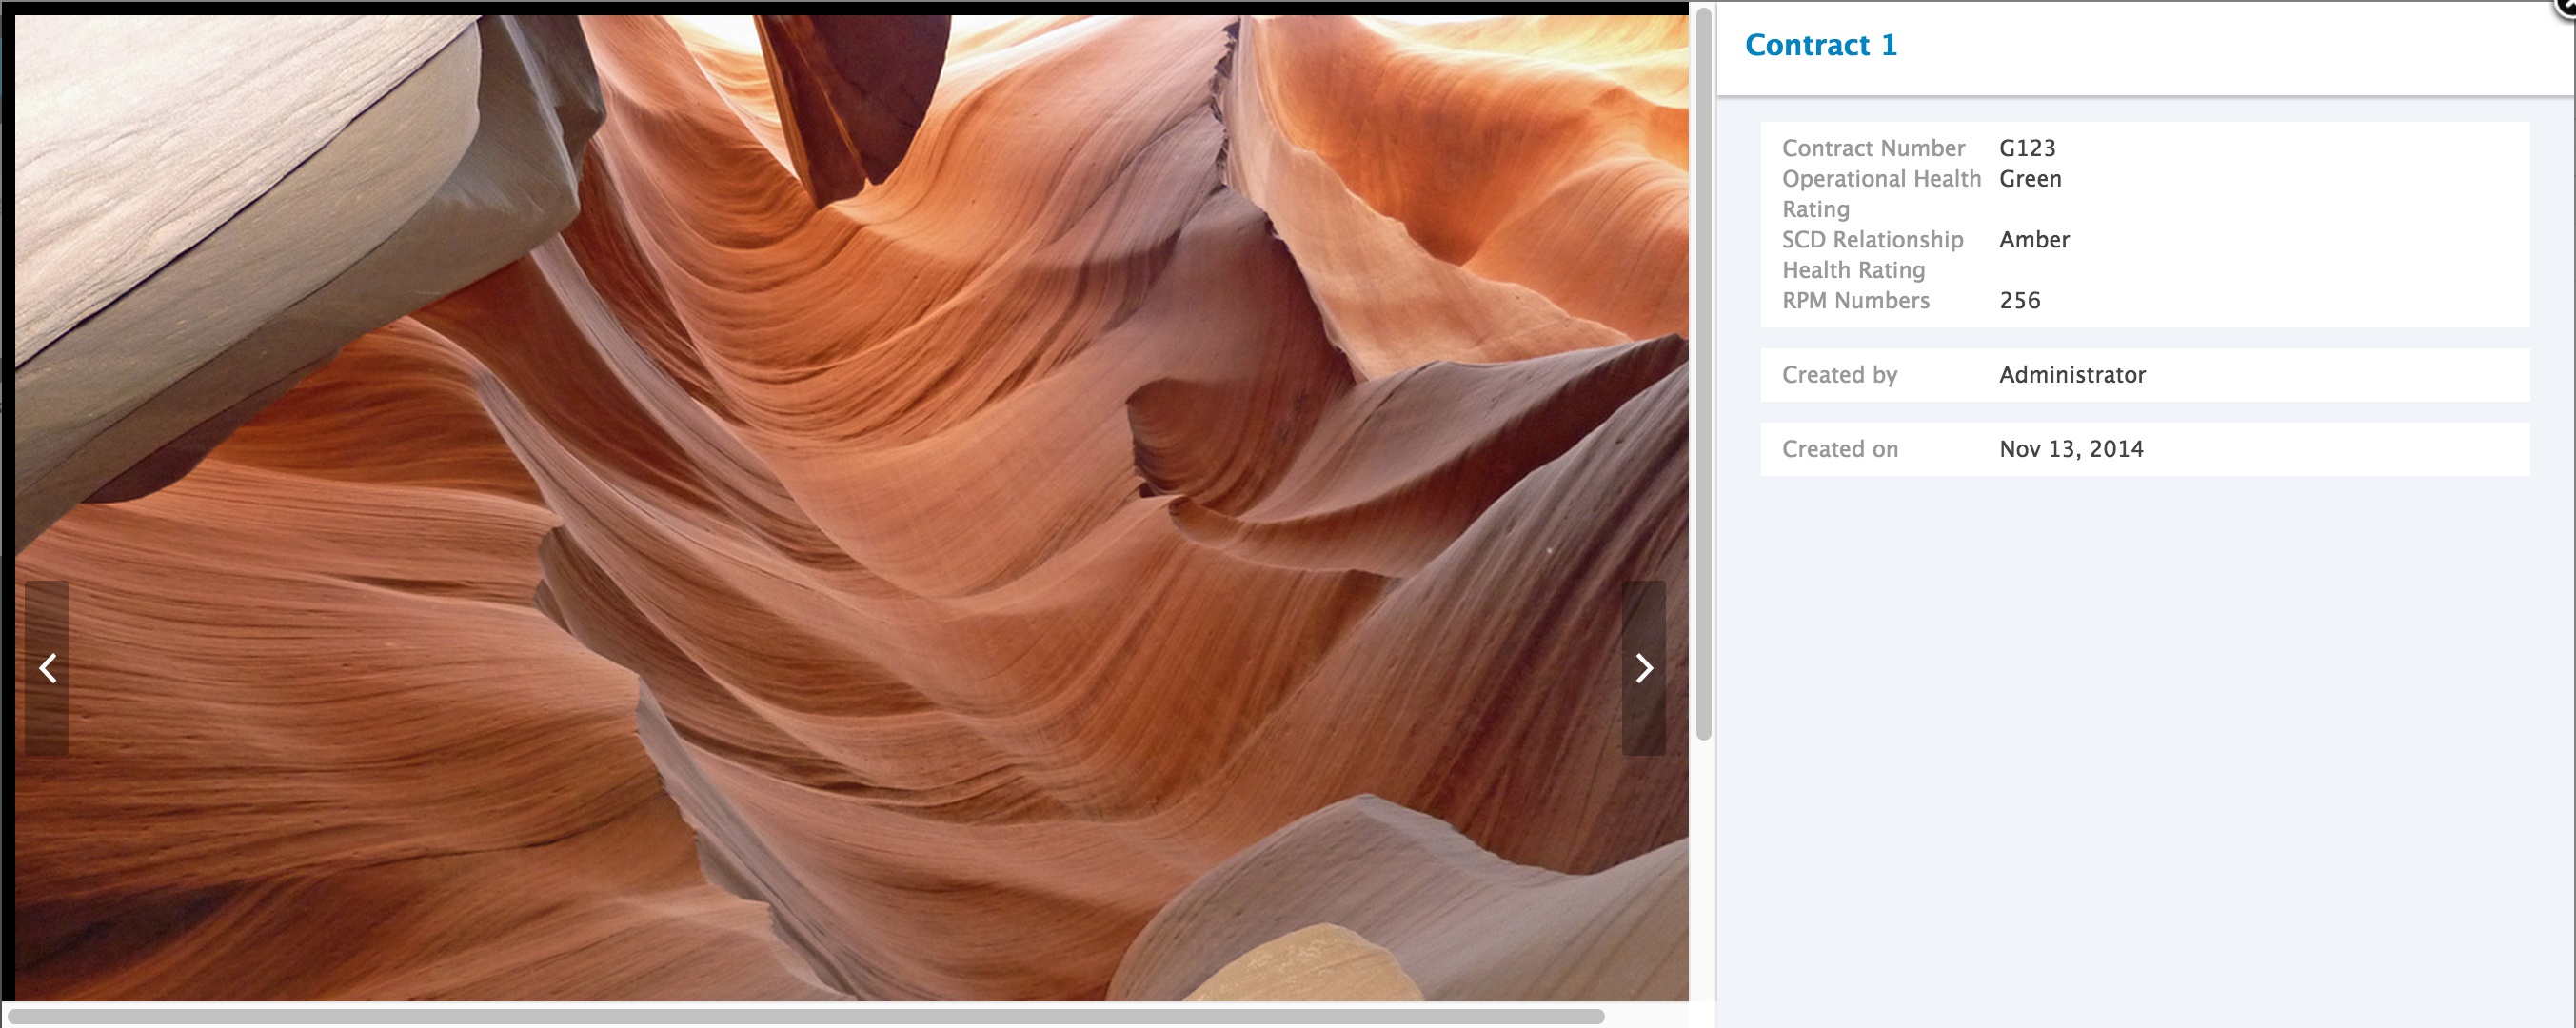
You should end up with something like this on your document type Contract:

