This document is part of the Sub Workflow Example project series.
What Will We Do in This Step?
We will create the document type on which the workflow will be launched.
Reviewing the Rules
Before starting the document type creation, we will take a little time to review what is expected from us at this step:
Users should be able to fill in their expenses and attach the corresponding receipt. => This means we need to create a document type that will allow us to attach a binary file. The file will be a mandatory field.
Each expense should be validated separately. => No more than one binary file at a time then.
Expense type can be chosen from a list (transportation, hotel or misc). => We will need to create a vocabulary.
Expenses worth 100 dollars or more and/or belonging to the misc type have to be validated by the accounting service and the general manager, otherwise only by the accounting service. => The user will have to fill the amount; amount and expense type should be mandatory fields.
Alright; now that we know where we are heading to, we can look further.
Creating the Vocabulary
Before creating the document type, we will create the vocabulary so that we have all necessary elements to complete it afterwards.
- In Nuxeo studio, go to Vocabularies and click on the New button.
- Name your vocabulary:
expenseType. - Leave the default vocabulary type, a simple vocabulary is exactly what we need.
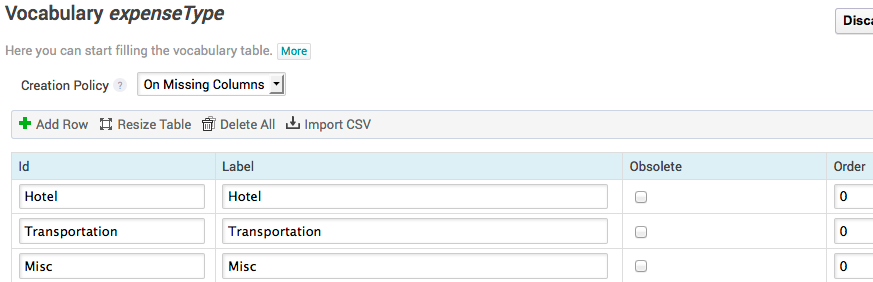
Add the following entries into the vocabulary (leave the default values for elements not indicated in the table):
Id Label Hotel Hotel Transportation Transportation Misc Misc - Save your vocabulary.
You can take a look at the expected result below:
Creating the Expense Document Type
On to the document type creation.
- In Nuxeo Studio, go to Content Model > Document Types, and click on the New button.
Fill in the fields:
- Feature ID: Expense
- Extends: Choose "Nothing"
- Label: Expense
- Click on the Ok button.
Defining the Document Type
Now that the document type is created, we have to define its specificities.
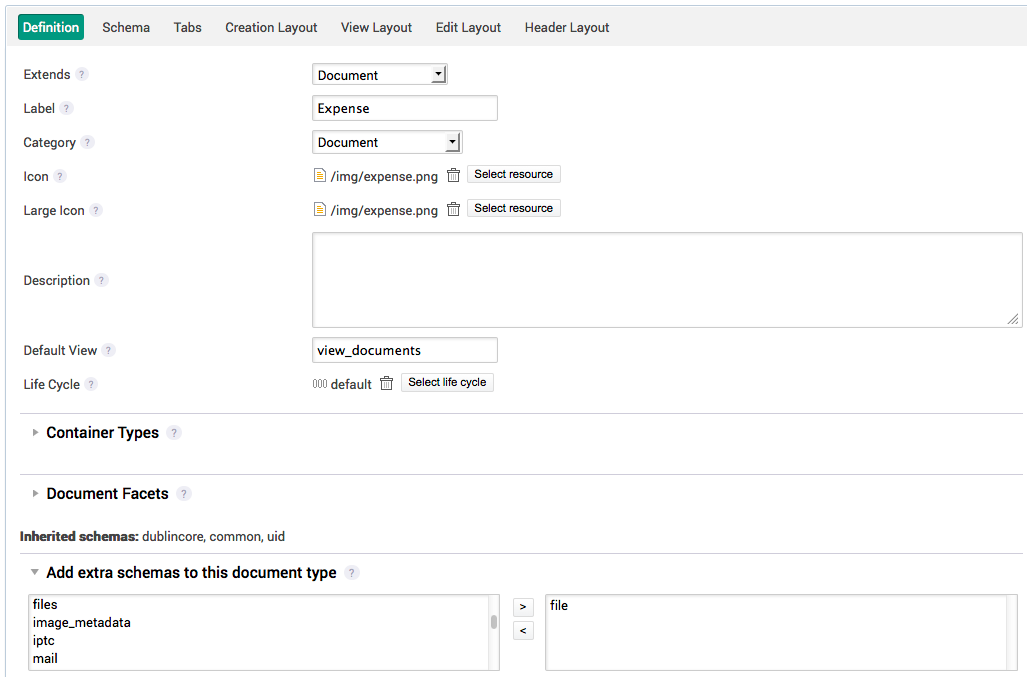
Definition Tab
- Set the category to Document.
- (Optional) You may add icons if you like to, your document type will be nicer that way.
- Save your modifications.
Look at the result below:
Schema Tab
We will need to add two specific fields: amount and type.
- In the Add extra schemas to this document type section, add the
fileschema (notfiles). Our document will now be able to hold a single binary file. - In the Add a custom schema section:
- Add a field named
amountof type Floating point. - Add a field named
expensetypeof type String.
- Add a field named
- Save your modifications.
Defining the Document Type Layouts
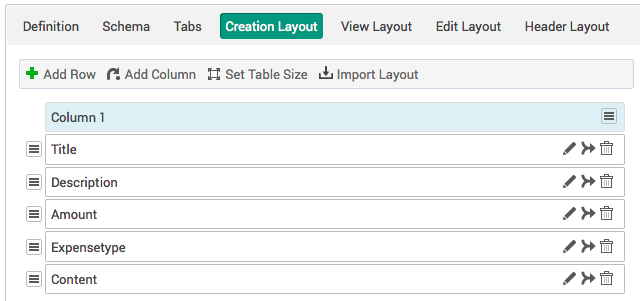
In the Creation Layout tab, create the layout as following:
Schema Field Widget type Required? dublincore title Text Yes dublincore description Textarea No expense amount Floating point Yes expense expensetype Vocabulary (use the expenseType vocabulary here!) Yes file content File Yes - Import this (create) layout in the Edit Layout and View Layout tabs.
- Save your modifications.
See the result:
Our document type is ready to rock!