This document is part of the Sub Workflow Example project series.
What Will We Do In this Step?
We will create the main workflow that will call a subworkflow depending on the document's metadata, and pass it variables along the way.
Creating the Workflow
- In Nuxeo Studio, go to Workflow > Process definitions and click on the New button.
Fill in the fields:
- Feature ID:
expenseValidation - Label: Expense validation
- (Optional) Description: Request your expense validation.
- Feature ID:
- Click on the Ok button.
Activtion Tab
This workflow will be a wrapper for the subworkflows. So contrarily to the previous ones we created, it should be visible to the users.
- In the "Current user has one of the permissions" list, choose Edit.
- In the "Current document has one of the types" list, choose Expense.
- In the "Current document has life cycle" field, type
project. We wouldn't like to launch the workflow on validated expenses. - Save your modifications.
Graph Tab
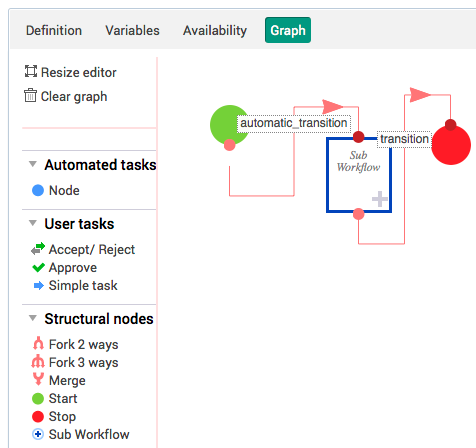
Drag and drop the following nodes on your graph:
- A Start node.
- A Sub Workflow node.
- An end node (Stop).
- Link the start node's output transition to the subworkflow node.
- Link the subworkflow's output transition to the end node.
- Save your modifications.
Your graph should look like this:
Edit the Sub Workflow Node
General Tab
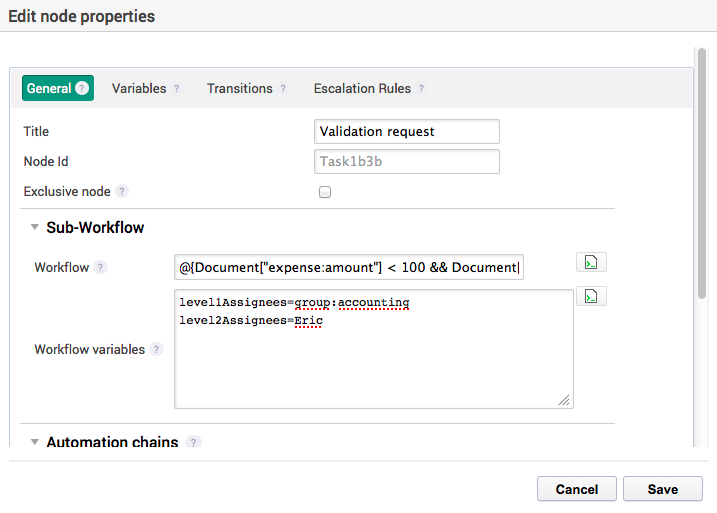
Set the following values:
Title: Validation request
Workflow: We will use an MVEL expression to determine which workflow should be run. Type the following expression in this field:
@{Document["expense:amount"] < 100 && Document["expense:expensetype"] != 'Misc' ? 'subOneLevelValidation' : 'subTwoLevelsValidation'} This implements our business logic rule, by checking the expense's amount and its type. If under $100 and not in the misc category, then we call a one level validation, otherwise a two-level validation. Result below (as seen in the expression editor because it is a rather large expression):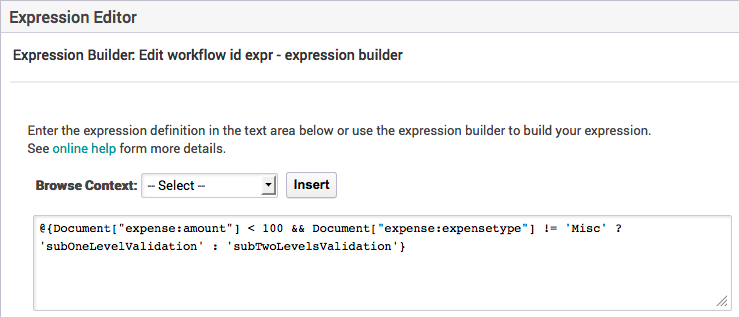
Workflow variables: This field determines which variables we will send to the sub workflow that is called. Note that to be able to use it in your subworkflow, it has to be set in the subworkflow Variables tab; as we did this already in the previous step, we're fine. Each value has to be set on a separate line, so we will fill this field as following:
level1Assignees=group:accounting
level2Assignees=Eric
Look at the result below:
Save your modifications in the node and on the graph.
You are now all set! This tutorial is merely a basic example of what can be achieved with the sub workflow functionality; the rest is up to your imagination.