The goal is to manage all kinds of documents like procedures or notices. At this first step, we will create a new document type called documentationItem. This documentation item will be the main document type we will be using in our project. We will use the Nature metadata to differentiate the different kinds of documentation items. See the page Several Document Types vs One Document Type with a Nature Metadata for more information.
Before You Start
We recommend you first take a look at the Repository Concepts page if you are not yet familiar with the Nuxeo Platform.
In this section we provide example names for items. You'll see different names in screen shots. Most of the time a suffix like "tuto" is added. In your Studio project please use the suggested names (or invent your own) and not the ones in screen shots.
Declaring the Documentation Item Document Type
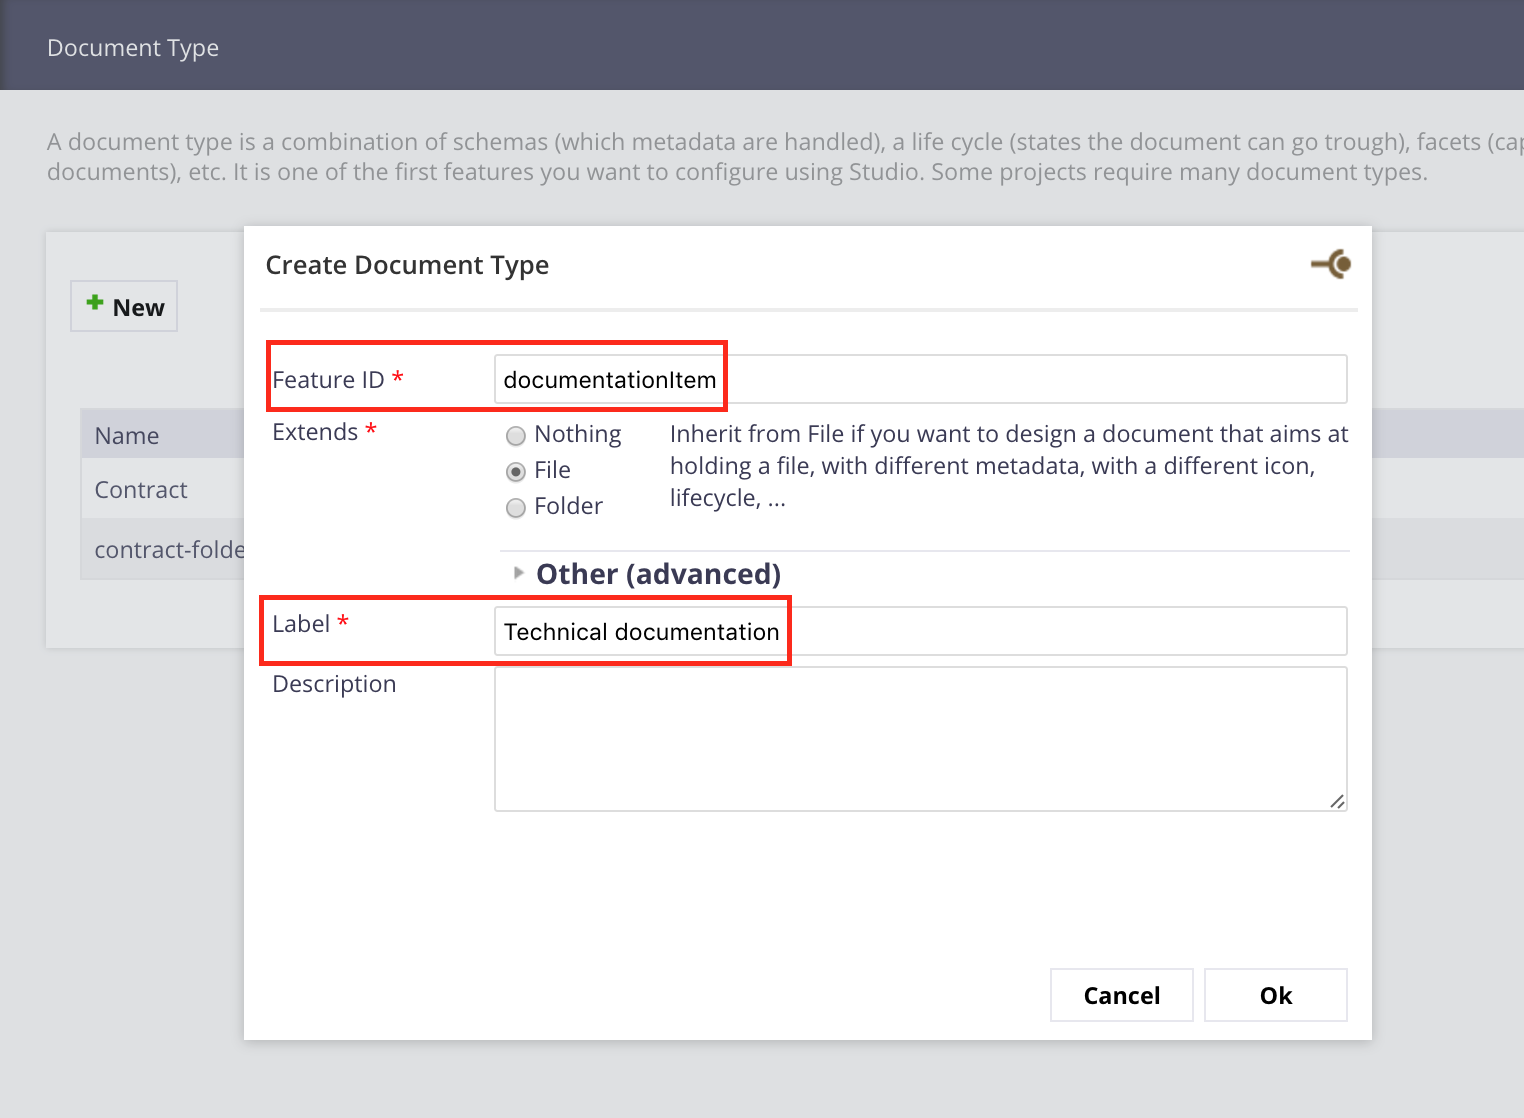
To create the documentationItem document type:
- In Nuxeo Studio, go in Content Model > Document Types.
- Click on New.
- Type the feature ID (i.e. the document type name in Studio):
documentationItem. - In the Extends field, select File. We need to have something holding a binary file with metadata, lifecycle, version and validation. This is very similar to the File default document type.
- Type a label for the end user in the Nuxeo Platform:
Technical documentation item. - Click on Next.
 The
The
documentationItemdocument type is created.
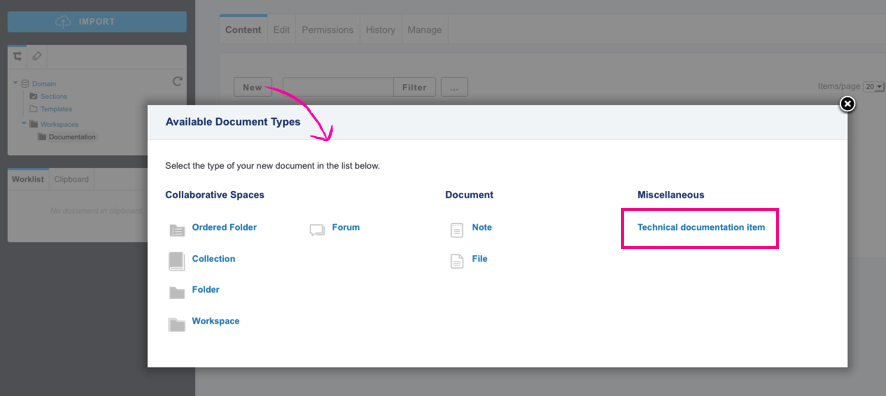
Check your changes on the Nuxeo Platform:
- Go to your Nuxeo Platform and deploy your project.
- On the Nuxeo Platform interface, go in a workspace and click on New.
You should see Technical documentation item in the Miscellaneous category.
The new document type is created, it is now time to customize it.
Defining Properties and Facets
Let's define some properties of the documentationItem.
- In Studio go back on the
documentationItemDefinition tab. - Select the category Document. This will make the document type be displayed in the Document category in the Nuxeo Platform Available Document Types popup instead of Miscellaneous.
- Choose icons.
- Leave all other values as they are for now.
- Click on Save. The documentation item is now available in the correct category and it has some icons. But it does not hold the needed informations (process, nature, binary...).
Notes:
- Take a look at the facets. The ones we are interested in are already selected and grayed out: versionable, can be published. This is because the
DocumentationIteminherits the File document type facets.
Read More:
Defining the Metadata
To be able to describe and find the document, the following metadata should be available on the document:
- The usual descriptive information (title, description, creation date, creator...)
- A nature: a simple and limited list of choices
- A process: a two level list of choices. Since there can be many processes we will group them by category.
- A binary file (Word, PDF...): the attachment that will be the actual content. On the Nuxeo Platform, binary files are "just another metadata" with a specific type (blob).
Checking Inherited Schemas
In the Nuxeo Platform metadata are always grouped by schemas. A schema is a set of metadata that make sense together. A document very often has several schemas of metadata. In Studio, look at the Schema tab: there are already several inherited schemas. Once again, this is because DocumentationItem extends File.
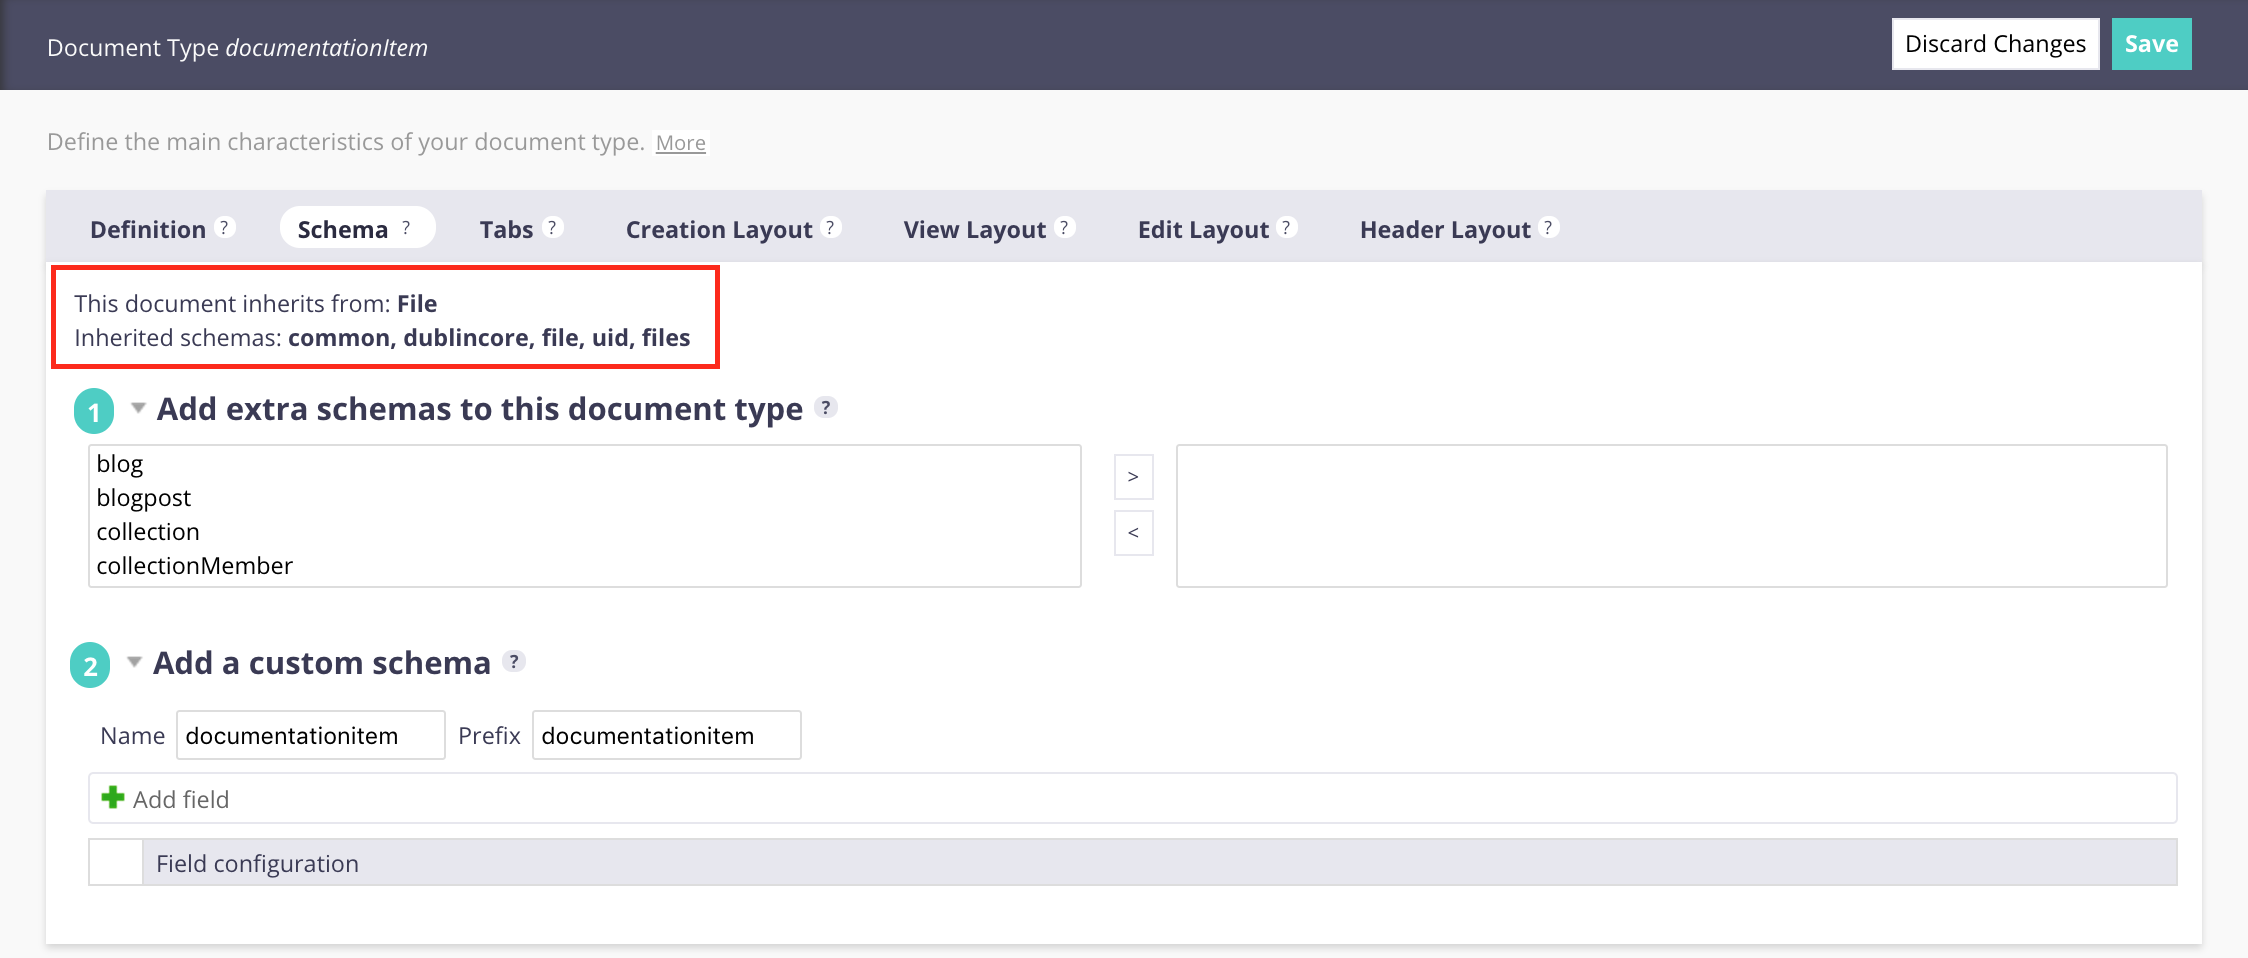
commonanduidare schemas used by the system.fileis a schema defined to hold a binary file. This exactly what we need.filesenables to hold other binaries (like attached files). This could be useful for the annexes of thedocumentationItemfor instance.dublincoreis a standard schema that holds descriptive information like title, creator...
In the end we need two metadata: nature and process. So let's create them in Studio.
Creating the Quality Schema
- Click on Content Model > Schemas.
- Click on the New button.
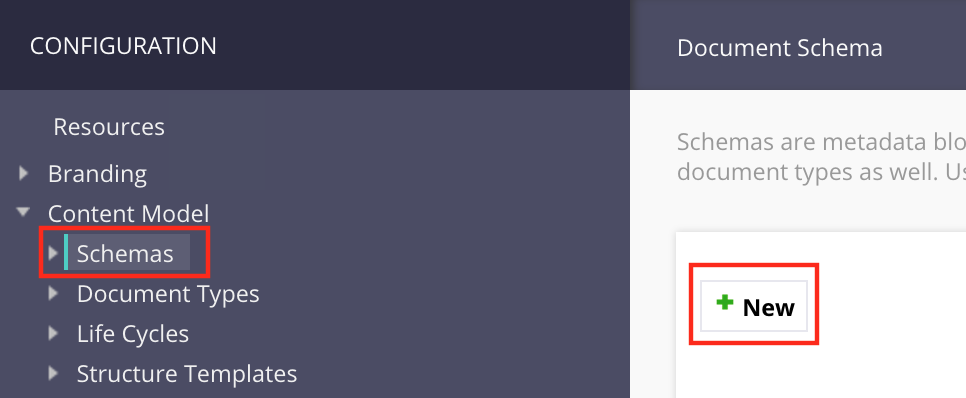
- Name the schema
qualityas processes are often managed by quality departments. - Choose a shorter name for the prefix:
qa. - Click on Next to validate the schema creation. The schema is created. It is empty for now.
Note: In Studio, each document type has its own dedicated schema, that you can define from the Schema tab. The "process" metadata can be a generic metadata in a technical documentation management app. So we create a generic schema in the Schemas item on the menu of Nuxeo Studio instead of using the default documentationItem Schema tab.
Adding Metadata to the Schema
- Add a new field and name it
process. Select the String type.
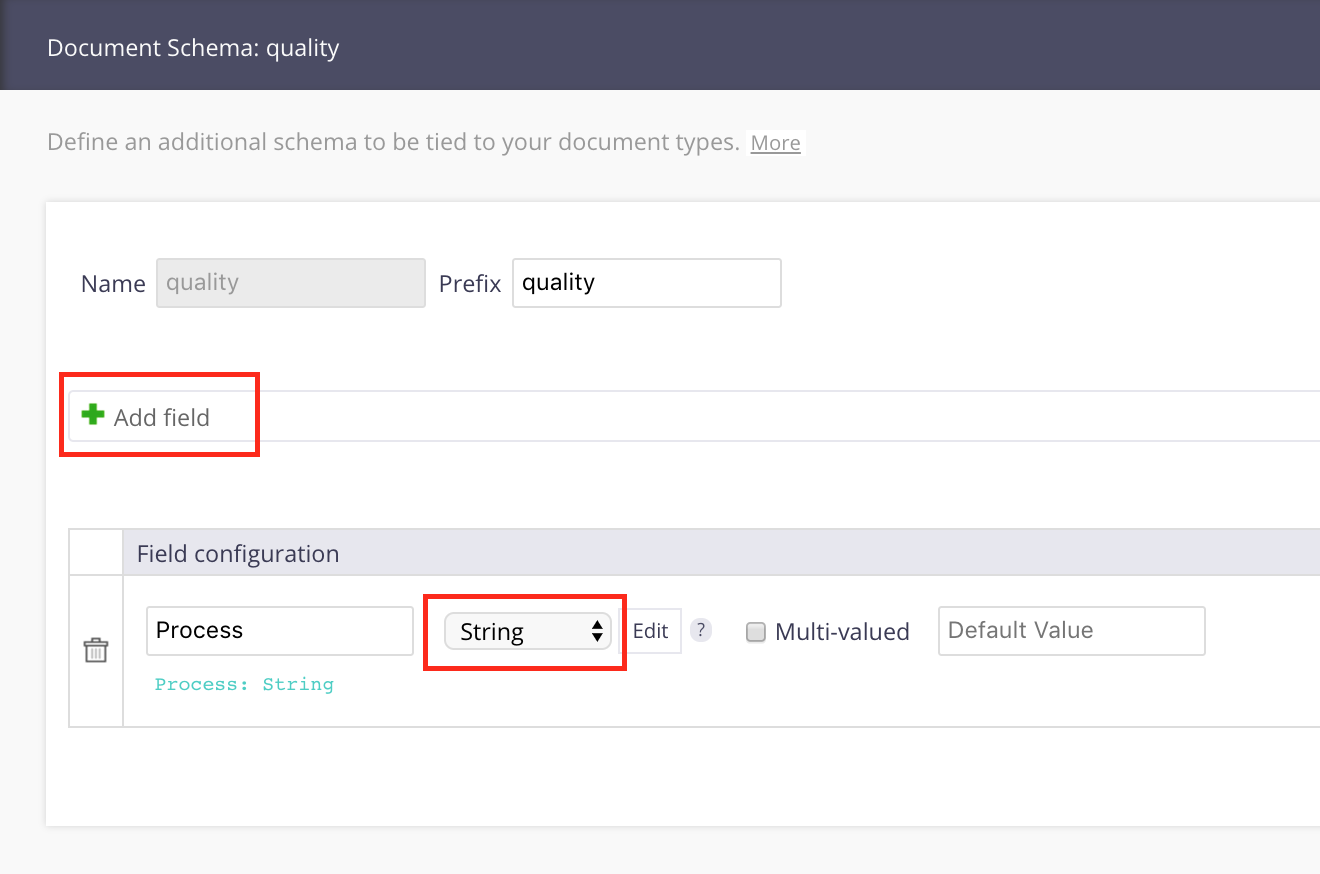
Add a new field and name it
nature.- Select the String type.
- Click on Save. The schema now holds two metadata.
Note: A document is only related to one process and one nature, so we do not check Multi-Valued. We don't want the documentationItems to have a default process or nature value either.
Adding the Schema to the documentationItem Document Type
Now you add this new schema to the DocumentationItem document type:
- Go back to the Schema tab of the document type.
- In the Add extra schemas to this document type form, select the
qualityschema in the left list. - Add it to the right list.
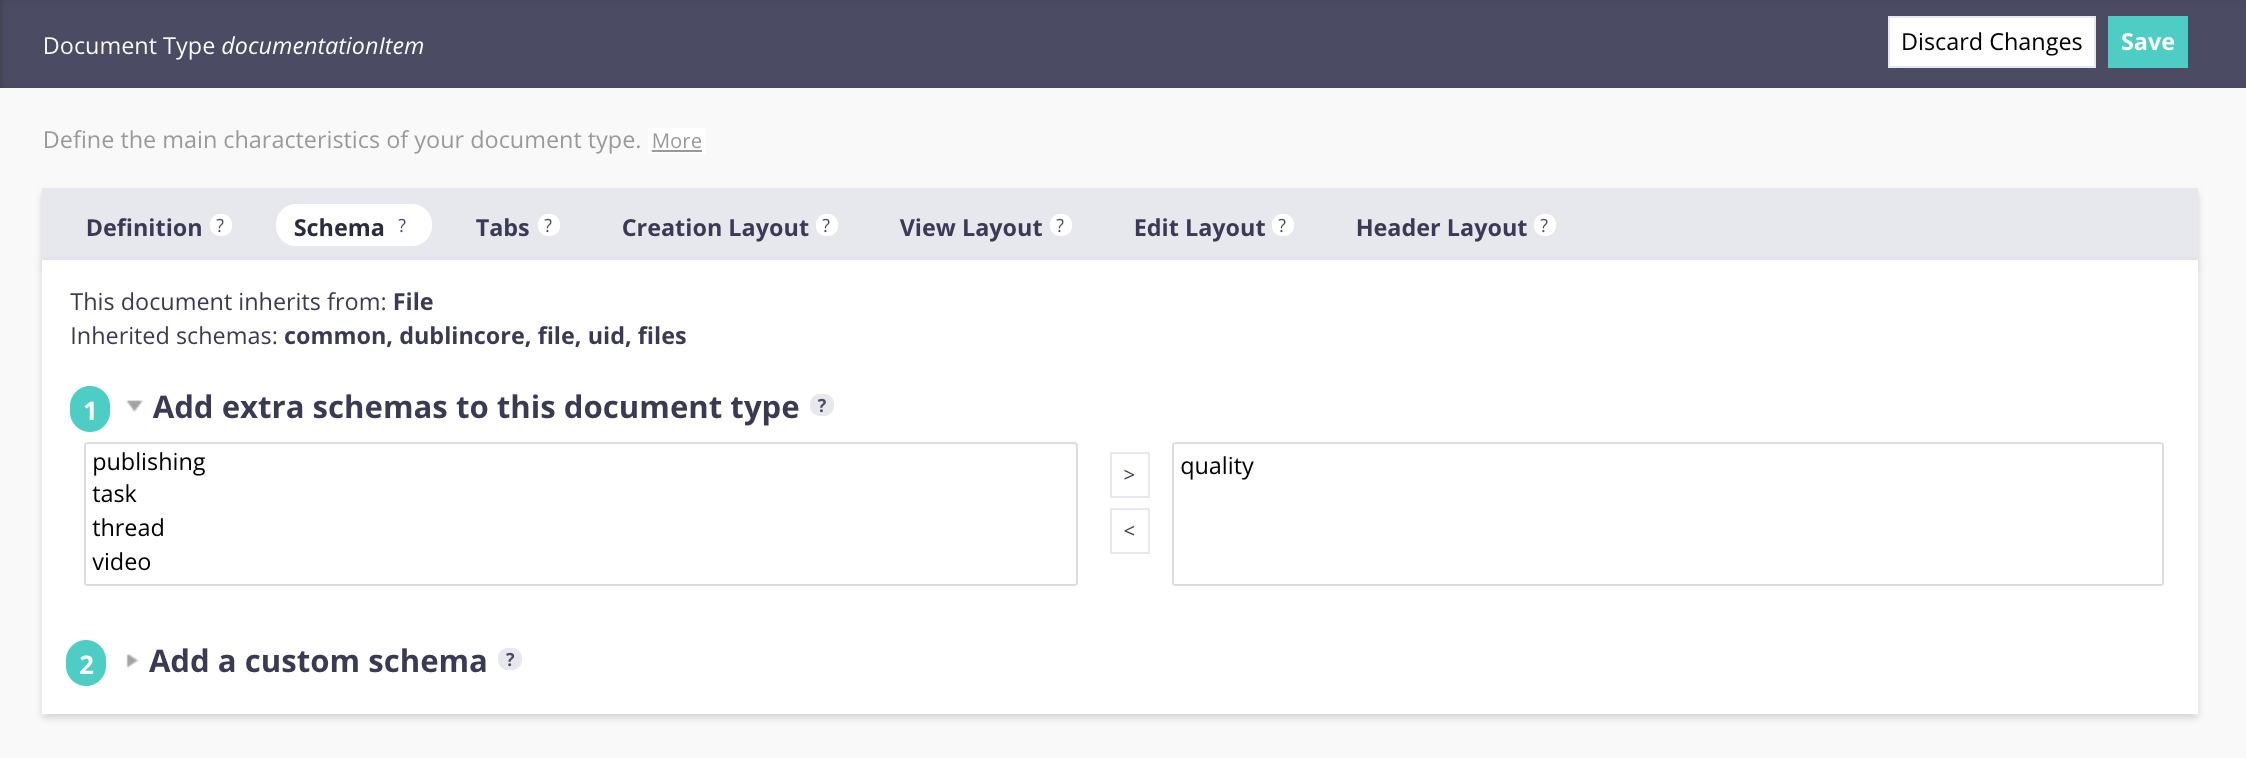
- Click on Save. The schema is now available on the document type. So every metadata added to the schema will automatically be added to the document.
Nuxeo makes a difference between the content model (what are the document types and metadata?) and the user interface. The metadata is available on the document but we haven't defined how to fill in this metadata.
Showing Metadata in the User Interface
Metadata are displayed in form layouts. A form layout can be generic and reused by several documents or it can be specific to a document type. In our example, we will change the specific layouts of our document type.
- Go on the
DocumentationItemdefinition. Four layout tabs are available. Each layout corresponds to a way to access the document: creation, view, edition. You can then control what can be seen and modified. The header layout is what you see on the top of the document. We will leave it empty, and it will take the default layout that displays the title of the document. - Click on the Creation Layout tab. You can see that the layout is already filled with a minimum set of metadata.
- Click on the icon
 of the WARNING row and confirm deletion.
 - Select the
qualityschema in the right drop down list.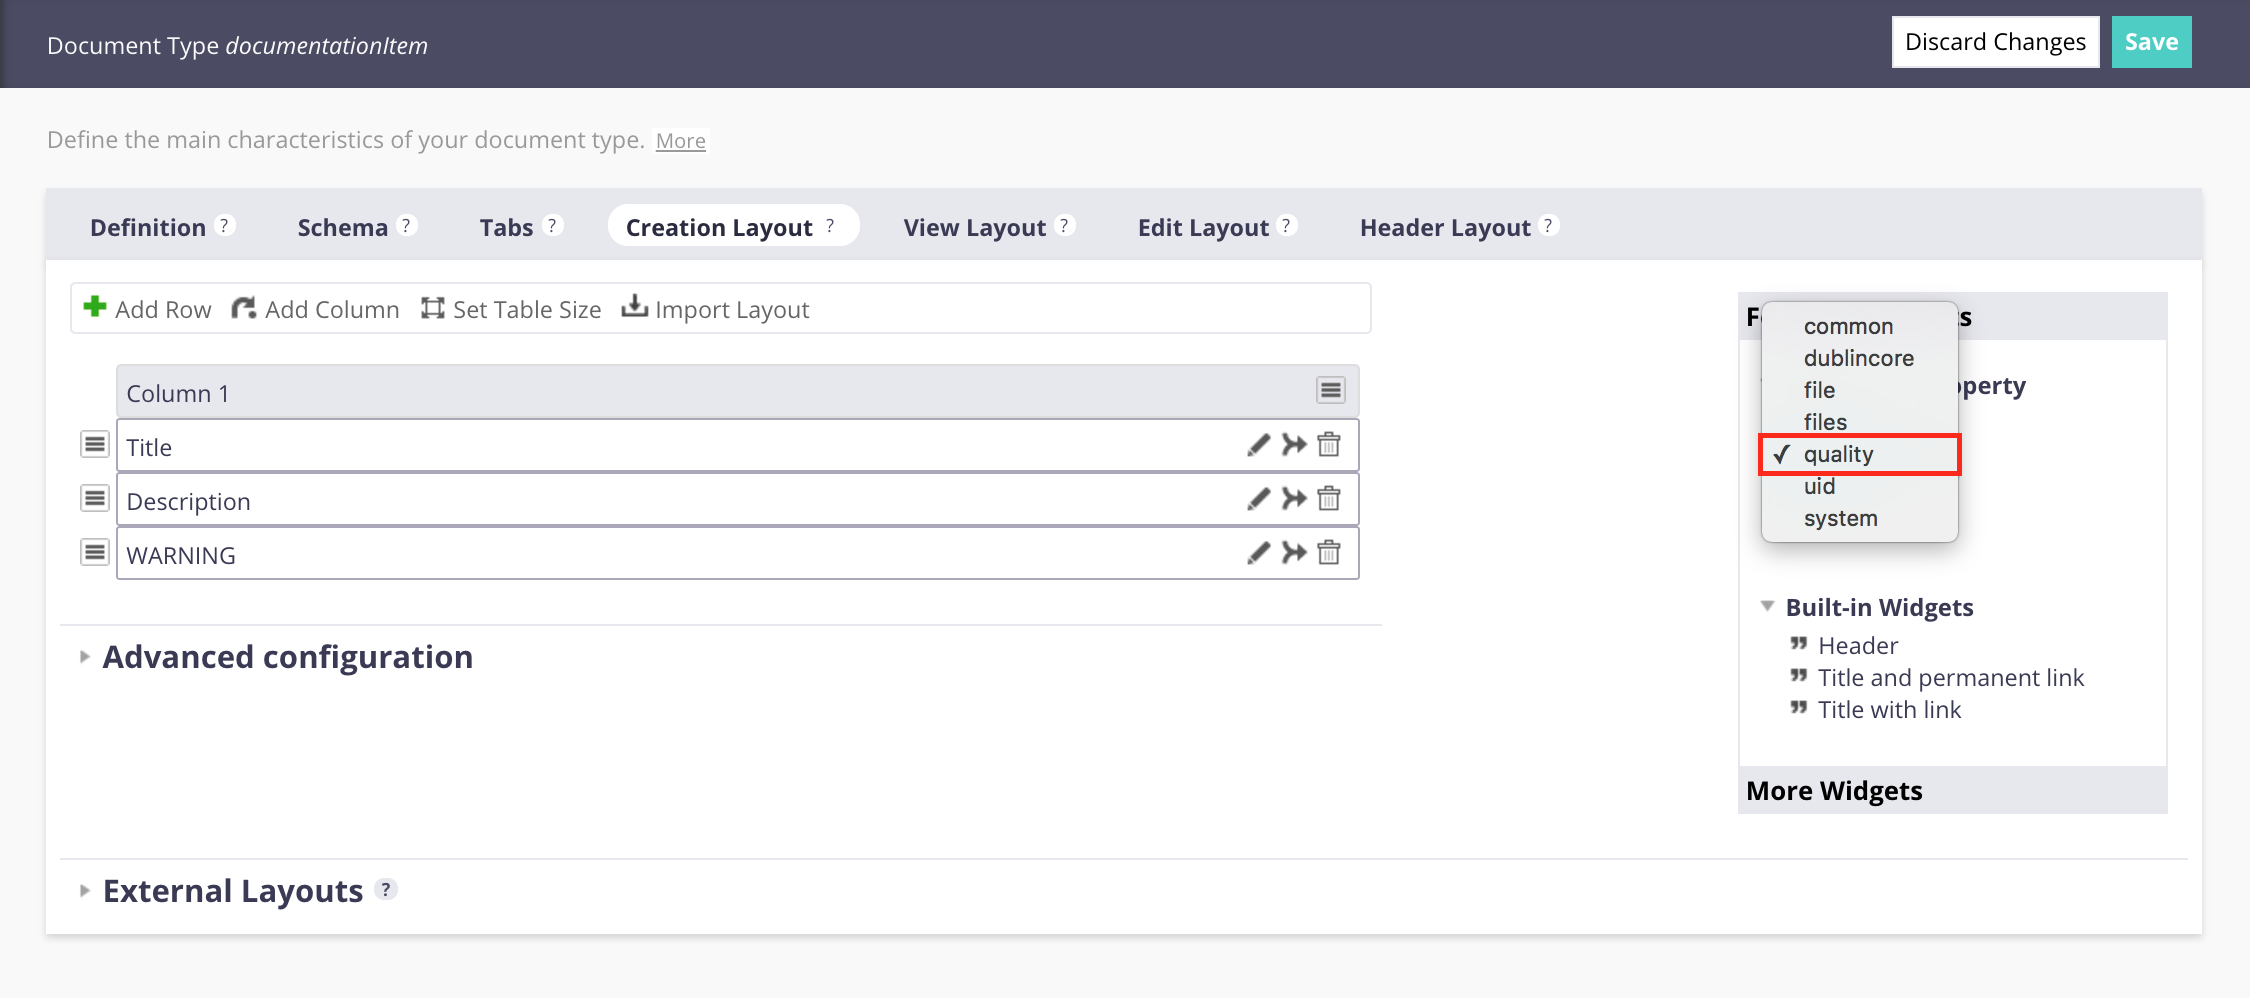
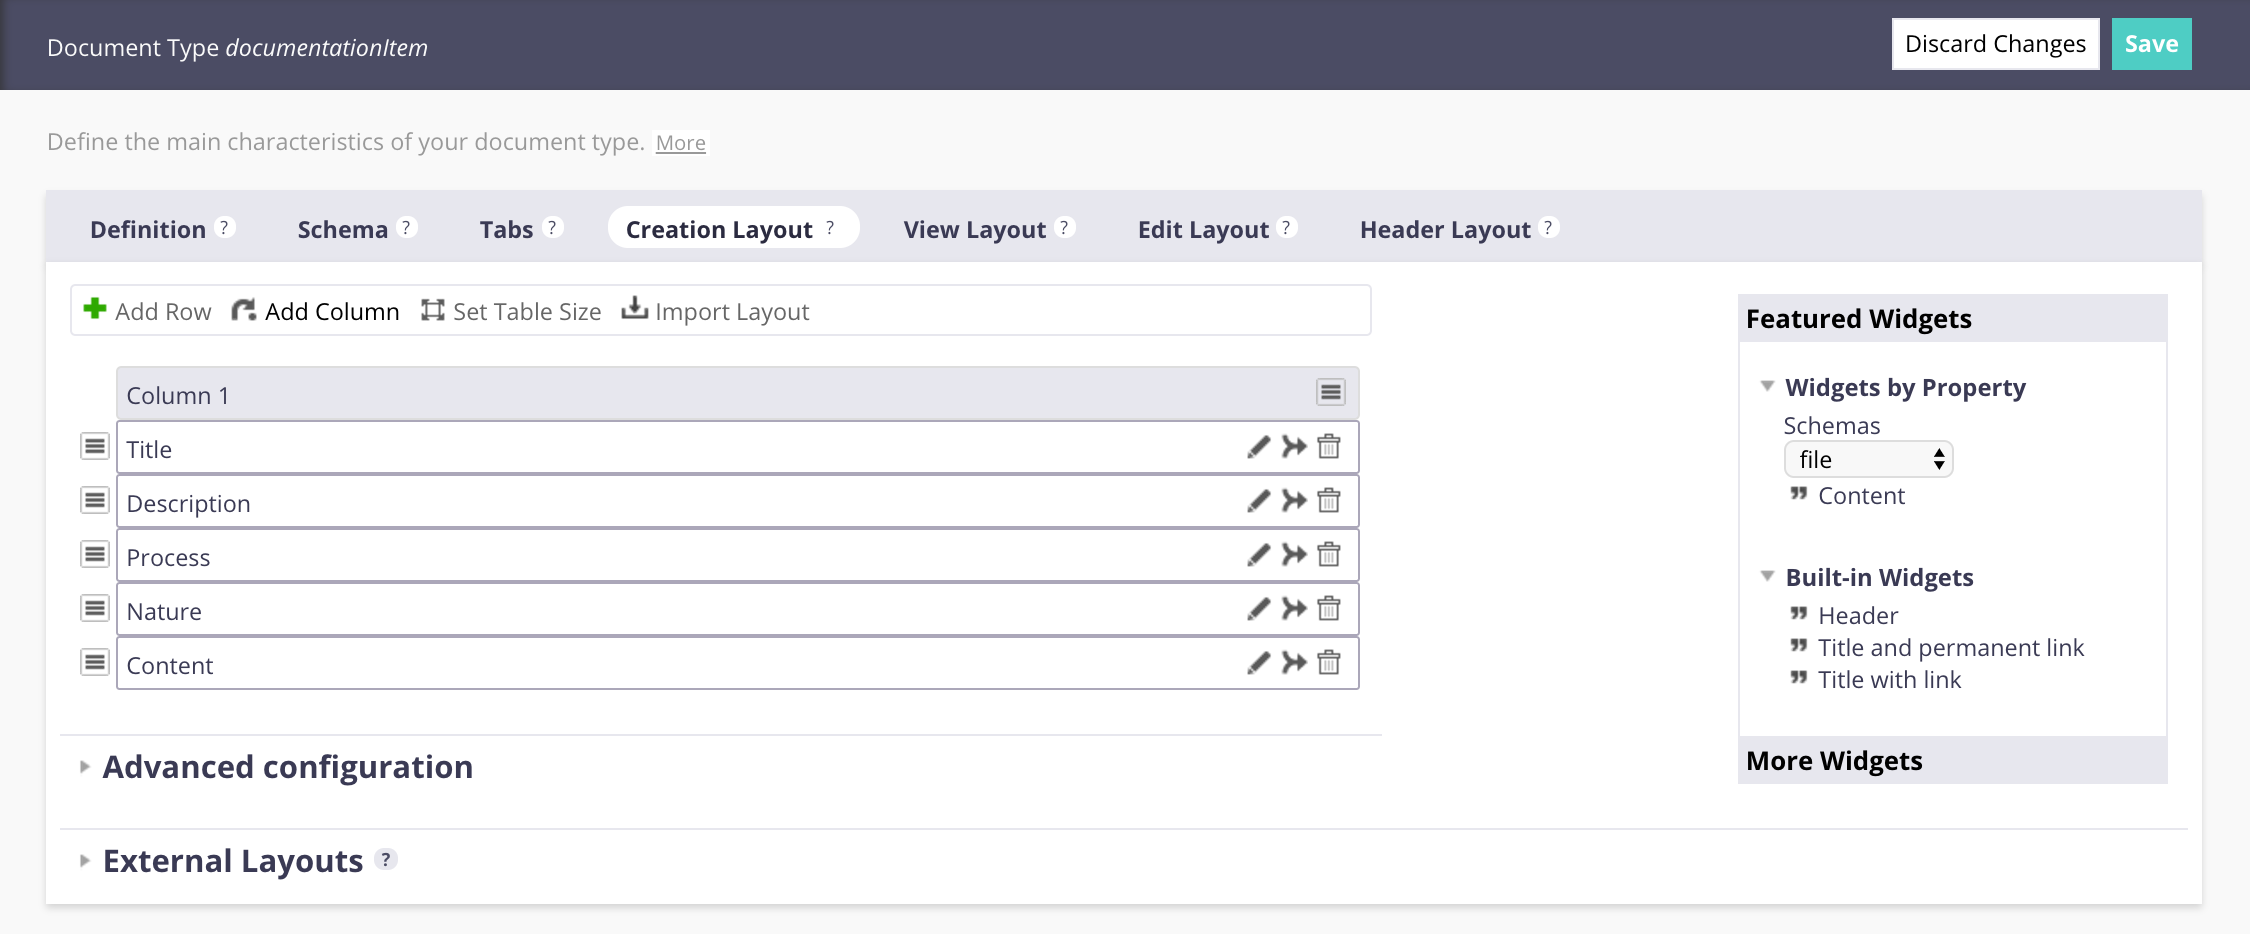
- Drag the
Processmetadata from the list and drop it on a row of the layout. The widget edition pop-up displays several options for the widget you just dropped. - Leave the default values for now, and click on Save.
- Click on the Add Row button to add two new rows to the layout.
- In the
qualityschema, drag and drop theNaturemetadata on a row and save default values. - In the
fileschema, drag and drop thecontentmetadata and save default values. - Click on Save.
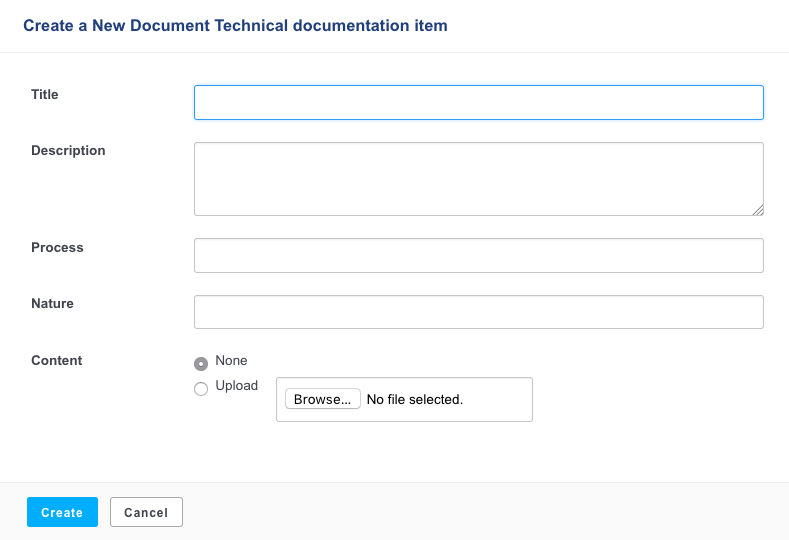
In the end you should have a creation layout looking like:
 Which will give, once deployed on the server:
Next, let's make Nature and Process lists of choices and not simple text boxes.
Showing a List of Choices in the UI for a Metadata
In the Nuxeo Platform lists of choices are called vocabularies. A specific section is available in Studio for them.
Creating the Nature List
- In Studio, go in the Vocabularies section.
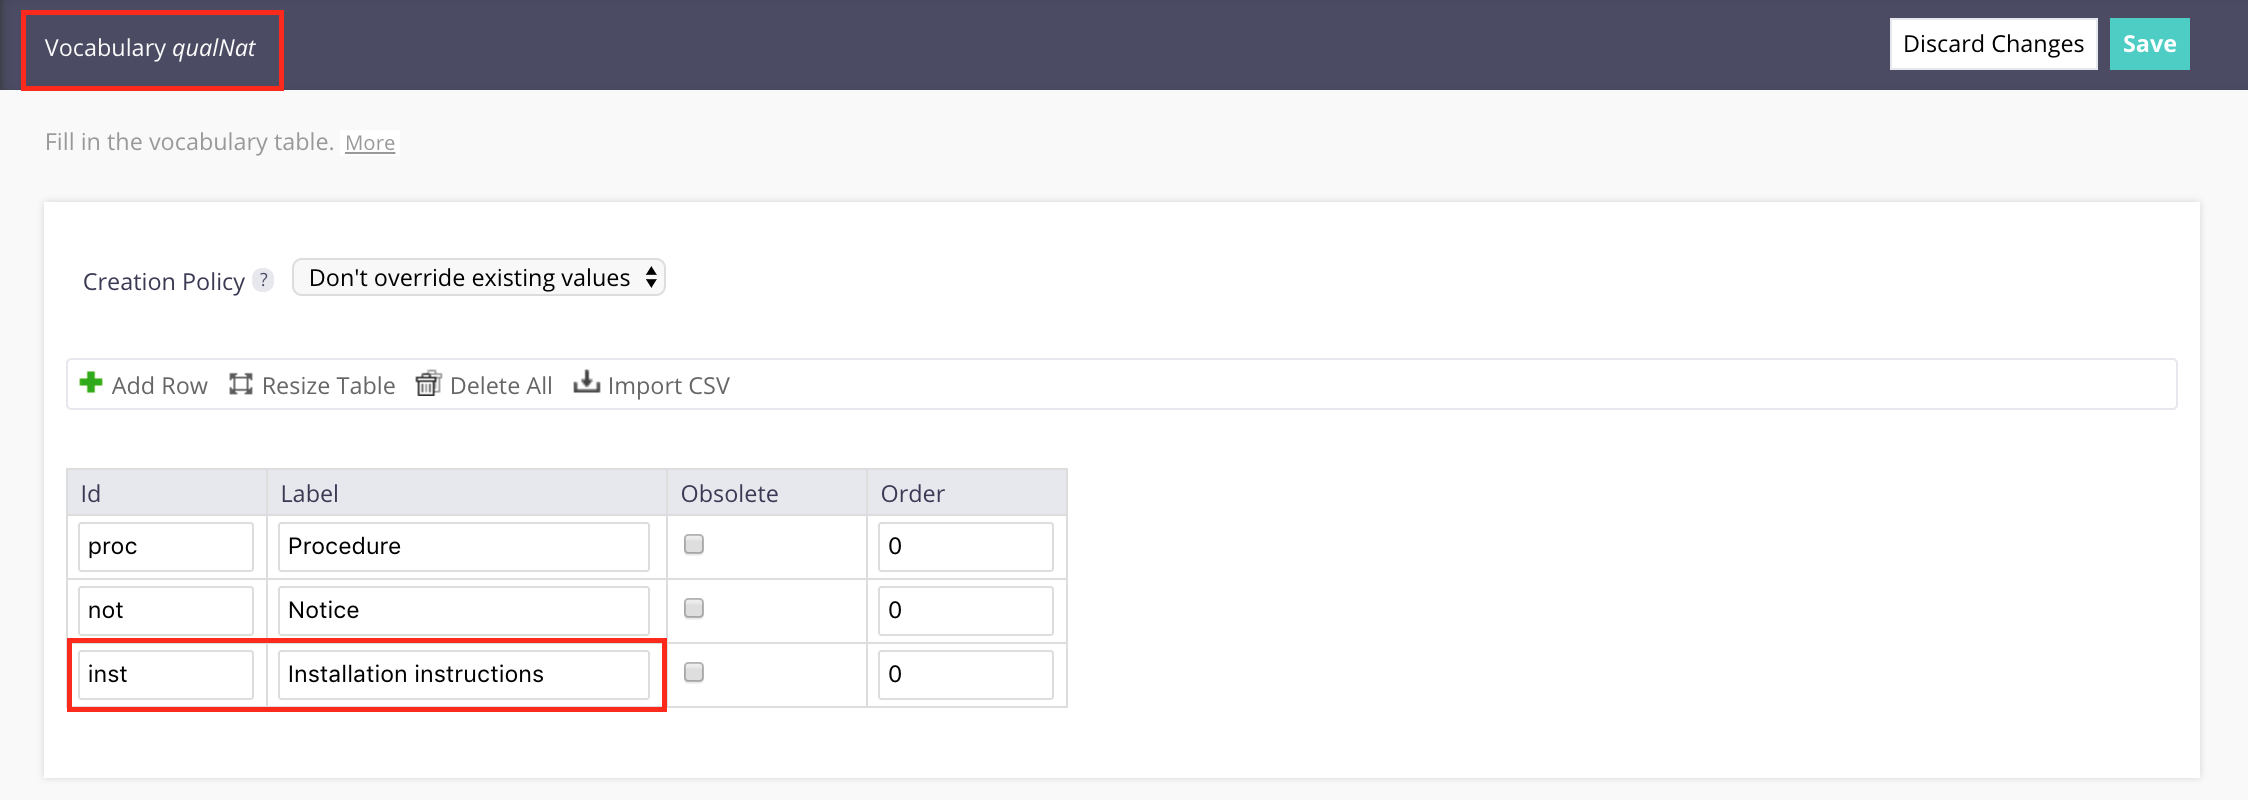
- Create a new vocabulary : call it it
qualNatand select Simple Vocabulary. - Add a few entries. Ids are for the system, labels will be displayed to the final user.
In the end, you should have something like:
Creating the Process List
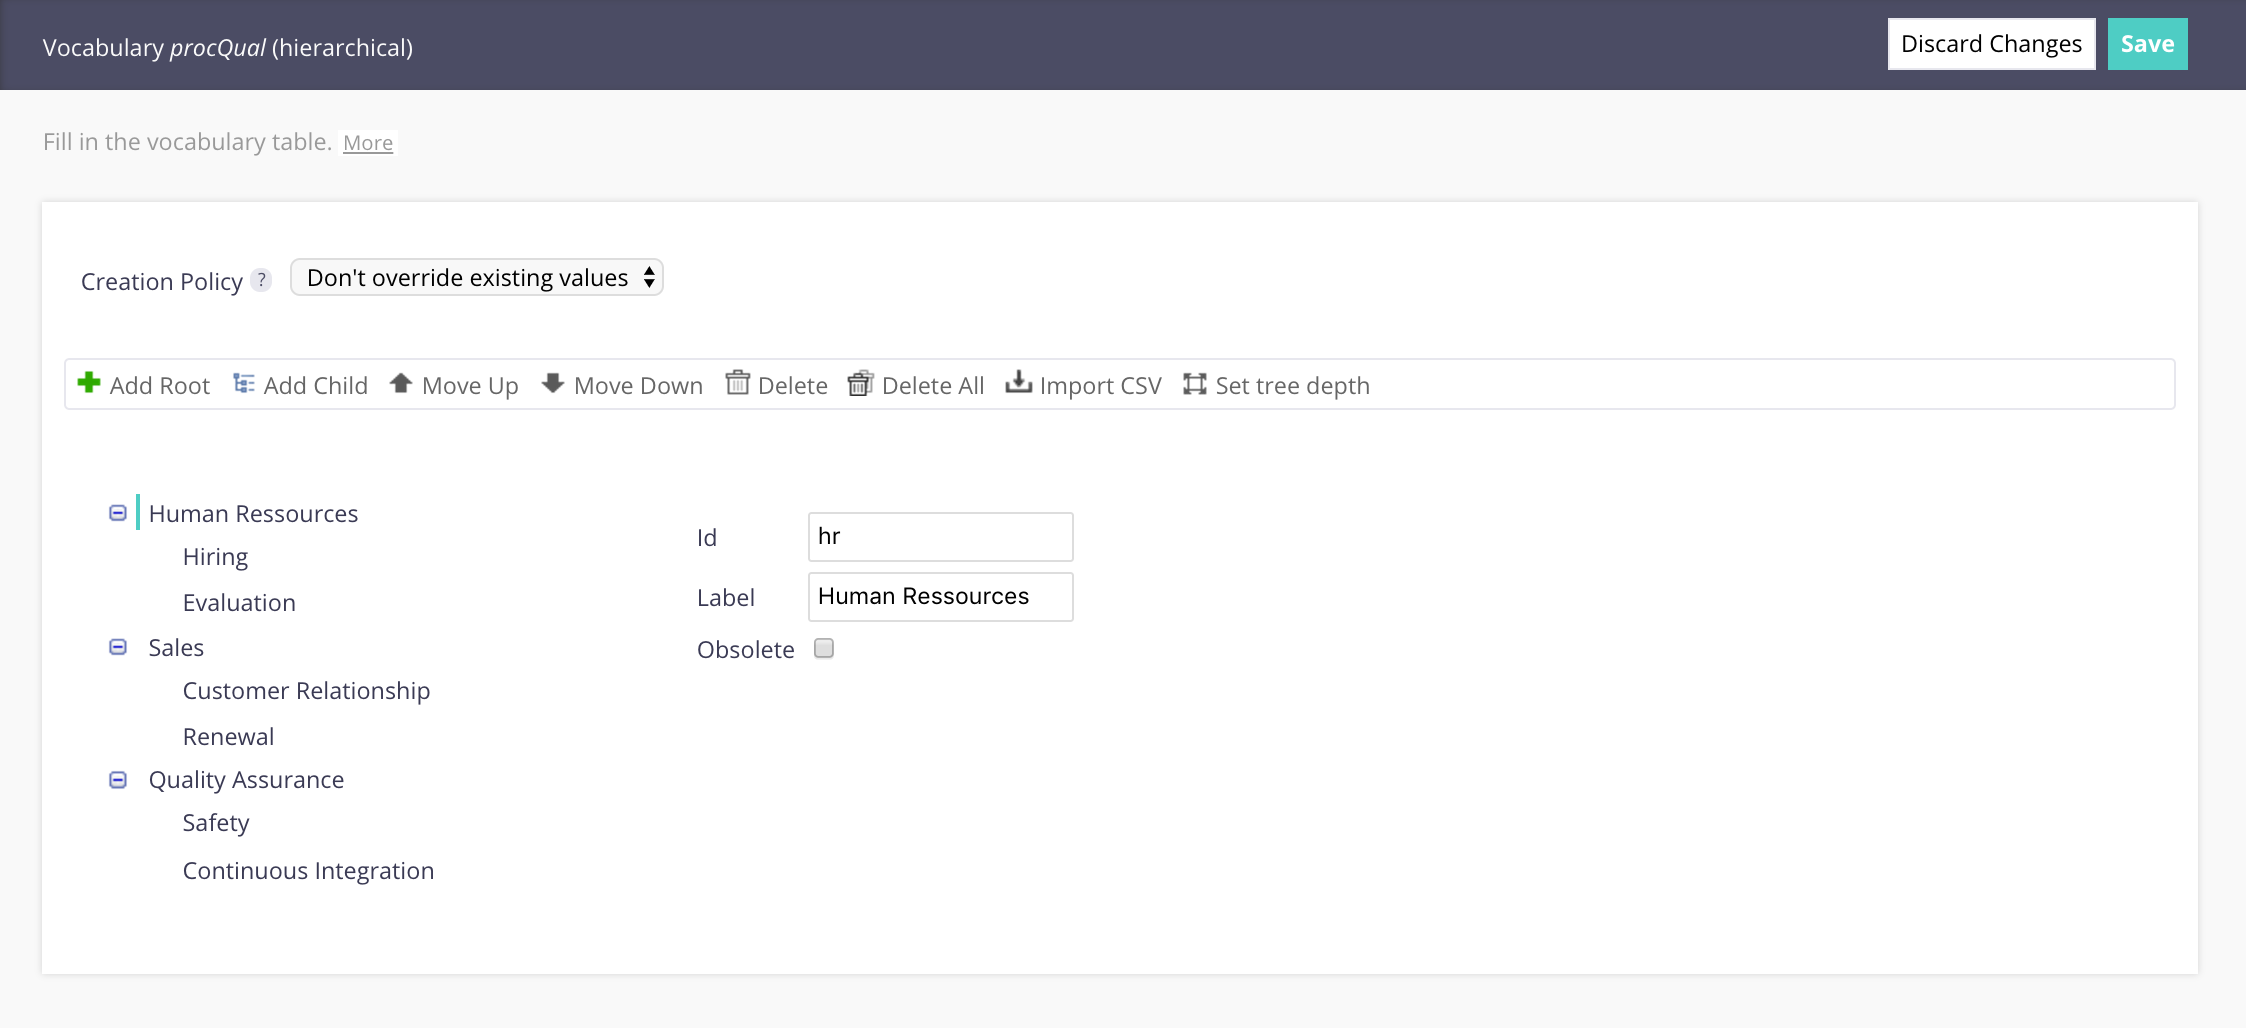
- Create a new vocabulary: call it
procQualand select the type Hierarchical Vocabulary. We need a two-level vocabulary as they are processes and sub-processes. - Click on Add Root and Add Child to create processes and sub-processes.
In the end, you can have something like that (please note that these are dummy processes):
Now that you have the two vocabularies, you still have to bind them to the metadata so that the user can select them. This is where we will customize each metadata widget in the creation layout from a simple text to list of choices.
Configuring the Nature Widget
- Go back to the creation layout of
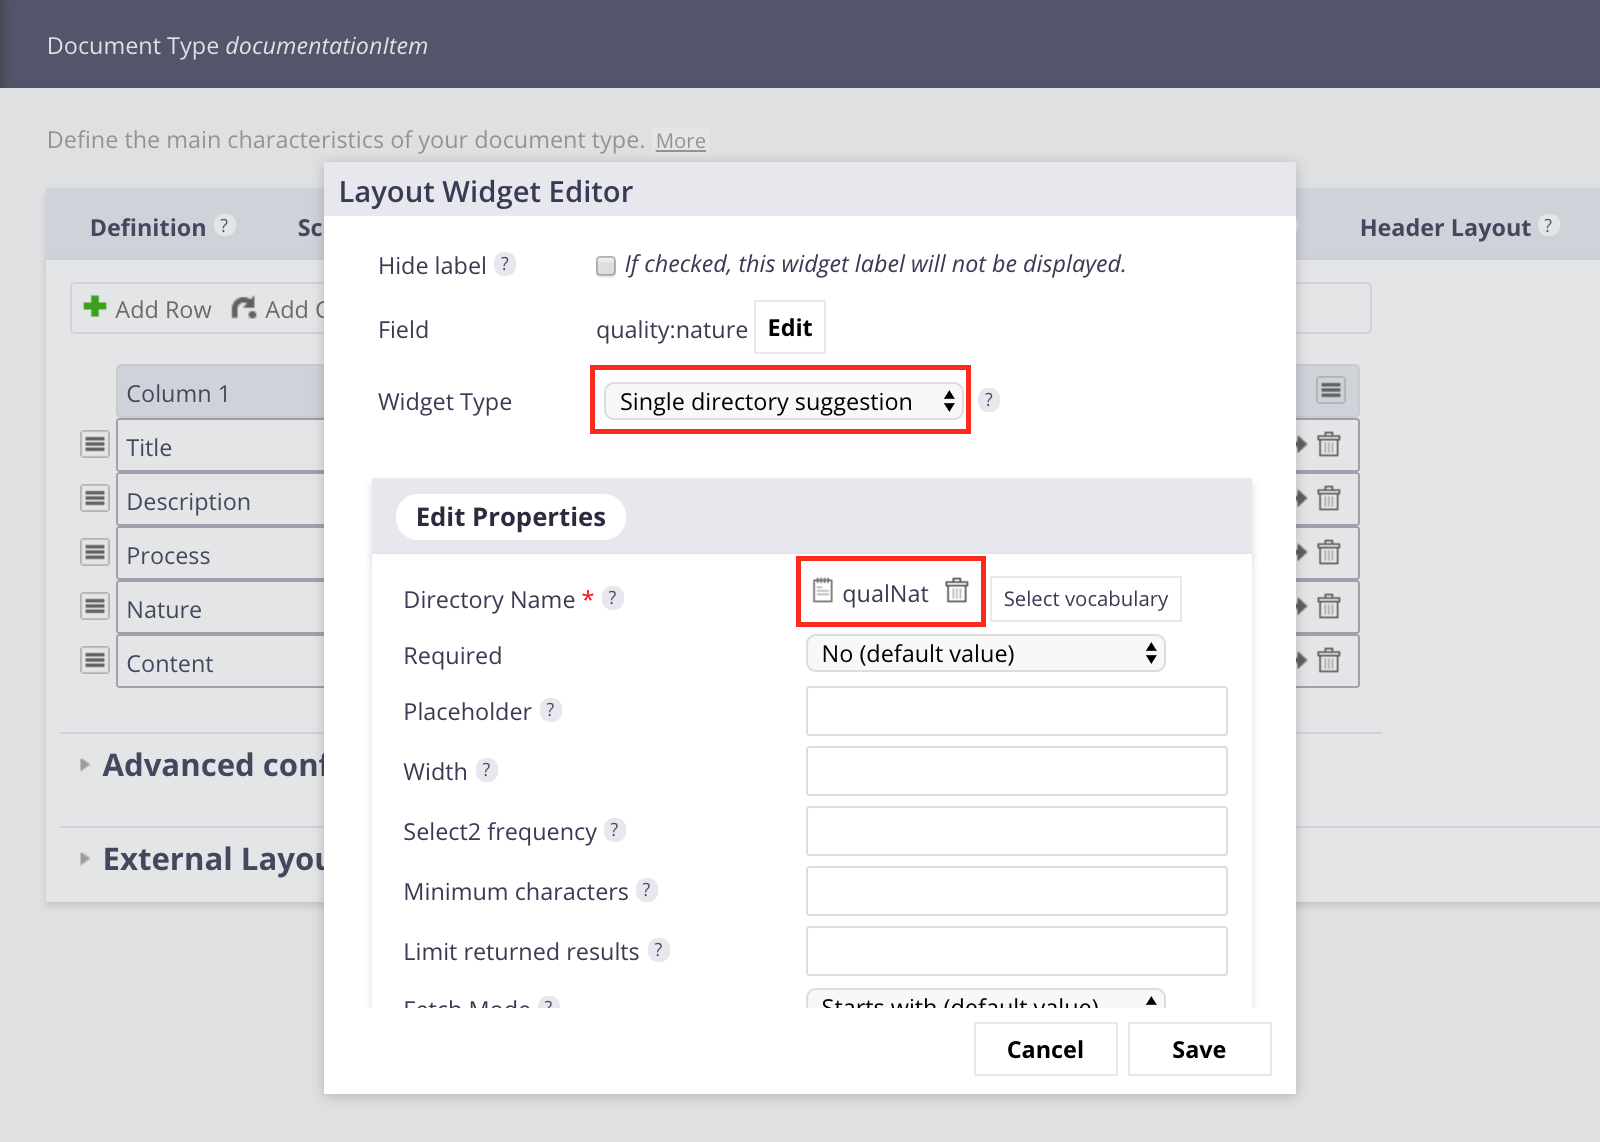
DocumentationItem. - Edit the
Naturemetadata widget by clicking on the icon .
. - In the Layout Widget Editor, select the widget type Single directory suggestion .
- In the Edit properties part, select the vocabulary
qualNat. - You can make the nature field required if you want to by selecting Yes in the Required drop down list.
- Click on Save.
Configuring the Process Widget
- Edit the
Processwidget. - In the Layout Widget Editor, select the widget type Single directory suggestion.
- Select the vocabulary
procQual.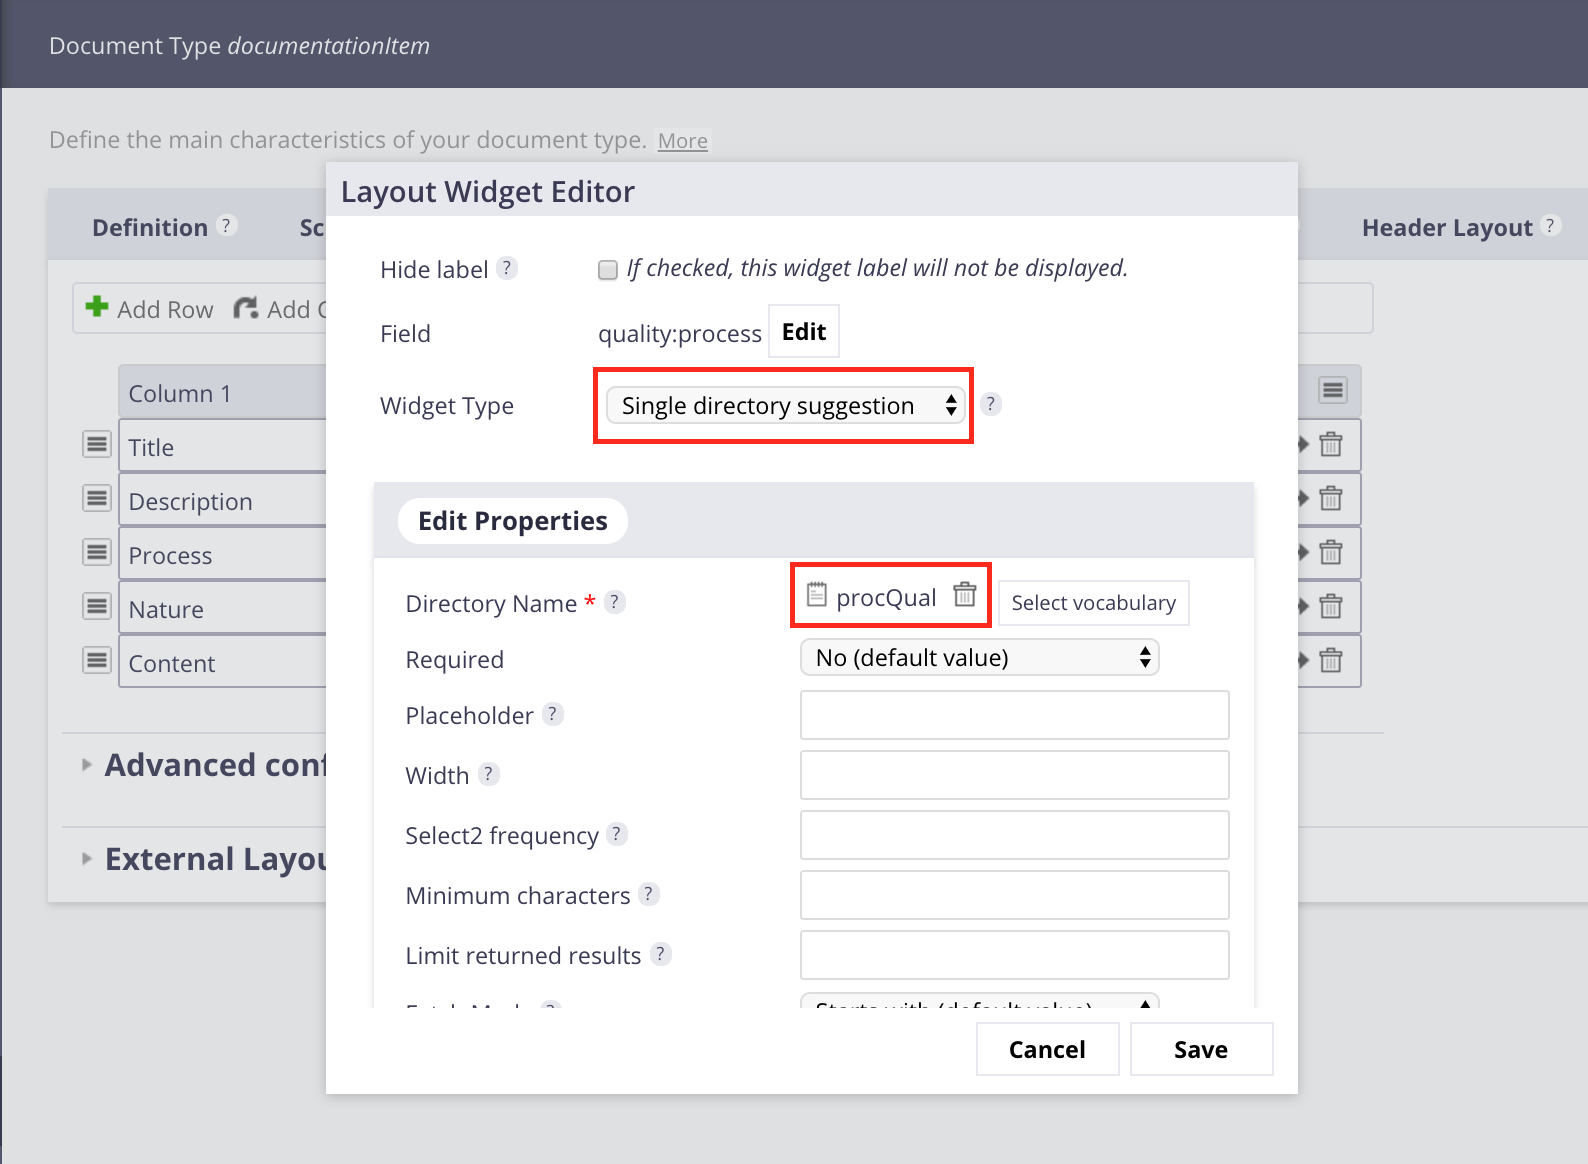
- Click on Save. The Creation Layout is now fully configured.
Applying the Creation Layout Configuration to Other Layouts
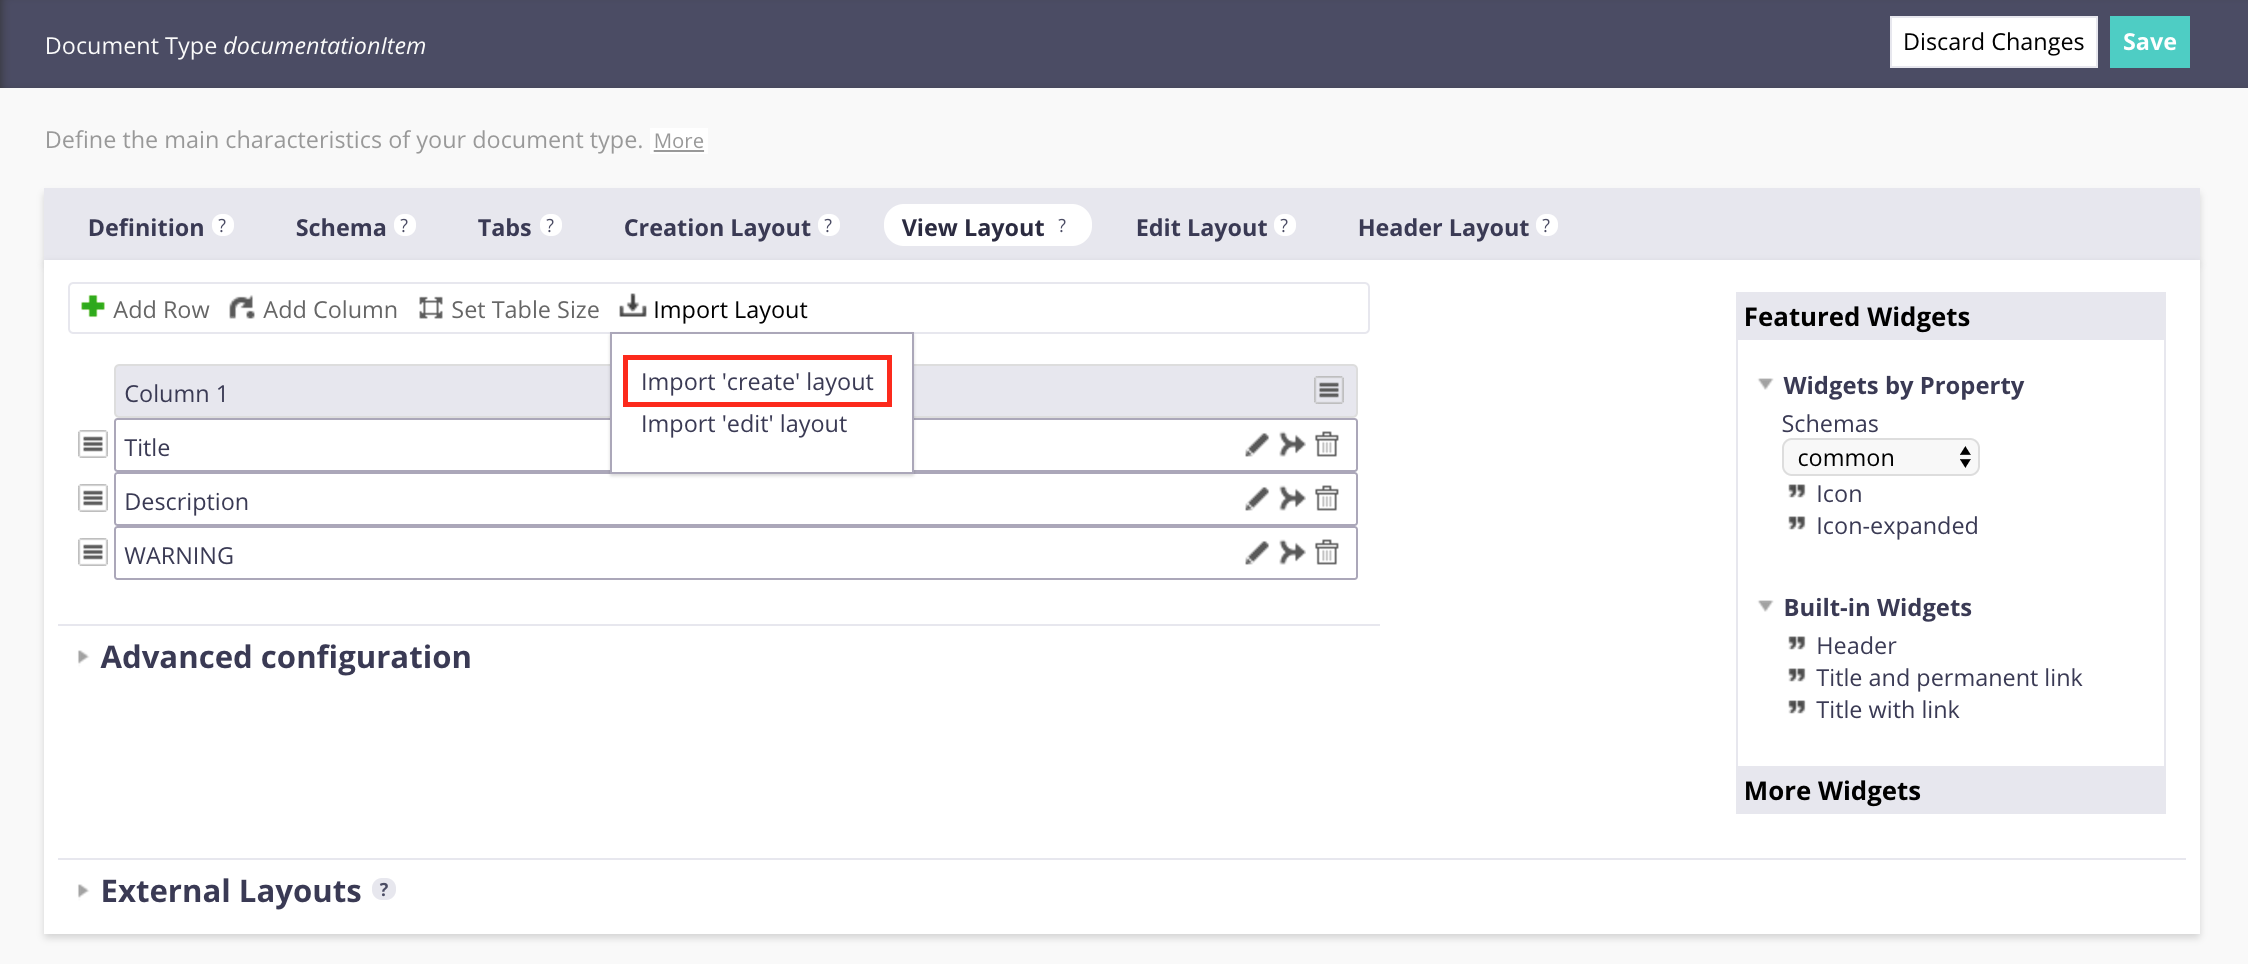
- Click on the View Layout tab, and click on Import Layout > Import 'create' layout.
It imports what you did on the creation layout, so that you are able to see on the Summary tab the metadata of your document.
- Do the same thing on the Edit Layout tab.
- Click on Save.
Testing Your Changes
- Redeploy your customization the server.
- Create a new Technical Documentation Item.
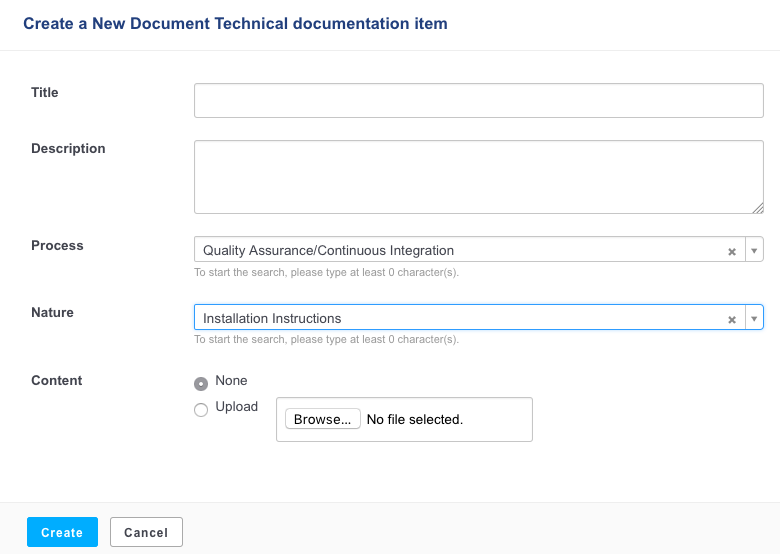
You created a document type that will hold all the information you need to manage your technical documentation items.
To sum up, what we saw:
- A document type can have metadata of several types (String, Integer...).
- Metadata are grouped in schemas. Of course, one document can have several schemas.
- The content model is different from the user interface. When you add a metadata to a document (through its schemas), you have to add the metadata in the layouts of the document.
- You can control how the metadata are filled in directly from the layouts of the document by changing the widget type.
The next step is to adapt where the documents are created and how they are displayed when browsing.