This page explains how to start customizing the Nuxeo Platform using Nuxeo Studio. It will guide you through the steps to:
- Get a Nuxeo Studio project using Nuxeo Online Services
- Get a running Nuxeo Platform instance
- Change the logo of your Nuxeo Platform instance
- Create a new Contract document type in Nuxeo Studio
Nuxeo Studio is a Nuxeo tool provided as part of the Nuxeo Online Services subscription offer. If you are a Nuxeo customer, you should already have a username/password to connect and access to your Studio project. Otherwise, we provide a 30-day trial offer so you can discover Nuxeo Studio and its configuration capabilities.
Step 1 - Get a Nuxeo Platform Instance
The Nuxeo Platform is available in different packages. Here we will use the ZIP archive.
Installing the Nuxeo Platform using the .zip package installs the Nuxeo Platform only. External dependencies must be installed separately.
To install and start the Nuxeo Platform ZIP archive:
Unzip the .zip archive using your favorite tool.
Double click on the
Start Nuxeo.commandfile (or theStart Nuxeo.batfile for Windows users) to start the server.In a browser, go to
http://NUXEO_SERVER/nuxeo.Fill in the information in the configuration wizard steps.
At the Nuxeo Online Services step, provide your Nuxeo Online Services credentials if you already have a Nuxeo Online Services account or register to the 30-day trial offer.
- Provide a valid email address or else registration will not be completed.
Confirm registration by clicking on the link sent to the email address you provided.
Your Online Trial account is created. You can now access Nuxeo Studio by clicking on the link provided in the last email received.
At the Modules step, select Nuxeo JSF UI.
Click on Start at the final step.
Your application is ready to use. Now, you need to activate development mode so as to enjoy the hot reload of your Nuxeo Studio configuration.
To activate development mode:
When the application is started, log in with the Administrator / Administrator credentials.
Click on Admin Center > Update Center.
The Nuxeo Studio tab is displayed.
Click on the Enable button to activate development mode.
Click on the Restart Server button displayed on top of the Admin Center.
The Nuxeo Platform instance restarts. You can then enjoy your Nuxeo Studio configuration without restarting your server.
Once your project registered on Online Services, you can start customizing your Nuxeo Application. The first customizations occurs in Nuxeo Studio, where you can easily create new document types, content views, etc. Here, we will change the logo and then create a document type named "Contract".
You can now access Nuxeo Studio from Online Services by clicking on this link: connect.nuxeo.com/nuxeo/.
Step 2 - Edit the Logo
Goal is to change the logo displayed in the banner of the Nuxeo Platform application. You must preliminary have a logo in the PNG or JPG format.
Studio Customization
Change the logo:
In Studio's left menu, click on the Branding section.
Click on the New button.
In Feature ID field, type "MyBranding" and click on the Next button.
In Main Pages tab:
Check-box "Set as default branding" must be checked.
Click on the Select Resource button of the "Logo image" field.
A "Select Resource" window pops up. It shows a list of images available by default, imported with the "Default Nuxeo Platform Configuration" template.
Click on Choose File and select an image from your desktop.
Click on the Upload button.
The selected image is uploaded to Studio, added to the list of available images and selected.
Click on the Ok button at the bottom of the popup window.
The path to the uploaded image is displayed next to the Select resource button.
Deploying Changes on Your Nuxeo Platform Instance
Go to your Nuxeo Platform instance, typically available at
http://NUXEO_SERVER/nuxeo.Connect as Administrator with Administrator password.
Click on Admin Center > Update Center > Nuxeo Studio.
Click on the Update button.
Your logo is updated.
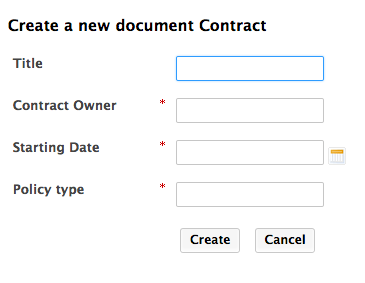
Step 3 - Create a Contract Document Type
Here we want to create a document type named "Contract" that will hold specific metadata related to the notion of contract: contract owner, starting date, policy.
Studio Customization
Unfold the Content Model item of the Studio tree, click on Document Types and click the New button.
Fill in the creation form and click on Next:
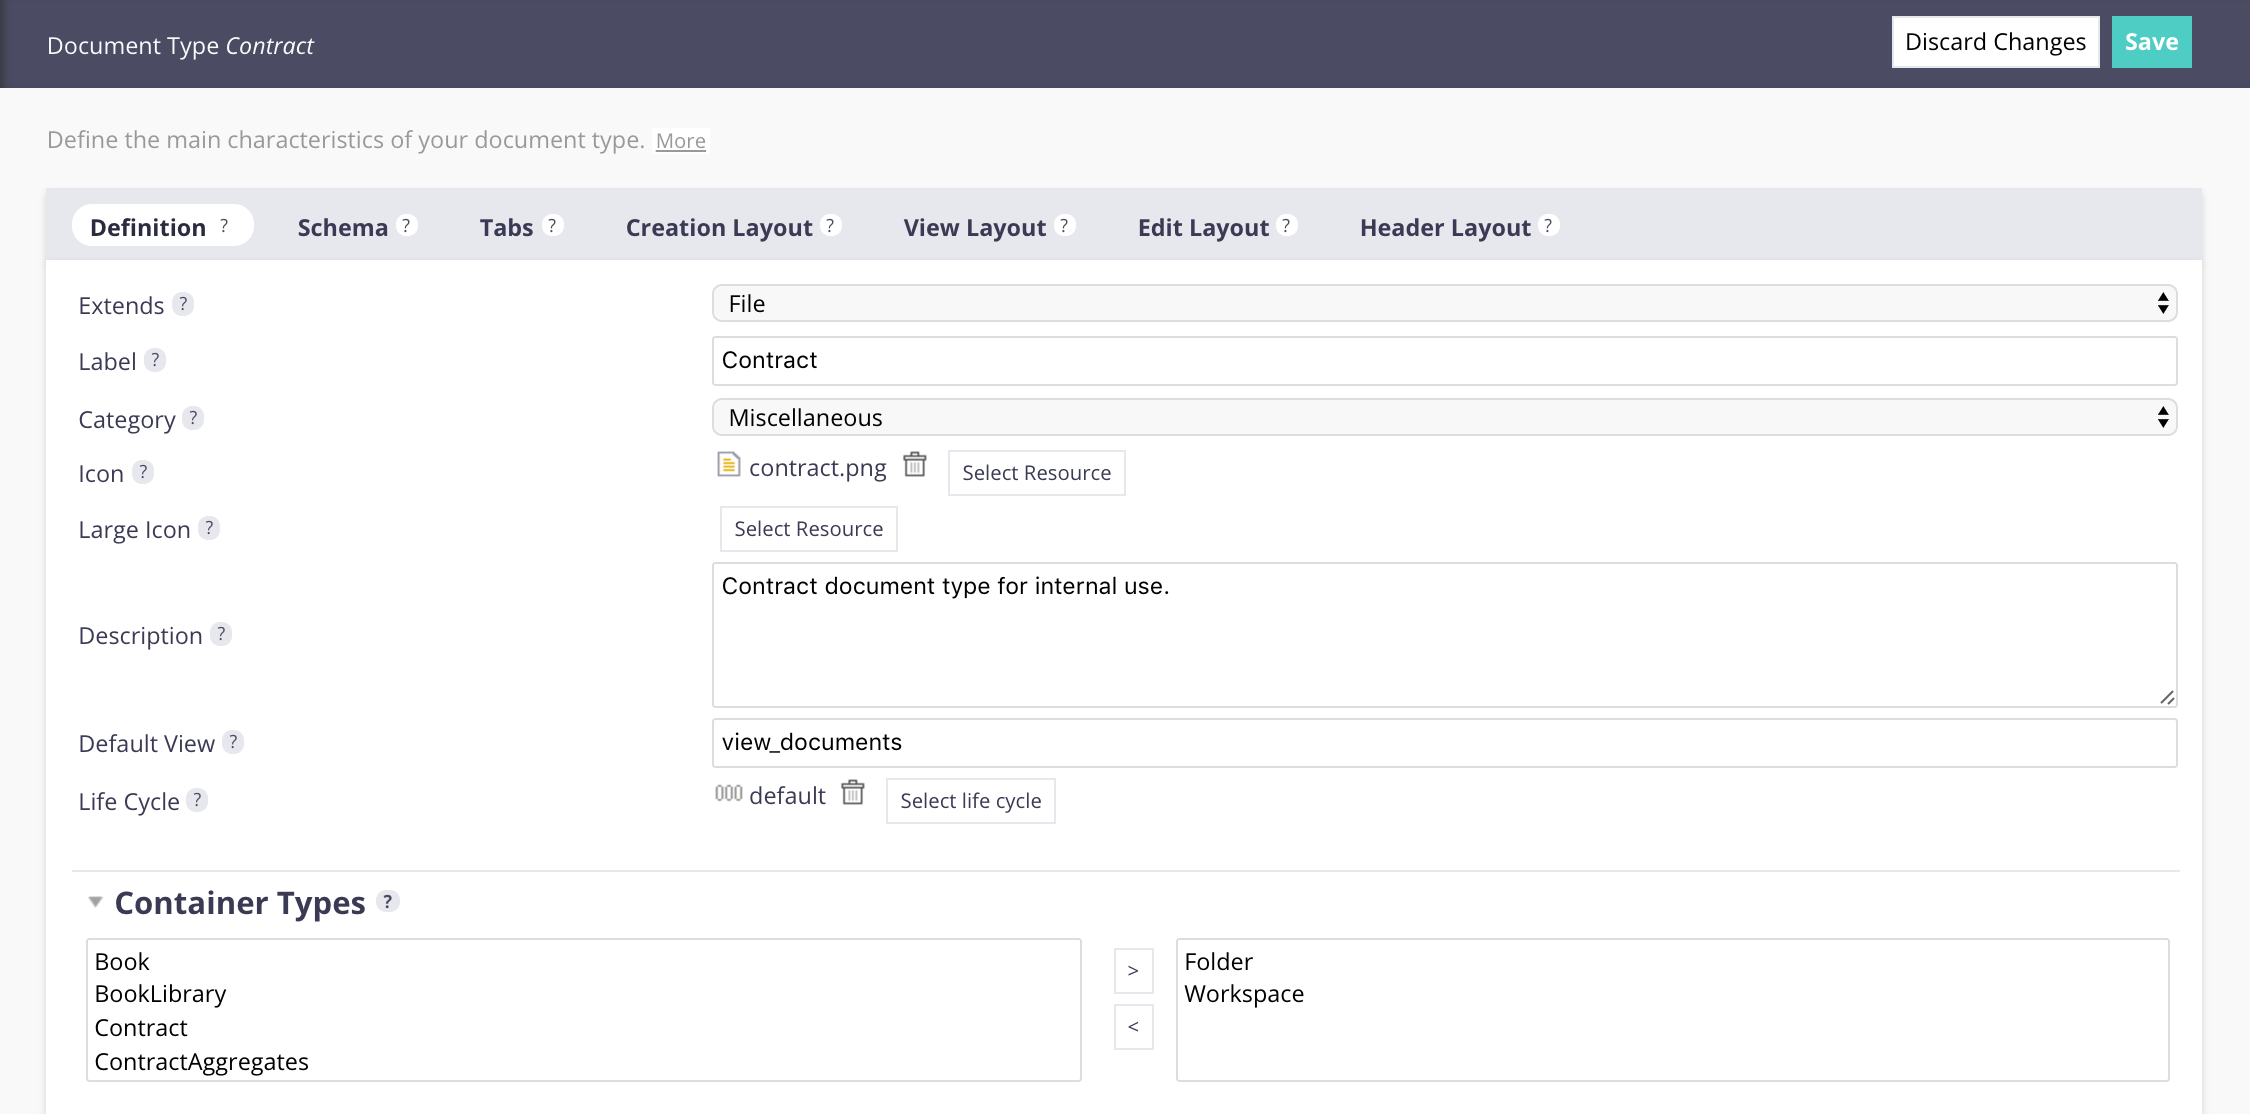
- ID: Contract
- Extends: File
- Label: Contract
- Description: Contract document type for internal use.
Your document type is created.
Fill in the Definition tab:
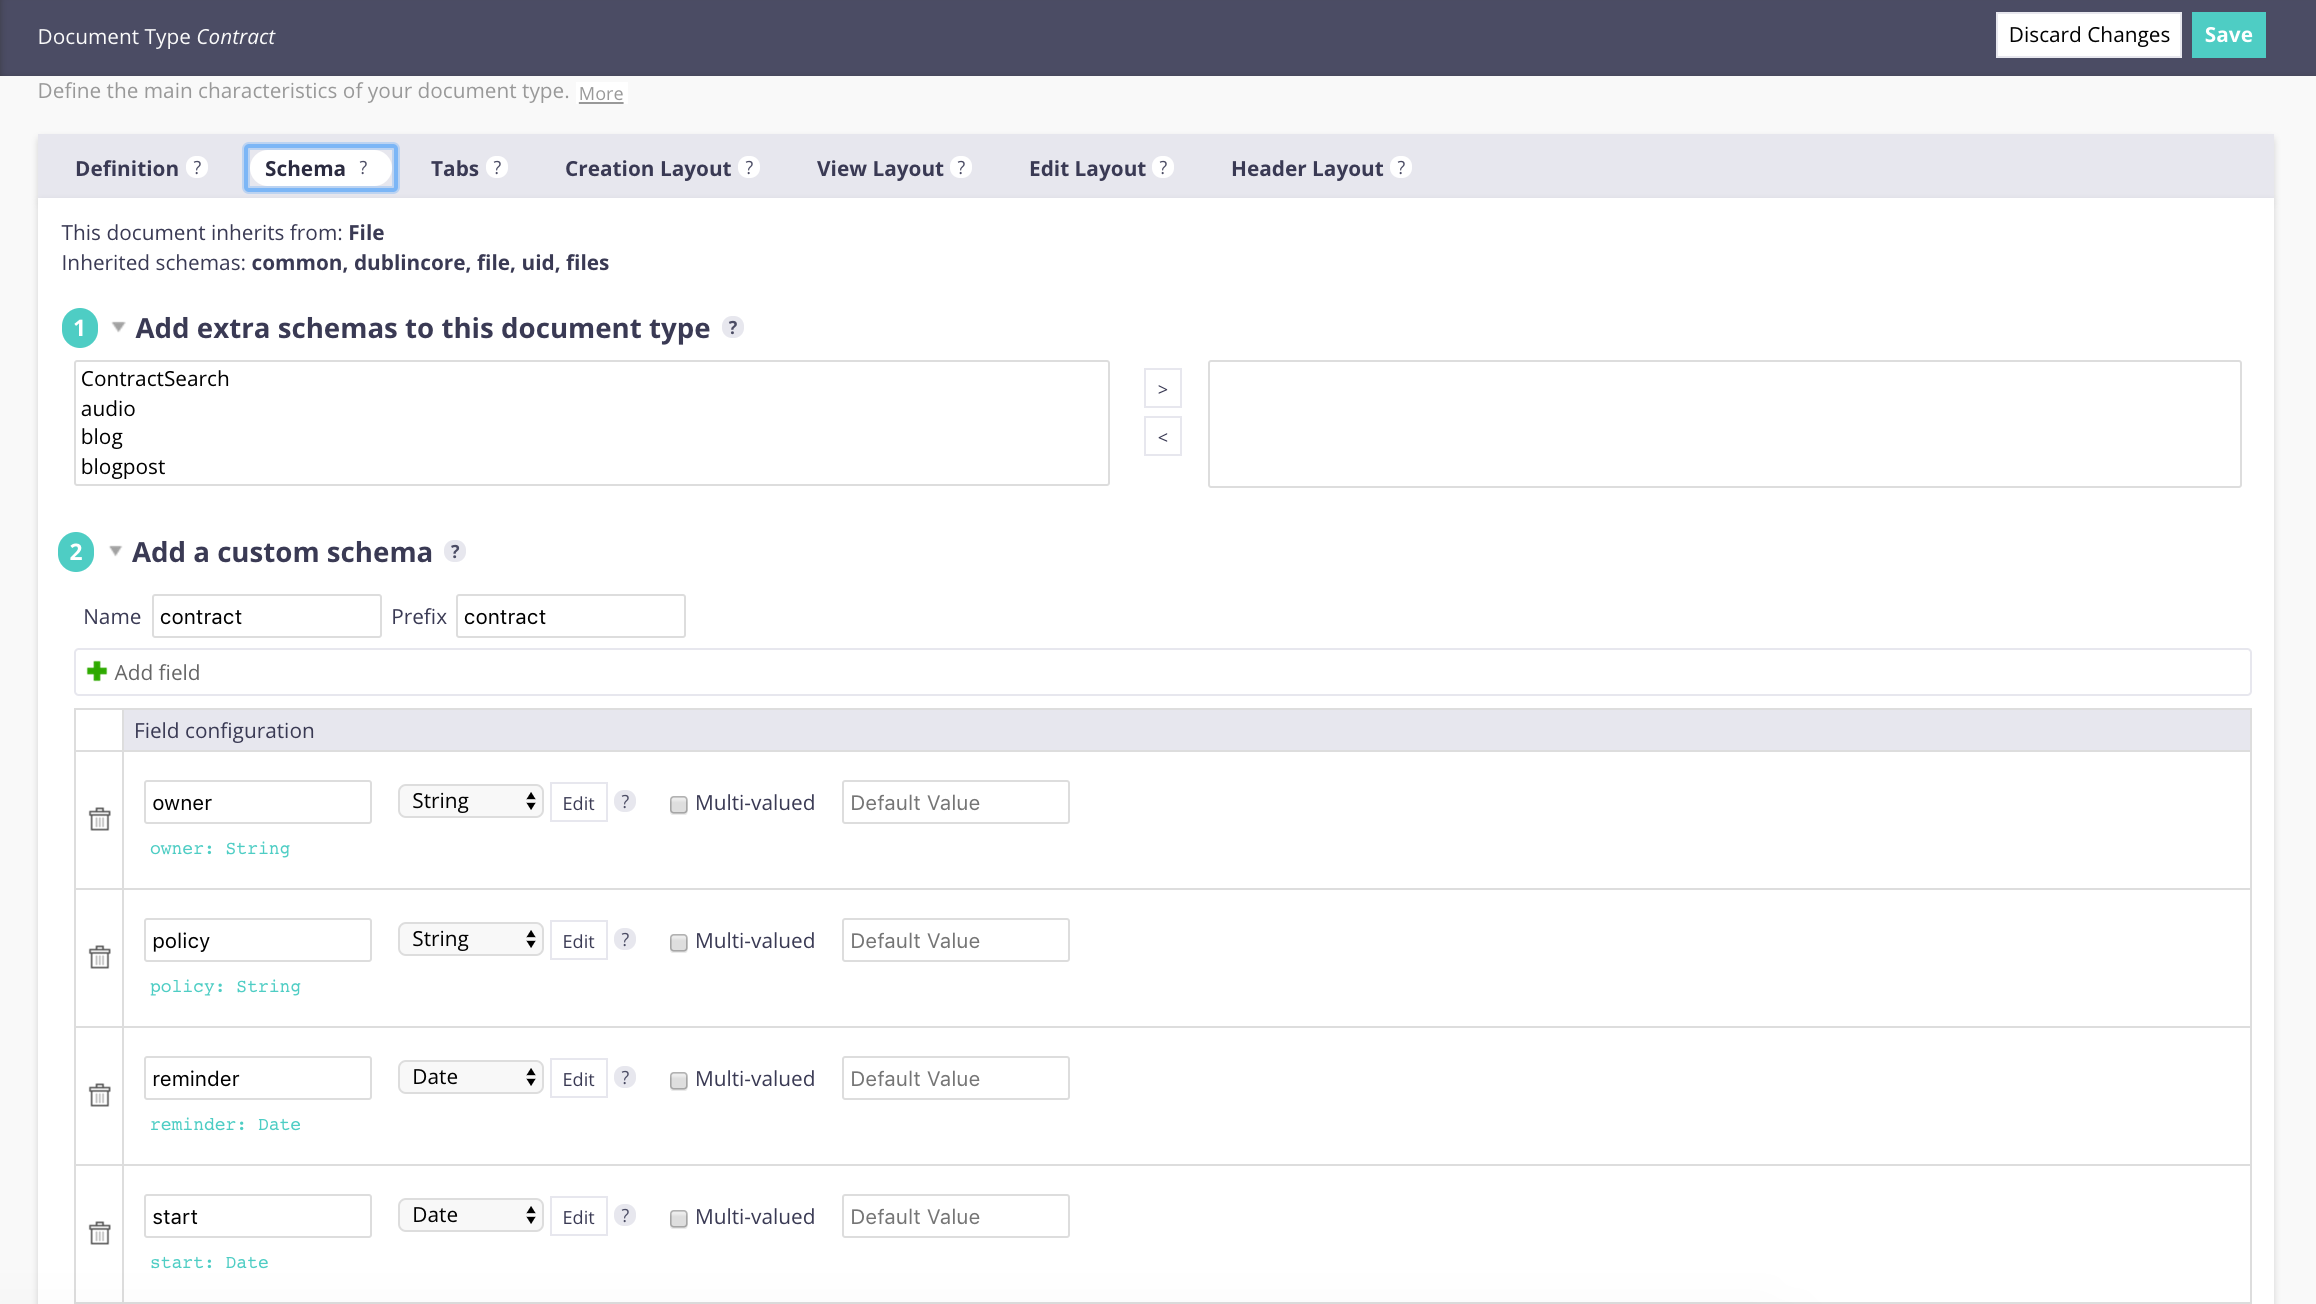
Fill in the Schema tab with the following metadata:
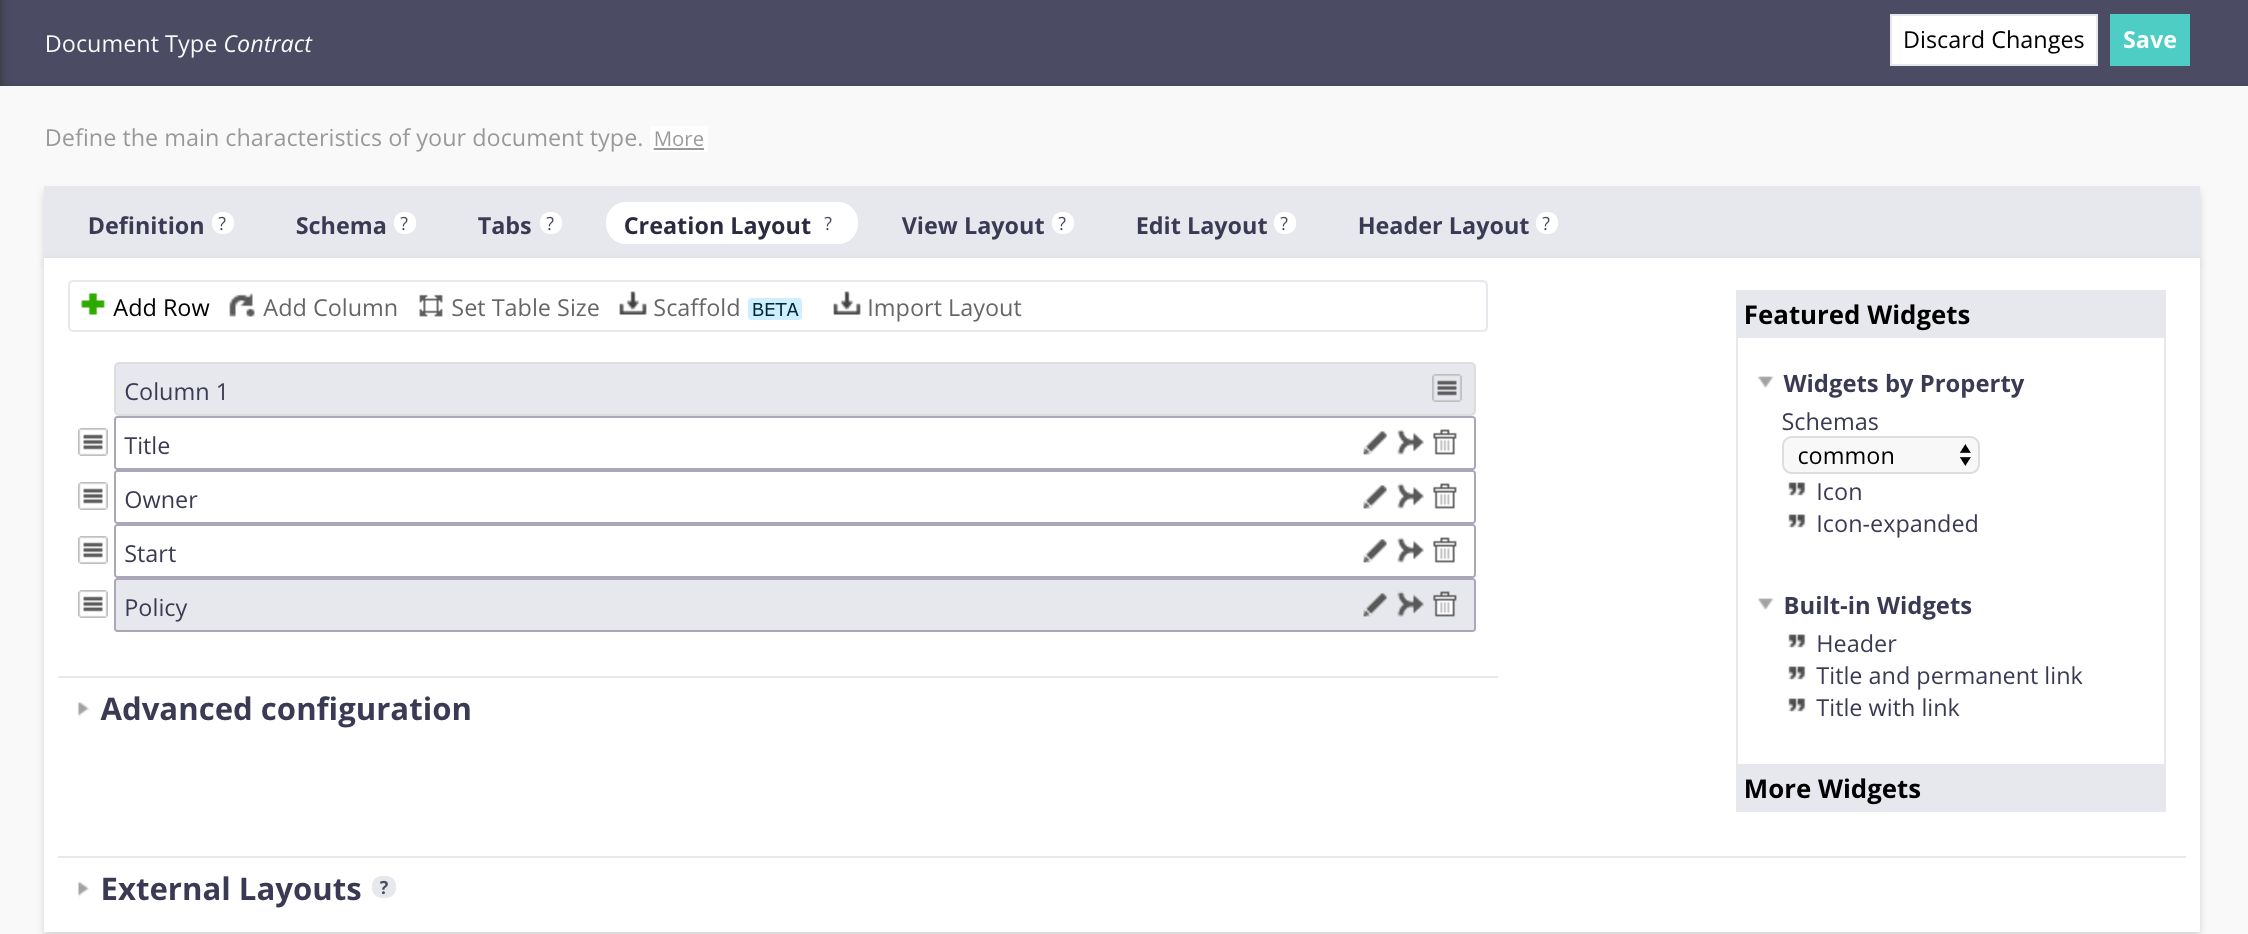
Specify the form that will be used to create the document (aka creation layout):
Click on the icon
 to remove the WARNING and Description widgets.
Drag and drop the fields "Owner", "Start" and "Policy" from the schema Contract to the grid.
Click on
 if you want to edit their label and click on the popup Save button.
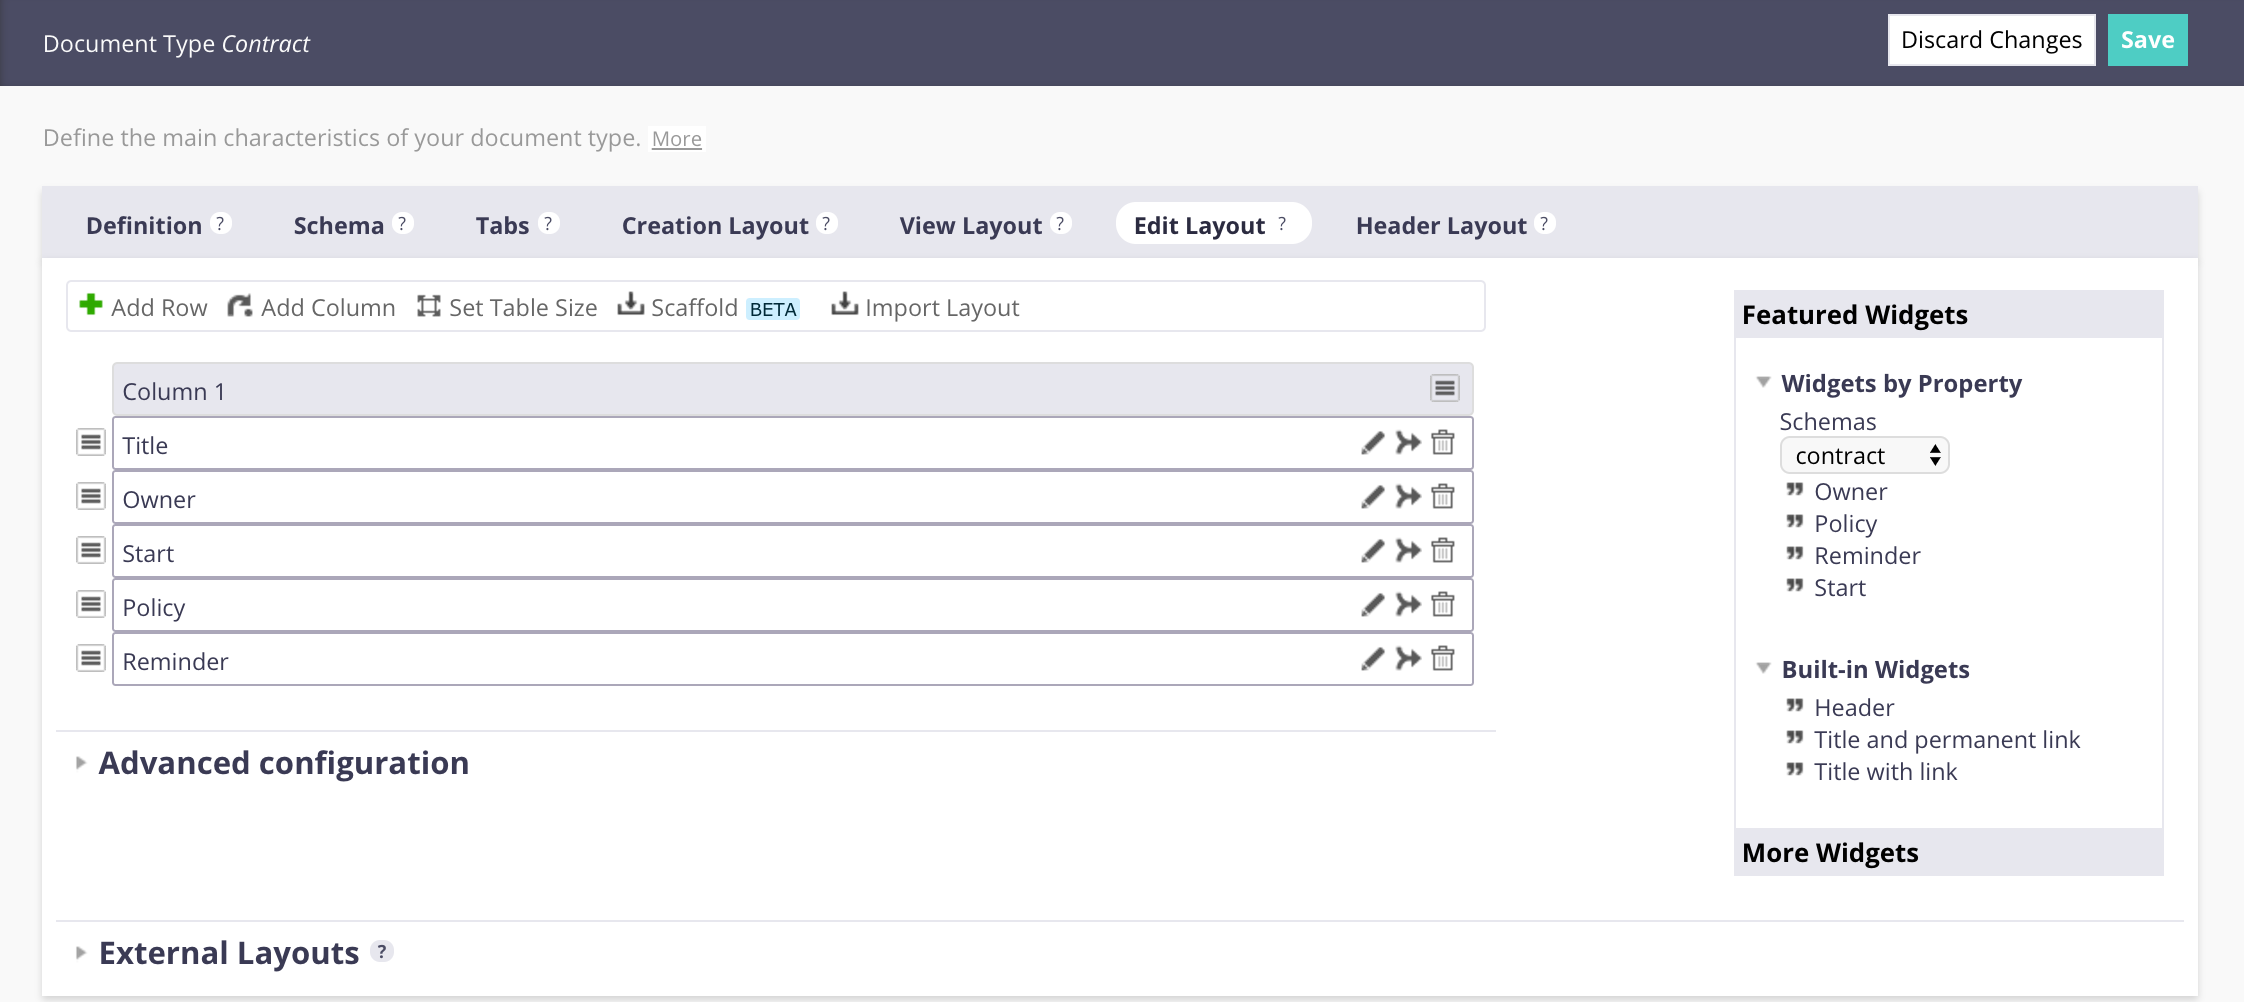
On the Edit layout (the form used to update the metadata of the document):
Click on the button Import Layout and select Import 'create' layout.
Click on the button Add Row.
Drag and drop the field Reminder from the schema Contract to the grid.
Click on
if you want to edit the widget label and click on the popup Save button.
On the View Layout click on the button Import Layout and select Import 'edit' layout.
Click on Save.
Deploying Changes on Your Nuxeo Platform Instance
Go to your Nuxeo Platform instance, typically available at
http://NUXEO_SERVER/nuxeo.Connect as Administrator with Administrator password.
Click on Admin Center > Update Center > Nuxeo Studio.
Click on the Update button.
Go in a workspace and create a new Contract.
You are now ready to use Nuxeo Studio! You can:
- Go to the next step of this quick start, so as to discover how you can contribute new features using Java code to the server.
- Go deeper with learning more of Nuxeo Studio and Nuxeo Platform, by following a complete tutorial.