While dealing with a workflow task, you may be interrupted, but you don't want to lose the review that you started. This how-to will teach you how to implement an option so that work in progress can be saved, giving more flexibility to users to complete it at their own pace.
Prerequisites
Start by creating a group of users named reviewers; they will be in charge of reviewing the task.
Create a Workflow
- Go to Workflow > Process Definitions and click on New. Name it
importantReviewand click on Ok. - On the Variables tab, Add a new variable
reviewComment. Click on Edit next to this new variable and click on "Required".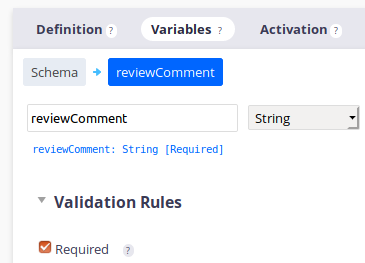
- On the Graph tab, select an Accept/Reject user task and drag and drop it on the graph.
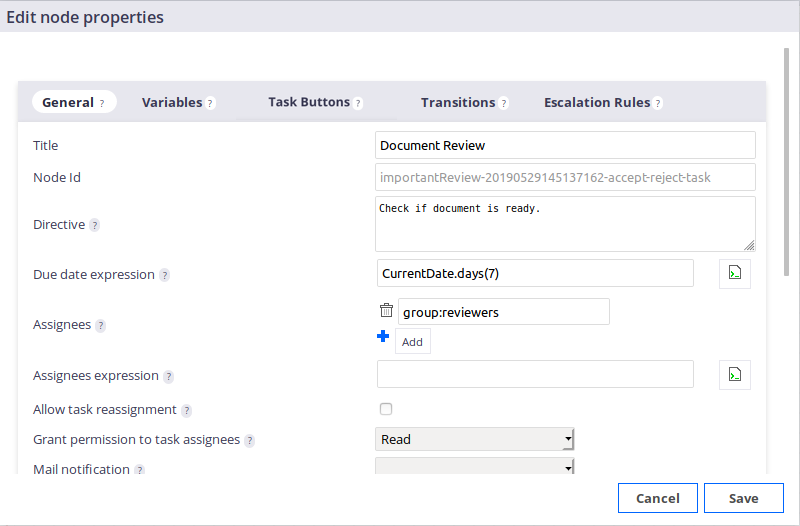
- Click on the Edit button next to the task. Fill in the General tab as shown below:
- On the Variables tab, activate the
reviewCommentvariable by moving it to the right box.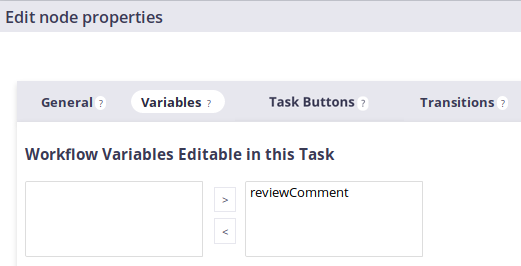
- On the Task Buttons tab, add a task button:
- id:
saveprogress - Label: save progress
- Uncheck the box Validate Form of this new button.
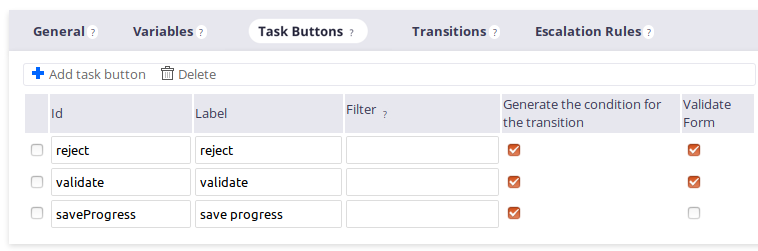
- id:
- Go to Transitions tab, to make sure that the 3 transitions are automatically created.
- Click on Save on the popup.
- On the graph, link the
saveProgresstransition back to the beginning of the Document Review task as you want to go back to it when you click on the Save Work in Progress button. You should end up with a graph like this: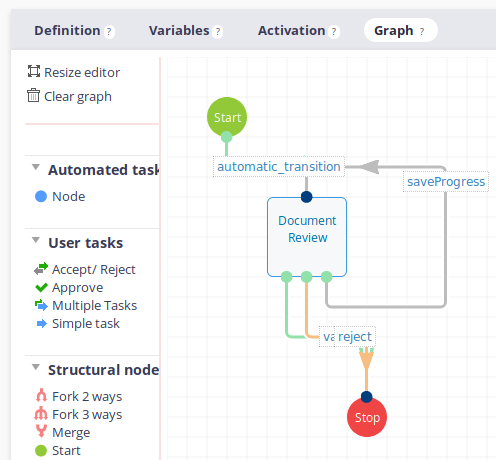
You can now click on Configure layouts in Designer at the top-right of your screen to go directly to the Designer side.
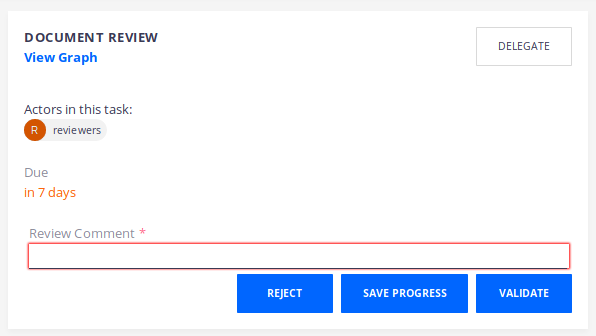
Configure the Task Layout
Once you are on the Document Review layout, keep only the
Review Commentproperty and delete the others by clicking on the trash icon next to each of them.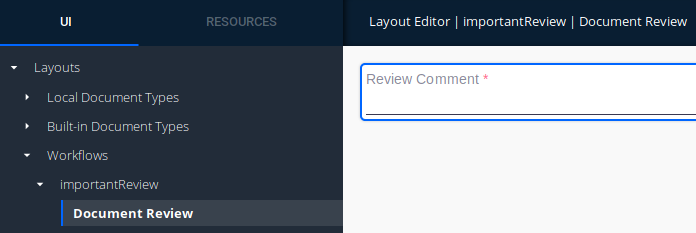
Users may want to replace the text input (1 line max) with a textarea, made for larger text. It's just about changing the
<nuxeo-input>element to<nuxeo-textarea>in the layout configuration after clicking on switch to code at the bottom of the editor screen. It should look like this: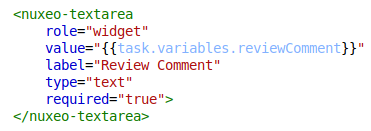
That's it! Save your changes and deploy your configuration.