The Nuxeo Frame.io connector allows users to improve their capabilities of syncing and collaborating on content from/to Adobe Premiere, and other video editing tools, through Frame.io.
It enables you to store master files in Nuxeo, but collaborate on lower resolution conversions in Frame.io. You can therefore do all the review work in Frame.io and once you are finished, export your asset to Nuxeo. It will import the Master file along with its Frame.io metadata, comments and annotations.
This page will help you to:
- Configure the Frame.io account.
- Deploy and configure the Nuxeo Frame IO addon.
- Test the addon.
Installation
Frame.io Side
Registration
- You first need to register a Frame IO account or connect to your account.
- Create a team/verify that all users within your team have the right access.
- Add a new project and upload some documents.
Define an OAuth2 Application
A frame.io administrator user has to create an Oauth2 application.
For this you can:
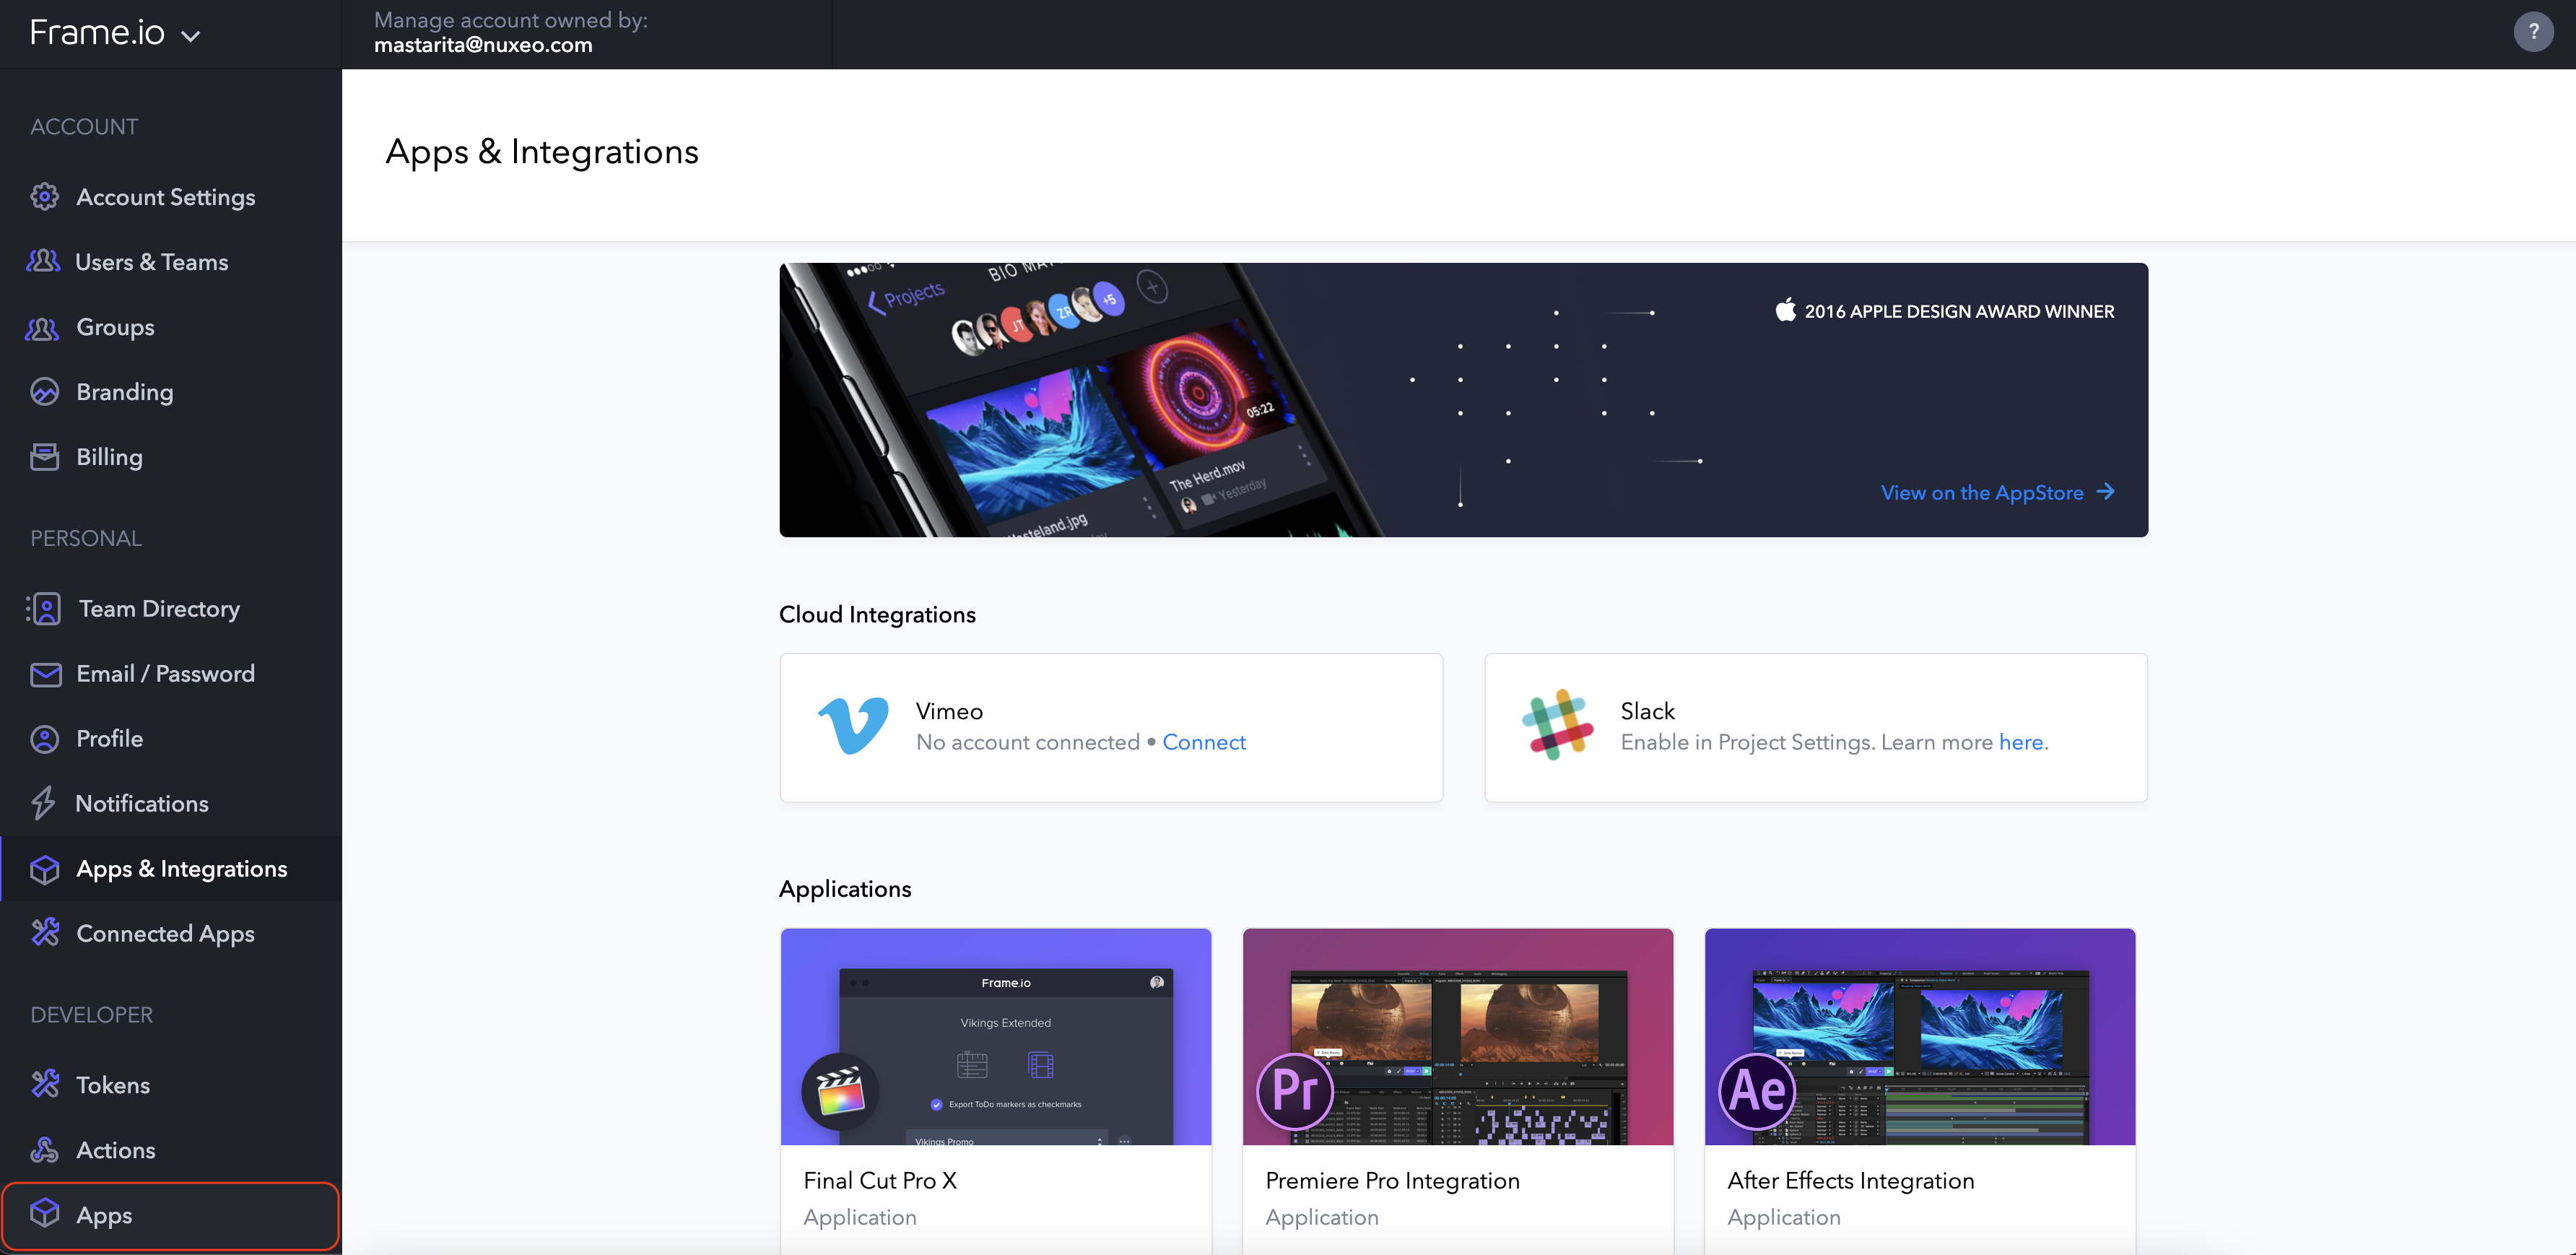
- Click on your at the top left, and click on Apps & Integration.
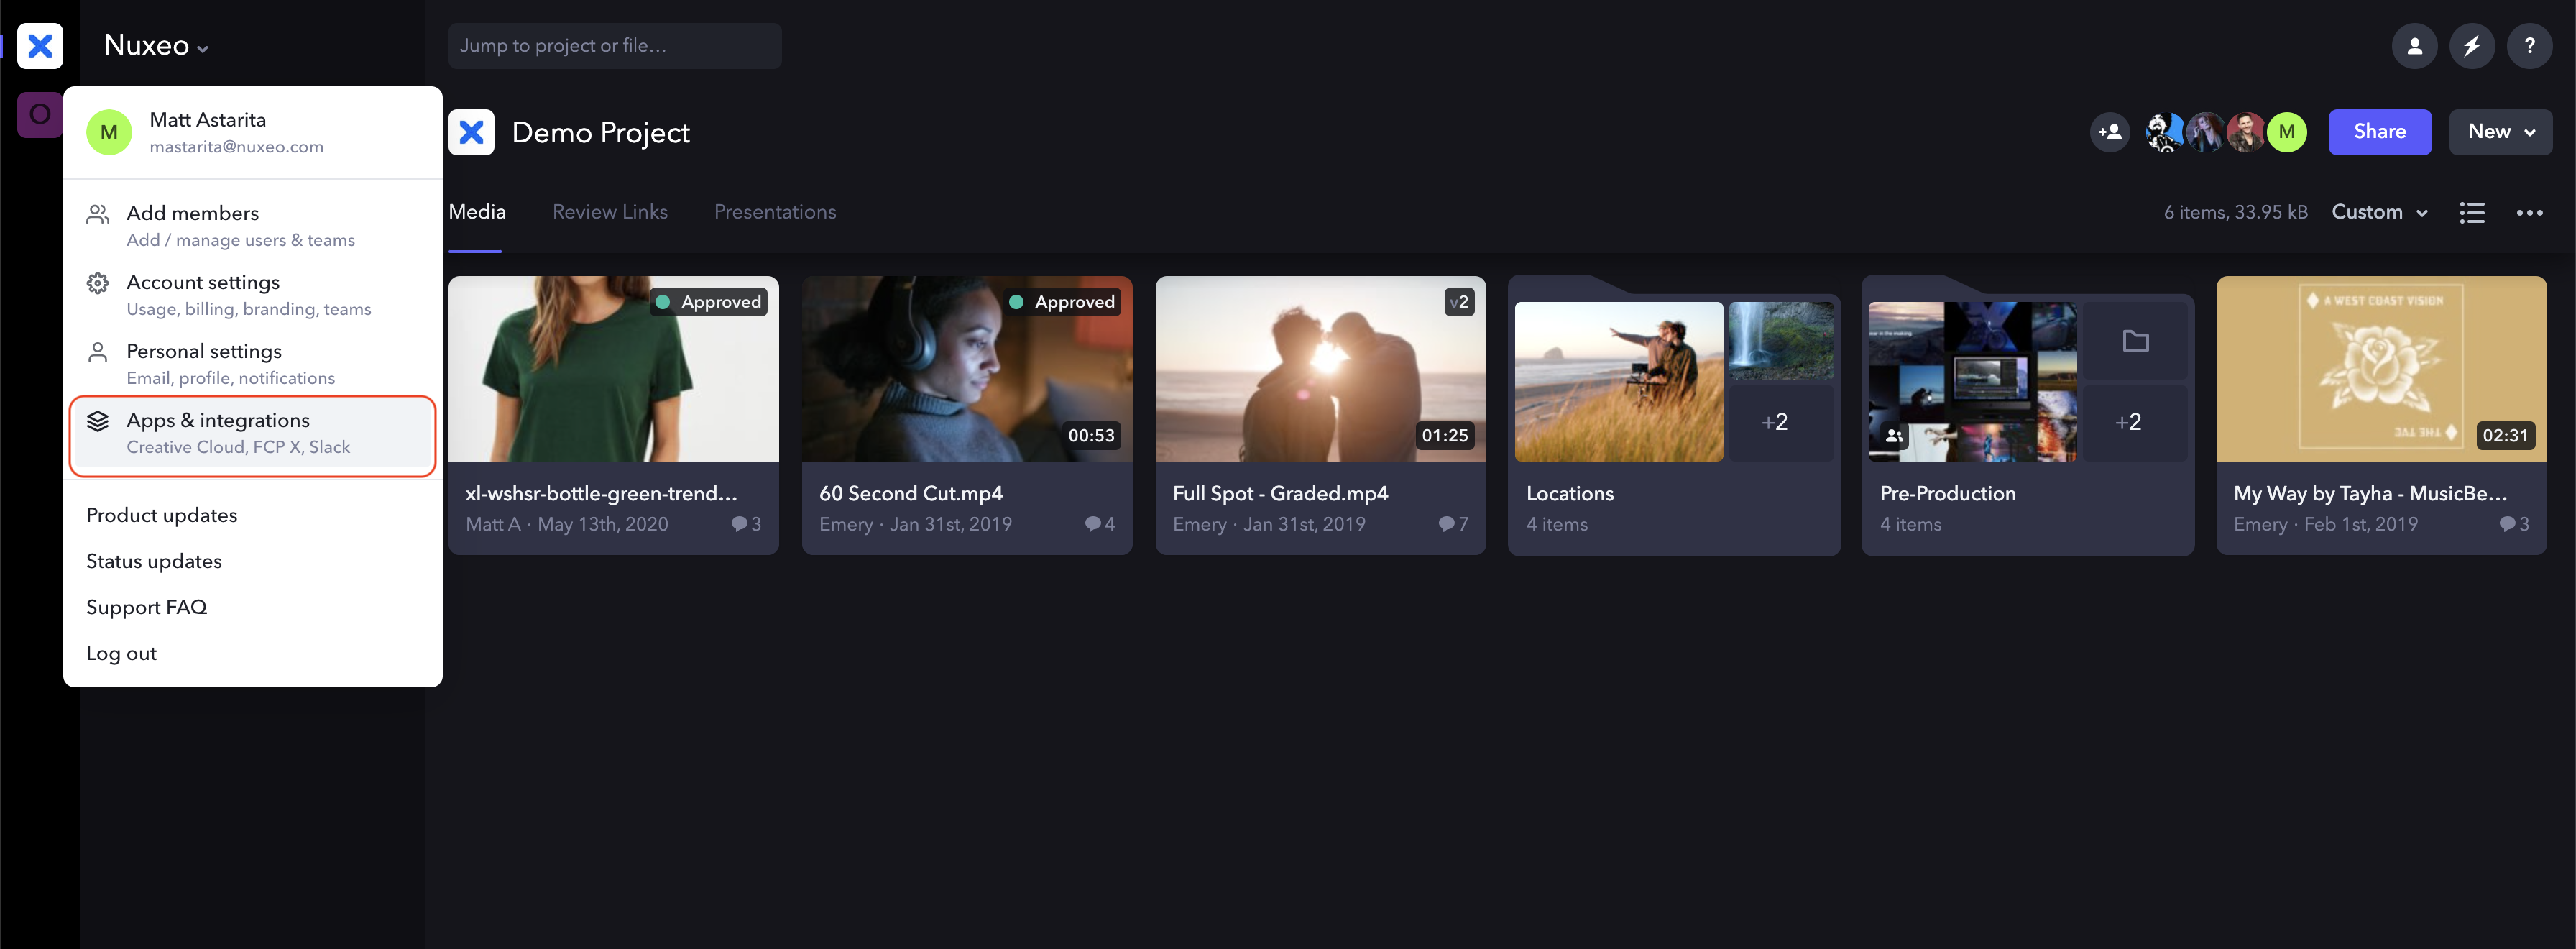
From the left menu, select the Apps link in the Developer category.
In case of blank page:
- Log to https://developer.frame.io
- Navigate to https://developer.frame.io/app/oauth-apps
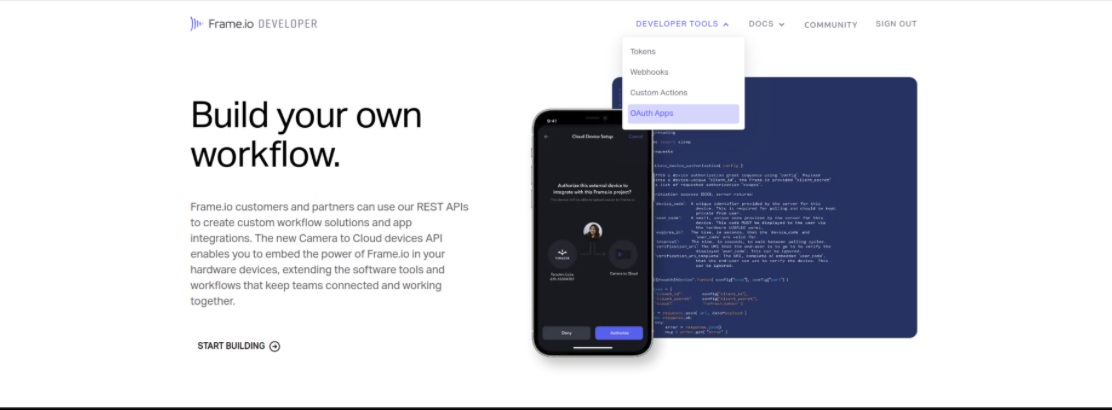
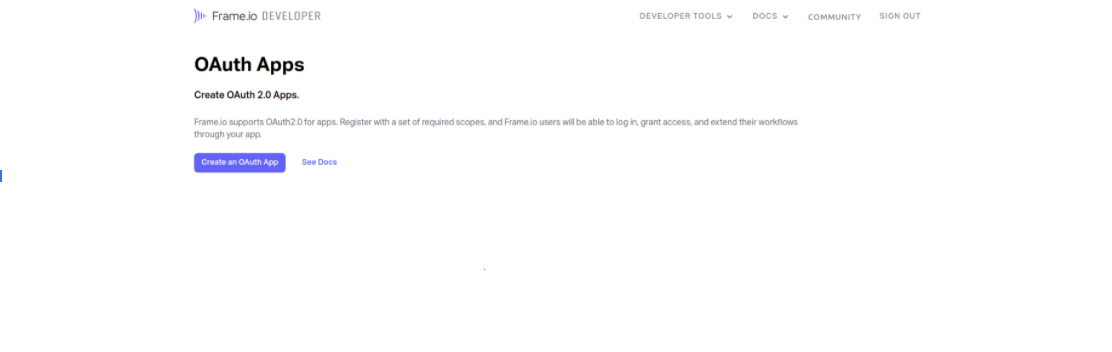
- Click the Create an OAuth app button.
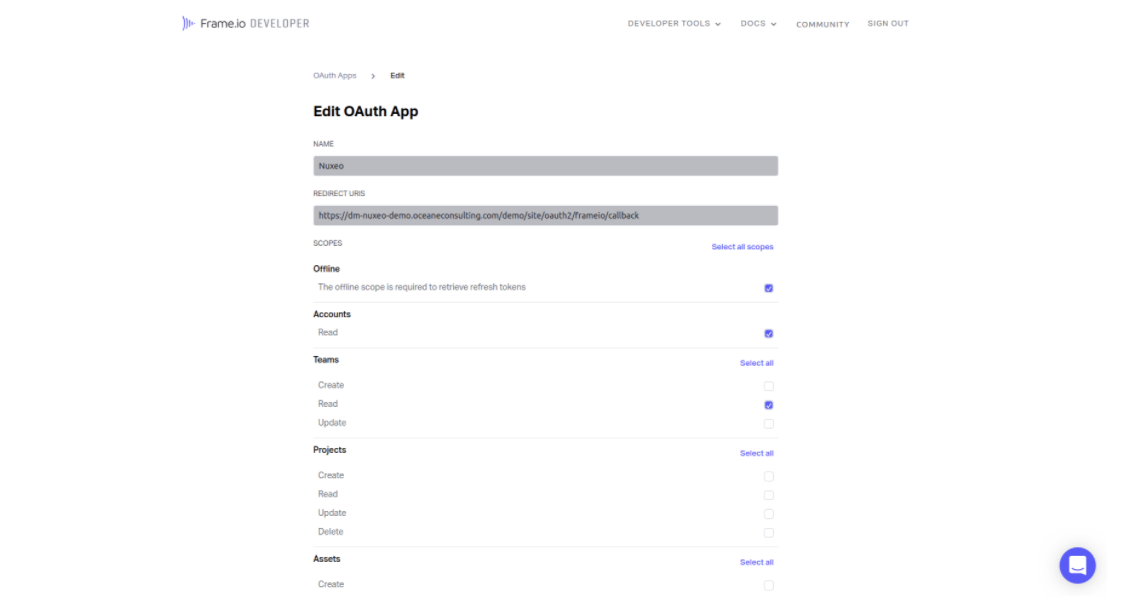
- Fill in the form:
- Name: Nuxeo
- Redirect URL: your instance: https://nightly.nuxeo.com/nuxeo/site/oauth2/frameio/callback
- Uses PKCE: false
- Scopes: action.create,action.delete,account.read,comment.read,action.update,action.read,team.read,asset.read,offline
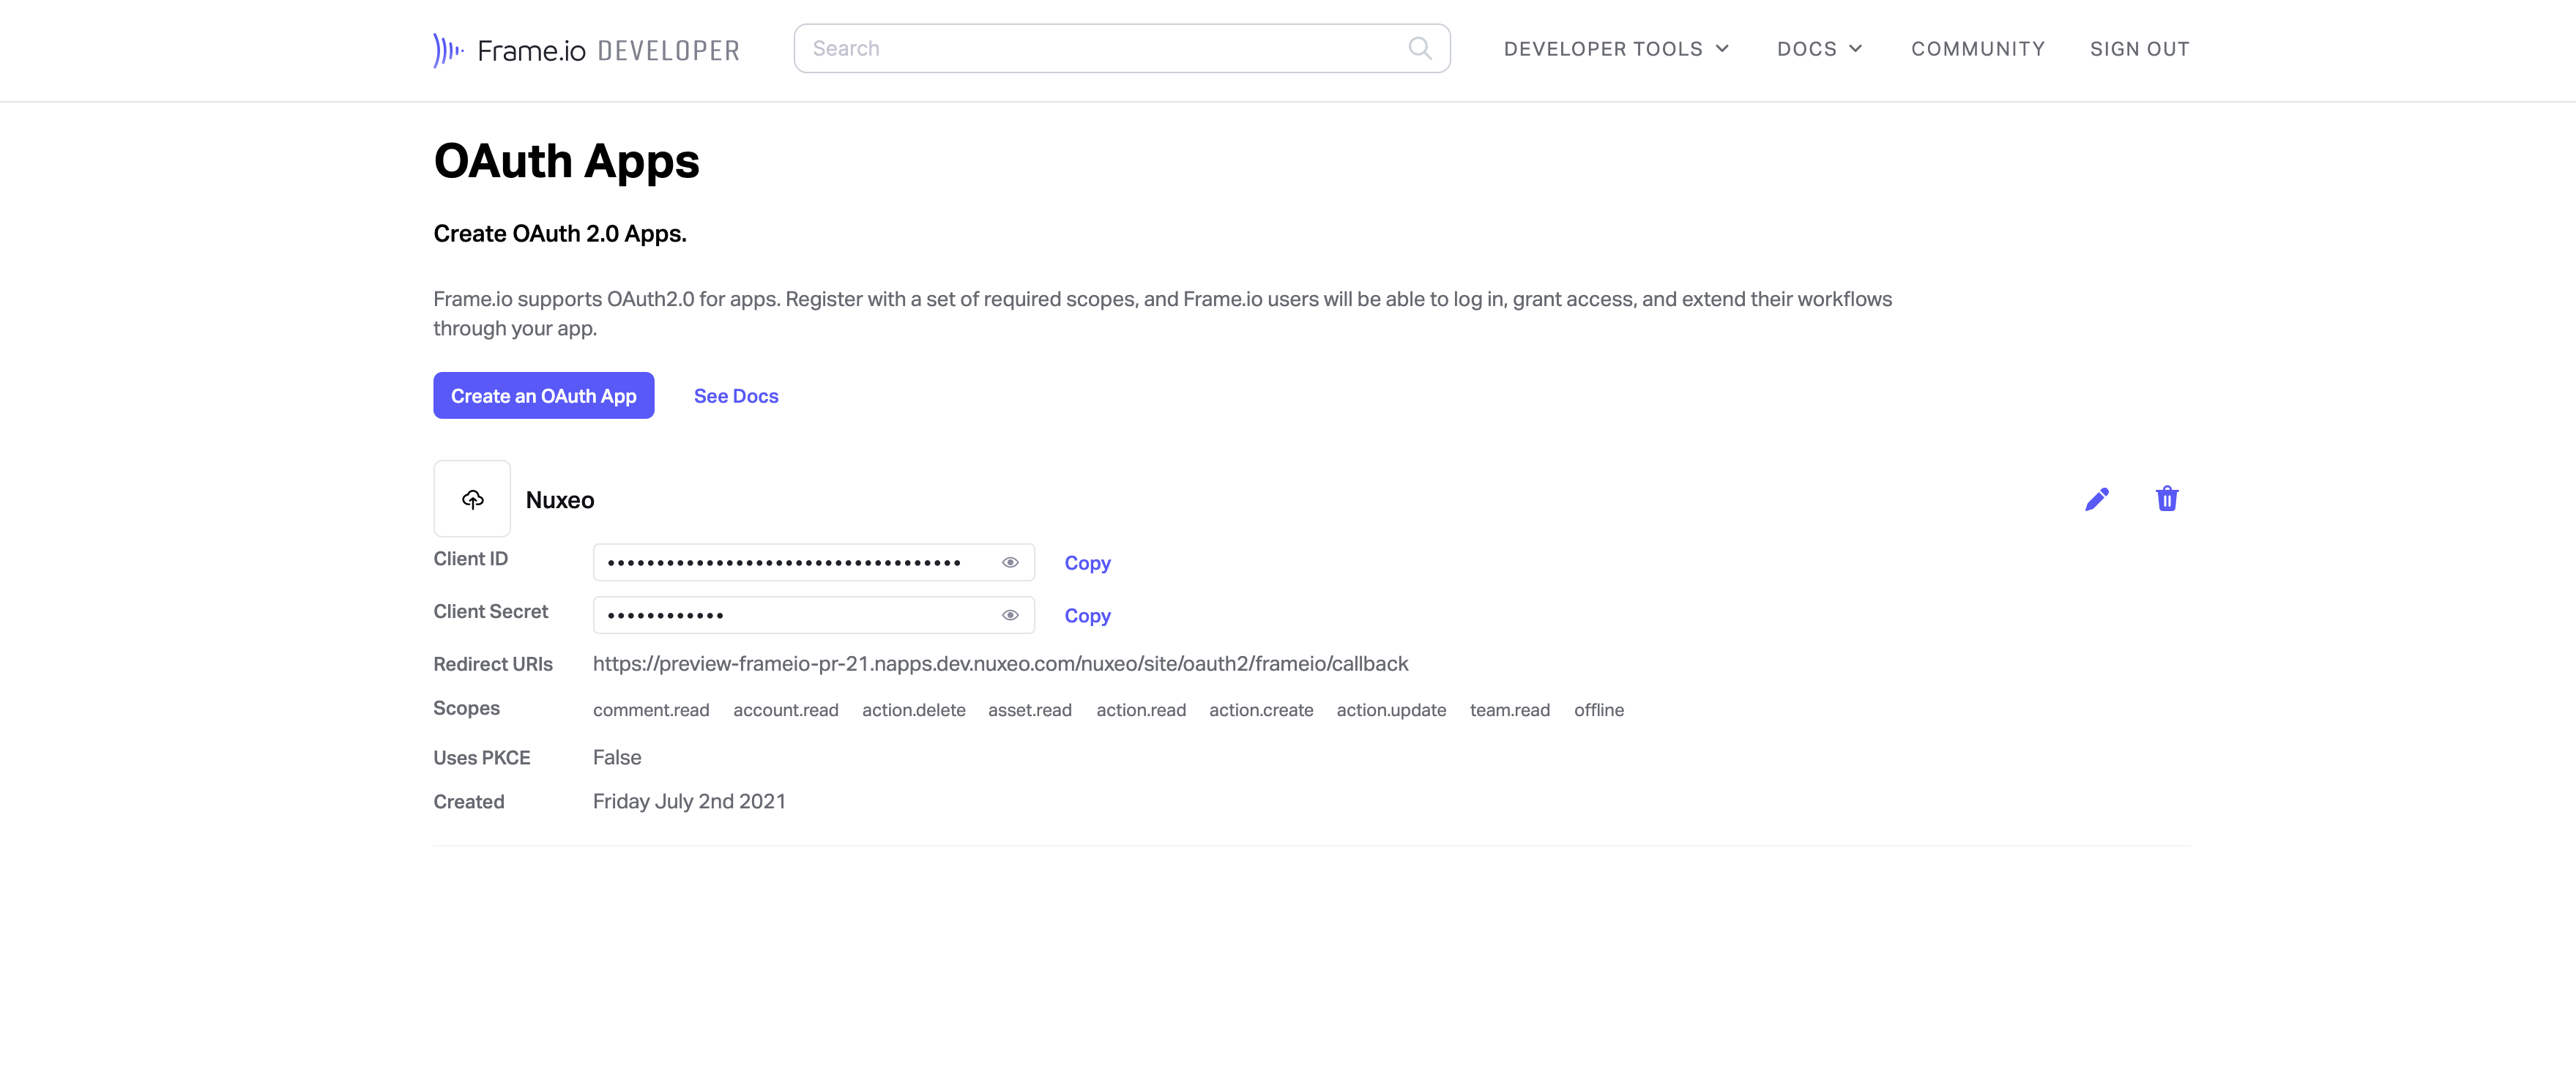
It should look like this in the end:
Nuxeo Side
Prerequisites
Your Nuxeo instance must be live.
As an example: https://nightly.nuxeo.com/nuxeo
The URL should match the previously created OAuth 2 app redirect URL on the Frame IO side!
Addon Deployment
- Stop your nuxeo instance:
/opt/nuxeo/bin/nuxeoctl stop - Install the Nuxeo addon as usual:
/opt/nuxeo/bin/nuxeoctl mp-install nuxeo-frameio - Start your nuxeo instance:
/opt/nuxeo/bin/nuxeoctl start
Register the Frame.io Provider
Only an administrator user is able to register the Frame.io provider. You only need to do this once to enable your team to bind folders.
- Log to the Nuxeo UI with Administrative privileges.
- From the left menu, go to Administration, then Cloud Service.
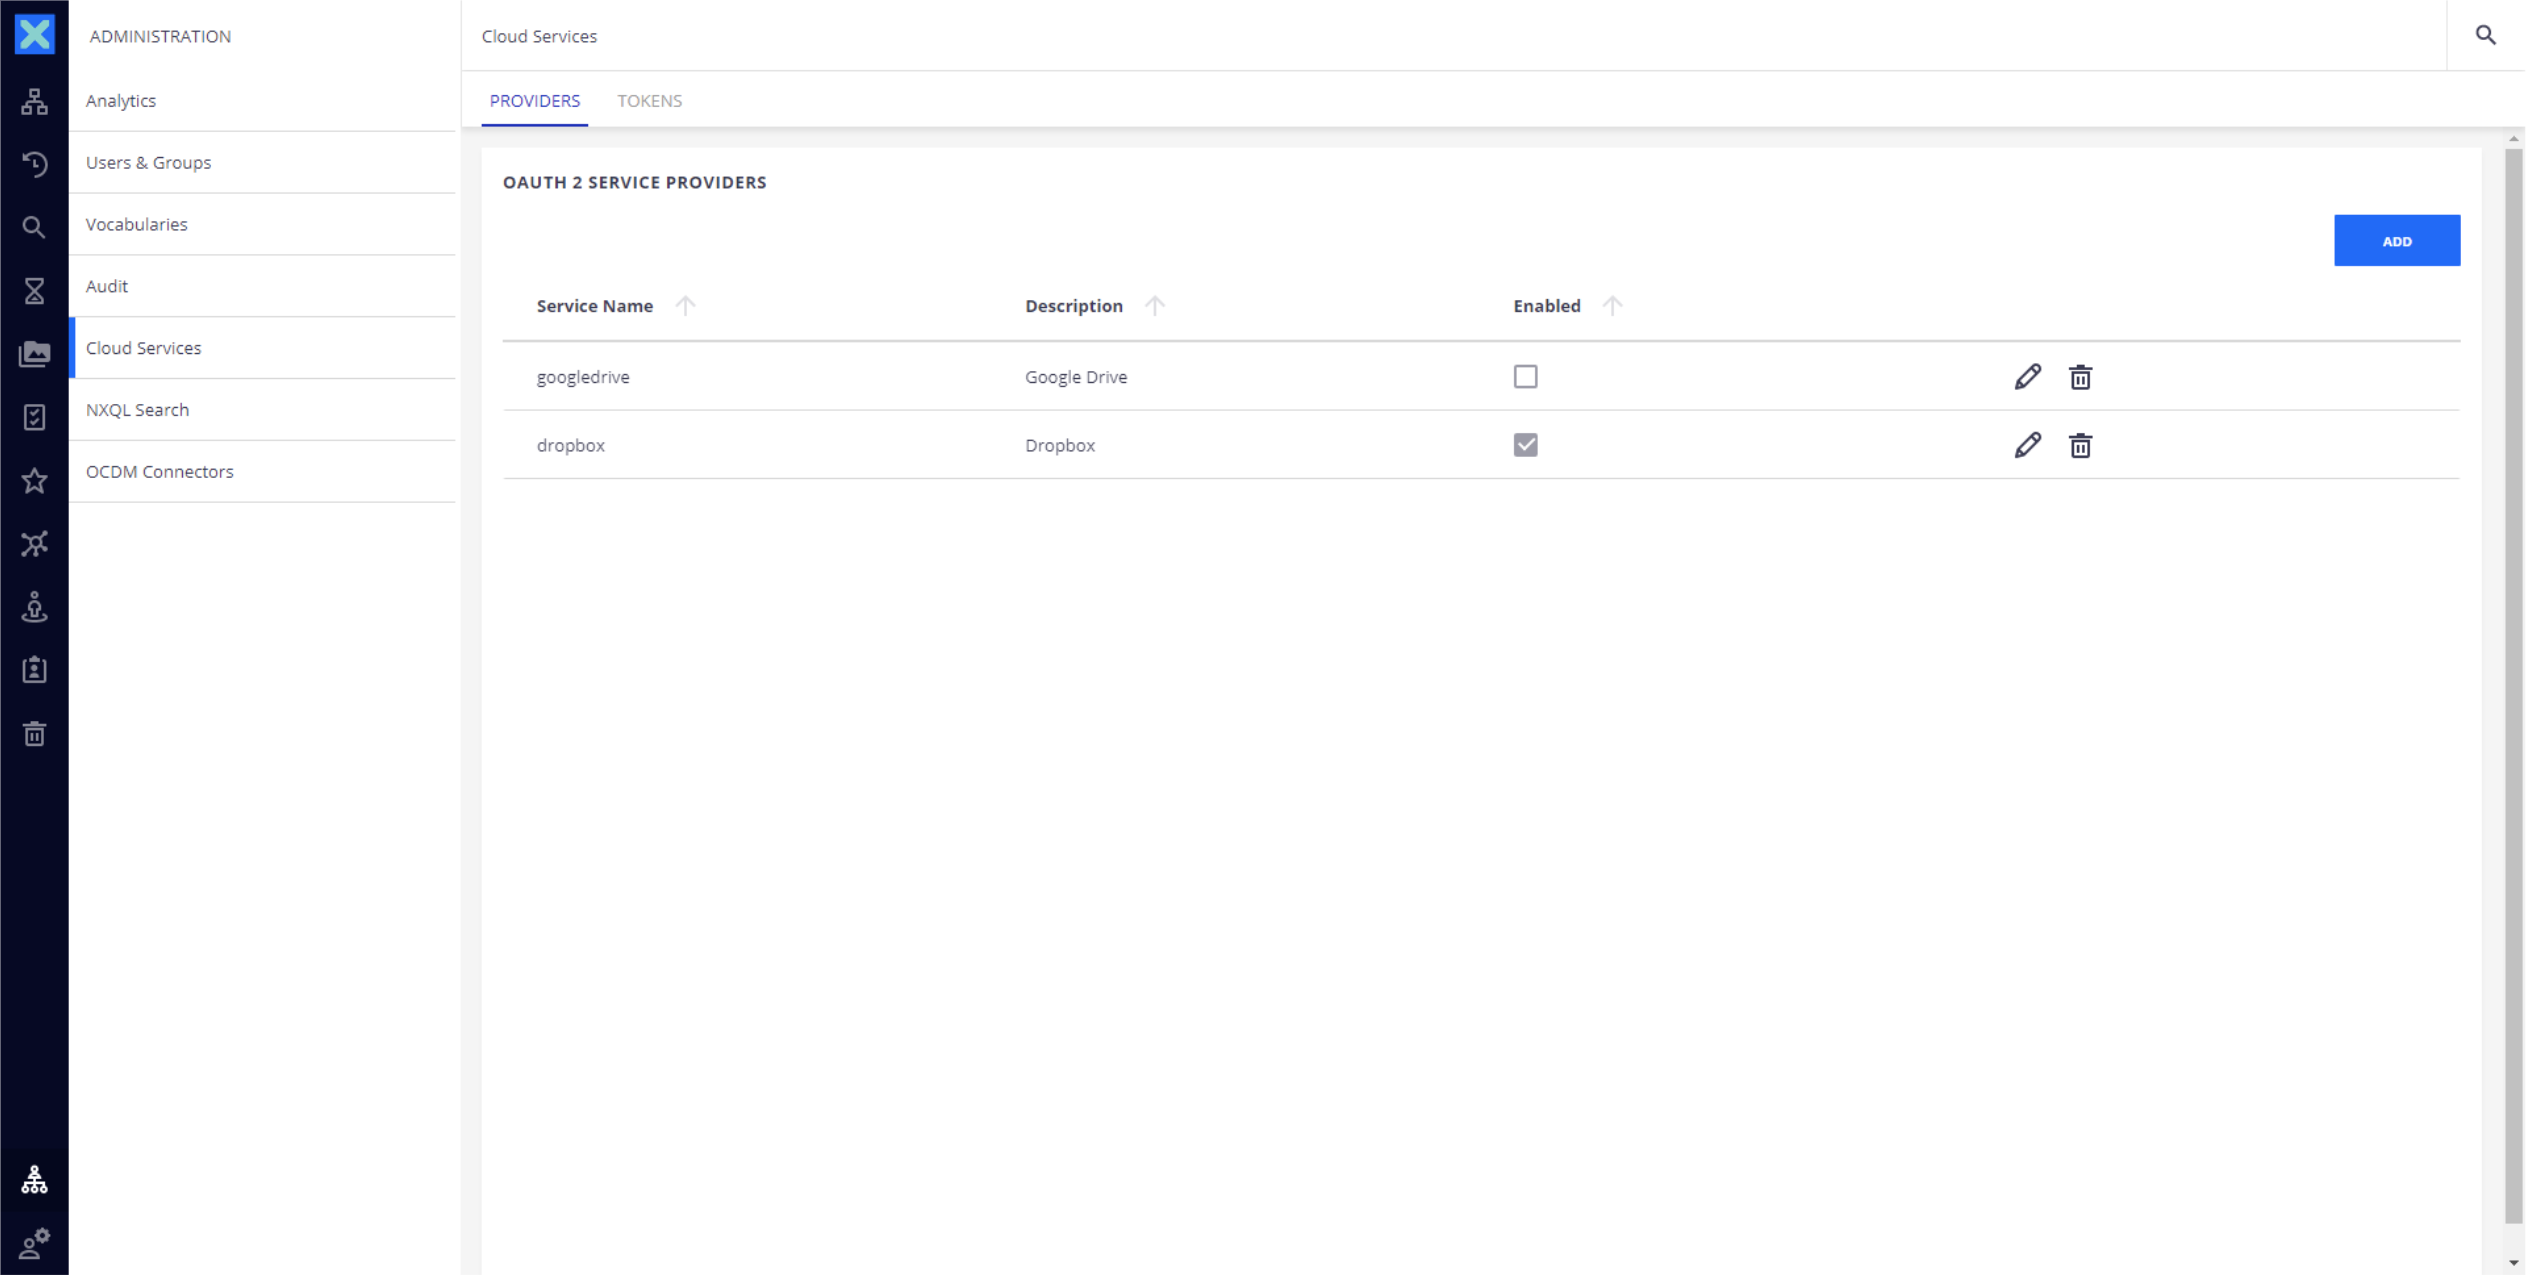
- Add a new provider.
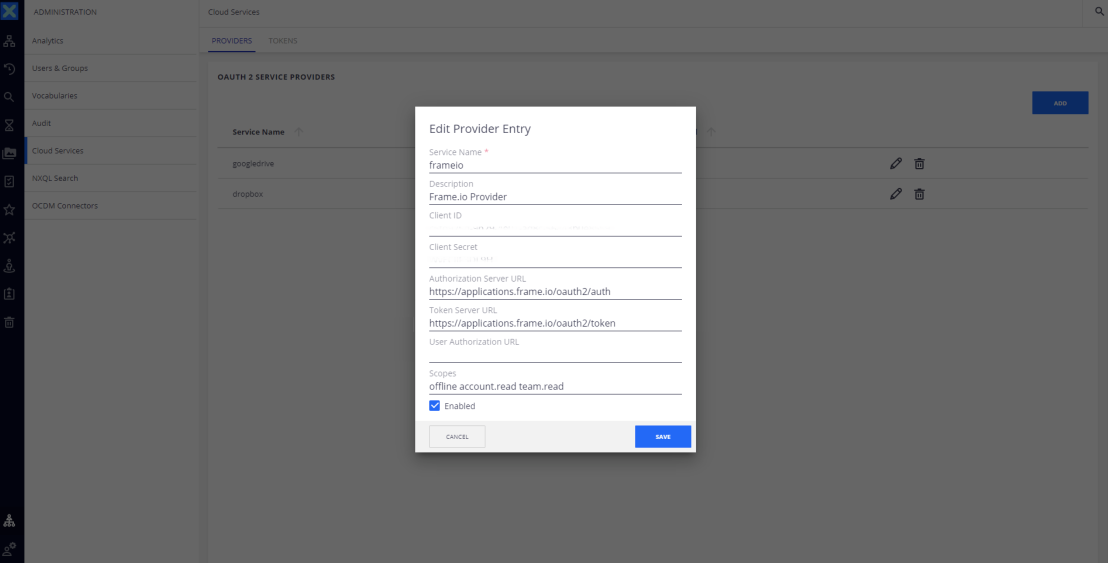
The following form will be prefilled for you, you only need to add the Client ID and Client Secret, enable the provider and enable the service.
Fill the form:
- Service name: frameio
- Description: Frame IO Provider
- Client ID: paste from Frame IO Oauth2 application
- Client Secret: paste from Frame IO Oauth2 application
- Authorization Server URL: https://applications.frame.io/oauth2/auth
- Token Server URL: https://applications.frame.io/oauth2/token
- User Authorization URL:
Scopes: action.create,action.delete,account.read,comment.read,action.update,action.read,team.read,asset.read,offline
Your team will now be ready to bind folders with their Frame.io projects.
Use Case
Prerequisites
The user must have:
- A Frame.io account
- Rights access to the Frame.io project
- A Nuxeo account.
Step 1: Bind a Nuxeo Folder with a Frame.io project.
- Log to Nuxeo.
- Create a new Folder or go to an existing one.
- From the summary view, click to the Bind to Frame IO available on the action menu.
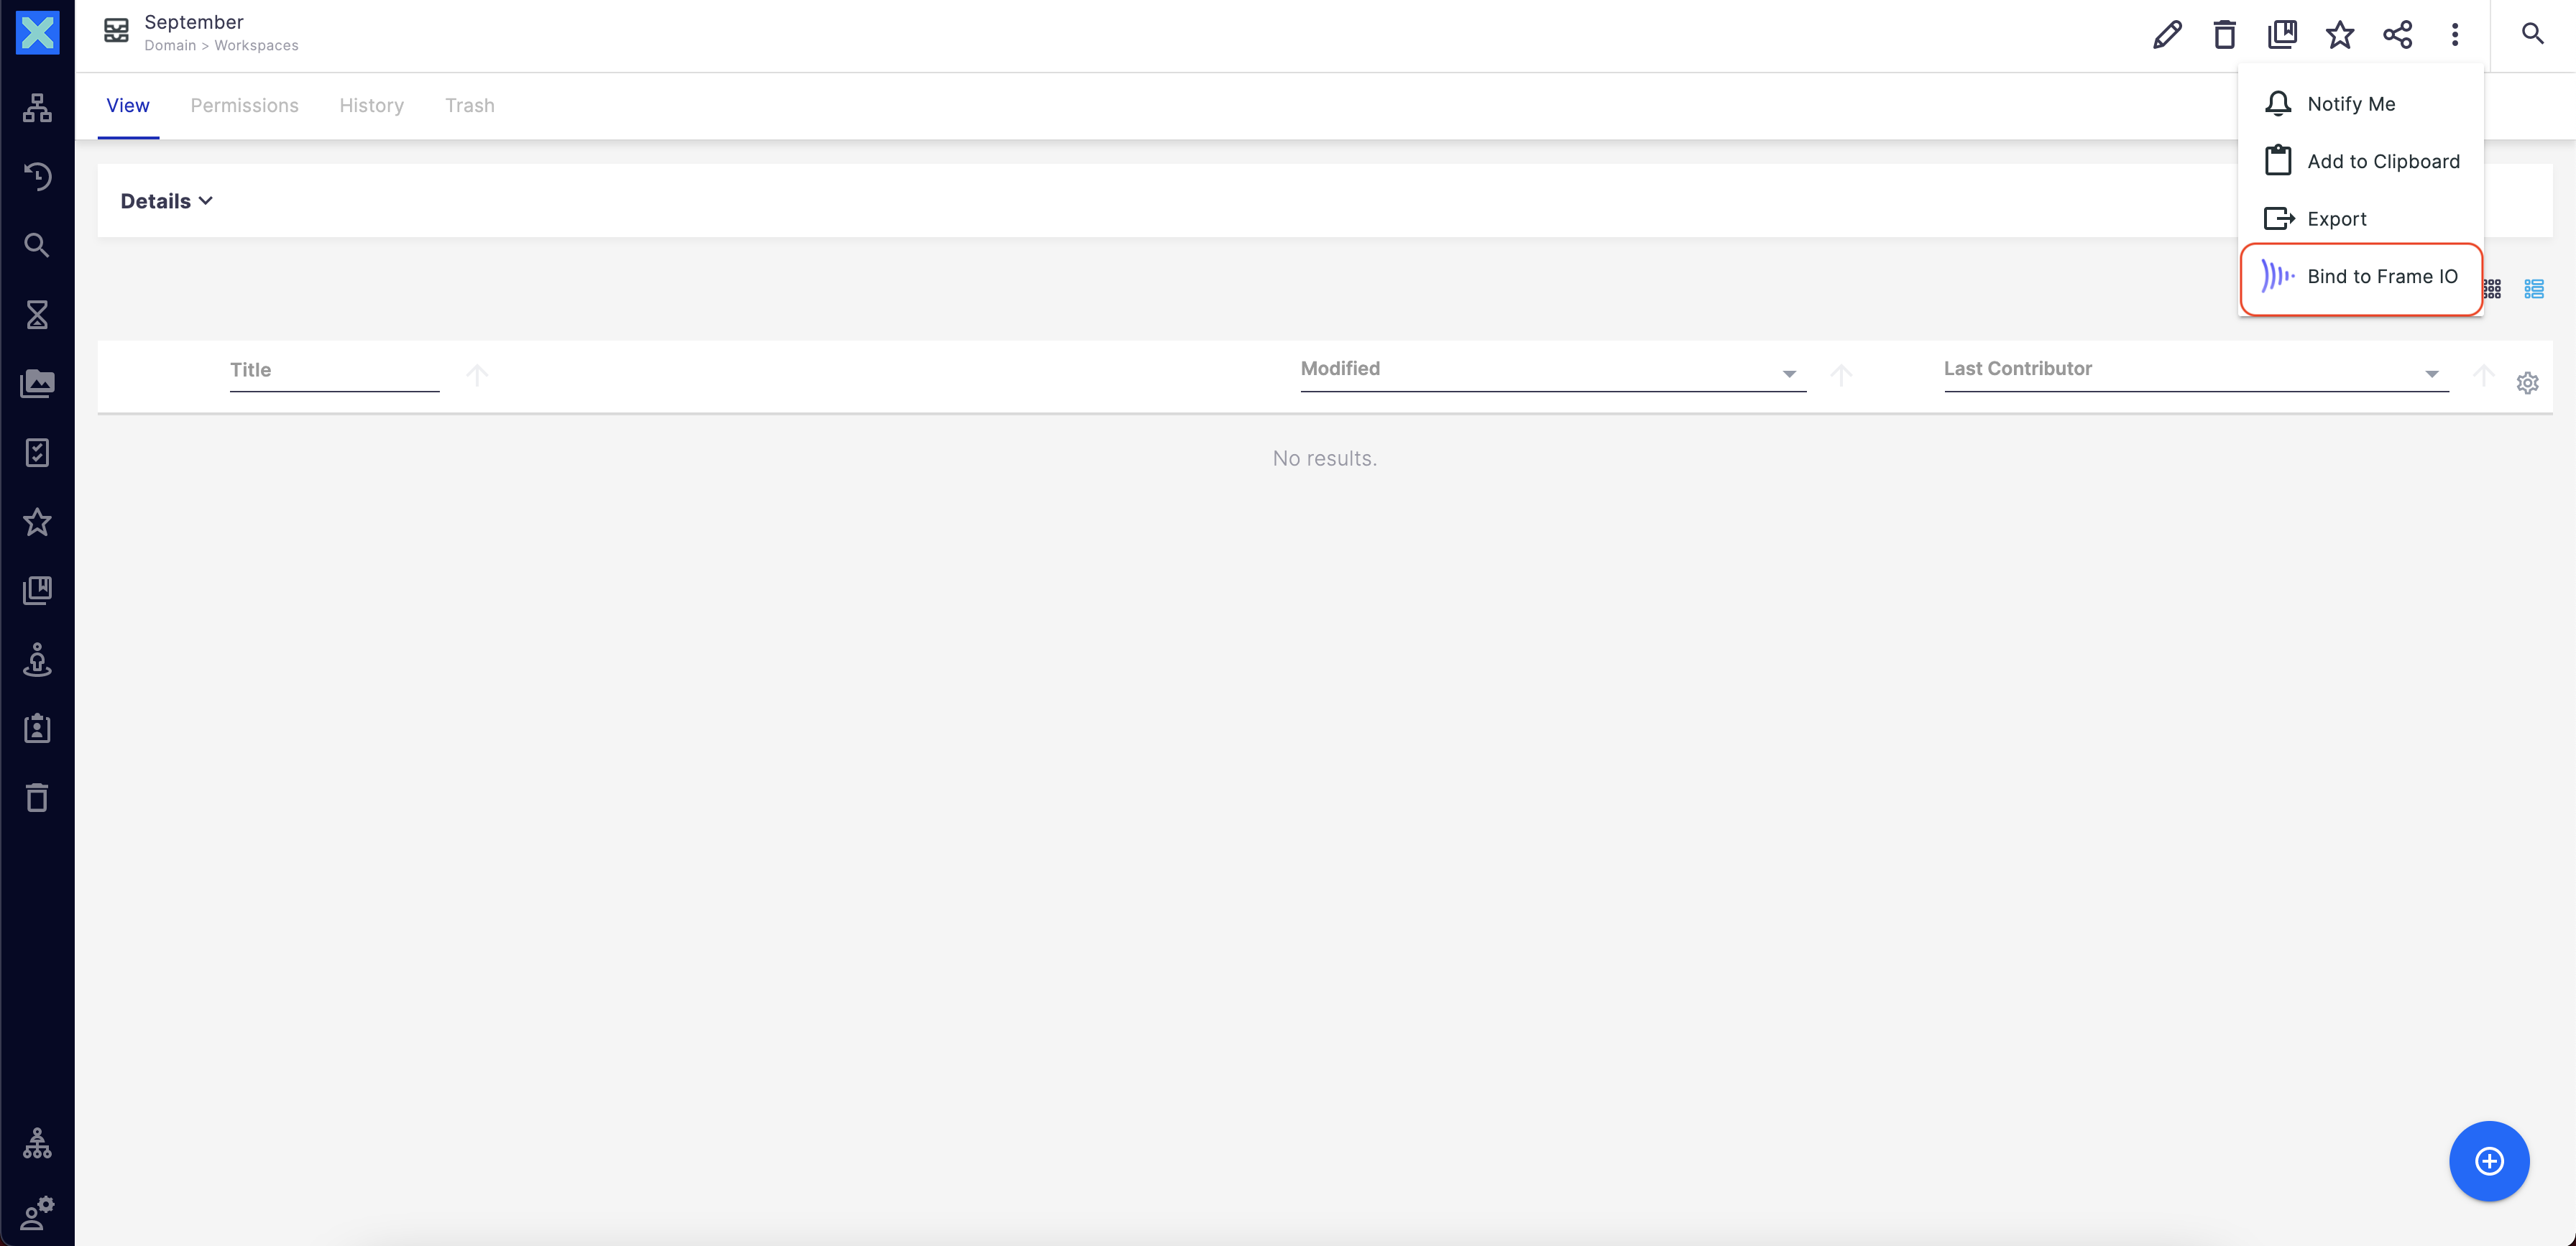
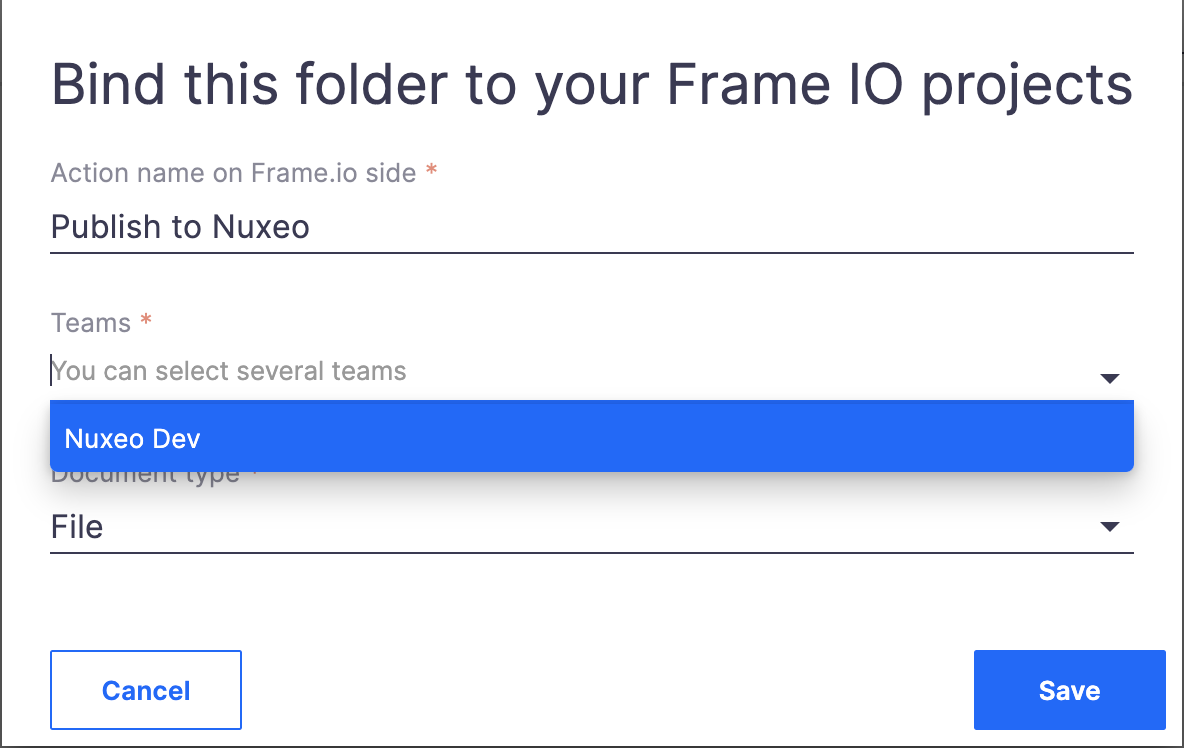
- A popup is displayed.
You can name the custom action that will appear on the frame.io side to push assets to your Nuxeo repository. You can name it Publish to Nuxeo as an example.If you want to bind another folder, another custom action will be created and you will need to name it differently. - Fill the form and click the Validate button.
- Take a look at the new tab named Frame IO.
You can now see that your folder is bound with the Frame.io team we selected earlier.
Step 2: Push an asset from Frame IO to Nuxeo
- Log to Frame IO.
- Navigate to the shared project.
- Select a file and push the file to Nuxeo using the custom action.
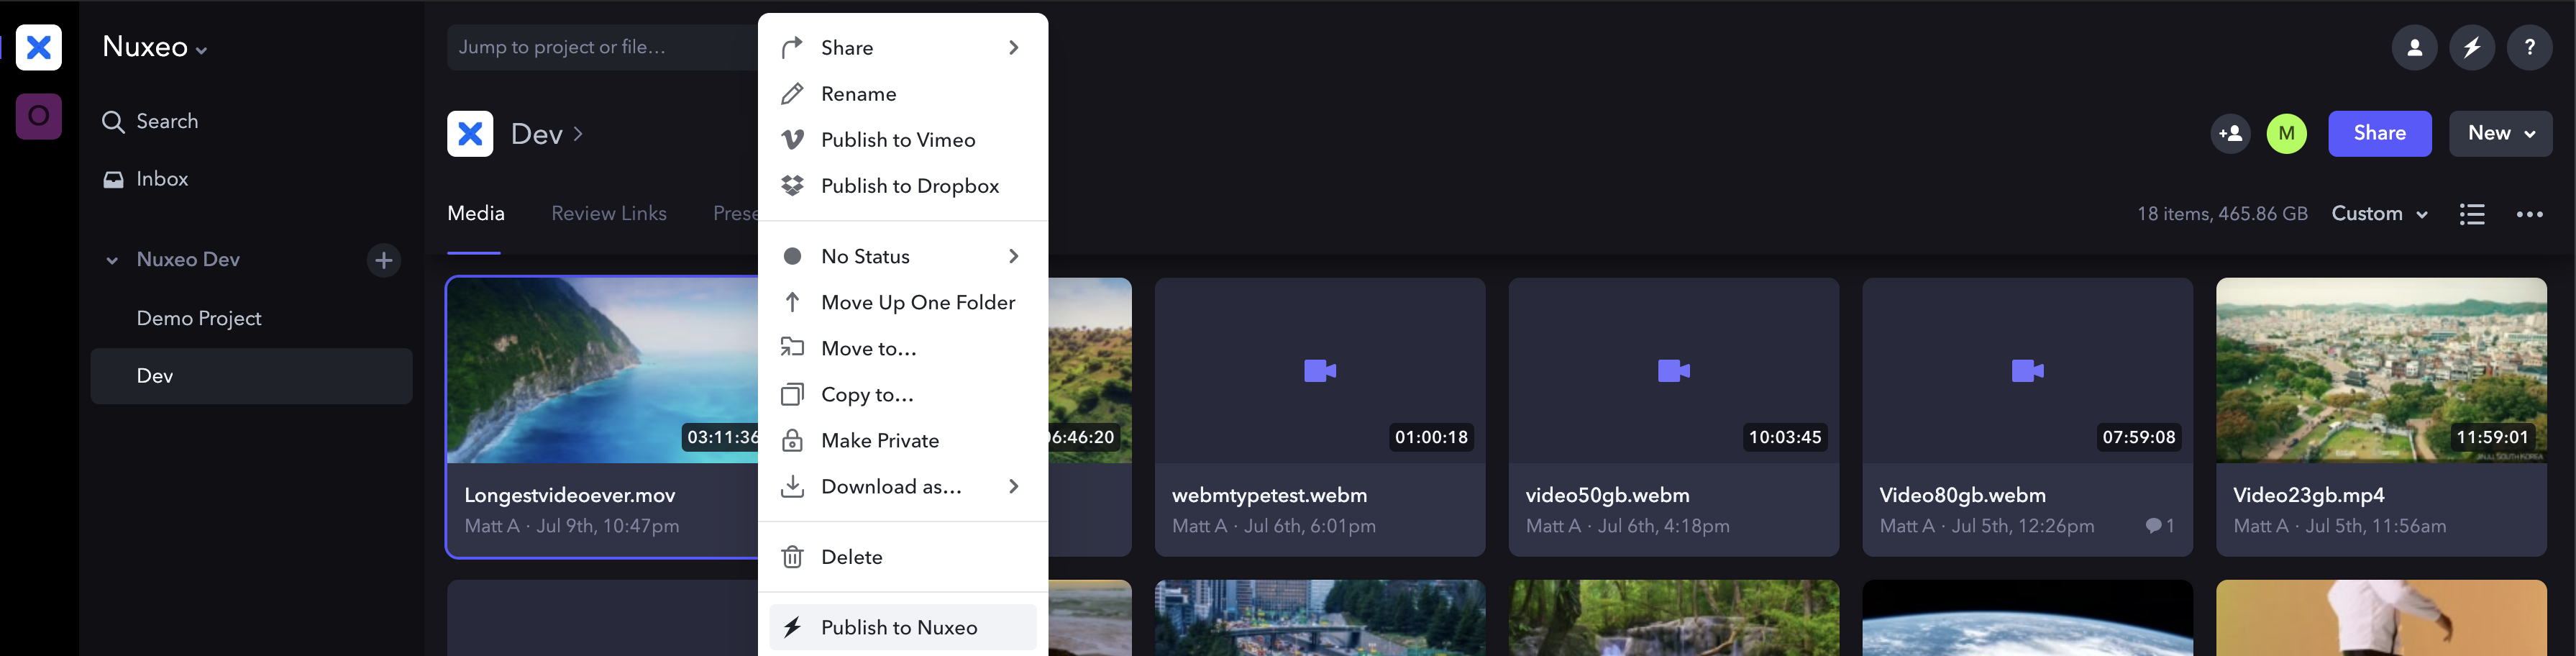
- After a few seconds, the popup displays "Asset pushed to Nuxeo”.
It means that the video is being sent to Nuxeo and is currently being uploaded into your Nuxeo folder. You will receive an email notification when your video is available in your Nuxeo folder.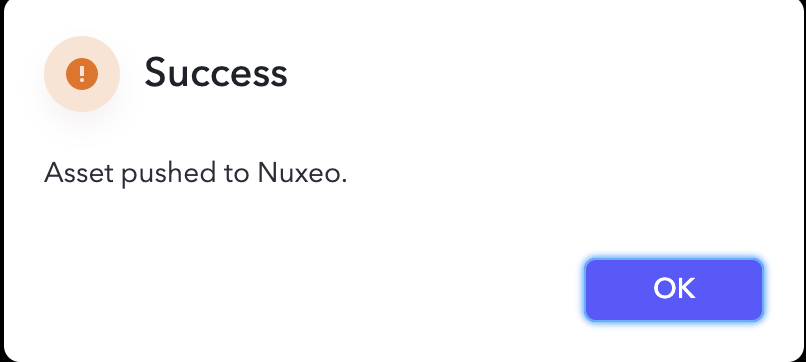
Step 3: Check the new created document into Nuxeo
From the summary view of the bound folder, check the new created document.
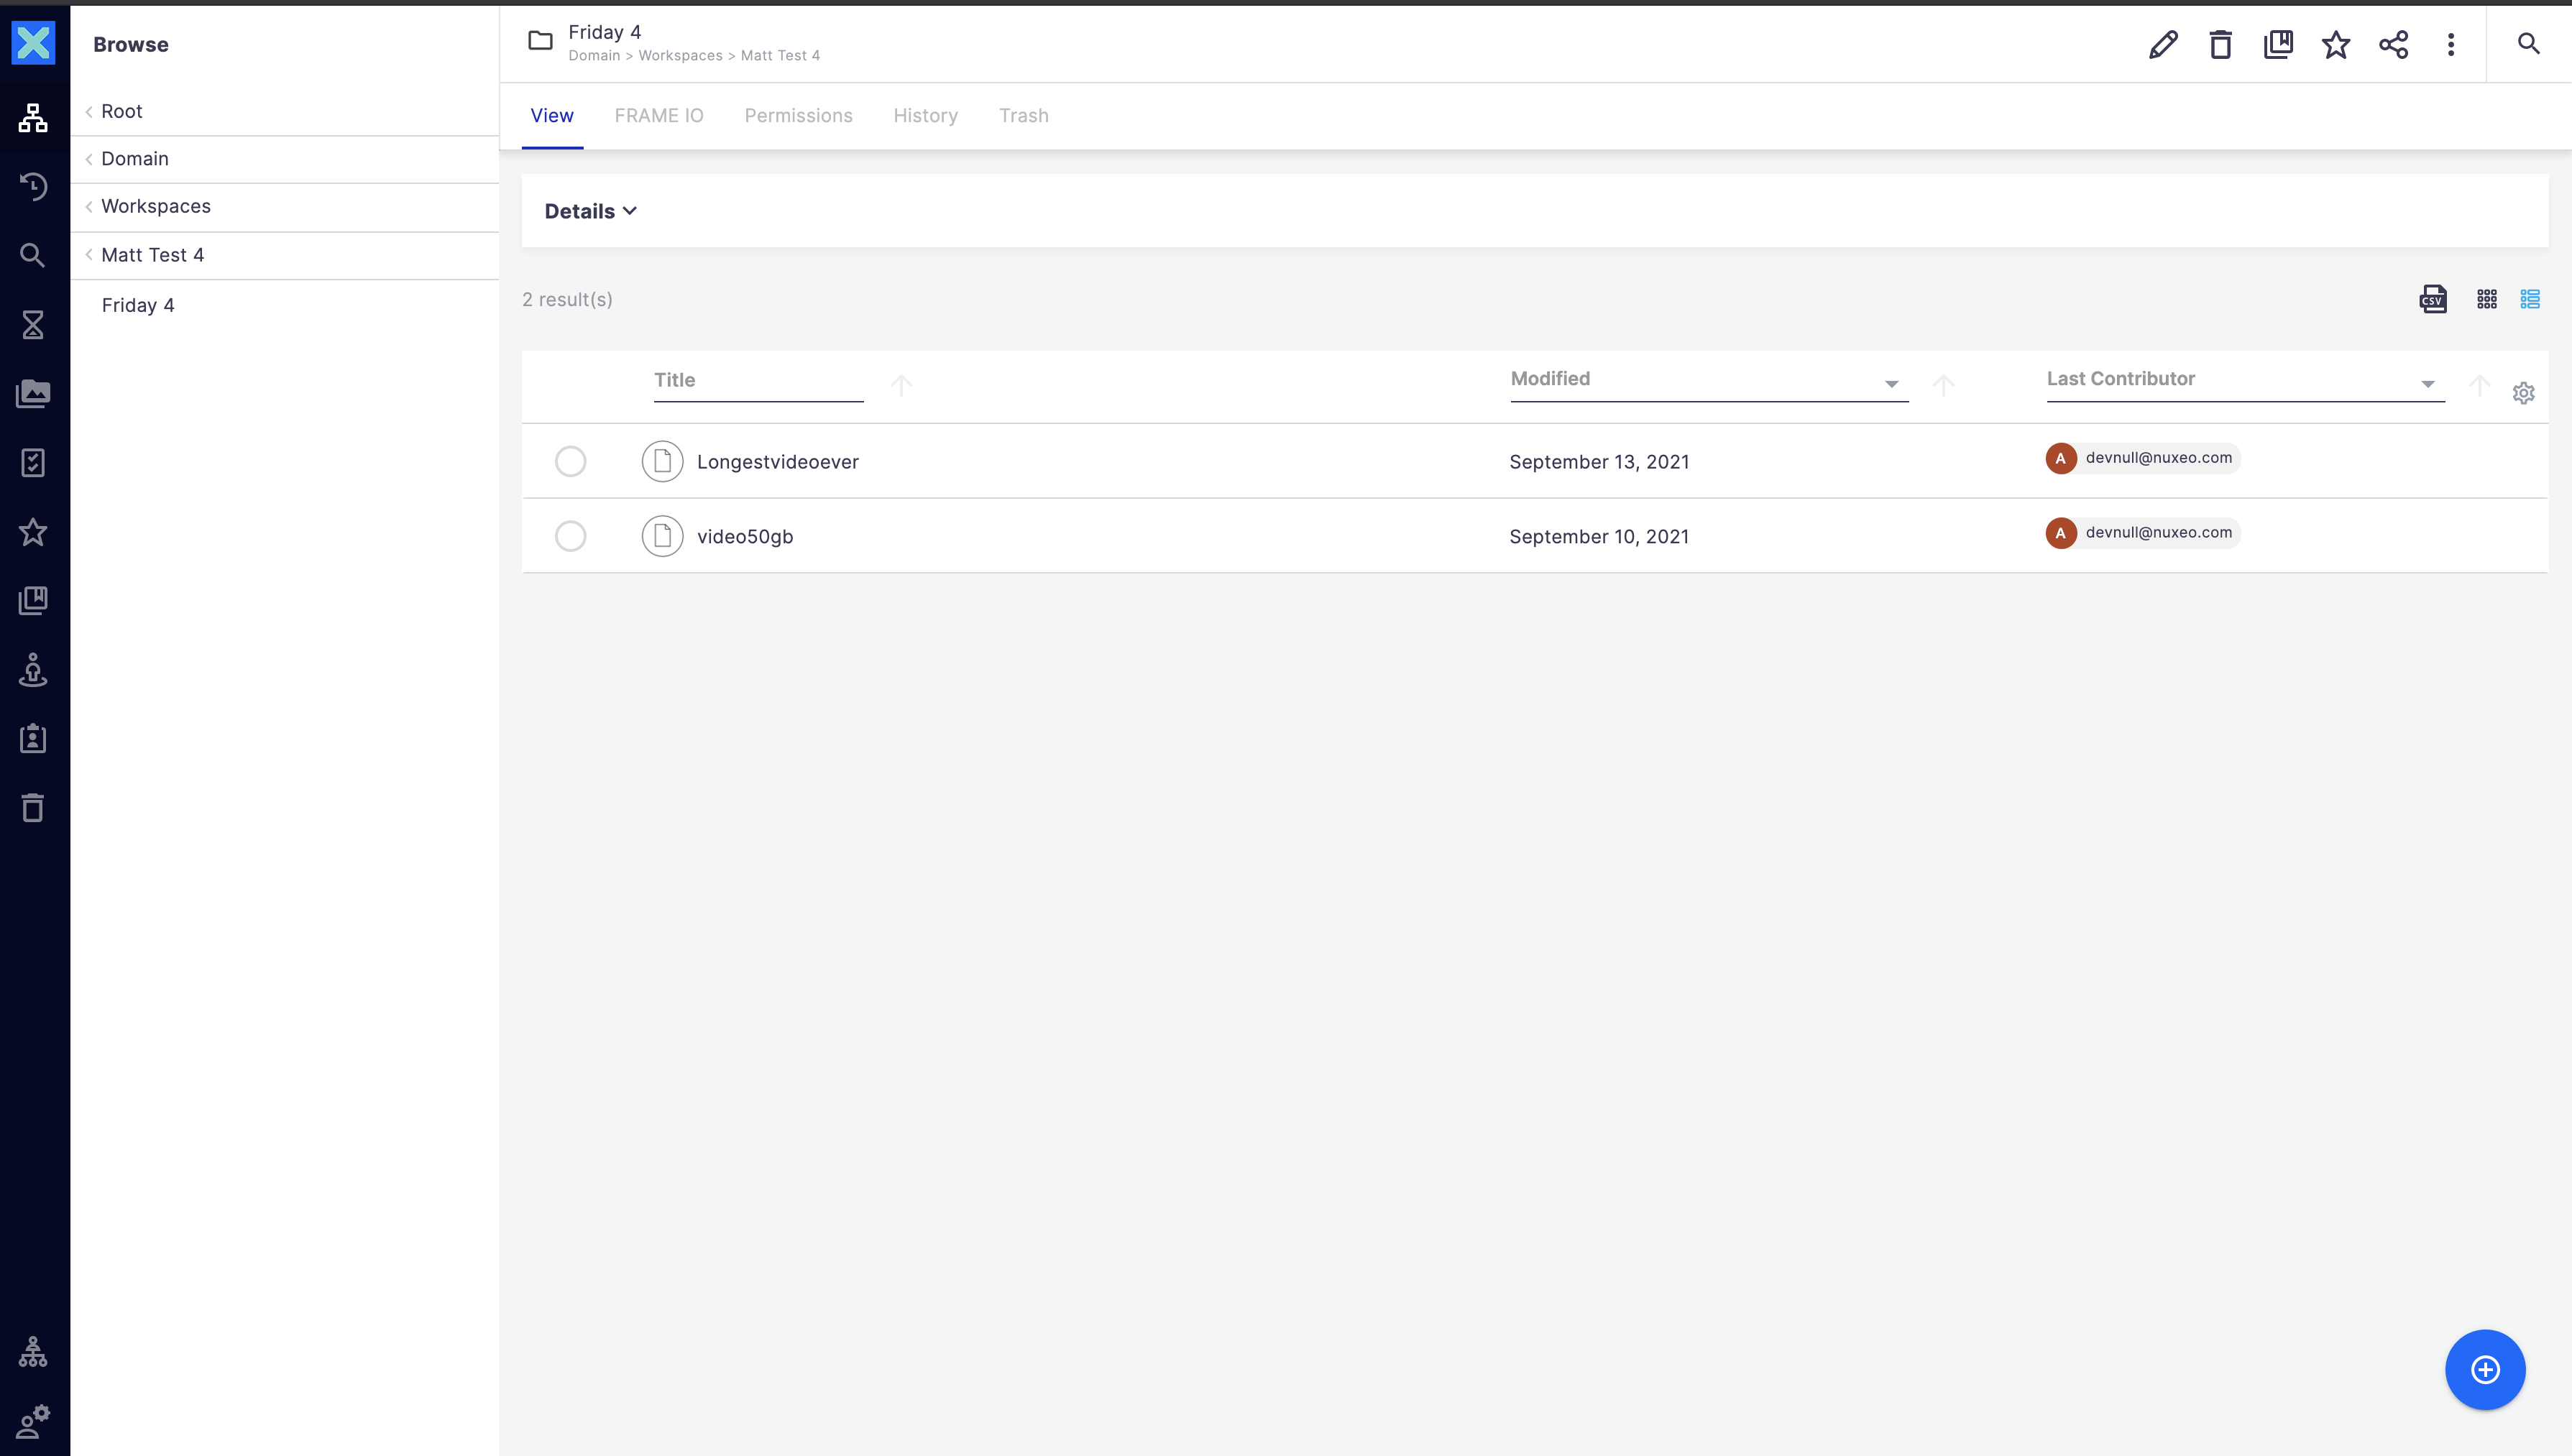
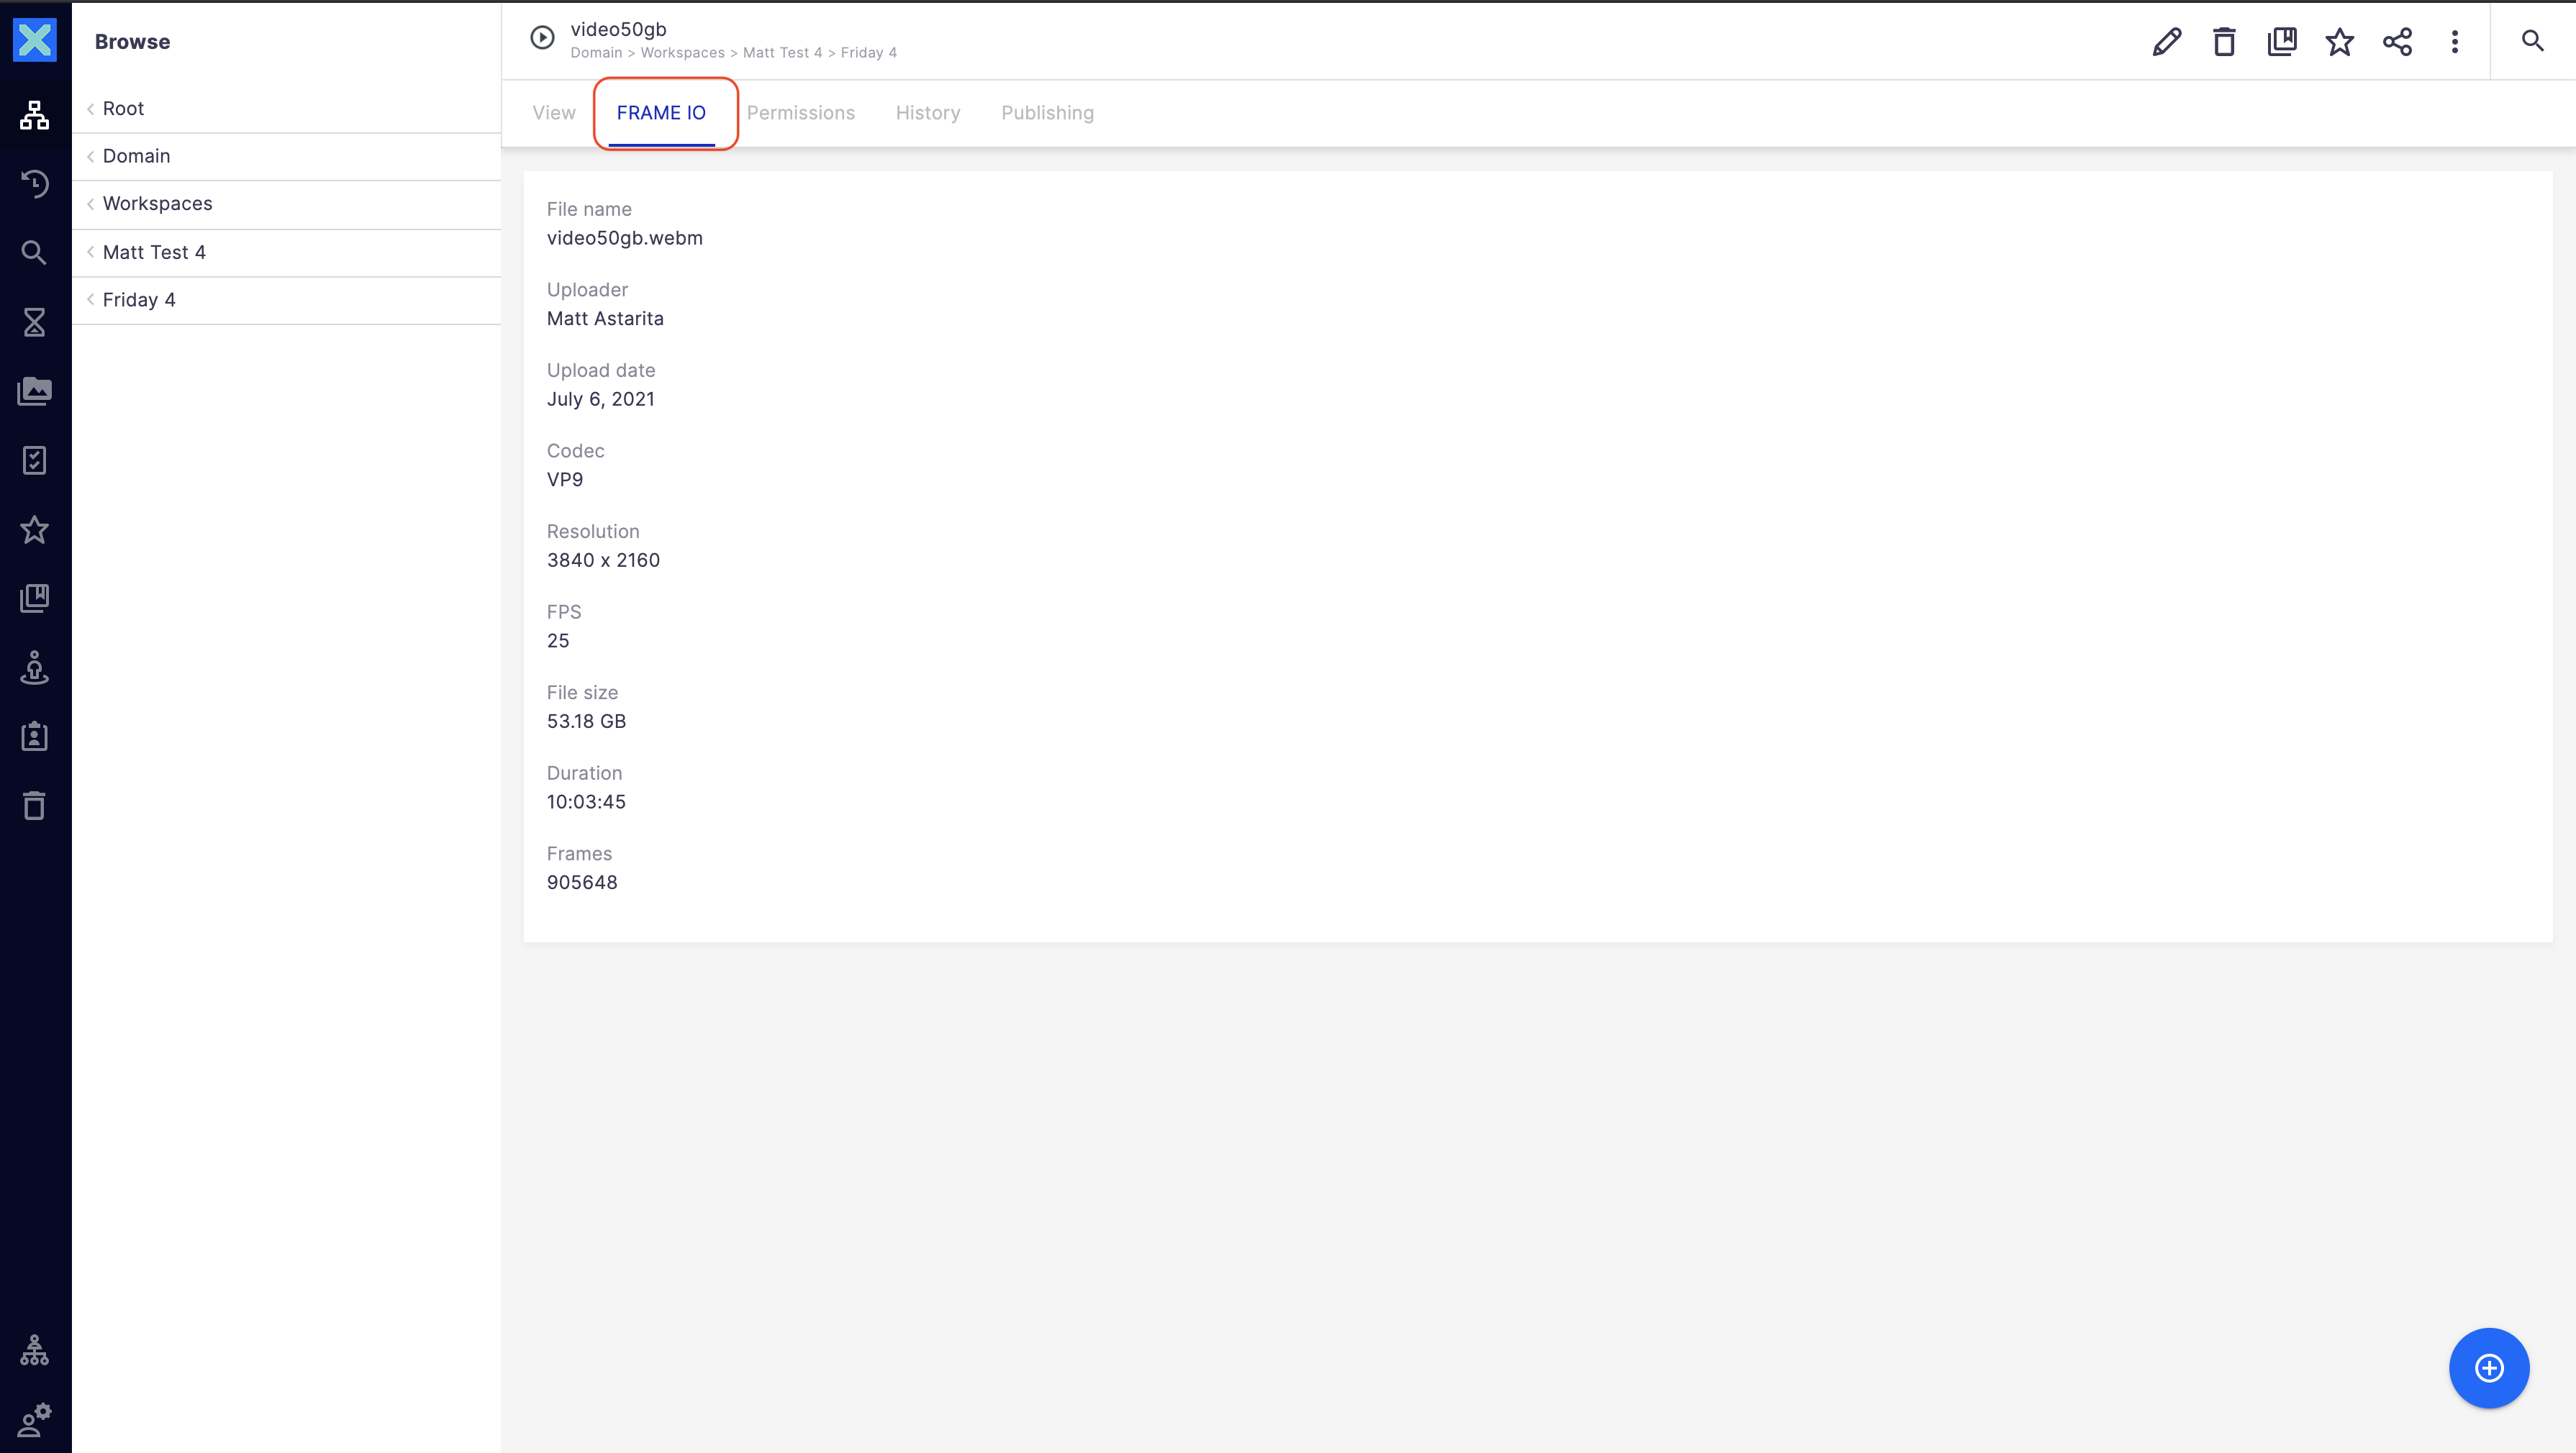
You are now able to retrieve your video and read the metadata imported from Frame.io in the frame.io document tab.
Note that, if you are sending a new version of the video from Frame.io, we will then increment the version in Nuxeo following your rules.
Optional: UnBind a Nuxeo Folder with a Frame IO project.
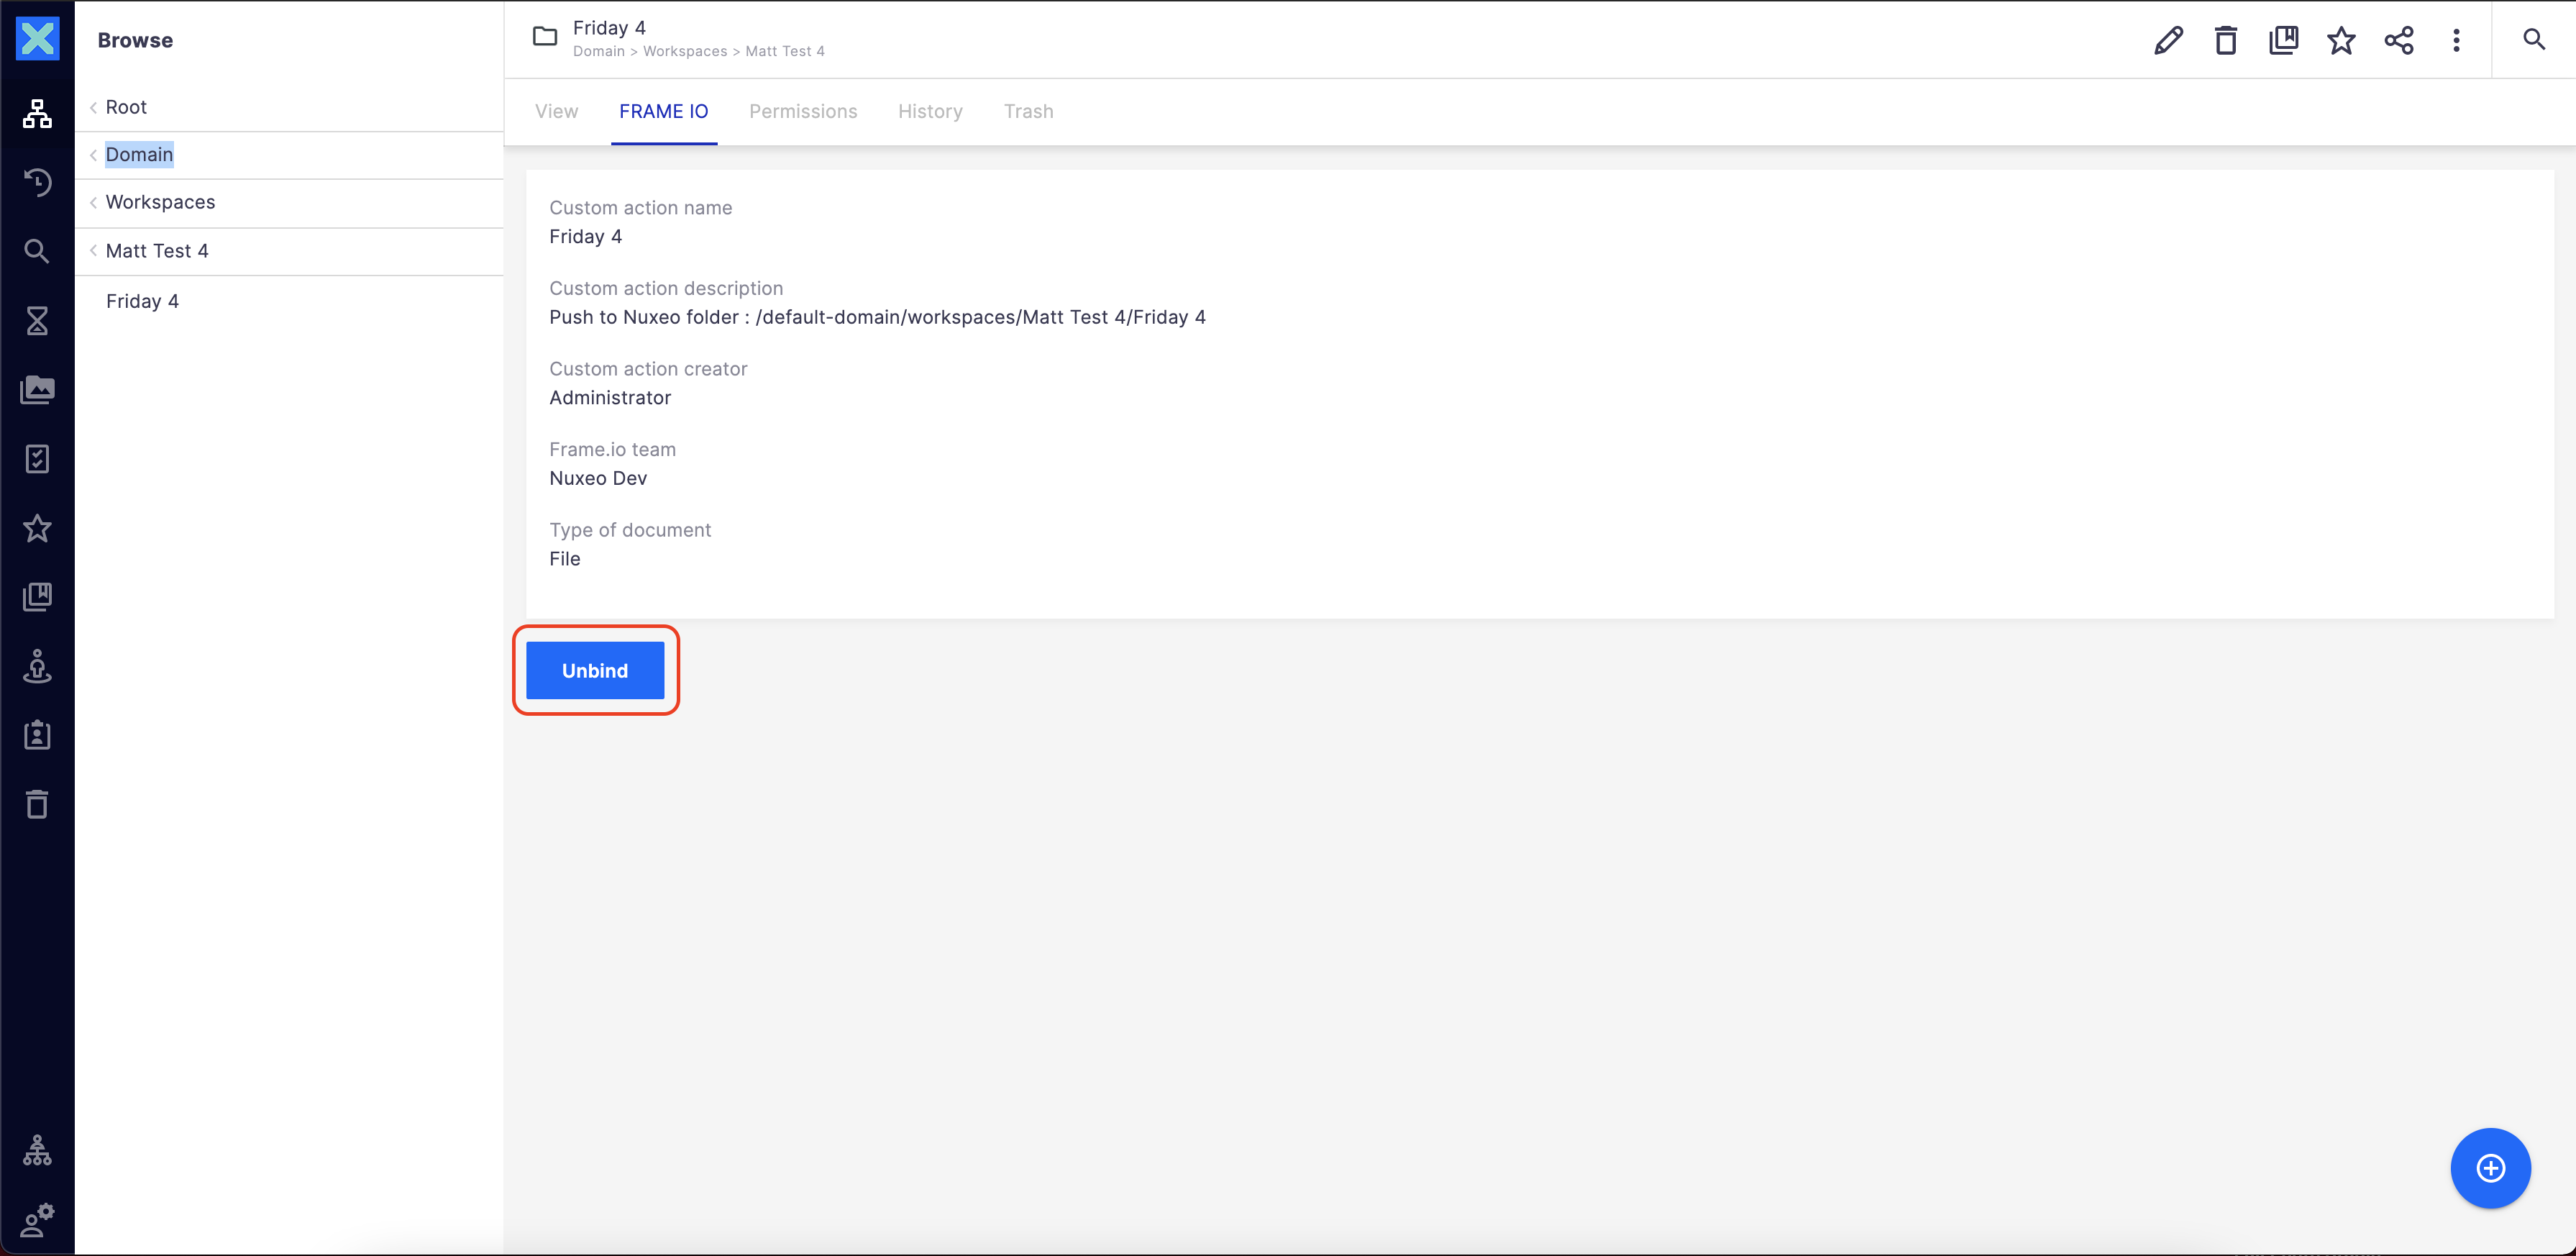
At any given moment, you are able to unbid your folder with your frame.io project.
This will have immediate effect and your frame.io team members won’t be able to send new content to your Nuxeo folder.