Requirements
Nuxeo JSF UI is supported on the following browsers:
- Chrome - latest version
- Firefox - latest version
- Edge - latest version
- Internet Explorer 11
- Safari 9+
Installation
This addon requires no specific installation steps. It can be installed like any other package with nuxeoctl command line or from the Update Center.
Once the addon is installed, you can go to http://SERVER_URL/nuxeo/jsf and after authentication, you will be able to browse the JSF UI and start creating content, upload files, browse and search for content.
Configuration
There is no additional configuration step required to start using the addon. Customiz ation is done via Nuxeo Studio.
Nuxeo Platform Concepts
Nuxeo Platform JSF UI is the Back office view on the content repository. There are three main spaces in Nuxeo Platform:
- The Home tab provides a set of dashboards
- The Workspace tab enables to navigate in the repository
- The Search tab enables to query the repository
The Nuxeo Platform gives you all the necessary tools to let you customize what is displayed on your platform.
Workspace
This is where the majority of user's activity within the Nuxeo Platform will occur since it's where users can work on documents and browse the application domains, workspace, sections, etc.
Content Hierarchy
You can create different types of documents to be able to display the content hierarchy that you need in your application. By default you can create workspaces, folders, collections, templates, etc., but you can also create your own document types.
The default navigation tree displayed on the left hand side of the pages is the folders navigation tree. It displays all the domain structure from the root. It enables you to easily access any space in the application structure. The navigation tree displays folderish documents, i.e. documents in which you can create other documents (workspaces, folders, etc.).
Breadcrumbs
Breadcrumb enables you to navigate in the platform. For example, you can go up one level in the platform structure, by clicking on the ![]() icon in the breadcrumbs. Users can also click on the workspace's title in the breadcrumbs directly or in the navigation tree. They can go up several levels in the document's path in a single click that way.
icon in the breadcrumbs. Users can also click on the workspace's title in the breadcrumbs directly or in the navigation tree. They can go up several levels in the document's path in a single click that way.

Due to technical reasons, it is recommended to NOT use the browser's Back and Next buttons to navigate in the Platform.
Tabs
A tab in the Nuxeo Platform is a view displayed on a document, controlled by a filter. Different tabs are displayed on each document type created in the content hierarchy, the basic ones are:
- Summary: this view lets you see the metadata of your document, start a workflow or more specific metadata like for pictures document.
- Edit: from this tab you can edit the metadata and the content of your document.
- Files: you can add additional files from this tab.
- Publish: this view lets you publish your document in another section of your platform.
- Relations: this tab lets you manage the relations around the document.
- History: this tab lets you see the event log of the document concerned.
On a same document users with different profiles will have access to different tabs. And so they will be presented different forms and buttons that correspond to their profile. Typically users with Read permission are not displayed the Edit tab.
Dashboards
Each user has a set of personal dashboards from the Home tab that display the information they find relevant and help them have a global view of the application's activity.
The Home default tab is the Dashboard tab.
The dashboard is composed of a set of boxes that display either a list of documents matching a criteria (all the workspaces the user can access, the last documents he modified, the last documents that have been published...), or possibly a piece of information either from the Platform or from external websites.
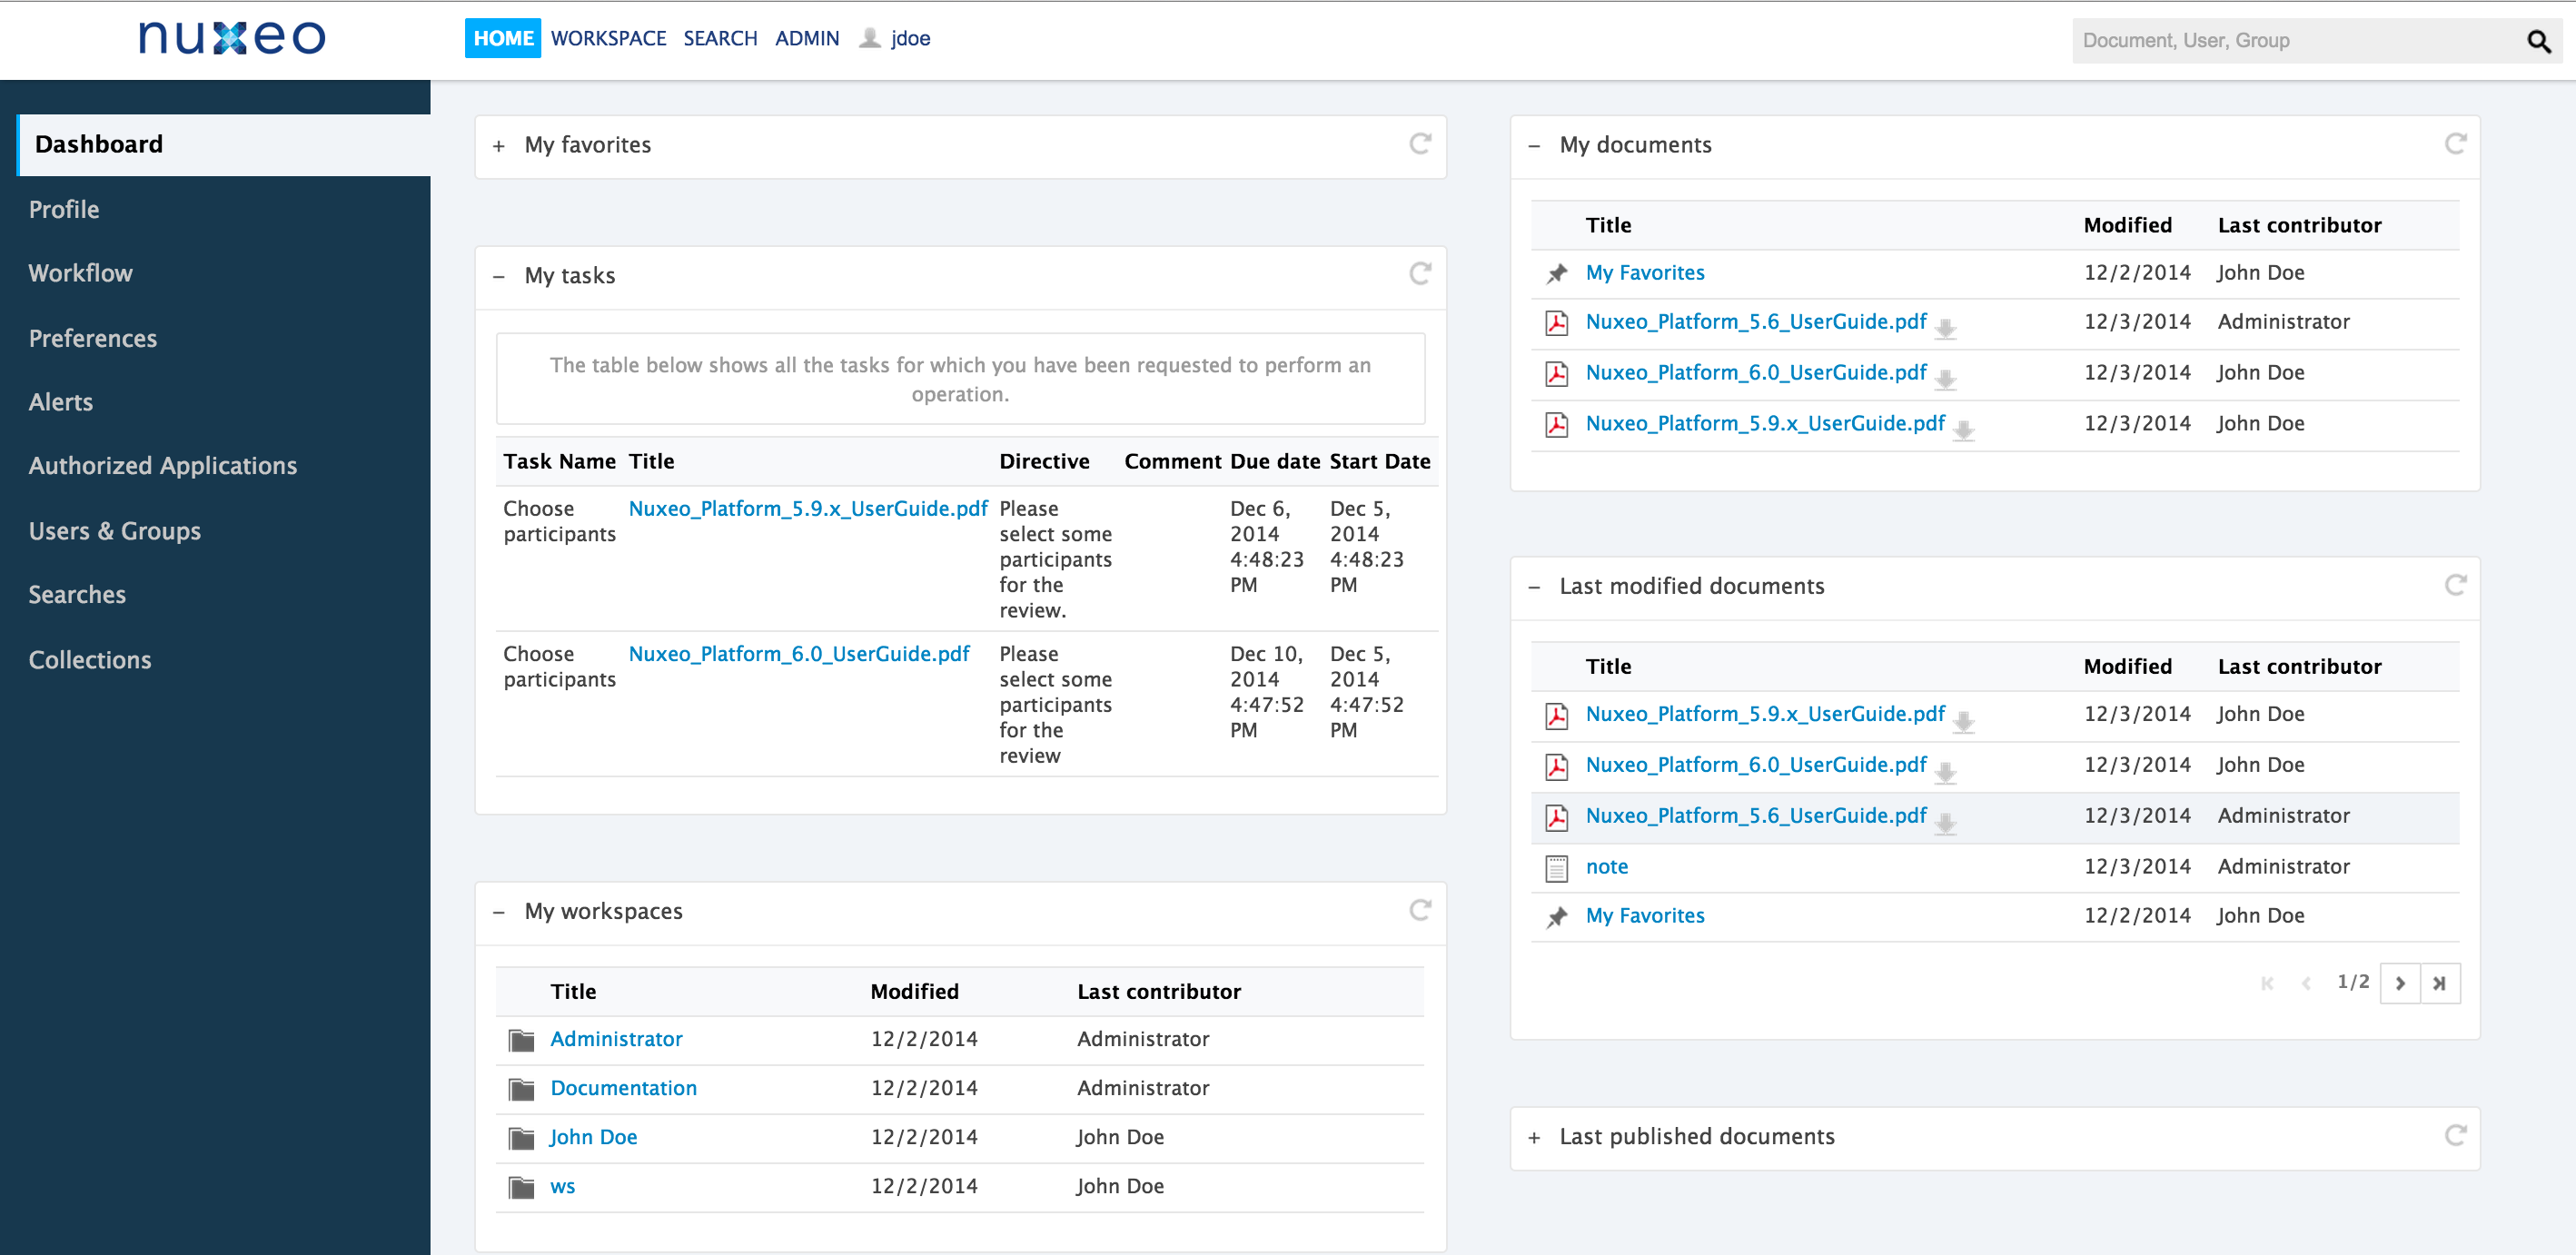
Other main user-centric information available from the Home is:
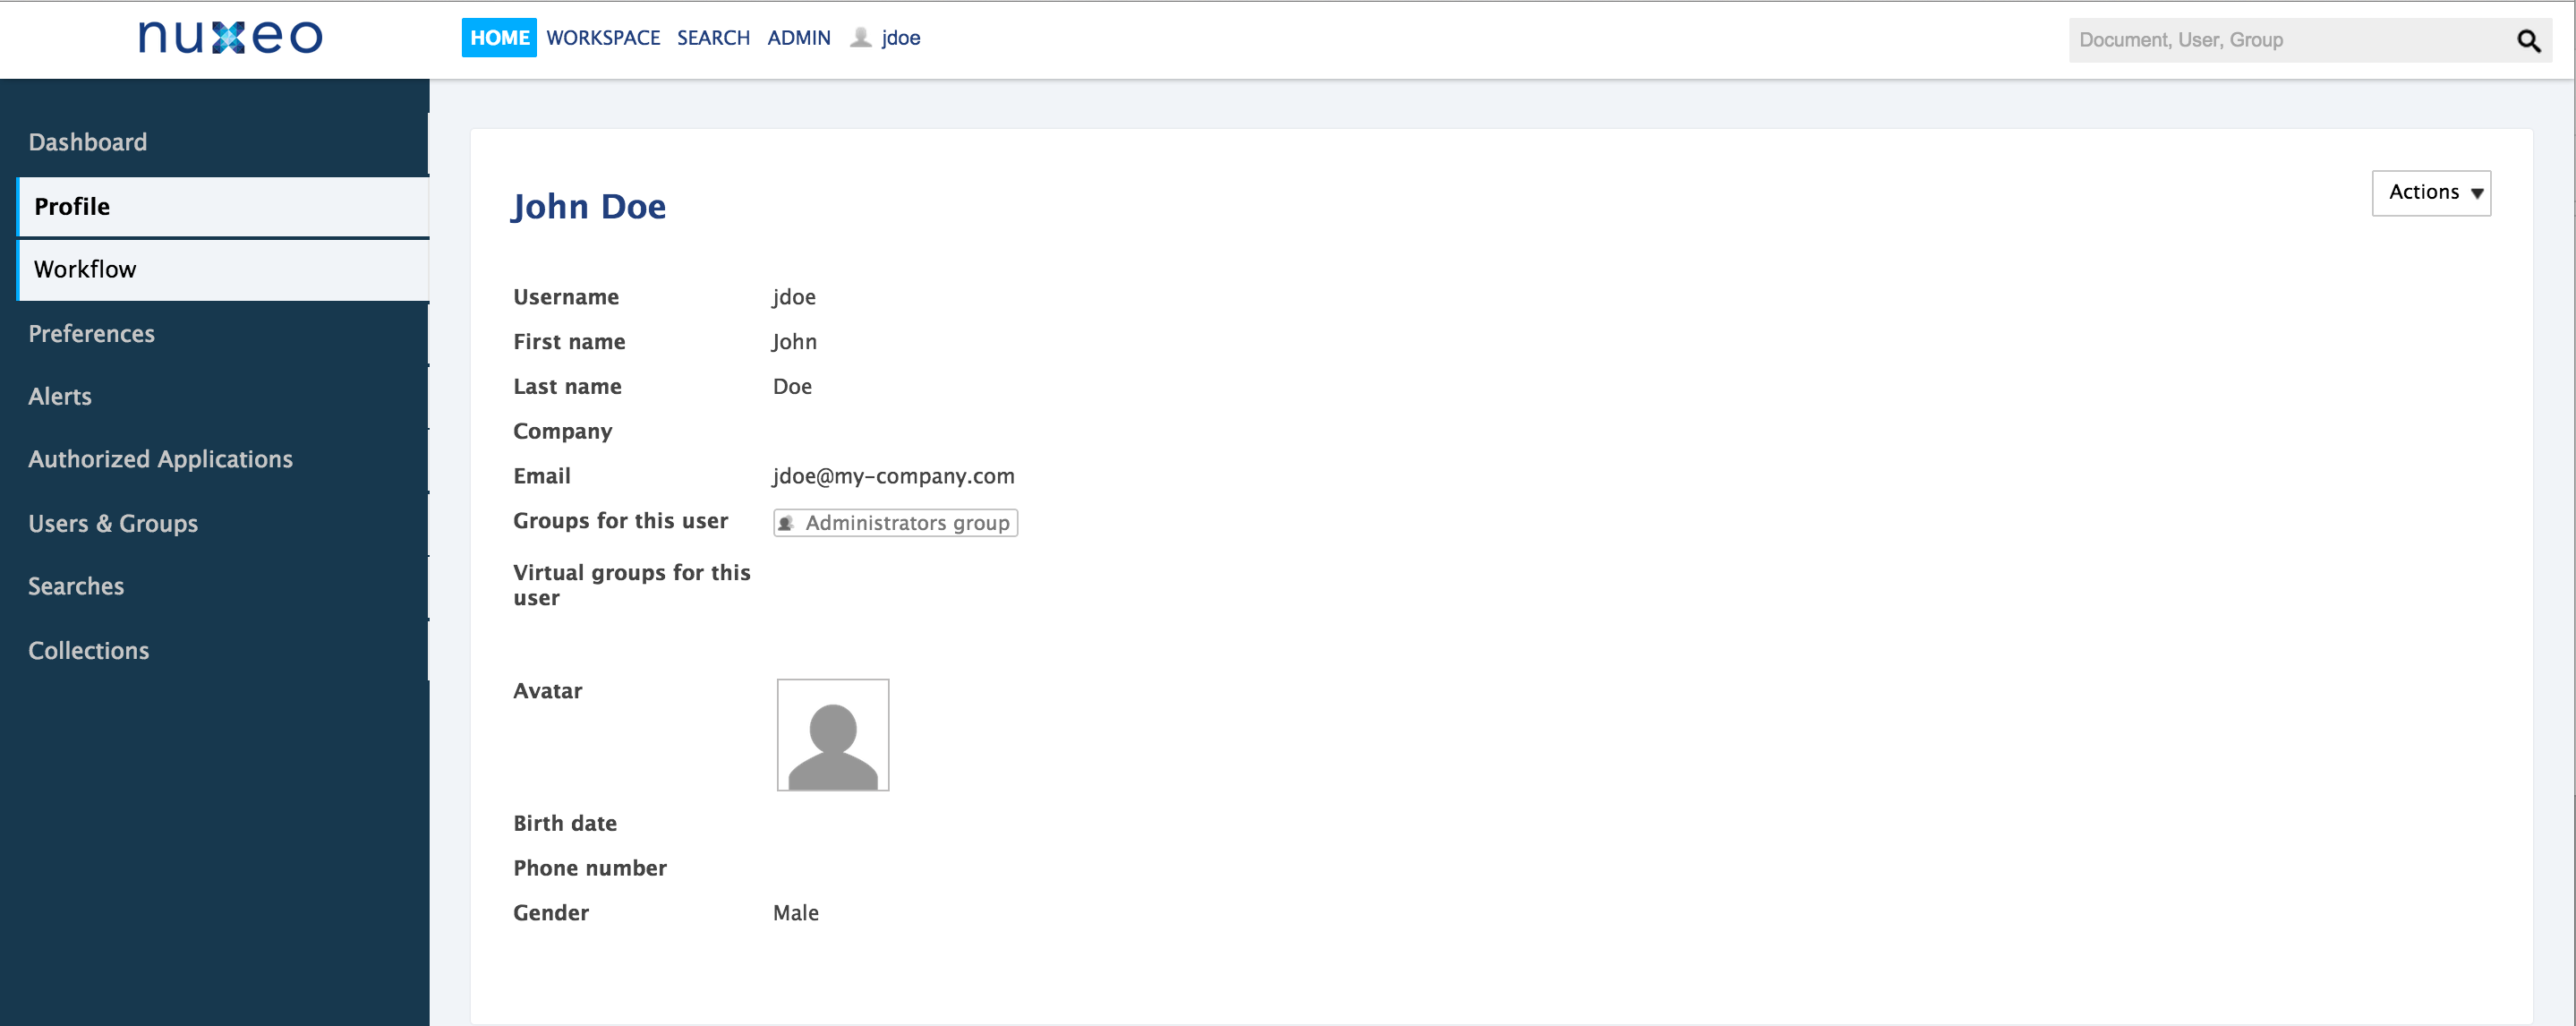
- Profile: Enables the user to edit their personal information and their password
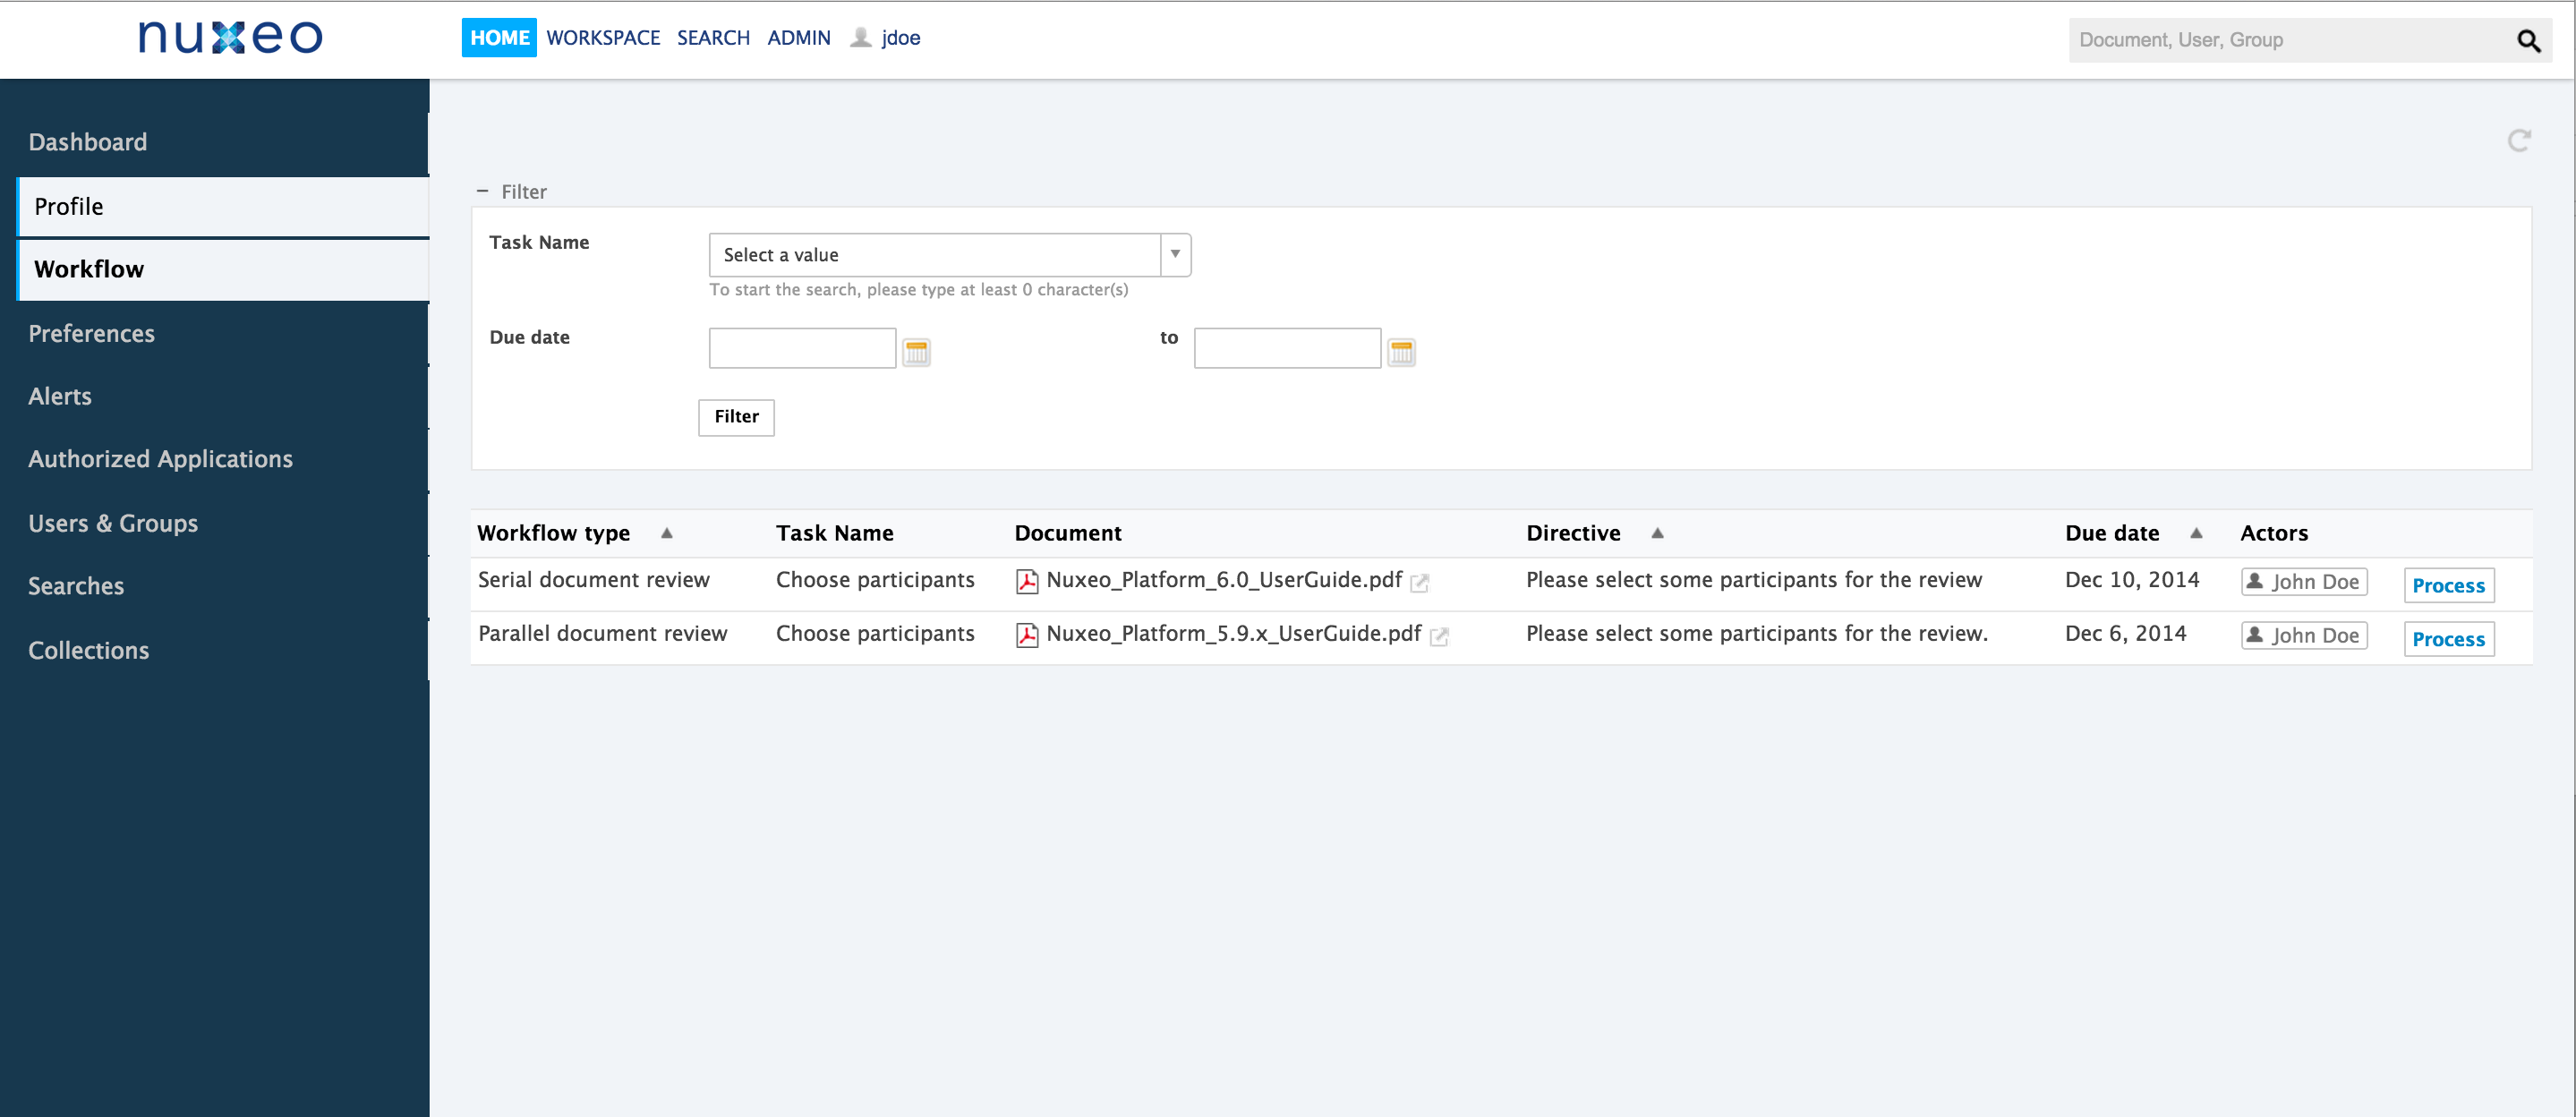
- Workflow: Displays the tasks assigned to the user
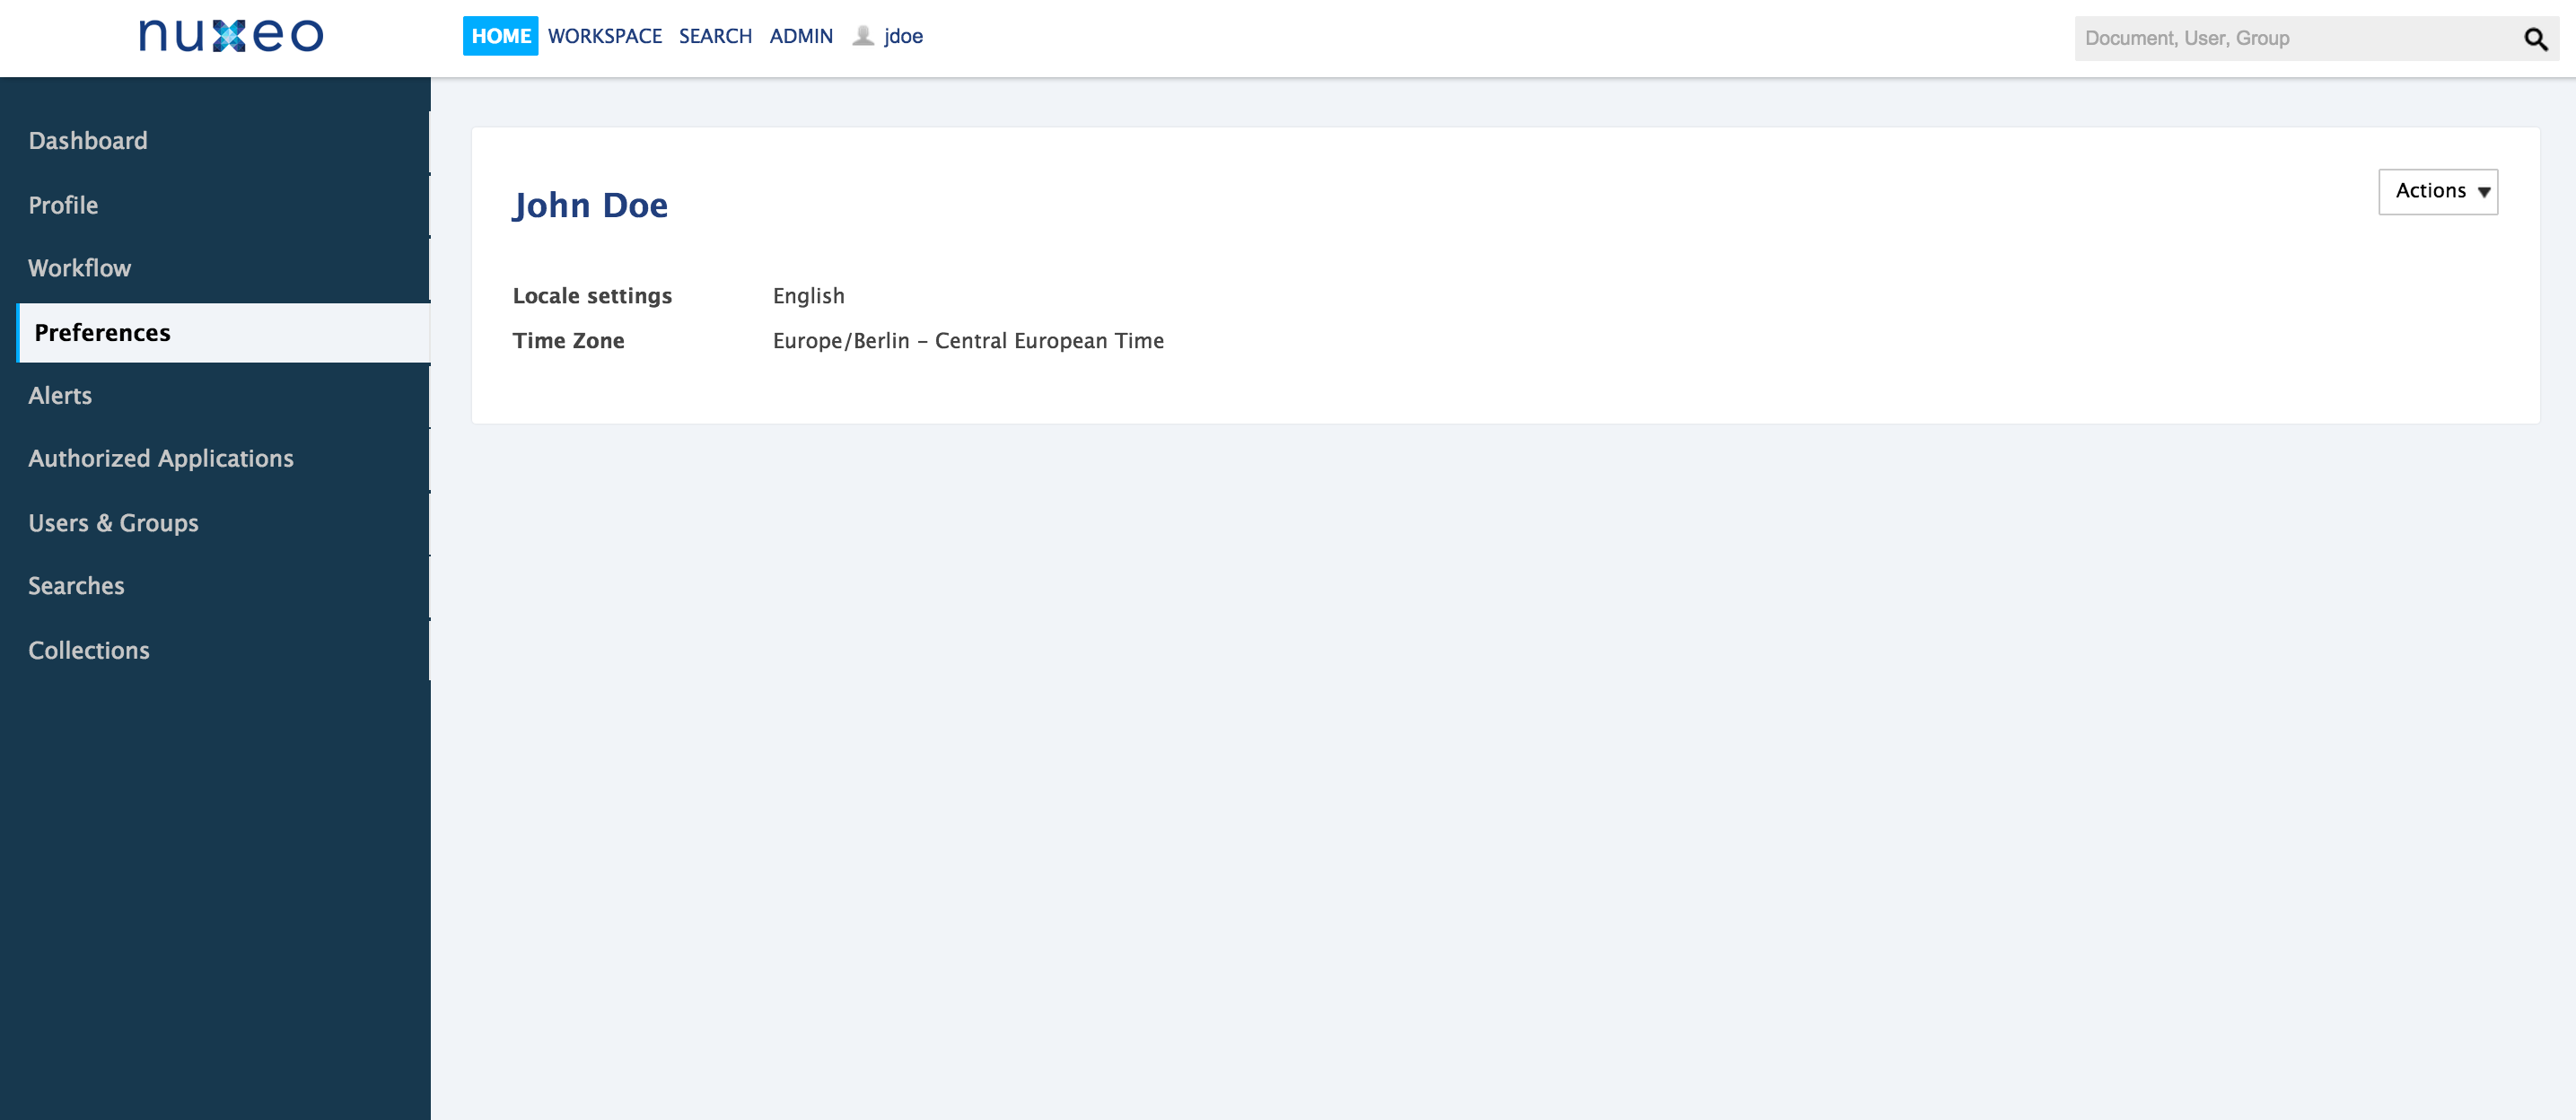
- Preferences : Enables to select the language of the platform interface
- Alerts: Shows the list of email notifications the user subscribed to
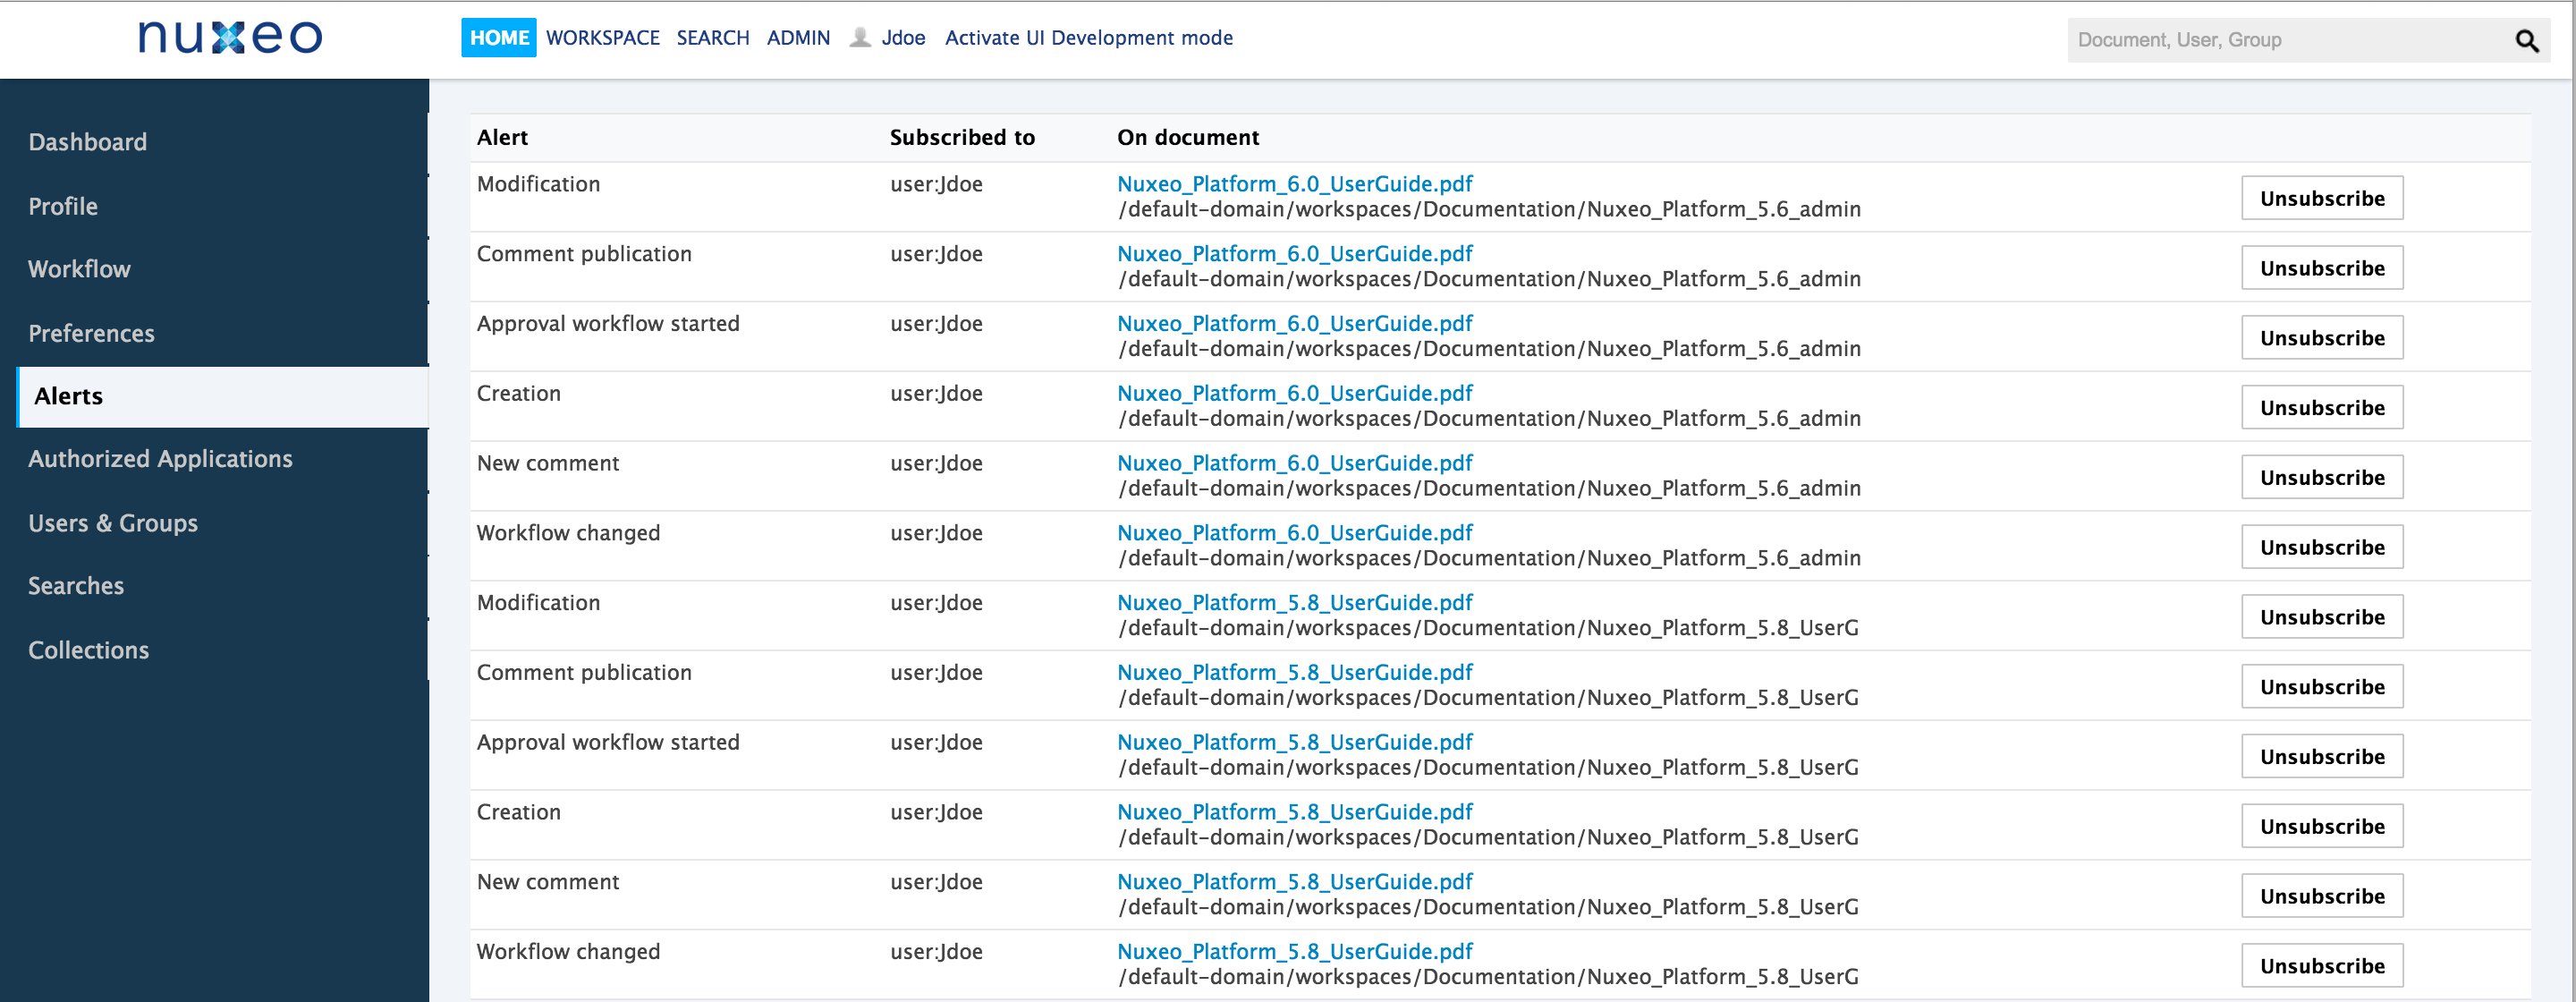
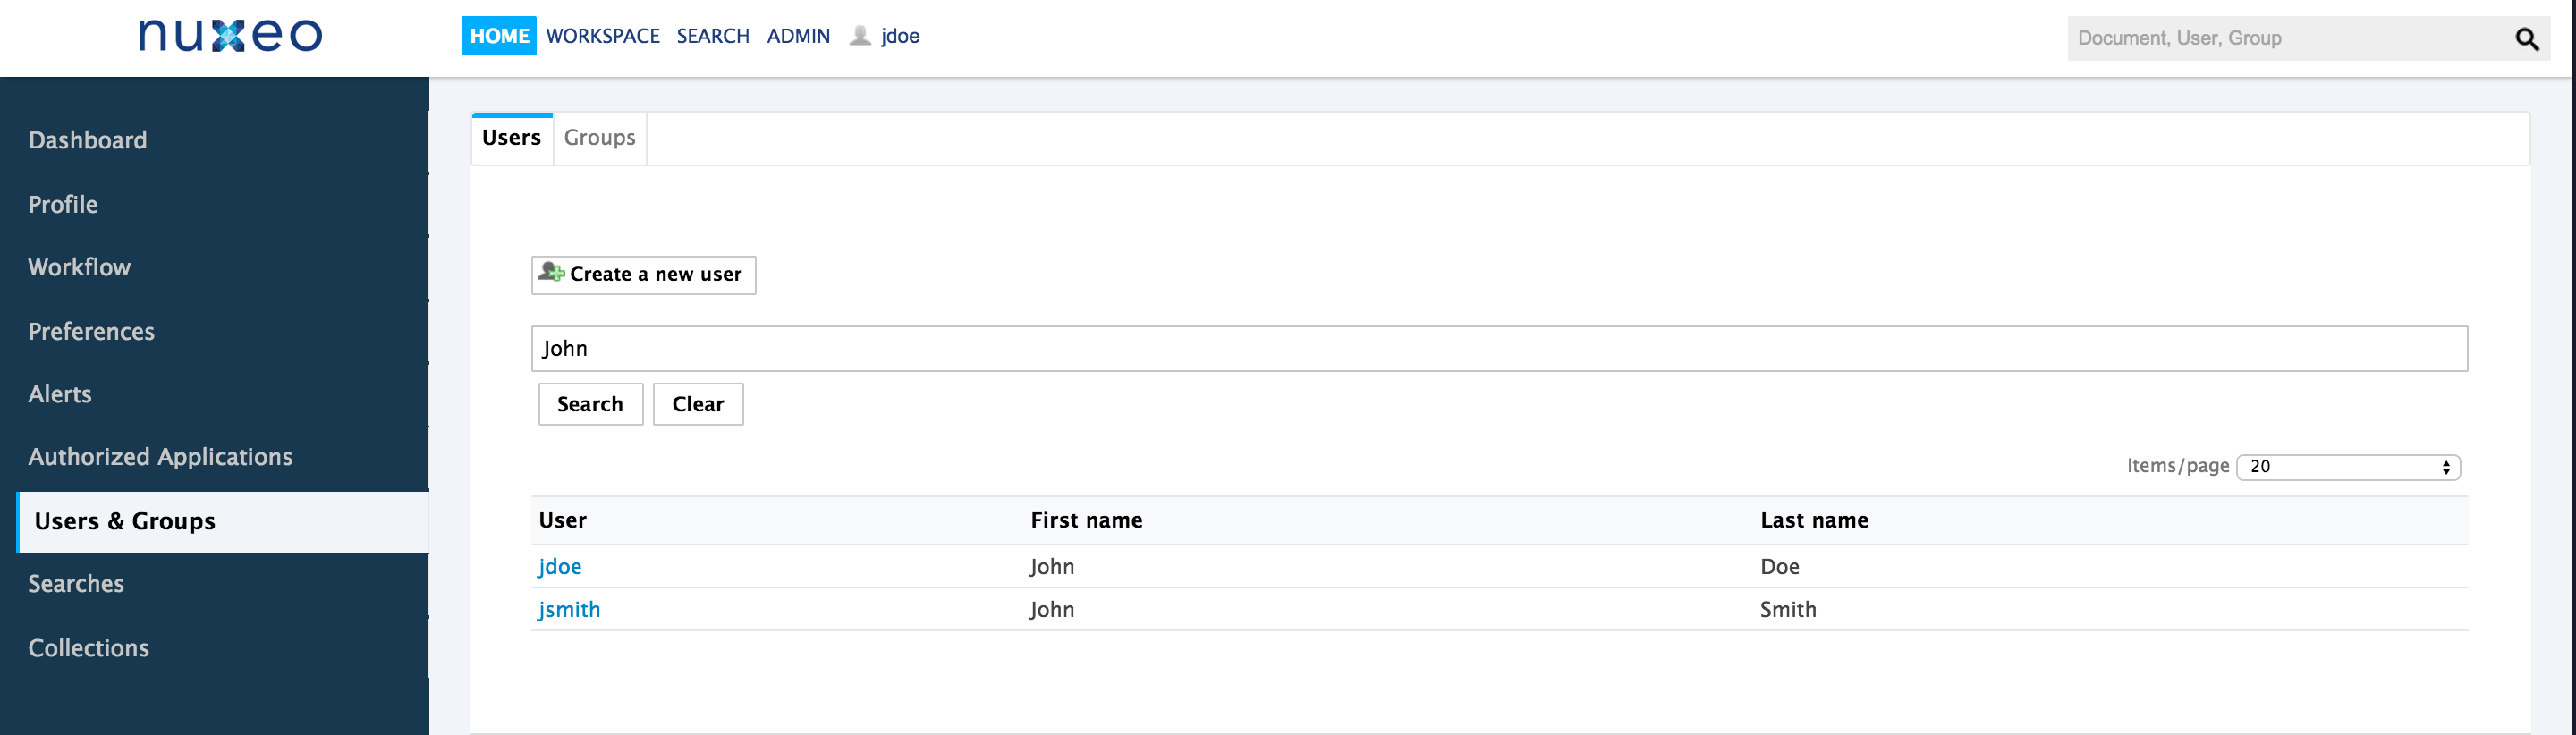
- Users & Groups: Enables the user to browse the users and groups directory
- Searches: Provides access to the user's saved searches

- Authorized Applications: Lists the external applications that can access Nuxeo data. See Nuxeo Media Publishing for instance.
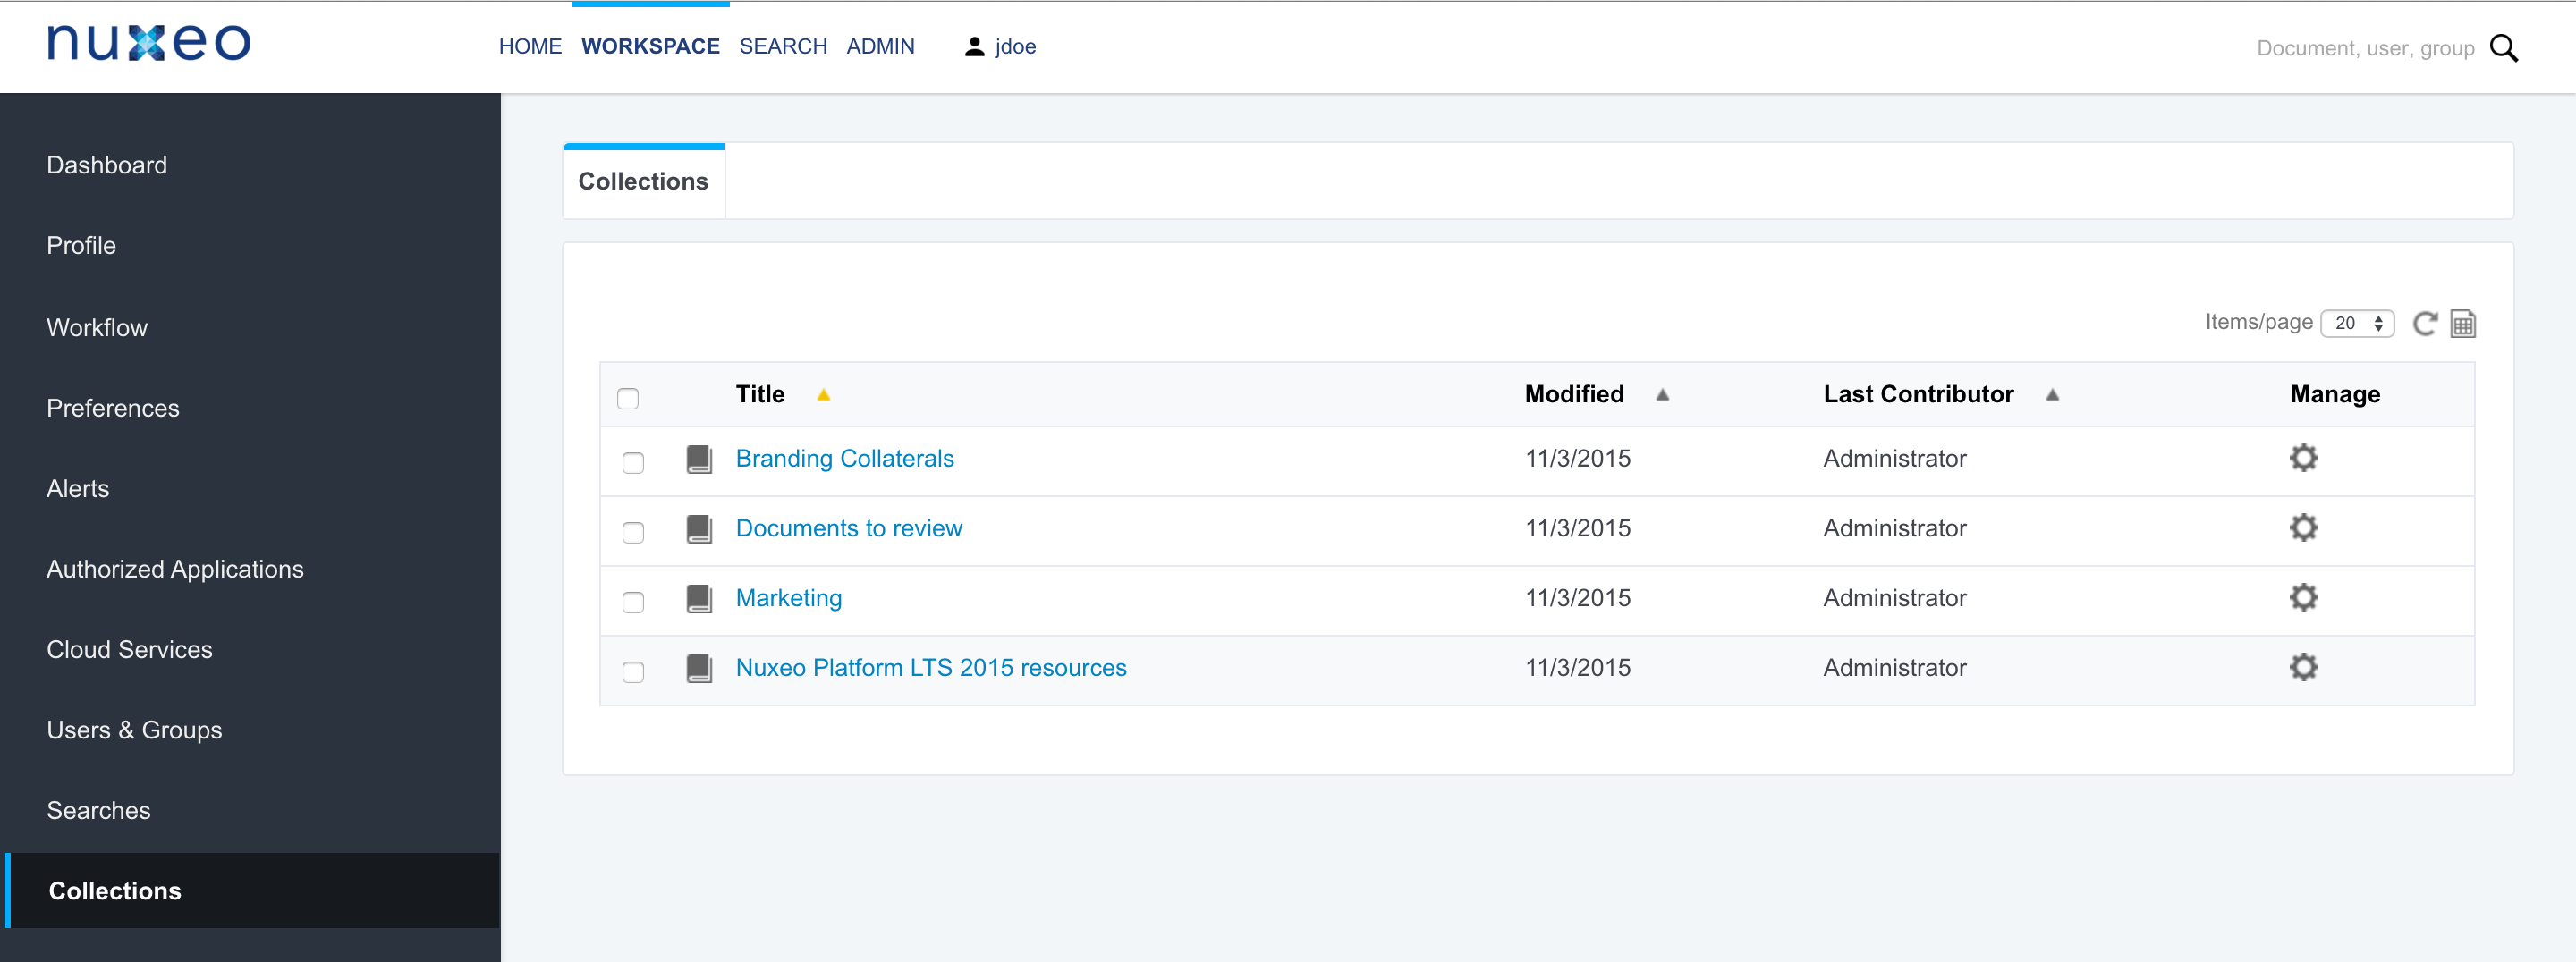
- Collections: Lists the collections the user can access
Search
Available Filters
The Nuxeo Platform provides a Search tab that enables you to browse and search the content of the Nuxeo Platform. This tab gives access to different searches to query the content of the application.
- Default search enables you to search on keywords, metadata and additional criteria such as the location in the application.
- Quick search is a full-text search. Quick search is available from the Search tab and from the top right corner of the screen. It provides suggestions of search results as you type your keywords. Note that this type of search can generate a lot of noise if you search for very generic keywords.
- NXQL search enables you to query the content of the platform using Nuxeo query language, giving you access to as many criteria as you need.
You can configure as many search forms as you need to provide users with search capabilities adapted to your business document types and rules.
Documents are indexed using their title, description, content (note field, attached files), and metadata. But these different search forms don't have the same behaviors and may not give you the same results. They can provide text fields in which you can type keywords, date fields in which you can select a date to define a period, lists from which you can select values. Text fields can be full-text search fields or exact match fields.
Facets
The default search filter provides a faceted search, leveraging the Elasticsearch aggregates. You can search for documents from their metadata and other properties and search results are filtered as you add or remove criteria. Aggregate fields values are also filtered so as to display only relevant values and show the count of matching documents for each value.
Result Layout
Users can change the way content is presented in the result layout. They can also change the displayed information. At the top right and corner of the results pages, you have different options to display your content list.
- Thumbnail view
 : this view displays a thumbnail of documents. For folders, the thumbnail of the first item in the folder is displayed.
 Edit Result Columns
 : this button lets you change the information displayed in content lists. The right column shows selected information and the left column shows information that are currently not displayed. You can move information from one column to another using the horizontal arrows and reorder columns using the vertical arrows.Editing results column is possible from search results and the Content tab of folderish documents. It is not possible from the tag cloud.
When you create new search forms, you can adapt the result layout to your own document types so as to display information relevant to your users. See HOWTO: Define a New Content View for instance.
Creating Content
Creating a Document Using the New Button
Creating a document using the New button enables you to select the type of document you want to create among all Nuxeo Platform's document types.
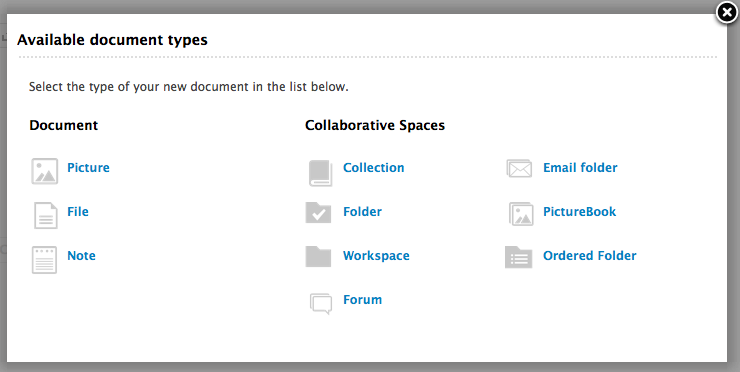
To create a document using the New button:
- Click on the New button and click on the desired document on the pop-up.
- Fill in the document's creation form and click on the Create button.
The Summary tab of the document is displayed.
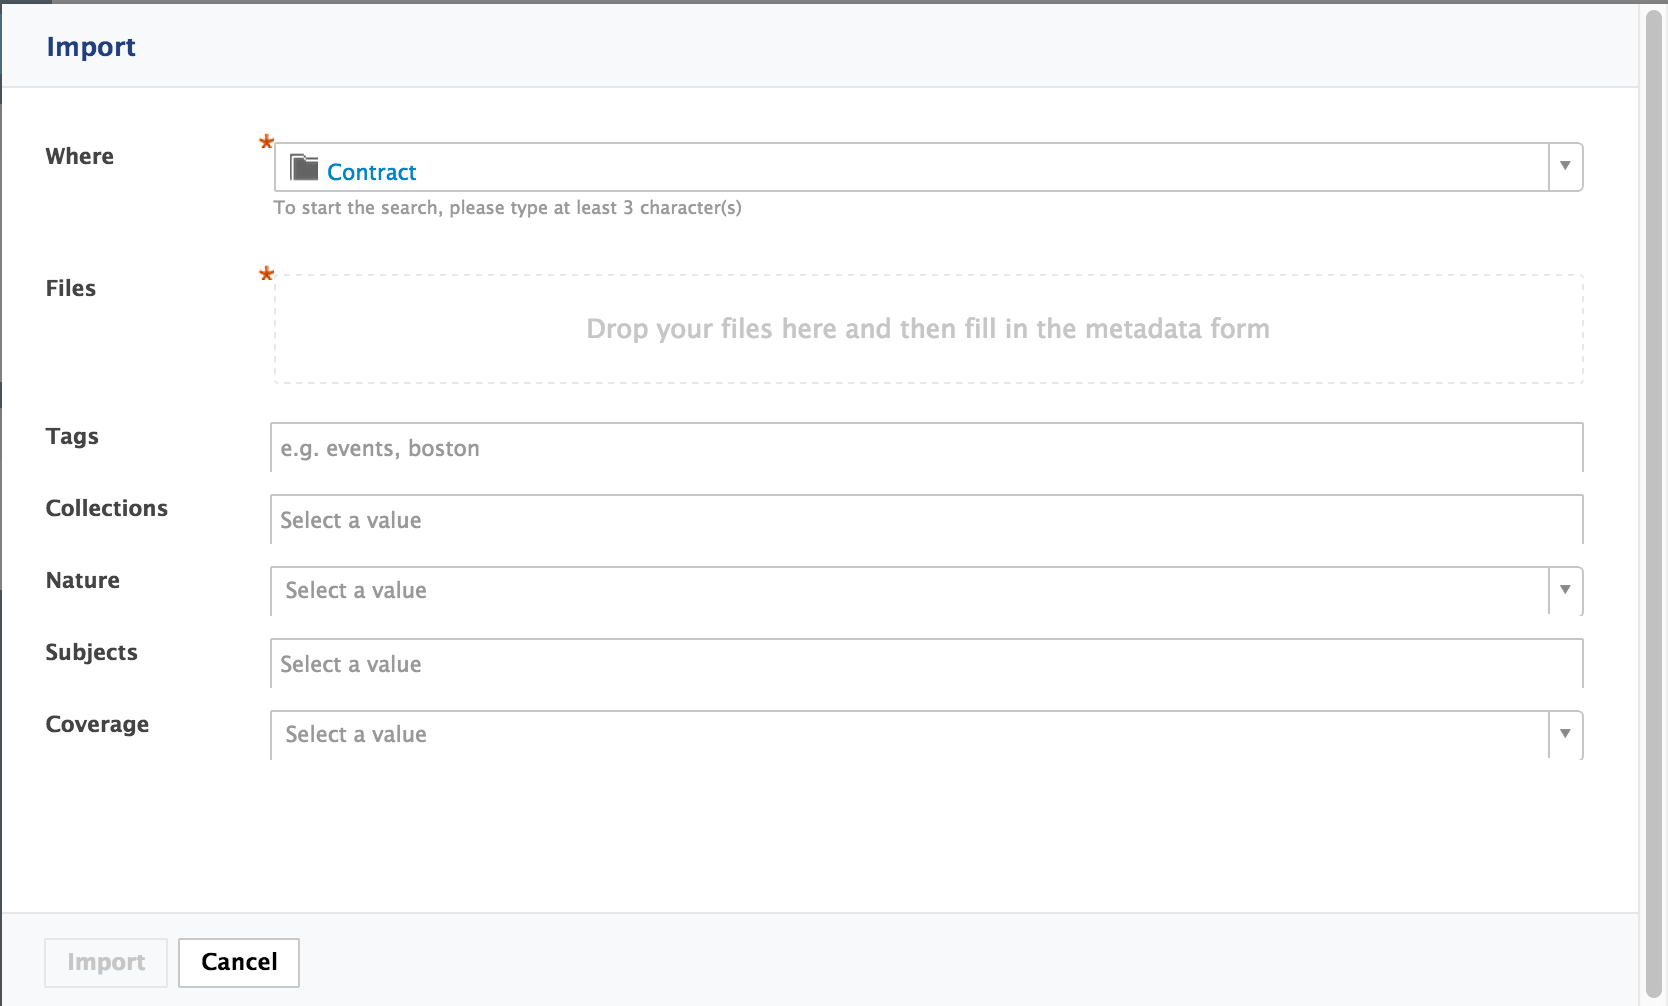
Creating Documents Using the Import Button
You can use the Import button to create one or several documents in a faster way.

To create a document using the Import button, fill in the Import popup with the relevant information:
- Select where to import the document (default is the current workspace).
- Drag and drop the file(s) to import.
- Fill in the relevant metadata if needed.
The documents automatically takes the name of the uploaded files as their title. The documents have no description. You need to modify the documents to fill in this field.
Depending on the uploaded file type, the system will create a note, a file or a picture.
Here are some examples of most commonly used item types and their output in Nuxeo:
| Item type | Document created in Nuxeo |
|---|---|
| Microsoft Office file | File |
| OpenOffice.file | File |
| .txt file | Note |
| Picture (.jpg, .png, etc) | Picture |
Importing Documents Using Drag and Drop
Drag and drop is based on the HTML 5 standard and is available on all browsers that support the HTML 5 Drag and drop, without extension. Basically, this includes all browsers supported by the Nuxeo Platform:
- Chrome - latest version
- Firefox - latest version
- Edge - latest version
- Internet Explorer 11
- Safari 9+
You can use drag and drop to easily import content into a workspace or just to create one document at a time. Two types of import are available:
- Quick import, that enables to quickly create documents in workspace
- Import with metadata, that enables to fill in metadata of the document(s) before they are created in the workspace
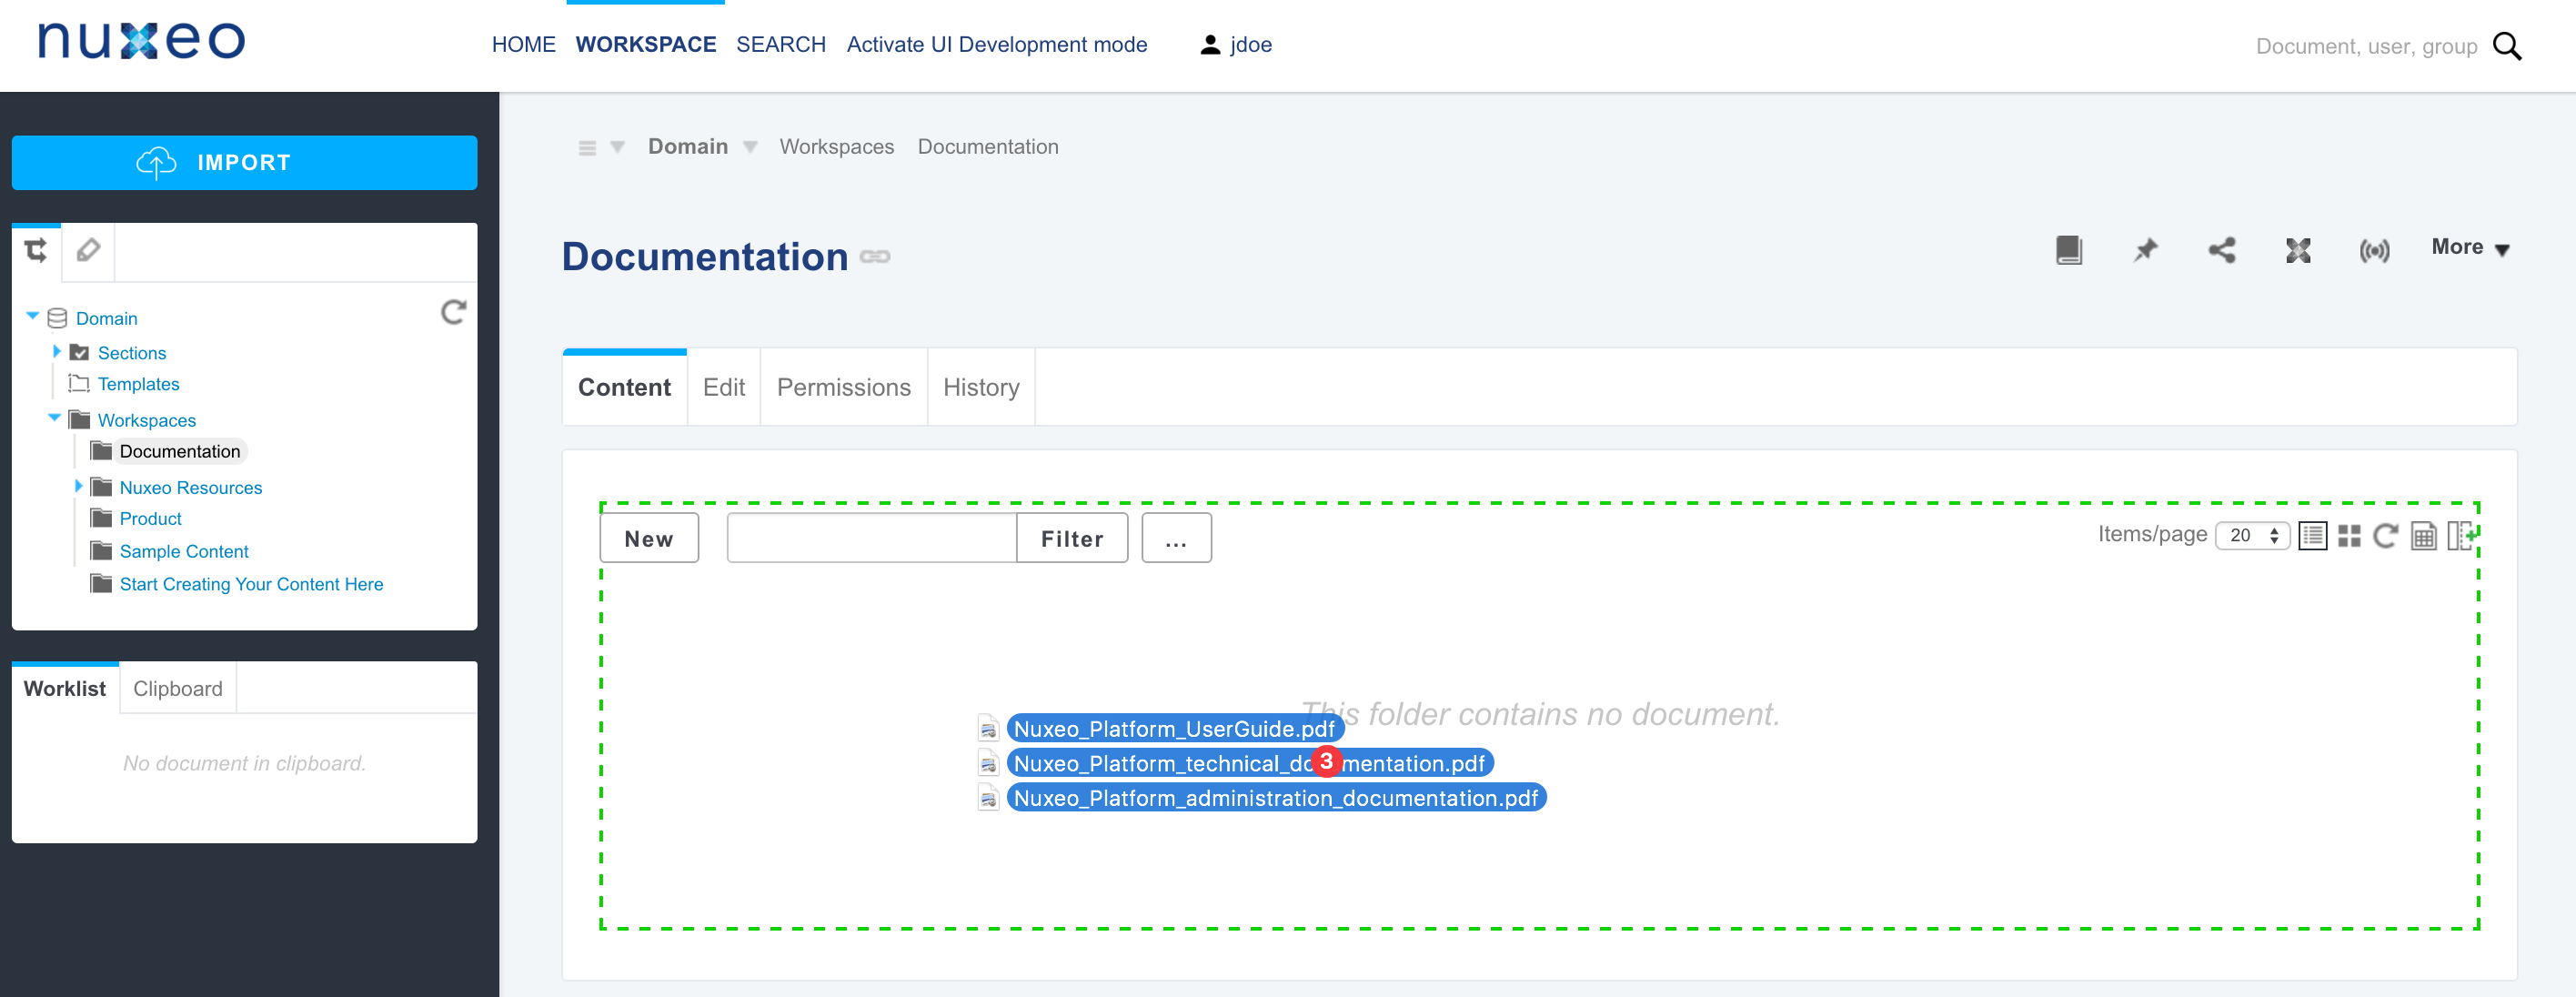
Quick Import of Documents
To import content into Nuxeo, drag an item from your computer and drop it into a workspace. The document is then automatically created in the workspace and its title is the name of the original file, and no metadata is filled in.
You can also drop files in your worklist. The document is then created in your personal workspace.
You can drag and drop one or more files of any type in Nuxeo.
Import with Metadata
It is possible to do a drag and drop import of documents with an additional step to fill in some metadata. This prevents you from editing the documents after the import is done.
To import documents with metadata:
- Drag your file from your desktop to the workspace main area in the browser and wait for the drop aread to be highlighted in green to drop the file.
The drop area is highlighted in blue.
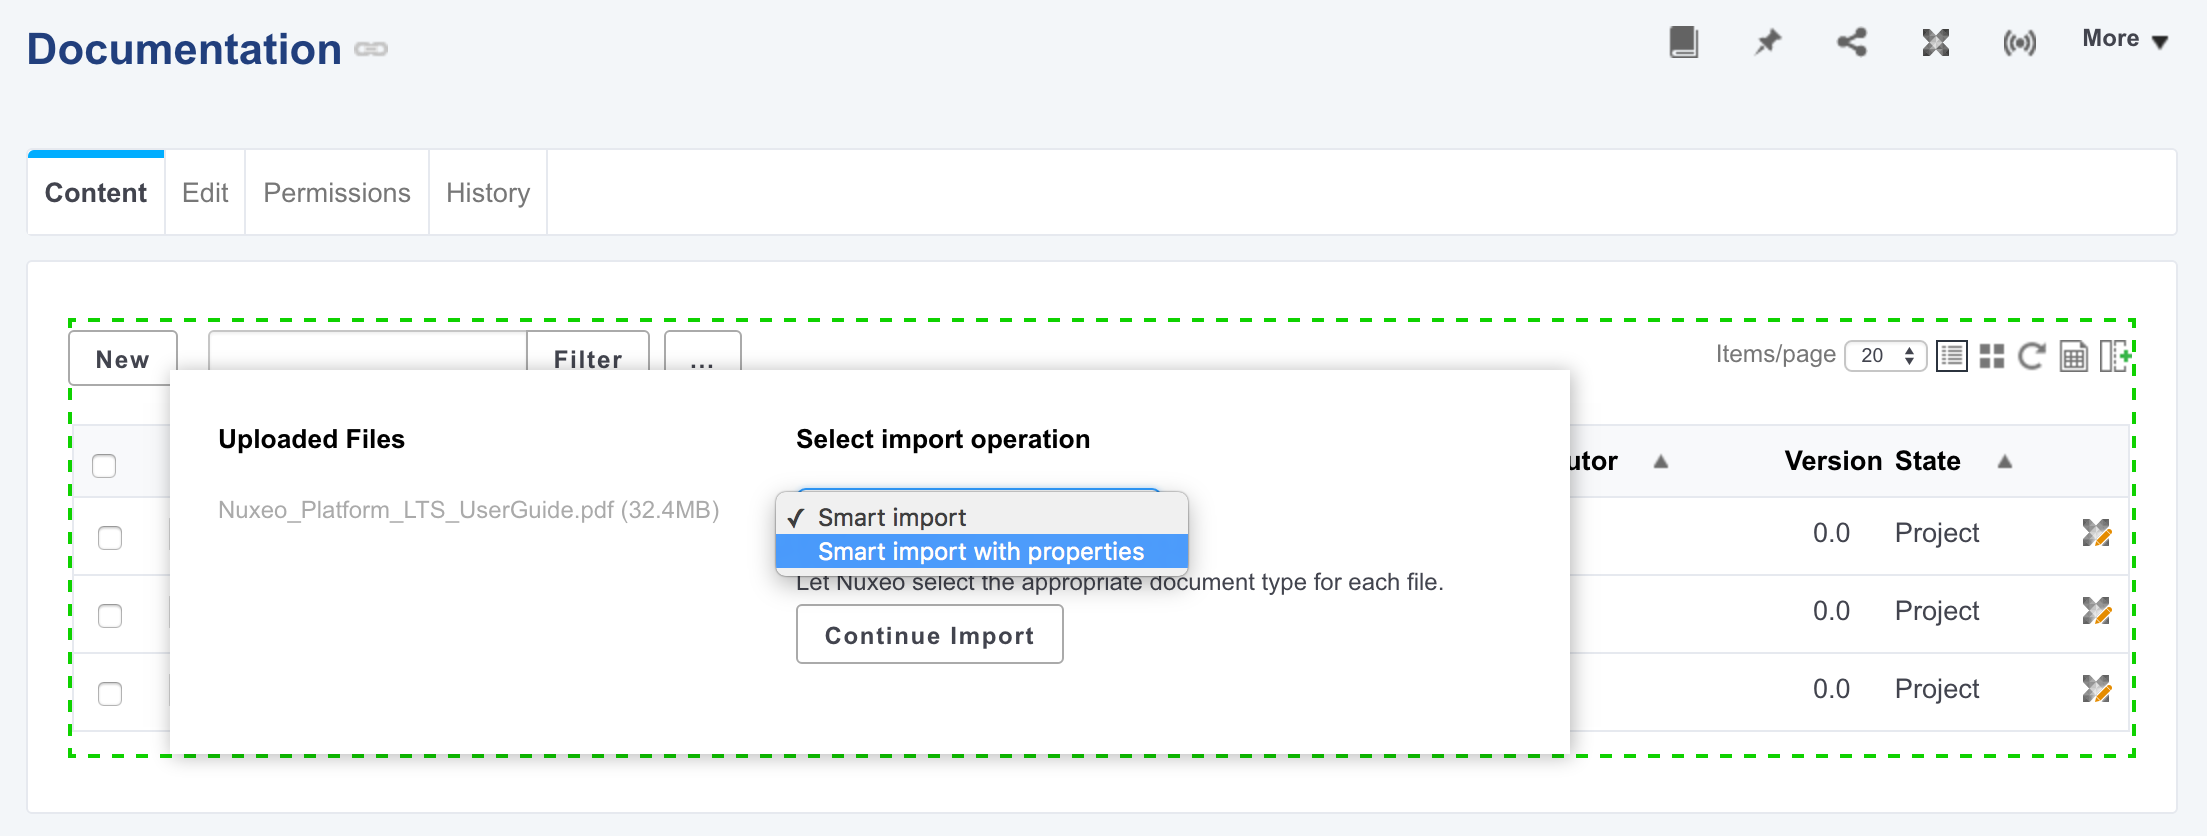
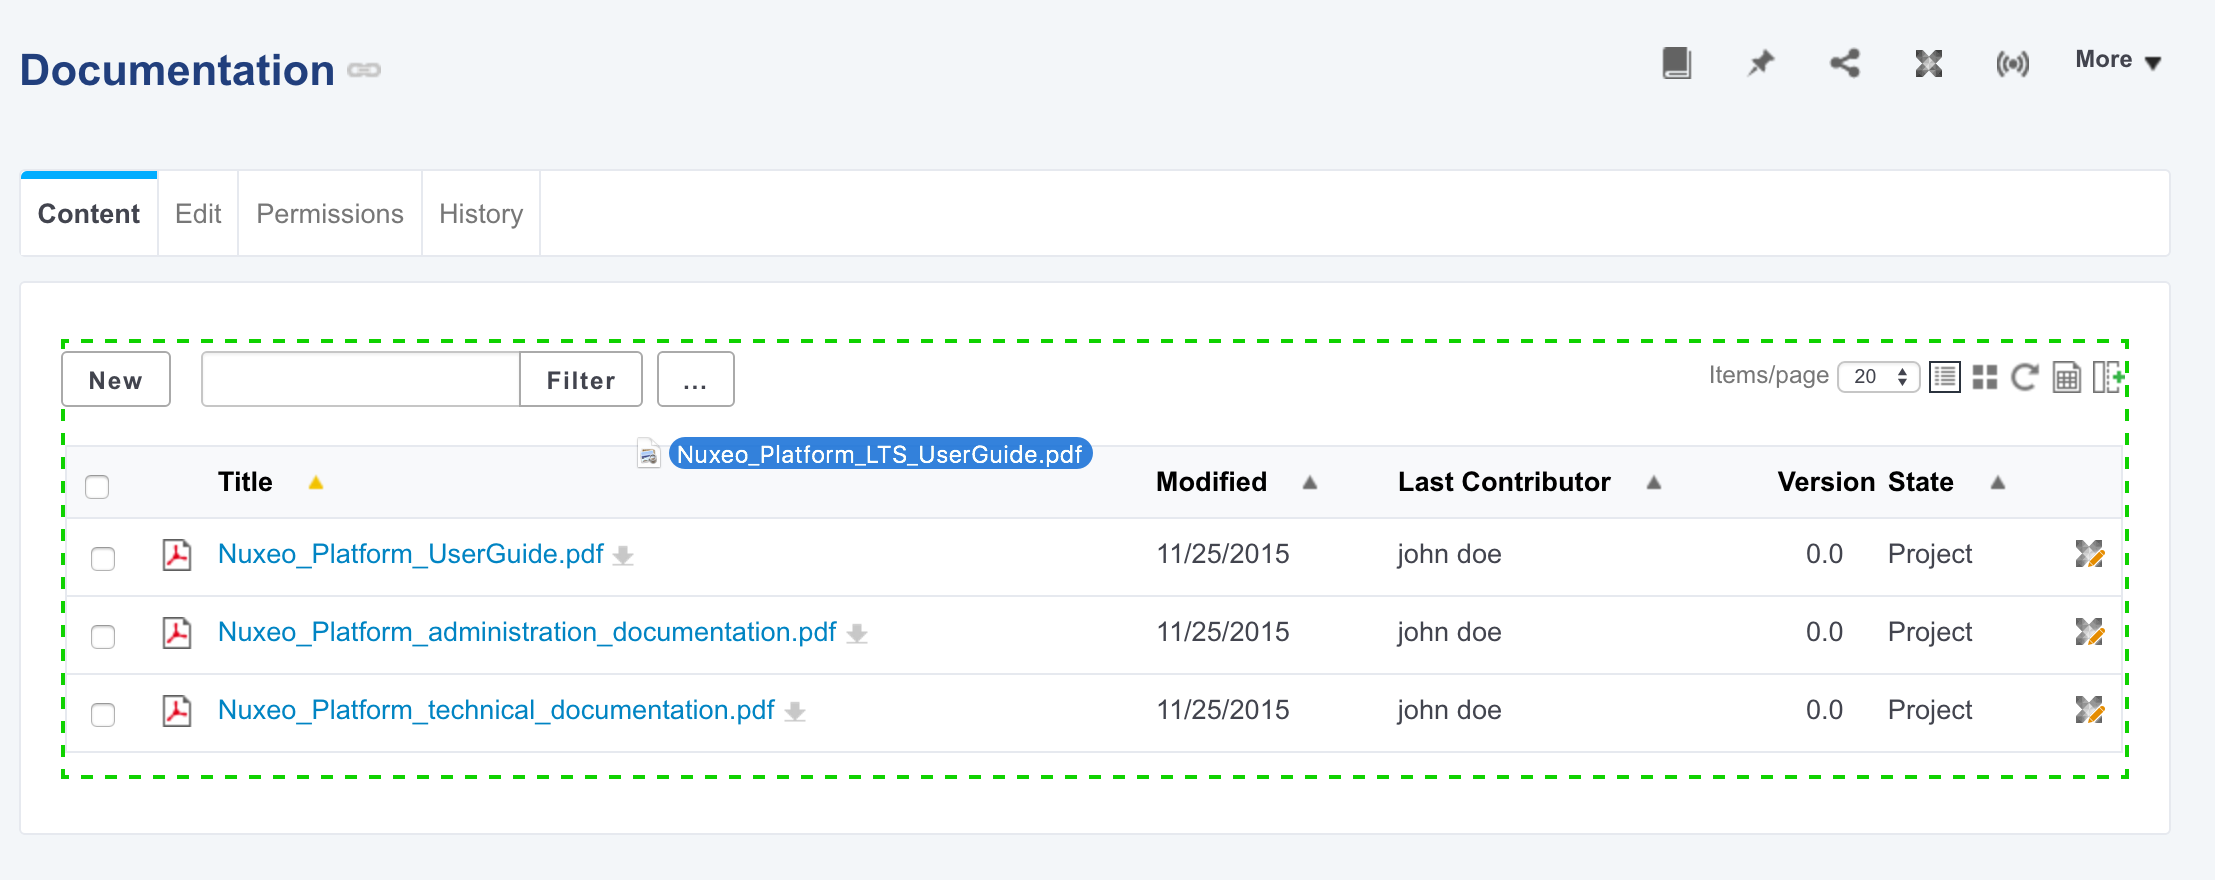 The file is uploaded. When the upload is done, a popup with a Continue button is displayed.
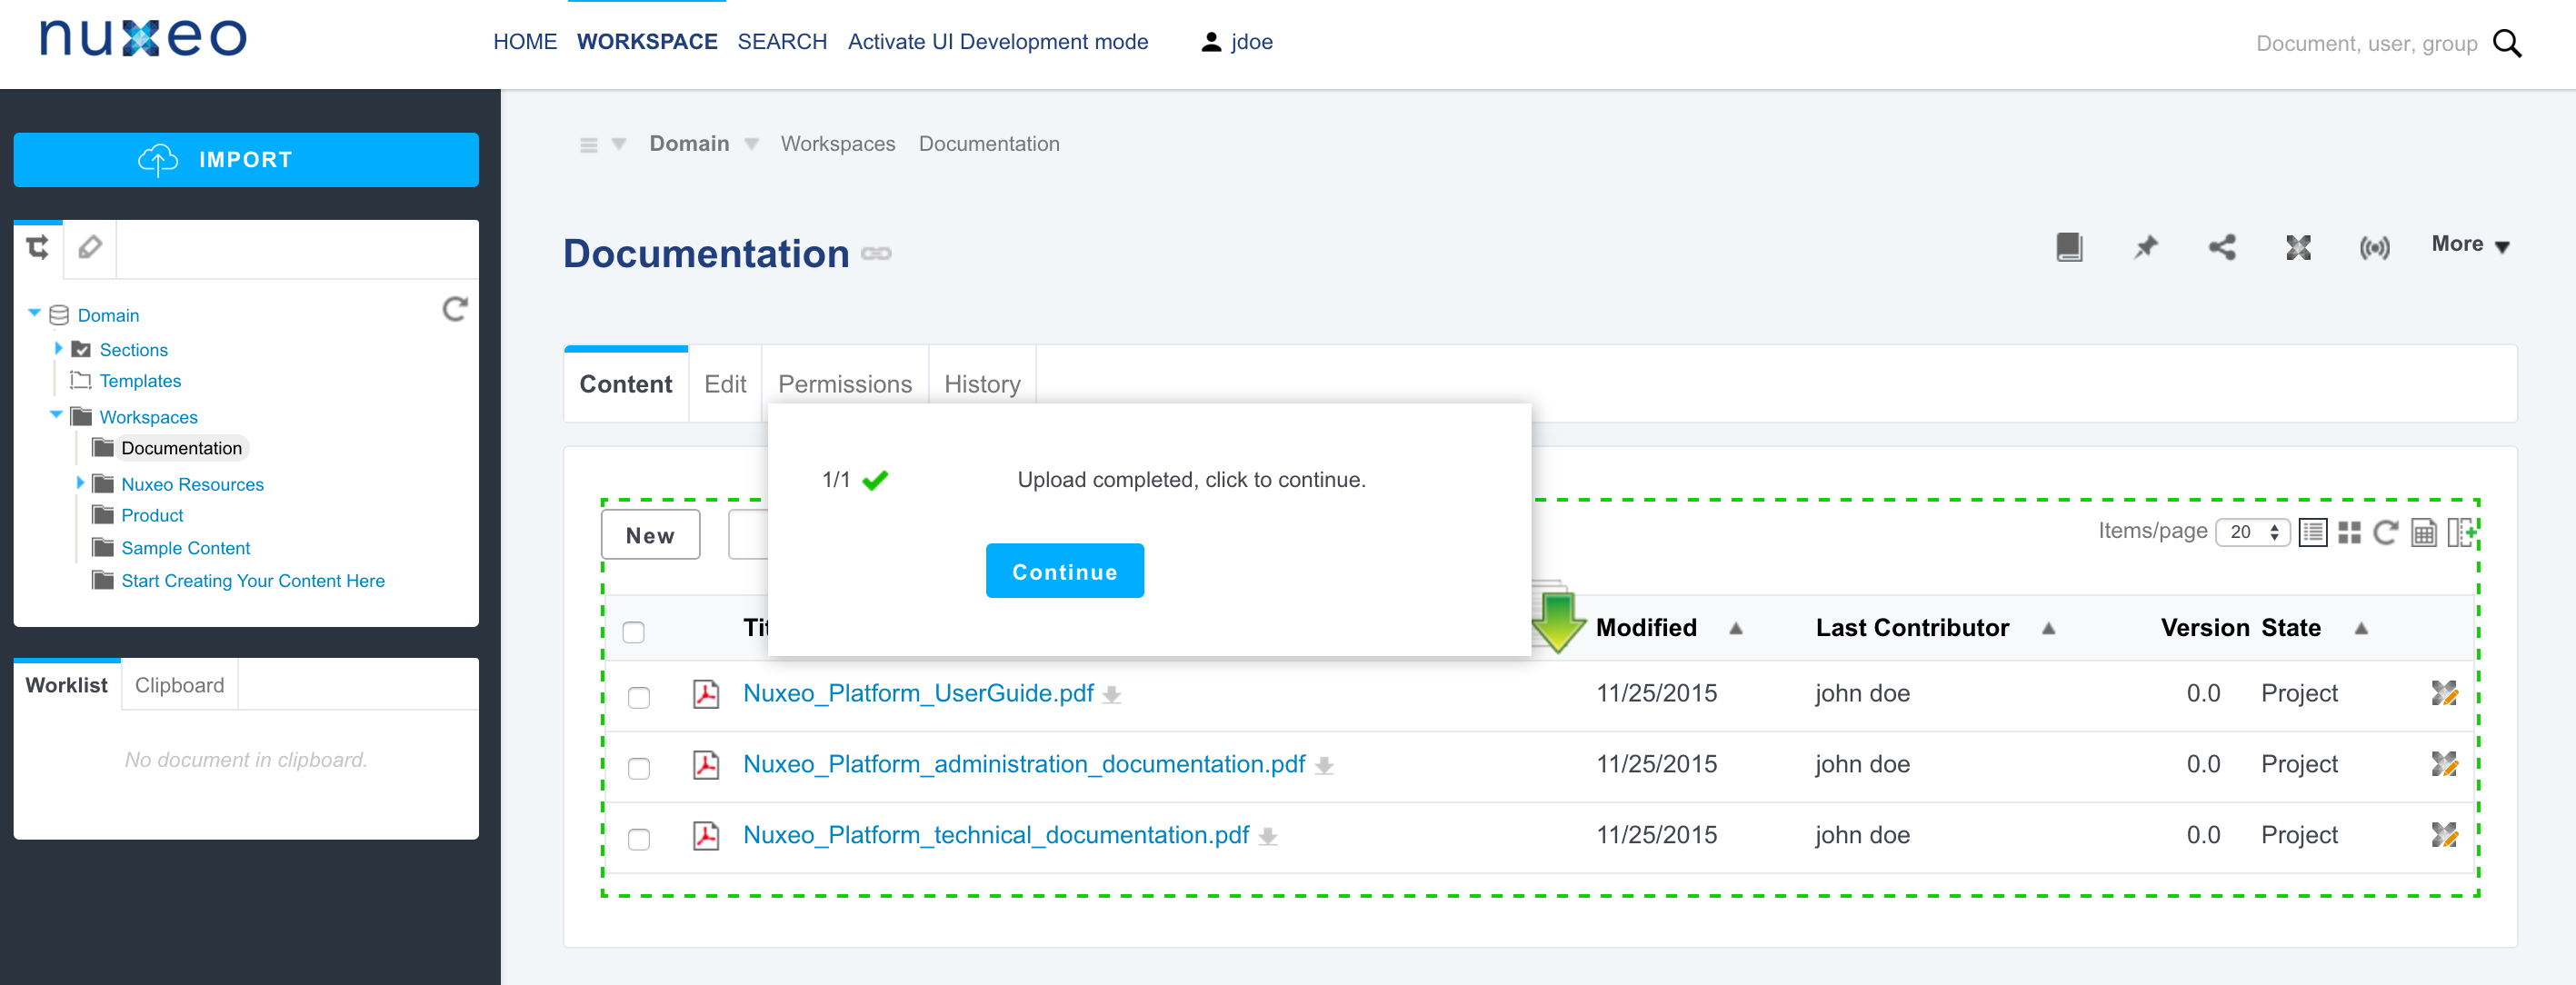
- Click on the Continue button. The popup enables you to select if you want to do a quick import (smart import) or an import with metadata.
- Select Smart import with metadata and click on the Continue import button.
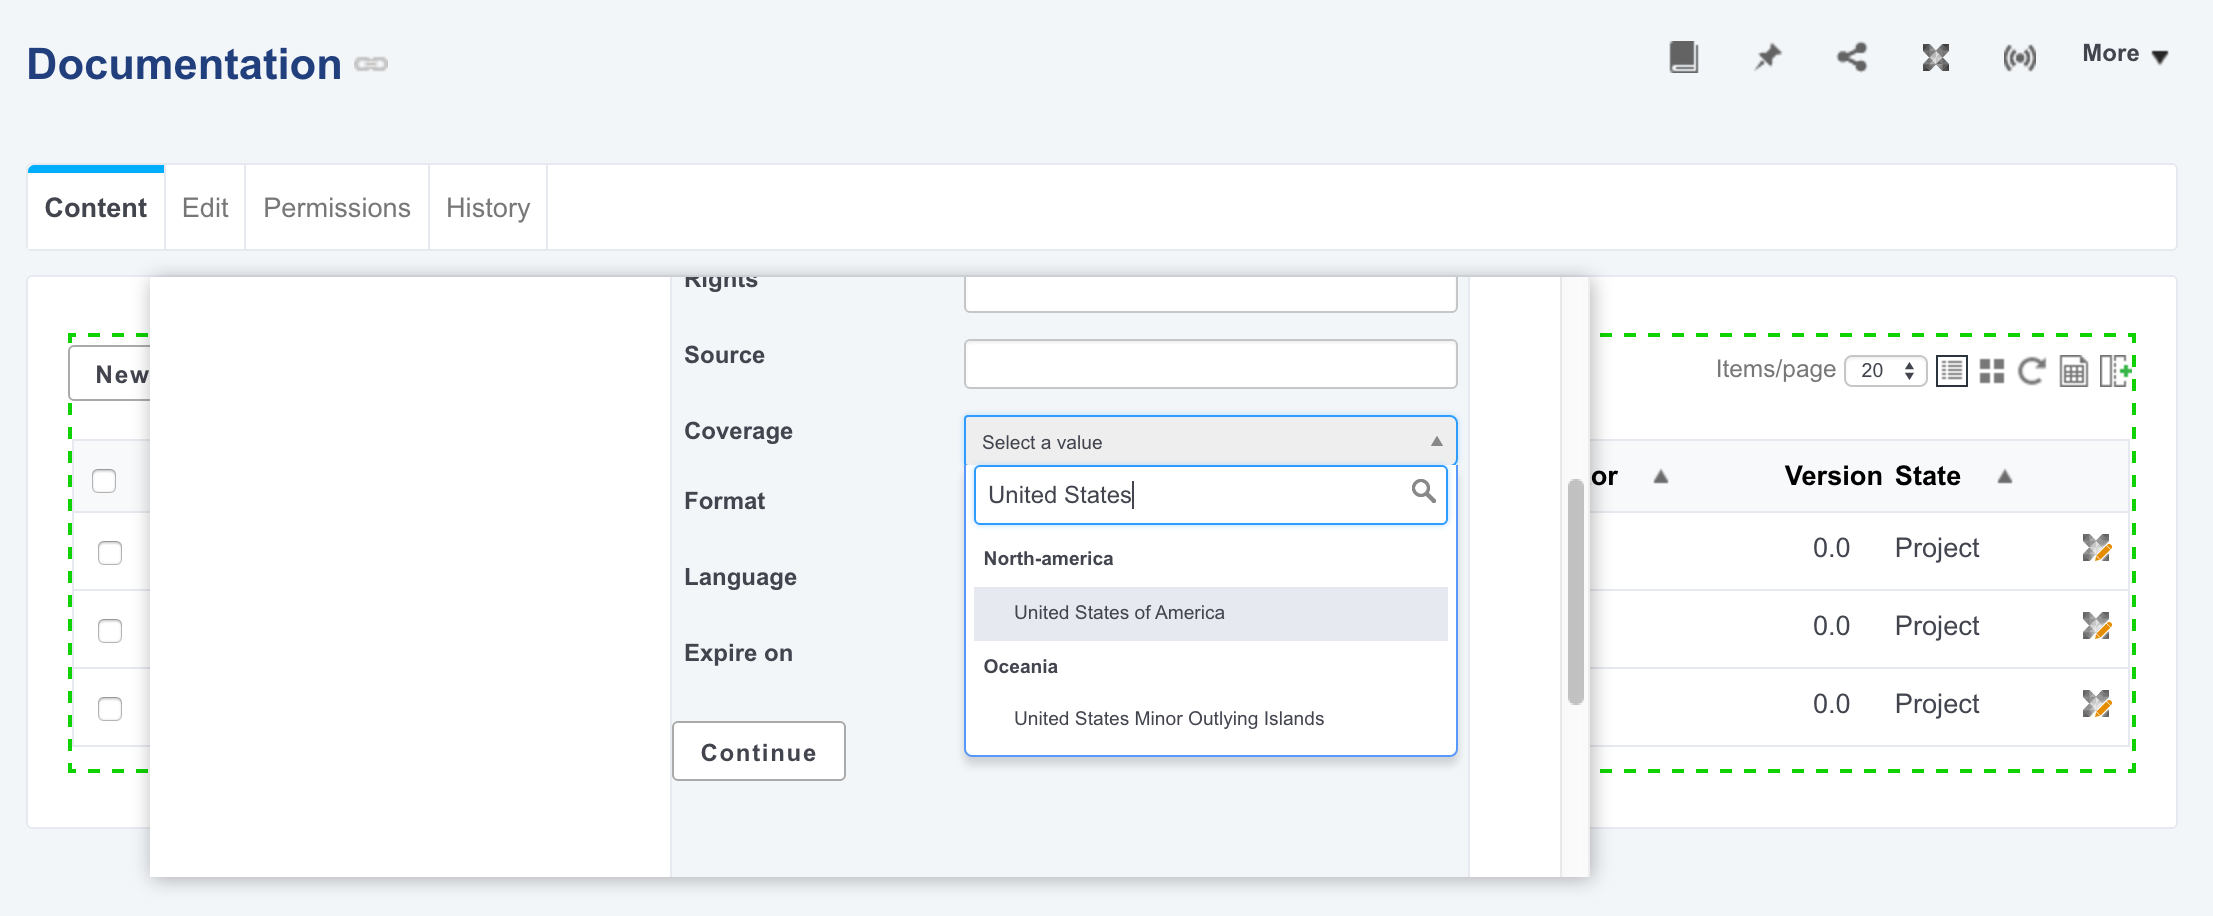
 The metadata are displayed on the pop up window.
- Fill in the metadata that you need and click on the Continue button.
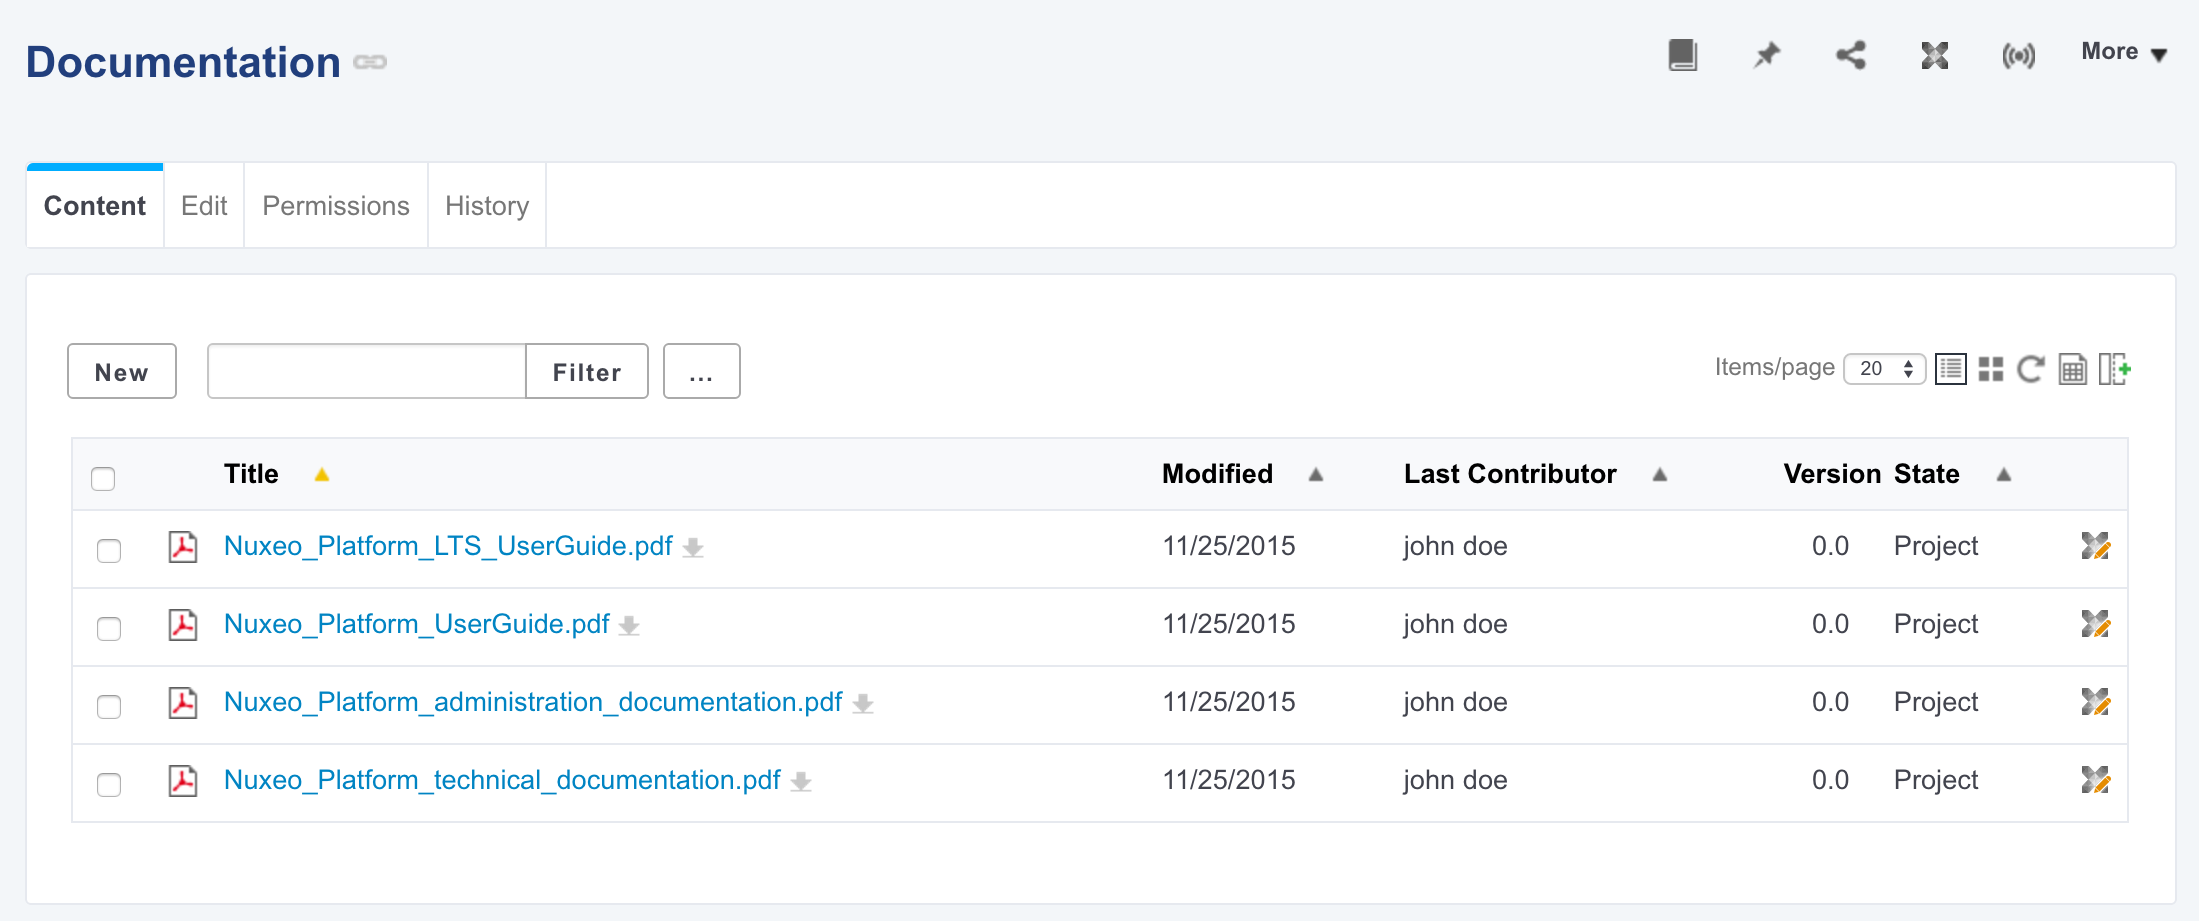
 The file is created with the filled in metadata.
Editing Content
Content and Metadata Edit Form
To edit a document, you can:
- Click on the Edit tab of the document
- Right click on the document and click on Modify
Both ways show you the document's Edit tab that displays a form to edit the content of the document and its metadata.
In the Edit tab type your modifications and indicate if you want to update the document's version. Type a comment if you want to indicate why you modified the document (this comment is logged in the document's history and helps other users know what has been changed on the document). Once it's done, click on Save.
The Edit form can be customized to show your business metadata, using the Edit layout. You can define your Edit tab to show organized groups of metadata and make some fields editable depending on a user property or document property.
Clipboard and Worklist
What is the difference between the clipboard and the worklist?
Both are used to select documents and apply actions on these documents. Possible actions are:
It is possible to add your own actions in the clipboad or the worklist.
There are two differences between the clipboard and the worklist:
- The clipboard is a one-shot selection: when you select one or several documents and add them to the clipboard, it replaces the previous selection. On the contrary, putting documents to the worklist adds them to the existing selection.
- The worklist content is kept when you log out: your selection is still available when you log back in, until you remove documents from the worklist. The clipboard selection is lost when you log out.