Installation
The Smart search package requires no specific installation steps. It can be installed like any other package from the Marketplace or from the Admin Center.
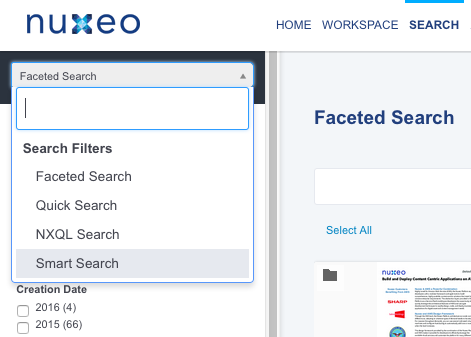
After the package is installed, the Smart Search form is available from the Search tab.

Functional Overview
Building a Smart Search
To build a query using Smart Search:
Go to the Search tab and select Smart Search in the drop down menu of the search filters.
The Smart Search form is displayed.
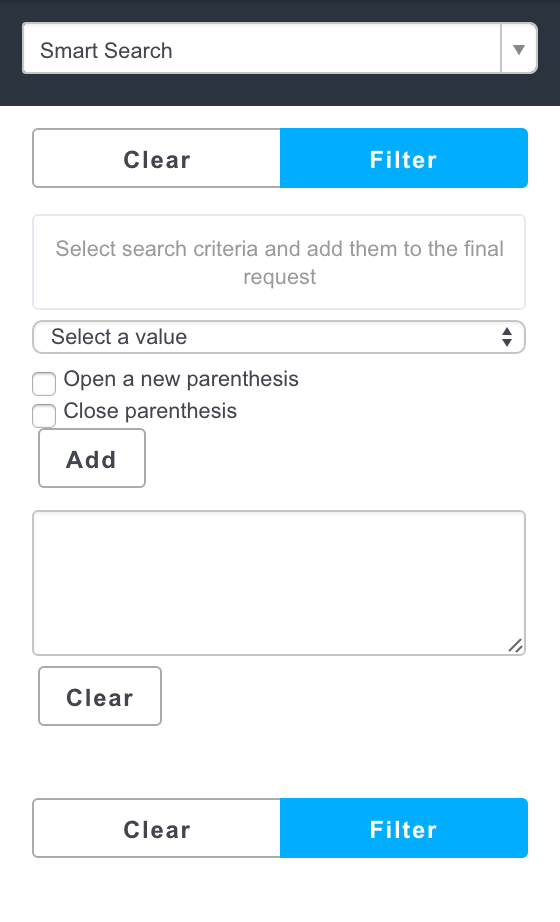

- Select a first search criterion in the drop down list and fill in the corresponding field.
- Click on the Add button.
The criterion is displayed in the text area below.
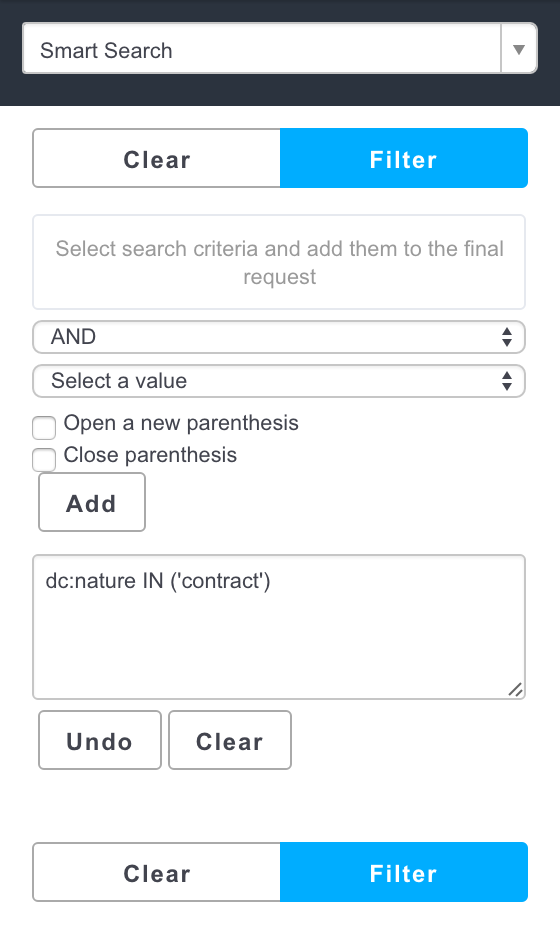

Possibly, add other criteria.
You can organize your search criteria in parenthesis. You can also use the Undo and Clear buttons to cancel actions when you build your query.
- When your query is ready, click on Add and then on Search.
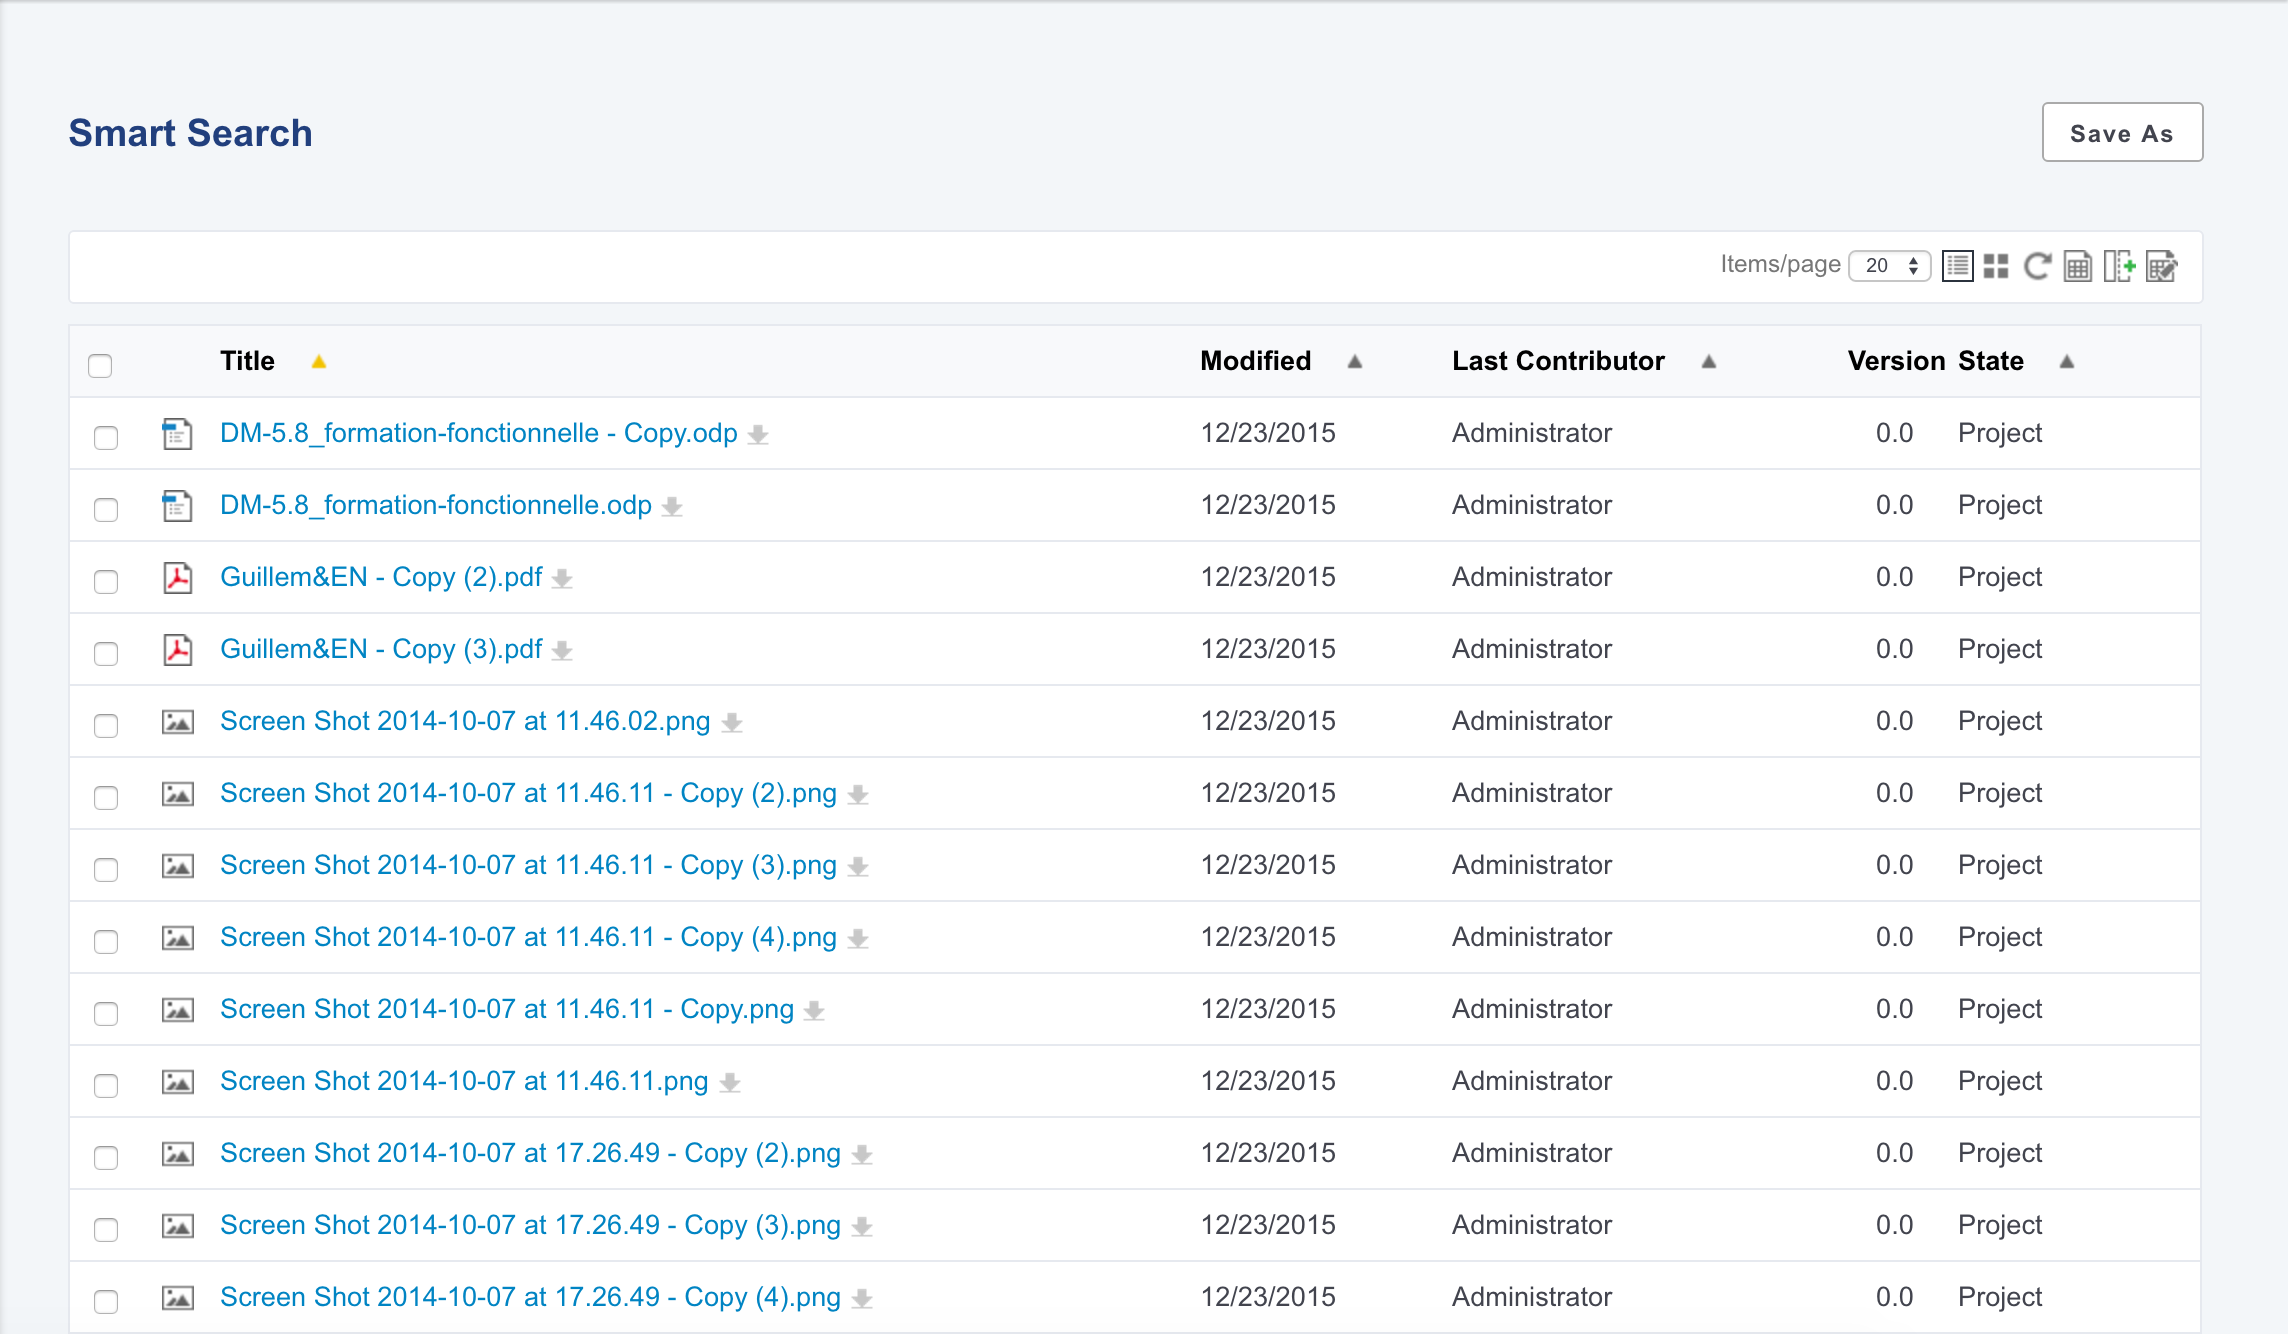
The search results are displayed. You can click on the documents to consult them. You can also edit your search to refine the query or save your search.

Saving a Smart Search
Smart Search enables users to save their search in smart folders. A smart folder is a folder that displays the result of the associated query. Every time a user click on the folder, the query is executed and the content displayed is updated. Smart folders can be created in workspaces and folders. There are two ways to create a smart folder:
- you can first create your query and save it in your personal workspace,
- or you can create a smart folder directly from a workspace.
Permissions cannot be managed on smart folders. If you want to share a smart search, you need to save it in a workspace or a folder that is shared with other users.
Saving a Smart Search
You can save a smart search from the search form directly or from the search results. When you save a smart search, it is automatically saved in your personal workspace.
To save a search in a smart folder:
- Build your query.
- From the search result page or from the search form, click on the Save As button.
Give the smart search a title and click on Save.
Once your smart search is saved, the smart folder is available:
in your personal workspace


in the drop down list in the Search tab:
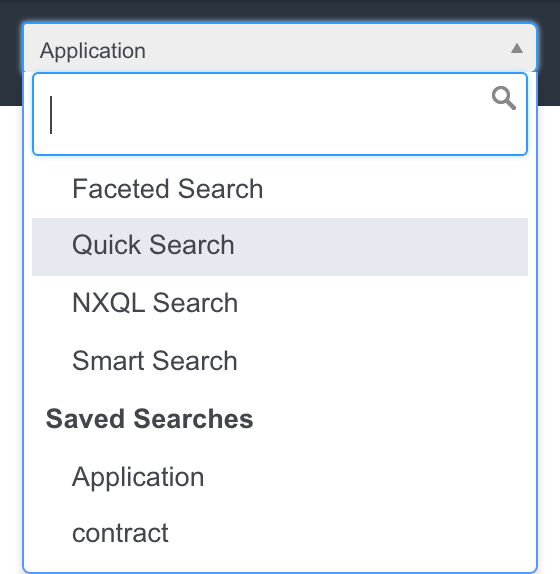

- in Home > Searches:


Creating a Smart Folder
You can create a smart search in a workspace or in a folder.
To create a smart folder: You can create a smart folder and then build the query that will be associated to it:
- In a workspace, click on New.
- In the modal window, click on Smart folder.
- On the creation form, type a title, a description (optional) and build your query.
- Click on the Create button to save the smart folder and display its content. The smart folder is saved.
Technical Overview
Smart Query Configuration
The smart query is designed to work in conjunction with a content view. This content view search layout displays a selector to help building a query part, and a text area with the existing query parts already aggregated:
The SmartQuery interface is very simple: it can build a query (or query part) and can check if it is in a valid state.
The IncrementalSmartQuery abstract class holds additional methods for a good interaction with UI JSF components. It is able to store an existing query part, and has getters and setters for the description of a new element to add to the query.
The IncrementalSmartNXQLQuery class implements the org.nuxeo.ecm.platform.smart.query.SmartQuery interface and generates a query using the NXQL syntax.
The seam component named smartNXQLQueryActions exposes an instance of it, given an existing query part, and is used to update it on Ajax calls.
The complete list of layouts used to generate this screen is available here: smart-query-layouts-contrib.xml.
The content view is configured to use the layout named nxql_incremental_smart_query as a search layout, and this content view is referenced both in the search form and search results templates: smart-query-contentviews-contrib.xml.
The easiest way to customize available query conditions is to override the definition of the layout named incremental_smart_query_selection. This layout uses the template incremental_smart_query_selection_layout_template.xhtml that accepts one property named "hideNotOperator". This property, if set to true, will hide the selection of the 'NOT' word that can be added in front of each criterion. If you do so, operators should include negative operators.
Here is an explanation on how to define this layout widgets, that need to be of type "incremental_smart_query_condition" to ensure a good behaviour with other layouts.
As a simple example, let's have a look at the widget to add a condition on the title:
<widget name="nxql_smart_query_condition_title"
  type="incremental_smart_query_condition">
  <labels>
    <label mode="any">title</label>
  </labels>
  <translated>true</translated>
  <properties widgetMode="edit">
    <property name="searchField">dc:title</property>
    <propertyList name="availableOperators">
      <value>CONTAINS</value>
      <value>LIKE</value>
      <value>=</value>
    </propertyList>
  </properties>
  <subWidgets>
    <widget name="title" type="text">
      <fields>
        <field>stringValue</field>
      </fields>
    </widget>
  </subWidgets>
</widget>
The properties searchField and availableOperators are used to set the left expression of the condition and the operator. The subwidget is a standard widget of type "text". It is bound to the "stringValue" field so it will be stored in the smart query instance field with the same name. Other additional properties supported by the "text" widget type can be added here (for instance, the required or styleClass properties).
Here is the complete list of available field bindings:
- booleanValue
- stringValue
- stringListValue
- stringArrayValue
- datetimeValue
- otherDatetimeValue (to be used in conjunction with datetimeValue)
- dateValue
- otherDateValue (to be used in conjunction with dateValue)
- integerValue
- floatValue (to bind a Double instance)
As a more complex example, let's have a look at the widget used to add a condition on the modification date:
<widget name="nxql_smart_query_condition_modified" type="incremental_smart_query_condition">
<labels>
<label mode="any">label.dublincore.modified</label>
</labels>
<translated>true</translated>
<properties widgetMode="edit">
<property name="searchField">dc:modified</property>
<propertyList name="availableOperators">
<value>BETWEEN</value>
<value>NOT BETWEEN</value>
<value><</value>
<value>></value>
</propertyList>
</properties>
<subWidgets>
<widget name="modified" type="datetimeRange">
<fields>
<field>dateValue</field>
<field>otherDateValue</field>
</fields>
<properties widgetMode="edit">
<property name="required">true</property>
<property name="format">#{nxu:basicDateFormatter()}</property>
</properties>
<widgetModes>
<mode value="any">
#{(empty value.conditionalOperator or value.conditionalOperator=='BETWEEN' or value.conditionalOperator=='NOT BETWEEN')?'edit':'hidden'}
]]>
</mode>
</widgetModes>
</widget>
<widget name="modified_before" type="datetime">
<fields>
<field>dateValue</field>
</fields>
<properties widgetMode="edit">
<property name="required">true</property>
<property name="format">#{nxu:basicDateFormatter()}</property>
</properties>
<widgetModes>
<mode value="any">
#{(empty value.conditionalOperator or value.conditionalOperator=='BETWEEN' or value.conditionalOperator=='NOT BETWEEN')?'hidden':'edit'}
]]>
</mode>
</widgetModes>
</widget>
</subWidgets>
</widget>
It is more complex as some subwidgets should not be shown depending on the chosen operator: when operator "BETWEEN" is selected, all of the three subwidgets should be displayed, whereas when other operators are selected, only the first subwidget should be shown. This is achieved by setting the widget mode according to the selected value.
Let's have a close look at the condition:
#{(empty value.conditionalOperator or value.conditionalOperator=='BETWEEN' or value.conditionalOperator=='NOT BETWEEN')?'edit':'hidden'}
In this expression, value references the value manipulated by the widget (e.g. the smart query instance). This variable is made available by the layout system. Here, if the conditional operator is not empty, and is different from 'BETWEEN' or 'NOT BETWEEN', the widget should be hidden. Otherwise, it can be shown in edit mode. The widgets shown when the conditional operator is empty should be suitable for the first operator within the list of available operators.
Smart Folder Configuration
The smart folder creation and edition pages is very close to the smart search form. It reuses the same widget types, including some adjustments since the bound values are kept in its properties instead of a backing seam component. Its layout definition is here: smart-folder-layouts-contrib.xml. It also includes the definition of a widget in charge of displaying the content view results.
Note that it needs another content view to be defined (see smart-folder-contentviews-contrib.xml) so that this content view uses the query, sort information, result columns and page size as set on the document properties (note the usage of tags parameter, sortInfosBinding, resultColumns and pageSizeBinding).


Result Layout, Column and Sort Selection
The layout used to display the column selection, the sort information selection, and to display the search results, is the generic layout document_listing_table. If it is changed, it needs to be kept consistent between all the places referencing it:
- the smart search form
- the smart query content view result layout and result columns binding
- the smart folder layout in edit mode
- the smart folder content view result layout and result columns binding (displayed via its layout in view mode)