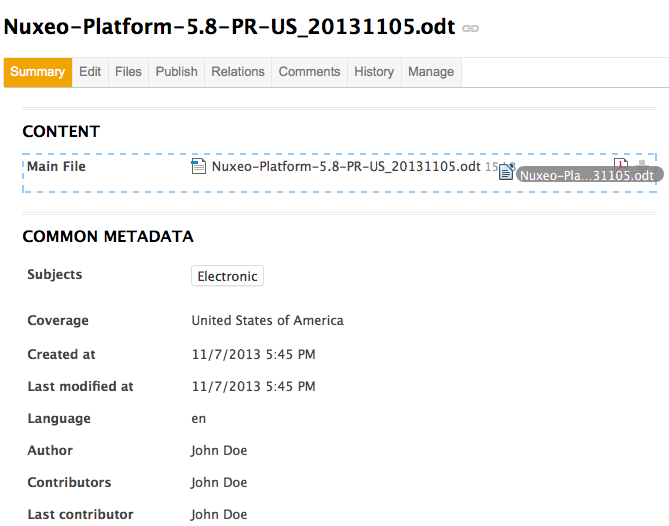
Drag and Drop from the Desktop to Nuxeo HTML UI has been available for a long time using a browser plugin.
You can use the native HTML5 Drag and Drop features on recent browsers (Firefox 3.6+, Google Chrome 9+, Safari 5+, IE11, Edge). This new Drag and Drop import model is pluggable so you can adapt the import behavior to your custom needs.
How to Use it
Selecting the DropZone
If you drag some files from the Desktop to the Nuxeo WebUI, the possible DropZones will be highlighted.
In Nuxeo there are 5 different DropZones (depending on the page):
ContentView: the content listing for a folderish Document;

Clipboard_CLIPBOARD: the user's Clipboard;Clipboard_DEFAULT: the user's Worklist;mainBlob: the main attachment of the current Document;

otherBlobs: additional attachments of the current Document.
Depending on the DropZone you select, the import action will be different:
- Content view: create documents from files in the current container;
- Clipboard: create documents from files in the user's personal workspaces and add them to the clipboard;
- Worklist: create documents from files in the user's personal workspaces and add them to the worklist;
- main blob: attach a file to the document;
- other blobs: attach file(s) as additional files in the document.
Default Mode vs Advanced Mode
In the default mode the file you drop will be automatically uploaded and imported into the document repository.
By using the advanced mode you can have more control over the import process:
- you can do several file imports but still keep all files part of the same batch,
- you can select the Automation chain that will be executed.
To trigger the extended mode, just maintain the drag over the DropZone for more than 2.5 seconds: the drop zone will be highlighted in green indicating you are now in extended mode.


How to Customize it
Defining a New DropZone
You can very simply define a new DropZone in your pages; you simply need to add an HTML element (like a div) which has:
- a unique id,
- the '
dropzone' CSS class, - a context attribute.
<div id="myDropZone" class="dropzone" context="myDropZone"> ... </div>
Associating Automation Chains
Each dropzone context is associated with a set of content Automation operations or Automation chains. This association is configured via the action service:
<action id="Chain.FileManager.ImportInSeam"
        link="" order="10" label="label.smart.import"
        help="desc.smart.import.file">
  <category>ContentView</category>
  <filter-id>create</filter-id>
  <properties>
    <property name="chainId">FileManager.ImportInSeam</property>
  </properties>
</action>
Where:
- the operation or Automation chain is configured through the action properties (since 5.7.1). The
chainIdproperty is used to configure the Automation chain to execute. If not present, theoperationIdproperty is tried. For backward compatibility, if both properties are not present, we fallback using the actionidto get the Automation chain or operation to execute (for Automation chains, appendchain.as a prefix for id). categoryrepresents the dropzone context;filter/filter-idare the filters used to define if the operation should be available in a given context;linkpoints to a page that can be used to collect parameters for the Automation chain.
The operation or chain that will be called for the import will receive:
- as input: a BlobList representing the files that have been uploaded;
- as context: the current page context, typically:
{
  "currentDocument": "#{currentDocument.id}",
  "currentDomain": "#{currentDomain.id}",
  "currentWorkspace": "#{currentWorkspace.id}",
  "conversationId": "#{org.jboss.seam.core.manager.currentConversationId}",
  "lang": "#{localeSelector.localeString}",
  "repository": "#{currentDocument.repositoryName}"
}
- as parameters: what has been collected by the form if any.
The output of the chain does not really matter.
At some point, inside your Automation chain you may need to access the Seam context. For that, new operations were introduced:
Seam.RunOperation: runs an operation or a chain in the Seam context. For example, if you want to get available actions via theActions.GEToperation, but want to leverage the Seam context for actions filters:
<chain id="SeamActions.GET">
  <operation id="Seam.RunOperation">
    <param type="string" name="id">Actions.GET</param>
  </operation>
</chain>
Seam.InitContext/Seam.DestroyContext: initializes / destroys the Seam context:
<chain id="ImportClipboard">
  <operation id="Seam.InitContext" />
  <operation id="UserWorkspace.CreateDocumentFromBlob" />
  <operation id="Document.Save"/>
  <operation id="Seam.AddToClipboard"/>
  <operation id="Seam.DestroyContext" />
</chain>
Parameters Management
In some cases, you may want user to provide some parameters via a form associated to the import operation you want to run. For that, you can use the link attribute of the action used to bind your Automation chain to a dropzone. This URL will be used to display your form within an iframe inside the default import UI.
In order to send the collected parameters to the import wizard, you should call a JavaScript function inside the parent frame:
window.parent.dndFormFunctionCB(collectedData);
where collectedData is a JavaScript object that will then be sent (via JSON) as a parameter of the operation call.
In the default JSF web app you can have a look at DndFormActionBean and dndFormCollector.xhtml.