Need a quick Nuxeo Platform instance for your cloud? You can deploy one in just a few minutes with our CloudFormation template, as we provide a template that will automatically install the latest Nuxeo on your Amazon AWS and all the required resources.
Prerequisites
You need an account on Amazon AWS with the CloudFormation service activated.
To sign up for AWS, just go to http://aws.amazon.com/ and click on the “Sign Up Now” link.
To activate the CloudFormation service, sign in to your management console, click on the “CloudFormation” tab and follow the instructions.
If you don't have a keypair, you will also want to create a one so you can connect to your instance later. You can create one in the “EC2” tab in your management console.
You're ready to deploy our template!
Deploying the Template
Deploying the Nuxeo template on Amazon AWS installs:
- The latest version of the Nuxeo Platform (LTS or FastTrack), with a PostgreSQL database and an Apache2 HTTP front-end
- All the required Amazon resources, which are: an EC2 instance, an elastic IP, an EBS volume.
To deploy the Nuxeo template:
- Sign in to your CloudFormation management console.
- Choose the region you want your stack to be deployed in.
- Start the new stack creation by clicking the Create New Stack button.
- On the first page of the Wizard on Select Template, choose Specify an Amazon S3 template URL, and put:
https://nuxeo.s3.amazonaws.com/templates/Nuxeo.template(for the latest LTS)https://nuxeo.s3.amazonaws.com/templates/NuxeoFT.template(for the latest FastTrack).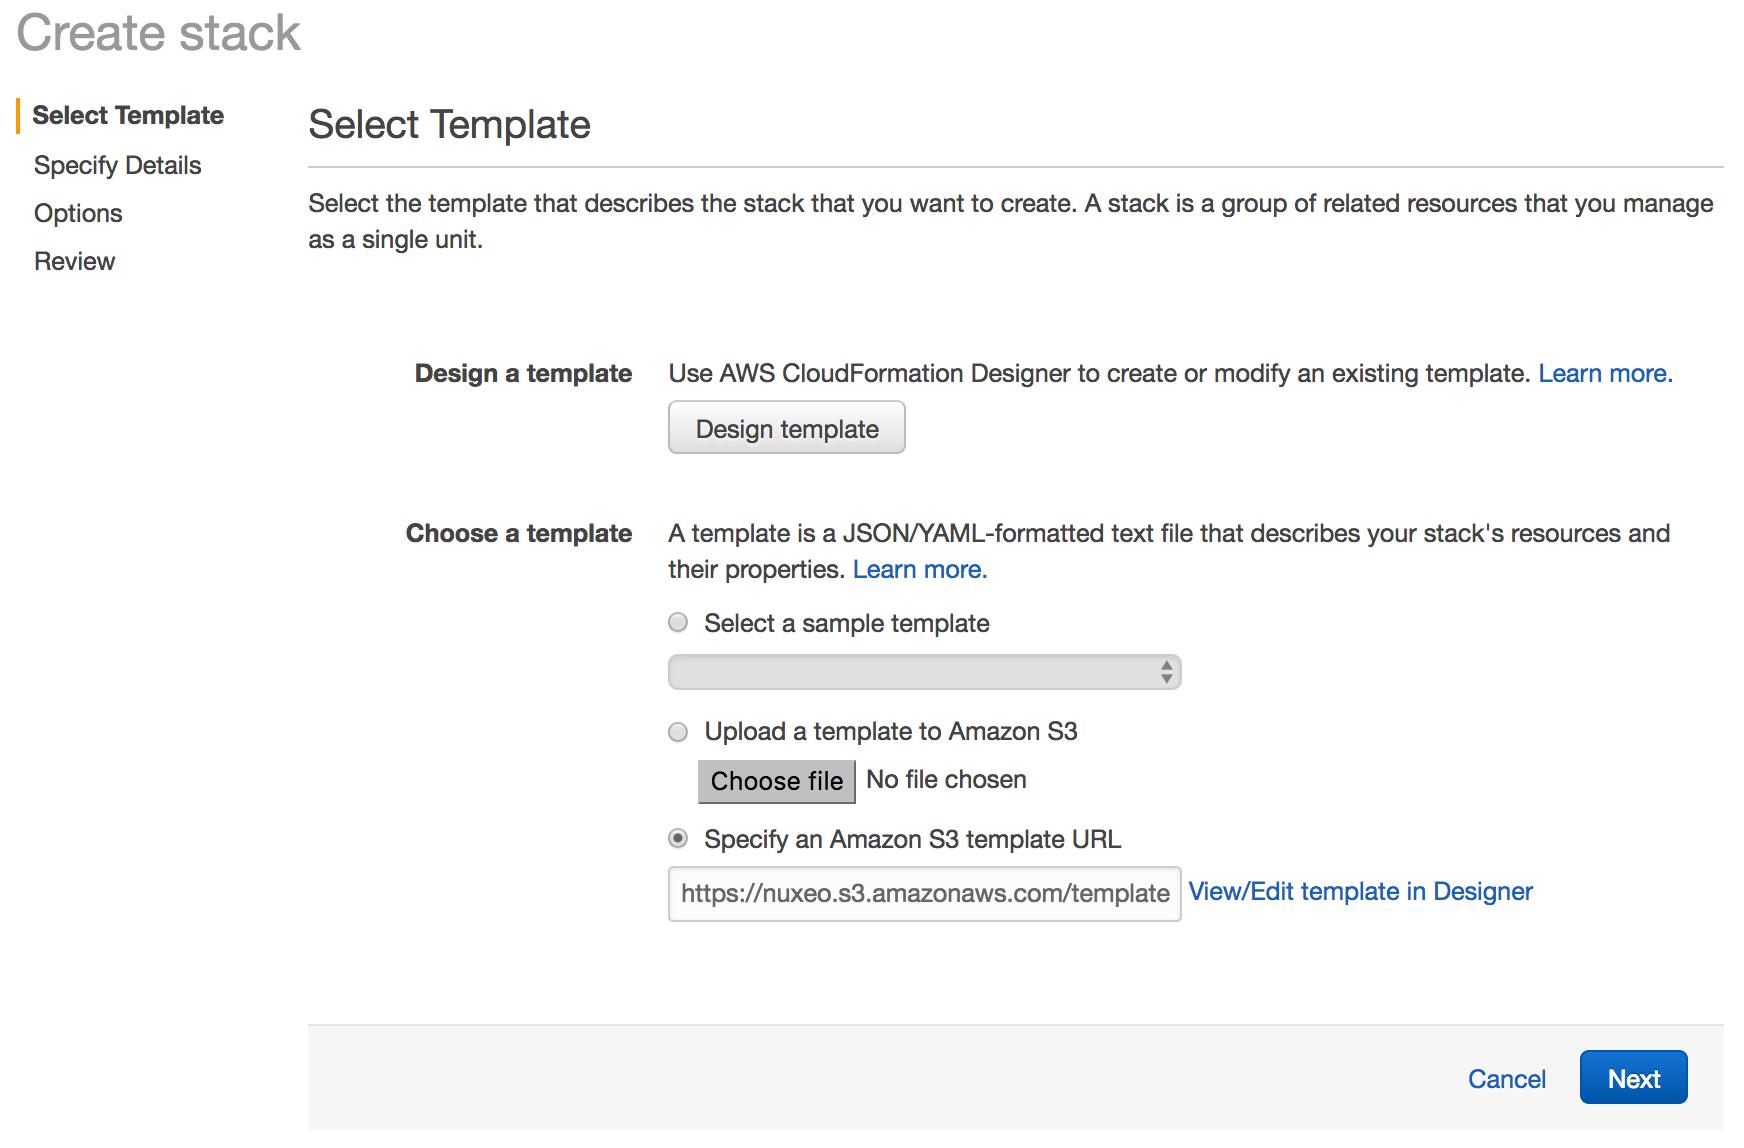 In some regions, AWS will tell you that is not a S3 URL, in that case just download the file locally and use the "Upload a template" option. Press "Next" button to proceed.
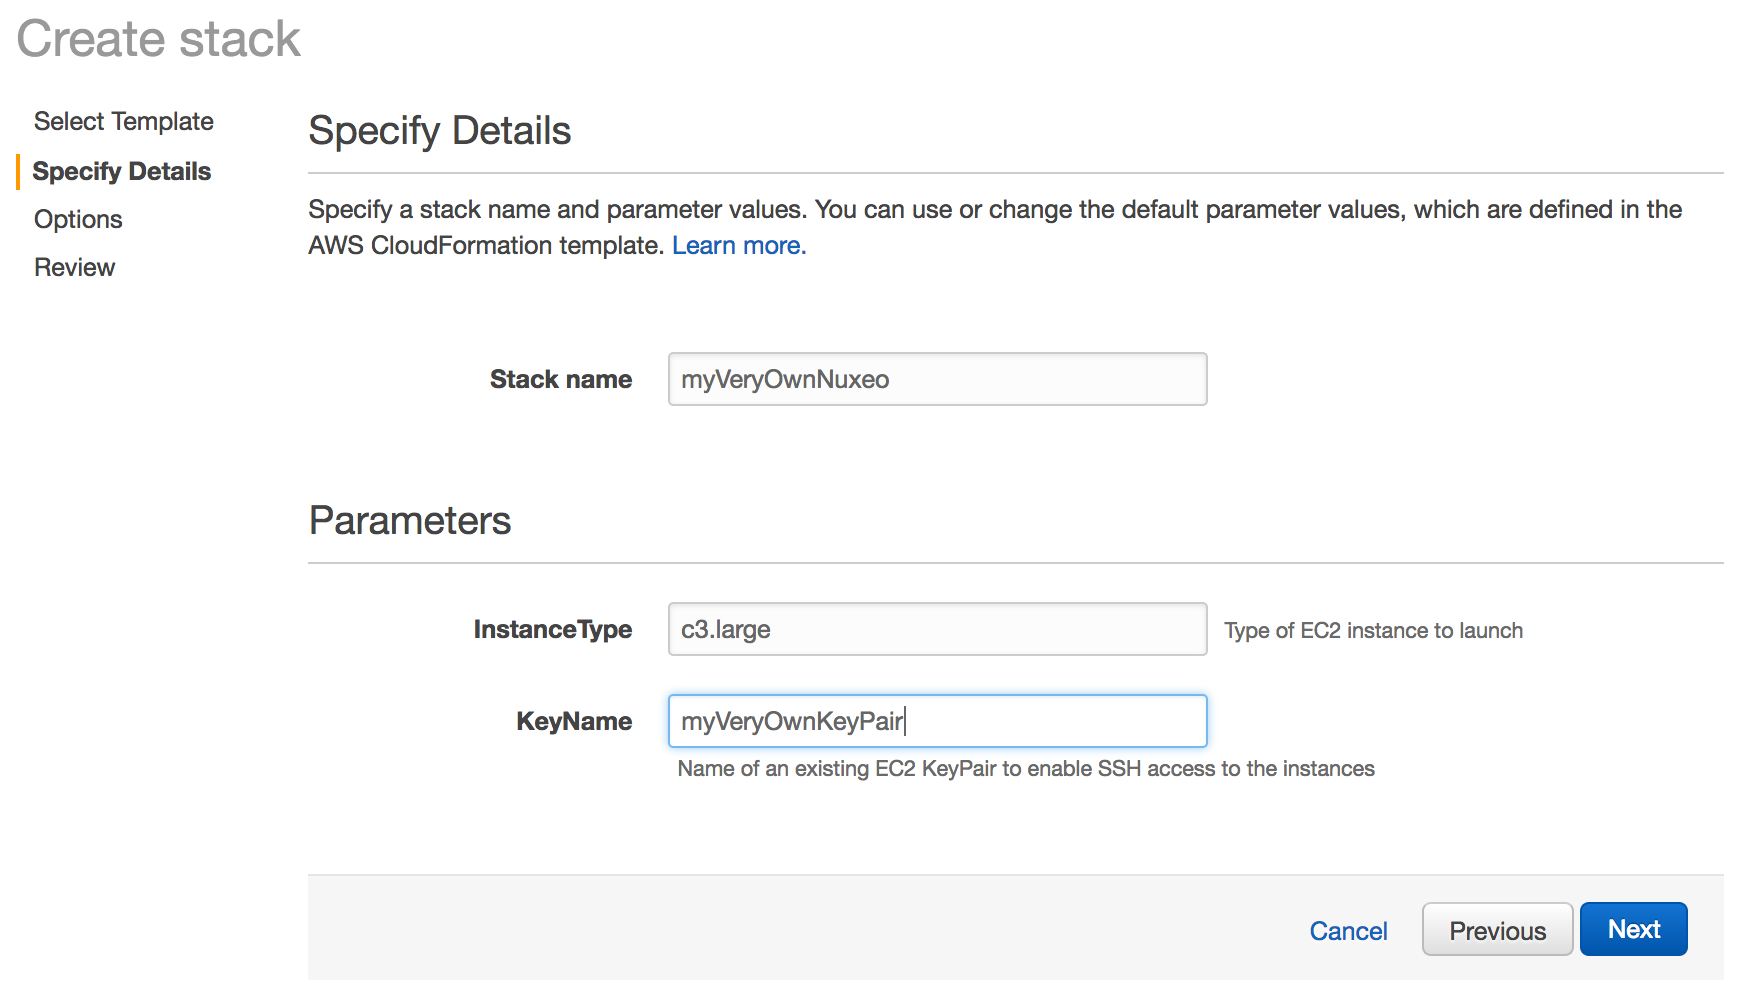
- On next page for Specify Details type the stack name for your instance. For Instance Type put the type of amazon instance you want.
You can find a list of instance types at http://aws.amazon.com/ec2/instance-types/. The default (c3.large) is suitable for small to medium size installations.
If you choose a different instance type, check its “Model” on the instance types page and use that for the "InstanceType" field.
Put also in a previously created and existing keypair name (KeyName). This key must exist or the stack creation will fail.
Press "Next" button to proceed.
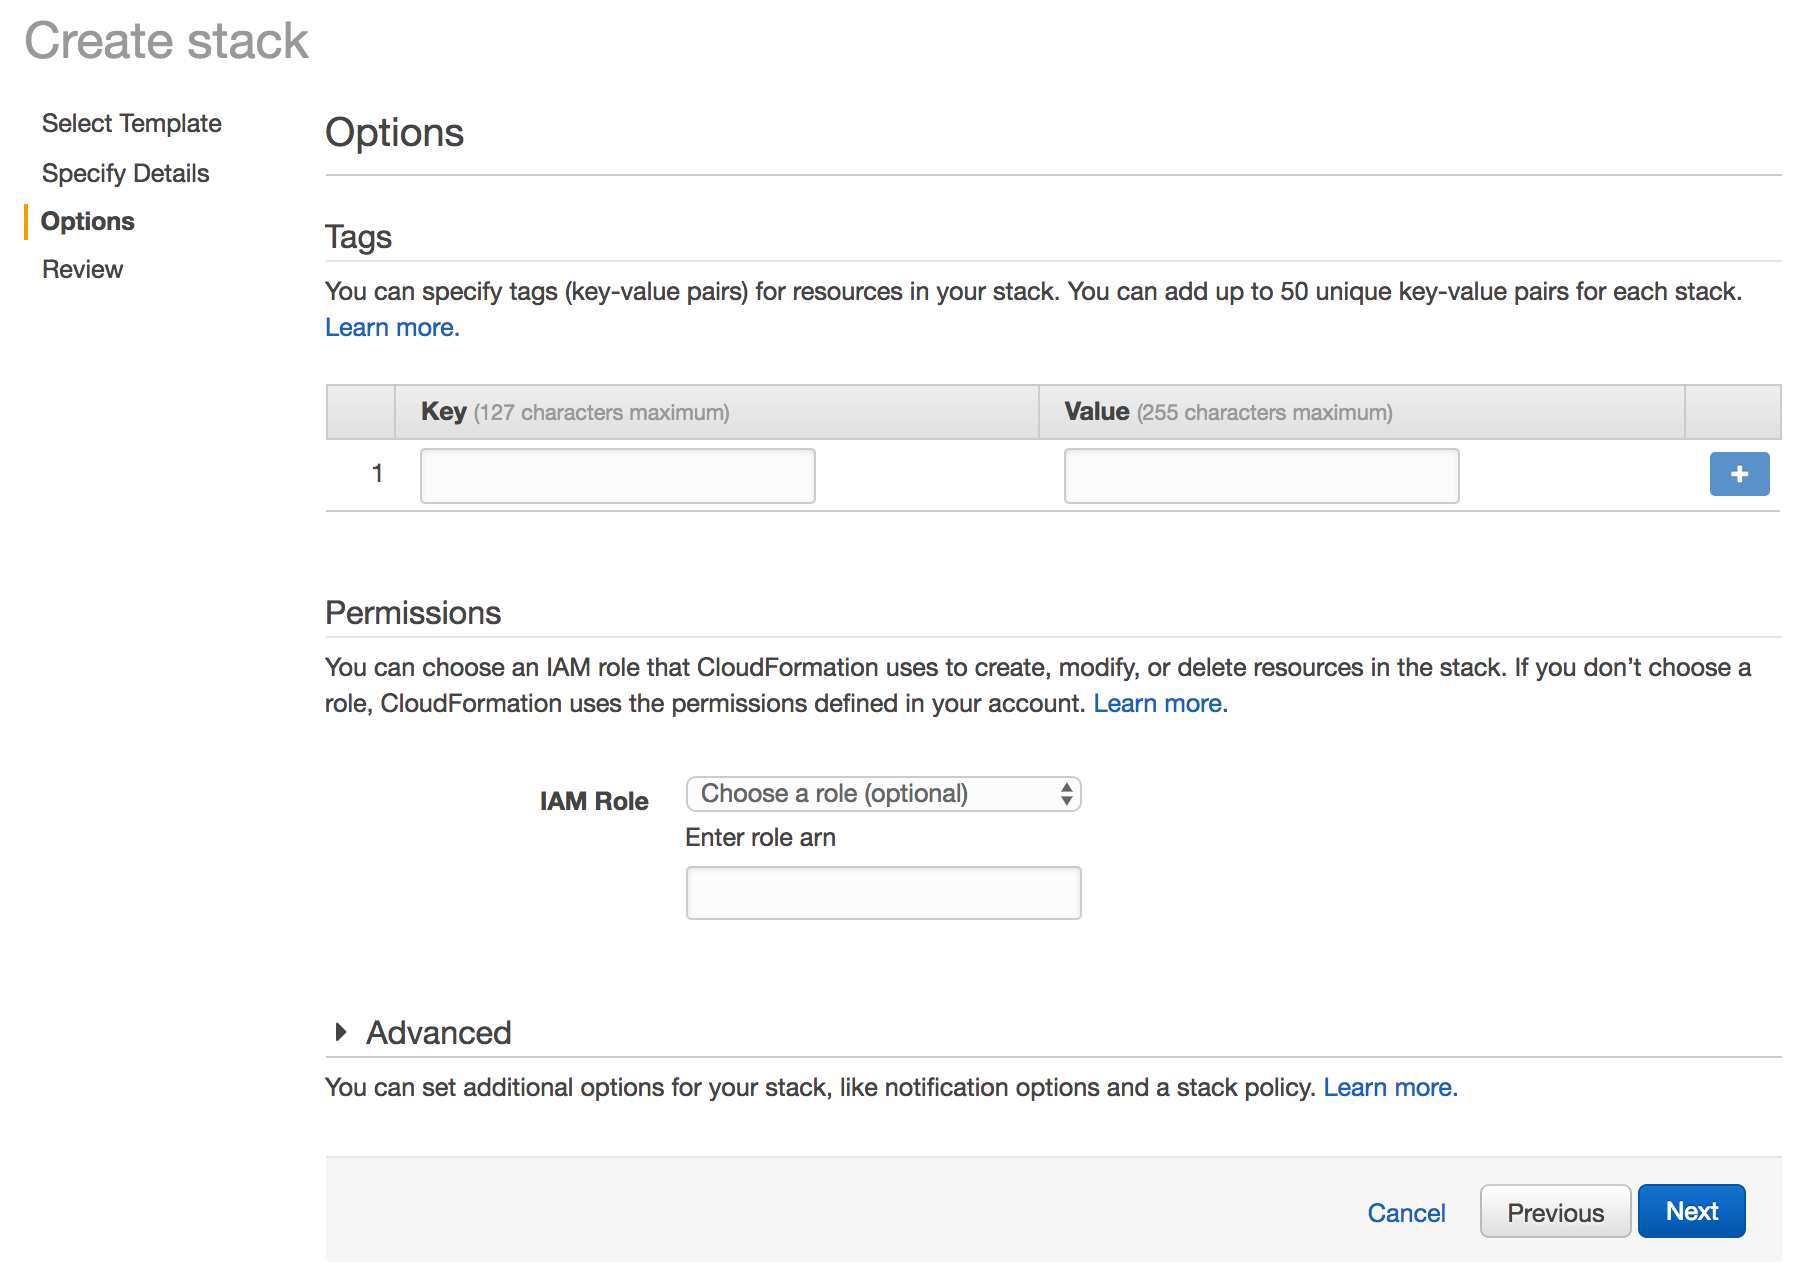
On "Options" page feel free to customize tags or assign an IAM Role to access other resources like S3 Buckets.
Review your settings and click on the Create Stack button to start the creation process.
 After a few minutes, the instance creation is complete.
 Click on the Refresh button on the top right corner of the page now and then as it doesn't auto-refresh.
Select the line that shows your new CloudFormation stack, then the Outputs tab at the bottom. It shows the URL at which you can reach your brand new Nuxeo Platform.
Note that it can take a few more minutes for the Nuxeo Platform to be active on that URL as there can still be some installation tasks running at this point.
The template can be used for testing and production purposes. As for every production setup, you will want to check that the configuration suits your needs and tune it as needed: HTTPS setup, disk size, ...