A content view is the definition of a list of documents displayed in the interface. The lists of documents displayed in the UI are the results of a query which you can customize and the definition of the information displayed on the documents. In Nuxeo applications, content views are used in most cases when there is a list of content.
For example:
- to display the content listing of folderish document types (Workspace, Section, Folder...),
- in the virtual navigation views,
- to display the advanced search results,
- for additional document listing that you can now configure and add as a tab on any document type.
A content view definition form is composed of two parts:
- Query and form tab: Define the query that will be run to filter the content listing. You can also define a filter that will enable the user to filter the results of your query.
- Results tab: Design the table of results and the sorting options.
Enablement tab: Configure the conditions for which the search filter will be displayed to the user.
The Enablement tab will be displayed only if you select the flag "Search content view" on the Query & form tab of your content view.
Designing a new content view takes three steps:
- Defining the filter query
- Defining the form for user to input additional filtering
- Defining the results table
Set Your Query Filter
You can define the query that will be executed to filter the content repository and display only the documents relevant in the current repository. The query uses NXQL, the Nuxeo Query Language, an SQL-like query language.
When configuring a content view in Studio, a default query filter is already filled in. You can complete it with more conditions (or totally modify it if you know what you're doing). This default query filter is:
ecm:mixinType != 'HiddenInNavigation' AND ecm:isVersion = 0 AND ecm:currentLifeCycleState != 'deleted'
This filter:
- excludes from search results the documents supposed to be hidden in navigation (
ecm:mixinType != 'HiddenInNavigation'), - excludes the documents whose lifecycle state is "deleted"(
ecm:currentLifeCycleState != 'deleted'), - and sets that only the current version of the document should be displayed (
ecm:isVersion = 0) so as to avoid displaying all versions of a same document in the search result.
You can add as many filter criteria as you need. If the criterion is fixed, such as a specific lifecycle state or author, you just need to add your filter criterion at the end of the default query filter. For example, you could add a criterion saying that you want to exclude documents created by Administrator from the results:
ecm:mixinType != 'HiddenInNavigation' AND ecm:isVersion = 0 AND ecm:currentLifeCycleState != 'deleted' AND dc:creator != 'Administrator'
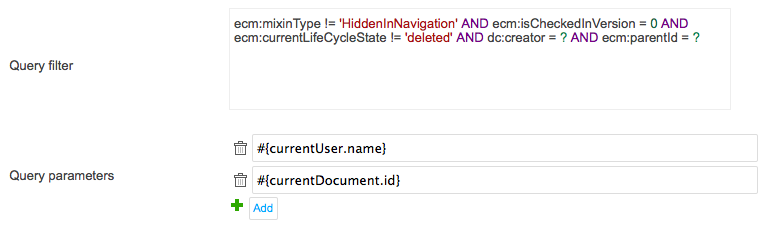
If the criterion is not a fixed value but depends on the context of the document, you should put "?" as a value and add a query parameter. For example, if you want to display only the document created by the current user:
- Add
dc:creator = ?(ordc:creator IN (?)with multivalued parameters) in the query filter. - Add a query parameter with value:
#{currentUser.name}.
When your query filter has several "?" parameters, you must add the query parameters in the same order as the criteria in the query filter.
Note for those already familiar with Nuxeo product customization: the syntax used in these parameters is the same EL syntax used in XHTML files. You have access to the SEAM context. Other sample expressions:
#{currentDate.toString()}: that can be used with date properties, likedc:created > DATE ?#{currentDocument.dc.rights}#{empty currentDocument.getProperty("dublincore","subjects") ? '%' : currentDocument.getProperty( ("dublincore","subjects" )}for multivalued properties#{empty currentDocument.collection.documentIds ? '%' : currentDocument.collection.documentIds}to get the content of a collection. In this case the Query filter should be something like ...AND ecm:uuid IN (?)
More information on NXQL and examples are available on the NXQL dedicated page.
Define the Filter Form
You can set a filter form that can be used:
- to define a search filter, that will be displayed in the Search tab of your application,
- to filter the content of the folder.
To design the filter form:
Check the Document Content box if you want to create a filter form displayed on top of content table.
- Set the number of columns and rows using the Add column, Add row or Set Table Size buttons.
- Drag and drop the widget corresponding to the criterion you want to display from the widget list into an empty table cell.
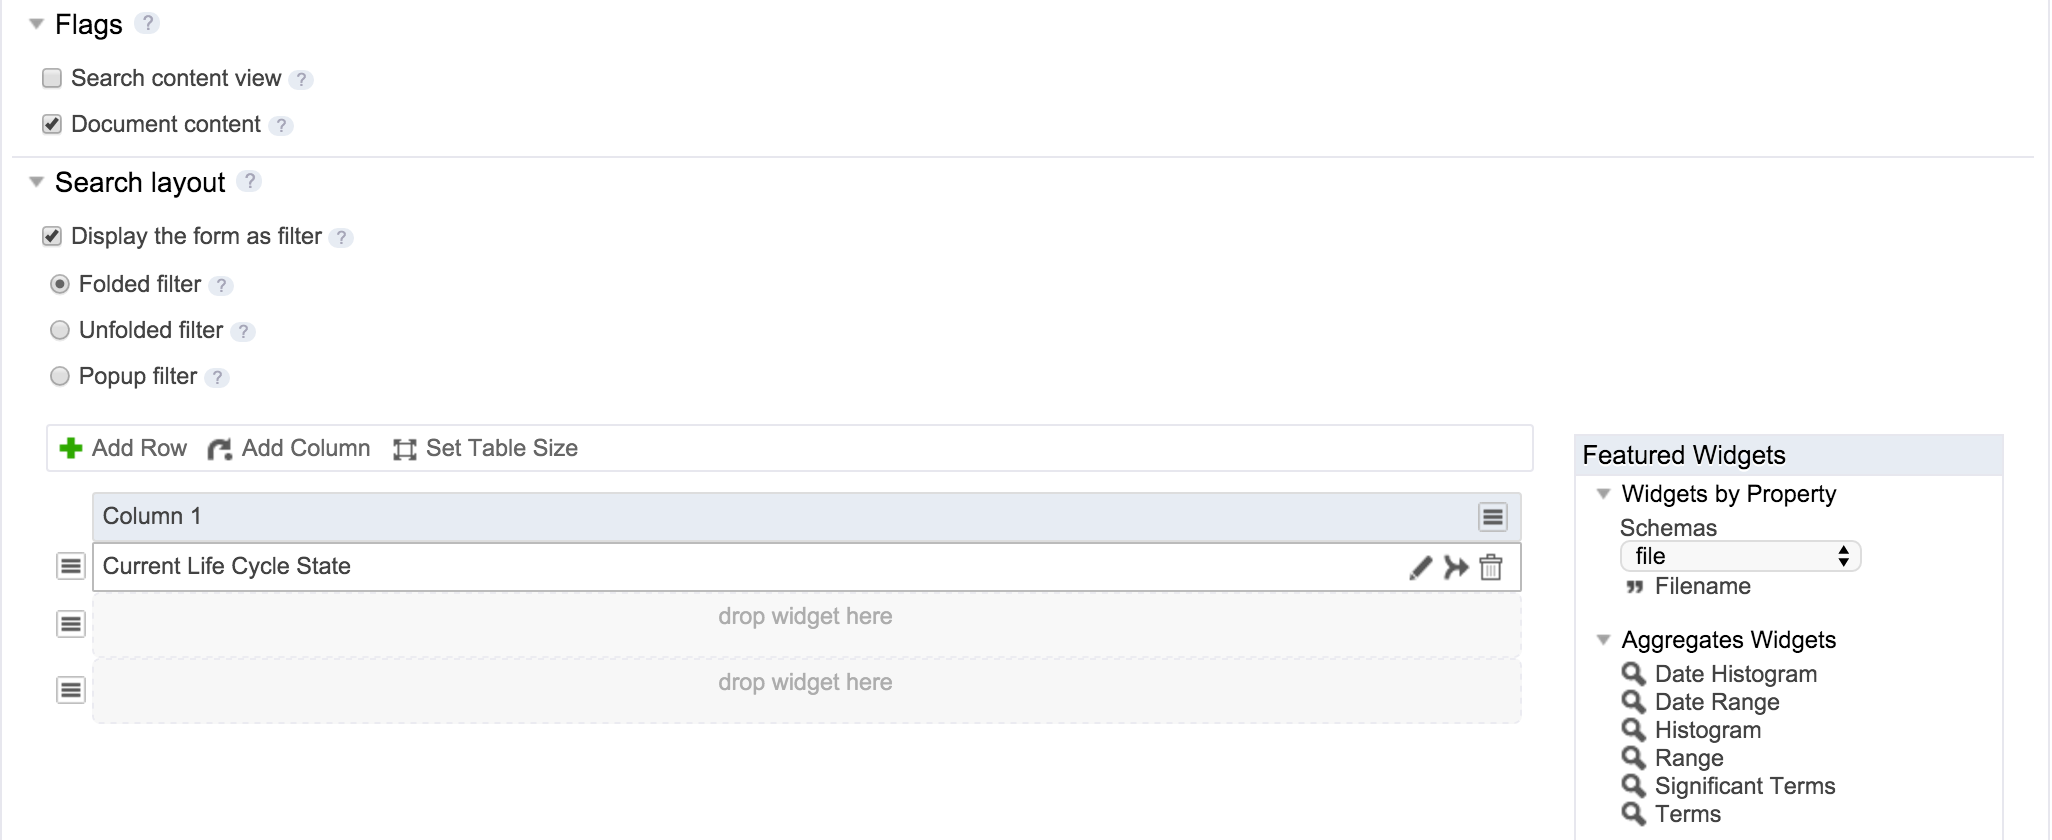 The widget is added in the content cell.
- Click on the icon
 to edit the widget and edit the search field's label, search operator, sort criterion, etc.
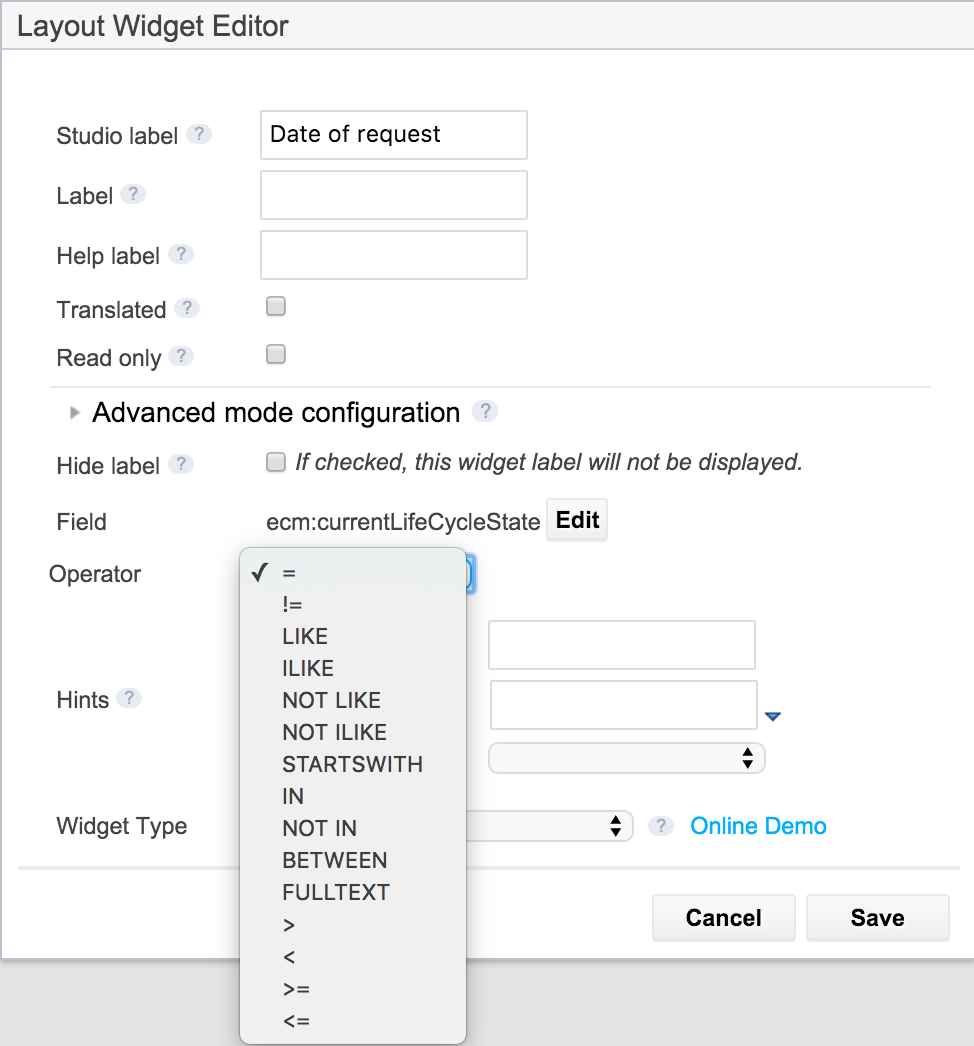
- When done editing, click on the Save button.
- Repeat these steps until your form is complete.
- Click on the Save button to save your changes.
Configure the Result Layout
Search results and content listings are presented in a table. You can configure the columns as well as the information on the documents that will be displayed in your content view.
To configure a result layout:
- Go on the Results tab.
- Set the results parameters you want to be applied (see below for more information on the results parameters).
Define the information that will be displayed to users in the result table:
- Set the number of columns and rows using the Add Row, Add Column or Set Table Size button. The blue first row of the table is the columns title row.
- Drag and drop the widget corresponding to the information you want to display from the widget list into an empty table cell.
The widget is added in the content cell. It is also automatically added in the title cell.
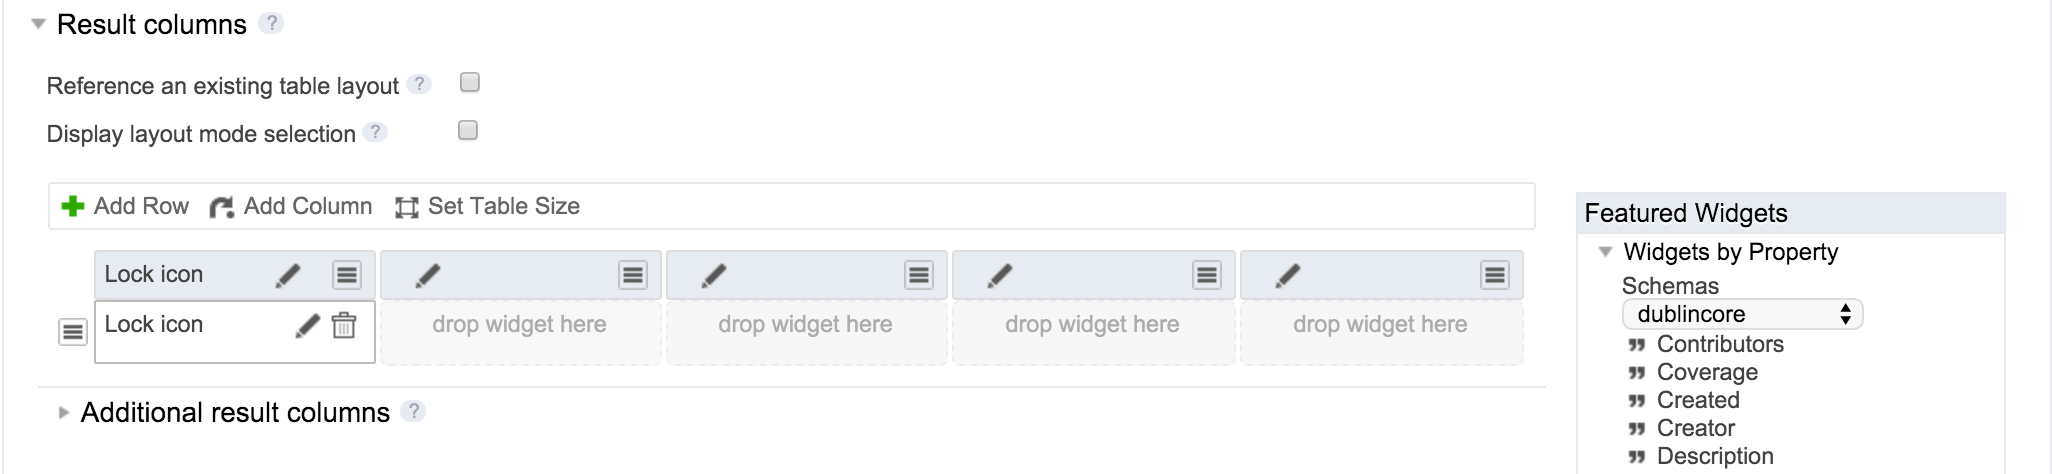
- Edit the title widget by clicking on the icon in the first row. You will also have to enter the sort criterion that will be used for that column.
- Edit the widget information itself by clicking on the icon on the second row.
Repeat for each widget you want to drop.
You can also add multiple rows: one result line is layered on various real lines in the result table, although this is not a very common use case.
If you are editing the advanced search results layout, repeat these steps for the additional results columns that users are able to select.
- When you have configured your default columns and the additional columns, click Save.
Results parameters
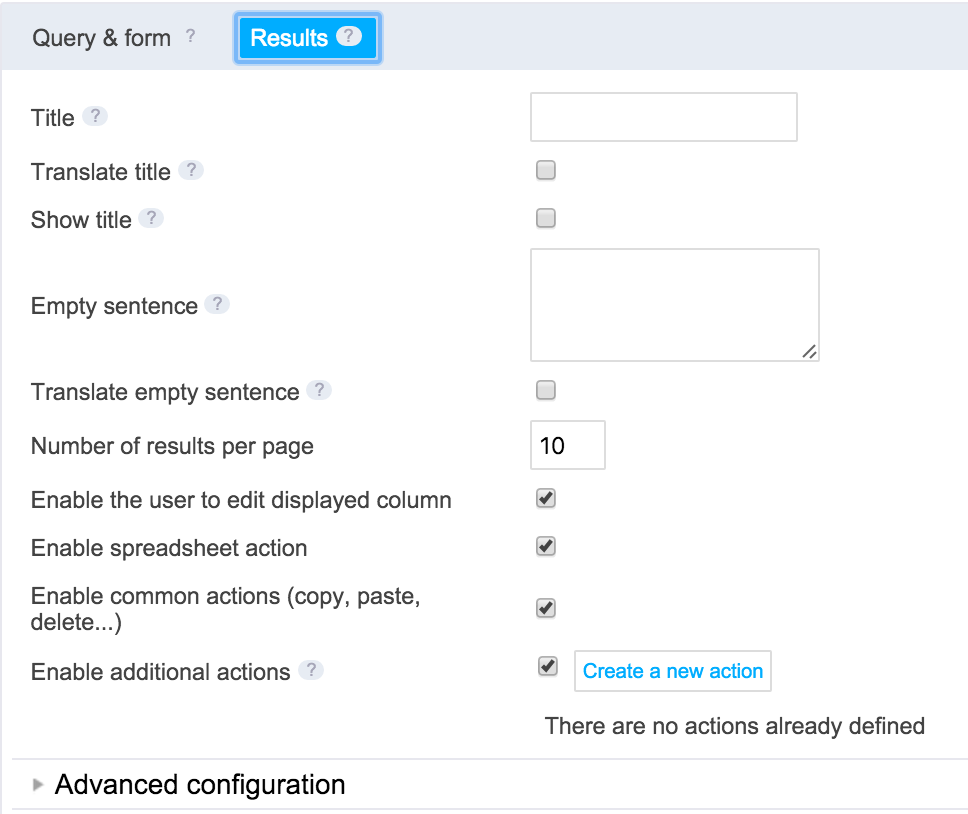
The first part of the result configuration form is dedicated to setting up some general parameters about the results that will be displayed.
| Parameter | Description |
|---|---|
| Title | The title that is displayed on the page or when exporting the content view results. |
| Translate title | Check this if the title is a message that needs to be translated. |
| Empty sentence | The sentence displayed when there are no results. |
| Translate empty sentence | Check this if the sentence displayed when there are no results is a message that needs to be translated. |
| Number of results per page | Indicate how many documents should be displayed on a page. |
| Enable the user to edit displayed column | Indicate if the user can edit what column should be displayed from this view. |
| Enable spreadsheet action | Indicate if the Spreadsheet action (if the addon is installed) should be displayed from this view. |
| Enable common actions | Indicate if the default document list toolbar (buttons Copy, Paste, Delete...) should be displayed from this view. |
| Enable additional actions | You can define new buttons or actions that will be displayed next to the default document list toolbar: Click Create a new action to define a new user action (button, icon or link) to be displayed below the list of documents. |
Use The Content View
There are several ways of using the content view you configured in your Nuxeo Platform application:
- In the search tab feature, so as to add a new filter set. You just need to click on the Search content view checkbox, in the Flag section of the Query & form tab of your content view in Studio.
- In any custom tab, using the Content View widget.