This add-on is deprecated since Nuxeo Platform 6.0.
Assets are imported in the Asset library, at the root of the domain.
You need to have Write permission on the Asset library to be able to import assets in DAM.
There are several ways to import documents in DAM:
- form-based creation: this enables you to create an asset by filling in a form and filling in a minimum set of metadata on the asset;
- drag and drop creation: you can either quickly import asset by dropping them in the DAM main area without filling any metadata or by doing a batch import with metadata.
Importing a Single Asset
You can import an asset individually using a form, that enables you to fill a minimum set of metadata (see below).
To import assets individually in DAM:
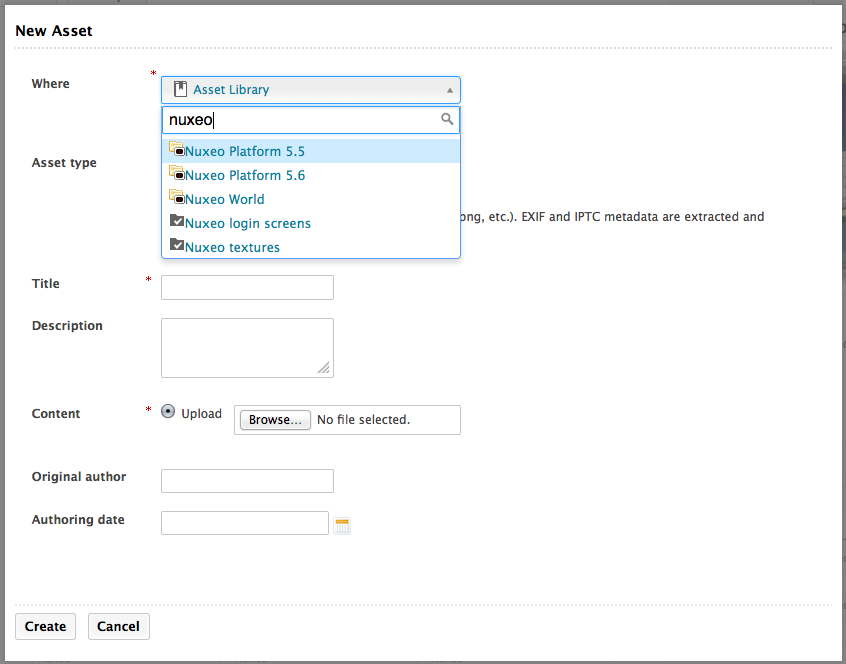
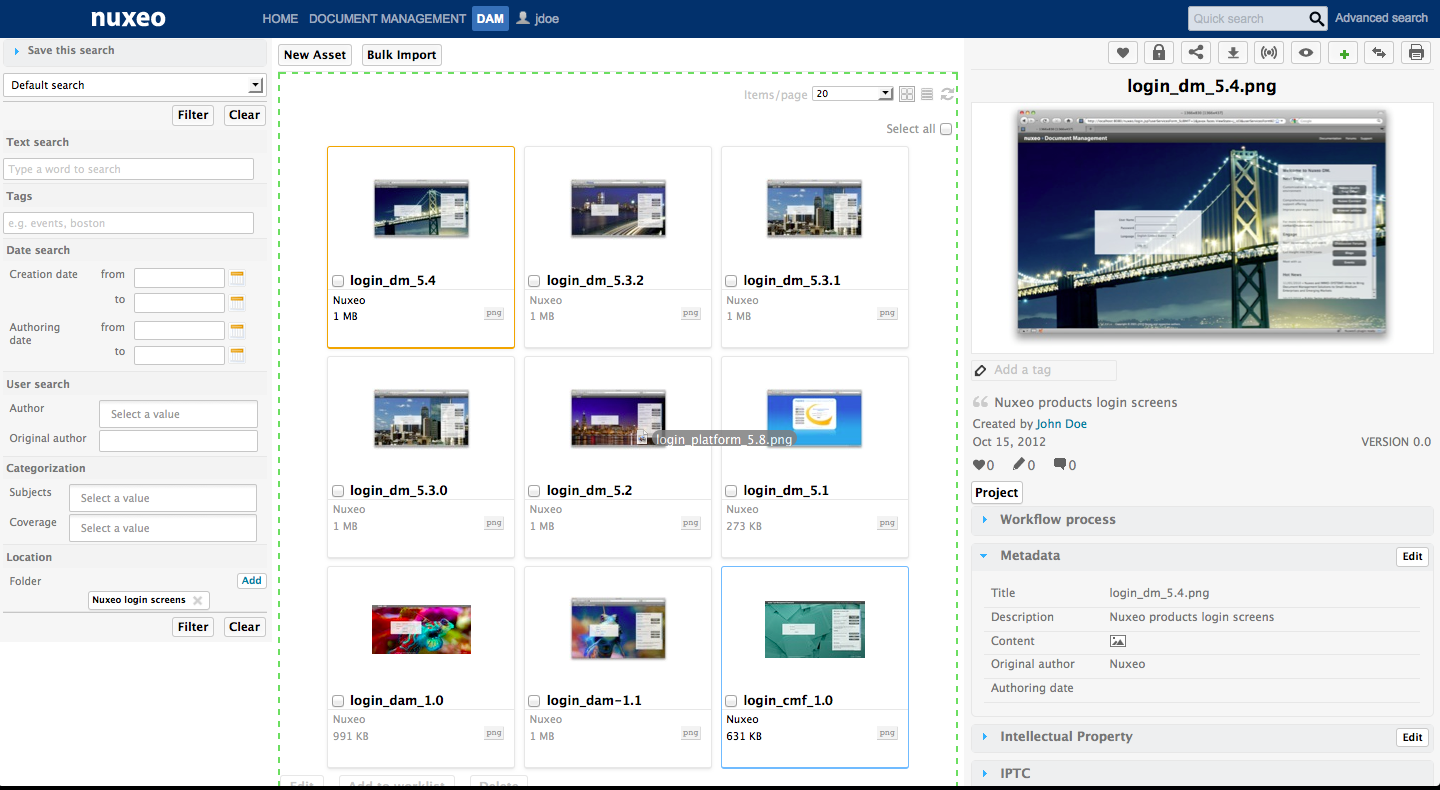
- In the middle pane of the DAM tab, click on the New Asset button below the main tabs. The "New Asset" window is displayed.
- Select where to create the asset and what type of asset you want to create.


Fill in the creation form and select the file to upload.
Click on the Create button. Once the import is done, you are displayed the content of the DAM tab. By default, if you don't select a specific folder, assets are created at the root of the Asset library domain, but they can be reorganized in folders from the Document Management interface at any time.
Asset metadata
|
Field |
Description |
|---|---|
| Title | Name of the asset. |
|
Description |
A textual description of the asset. |
|
Original author |
Name of the person who created the asset (photographer, graphic artist, name of a company or organization, etc.) |
|
Authoring date |
Date at which the content was created. |
This is the default product metadata set, that can be adapted to your own properties.
Importing Assets by Drag and Drop
Just like you can create document by drag and drop in the Document Management interface, you can also drop assets in DAM to import them. The behavior is a little different from the DM one however, to be adapted to a DAM application. In DAM, you have two drag and drop imports:
- quick import on the DAM main view, without metadata filling in;
- smart import with metadata, accessible from the Bulk import button.
For extensions installation, check the page Installing Drag and Drop Extensions.
Quick Import
You can easily import one or several files in DAM by dragging them for your desktop and dropping them in the main area of DAM. Assets are then automatically created at the root of the Asset library: the asset's name is the file's name with its extension. The assets have no description and no metadata filled in. The type of asset is determined by the system from the file extension: .png are picture assets, .mov video assets, .mp3 audio assets. See the Supported File Formats page for all supported formats.


Smart Import
Import with metadata is available only on browsers that support the HTML 5 drag and drop standard. Dropping assets on the drop zone using Internet Explorer will actually create the assets directly, as if you dropped them in the main area.
You can also import assets and fill their metadata in the import process. This prevents later edits of the assets and helps having more accurately indexed and so easier to find assets.
To import one or several assets with metadata:
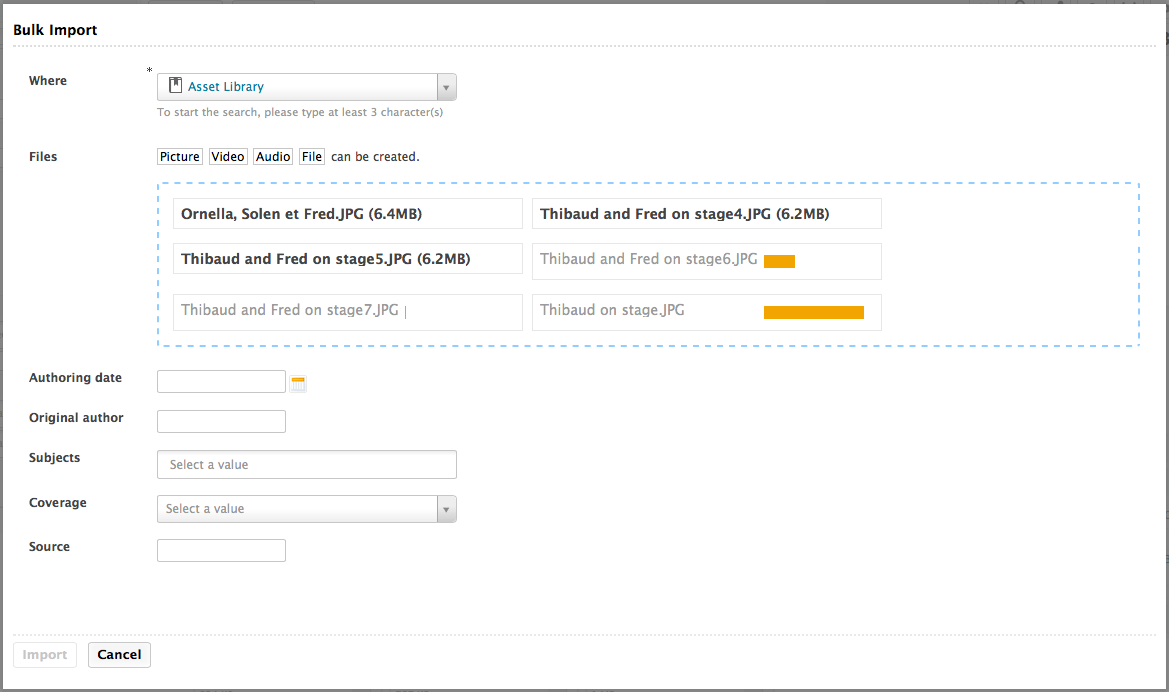
- Click on the Bulk import button on top of the assets. The Bulk import window pops up.
- Search for the folder where you want to import the assets.
- Drag your assets from your desktop to the window's drop area and drop them.
Files are pre-uploaded.


Fill in the metadata on the form below the drop area. The metadata displayed correspond to the available fields filters available in the left pane.
Click on Import button. Assets are displayed in the DAM main tab.