The Nuxeo Platform allows the import of documents from your desktop using drag and drop.Drag and drop is based on the HTML 5 standard and is available on all browsers that support the HTML 5 drag and drop, without extension. Basically, this includes Firefox 3.6+, Chrome10+, Safari 5+, IE 10+ (which means all the browsers supported by Nuxeo Platform 6.0).
It is also possible to move documents and publish them using drag and drop. Based on JavaScript these features are available on all JS-compatible browsers.
Creating Documents
You can use drag and drop to easily import content into Nuxeo or just to create one document at a time. Two types of import are available:
- quick import, that enables to quickly create documents in workspace;
- import with metadata, that enables to fill in metadata of the document(s) before they are created in the workspace.
Quick Import of Documents
To import content into Nuxeo, drag an item from your computer and drop it into a workspace. The document is then automatically created in the workspace and its title is the name of the original file, and no metadata is filled in. You can also drop files in your worklist. The document is then created in your personal workspace. You can drag and drop one or more files in Nuxeo.
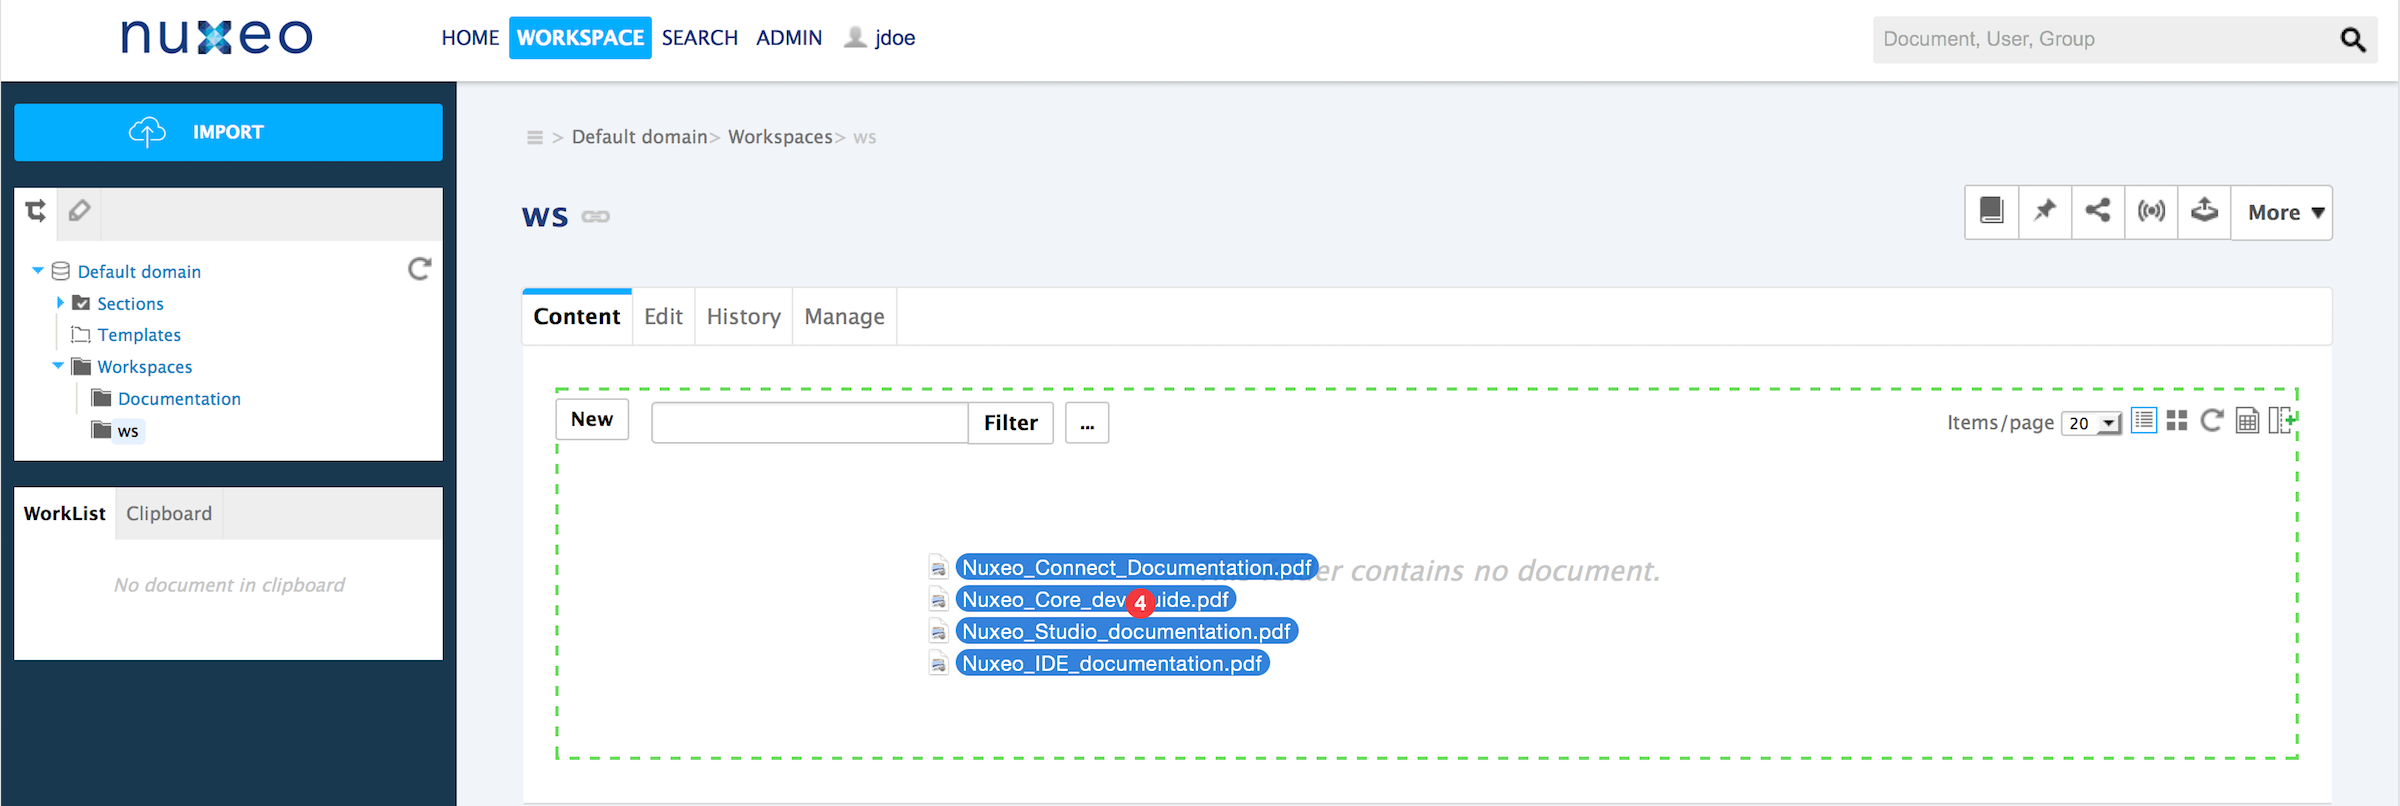
You can drop any file type in Nuxeo.
Here are some examples of most commonly used item types and their output in Nuxeo:
| Item type | Document created in Nuxeo |
|---|---|
| Microsoft Office file | File |
| OpenOffice.file | File |
| .txt file | Note |
| Picture (.jpg, .png, etc) | Picture |
Import with Metadata
It is possible to do a drag and drop import of documents with an additional step to fill in some metadata. This prevents users from editing the documents after the import is done.
To import documents with metadata:
- Drag your file from your desktop to the workspace main area in the browser, but don't drop it. The drop area is highlighted in blue.
- Stay on the workspace a few seconds until the drop area is highlighted in green.
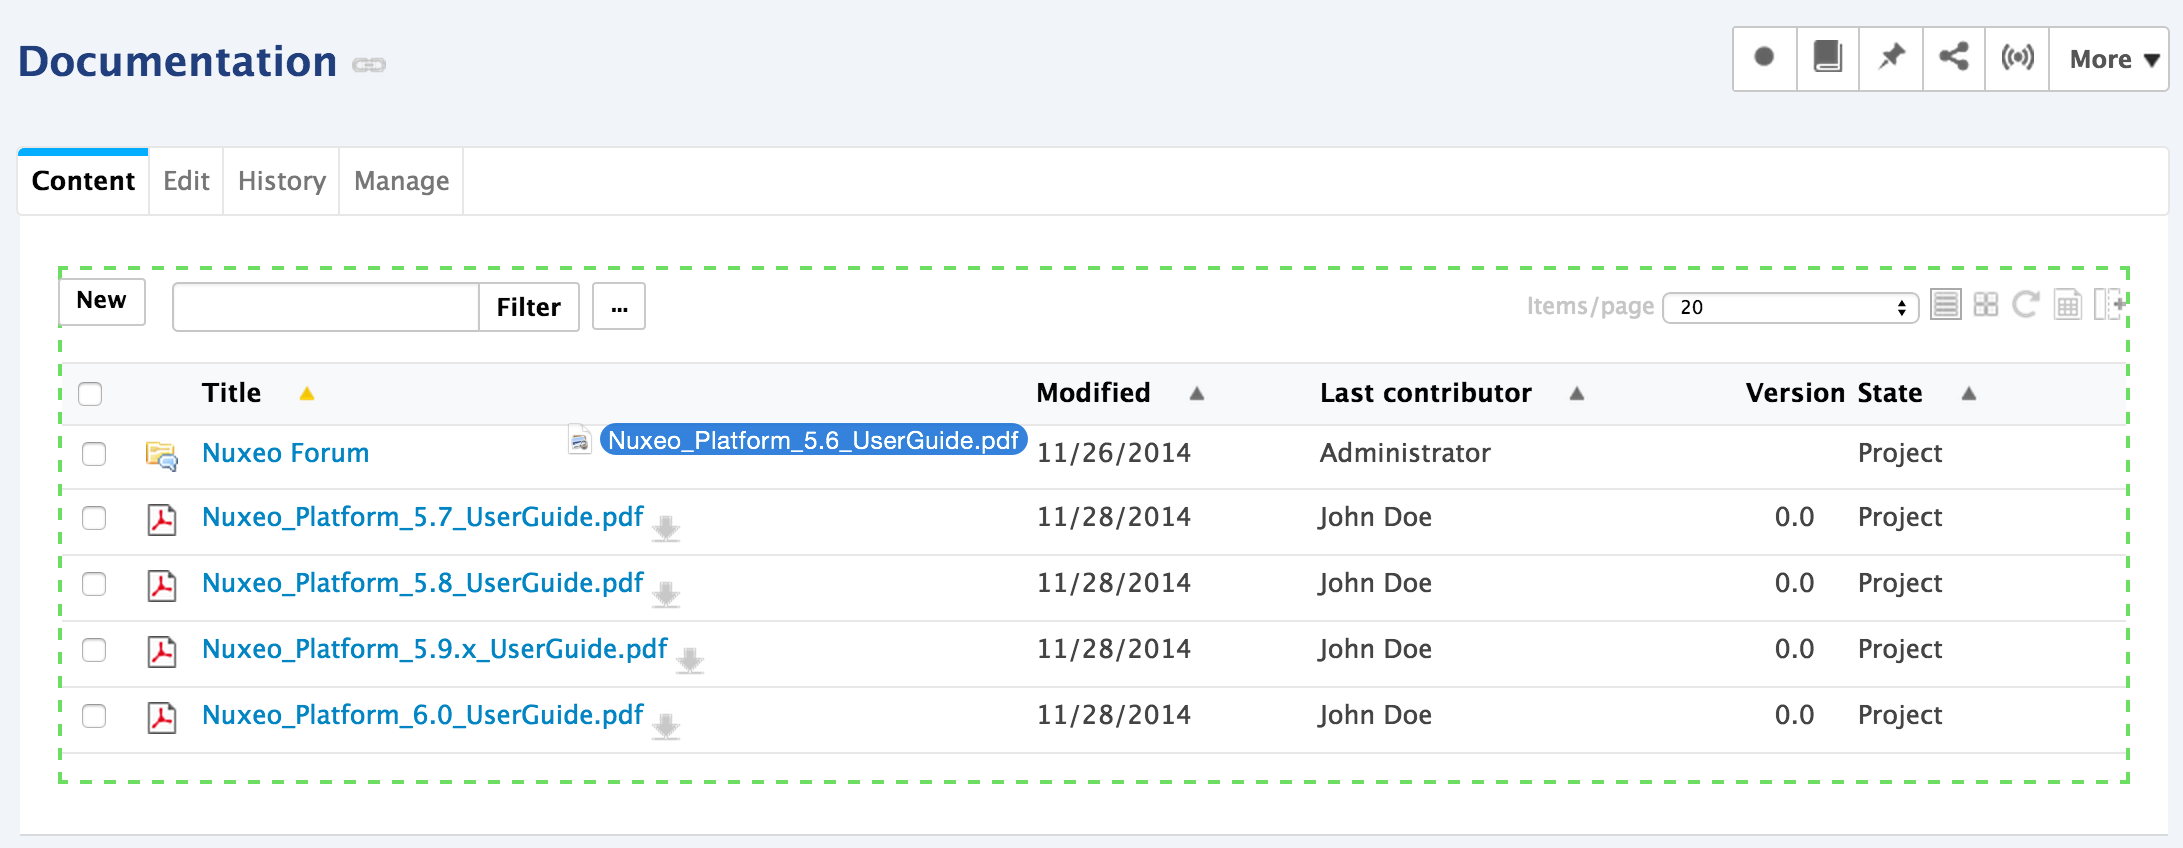
- Drop the file.
The file is uploaded. When the upload is done, a "Continue" button is displayed in the top right corner of the page and an icon is displayed in the center of the page.
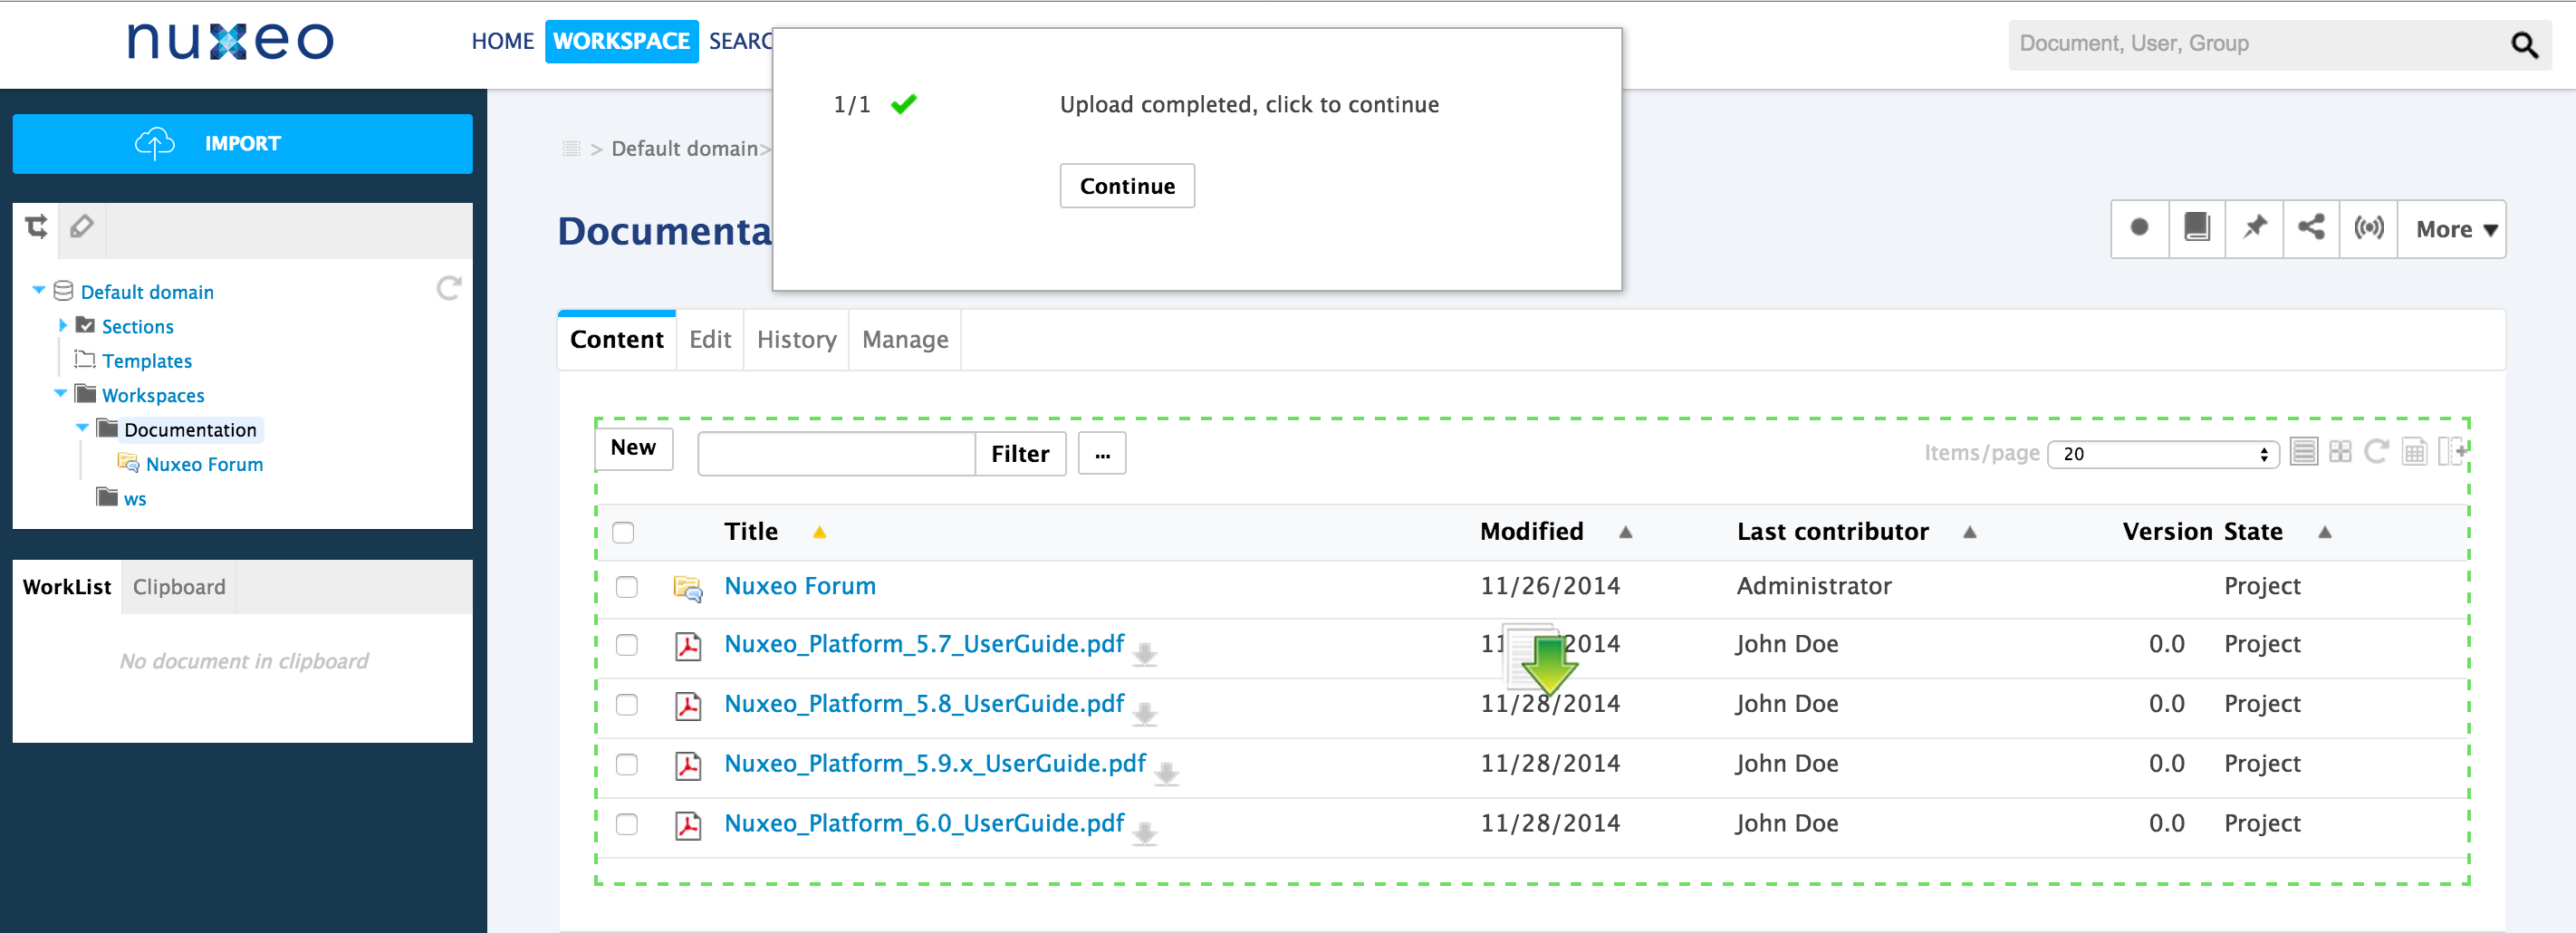
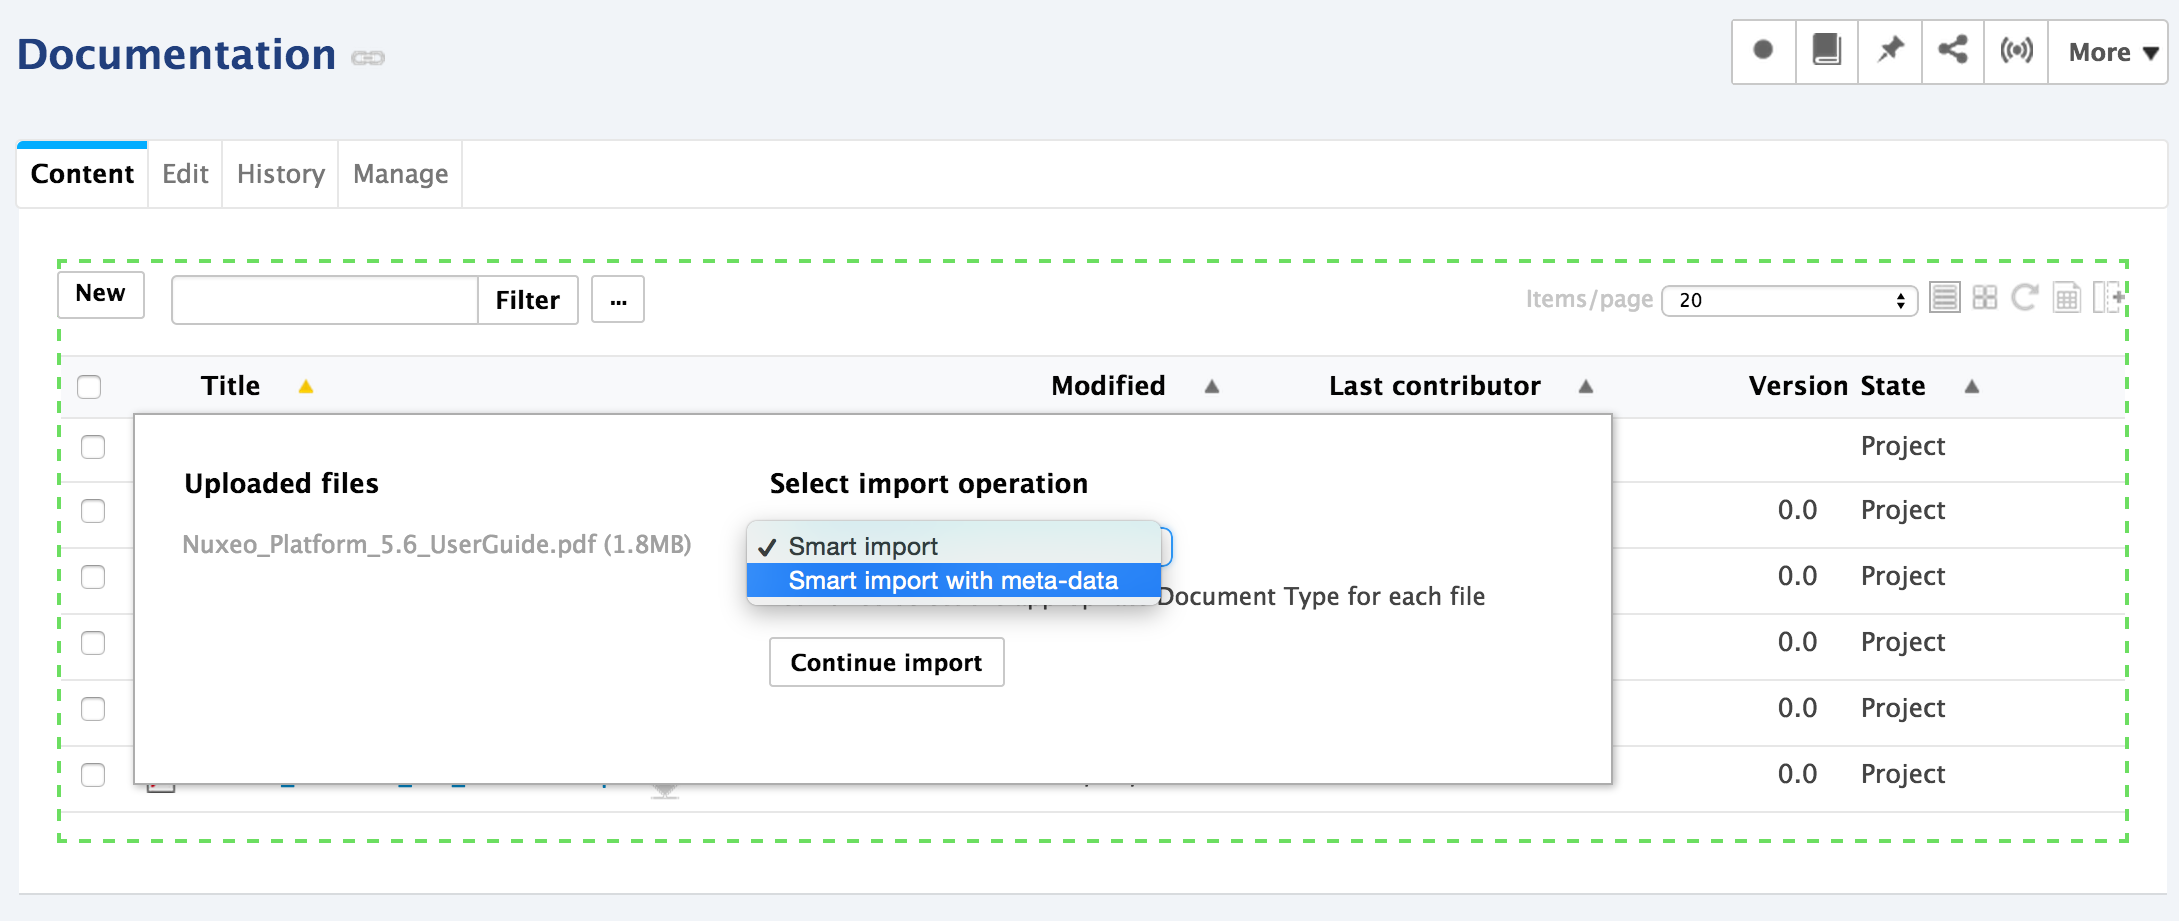
- Click on the icon or the "Continue" button. A window pops up, that enables you to select if you want to do a quick import (smart import) or an import with metadata.
- Select Smart import with metadata and click on the Continue import button.
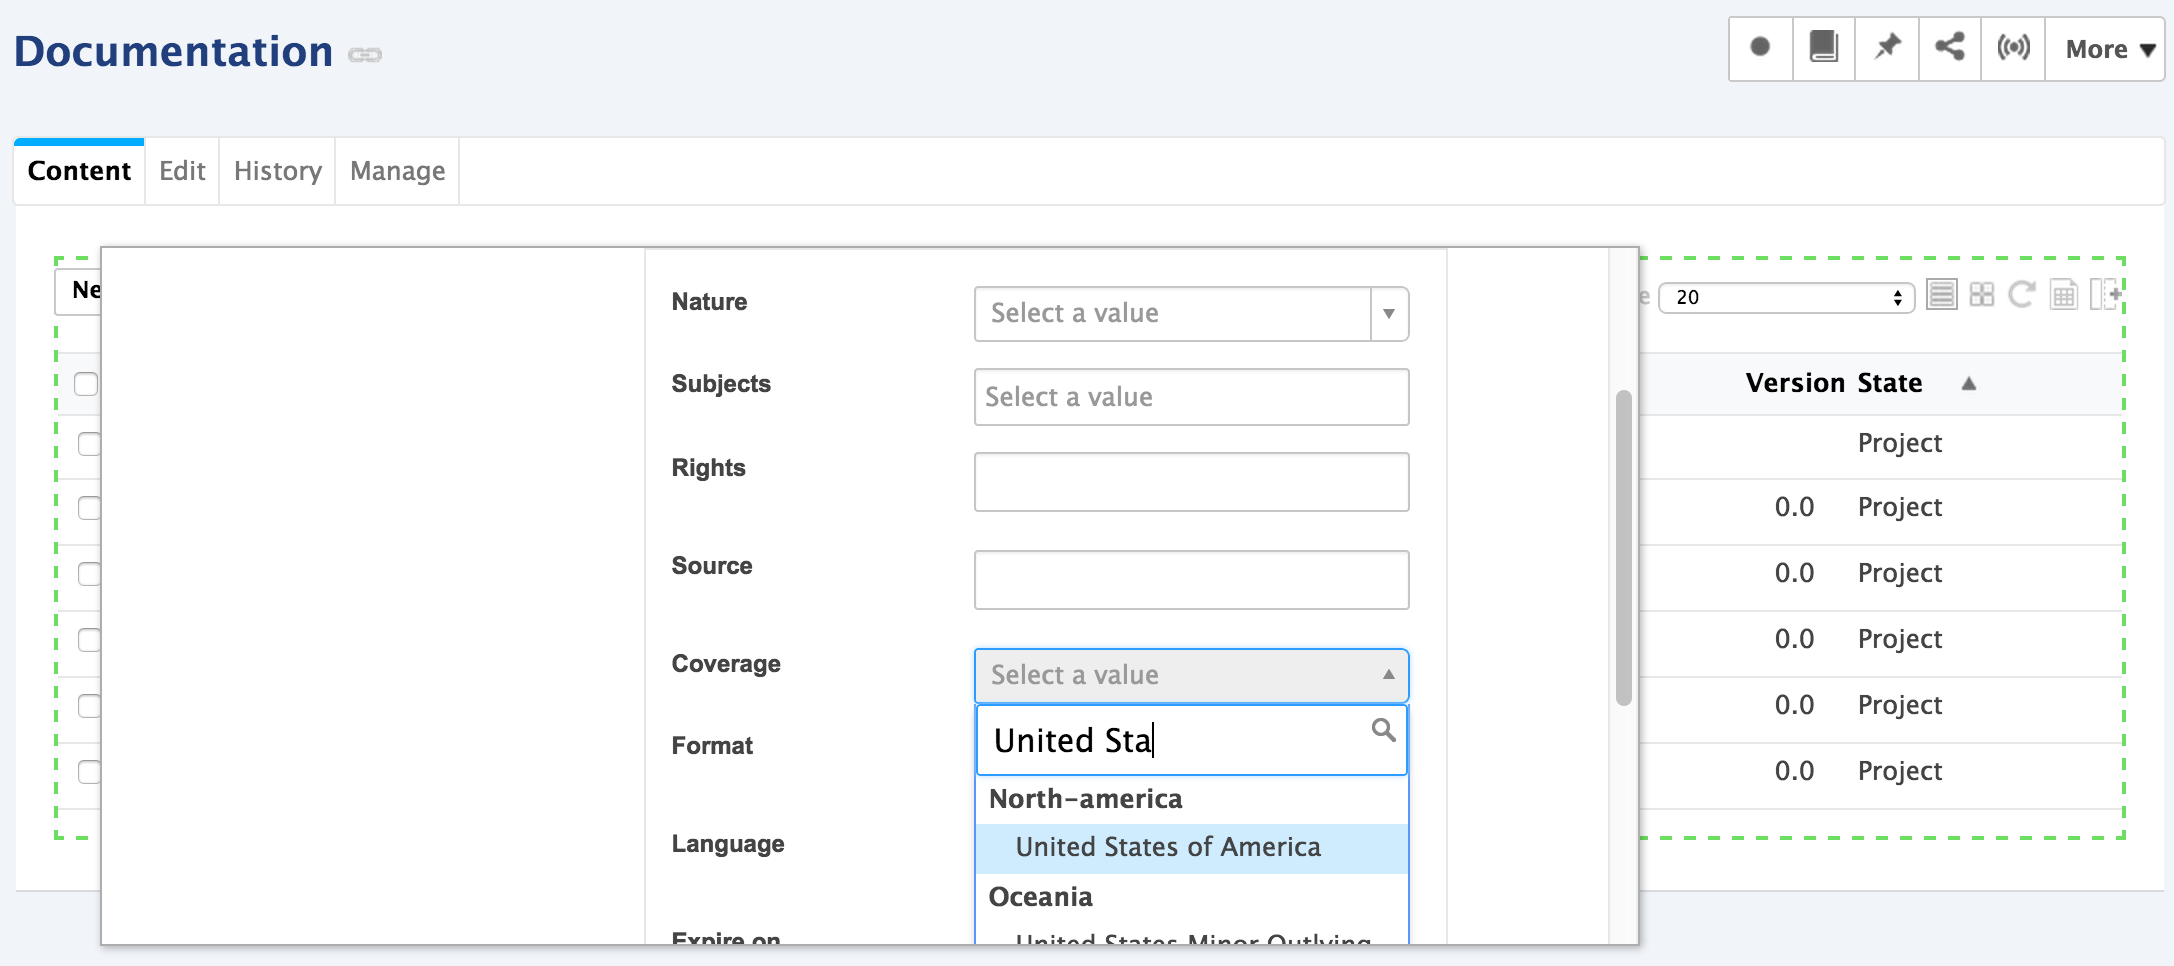
 The metadata are displayed on the pop up window.
- Fill in the metadata that you need and click on the Continue button.
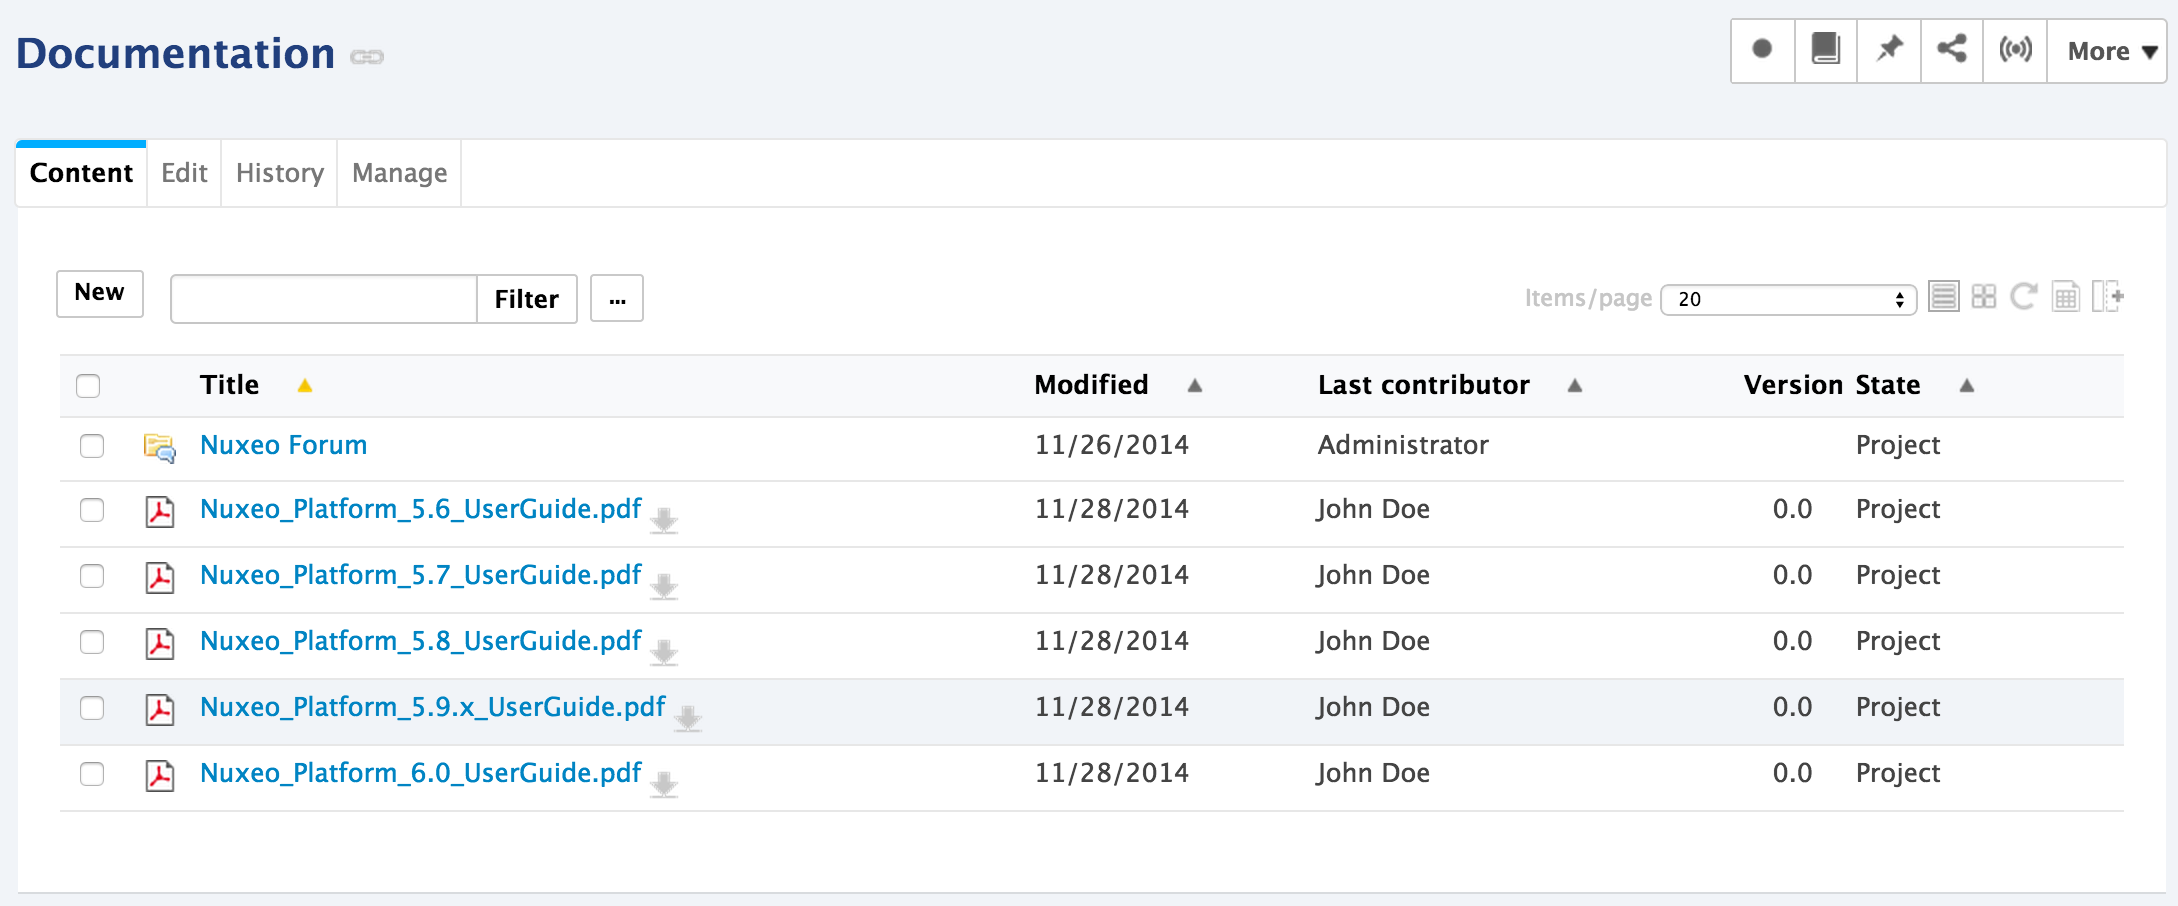
 The file is created with the filled in metadata.
Moving Documents
You can move documents individually from a workspace to another using drag and drop.
- Go in the workspace where the document to move is located.
- Unfold the navigation so the target workspace is visible.
- Drag the icon of the document to move onto the target workspace in the navigation tree until the workspace is highlighted, and drop the document icon.
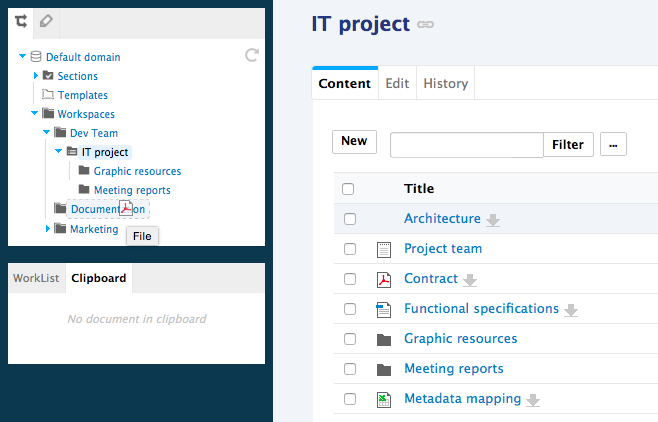 The document is immediately moved.
Publishing Documents
It is possible to publish documents individually using drag and drop. This requires that you have the right to directly publish documents in the target section, i.e. that you have the Write right in the section.
To publish a document using drag and drop:
- Go in the workspace where the document to publish is located.
- Unfold the navigation so the target section is visible.
- Drag the icon of the document to publish onto the target section in the navigation tree until the section is highlighted, and drop the document icon.
 The document is immediately published.