The Nuxeo for Adobe CC connector enables Adobe Creative Cloud users to import assets into an InDesign document directly from the Nuxeo repository. Link to the repository is maintained to facilitate updates of the referenced assets. Additionally, creative users can access assets directly from Illustrator or Photoshop to make edits and trigger update warnings in InDesign.
Requirements
Nuxeo for Adobe CC works with Adobe CC 2020 and 2021 and requires Nuxeo Platform 10.10 or newer, along with the appropriate Nuxeo for Adobe CC marketplace package installed on your Nuxeo instance. Make sure that the Nuxeo DAM addon is installed on your instance and, ideally, that the DAM external template has been included in your Studio package (template should not be required, however).
Support
For support related to the connector, please contact Nuxeo Support via your regular support channels.
Installation
Installation is made of two-steps:
- Install the server-side Nuxeo Package available from the marketplace.
SSO support requires an additional cloud consumer redirect URI
https://5tlkhjwj6g.execute-api.us-west-1.amazonaws.com/Prod/callback/nuxeoto be added to the existing OAuth 2 Cloud consumer entry included as part of the marketplace package. This can be modified by an Administrator via the JSF/Web UI administration panel/cloud services section for cloud consumers or via API as described in our Nuxeo documentation.
Please contact your Nuxeo Account Executive for access to the local client-side plugin installation .pkg (Mac) or .exe (Windows).
Install the local client package on each machine where the connector will be used.
If you have used a previous version of the Nuxeo Adobe connector, clear the application preferences by pressing and holdingAlt+Control+Shift(on Windows) orOption+Command+Shift(on macOS) as you start Photoshop/InDesign/Illustrator.
Once the installation is done, a new extension Nuxeo CC Connector is available within your Photoshop, InDesign or Illustrator application.
Licensing Information
Once Nuxeo for Adobe CC is properly installed, launch InDesign CC 2020/2021 (licensing dialog does not appear in Photoshop or Illustrator) to see a dialog requesting license information:
- If you have a license key for Nuxeo CC connector (provided to you by Nuxeo Sales), click Yes to activate now, or click No to activate later. You can activate in InDesign later via the Nuxeo dropdown menu item.
If you have questions related to licensing, contact your Nuxeo sales representative or contact Nuxeo at [email protected].
Using Nuxeo CC Connector
The below information pertains to the local client install of 1.2.16 or newer (available since October 2021).
Logging into Your Server
https://myNuxeoServer.com) and the context path (/nuxeo is used by default).
So your "complete" instance URL might look like: https://myNuxeoServer.com/nuxeo
From the main InDesign, Photoshop or Illustrator menu, choose Window > Extensions > Nuxeo CC Connector
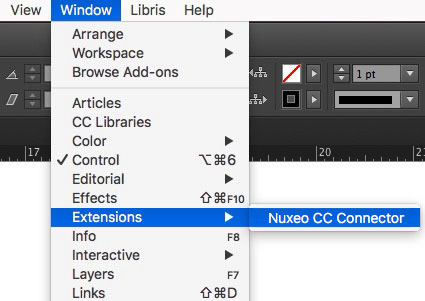
This will launch the connector and the Server Setup panel.
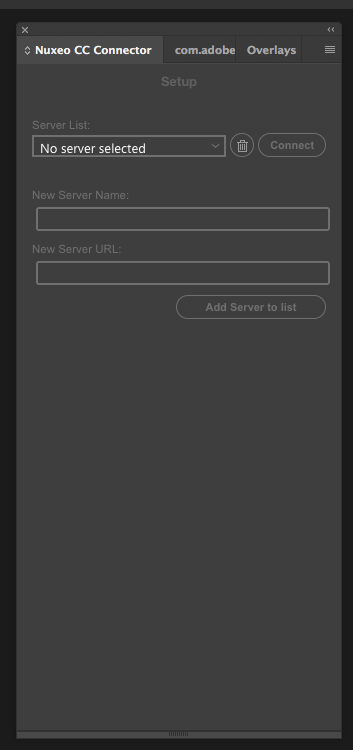
Initially, you will need to create a server listing for your Nuxeo Instance. Once the listing is created, you can simply select it to log in.
Before moving any further, locate your Nuxeo instance URL and determine if you are using the default /nuxeo context path or something else that has been configured by your Nuxeo Administrator.
If you are using a configured context path, please do the following. Otherwise, if you are using the default /nuxeo context path, please jump to To create your server listing
To modify the context path for the connector to use:
- With the connector panel opened as described above, click on the connector burger menu and choose Preferences.
- In the Context Path section, choose to Use custom context path and in the box, type in the portion of the Nuxeo instance URL that follows the / in your Nuxeo instance URL (your context path as described in the info section above). In the example below;
myNuxeoContext. Note do not include the slash / as part of the context path, only what follows.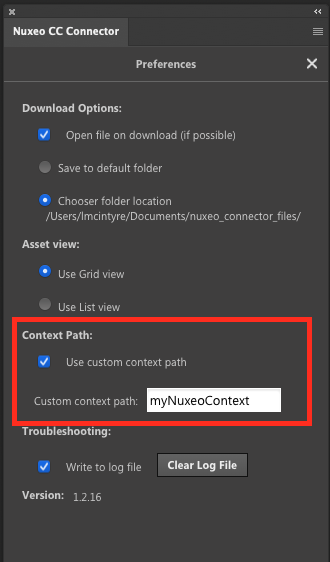
Close the Preferences panel and continue with To create your server listing.
To create your server listing:
- Fill in the field New Server Name with a "friendly value" to represent your Nuxeo instance.
- Fill in the field New Server URL with the address of your Nuxeo instance (this is the same URL you would use to access your Nuxeo instance via the web. Be sure to include the
http/httpsvalue and leave off any/nuxeothat might be included).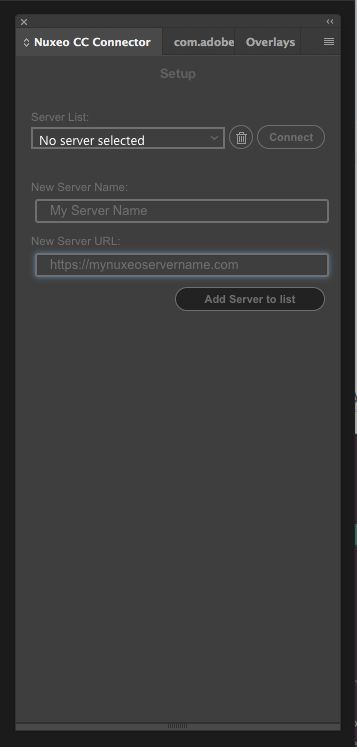
- Click Add Server to List button. You should now see this value in your “Server List”
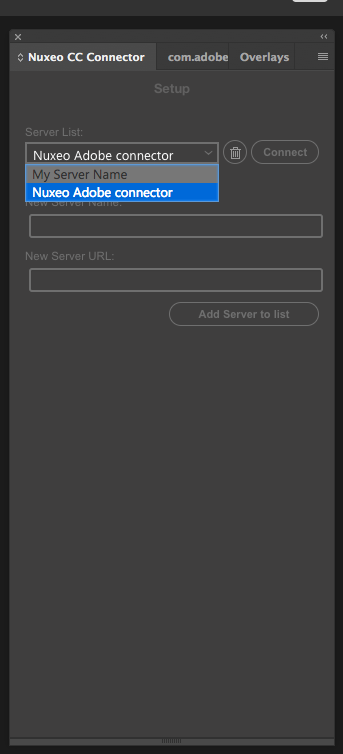
To login:
- Select your server from the list and click Connect. This will launch the Nuxeo login via your default browser.
- Enter your username and password and click Log In. If you have an existing authentication token, you should not need to fill in the username and password. Depending on your browser, once the token has been created/retrieved, you will be automatically redirected back to your Adobe application. If not, simply return to your Adobe application.

You should now see the connector populated with images that reside in your Nuxeo instance.
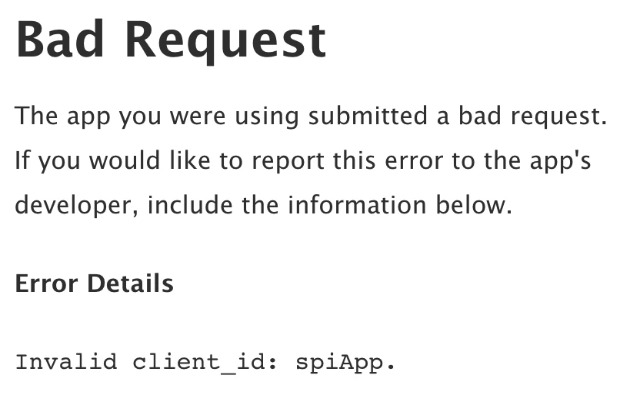
Since version 1.2.12 of the local client install (available April 2021), there is a new cloud consumer item to add to your Nuxeo setup. If you have used the connector before but still get an error message, it is likely that you don't have the additional cloud consumer redirect URI. Contact your Nuxeo Administrator to verify that they have updated the cloud consumer entry as described in the Installation section.
To logout, simply select Log Out from the Nuxeo connector fly out menu.
Preferences
The connector has a number of customizable preferences to enhance your workflow. Below are the preferences available within InDesign.
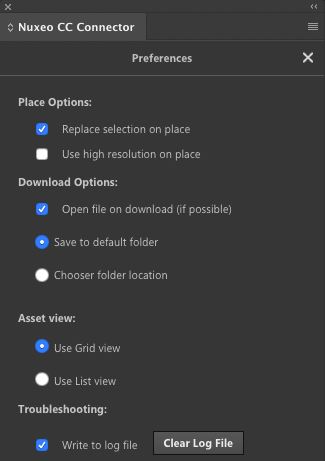
Place Options (InDesign only)
- Replace Selected on place
- When checked: replaces any selected object with the asset you drag onto the page.
- When unchecked: dragging an item to the page, places it as a new object.
- Choose between High and Low Resolution on Place
Download Options
- Open File on Download
- When checked: opens any downloaded file if possible (depends on Adobe app). It is best to have this checked if you intend to use the connector for interacting with Indesign files, as it is the most efficient way to open Indesign files with the connector.
- Save to default folder: saves downloaded files to your
User Documents\nuxeo_connector_files\downloadsfolder.- When unchecked: the User will be presented with the system browser to choose a folder.
- Choose folder location: select the location for your downloads.
Asset View
- Use Grid view: displays assets in a gallery.
- Use List view: displays individual assets at width of the connector panel, providing file name when hovered over the bottom of each asset.
Context Path
- Choose to use a configured context path (only if your Nuxeo Administrator has already configured one for your instance).
- Set the context path to use with your base server URL. Do not include any / slashes in this entry.
Troubleshooting
- Write to log file: when checked, create a log file in your
Documents/nuxeo_connector_filesfolder - Clear log file: click this to clear the log file.
Functional Overview
Finding Content (InDesign, Photoshop and Illustrator)
The connector has three tabs, each with slightly different behavior: Search, Browse and Other.
Each tab uses a different page provider, included with the server-side Nuxeo for Adobe CC package, to control behavior. The page providers can be overridden in Nuxeo Studio to reflect your own content model and needs, such as displaying more results per page. For more information on page providers and overriding them, read the related documentation
Search Tab
When logging into the repository via the connector, the first view you see is the search tab. The search bar supports wildcard operations, as in the example, and search the full-text index of the repository (including file names, and metadata fields).
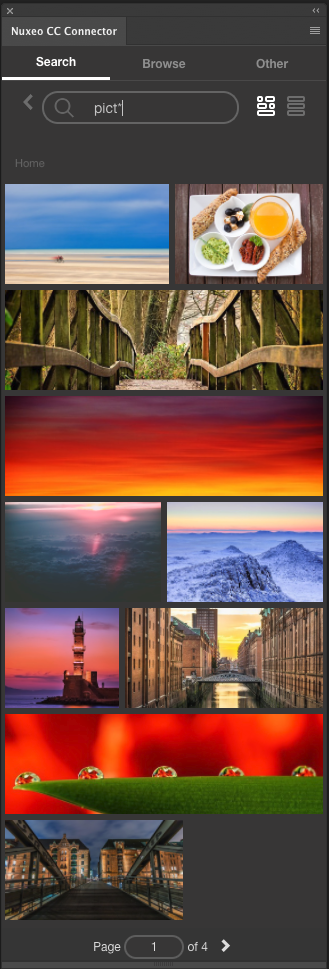
The Search tab allows you to search through all the repository at one time. It uses a page provider adobe-connector-all-images to control the objects searched and the query results.
Once you’ve entered your search terms in the Search field, clicking on the search icon lists the results below.
Results are shown in pages and you can navigate between pages using the arrow keys at the bottom of the panel.
You can also jump to a given page.
Whenever using the connector, if you want to perform a search, you can choose Search from the Nuxeo CC connector panel flyout menu, or just click on the Search widget.
To see more information about the object, double click the thumbnail to see more information. Each object comes with a detailed view containing:
- The thumbnail of the asset
- Filename/title, creator, usage info (mapped to dc:rights) and the lifecycle state.
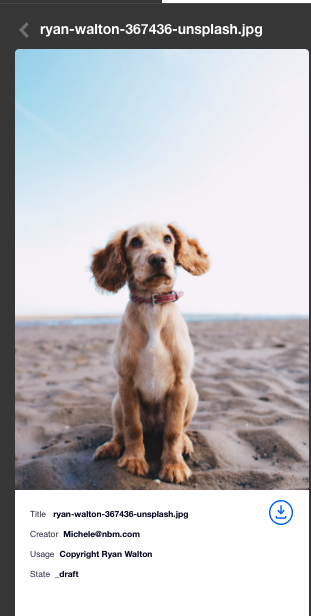
To open a copy of an image, drag and drop the object into your application (you can drag and drop multiple items at one time).
To download a copy of an asset from Nuxeo CC connector, click the blue download arrow to the right of the thumbnail to begin the download process. For more information, see Download Options in Preferences section.
While you can search and open from the search tab, you cannot save directly into the repository from search. You must first navigate to where you want the content to be saved using the Browse tab, then you can save the content.
Browse Tab
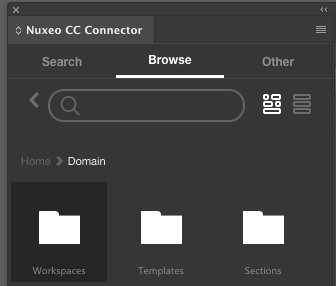
The Browse tab allows you to browse through the hierarchical setup of the repository. It uses the adobe-connector-browse page provider. While browsing, you can still use the search bar; the search content is scoped to the level in the hierarchy that you are currently viewing. You have the choice between a grid view (default) and a list view. You can toggle between view options using the buttons near the search bar.
The Browse tab is easy to use by clicking on the folders in the hierarchy. Note that as you click through the repository, a breadcrumb is generated just above the content view, which allows you to easily go back to any point within your path. Simply click on one of the levels to change location. If your path becomes too long to fit the panel, a slider appears to allow you to move “up” or “down” the path.
As indicated earlier, to see more information about an object, double click into the item to see the detail view, where you can also download the file.
Other Tab
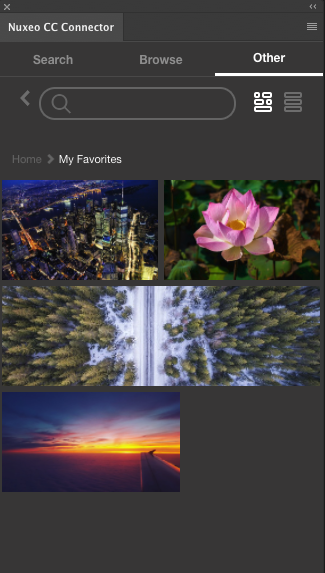
By default, the other tab displays the collections you have access to. You will see the search bar here, but it is not supported within collections.
The Other tab, by default, is configured to work with the Collections within your repository. Two separate page providers are used to surface the collections and their content: adobe-connector-other_primary and adobe-connector-other_secondary. It is called "other" because you could configure it to show any "other" two-step page provider query you want such as "Favorites".
Working in InDesign
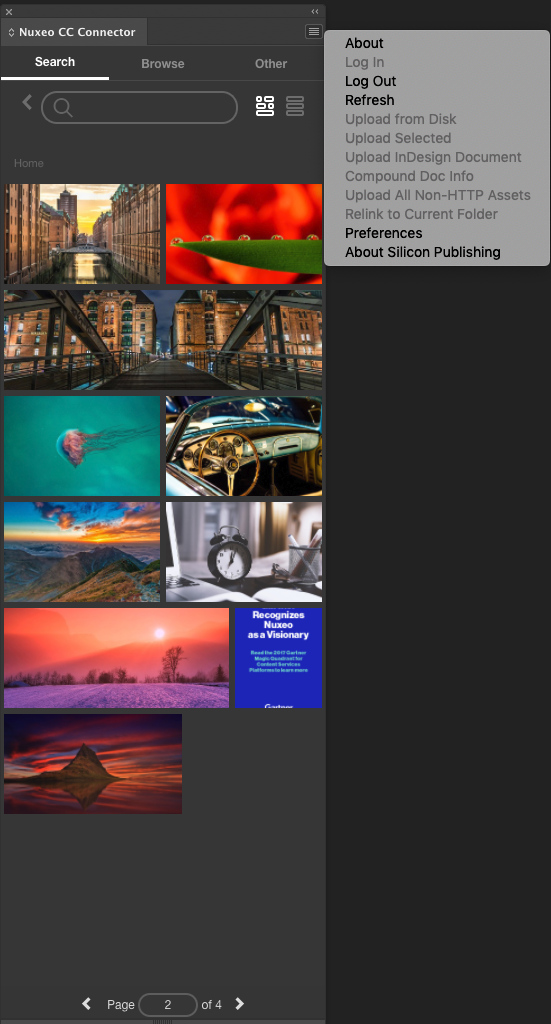
Nuxeo CC Connector Menu Listings (accessed via the burger menu)
The Nuxeo CC connector flyout menu has several options to assist the user:
- About takes you to our website
- Refresh re-establishes an updated connection to your current folder
- Upload from Disk opens your System file browser to upload an asset to your current connector folder
- Upload Selected uploads locally placed assets in InDesign to your current connector folder. After the uploads have occurred, you will notice that the connector will also "re-link" your assets and you should see a Nuxeo URL pointing to the asset in your links panel (instead of a local path).
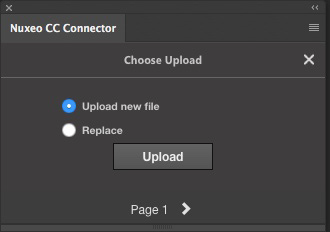
- Upload InDesign Document uploads open (If saved) InDesign doc to your current connector folder. You will be presented with an Upload option to either, Upload New File, or Replace.
- Compound Doc Info ensures HTTP links record a proper ID on the Nuxeo Server
- Upload All Non-HTTP Assets uploads all locally placed InDesign assets from your open InDesign document to your current connector folder. After the uploads have occurred, you will notice that the connector will also "re-link" your assets and you should see a Nuxeo URL pointing to the asset in your links panel (instead of a local path).
- Relink to Current Folder relinks locally placed InDesign assets to the current connector folder, if they have been saved to the location using one of the above methods. In many cases, the connector is taking care of relinking content stored in the repository, and this action is not necessary.
- Preferences opens Nuxeo CC connector Preferences
- About Silicon Publishing takes you to https://siliconpublishing.com
We can use the above menu items to work with the Nuxeo repository from within the Creative Cloud application
Starting from a new INDD file:
- Start with a new INDD file
- Locate items from within the repository to place
Once you’ve found an image to use, drag it into your InDesign document (can be from any view).
Before dropping it, release your mouse button to load your cursor with the asset’s thumbnail. Then drag your image to size and place it into your document.Formats supported for placing include: jpg, png, ai, eps, psd, eps, tif/tiff, and bmp.For local files, place them as usual, then use the connector menu panel to upload them to the repository.
- Select the local files and choose to upload selected items in the menu list or
- Use the menu list and choose to upload non-http items
- Once local items are in the repository, be sure to check that the links have been updated to reflect the location in the repository. If not, then use the relink to current location from the connector burger menu list. This will ensure the links are maintained server-side.
- If you have not already browsed to the location where you want to store the InDesign file, use the browse tab to navigate to your intended destination. Upload the INDD document using the Nuxeo CC connector fly out menu (Upload Indesign Document).
You will be asked if you want to Upload new file or Replace. As a new file, you need to choose Upload new file and then Upload.
Working with an existing repository InDesign file: To open InDesign files stored in the repository, double click on the item in the panel to open the "detail" view for the object (as described above). Use the "download" action/button to open the file. If you do not see the item open, please open the preferences for the connector as described above and choose to 'open file on download'.
After you have worked on your file (following instructions above for placing assets), use the Nuxeo Adobe connector fly out menu to upload the file as before. Use "Replace" to update the same file in the DAM. Use "New" to create a new file in the DAM.
Using the Nuxeo CC connector includes features within the traditional InDesign Links panel as well.
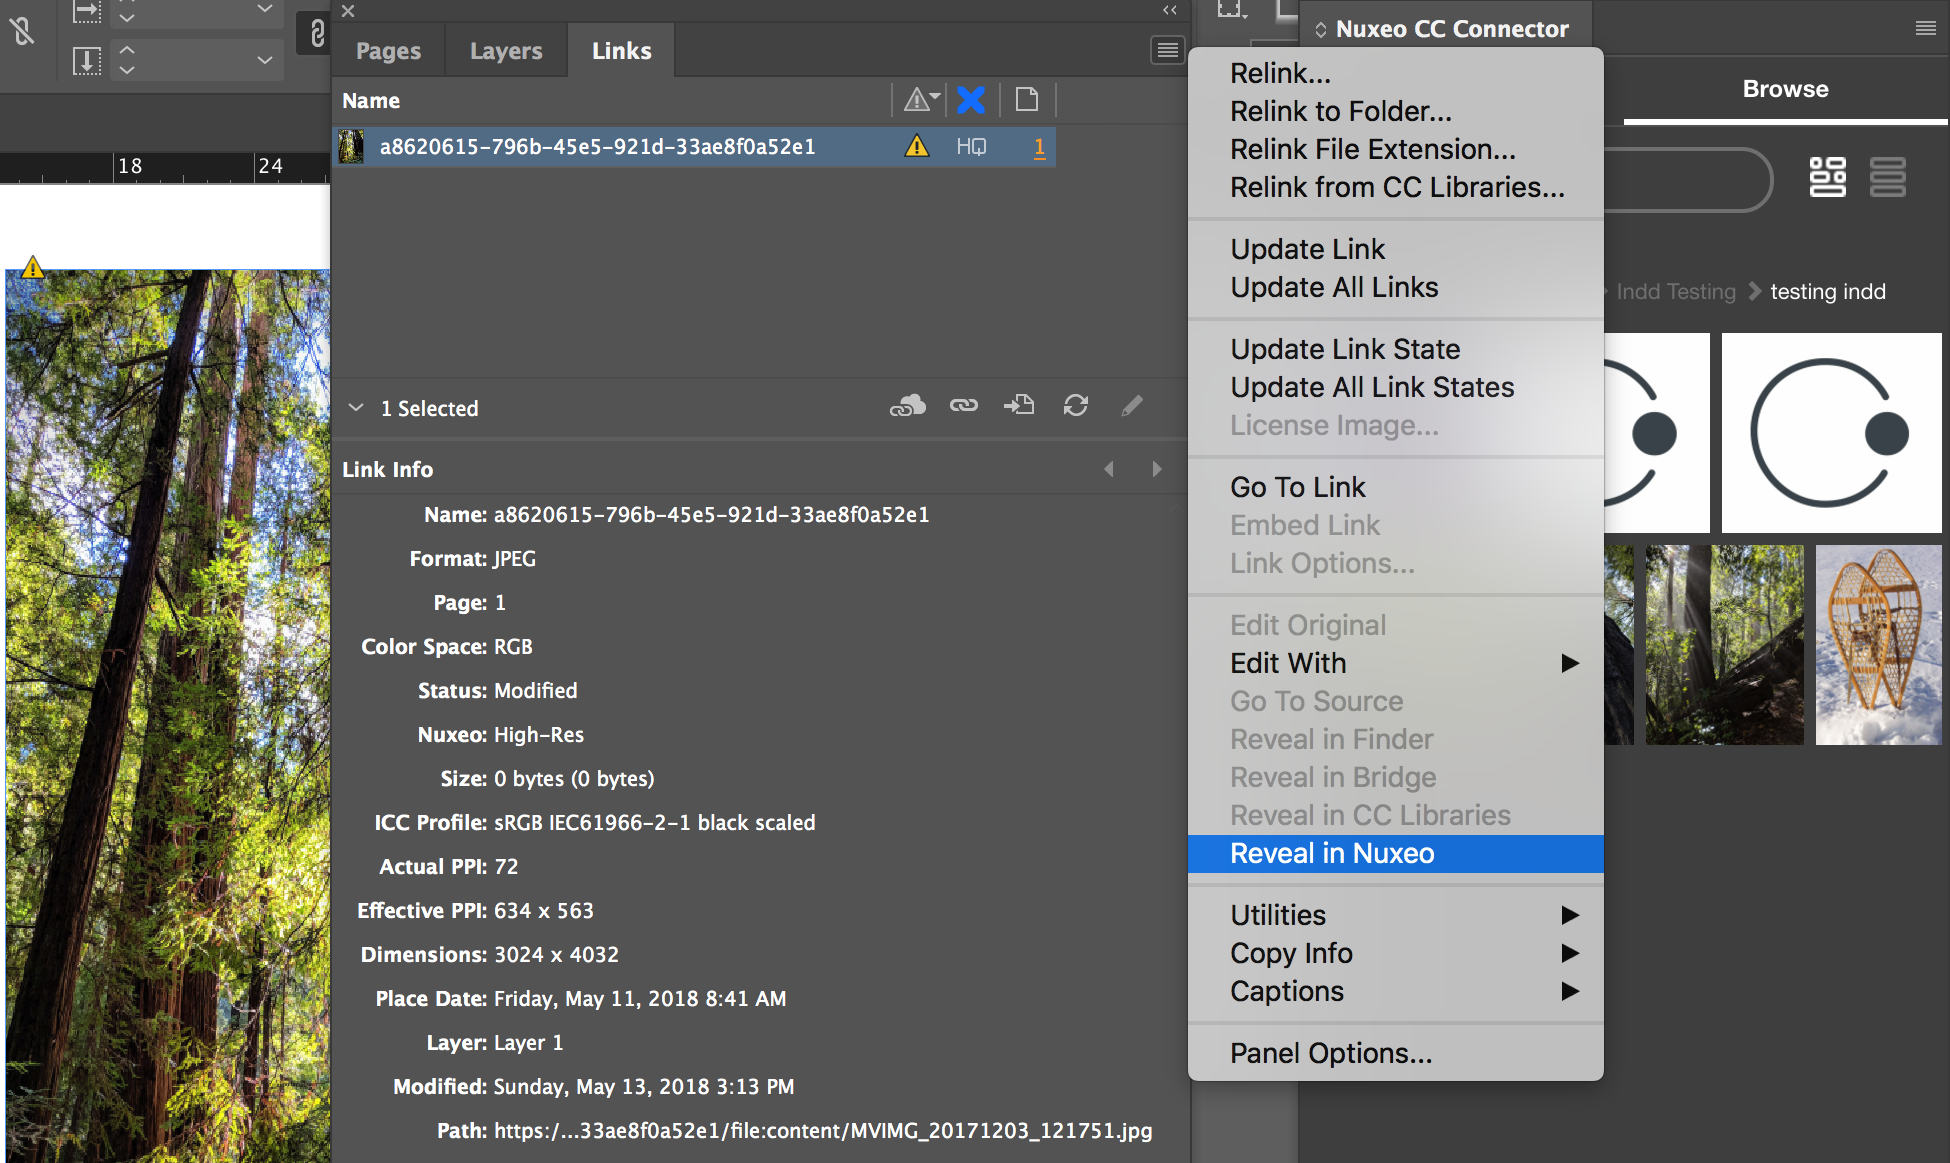
Choose to work with the high resolution (HQ) or low resolution (LQ) rendition of the file by double clicking the entry in the Nuxeo column in the panel (you might need to expose the column in the “Panel Options” seen in the links panel fly out).
Be notified when updates have been made to the placed repository items, so that you can update the items in the InDesign document (note - you also see this on the placed image within the document) Select a link and choose to “Reveal in Nuxeo” which will open the file in your Nuxeo web instance to see more information about the file.
Using the Nuxeo for Adobe CC connector for creating and placing content has the added benefit of capturing incredibly useful information. When you use repository content and link your assets and your InDesign files and then save the InDesign document to the repository, behind the scenes, Nuxeo captures the id's of the placed assets and saves them as metadata in the repository for the InDesign file (as part of a compound doc schema). The information is not exposed by default, but can be used by your Nuxeo team to create searches and views that show where content is used as part of other files.
We are working on a sample to show you how this can be used in real life. Check back here for updates.
Working in Photoshop/Illustrator
Photoshop and Illustrator have access to Nuxeo CC connector when you install the program.
If you want to edit an existing file from your Nuxeo account:
- Drag and Drop your asset from the connector.
A copy of the file will be saved locally at
nuxeo_connector_files\downloadsin your Documents folder, and then opened in your Adobe application. - Make your edits in Photoshop or Illustrator and save.
Once your local file is saved, choose Upload Photoshop (Illustrator) Document from the Nuxeo CC connector fly out menu. You will be presented with an option to either, Upload New File, or Replace.

When edits are made to repository content using the connector, users in InDesign who have placed the content will be notified that updates are available.
Uninstalling Nuxeo CC Connector
Nuxeo CC connector has two parts: an extension to provide the panel and a plug-in to provide the underlying linking technology.
On Mac
Remove the extension folder:
/Library/Application Support/Adobe/CEP/extensions/NuxeoCCConnector.Remove the plug-in folder (if used with InDesign, follow the path for the specific CC version):
/Applications/Adobe InDesign CC 201x/Plug-Ins/SiliconConnectorNuxeo.
On Windows
You can use the Windows Control Panel to uninstall Nuxeo for Adobe CC like you would do with any other installed application. If you need to uninstall manually, you can remove the following folders:
Remove the extension folder:
C:\Program Files (x86)\Common Files\Adobe\CEP\extensions/NuxeoCCConnector.Remove the plug-in folder (if used with InDesign, follow the path for the specific CC version):
C:\Program Files\Adobe\Adobe InDesign CC 201x\Plug-Ins\SiliconConnectorNuxeo.
Network Considerations (for Nuxeo Administrators)
Since Nuxeo CC connector requires network access to Nuxeo and the Silicon Publishing licensing server, there are certain network requirements to consider. You may find that working from home, where there is not proxy or firewall, you can use Silicon Connector for Box without a problem, but at work you run into errors when trying to activate or use it.
Proxy
You can configure your proxy settings in the SC.properties file located in:
mac:
/Users/<username>/Library/Preferences/SiliconConnector/Windows:
C:\Users\username\AppData\Local\SiliconConnector\
This file can be edited with a basic text editor and is documented with definitions of each property. Properties should be formatted with key=value syntax, e.g. sc.http.proxy_server=proxyserver.com
Firewall
If your company has a firewall, you will need to be sure to whitelist the Silicon Publishing licensing server. The URL to whitelist is https://licensing.siliconpublishing.com.