A permission is a rule to grant access to a user or set of users to a Nuxeo document. User has a view in the dashboard where he can see the documents on which a permission is set. Managing permissions means granting or denying access permissions in a document or folder.
Some permissions are granted automatically, for example when you create a workflow and grant access to a user on a document for the entire workflow or a particular task.
Permissions Overview
| Permission | Actions in Workspaces | Actions in Sections |
|---|---|---|
| Read |
|
|
| Edit |
|
|
| Manage everything |
|
|
| Can ask for publishing | Submit documents for publishing |
Managing Permissions on Content
Granting Permissions to the Application Users and Groups
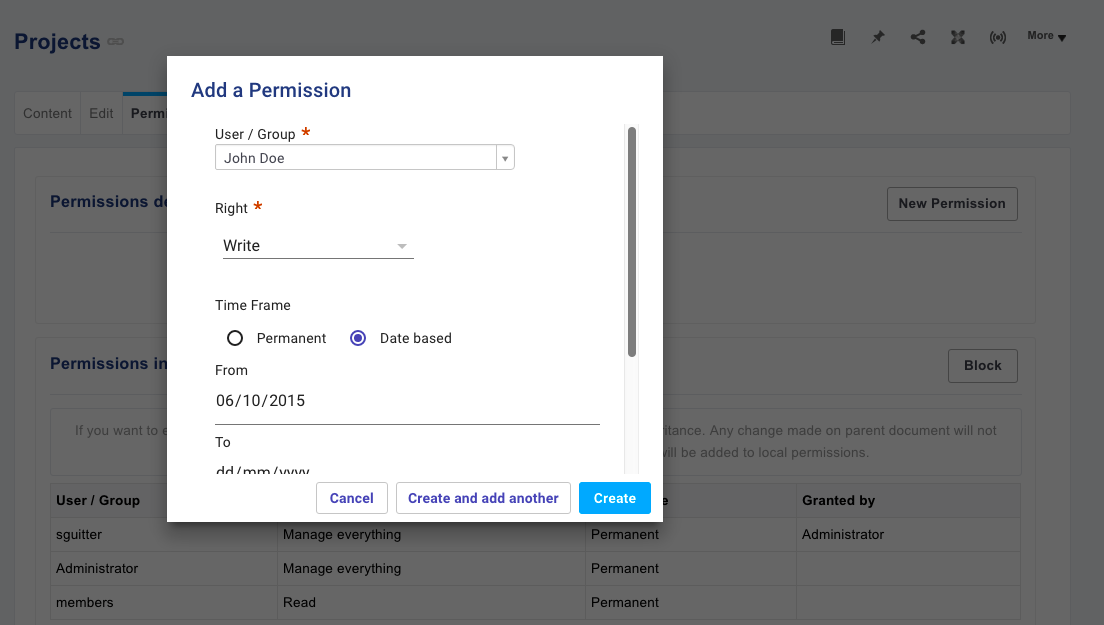
To add a permission, at the root of a workspace, a folder or a document, click on the Permission tab New Permission and fill in the popup form.
The new permission is displayed in the Permissions defined locally part of the screen.
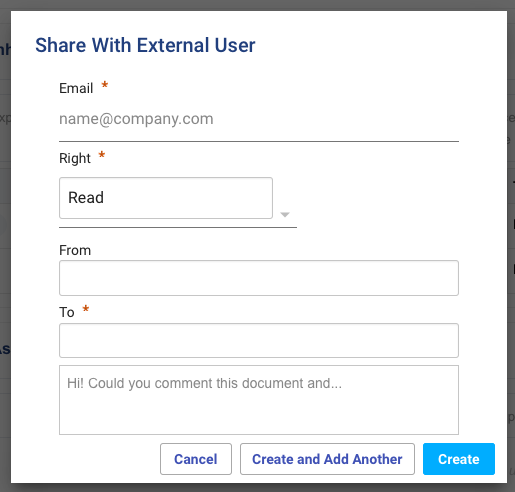
Granting Permissions to External Users (Instant Share)
You can share documents and folders with people that don't usually have access to the application, using their email.
In the Permissions Assigned to External Users part of the screen, click New and fill in the popup form. The external user receives an email notification that contains the link to the document or space. They can access the application only by clicking that link.
Notes:
- You can only grant a temporary access to external users.
- External users have not created a user account on the application. They do not have login / password credentials. They can only use the link that is sent to them to access the application.
- External users have access to the content that was shared with them (either documents or workspaces and their content) and the Search tab.
- External users do not benefit from the personal workspace, the Home tab and their features (dashboard, alerts, users / groups search, etc.).
Editing Permissions
To edit a permission click on ![]() next to it, from there you can modify the permission and/or the date frame.
next to it, from there you can modify the permission and/or the date frame.
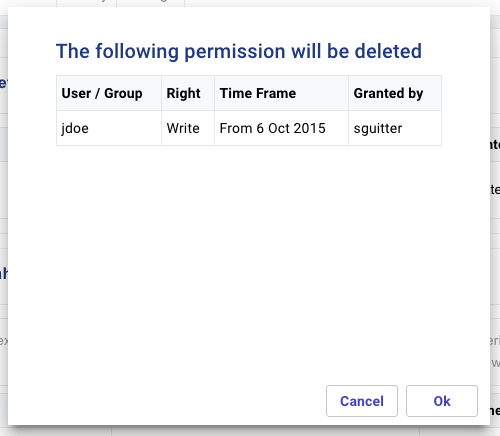
Deleting Permissions
To delete a permission click on ![]() next to the permission you want to delete, click Ok on the confirmation popup.
next to the permission you want to delete, click Ok on the confirmation popup.
Auditing and Purging Permissions
In the Admin Center, the Permissions tab presents two sub-tabs: a Search tab and a Purge tab.
Auditing Permissions
The Search tab will help you to audit permissions in the repository, you can search by user/group, time frame, permissions etc. You can then export search results in an Excel file by clicking the icon ![]() .
.
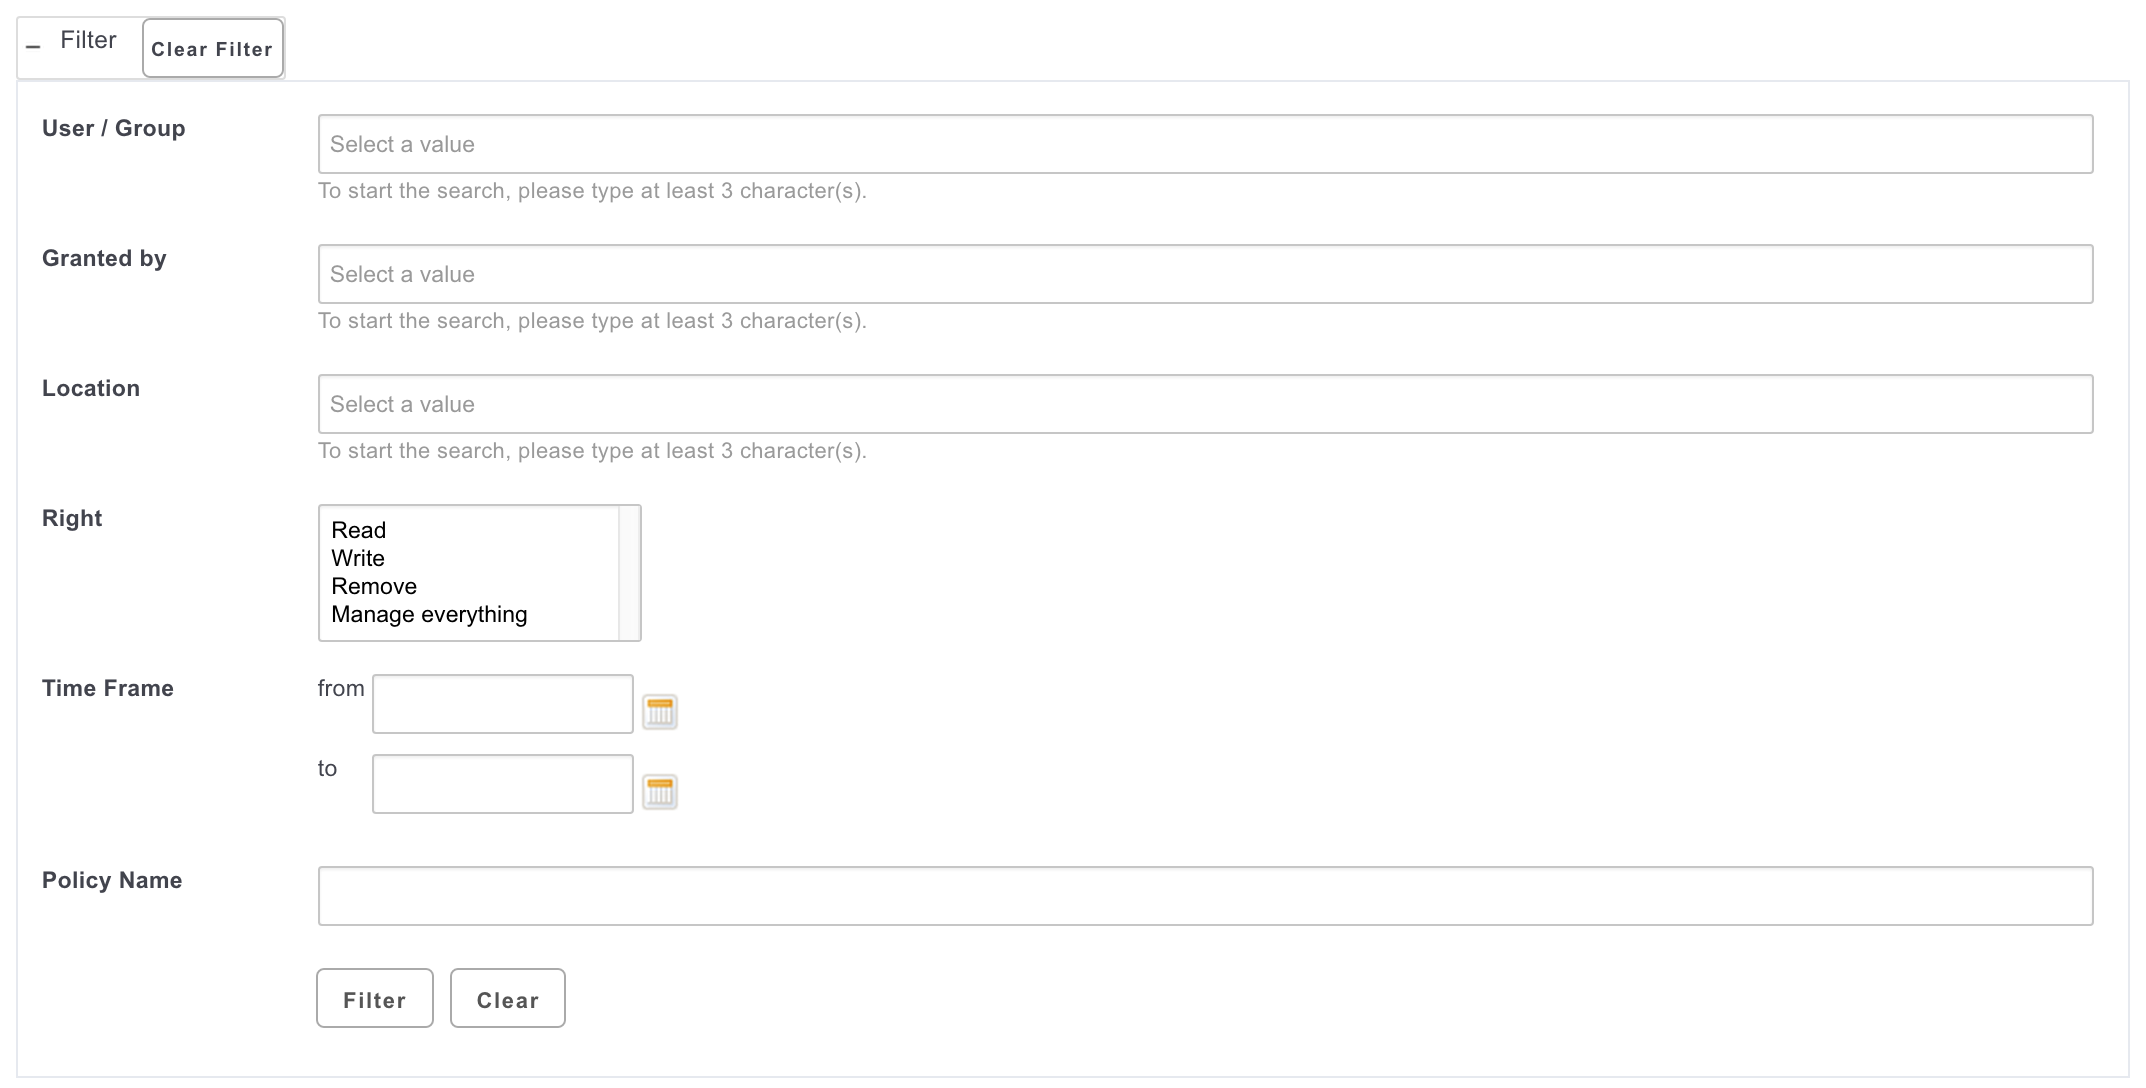
You can search permissions on the following criteria:
- User / Group: The user(s) or group(s) of which you want to see the permissions.
- Granted by: The user who assigned the permissions.
- Location: The documents or folder hierarchy from which permissions will be searched.
- Right: The permission to be searched for.
- Time Frame: The dates during which the permission is / was effective.
- Status: The status of the permission.
- Pending: The permissions is not yet active, the permission time range has not yet been reached.
- Effective: The permission is active.
- Archived: The permission is not active anymore, the permission time range is overdue.
- Policy Name: The ID of the policy name. By default, there are two policy types:
localfor permissions granted locallyroutingfor permissions granted by a workflow
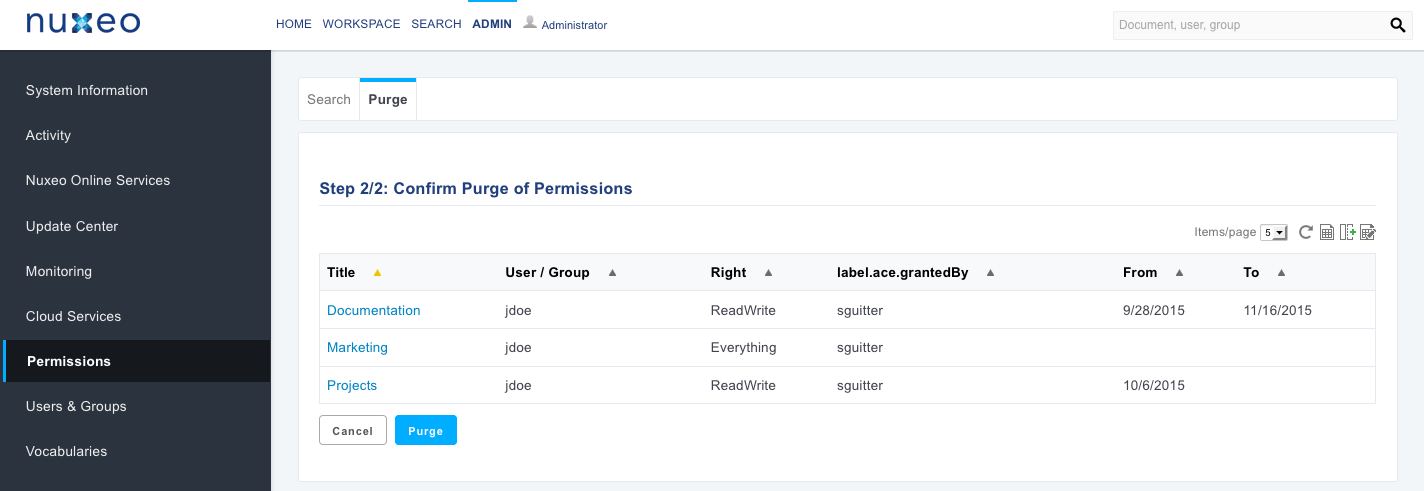
Purging Permissions
The Purge tab will enable admins to delete all the permissions granted to a user or on a section of the repository.
To purge the permission of a user: go to Admin > Permissions > Purge tab, search the user you want and click on Search. The available permissions are displayed, click on Purge to confirm. All the permissions for this user are removed.