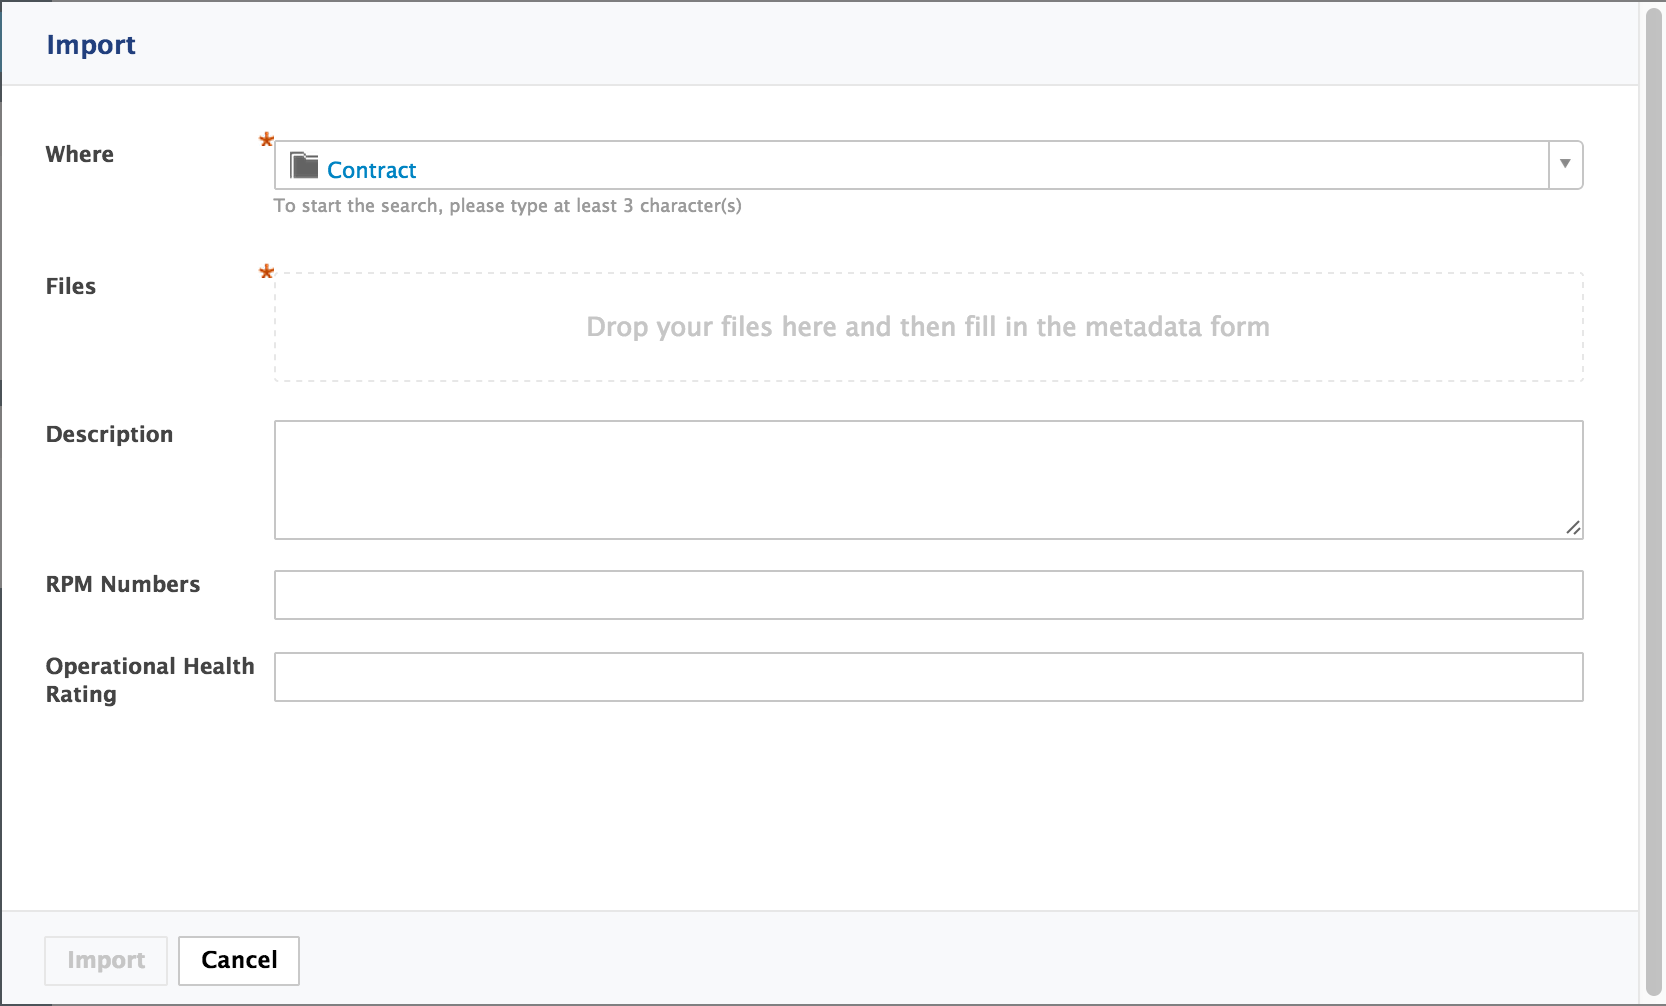
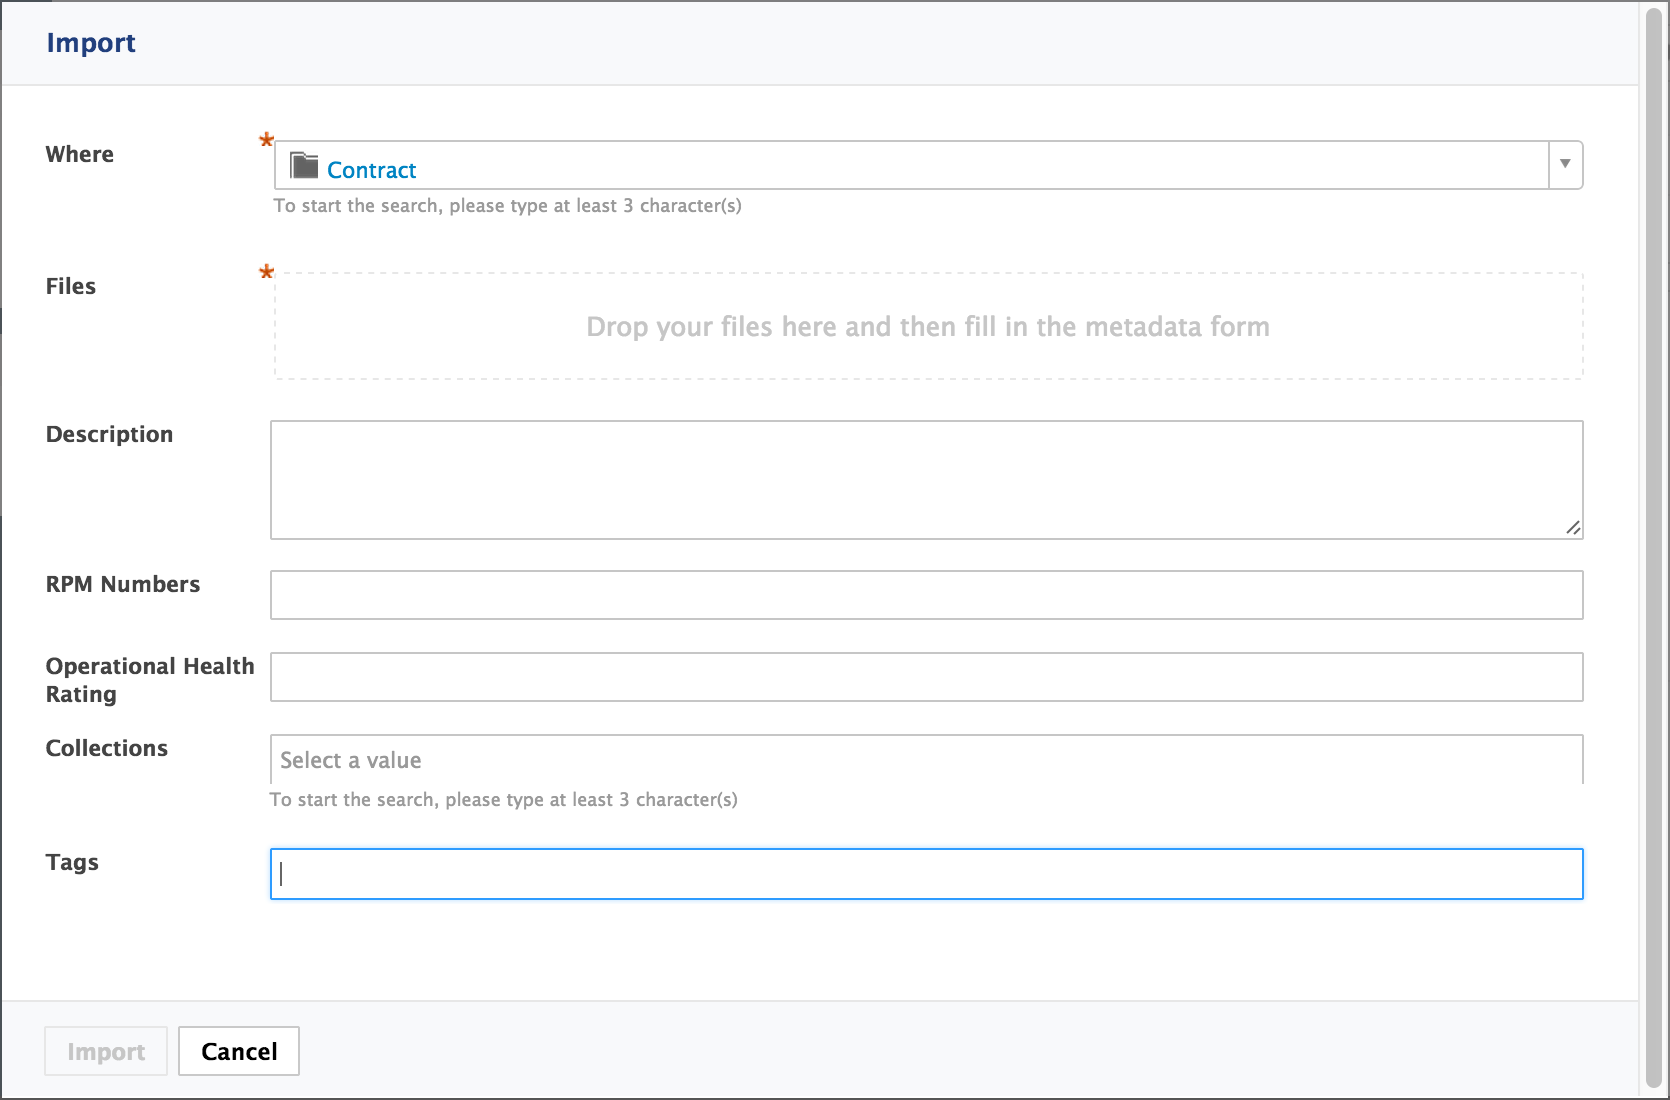
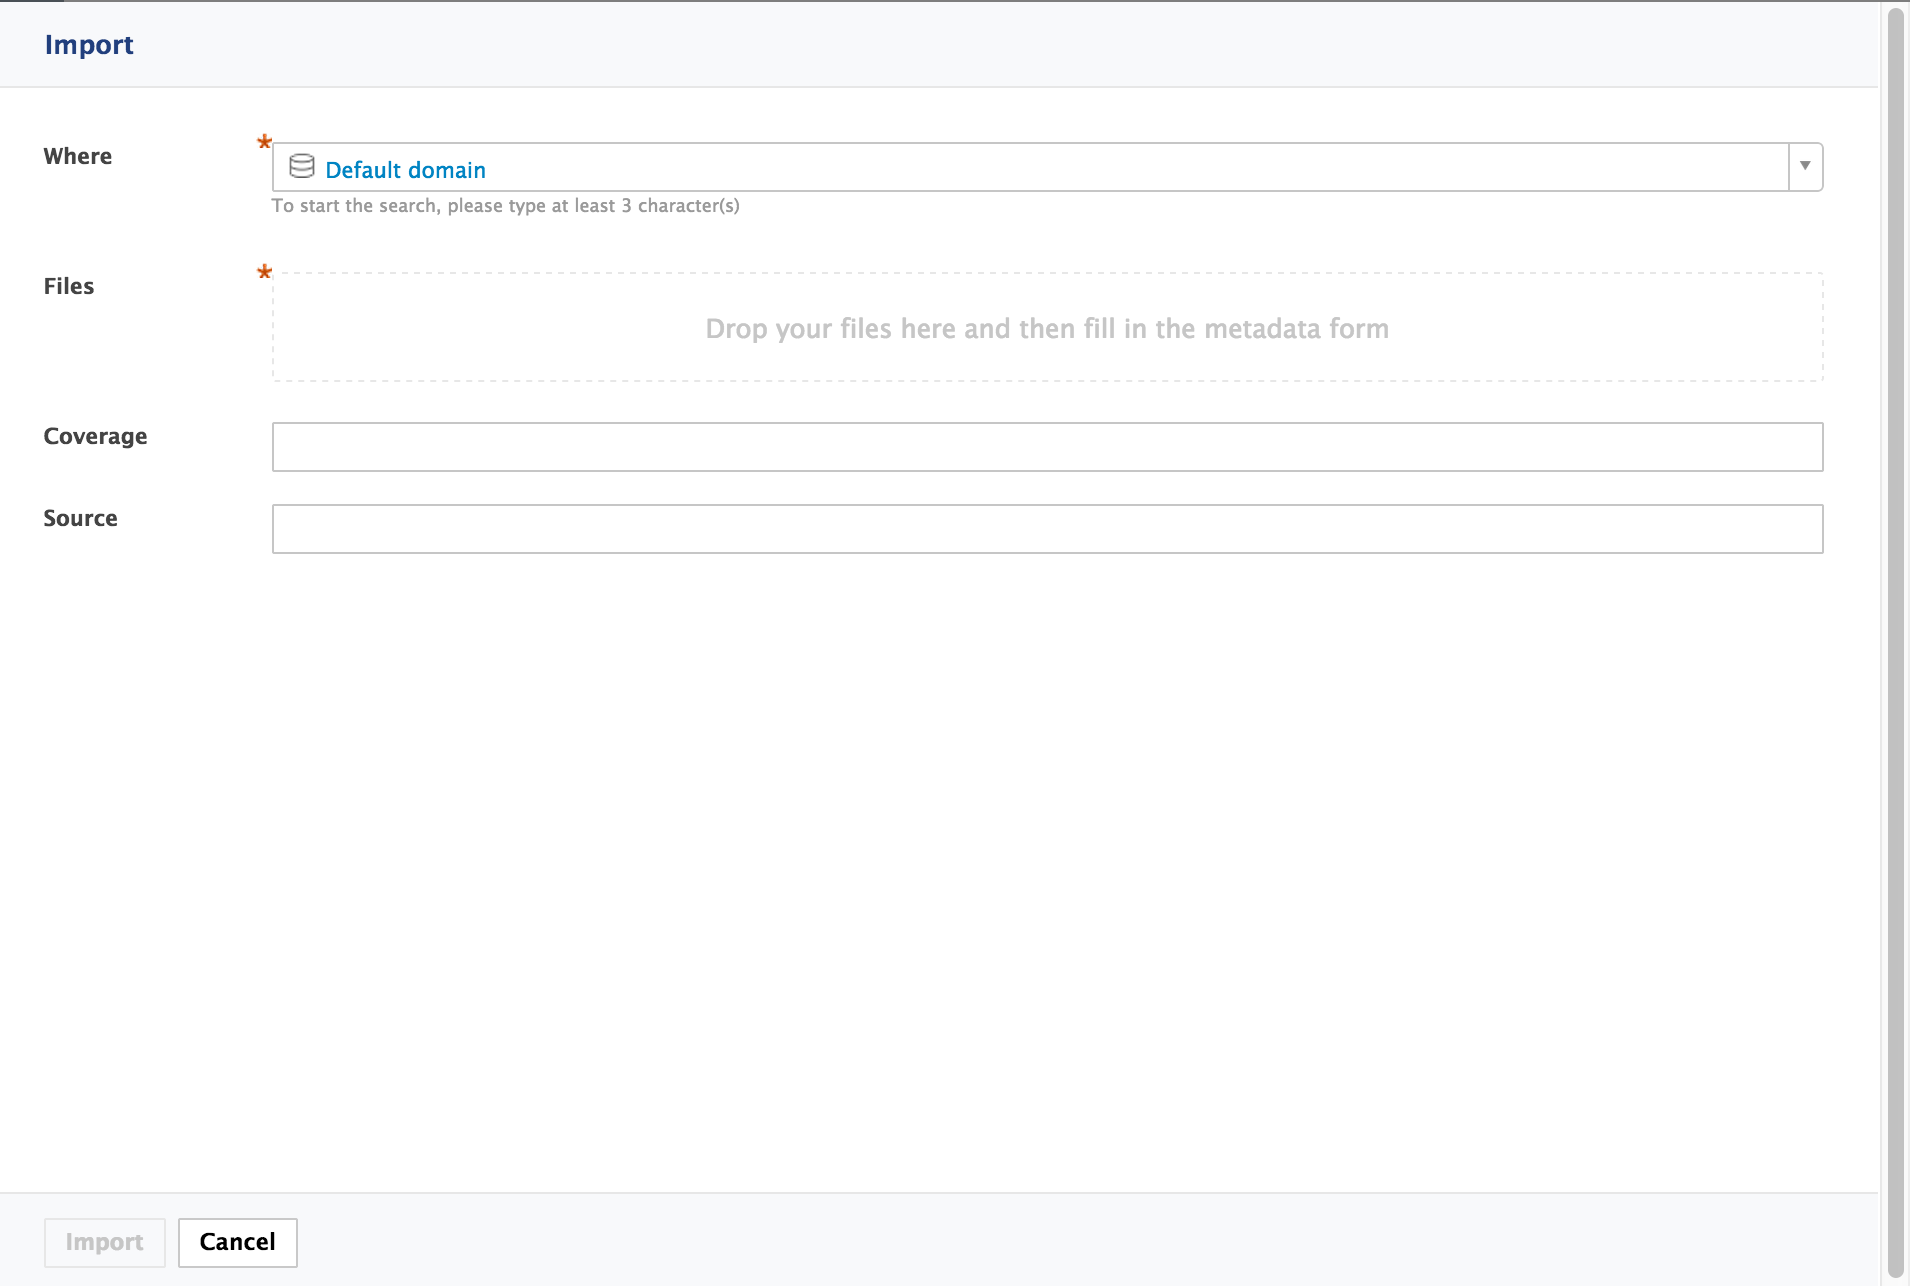
The bulk import screen has a form that allows you to edit several documents at the same time. You can customize it with Studio by creating a form layout named bulkImport. The "Create" layout will be used on the bulk import popup.

Note that the Where and Files fields are obviously not customizable and will always be displayed on this form. The layout is actually below these two fields.
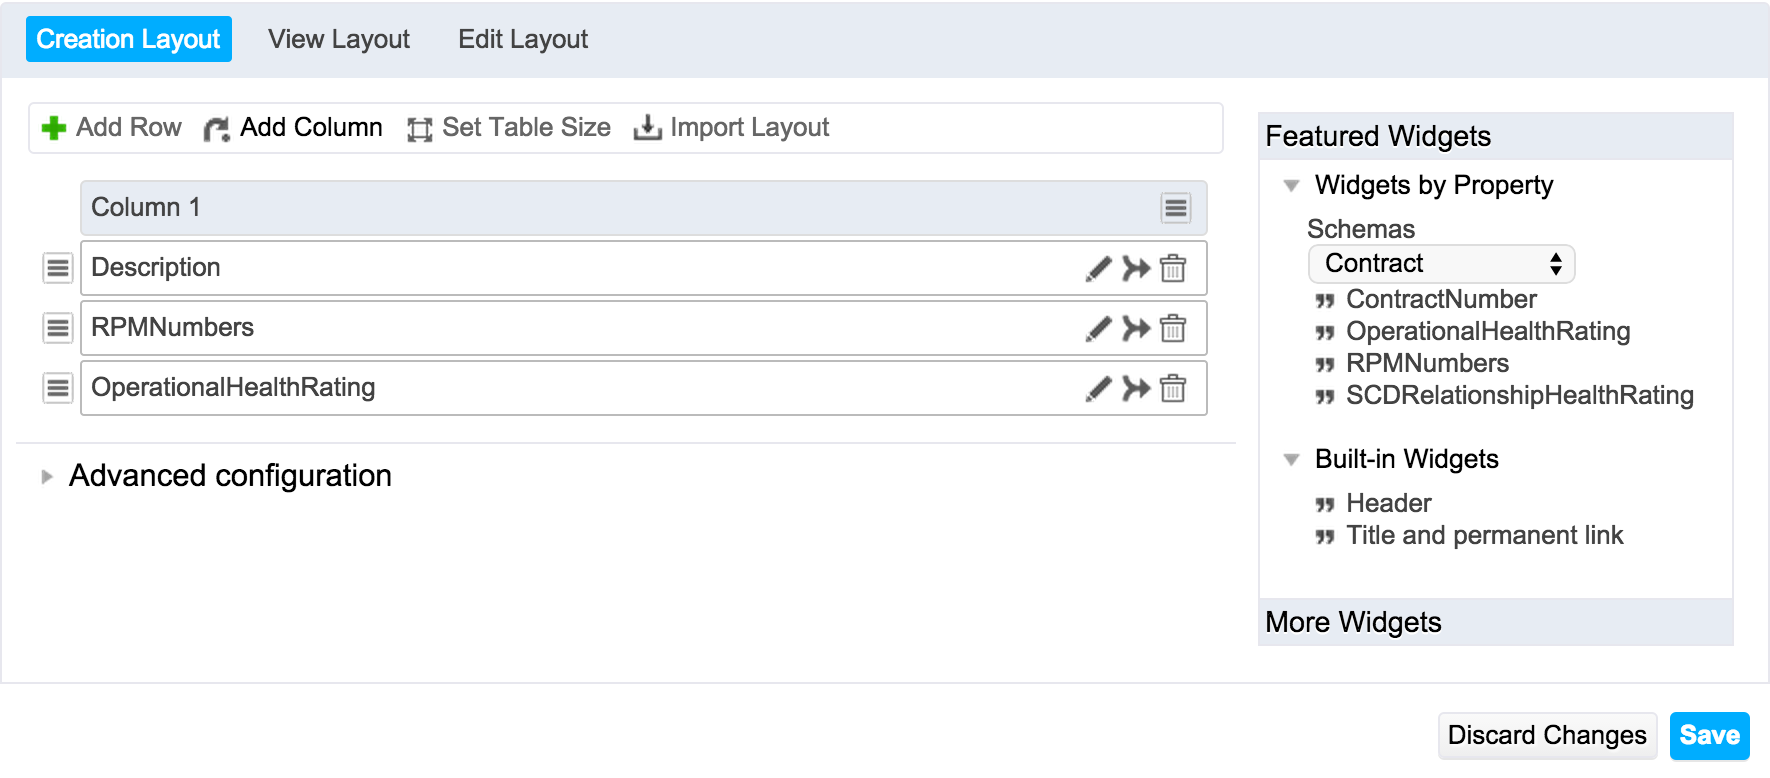
Creating a Form Layout in Studio
- In Studio, go to Listings & Views > Form Layouts and click on New,
Fill in the Feature ID:
bulkImportand click on Next,Make sure that your form layout is named
bulkImportto override the default one.- Go to the Creation Layout tab,
- Drag and drop the widgets you need,
- Click on Save.
Deploying Changes on Your Nuxeo Platform Instance
- Go to your Nuxeo Platform instance.
- Connect as Administrator with Administrator password.
- Click on Admin Center > Update Center > Nuxeo Studio.
- Click on the Update button.
- Go in a workspace and import your documents.
Specific Cases
When you want to create a bulk edit form with the possibility to edit the collections and the tags, you need a particular configuration.
Tags
When you configure a widget to select tags, the field that needs to be referenced is contextData['request/bulk_tags']
- Drag and drop a generic widget from the right to the grid.
- Fill in the creation form.
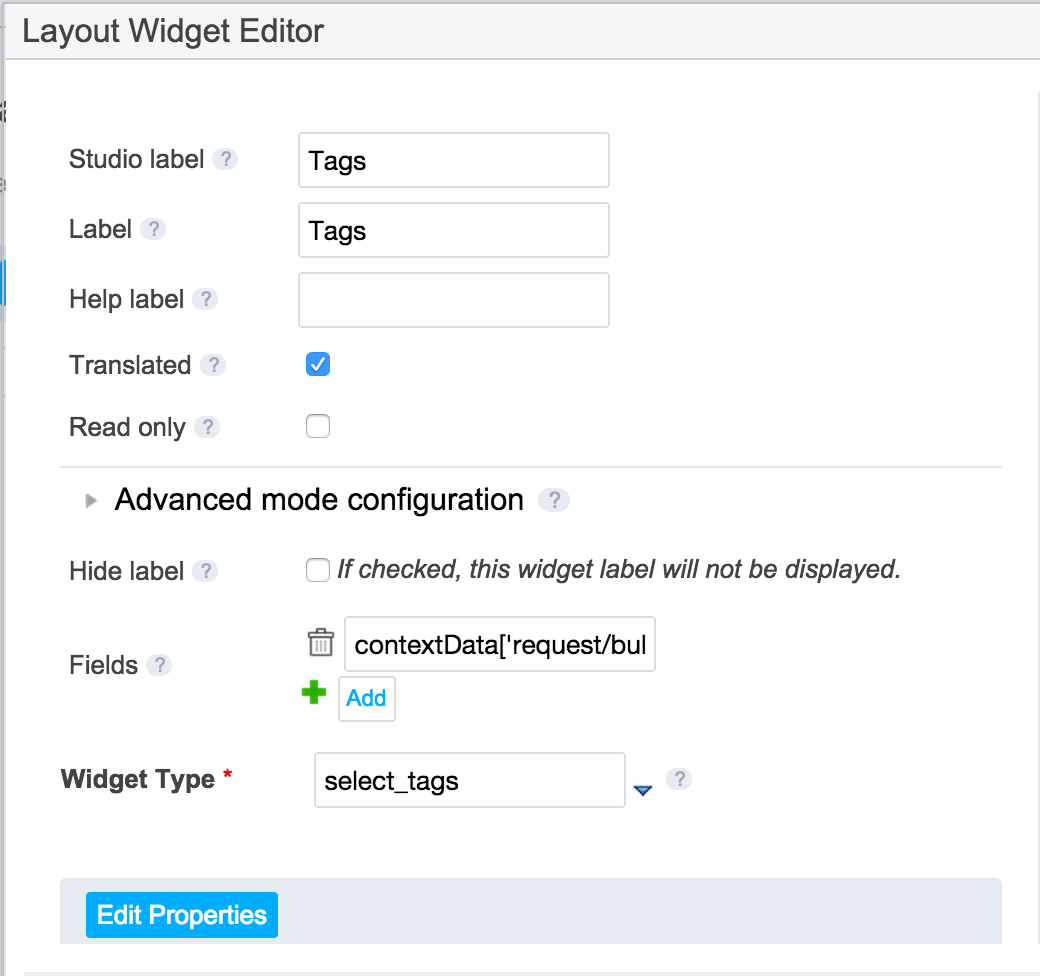
- In the Edit Properties, select Yes for the Can Select New Tag field.
- Click on Save and deploy your changes on your instance.
Collections
When configuring a widget to select collections, the field that needs to be referenced is contextData['request/bulk_collections'].
- Drag and drop a generic widget from the right to the grid.
- Fill in the creation form.
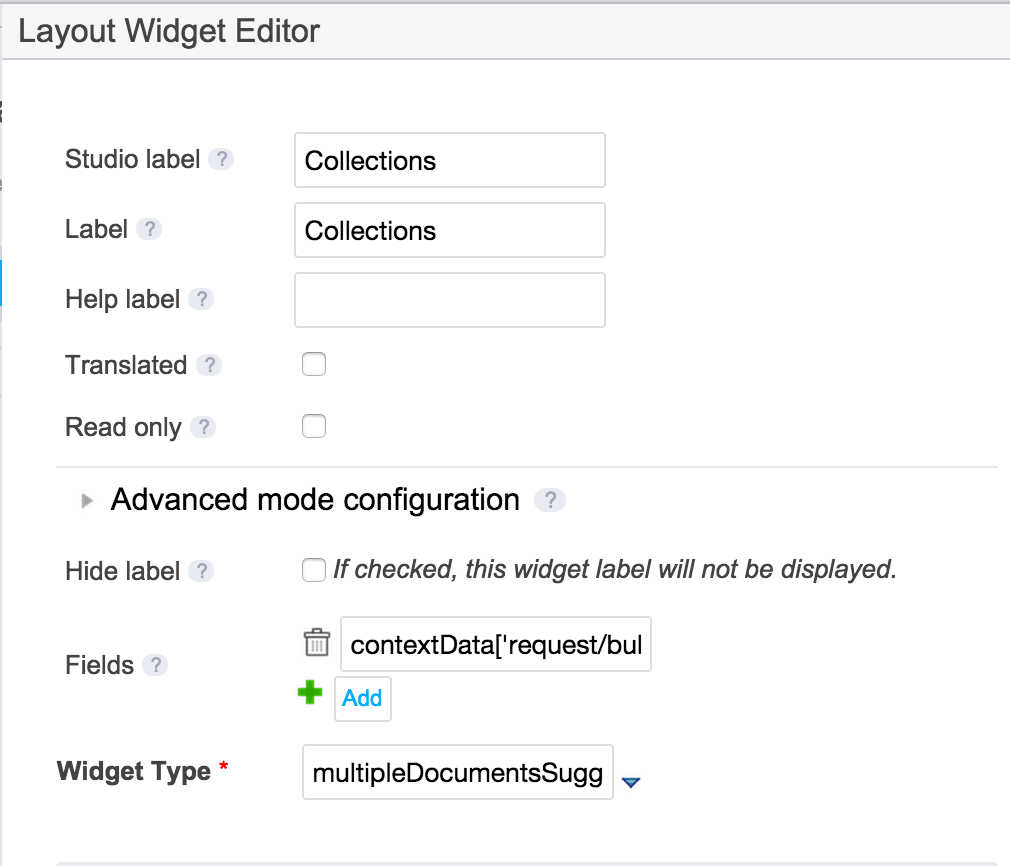
Fill in the Edit properties:
Document page provider name default_document_suggestionSelection Formatter formatSelectedCollectionSuggestion Formatter formatSuggestedCollectionIn the Custom properties part fill in the following fields:
restoreSeamCtx false operationId Collection.Suggestion Click on Save and deploy your changes on your instance.
You should end up with something like this:
Adding New Import Options
The bulk import popup can display more than one import layout. When more than one is contributed, you can select which one you want to use to import the uploaded documents through the "Import Options" field.
An import option is contributed through an action in the IMPORT_DOCUMENTS category.
The action must reference the chainId and the layout to use for this import option.
The action label is used in the "Import Options" select.
The contribution of the default bulk import is:
<extension target="org.nuxeo.ecm.platform.actions.ActionService"
  point="actions">

  <action id="dndBulkImportDocuments" link=""
    order="10" label="label.smart.import"
    help="desc.smart.import.file">
    <category>IMPORT_DOCUMENTS</category>
    <properties>
      <property name="chainId">FileManager.ImportWithMetaDataInSeam</property>
      <property name="layout">bulkImport@create</property>
    </properties>
  </action>
</extension>
The layout displayed will be bulkImport@create and documents will be imported through the FileManager.ImportWithMetaDataInSeam chain.
To add a new one, you can just add a new action referencing your own layout (or the default one) and your own chain id (or the default one).
In this example we create an import option that changes the status of your document to "obsolete" if you type in the term "legacy" in the source metadata.
In Studio, create this automation chain.
- FileManager.Import:
    overwite: "true"
- Document.Update:
    properties: {}
    save: "true"
- Document.SetLifeCycle:
    value: "@{Document[\"dc:source\"] == \"legacy\" ? \"obsolete\" : \"approve\"}"
- Seam.Refresh
You can now create an xml extension to add an import option that calls our chain.
<extension target="org.nuxeo.ecm.platform.actions.ActionService"
  point="actions">

  <action id="customBulkImportDocuments"
    order="20" label="My Custom Import">
    <category>IMPORT_DOCUMENTS</category>
    <properties>
      <property name="chainId">ImportChain</property>
      <property name="layout">ImportLayout@create</property>
    </properties>
  </action>
</extension>
Click on Save. You can now deploy the changes on your platform.

Disabling the Default Import Option
If you want to disable the default import option (after having contributed a new one, for example), you can do it with the following contribution:
<extension target="org.nuxeo.ecm.platform.actions.ActionService"
  point="actions">

  <action id="dndBulkImportDocuments" enabled="false" />
</extension>
After deploying your changes, you can only see your custom import option when you click on Import.