Nuxeo REST API provides 3 methods to query, create and delete relationships between documents, the description of each of these operations can be found in Nuxeo Platform Explorer.
On this page, we are going to create an element to retrieve relations on a document and to add/delete them.
Create an Automation Scripting
The Document.GetLinkedDocuments operation provides the relationships of a document based on the address and type of relationship. However, we need to recover all the relationships in the document in order to show them.
That's why we're going to create an Automation Scripting called getAllRelations from the Configuration > Automation > Automation Scripting menu in Studio Modeler.
Document.GetLinkedDocumentsGet the relations for the input document. The ‘outgoing’ parameter can be used to specify whether outgoing or incoming relations should be returned. Returns a document list.
- On Modeler, go to Automation Scripting.
- Click on New and name it
getAllRelations. - Copy the content from our Nuxeo cookbook.
- Save your changes.
Create Element to Retrieve Relation
Let's create an element nuxeo-se-document-relations that uses the javascript.getAllRelations operation that we created above to retrieve all the document's relationships.
This element refers to two auxiliary elements that are responsible for the creation and deletion of new relationships, we will create them right after.
- On Designer, go to Resources.
- Create a new folder under UI and name it relations.
- In it, create a new element and name it
nuxeo-se-document-relations. - Choose the type Sample layout template.
- Copy the content from our cookbook.
- Save your changes.
Add Relation
The web element nuxeo-se-add-relation-dialog shows a popup to add a new relationship specifying the direction and the type of relation. To create the relationship use the operation Document.AddRelation. At the end of the creation of the relationship, we will launch a custom event called relation-added to notify that the relationship has been created.
Document.AddRelation operation uses negative logic in the outgoing parameter, which makes it more difficult to follow the logic.
- In your relations folder, create a new element.
- Name it
nuxeo-se-add-relation-dialog. - Choose the type Sample layout template.
- Copy the content from our cookbook.
- Save your changes.
Delete Relation
Finally, we need to create a web element in charge of deleting relationships, nuxeo-se-remove-relation-button. For the deletion, we will use the operation Relations.DeleteRelation. At the end of the relationship deletion, we will launch a custom event called relation-removed to notify that the relationship has been removed.
- In your relations folder, create a new element.
- Name it
nuxeo-se-remove-relation-button. - Choose the type Sample layout template.
- Copy the content from our cookbook.
- Save your changes.
Use the Element
Now that you have your element you need to add it to a document type. You can add it to a custom document type or override an existing one. Here we'll add it to the File document type.
Here is our File document type view layout final result:
<link rel="import" href="../../relations/nuxeo-se-add-relation-dialog.html">
<link rel="import" href="../../relations/nuxeo-se-document-relations.html">
<link rel="import" href="../../relations/nuxeo-se-remove-relation-button.html">
<!--@license
(C) Copyright Nuxeo Corp. (http://nuxeo.com/)

Licensed under the Apache License, Version 2.0 (the "License");
you may not use this file except in compliance with the License.
You may obtain a copy of the License at

    http://www.apache.org/licenses/LICENSE-2.0

Unless required by applicable law or agreed to in writing, software
distributed under the License is distributed on an "AS IS" BASIS,
WITHOUT WARRANTIES OR CONDITIONS OF ANY KIND, either express or implied.
See the License for the specific language governing permissions and
limitations under the License.
-->

<!--
`nuxeo-file-view-layout`
@group Nuxeo UI
@element nuxeo-file-view-layout
-->
<dom-module id="nuxeo-file-view-layout">

  <template>
    <style>
      nuxeo-document-viewer {
        @apply --paper-card;
      }
    </style>
    <nuxeo-document-viewer role="widget" document="[[document]]"></nuxeo-document-viewer>
    <nuxeo-se-document-relations document="[[document]]"></nuxeo-se-document-relations>
  </template>

  <script>
  Polymer({
    is: 'nuxeo-file-view-layout',
    behaviors: [Nuxeo.LayoutBehavior],
    properties: {
      /**
         * @doctype File
         */
      document: Object
    }
  });
  </script>

</dom-module>
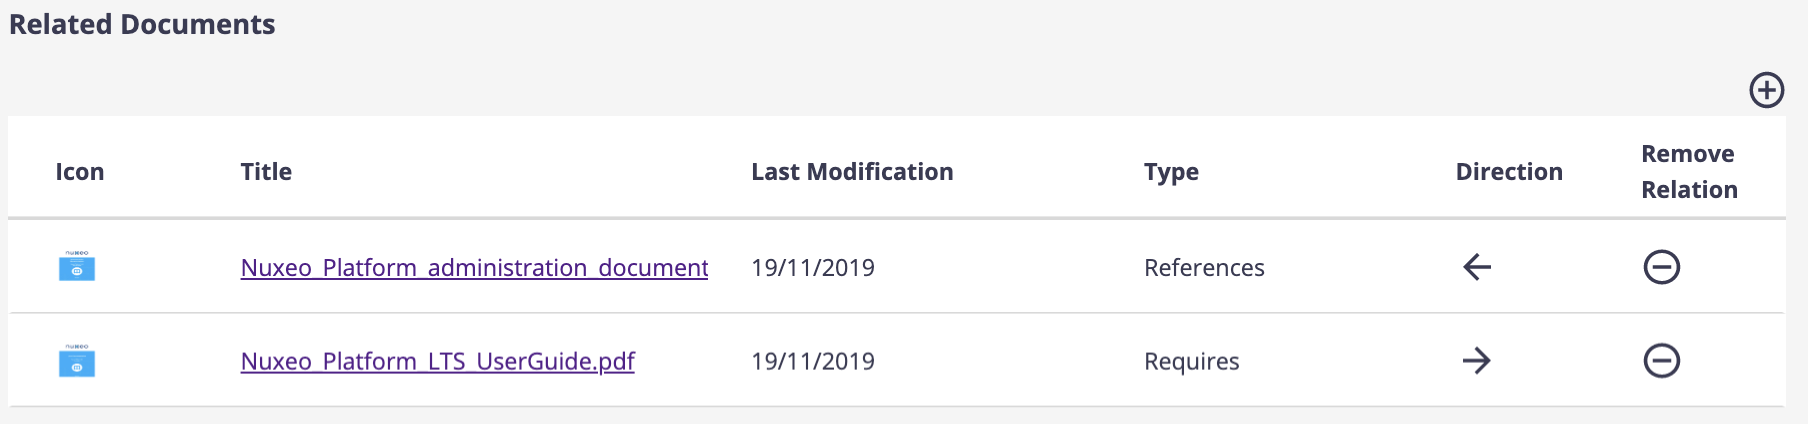
The result is a list with the related documents, which include the direction of the relationship (incoming/outgoing) and the type of relationship (Based on, Reference ...). We can eliminate existing relationships or add a new one. It should look like this:
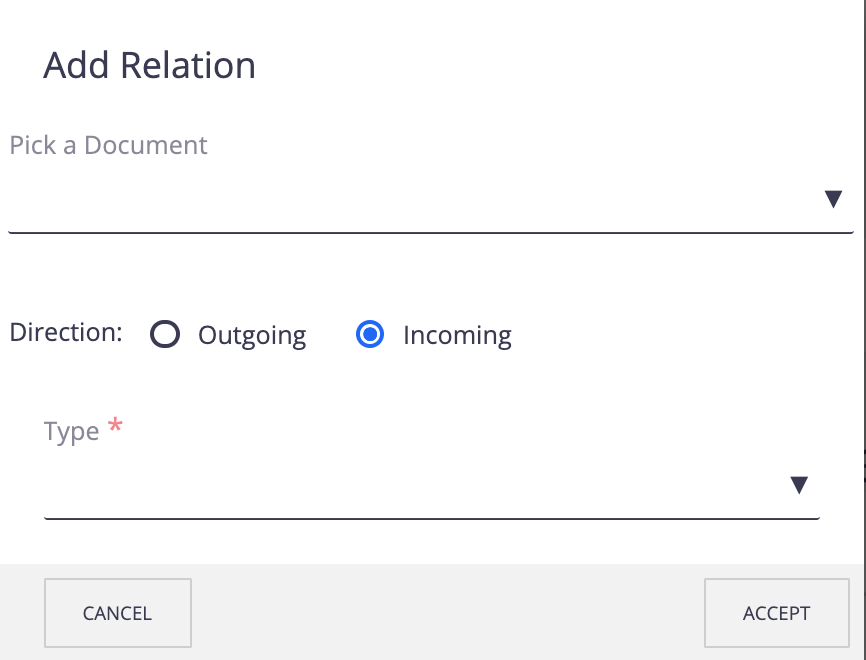
To add a new relation, click on the ![]() icon, a popup window appears to let you define your relation:
icon, a popup window appears to let you define your relation:
To remove a relation, click on the ![]() icon on the relation that you want to delete.
icon on the relation that you want to delete.