Nuxeo Media Publishing addon enables users to publish video documents stored in the repository to external video hosting websites, without leaving the Nuxeo Platform UI.
This addon is designed to allow many implementations. Default implemented providers are:
Functional Overview
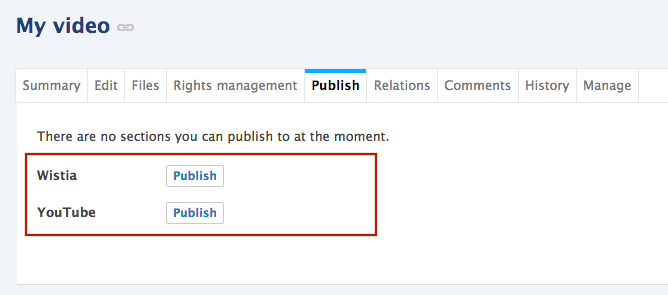
Installing this addon enriches the Publish tab of a video document with a set of external providers to where videos can be published. When publishing a video, users must select a publishing account and each provider can require additional fields to be filled (e.g tags, privacy of the video).
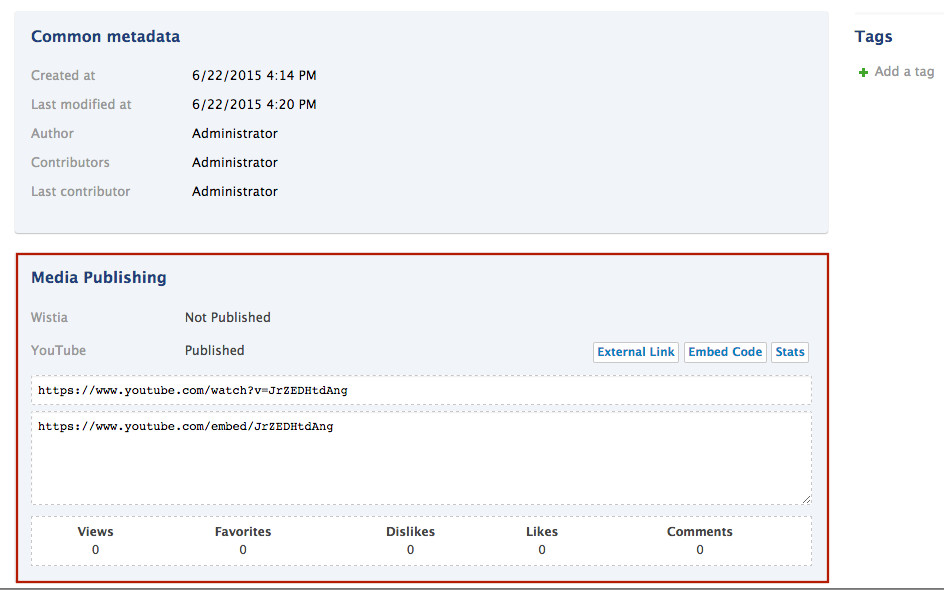
This addon also adds a new section in the Summary page which lists all the providers available and the respective status of the video (either “Published” or “Not published”). Once a video is published, additional informations are displayed, such as:
- The URL to the video in the external video host
- An embeddable HTML snippet
- Statistics
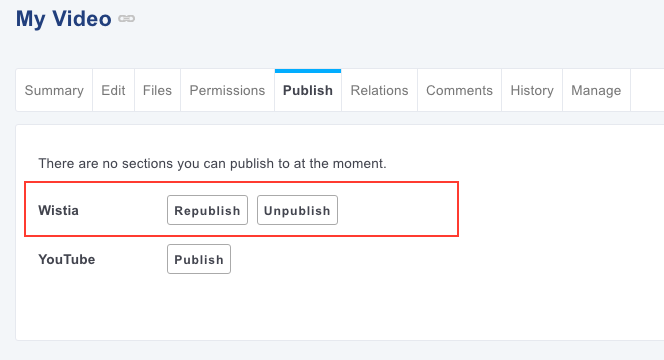
Published videos can also be republished or unpublished from the external provider.
Installation and Configuration
This addon requires no specific installation steps. It can be installed like any other package from the Marketplace or from the Admin tab. However, it requires the installation of the Digital Asset Management (DAM) addon which provides multimedia files (picture, audio and video).
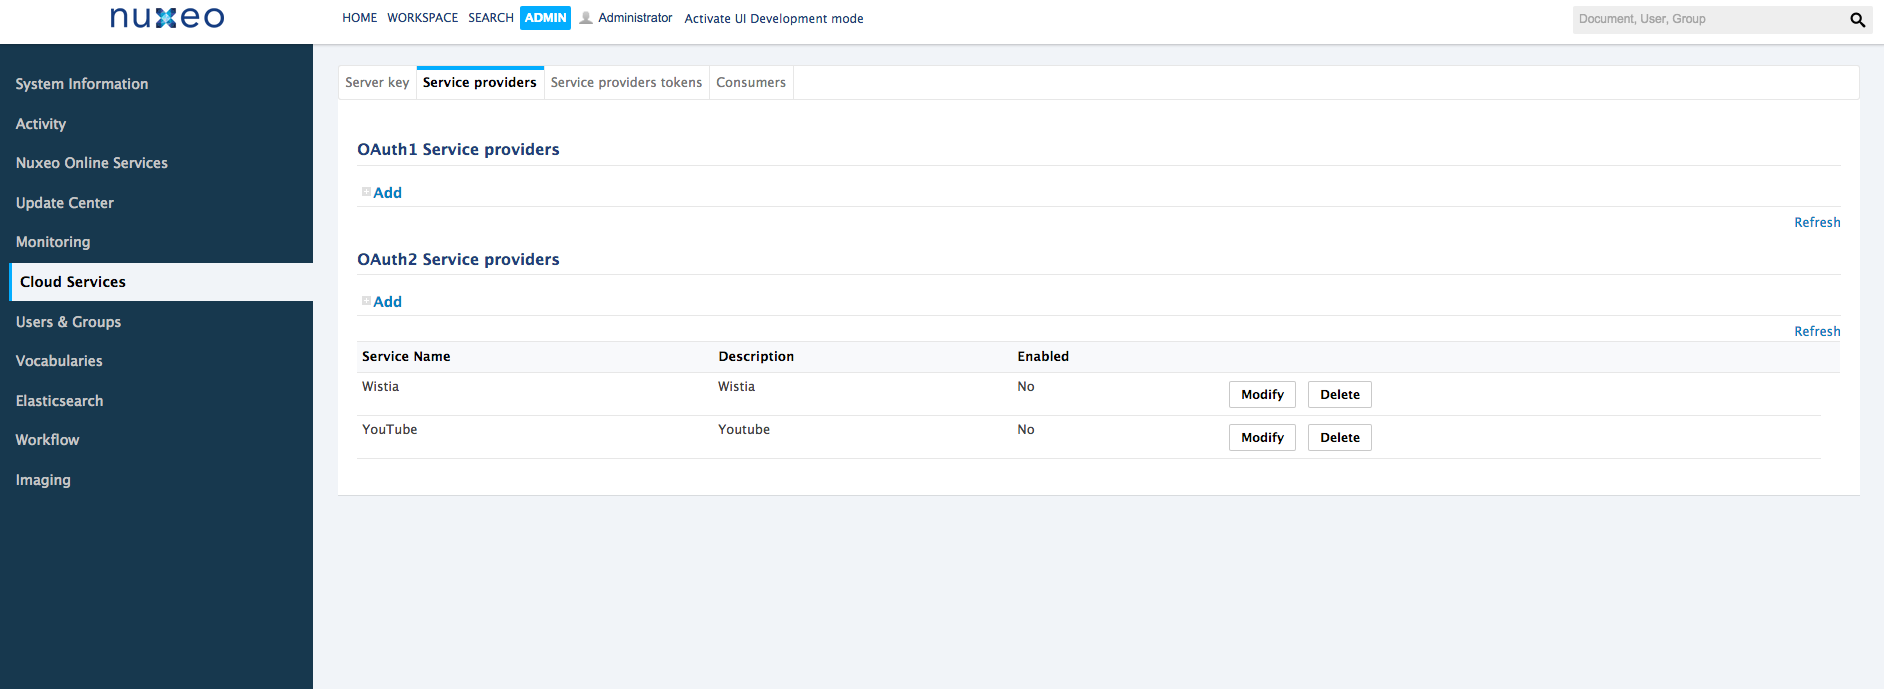
After the package is installed, two new OAuth2 service providers are added to Nuxeo (Admin > Cloud Services > Service providers). These providers must be properly configured before users can use them to publish their videos.
YouTube Configuration
Step 1: Preparing your application accounts on the Google Developers Console
Create a new project.
Enable YouTube API: On the API Manager, click on YouTube Data API and then on the Enable button.
Create a new OAuth Client ID: In Credentials, click on Create Credentials.
a. Choose OAuth Client ID.
b. If not already done, you will need to edit your consent screen: In Credentials > OAuth Consent Screen, fill the product name (the name of your application). Optionally, you may fill the other fields.
c. Choose Web Application.
d. For Authorized JavaScript origins set the URL of your server. Ex http://localhost:8080
e. For Authorized redirect URIs set the following URL, adapting the hostname and port to your case:
http://NUXEO_SERVER/nuxeo/site/oauth2/YouTube/callback.
Step 2: Configuring the Nuxeo Platform
In the Admin tab, go to Cloud Services > Service providers.
In the OAuth2 Service providers section, update the service whose name is “YouTube” by clicking on the Modify button.
Set the Client ID and Client Secret values with the one you got on the previous step.
Make sure the Enabled box is checked.
Save.
Wistia Configuration
Step 1: Preparing your Wistia OAuth application
Go to Wistia website > Account > Settings > OAuth applications.
Create a new application.
Fill in the required fields.
a. For Callback URL set the following URL, adapting the hostname and port to your case:
http://NUXEO_SERVER/nuxeo/site/oauth2/Wistia/callback.b. Set permissions to all:all.
Open the details of the application to get the Client ID and Client Secret values. You will need them in the next steps.
Step 2: Configuring the Nuxeo Platform
In the Admin tab, go to Cloud Services > Service providers.
In the OAuth2 Service providers section, update the service whose name is “Wistia” by clicking on the Modify button.
Set the Client ID and Client Secret values with the one you got on the previous step.
Make sure the Enabled box is checked.
Save.
How to Add Publishing Accounts
After setting up the OAuth service providers, users must add new accounts that are used to publish and retrieve video’s informations from the external providers. To do so, users must go to Home > Cloud Services and use the available buttons to add their service accounts.
Technical Overview
This section explains what is included in the Nuxeo Media Publishing addon.
Schemas
Nuxeo Media Publishing defines the following schema:
publishable_media: used to store a list of providers where the video is published.
Facets
This addon defines the PublishableMedia facet. This facet is added to the Video document type and contains the publishable_media schema.
Extension Points
The MediaPublishingService exposes the providers extension point to contribute new publishing services.
<extension-point name="providers" target="org.nuxeo.ecm.media.publishing.MediaPublishingService">
  <provider id="MyMediaPublishingProvider"
      enabled="true"
      service="org.nuxeo.ecm.media.publishing.MyMediaPublishingProviderService">
  </provider>
</extension-point>
How to Contribute New Providers
If you want to define other media publishing providers, you need to contribute a new publishing service to the Nuxeo Media Publishing addon.
Step 1: Contribute a media publishing service
Nested in the component tag of your XML contribution file, set the implementation class and use the extension point providers to register your media publishing service.
<component name="org.nuxeo.ecm.media.publishing.MyMediaPublishingProviderService">
  <implementation class="org.nuxeo.ecm.media.publishing.MyMediaPublishingProviderService" />

  <service>
    <provide interface="org.nuxeo.ecm.media.publishing.MyMediaPublishingProviderService" />
  </service>

  <extension target="org.nuxeo.ecm.media.publishing.MediaPublishingService"point="providers">
    <provider id="my-publishing-provider"
        enabled="true"
        service="org.nuxeo.ecm.media.publishing.MyMediaPublishingProviderService"/>
  </extension>
</component>
Your service implementation must implement the MediaPublishingProvider interface or extend any other class that implements this interface.
Step 2: Contribute an OAuth provider
- Nested in the component tag of your XML contribution file, add a
requiretag theOAuth2ServiceProviderRegistry. Then, use the extension point
providersof theOAuth2ServiceProviderRegistryservice to register the OAuth provider.<component name="org.nuxeo.ecm.media.publishing.MyOAuthServiceProvider"> <require>org.nuxeo.ecm.platform.oauth2.providers.OAuth2ServiceProviderRegistry</require> <extension target="org.nuxeo.ecm.platform.oauth2.providers.OAuth2ServiceProviderRegistry" point="providers"> <provider> <name>my-publishing-provider</name> <description>MyOAuthServiceProvider</description> <class>org.nuxeo.ecm.media.publishing.MyOAuthServiceProvider</class> <tokenServerURL></tokenServerURL> <authorizationServerURL></authorizationServerURL> <scope></scope> </provider> </extension> </component>
Note: The name field of your OAuth provider must match the id of your media publishing service defined in Step 1. The description field is used as a label in the UI.
Step 3: Contribute options widgets (optional)
By default, when publishing a video, the only required field to fill in is the publishing account. However, since different services allow different metadata (e.g. privacy status of a video, channels, projects, tags) it is possible to contribute more options widgets to the publishing panel in the UI.
<extension target="org.nuxeo.ecm.platform.actions.ActionService" point="actions">
  <action id="myprovider_options" type="widget">
    <category>MEDIA_PUBLISHING_OPTIONS_CATEGORY</category>
    <properties>
      <property name="widgetName">myprovider_options_widget</property>
    </properties>
    <filter id="isMyProvider">
      <rule grant="true">
        <condition>#{provider == "my-publishing-provider"}</condition>
      </rule>
    </filter>
  </action>
</extension>