This document is part of the Sub Workflow Example project series.
What Will We Do in this Step?
We will create the subworkflows that may be called from the main workflow depending on the document's metadata. We will need two separate workflows as the business logic is different between them. The first workflow will have one Accept/Reject node, the other will have two successive ones.
A single level validation workflow and a two-level validation workflow are both elements we could use again in the future, so we will keep them generic. Allowing a generic workflow design is one of the major assets in the subworkflow functionality.
Prerequisites
Before starting this tutorial step, make sure you create in your Nuxeo Platform Admin Center a user with "Eric" as his username and a user group named "accounting" with at least one member.
Creating the Accounting Validation Workflow
In our case this workflow will be used if the expense is worth less than $100 and not belonging in the "misc" category, but it needs to be reusable in another context as well.
- In Nuxeo Studio, go to Workflow > Process definitions and click on the New button.
Fill in the fields:
- Feature ID:
subOneLevelValidation - Label: Generic one level validation workflow.
- Feature ID:
- Click on the Ok button. The Definition tab of the workflow is displayed.
Variables Tab
We want to keep this workflow generic, remember? So what we will do is setup a workflow variable to define the assignees. The parent workflow will send us the variable content.
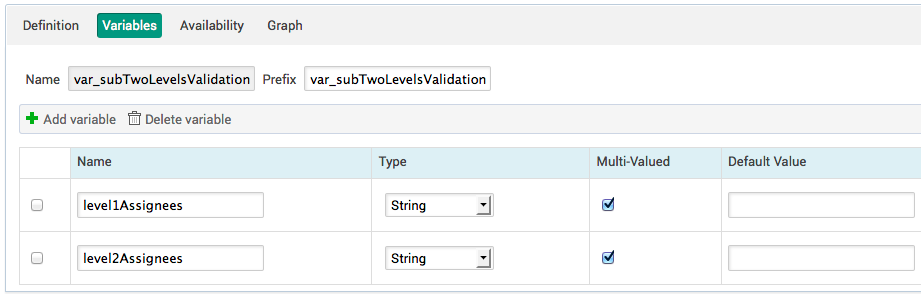
- Add a variable named
level1Assignees. - Choose the String type.
- Check multi-valued (we may have several assignees).
- Save your modifications.
Look at the result below:

Activation Tab
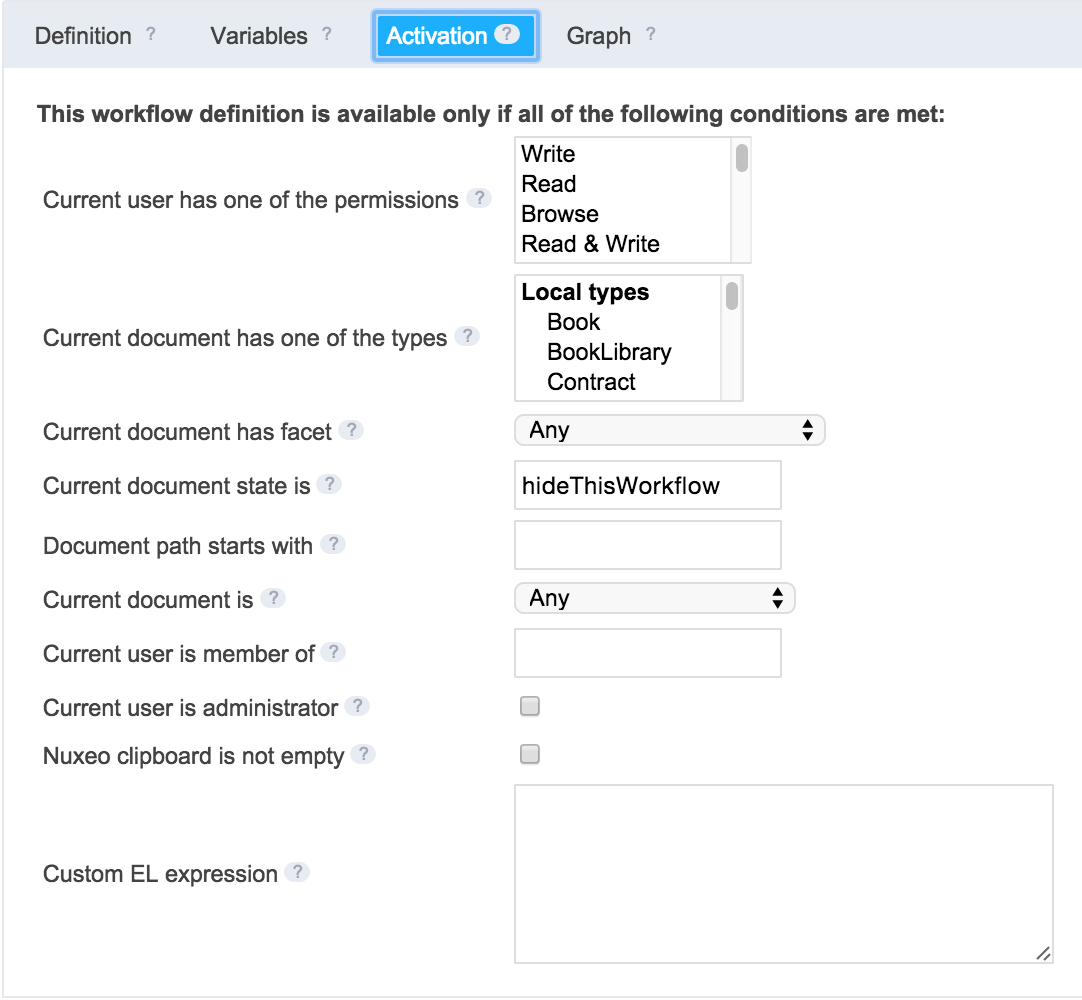
We do not want anybody to launch this subworkflow directly, so we will set rules to restrain its visibility.
- In the "Current document state is" field, type
hideThisWorkflow. As this lifecycle state does not exist, this trick will ensure the workflow will never appear in the drop-down list. Save your modifications. Look at the result below:
Graph Tab
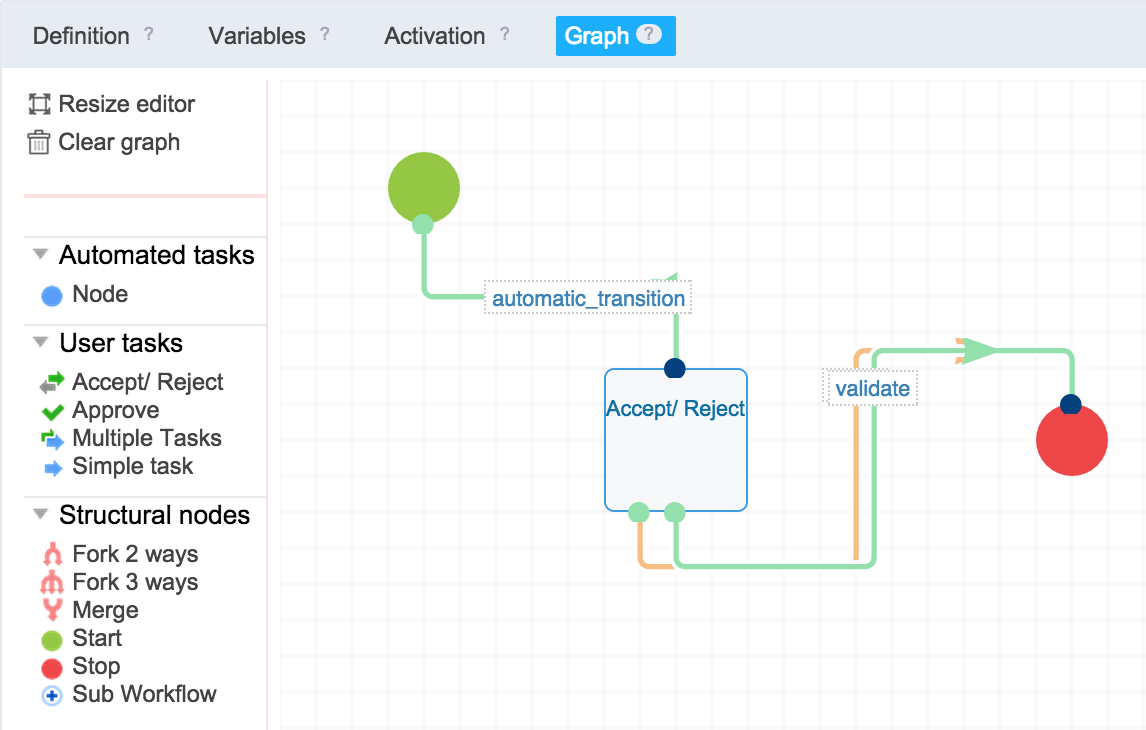
Drag and drop the following nodes on your graph:
- A Start node,
- An Accept/Reject node,
- An end node (Stop).
- Link the Start node's output to the Accept/Reject node.
- Link the Accept/Reject node's output transitions to the end node.
Your graph should look like this:
Edit the Accept/Reject Node
General Tab
Set the following values:
- Title: First level validation
- Directive: Please review this document.
- Assignees expression: Replace the value with the following MVEL expression:
@{WorkflowVariables["level1Assignees"]}This calls the corresponding workflow variable that will be set in the parent workflow. - Grant permission to task assignees: Read (in our case we want to make sure the accountants will be able to view the document, not necessarily to modify it).
- Look at the result below:

Transitions Tab
- In the
validatetransition, click on the Create button to add a new automation chain. - Name your chain
validateDoc. Set your chain as following:
Operation Parameters Fetch > Context Document(s) Document > Follow Life Cycle Transition Value: approve - Save your modifications.
Creating the Accounting + General Manager (GM) Validation Workflow
In our case this workflow will be used in the other possible situations, but it needs to be reusable in another context as well.
- In Nuxeo Studio, go to Workflow > Process definitions and click on the New button.
Fill in the fields:
- Feature ID:
subTwoLevelsValidation - Label: Two levels validation workflow
- Feature ID:
- Click on the Next button.
Variables Tab
Here comes another generic workflow. This time again we will setup workflow variables to define the assignees and the parent workflow will send us the variables content.
- Add a variable named
level1Assignees, and another one namedlevel2Assignees. - Choose the String type for both.
- Check multi-valued for both.
Look at the expected result:

- Save your modifications.
Activation Tab
Same goes for this subworkflow:
- In the "Current document state is" field, type
hideThisWorkflow. As this lifecycle state does not exist, the workflow will never appear in the drop-down list. - Look at the expected result:
- Save your modifications.
Graph Tab
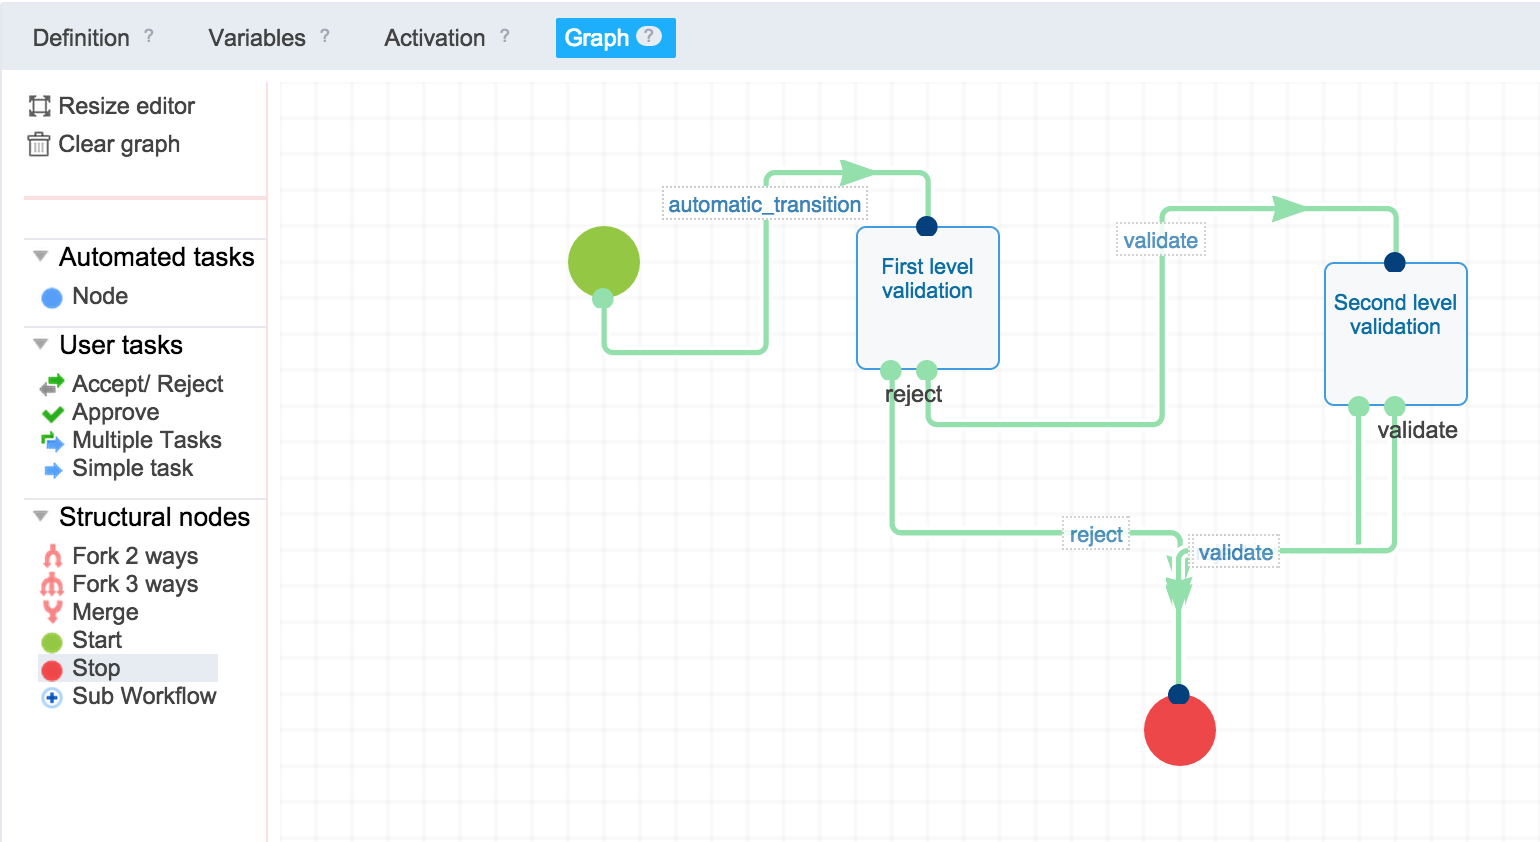
Drag and drop the following nodes on your graph:
- A Start node.
- Two Accept/Reject nodes.
- An end node (Stop).
- Link the Start node's output to the first Accept/Reject node.
- Link the first Accept/Reject node's validate output transition to the second Accept/Reject node.
- Link the second Accept/Reject node's validate output transition to the end node.
- Link both Accept/Reject node's reject output transitions to the end node.
Your graph should look like this:
- Save your modifications.
Edit the First Accept/Reject Node
General Tab
Set the following values:
- Title: First level validation.
- Directive: Please review this document.
- Assignees expression: Replace the value with the following MVEL expression:
@{WorkflowVariables["level1Assignees"]}This calls the corresponding workflow variable that will be set in the parent workflow. - Grant permission to task assignees: Read (in our case we want to make sure the accountants will be able to view the document, not necessarily to modify it).
- Look at the expected result:
- Save your modifications in the node and on the graph.
Edit the Second Accept/Reject Node
General Tab
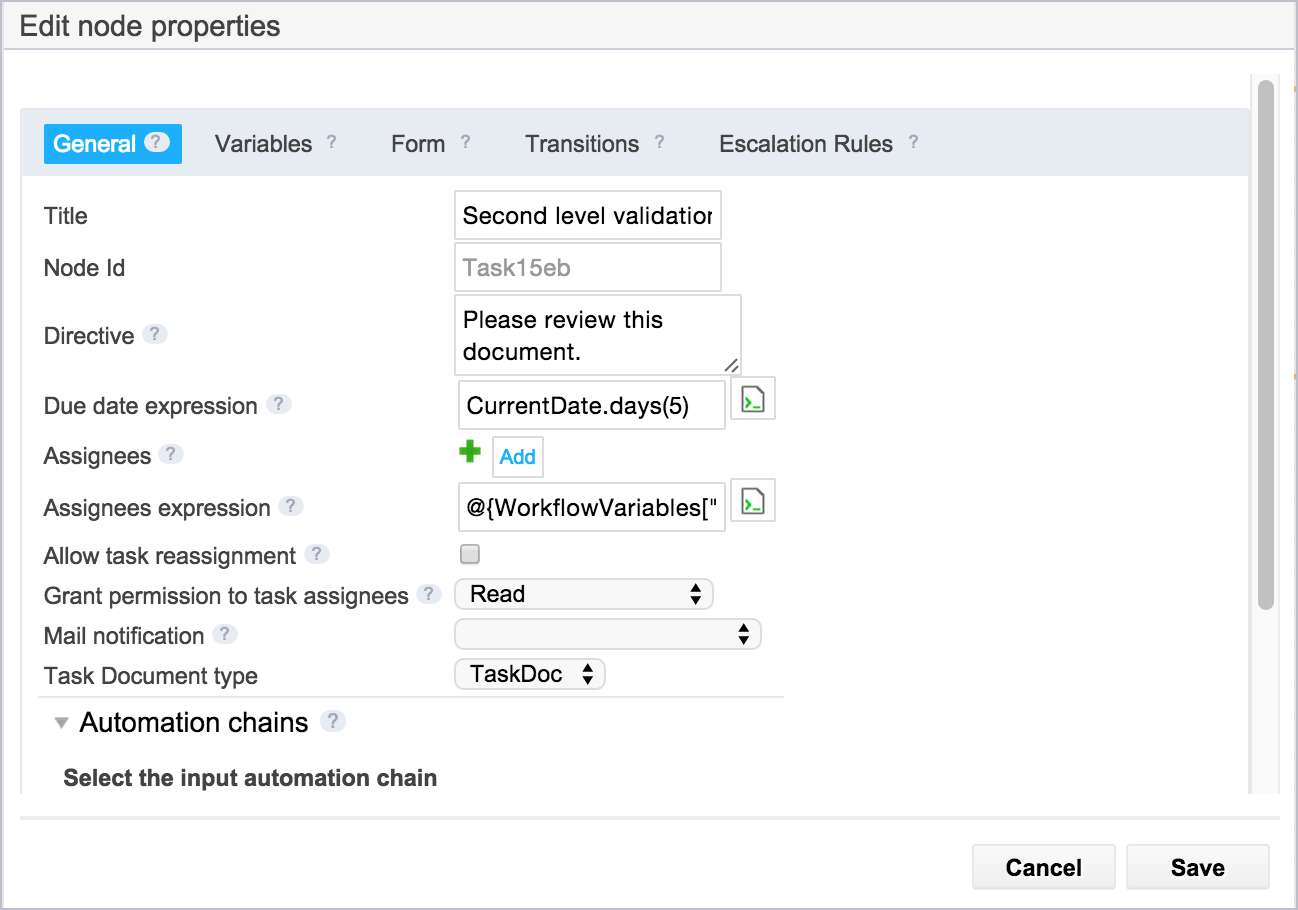
Set the following values:
- Title: Second level validation
- Directive: Please review this document.
- Assignees expression: Replace the value with the following MVEL expression:
@{WorkflowVariables["level2Assignees"]}This calls the corresponding workflow variable that will be set in the parent workflow. - Grant permission to task assignees: Read
- Look at the expected result:
Transitions Tab
- In the
validatetransition, select thevalidateDocchain. Look at the expected result: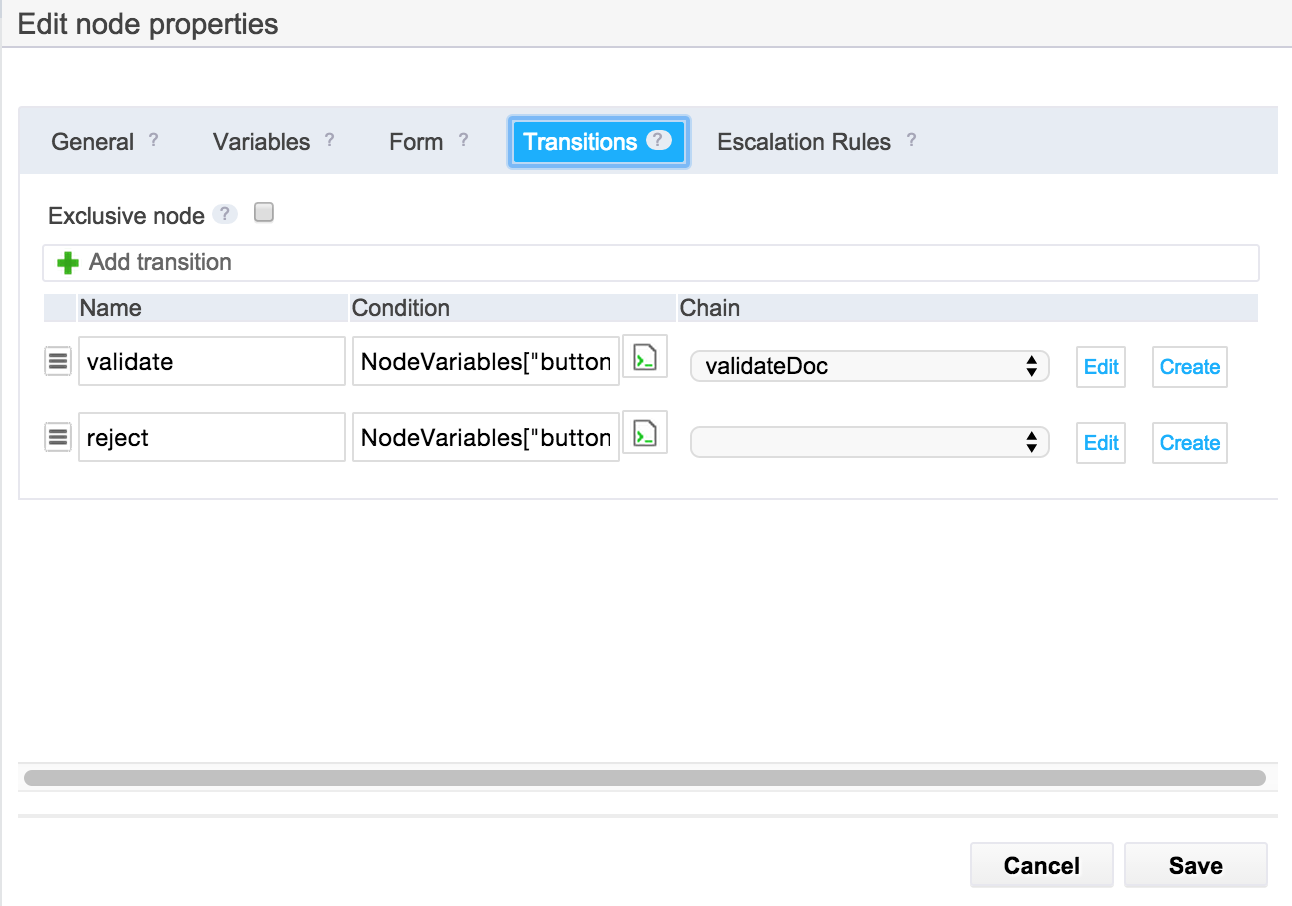
- Save your modifications in the node and on the graph.
That's it! Our sub workflows are ready, now only remains the one workflow to rule them all, the main workflow.