Users Tab

Adding Users
To add a new user, click the Add User button and fill in the email address, first name, last name, and optionally tags.
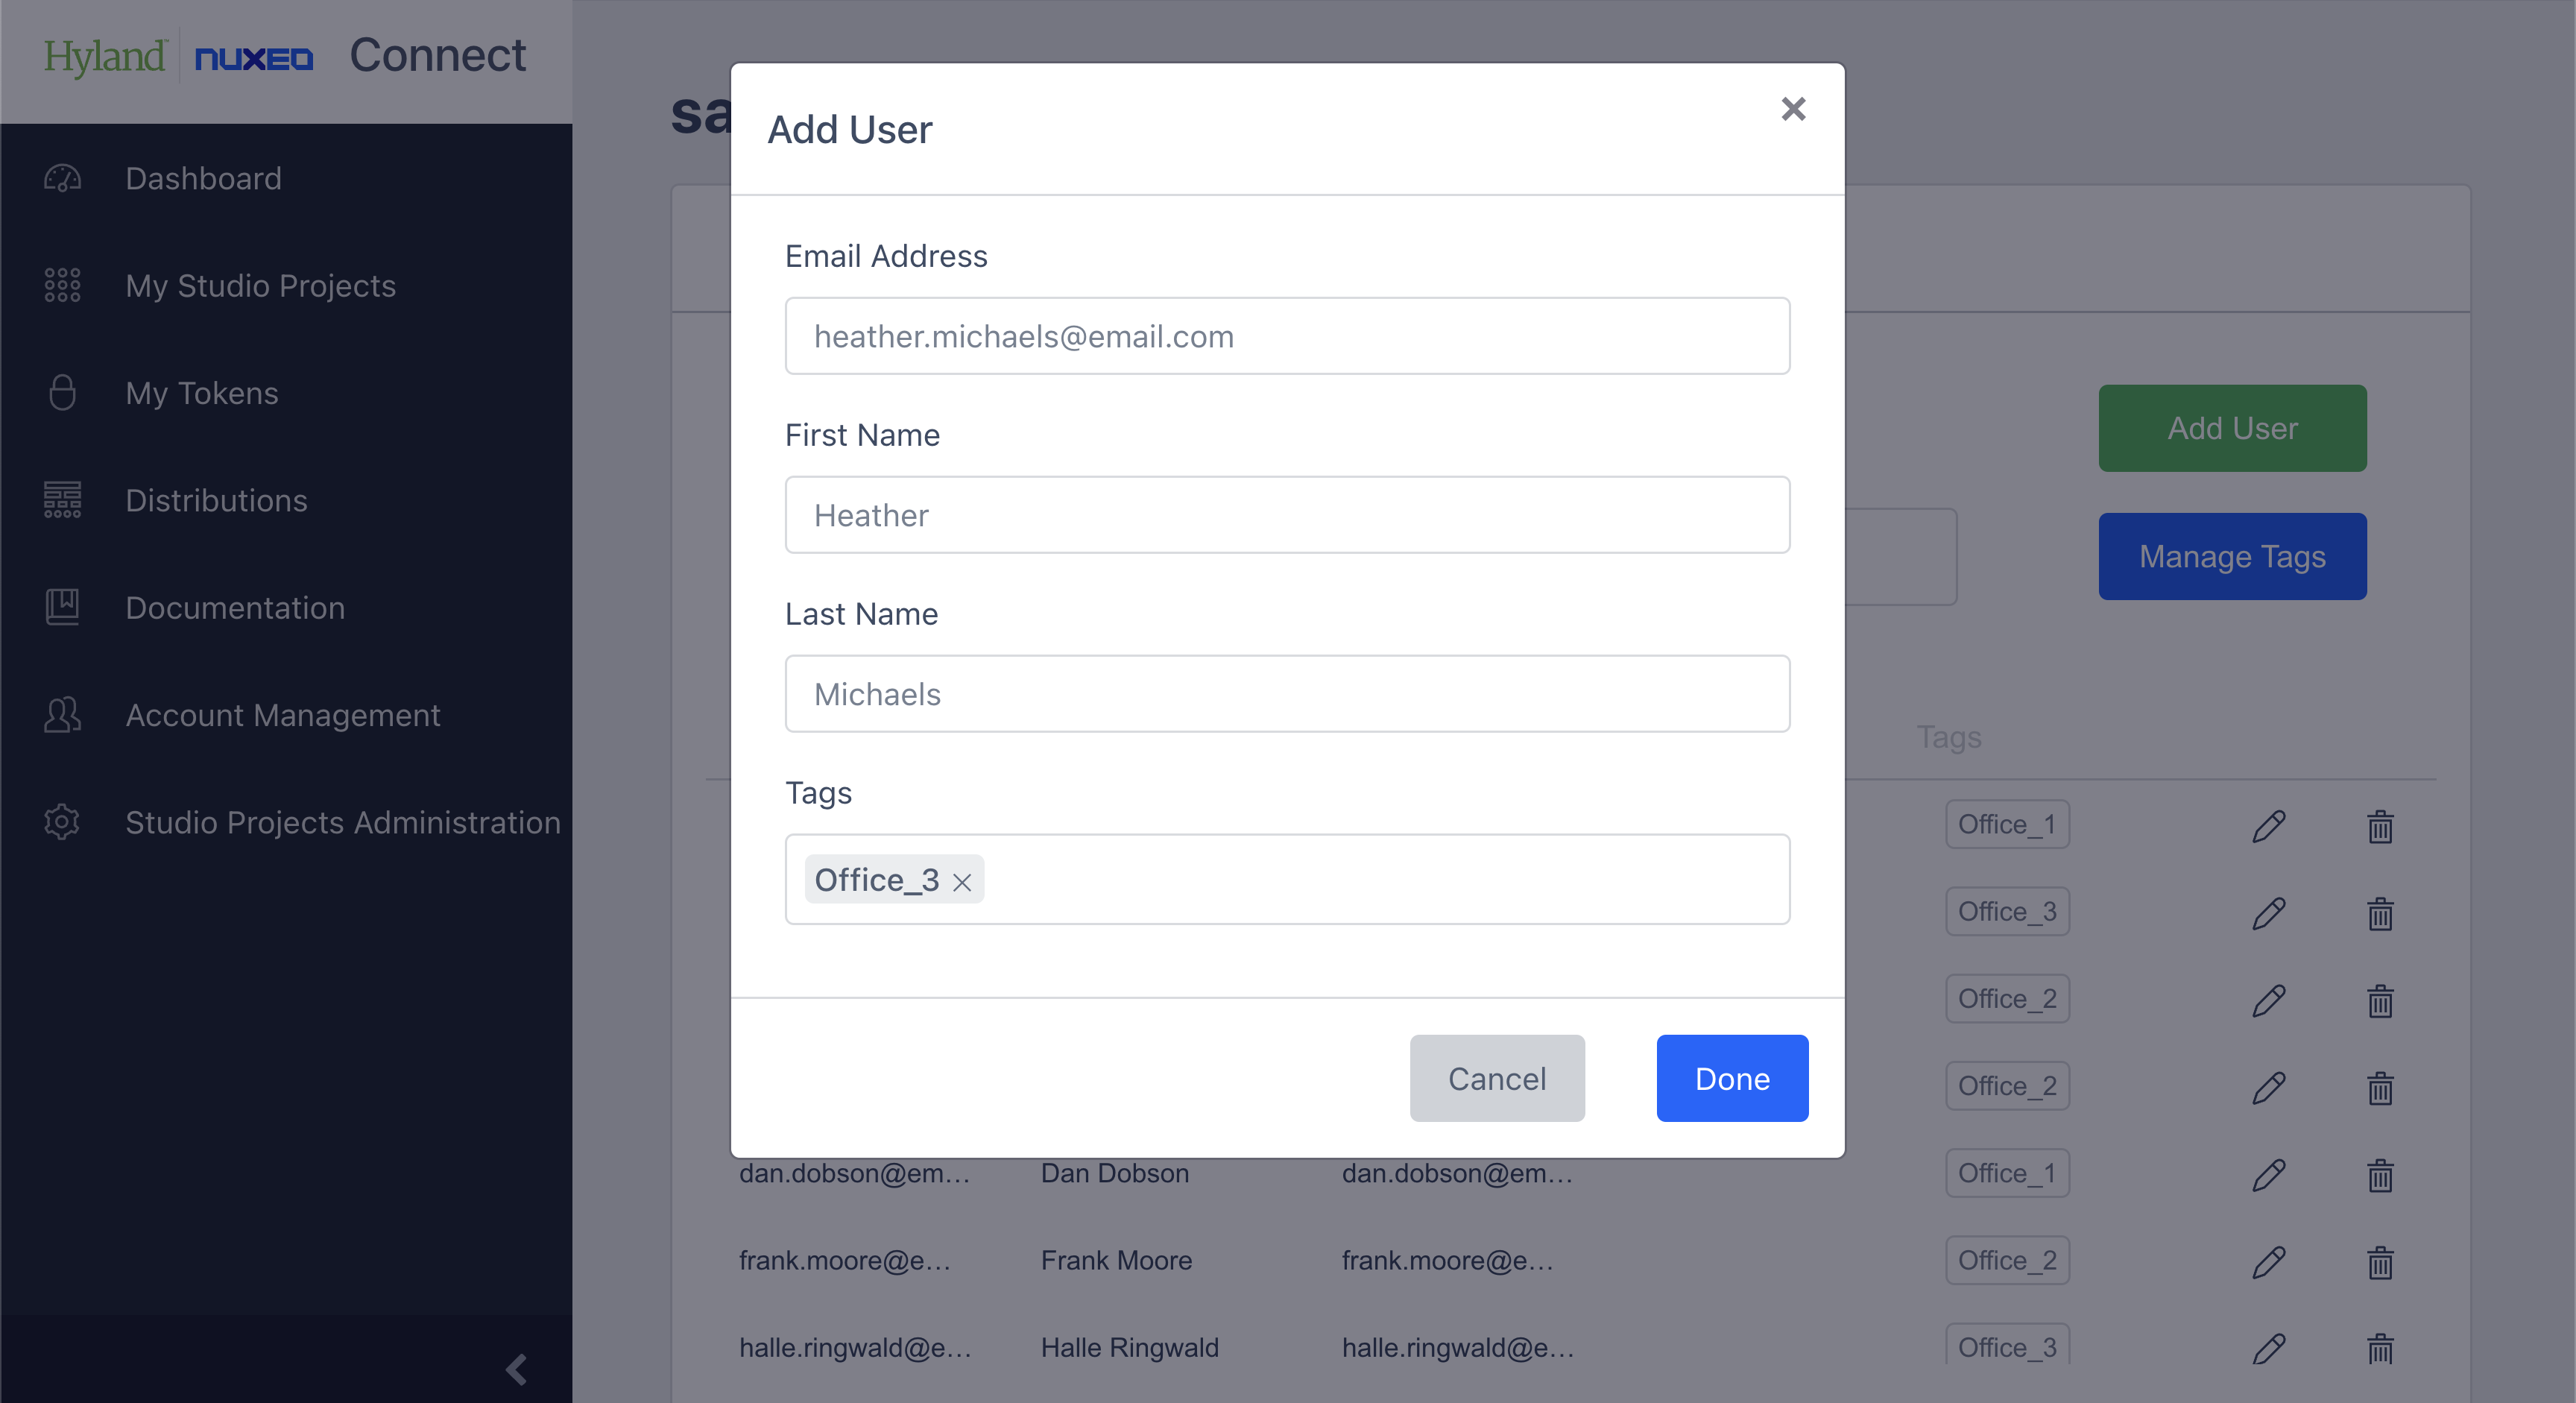
If there is no NOS account associated with provided email, email with link to set it up will be sent automatically. The setup link is valid for 7 days, after which our support team can send a new email upon request.
Managing Tags
By clicking the Manage Tags button you will open a pop-up window in which you can see the list of tags used in the organization and the number of their users.
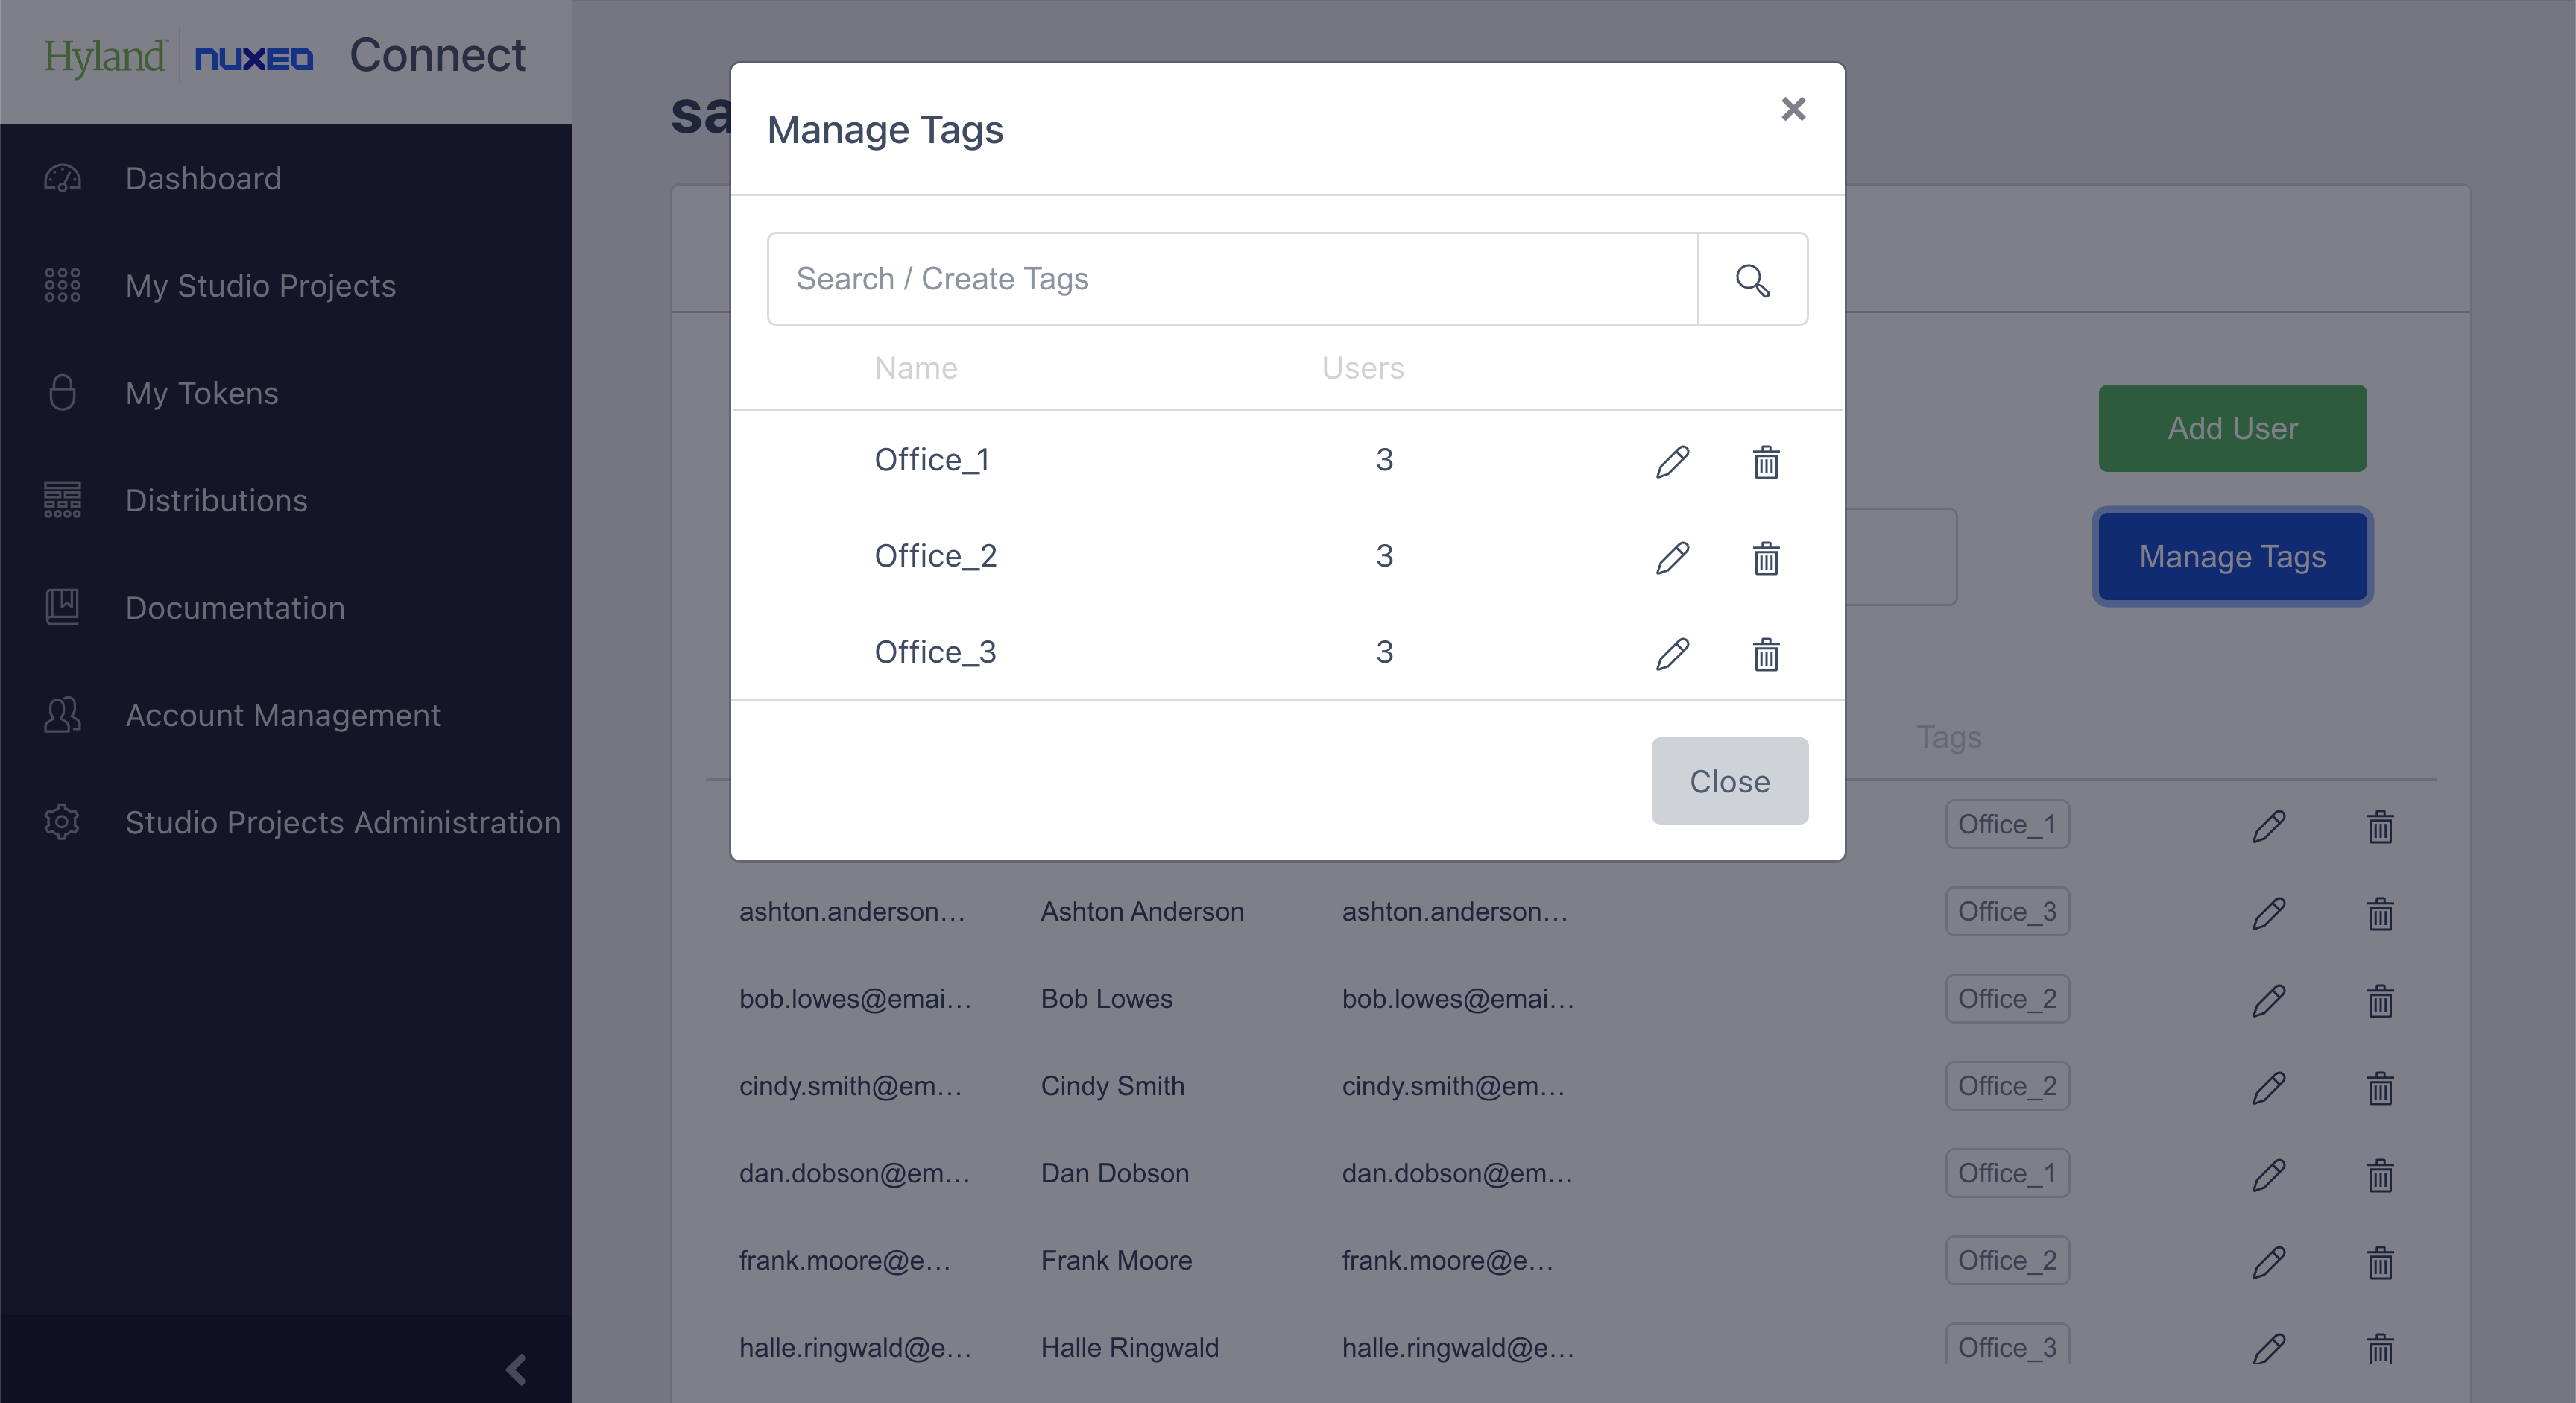
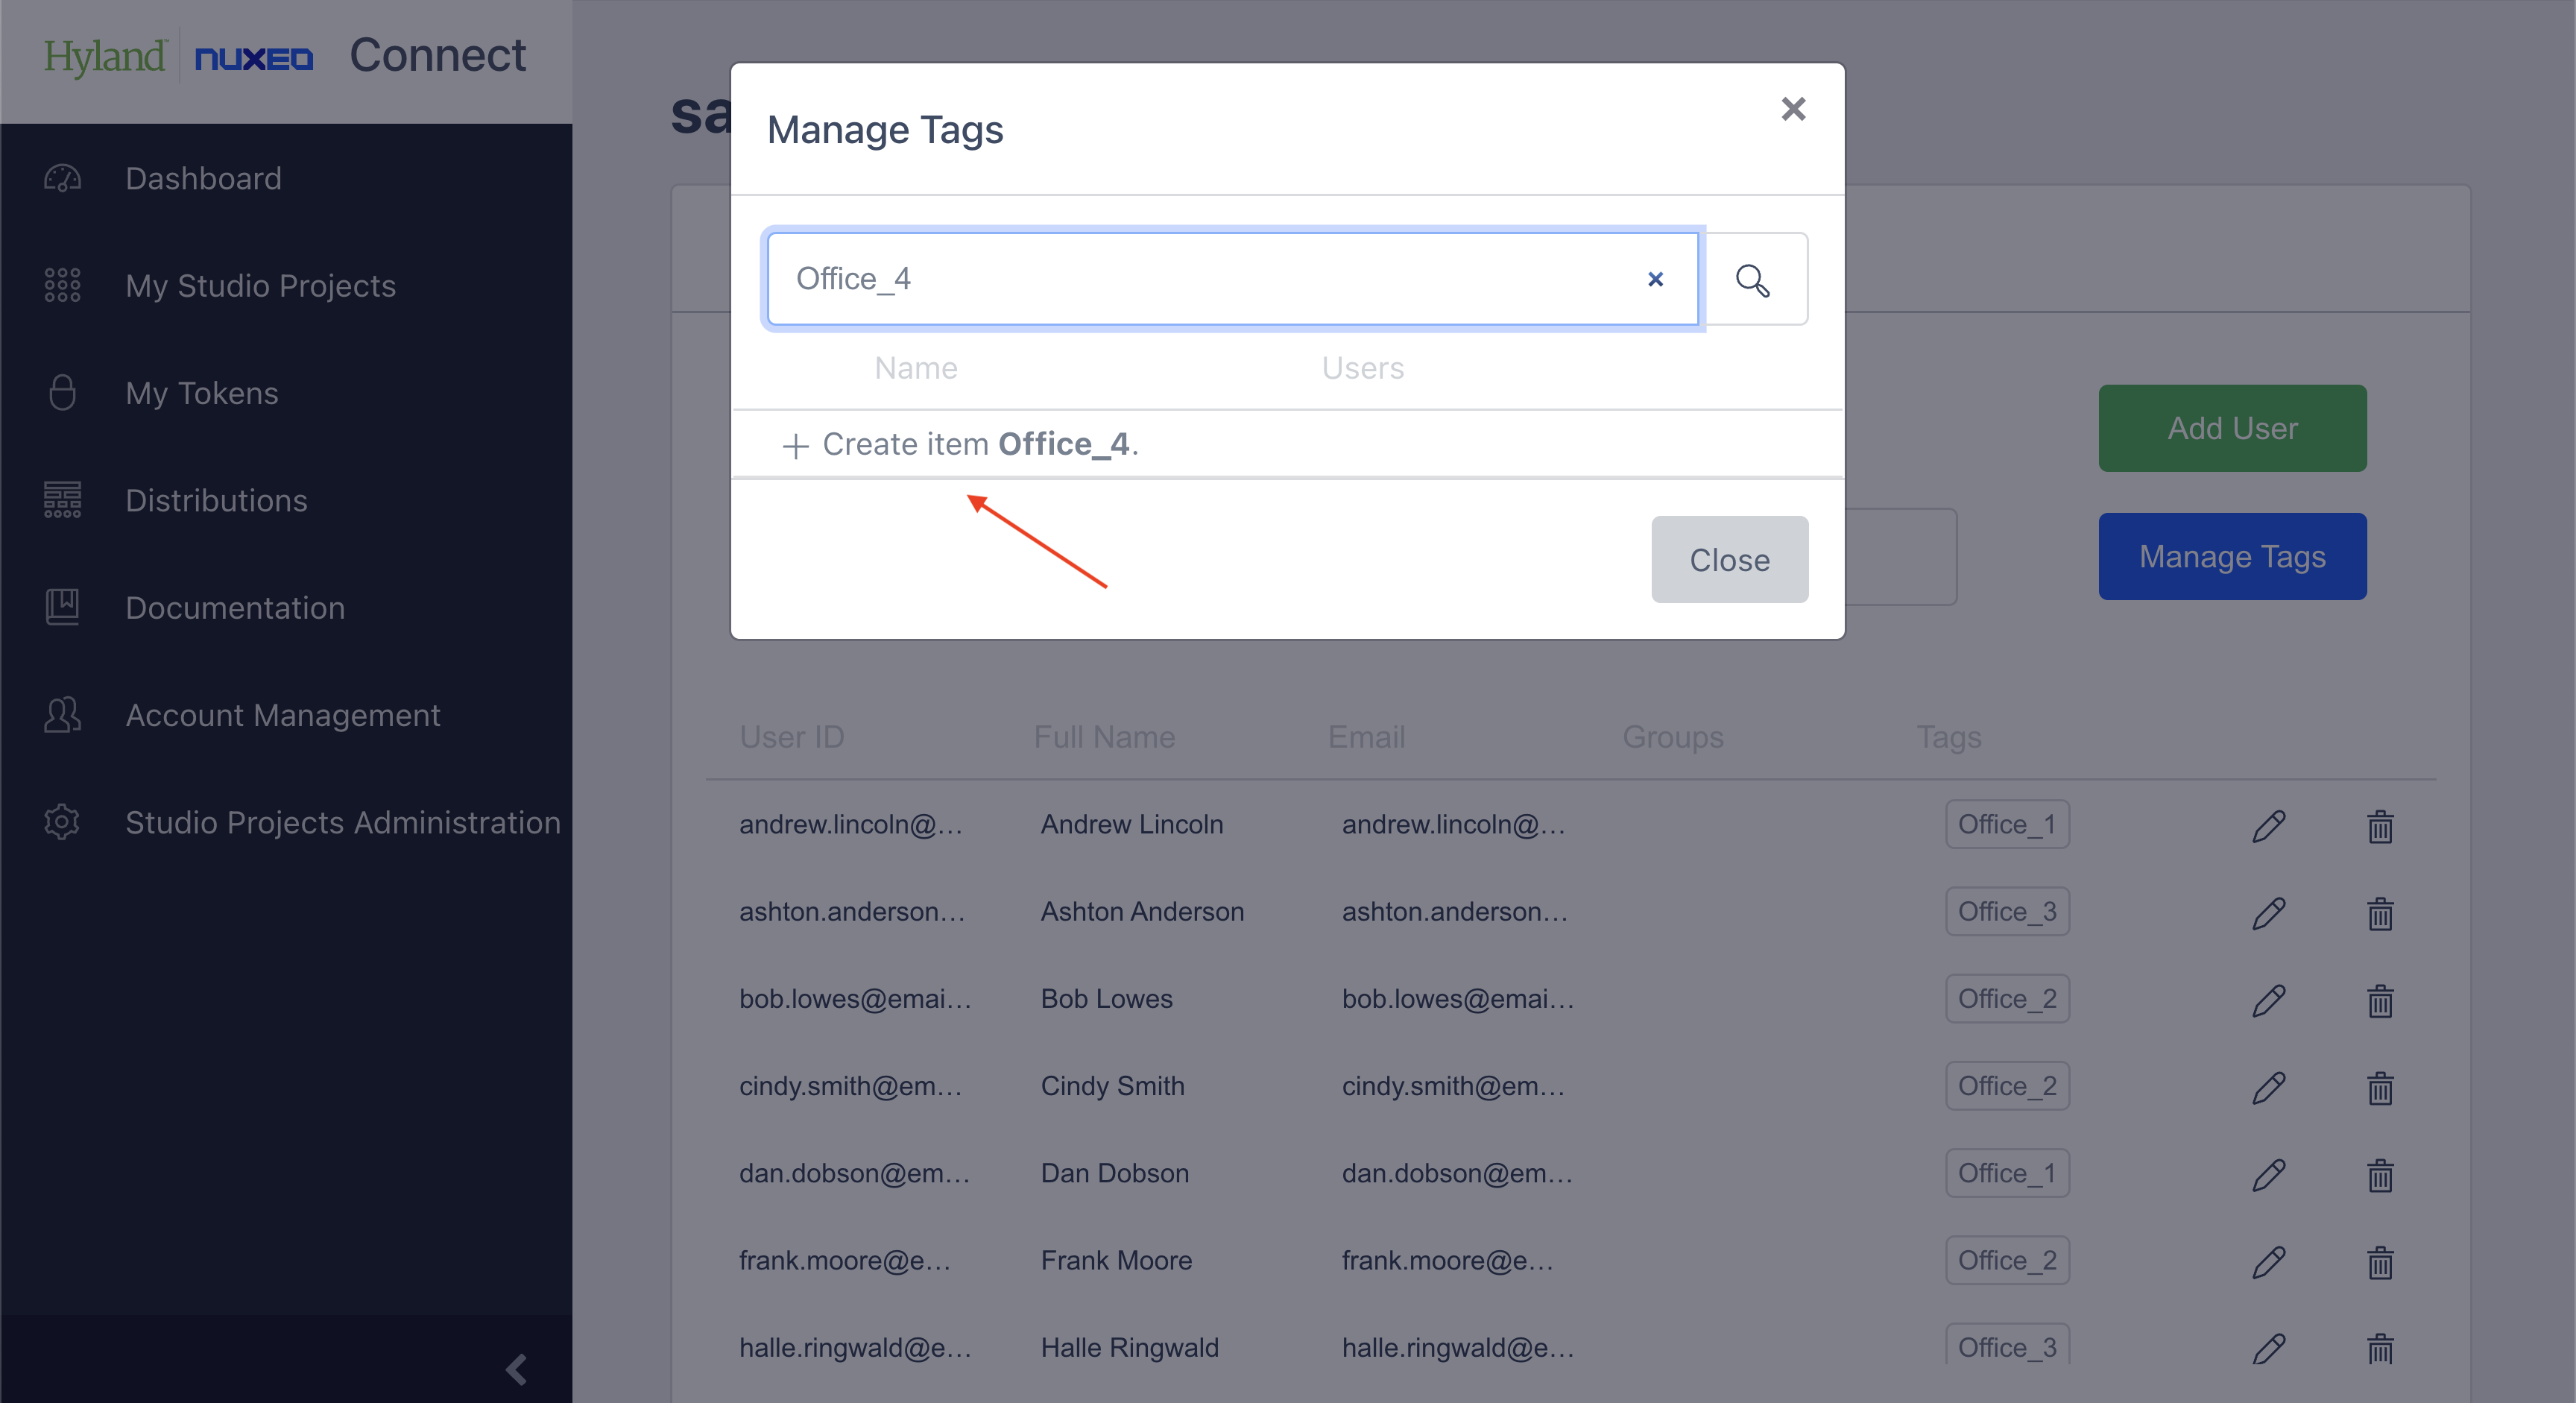
To add a new tag, enter its name into the search box and click Create item.
You can edit existing tags by clicking the pencil icon next to a tag’s name, editing the entry and clicking the checkmark icon.
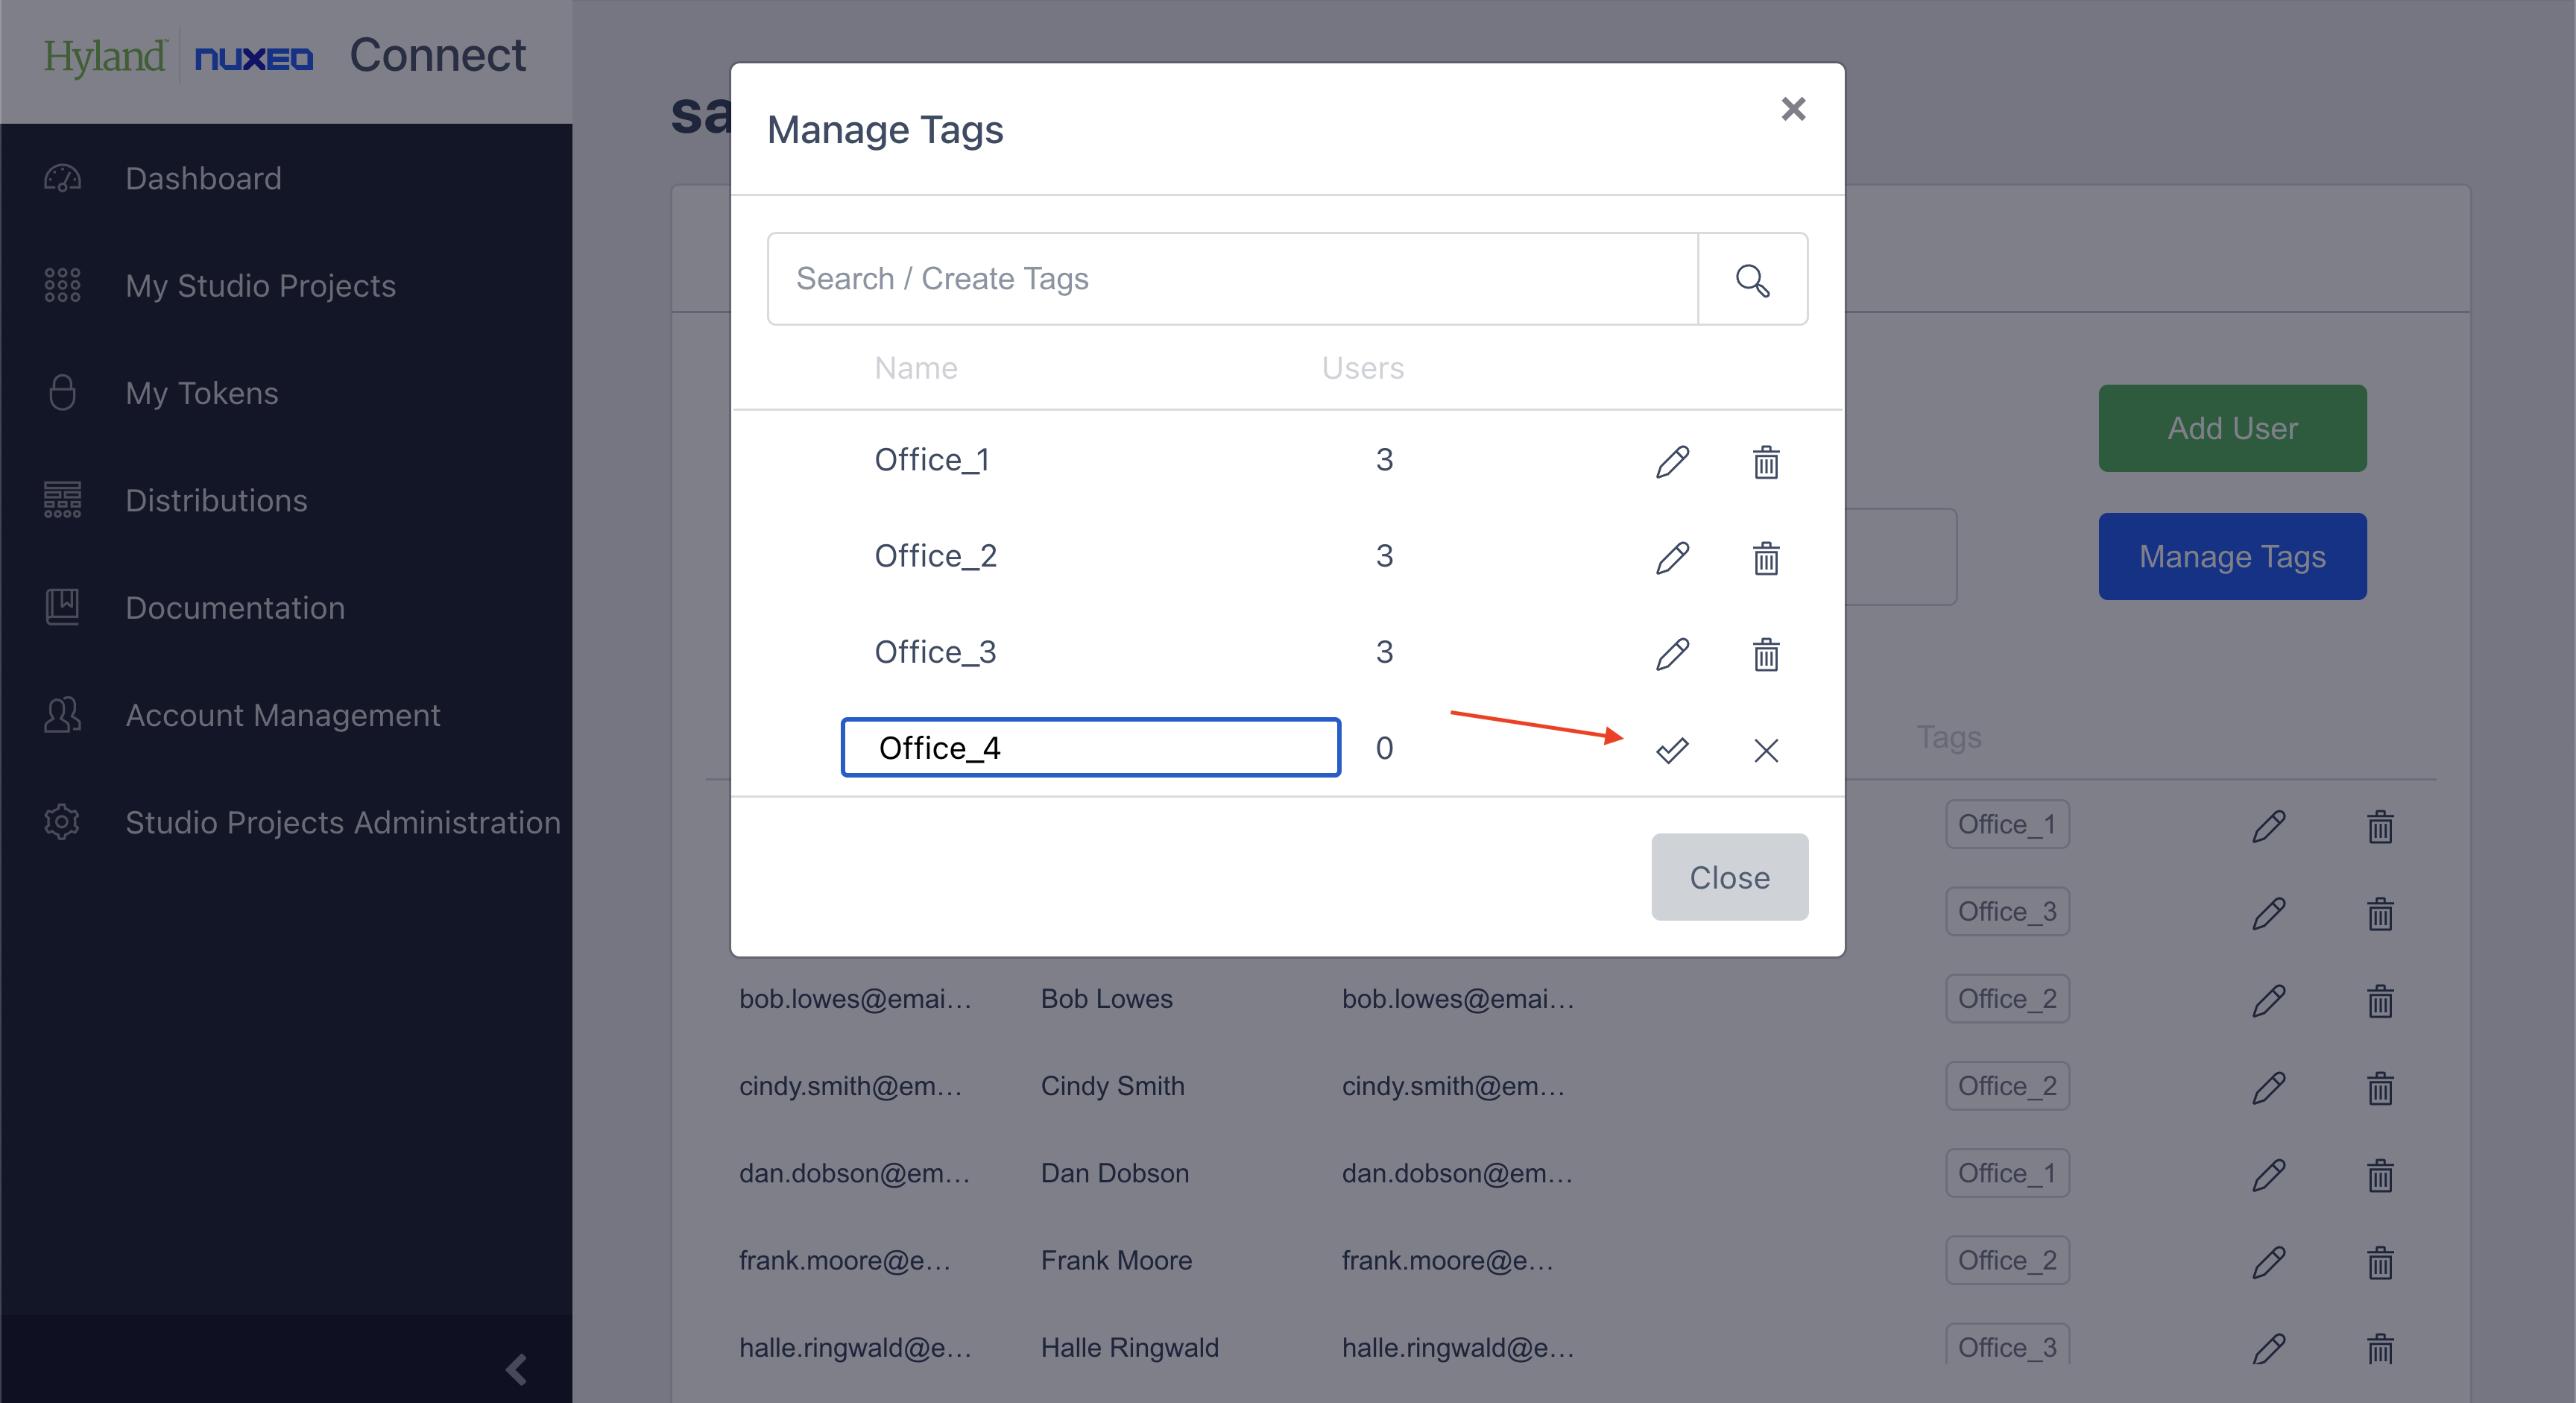
To delete an existing tag, click the trash icon next to it and click Confirm in the pop-up window.
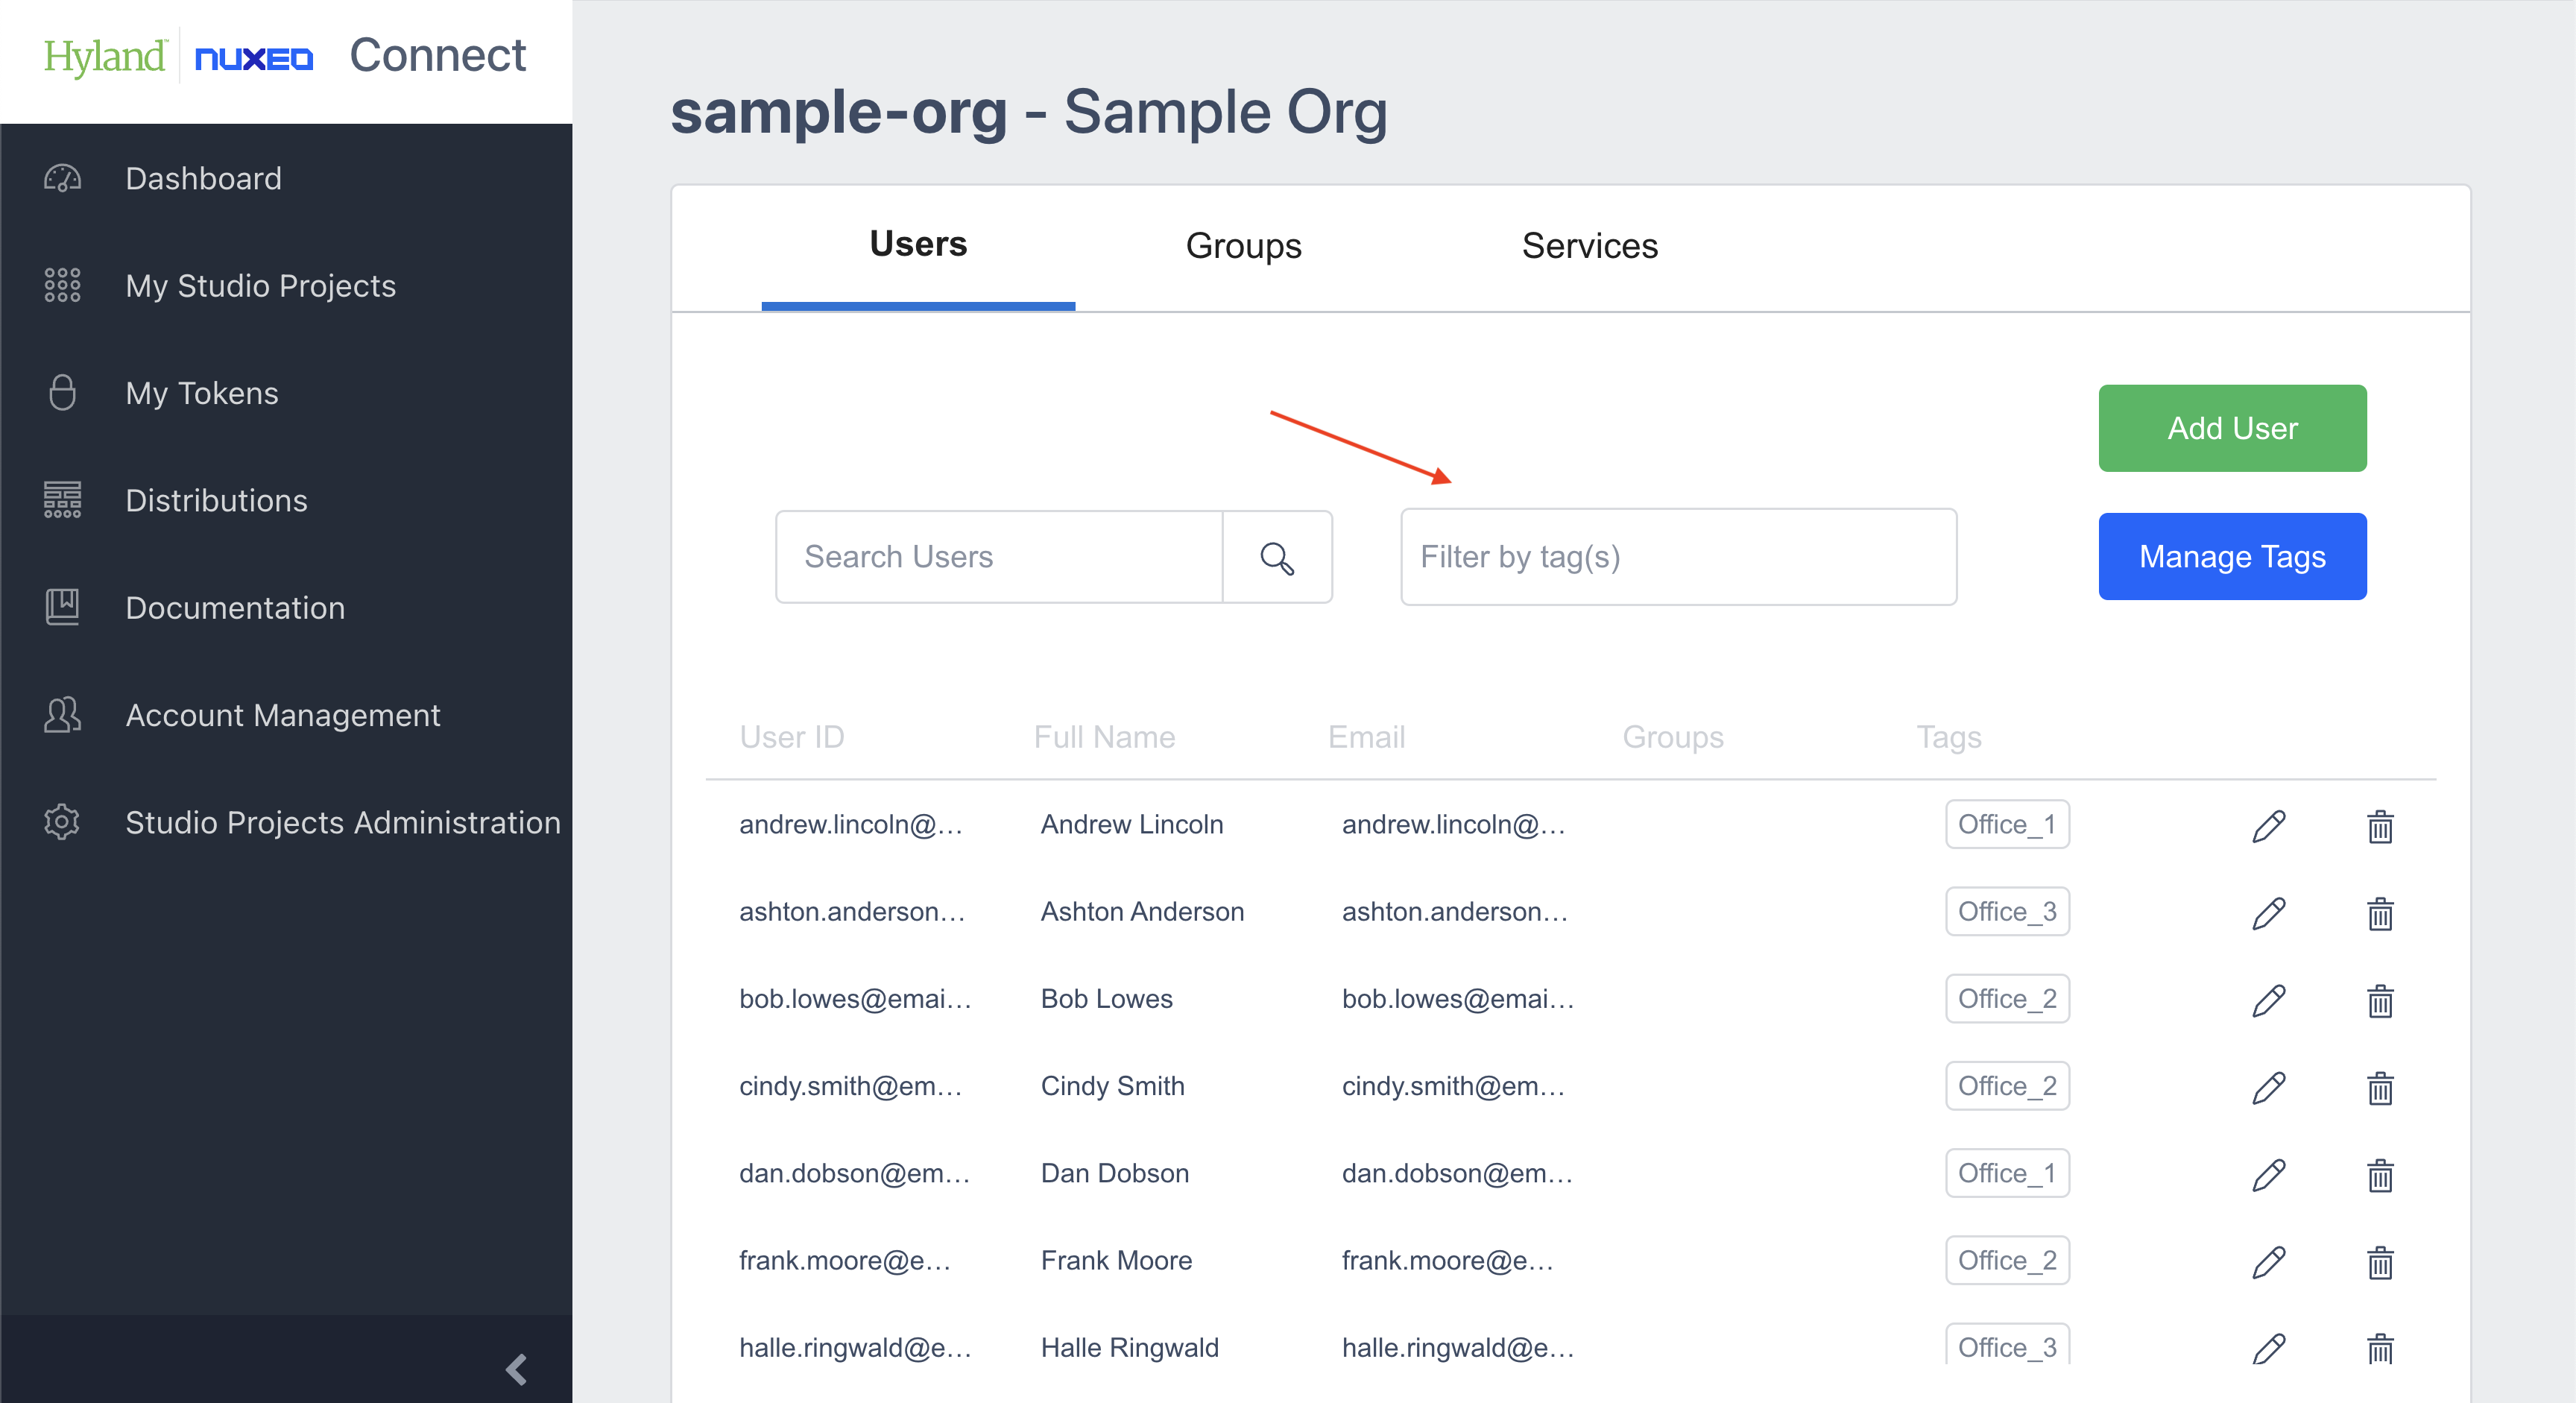
Searching Users
Use the search box to find users by user ID, full name, or email.

Filtering Users
Filter the user list by tag using the Filter by tag bar.
User View Page
Click a user's entry to access the user view page. Here, you can see:
- Their full name
- Their Okta user profile with a link
- Tags assigned to them
- Groups they belong to
- Linked services

You can navigate to the group view page by clicking an entry in the Groups table on the bottom and to the service view page by clicking an entry in the Services table.
Editing User Information
On the user view page, click the Edit button to modify the user's email, first name, last name, and tags.
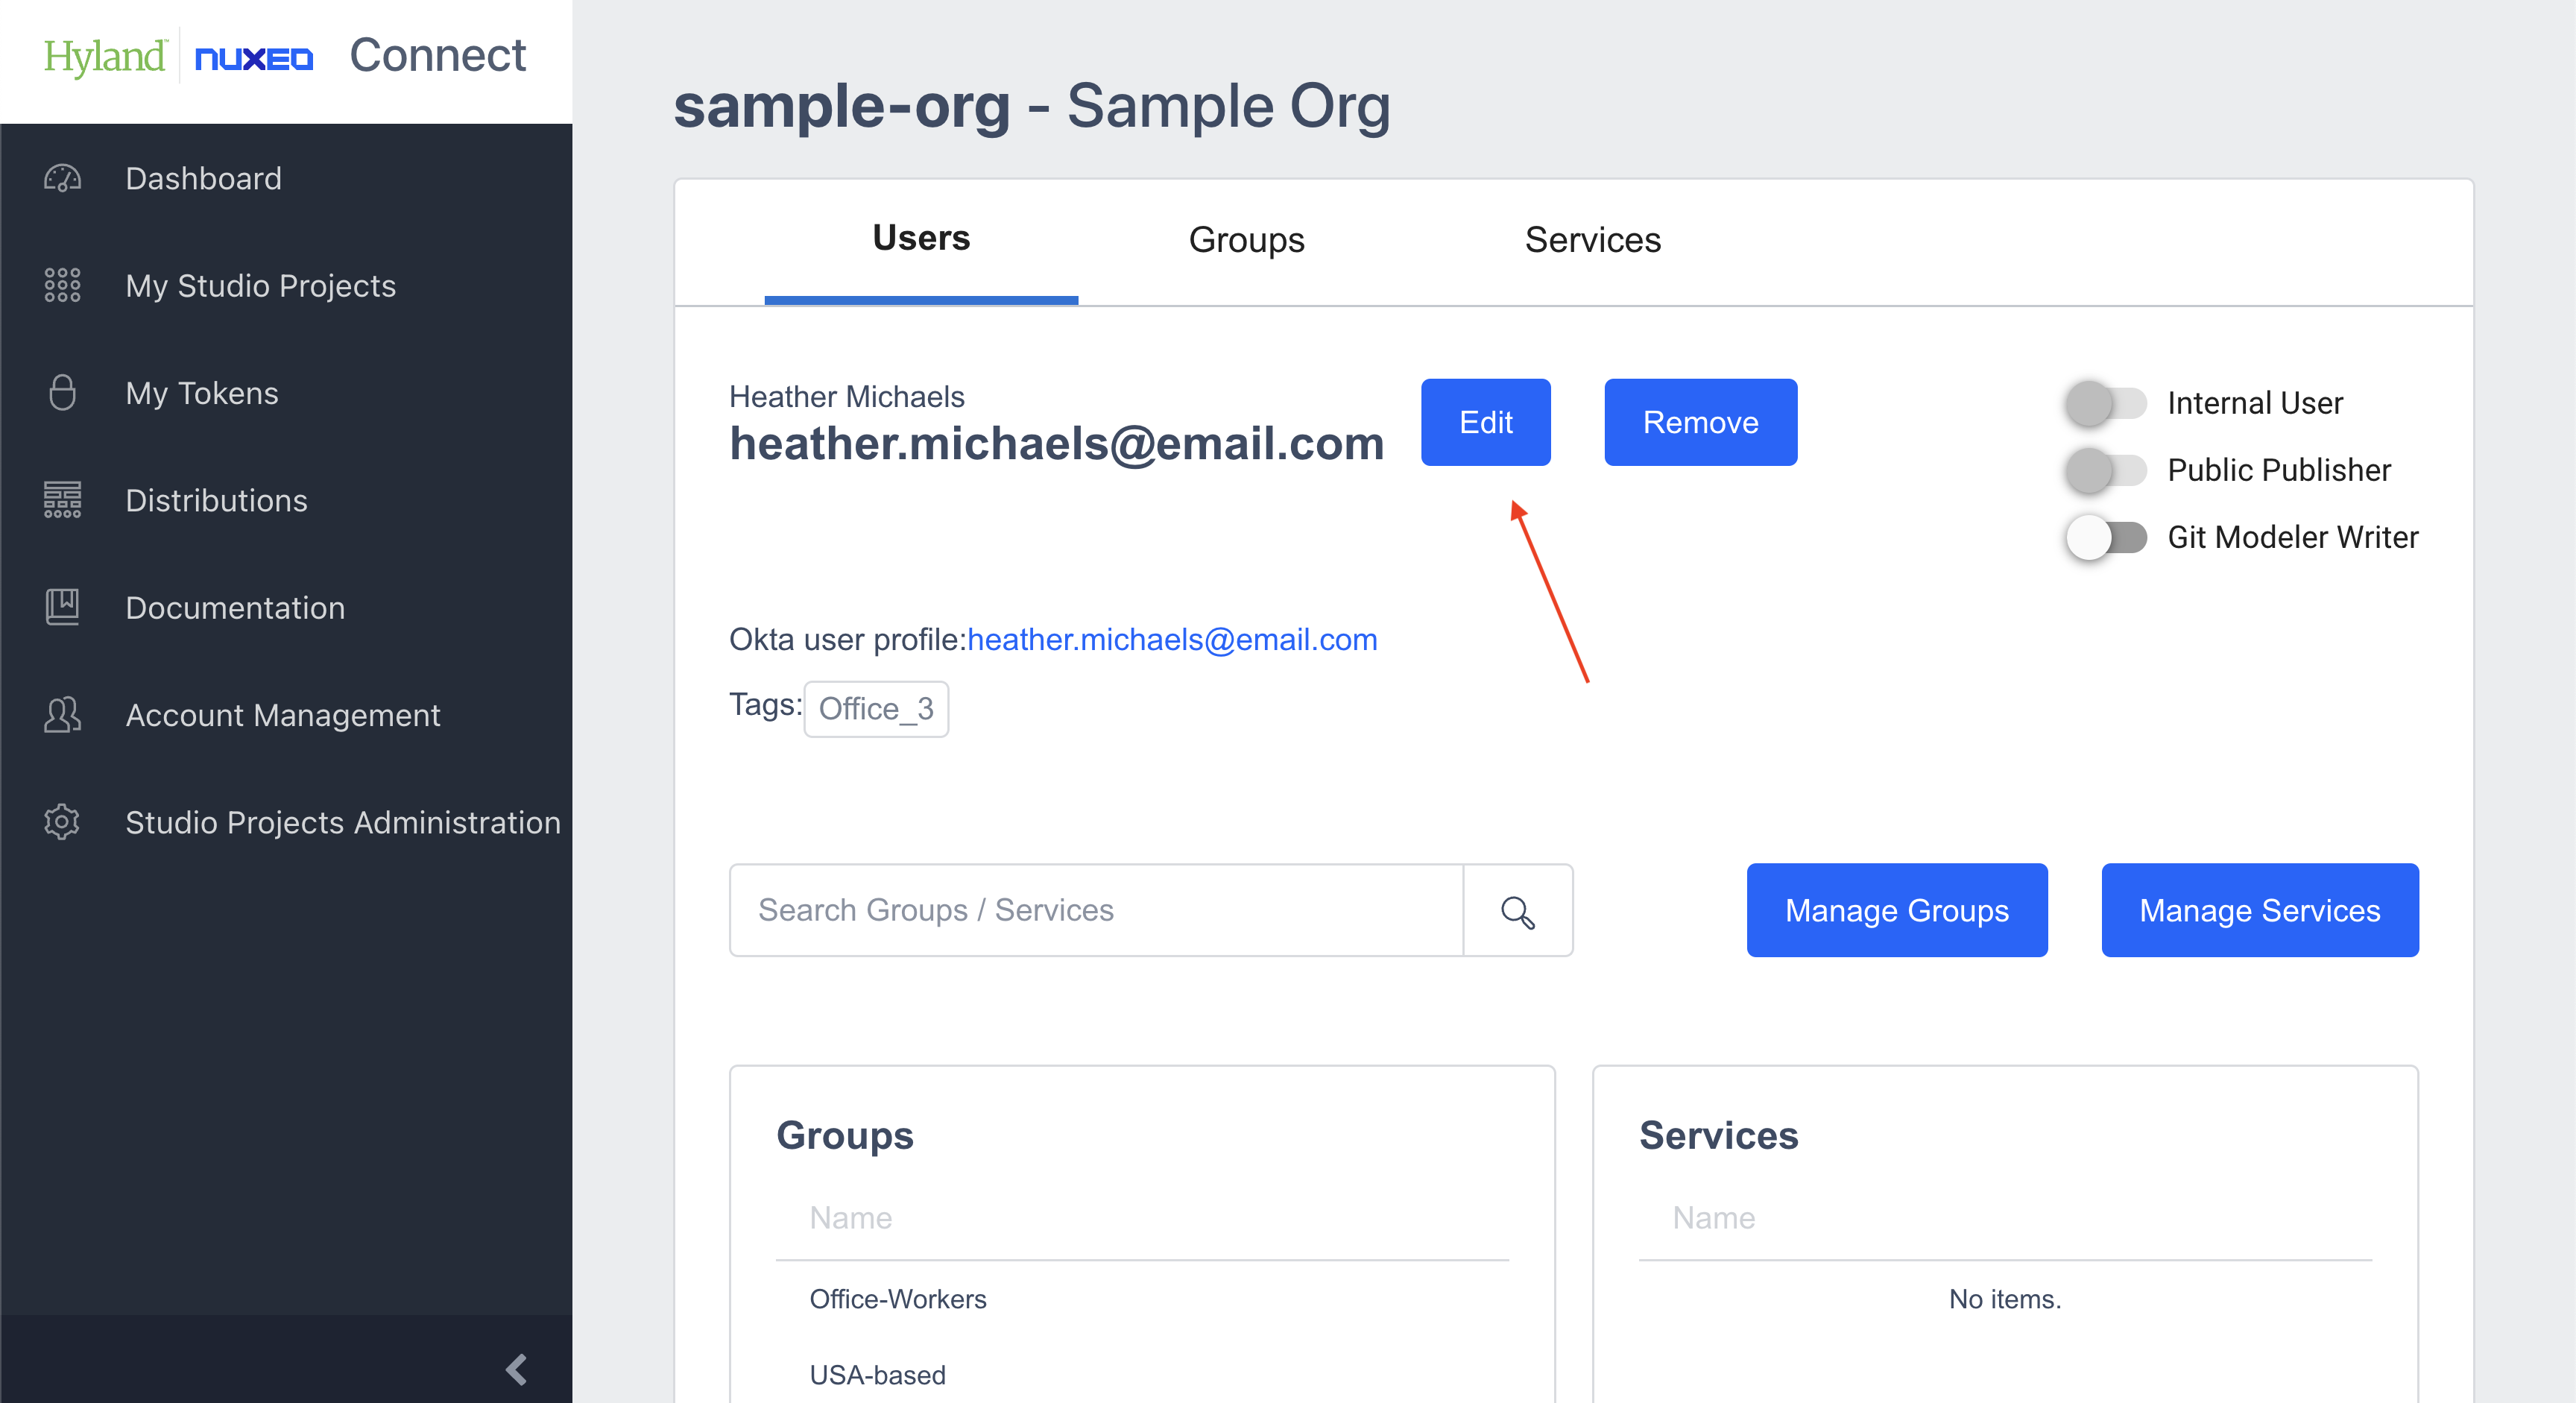
Removing Users
You can remove a user from the organization using the Remove button in the user view page. Confirming the action will remove access to all applications and services from this organization; it does not delete the user account. If that user is also a member of other organizations, access to them remains unchanged.

Group and Service Management
By using the search box in the user view page, you can search for groups the user is part of and services the user is associated with. By clicking the Manage Groups button you can assign the user to groups or take back group assignment.

By clicking on a group’s name in the Manage Groups pop-up window, you switch the position of it (Unassigned or Assigned).
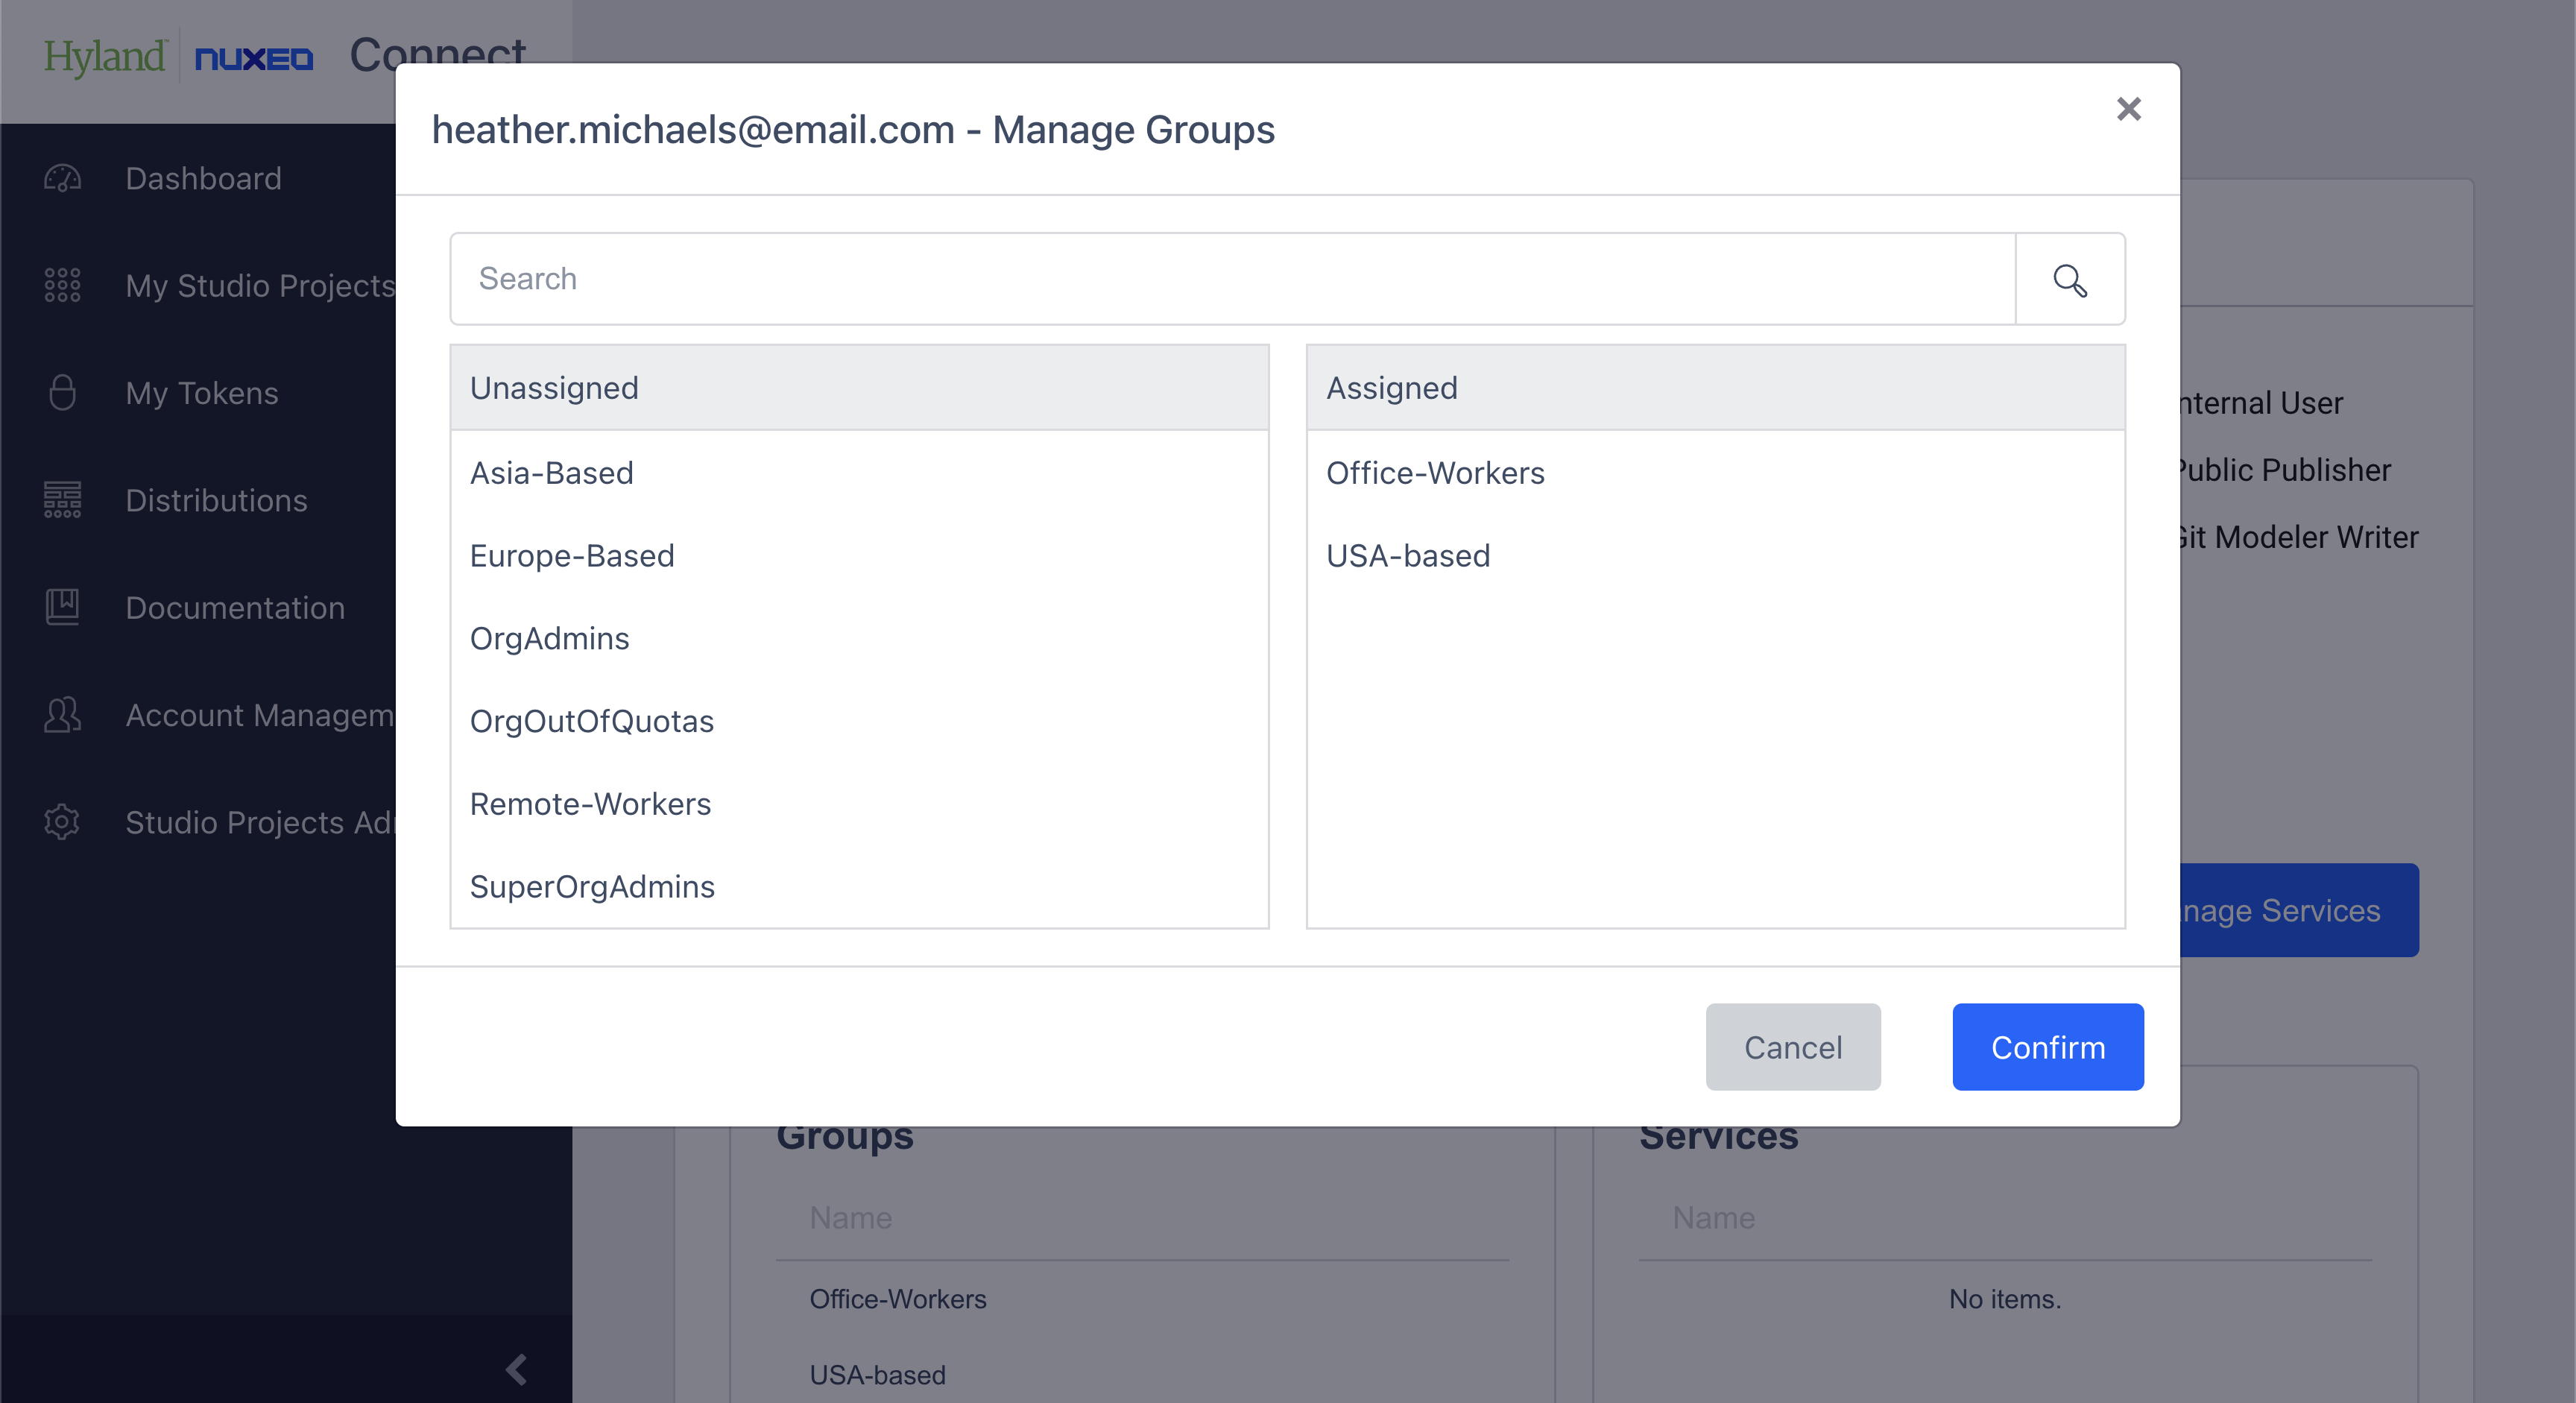
Click Confirm to save changes.
You can also manage services the user is assigned to by clicking the Manage Services button.

By clicking on a service’s name in the Manage Services pop-up window, you switch the position of it (Unassigned or Assigned). Click Confirm to save changes, like in Groups management pop-up.
Groups Tab
In the Groups tab you can see a list of all groups in your organization, with their name, number of members and description.
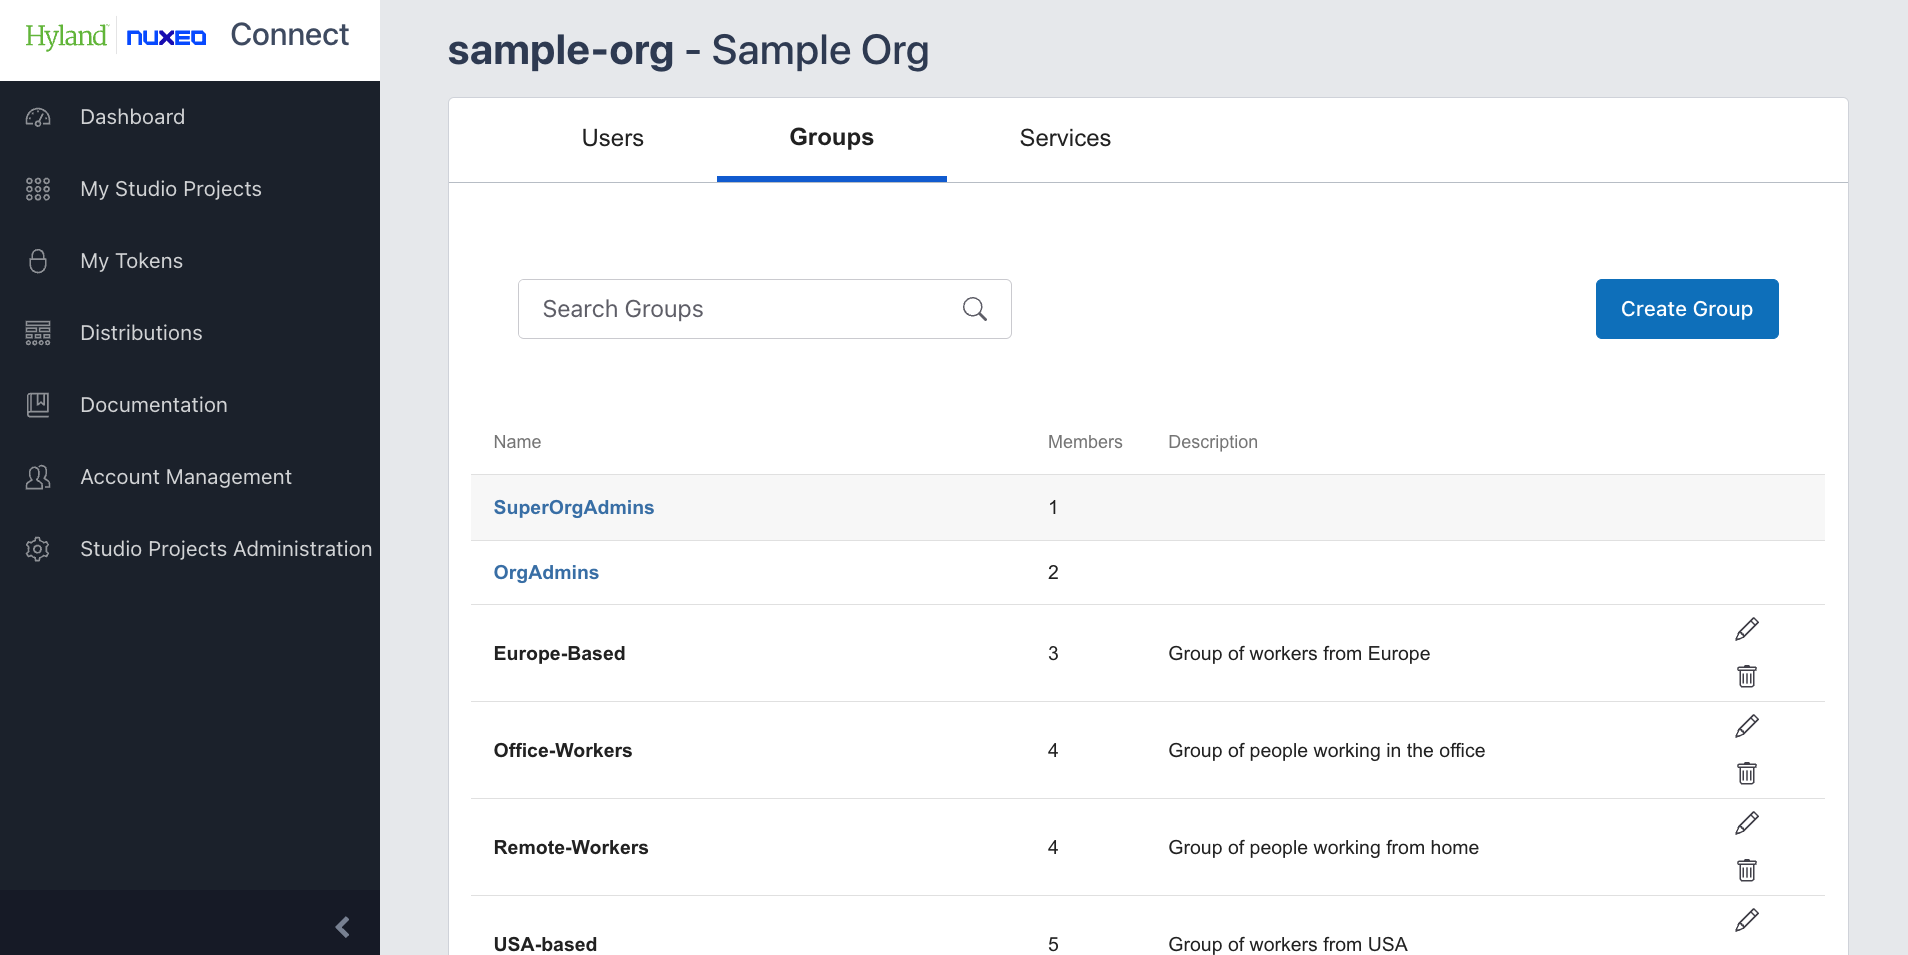
Searching Groups
Utilize the search box to search the list of groups using their names.

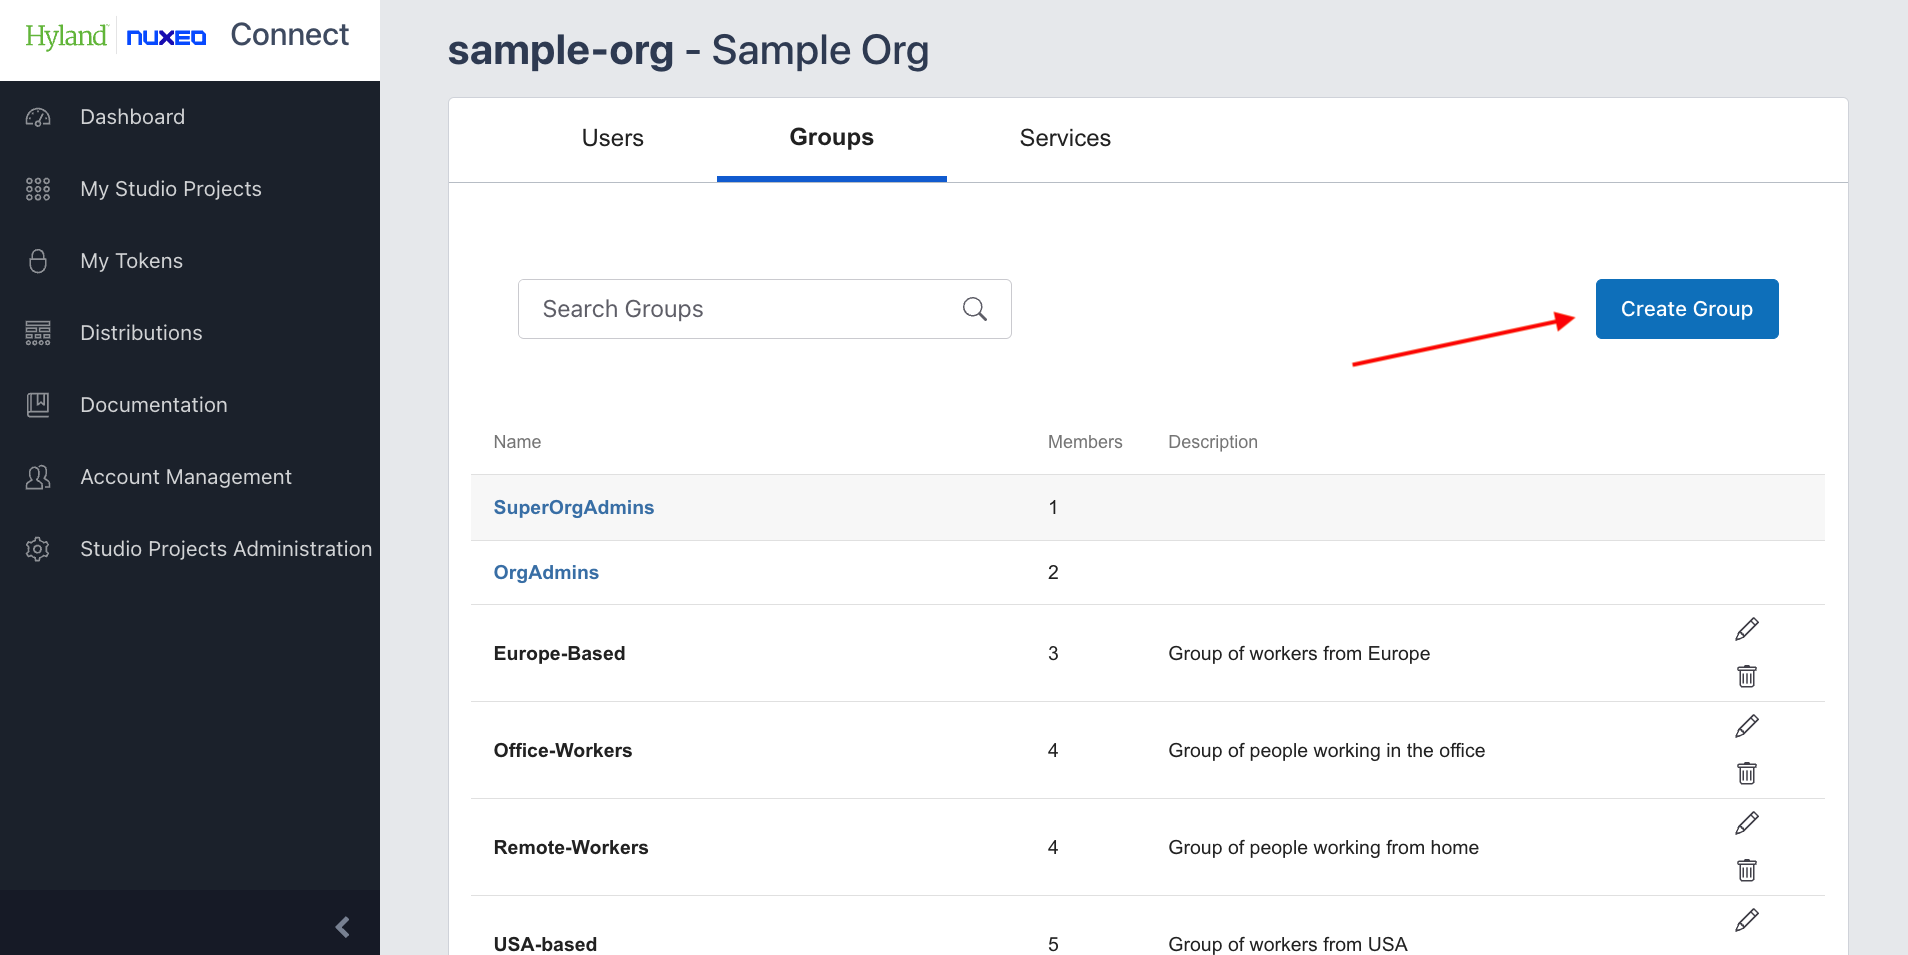
Creating Custom Groups
Create new custom groups by clicking the Create Group button,
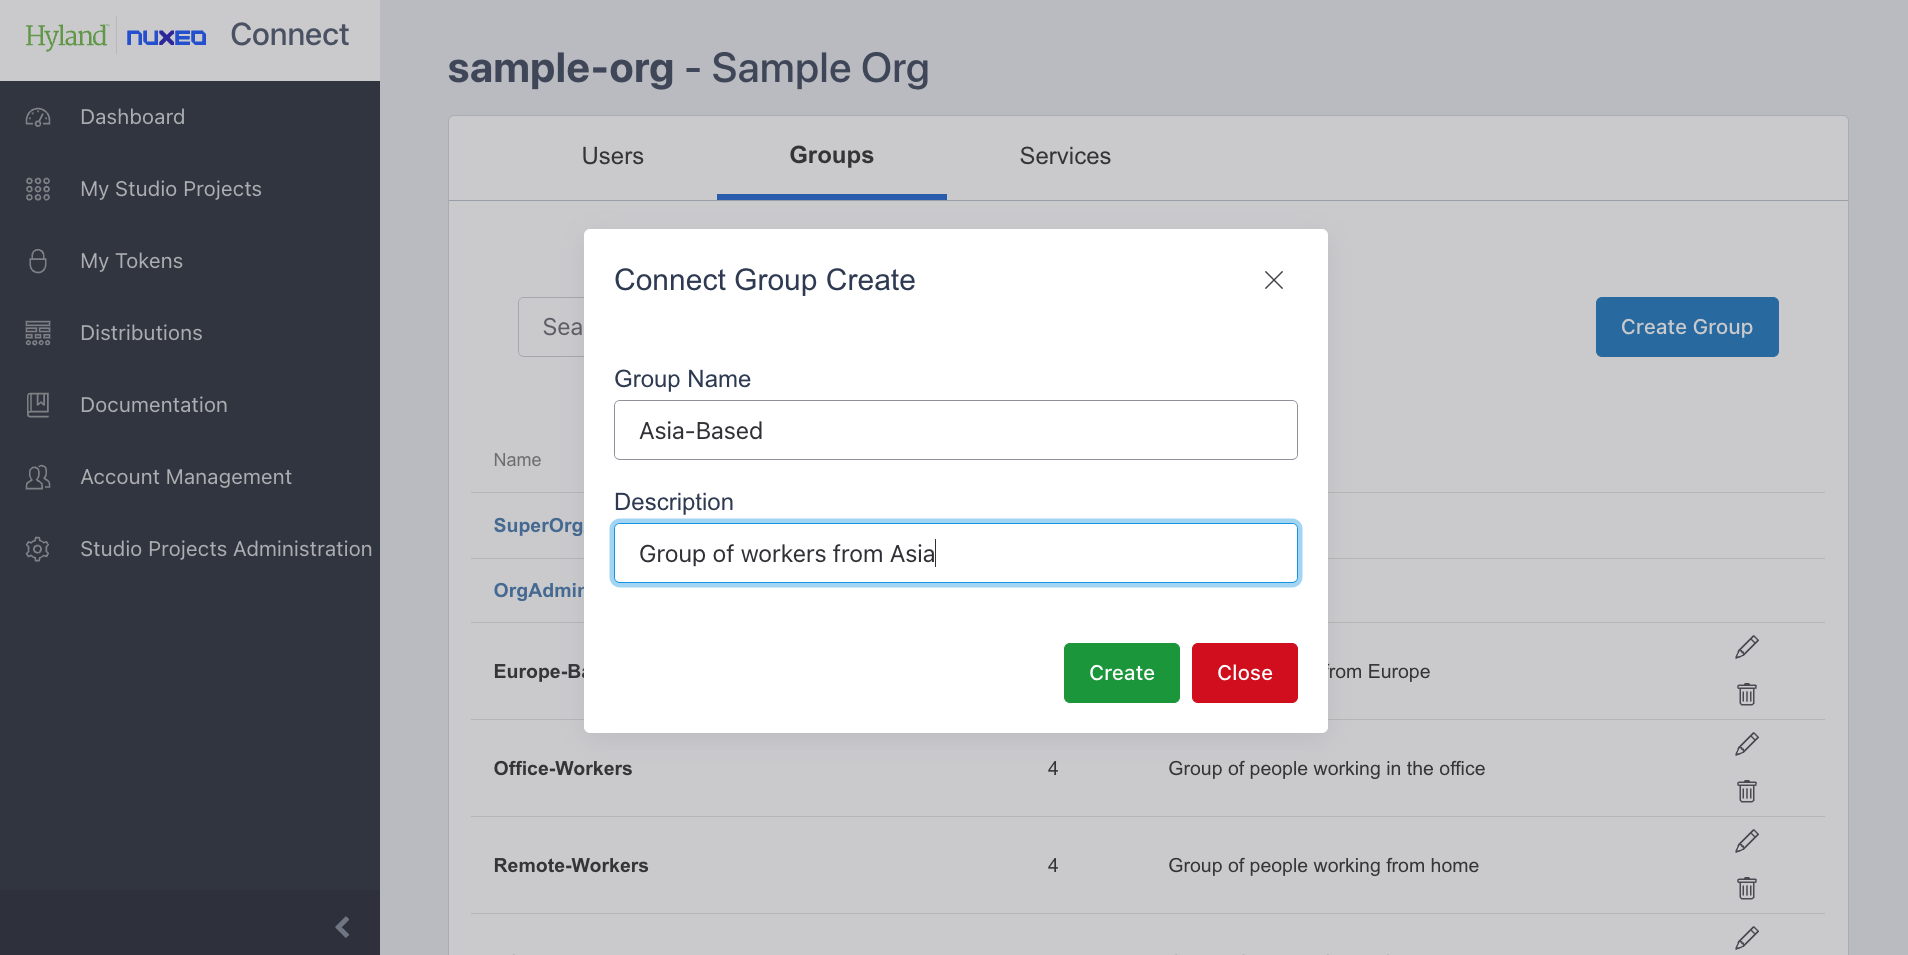
Once a group is created, you can assign users to it by clicking on their names in the pop-up window.
You can also add users to groups from the group view page.
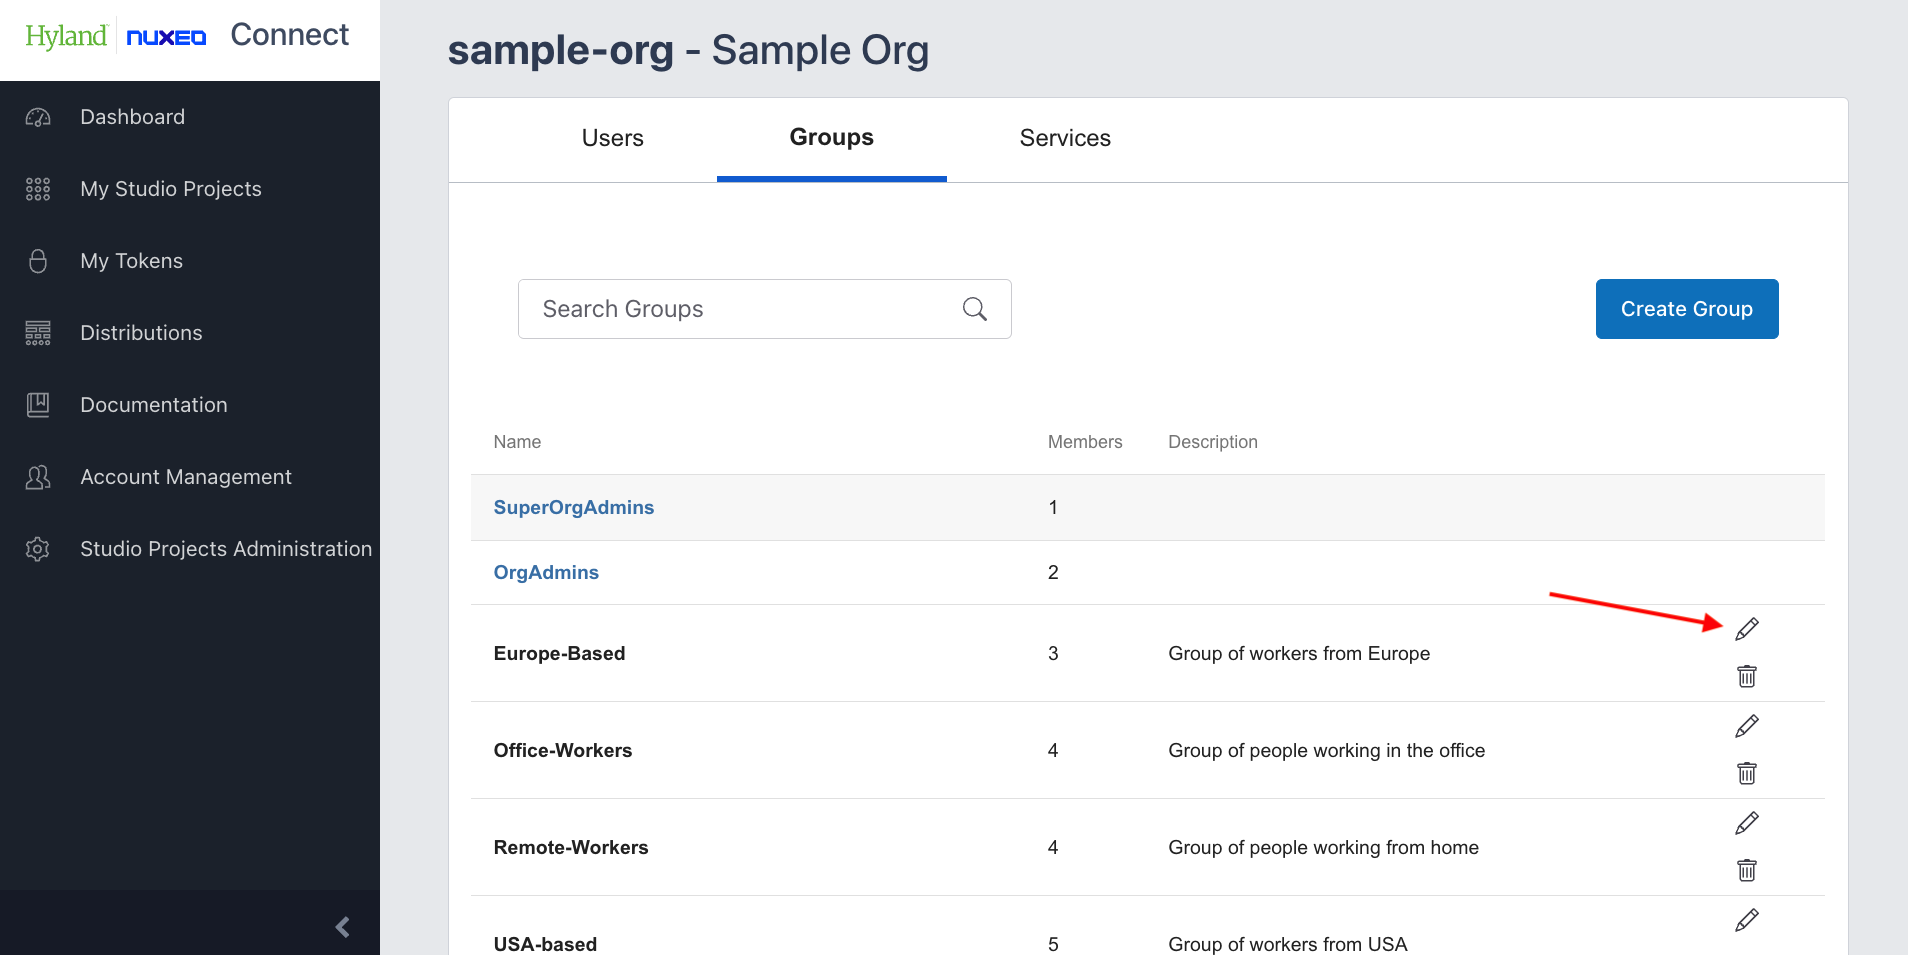
Editing Groups
You can edit a group’s description by clicking the pencil icon on the list, inserting a new group description and confirming changes in the pop-up window.
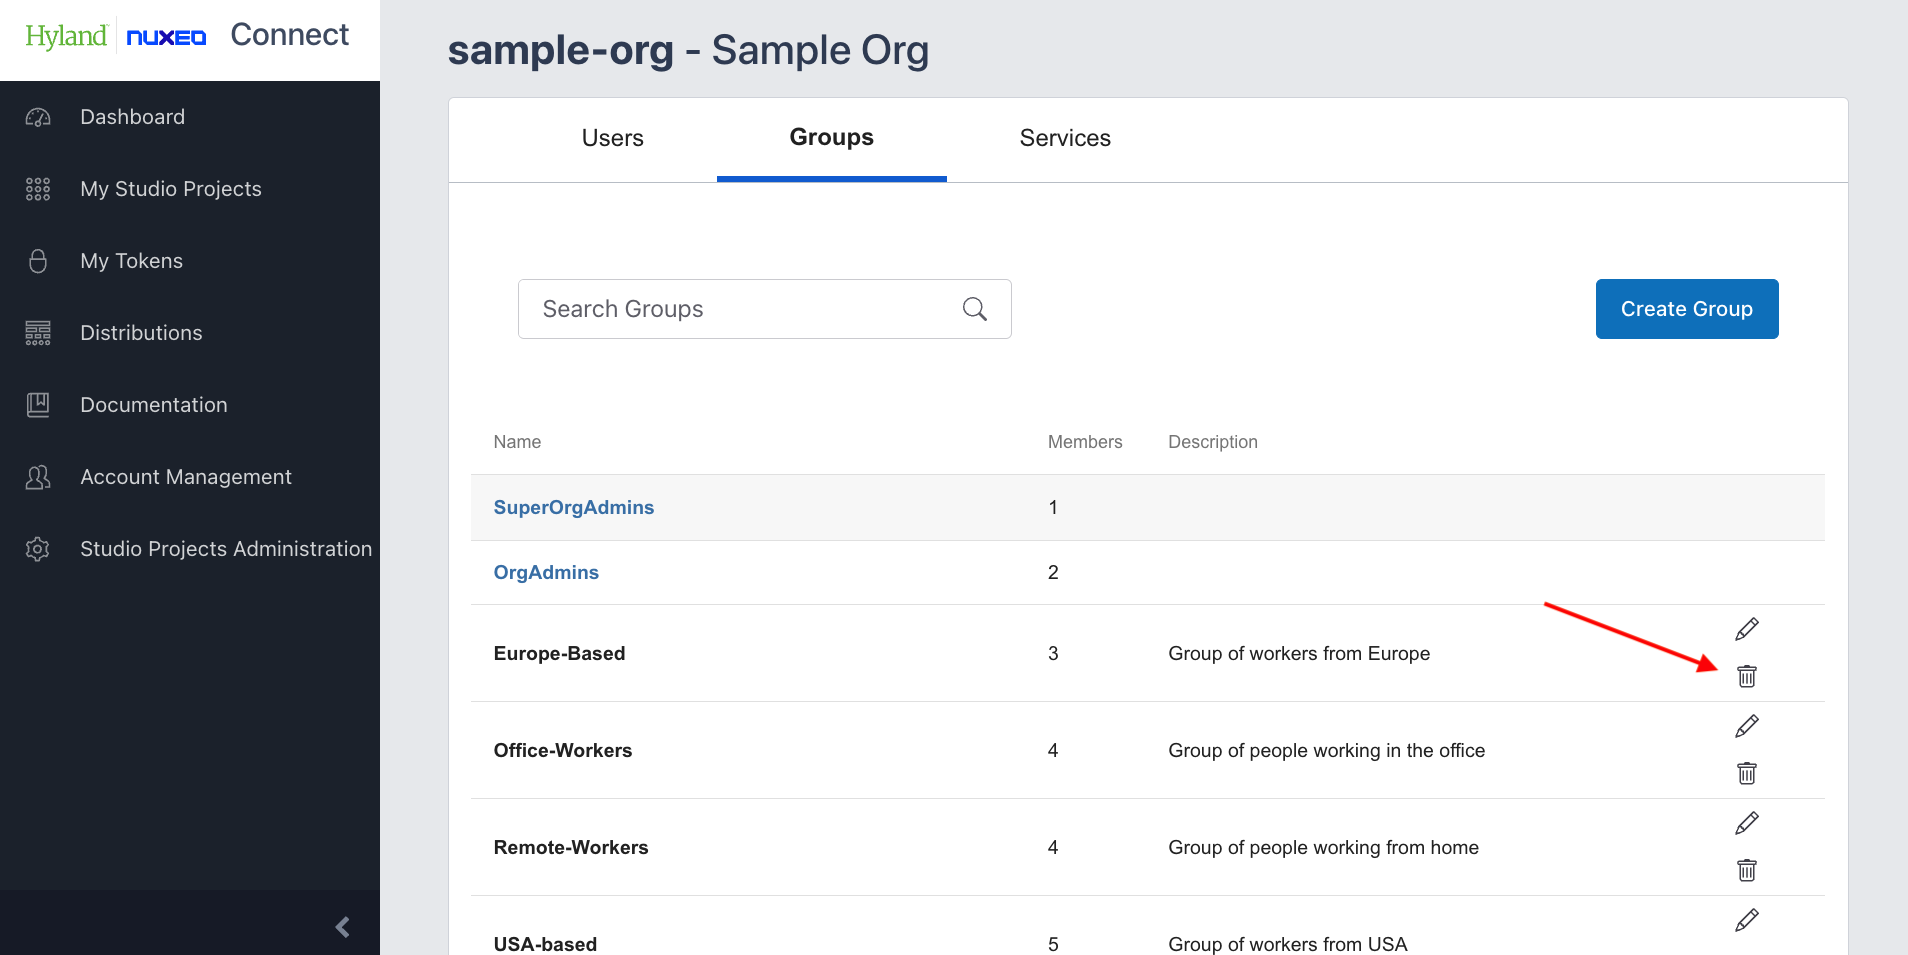
Deleting Groups
You can delete a group by clicking the trash icon and confirming your choice in the pop-up window.
Group View
Clicking on a group's name in the table will take you to the group view, where you can see a list of members and services associated with that group.

Searching Assigned Users
You can use the search box to find members of the given group by their name.

You can go to the user view page by clicking an entry in the Members table, and to the service view page by clicking an entry in the Services table.
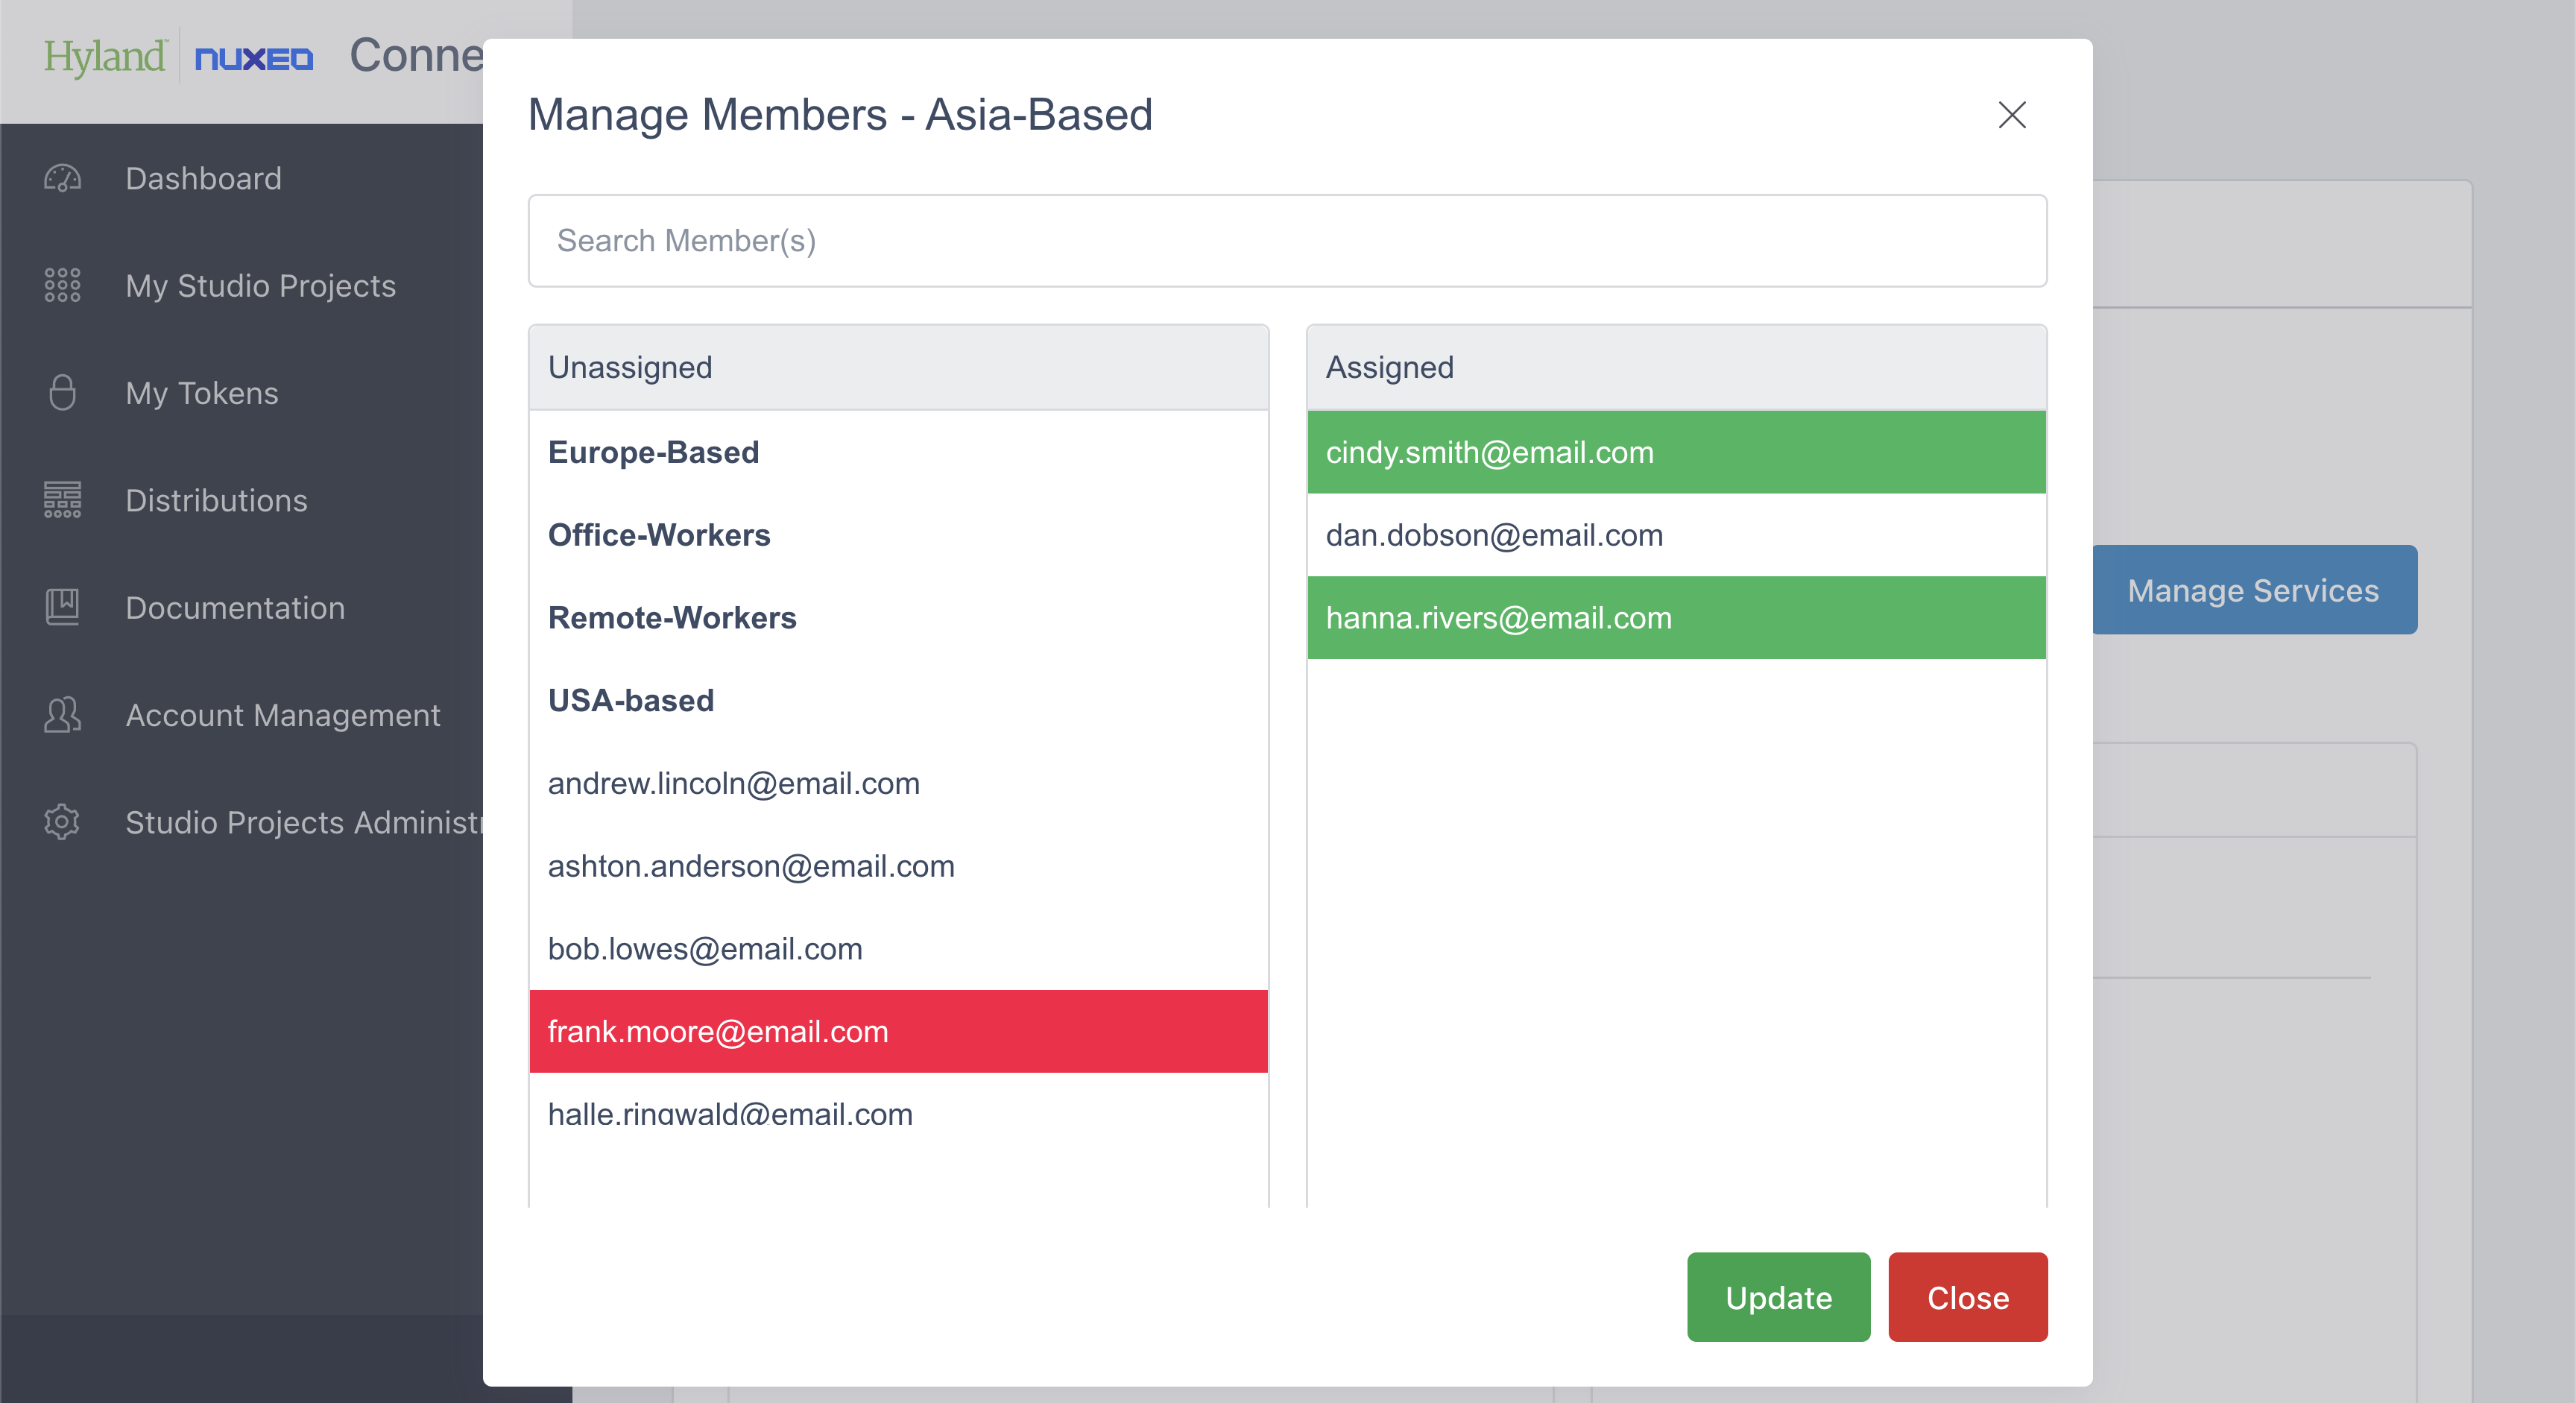
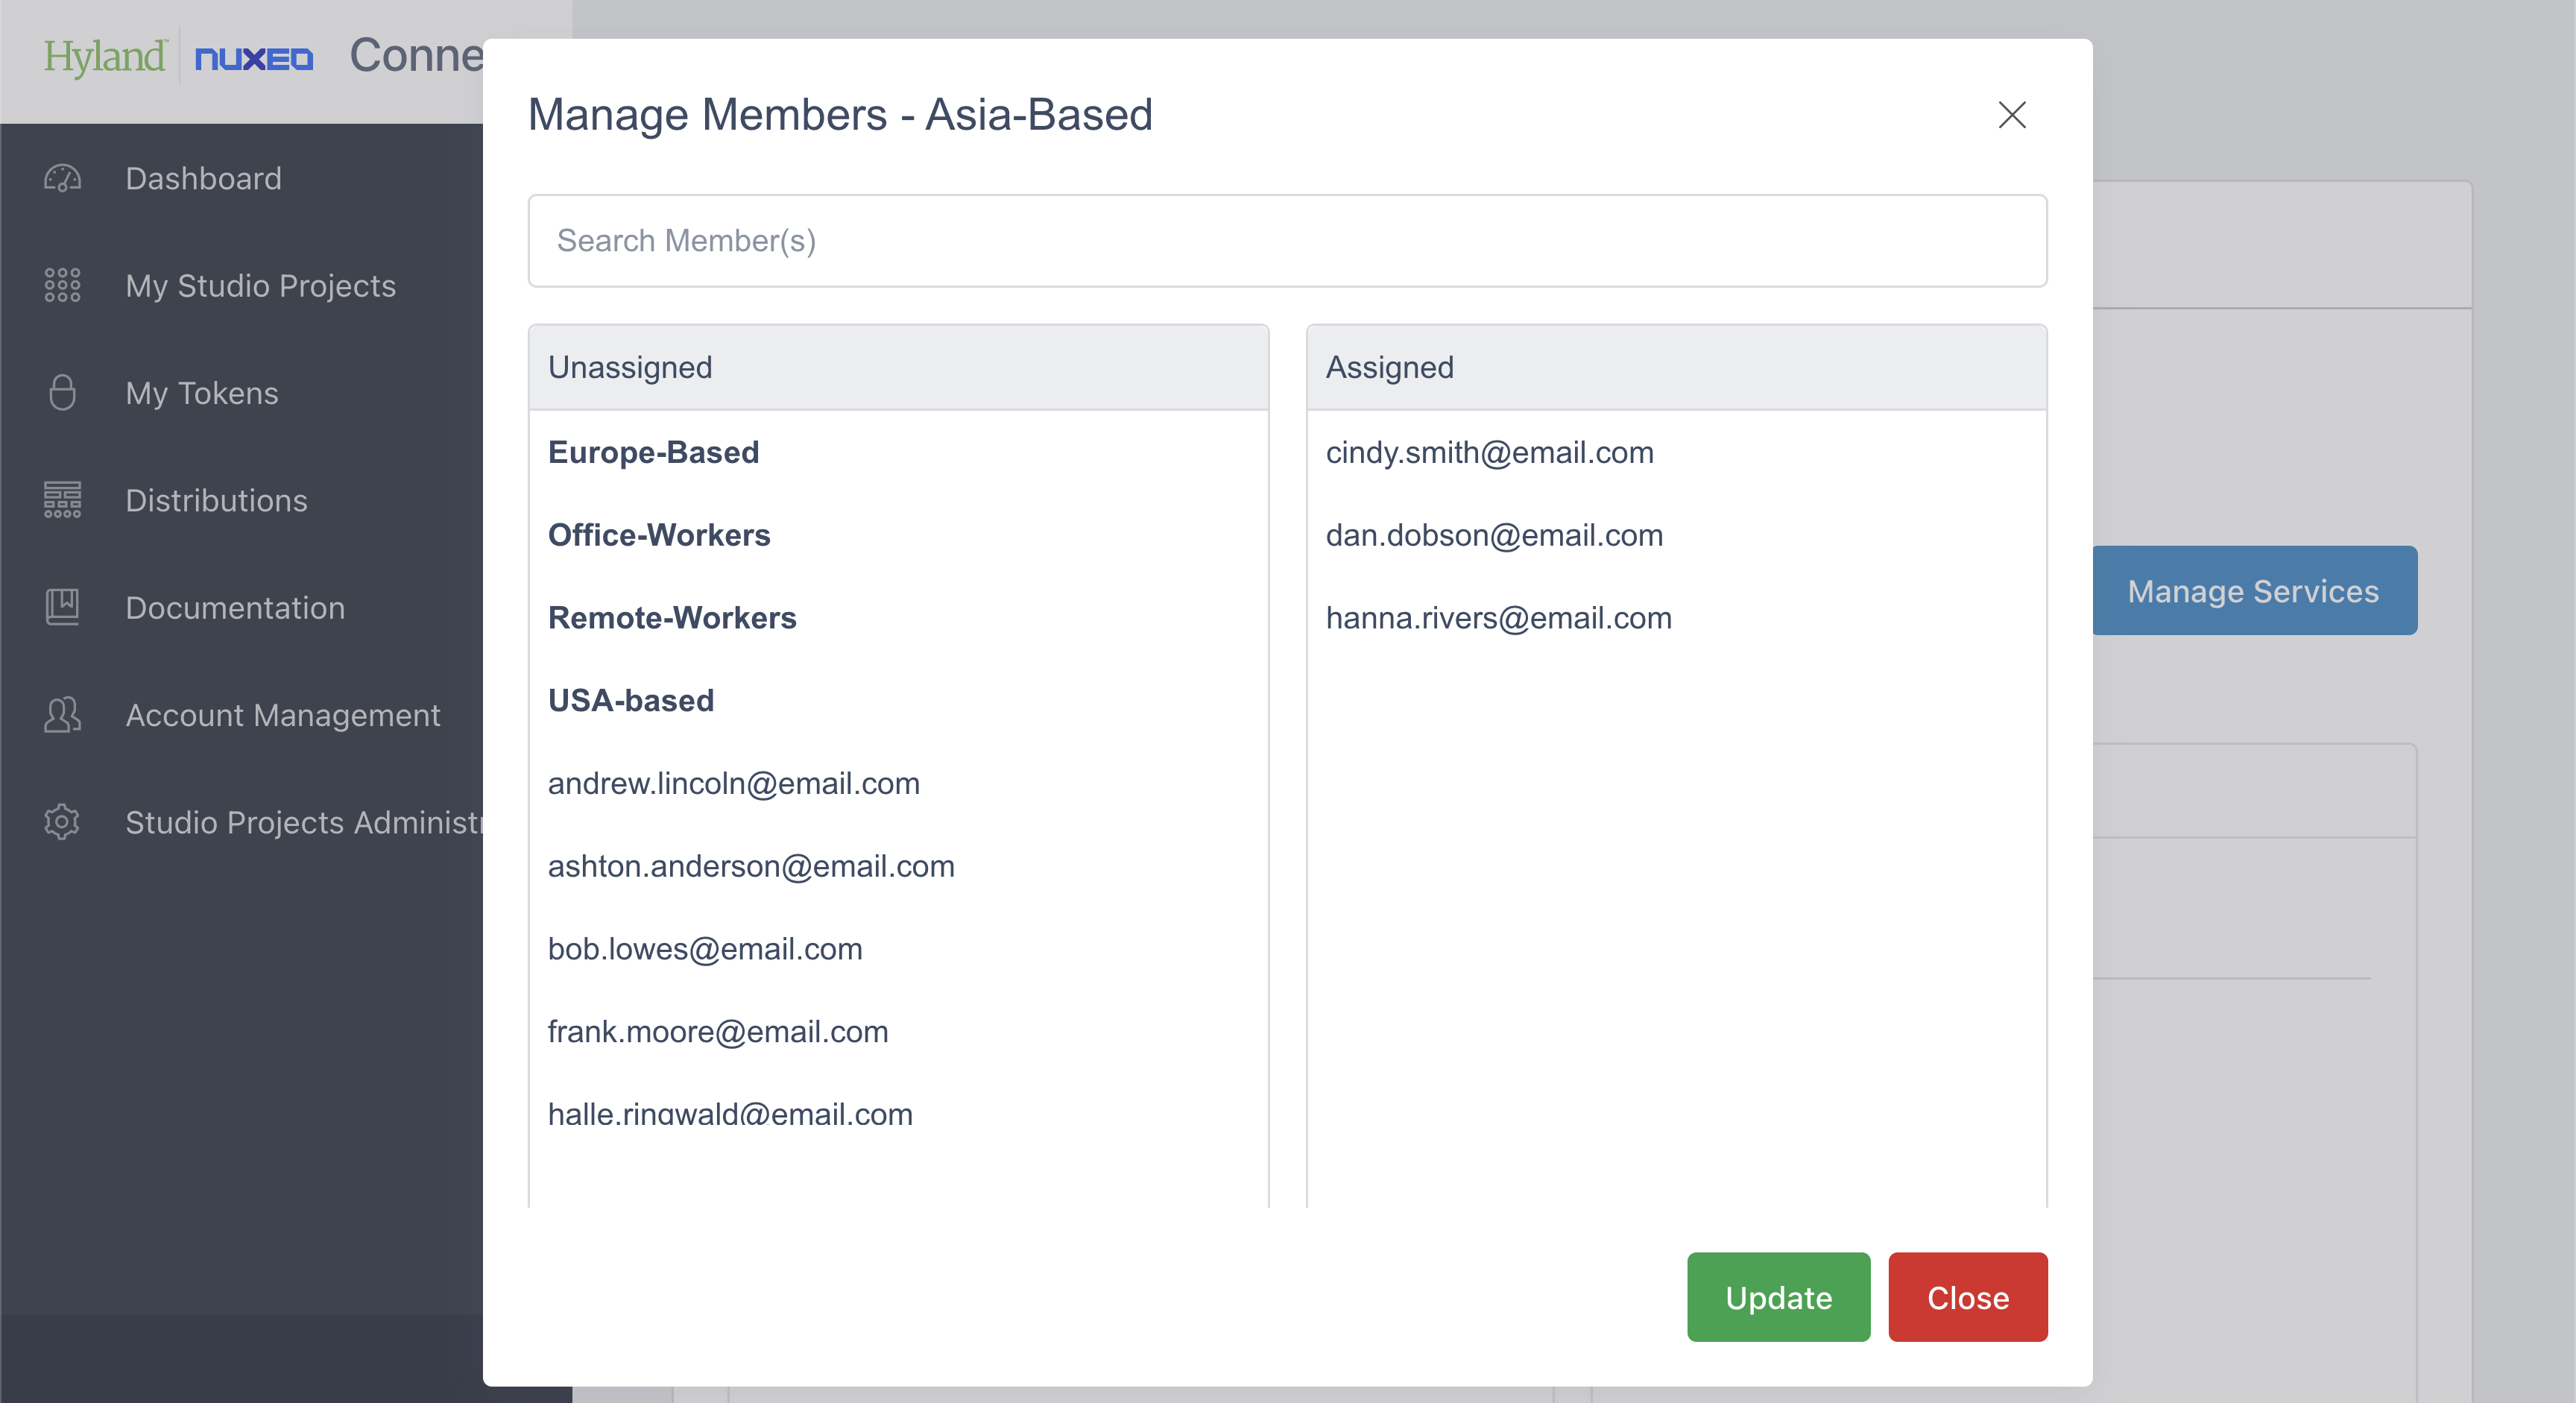
Managing Group Members
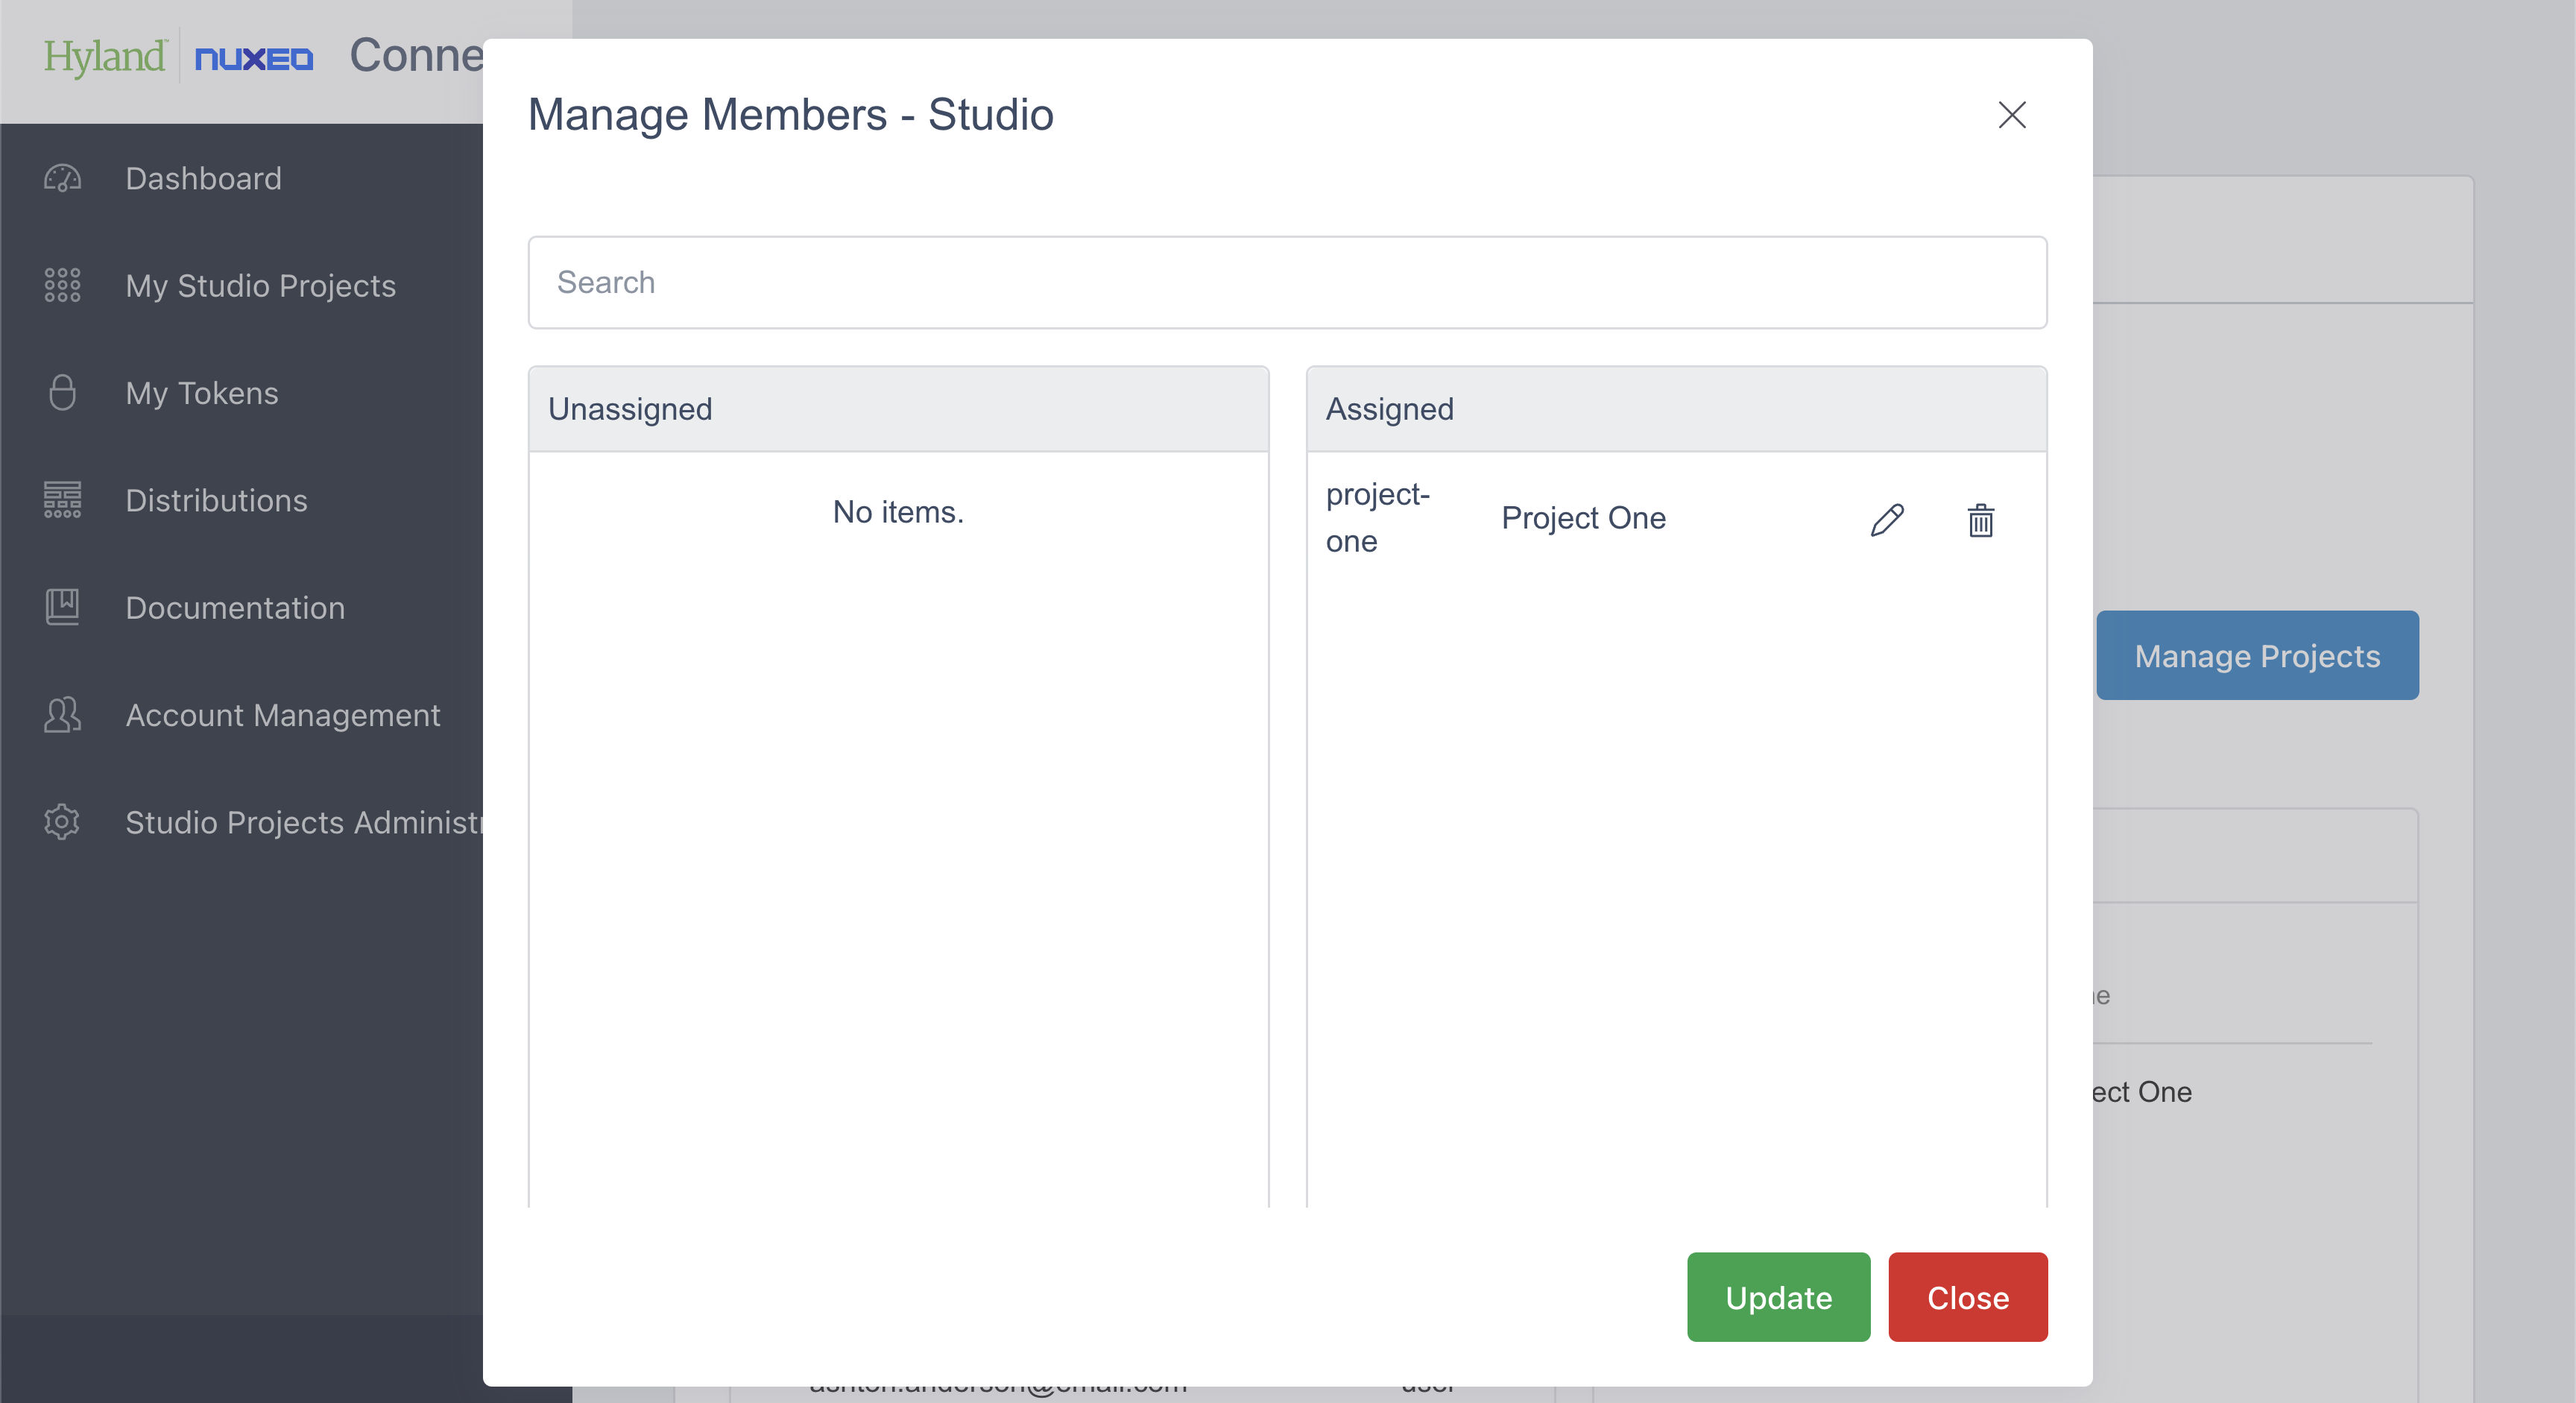
By clicking the Manage Members button you can edit the list of users assigned to this group.

By clicking a user’s name in the Manage Members pop-up window, you switch the position of them (Unassigned or Assigned). Click Update to save changes.
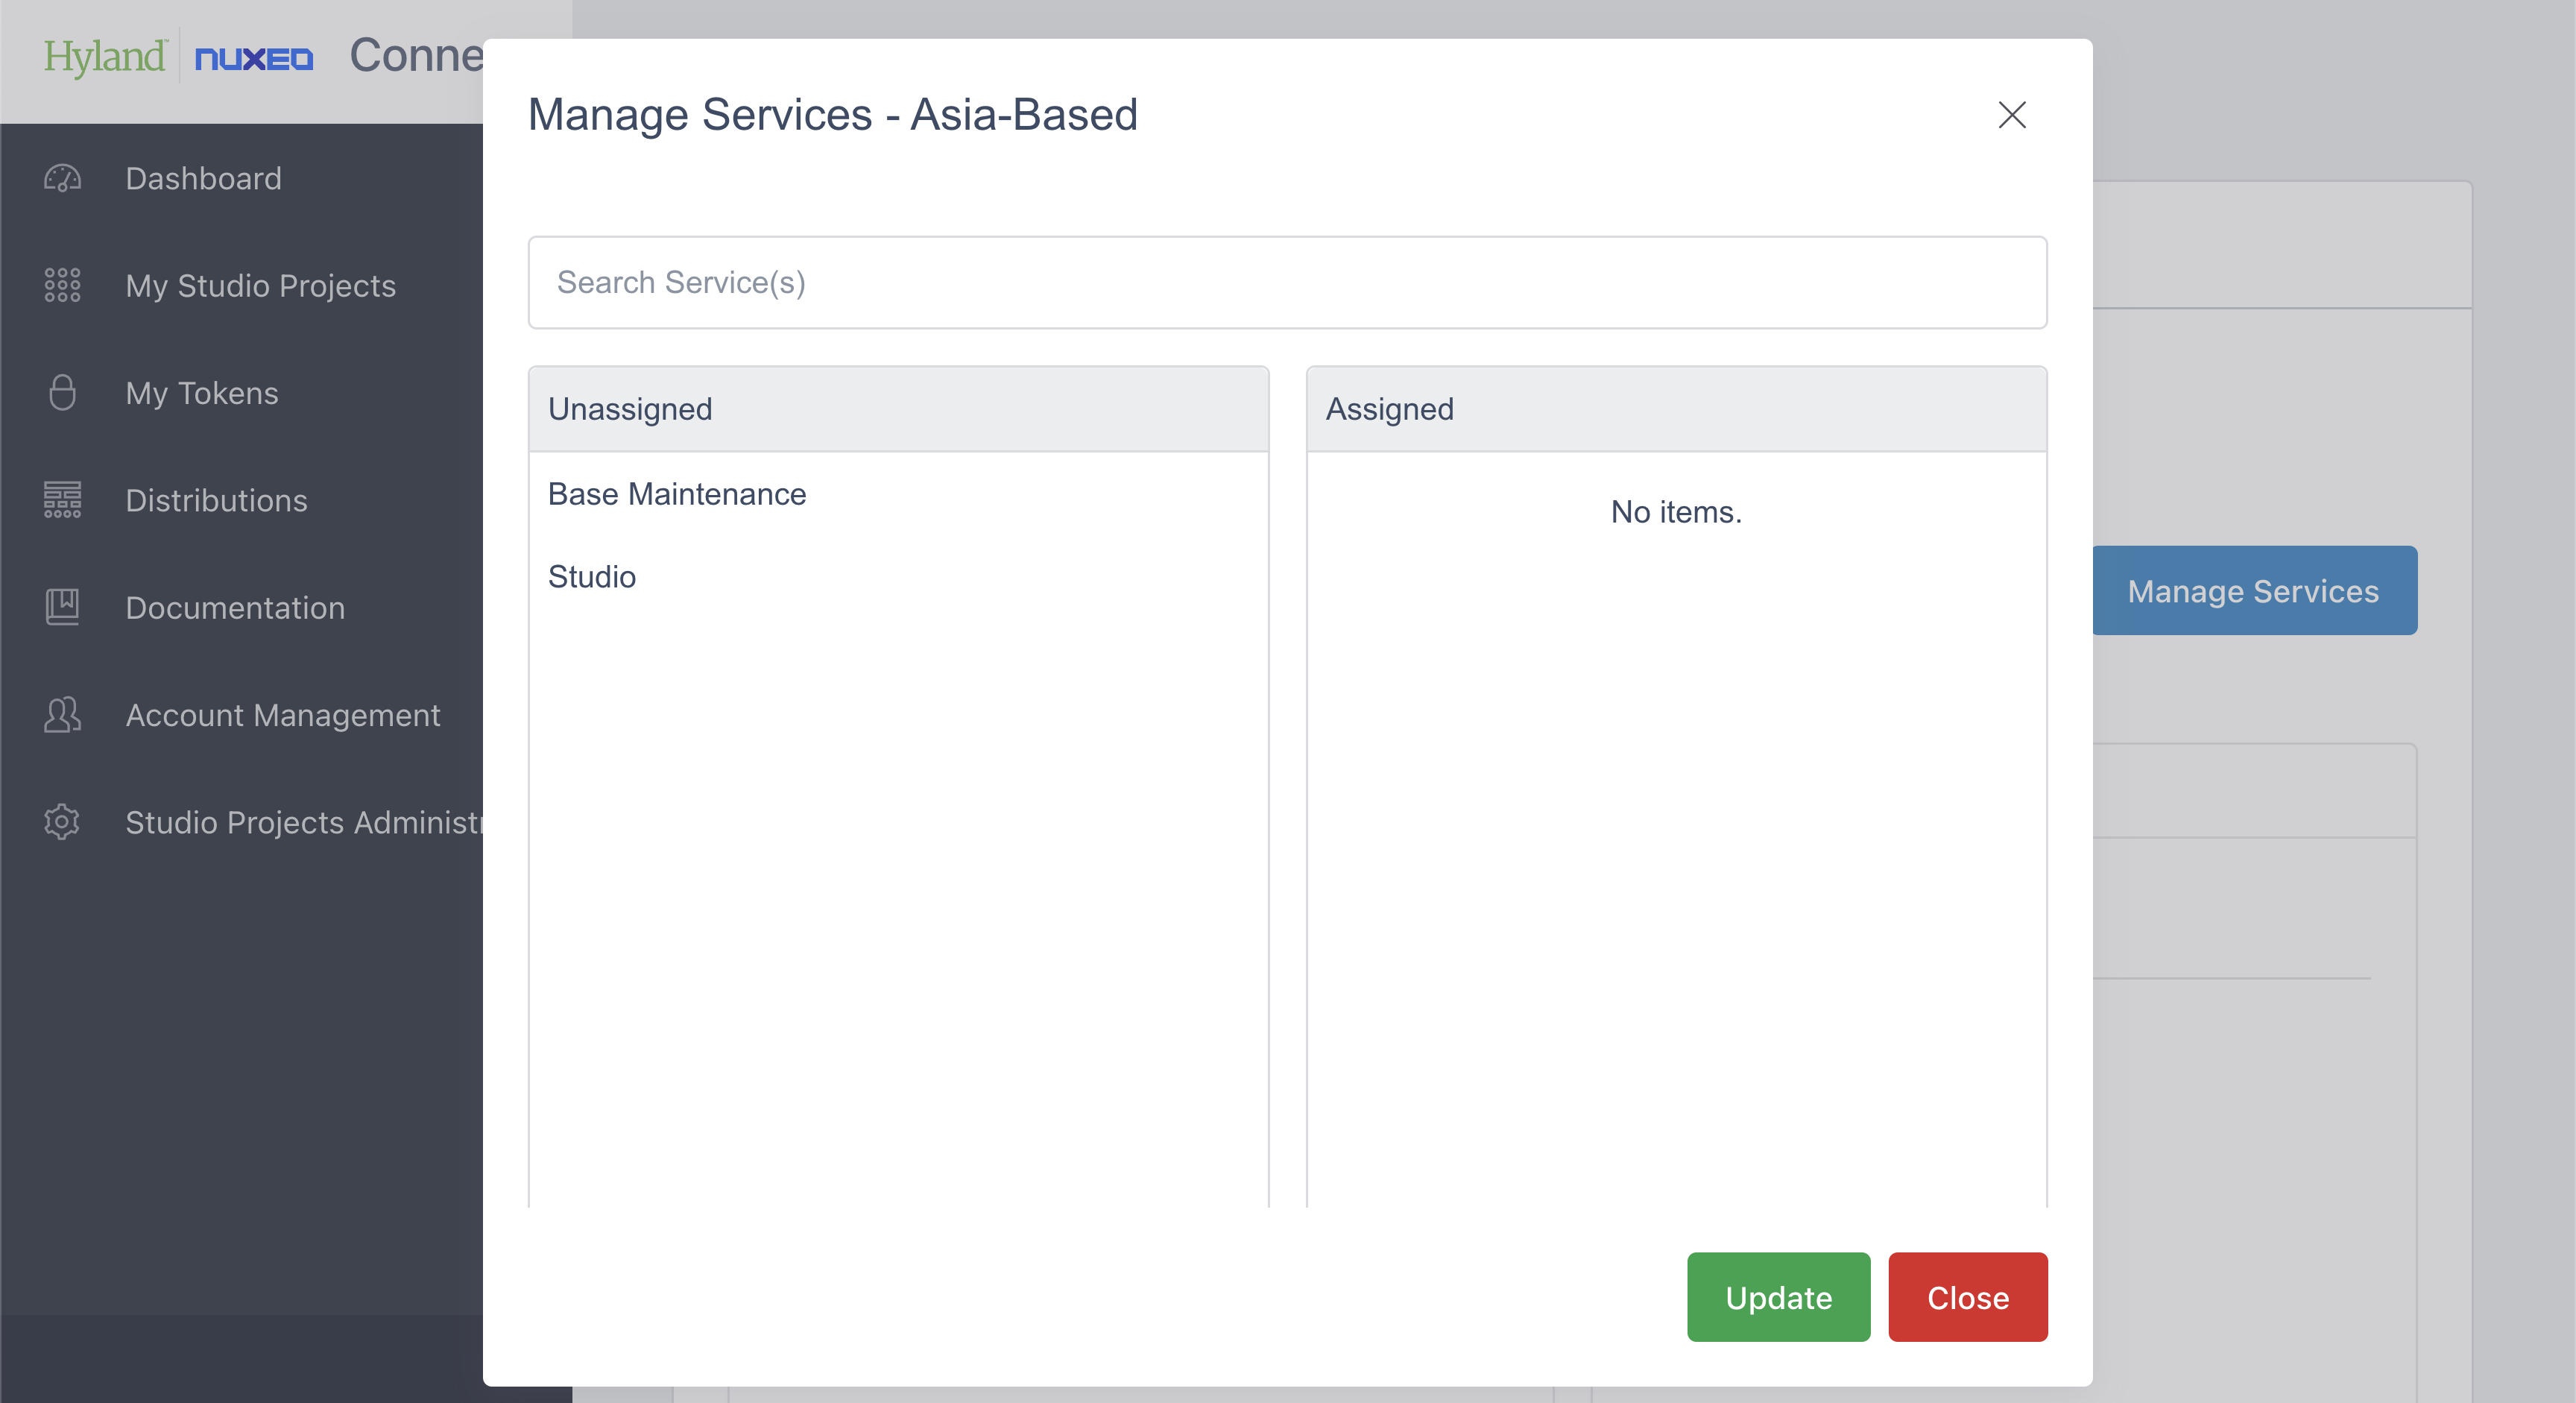
Managing Group Services
You can also manage services the group is assigned to by clicking the Manage Services button.

By clicking a service’s name in the Manage Services pop-up window, you switch the position of it (Unassigned or Assigned). Click Update to save changes.
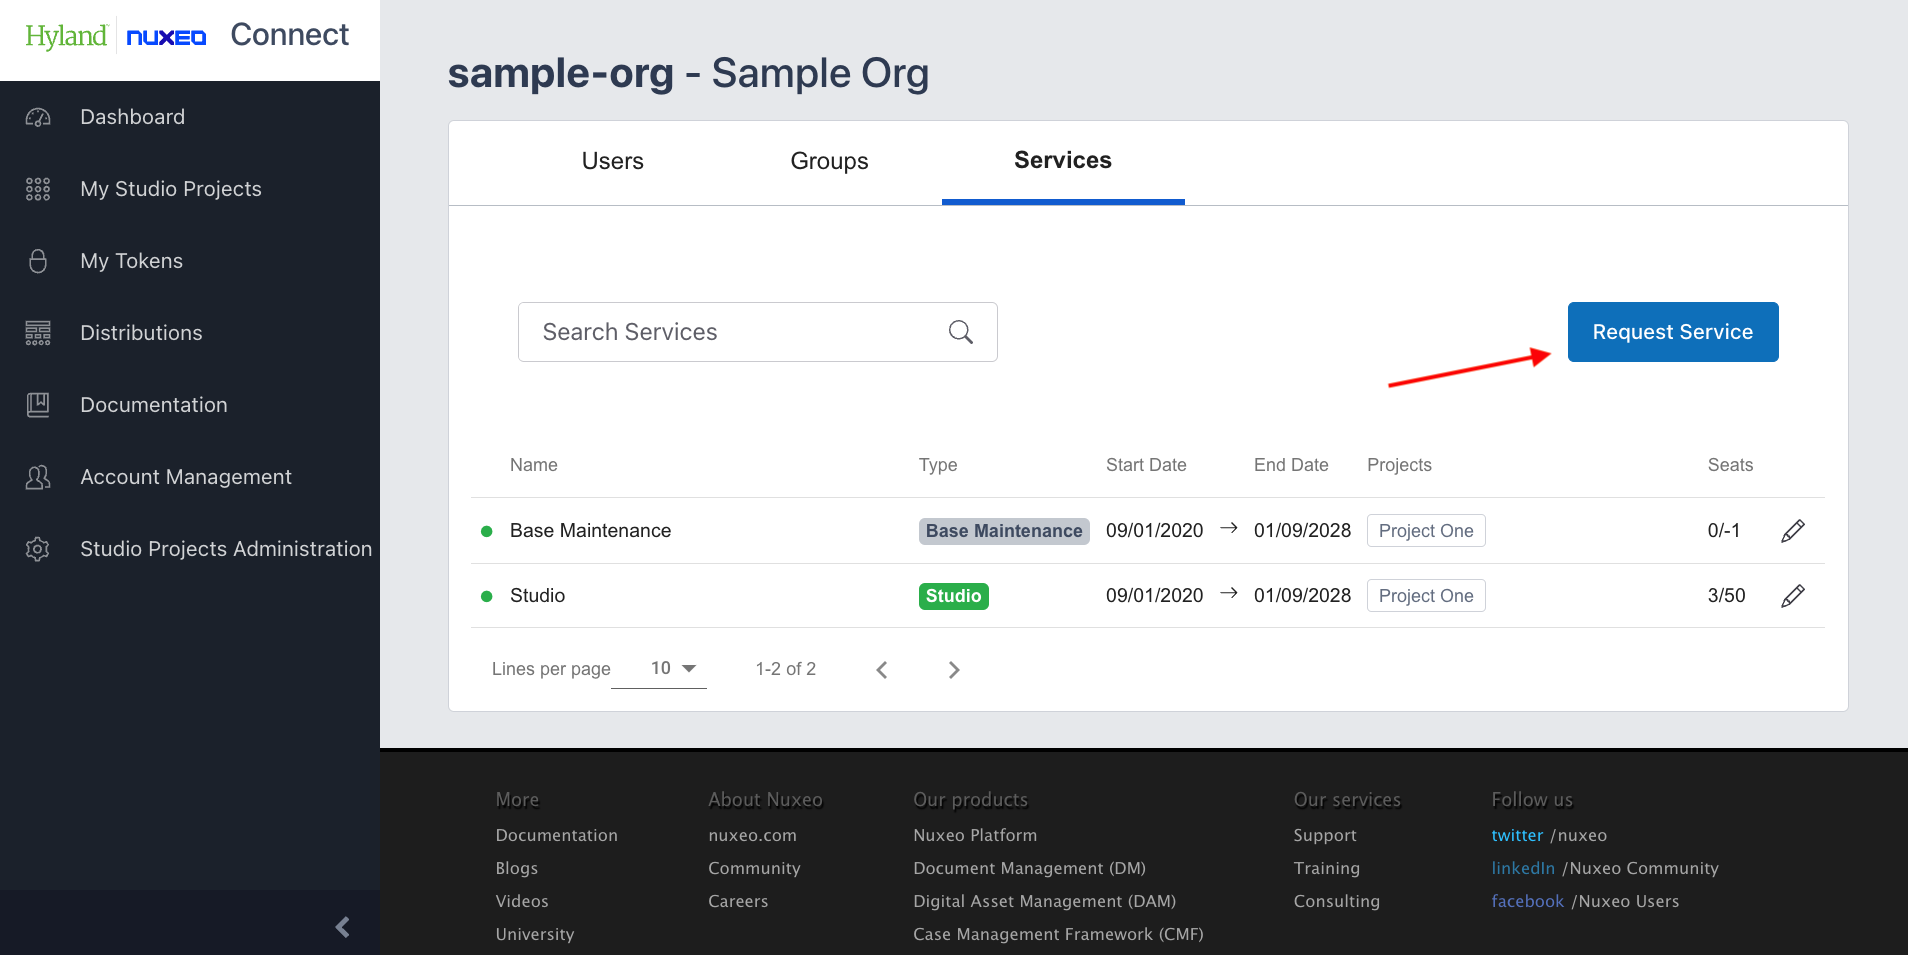
Services Tab
The Services tab lists all organization-linked services, categorized into four types. Information displayed includes start and end dates, associated projects, available seats, and service validity.

Permissions
Only Admin Users and Power Users can create, edit, and delete services. OrgAdmins can request a service via the Request Service button to create a Jira ticket.
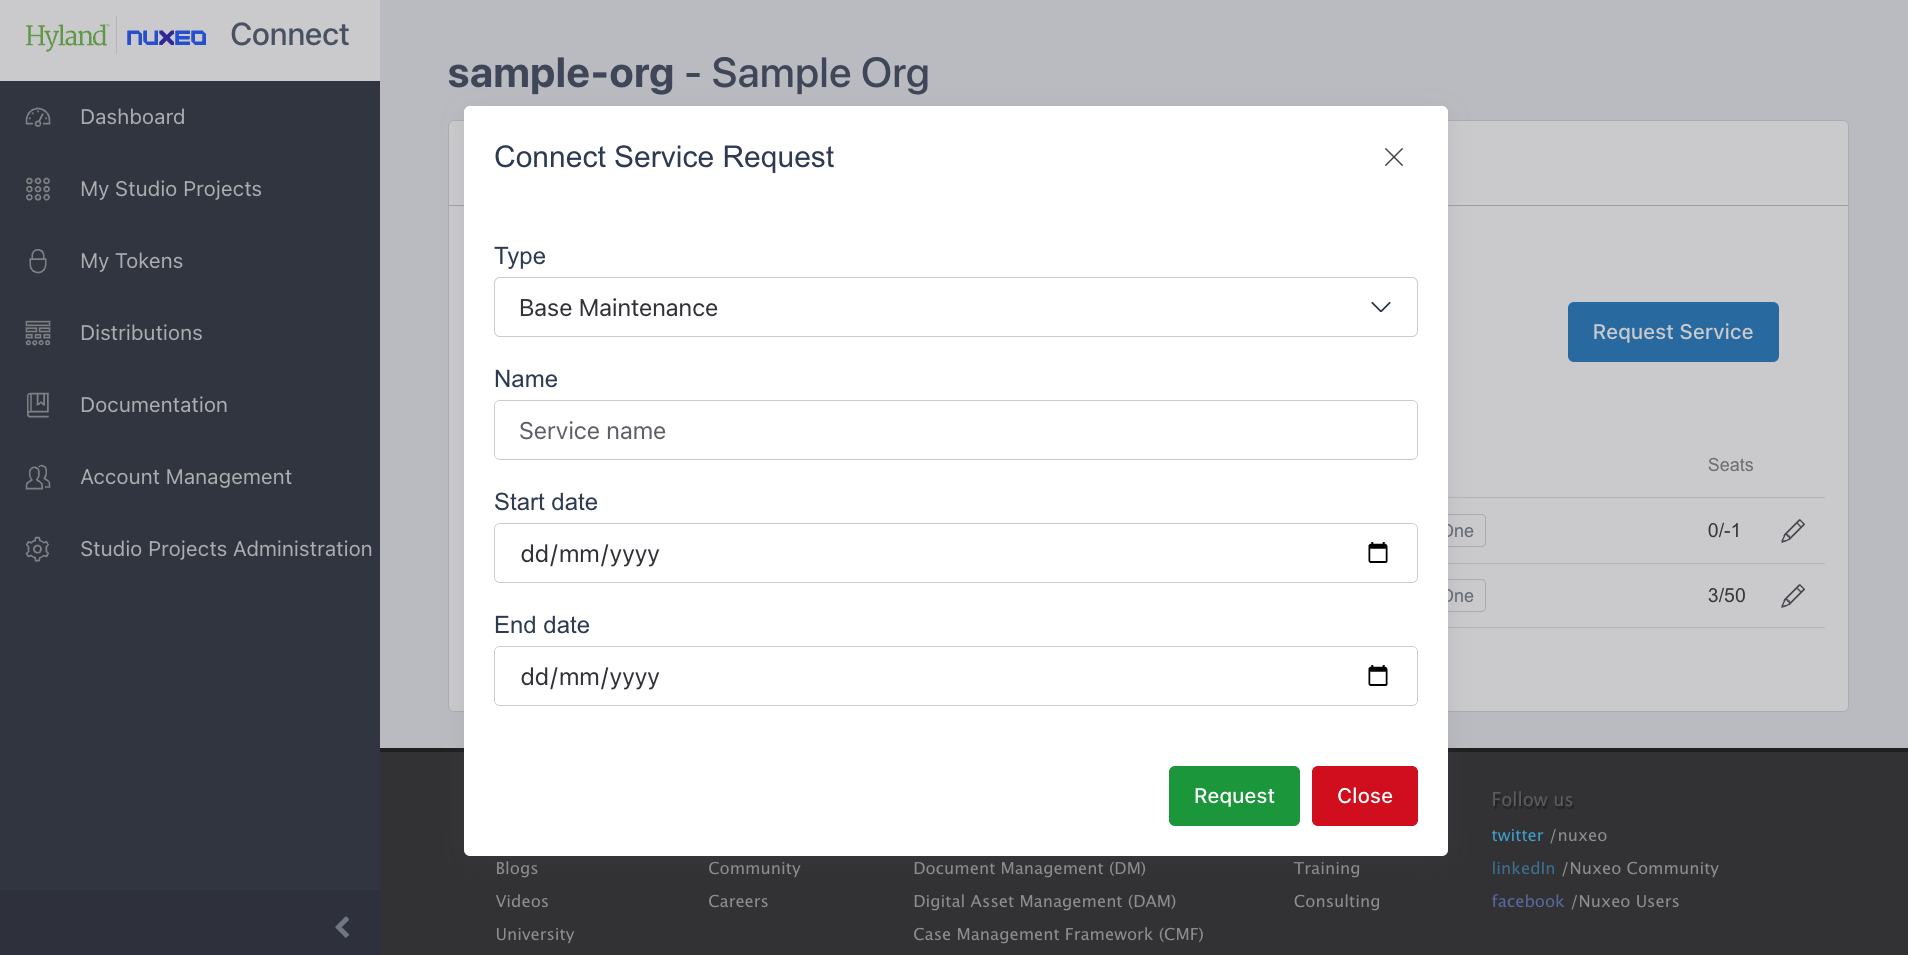
Creating Services
Click the Request Service button to request a new service.
Updating and Deleting a Service
By clicking the pencil icon in the table, you can update information about a given service: its name, start date and end date.

Click Update button to save the changes.

By clicking the trash icon, you can delete a service from your organization.
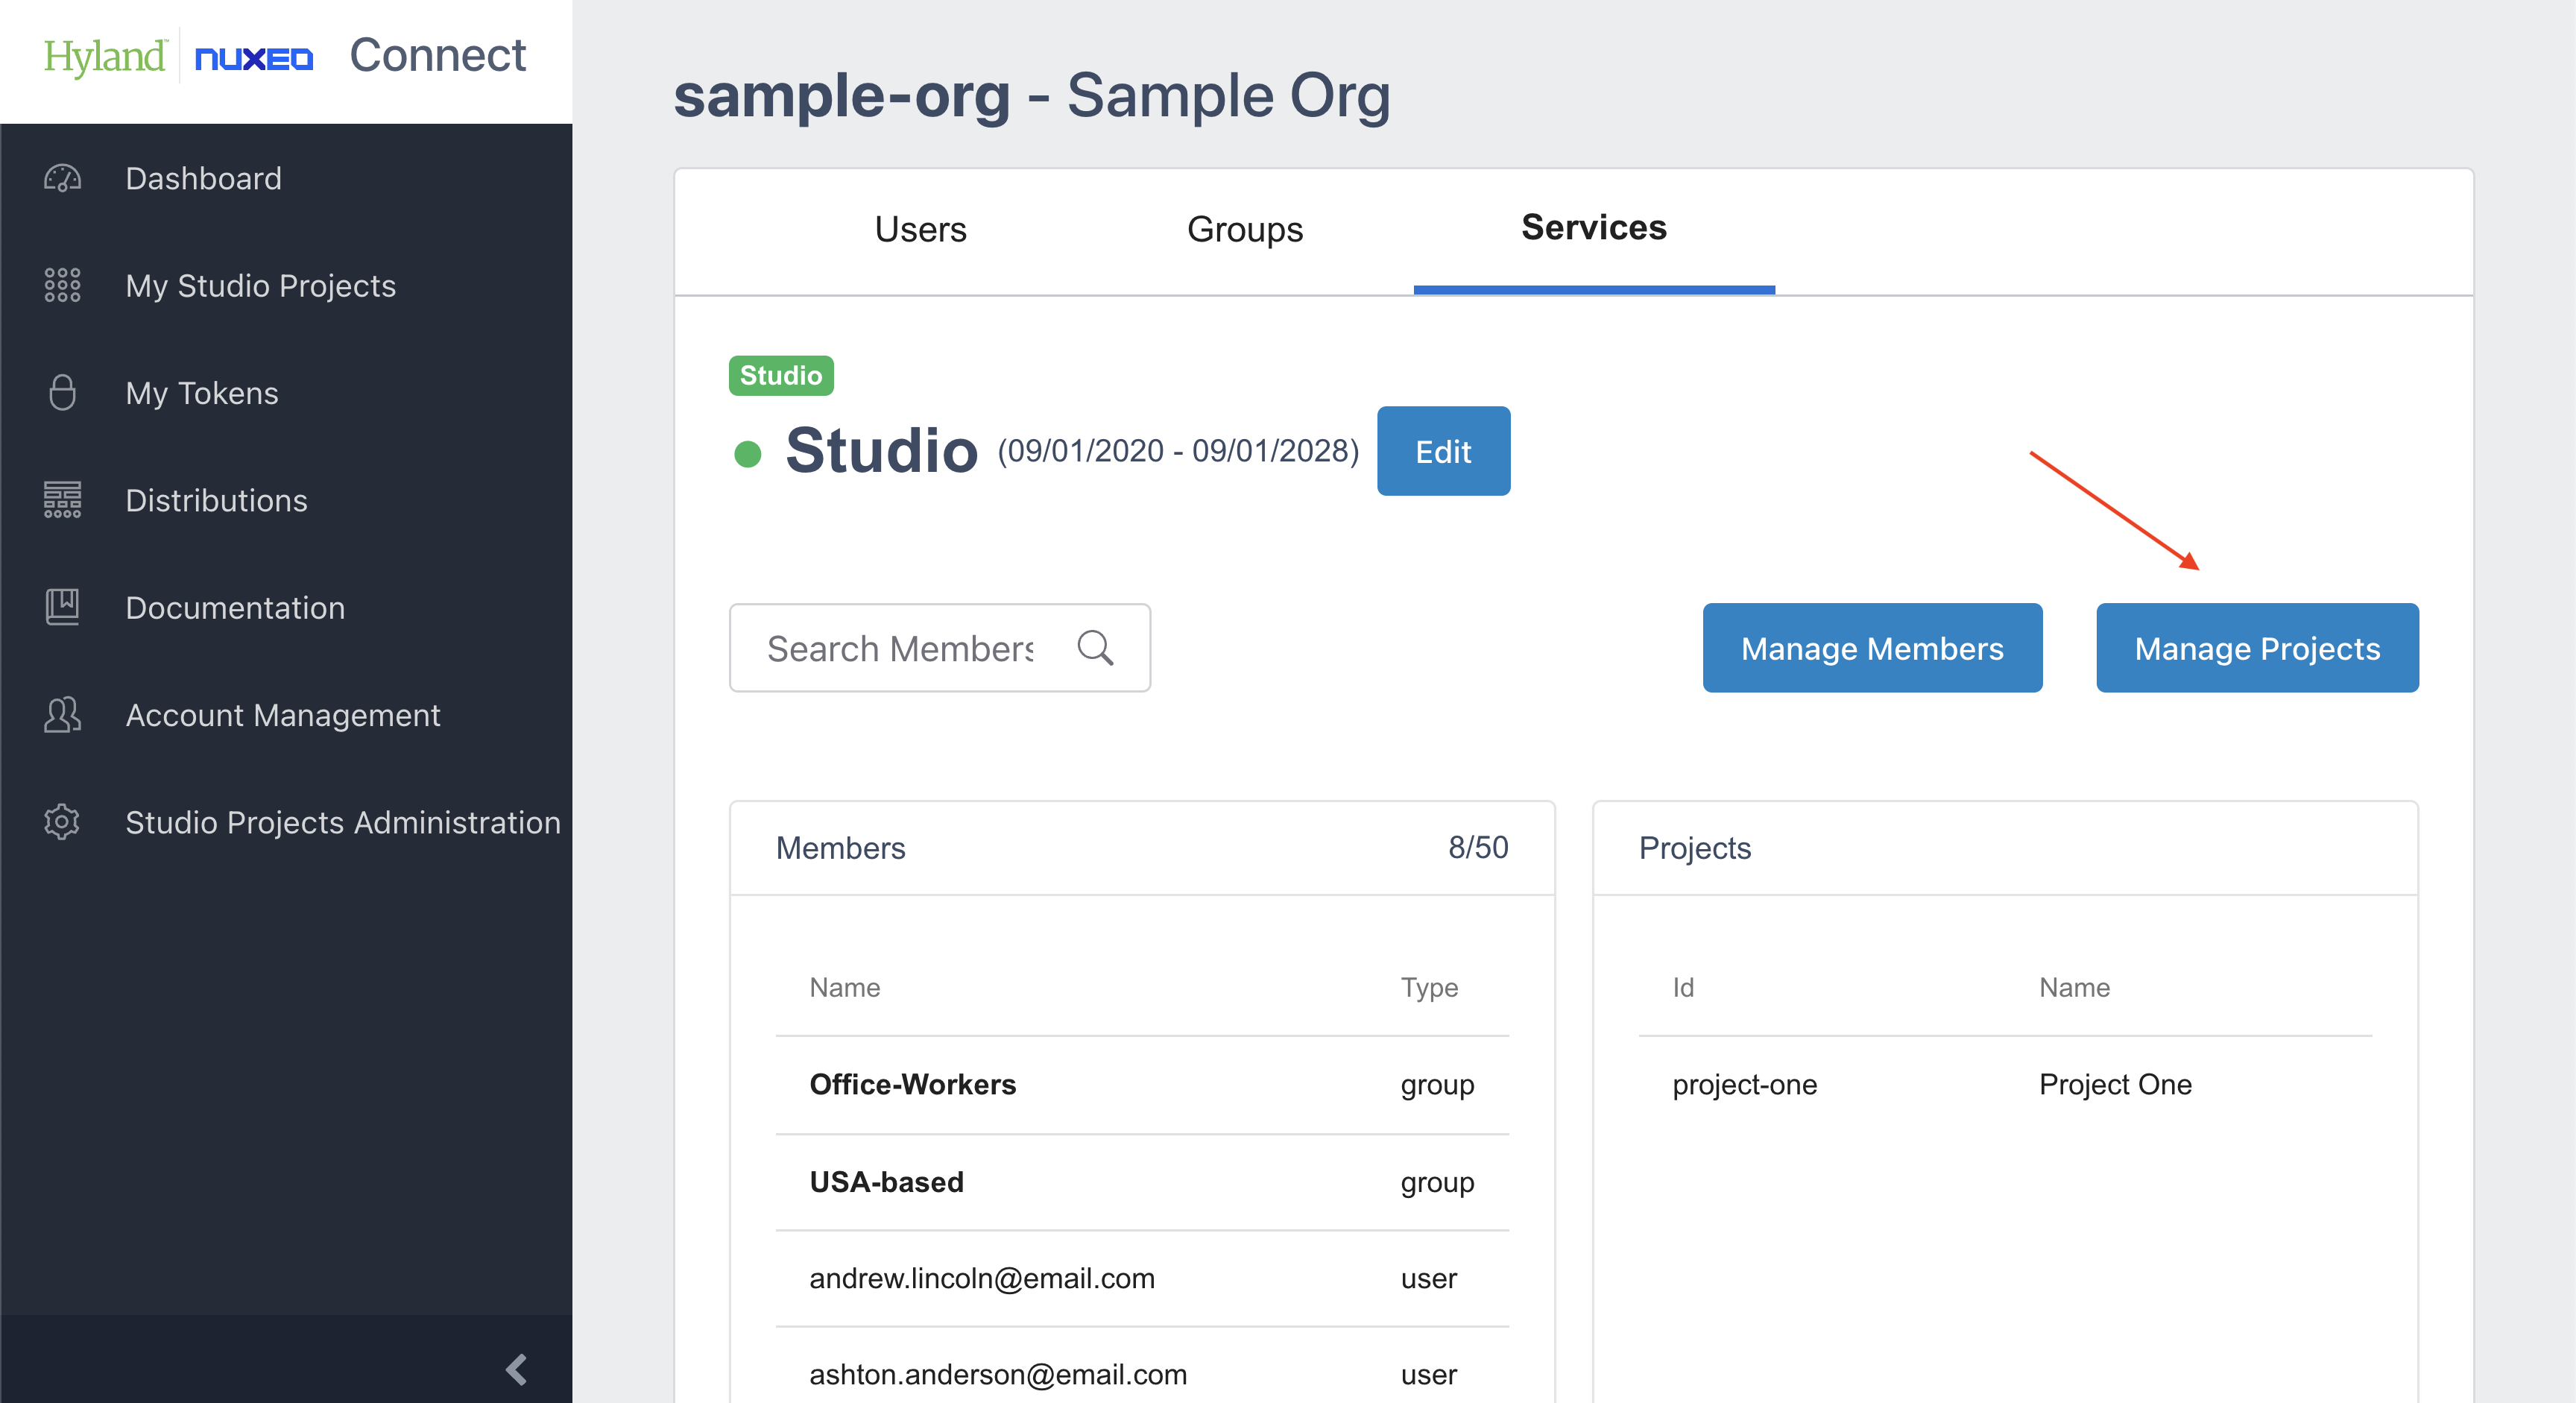
Service View
By clicking an entry in the table of services, you will go to the service view, where you can see all members and projects associated with that service. You can use the search box to find members and projects by their name.

Searching Assigned Users And Projects
You can use the search box to find users and projects that can access this service.

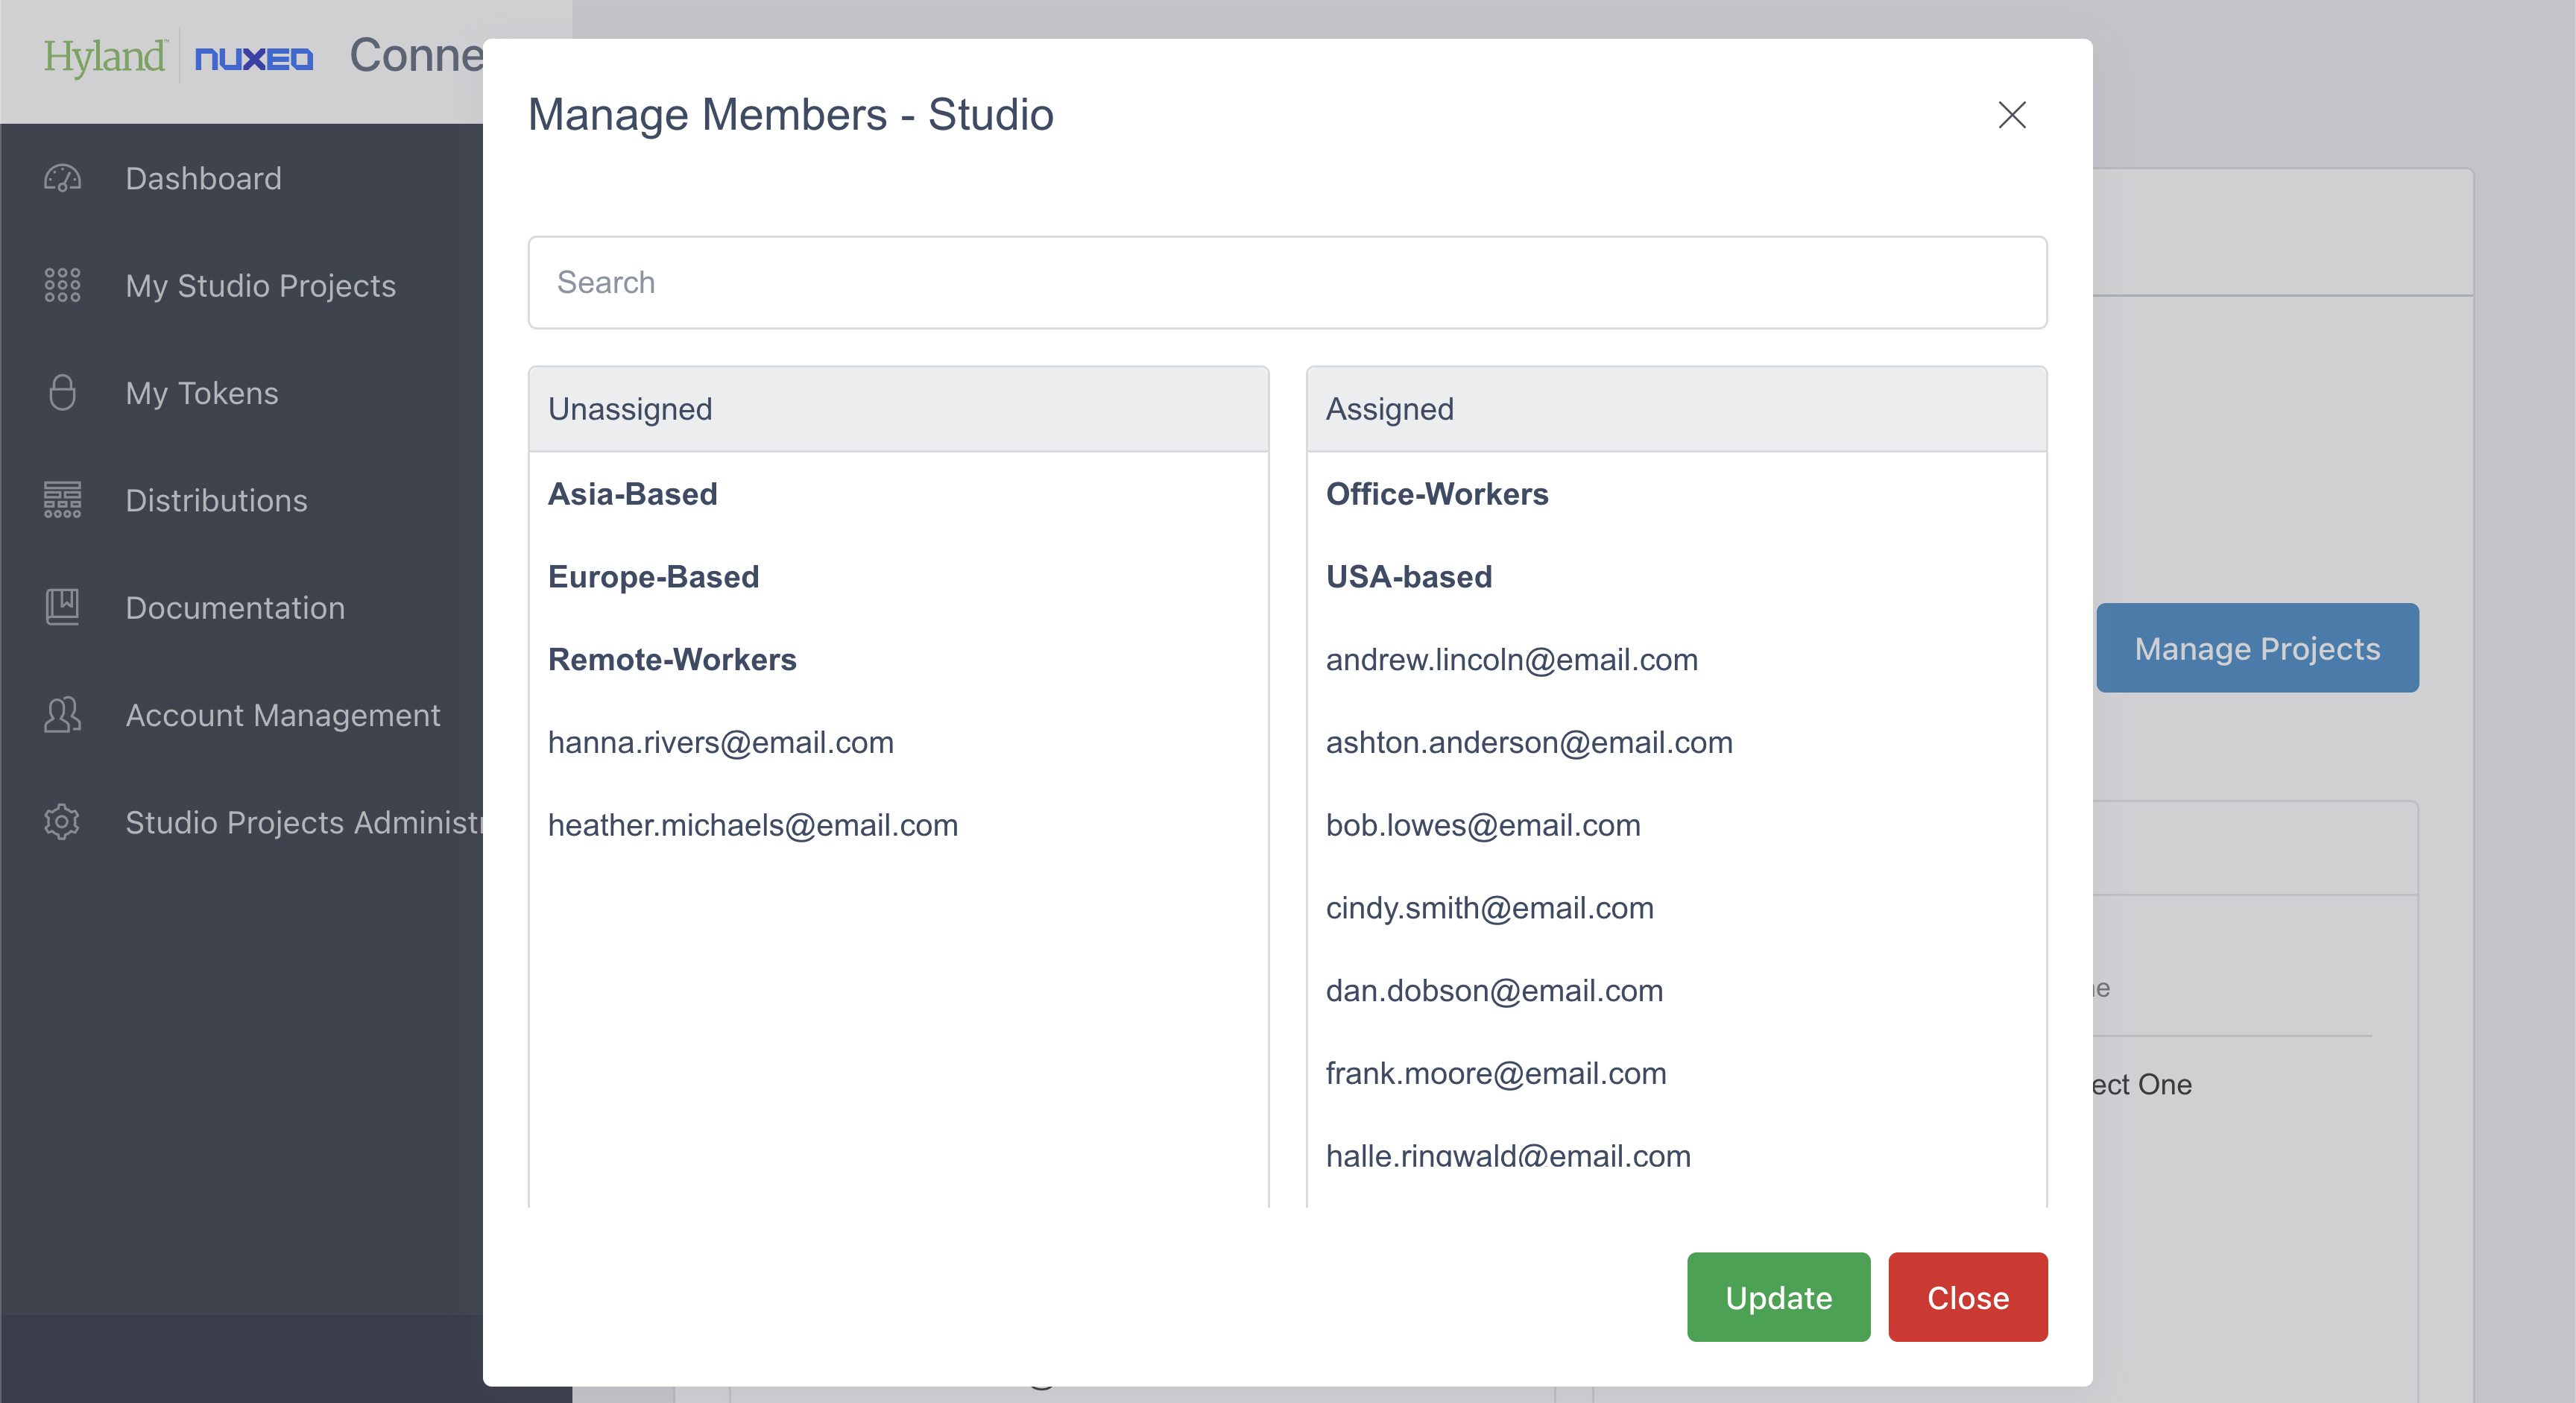
Managing Service Members and Projects
By clicking the Manage Members button you can edit the list of users assigned to this service.

By clicking a user’s name in the Manage Members pop-up window, you switch the position of them (Unassigned or Assigned). Click Update button to save changes.
You can also manage projects assigned to the service by clicking the Manage Projects button.
By clicking a service’s name in the Manage Services pop-up window, you switch the position of it (Unassigned or Assigned). Click Update button to save changes.