Nuxeo Studio offers the Branch Management, a collaborative feature that is inspired from distributed revision control systems.
In the Branch Management editor, you can find information related to the branch management of your current project as well as create, manage and delete your branches.
Every Studio project starts in a master branch, which is the main branch of your project. It should be used to perform the main release. The master branch cannot be removed. On a project, branches shared with all the developers are named common branches.
Creating a Branch
When creating a new branch, it is always based on an existing one, so that it is never empty.
You can create as many branches as you need. For example, you should create a branch each time you want to:
- work on a new feature and don't want to display it yet with the rest of your configuration.
- implement a feature without impacting the
masterbranch. - work with a maintenance branch to separate maintenance developments from evolution developments.
To work on a given branch, you need to check out the branch which creates a Work In Progress (WIP) branch, based on the existing one, where all your edits will occur. The WIP Branch cannot be seen in your list of branches. It is designed to be used as a local workspace, meaning that you obtain one workspace for each branch you have ever checked out.
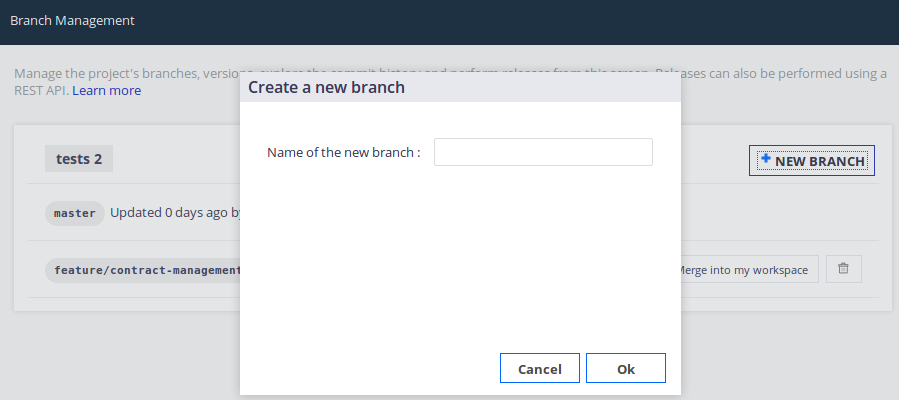
To create a branch:
- Go to Source Control > Branch Management
- At the top-right, click New Branch.
- Enter the name of your new branch.
The branch should respect the following pattern:
[a-zA-Z_]+.*, do not start your branch name with digits. - Save.
The new branch will be created from the content of the last branch you checked out into your workspace.
Managing Local Changes
You can also access the Branch Management screen, by clicking on the name of the branch on the left of the status bar at the bottom of your screen.
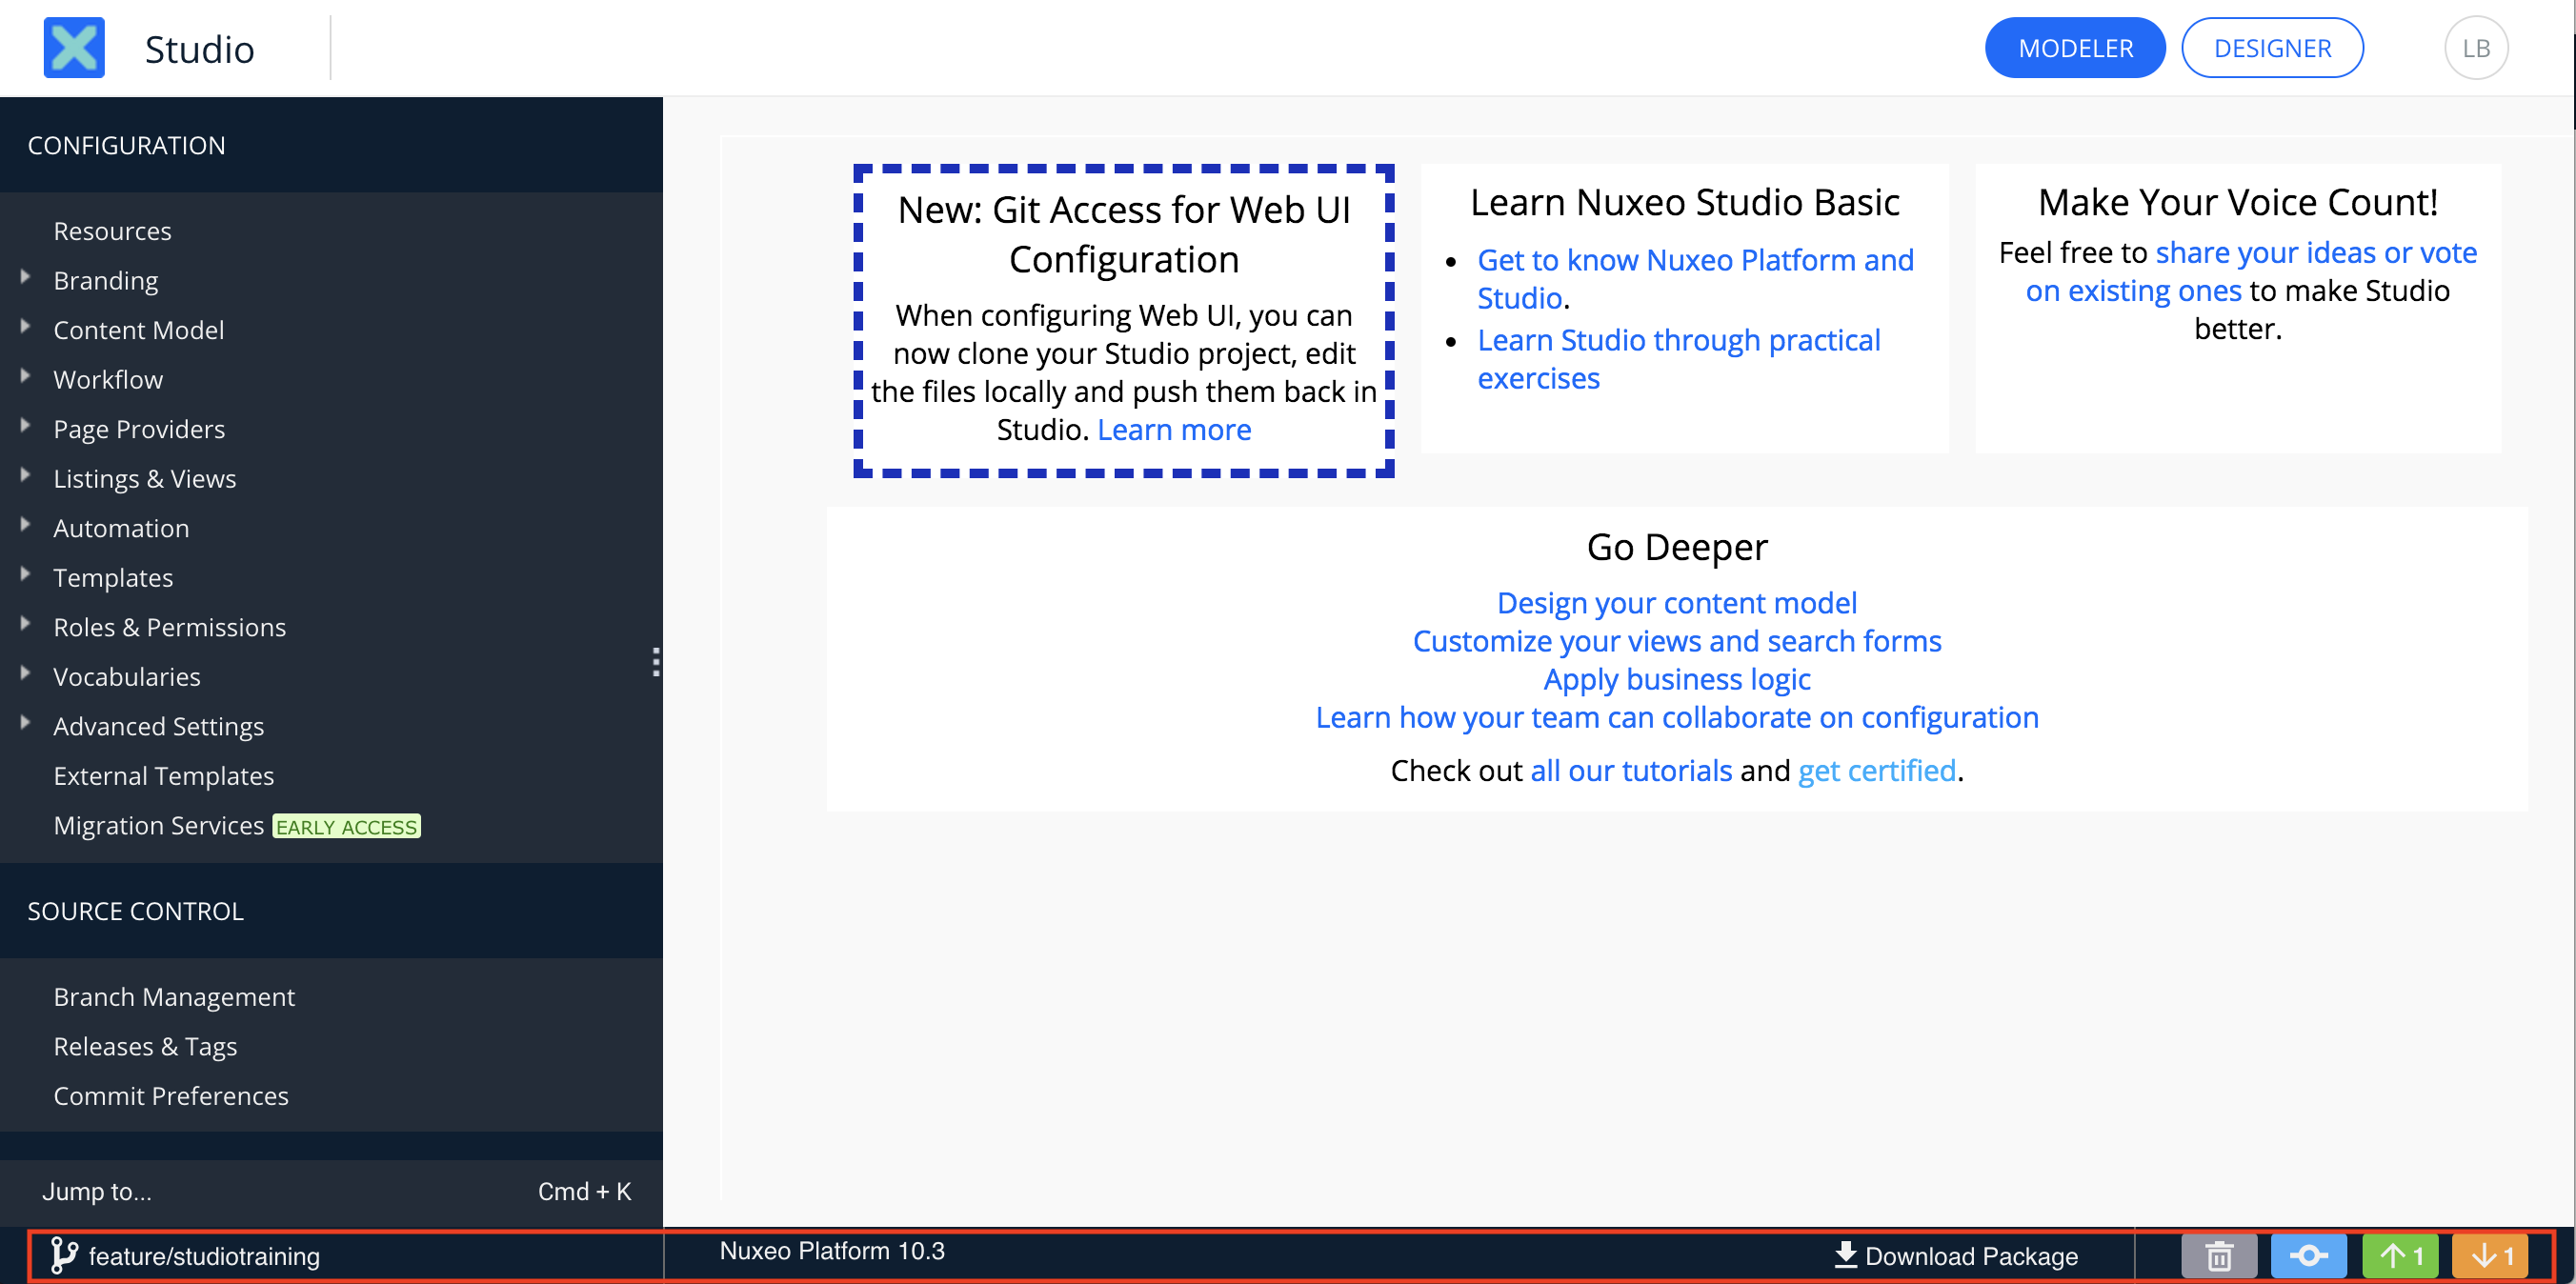
Depending on your commit preferences , you can perform different actions from the status bar:
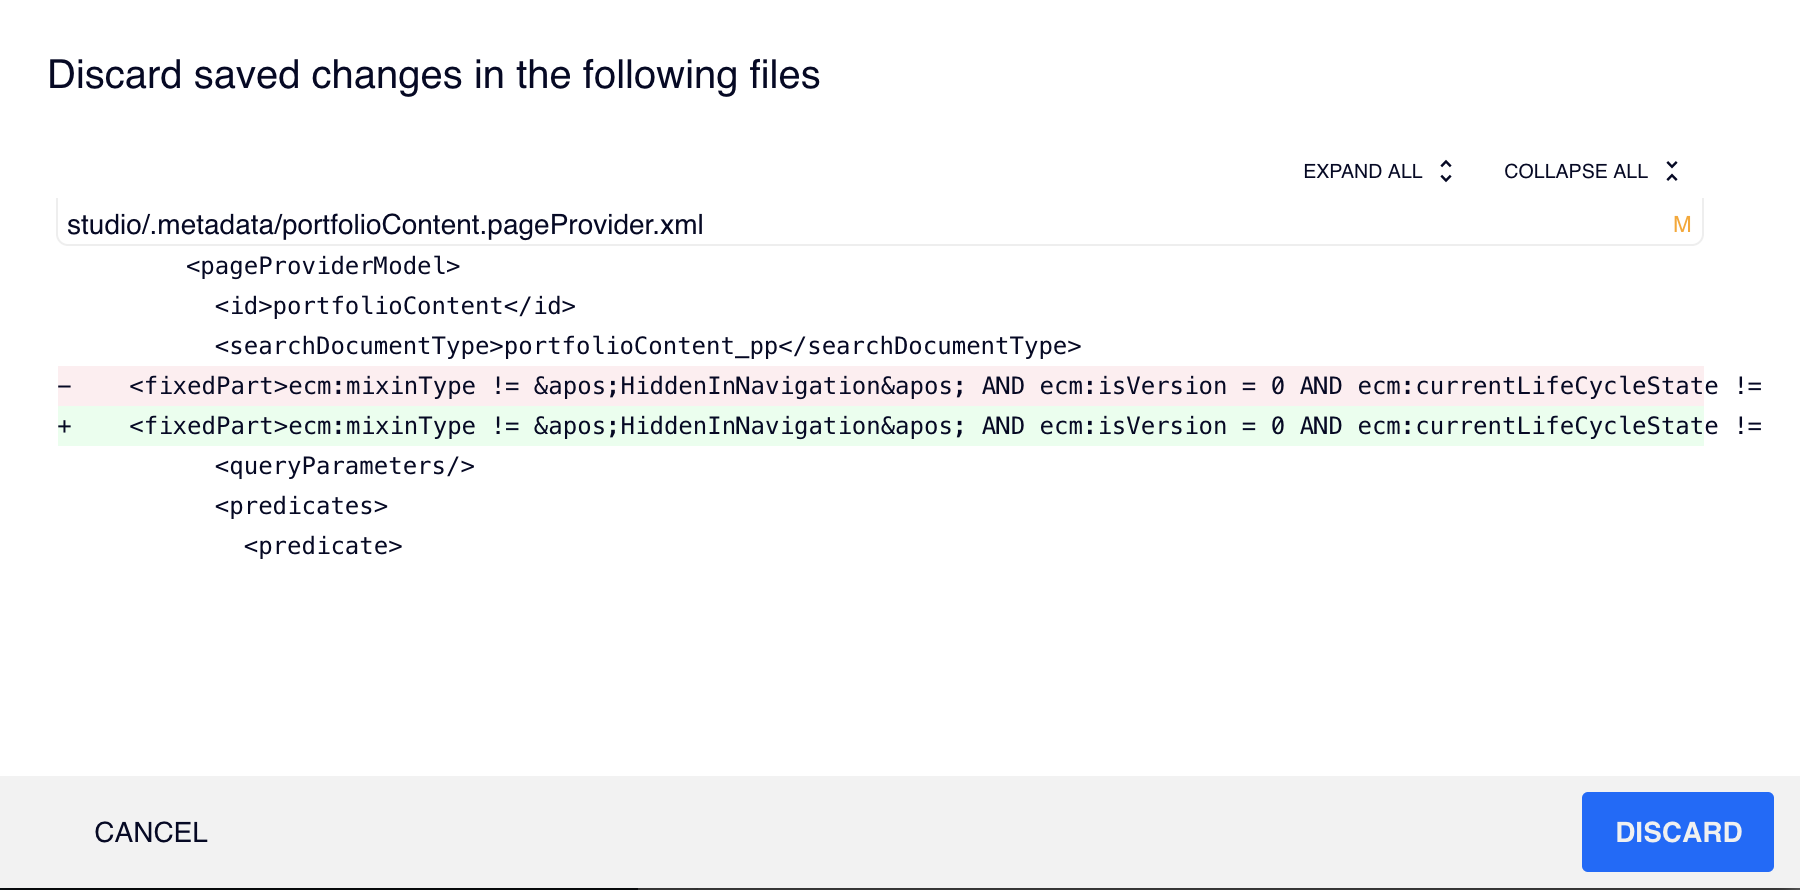
- Delete: Enables you to review changes that are saved but not committed and to discard them if needed.
Commit: Enables you to record the set of changes performed on your project since your previous commit. A version of the project is the result of a sequence of commits from the moment you created the project.
To commit, click on the icon
 and type a commit message.
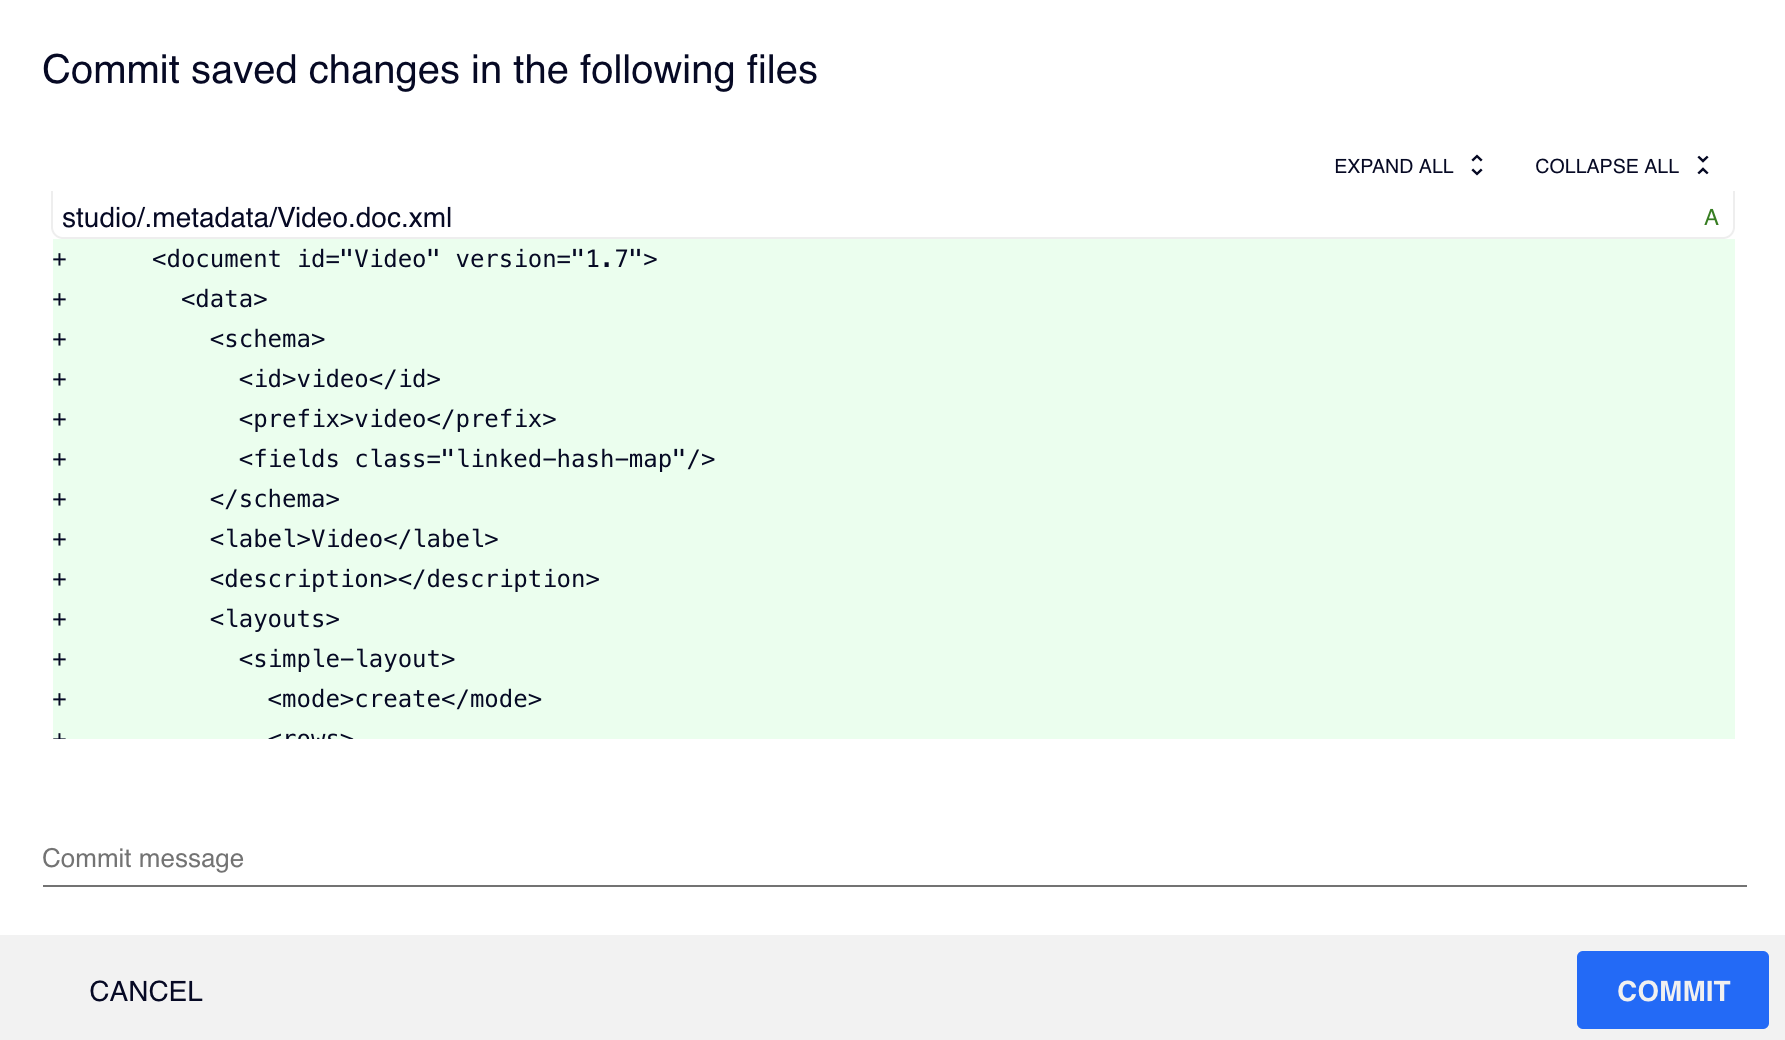
Push: Enables you to share local commits with others.
To push, click on the icon
 you will push the changes committed in your workspace to the common branch.
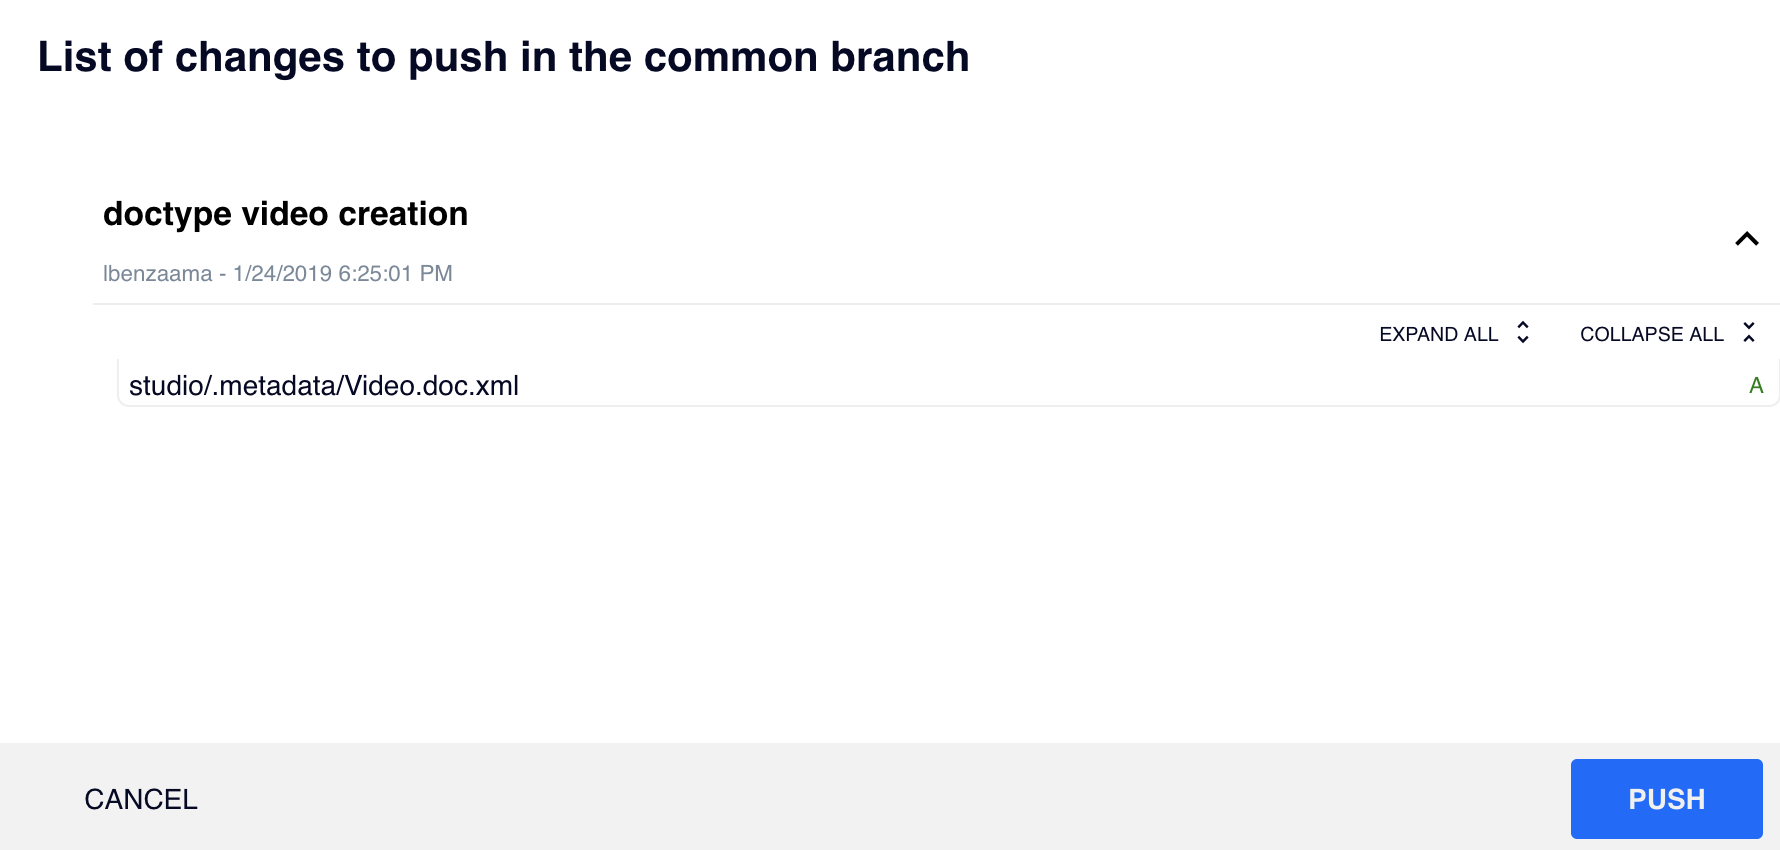 To push your changes, a pull action has to be performed first, so that your workspace is up to date with the content of the common branch.
Pull: Enables you to update your workspace with changes performed by other users in the common branch. For instance, if someone has also modified a part you are working on, you want to pull those changes to your workspace so that it's up-to-date.
To pull, click on the icon
 .
.
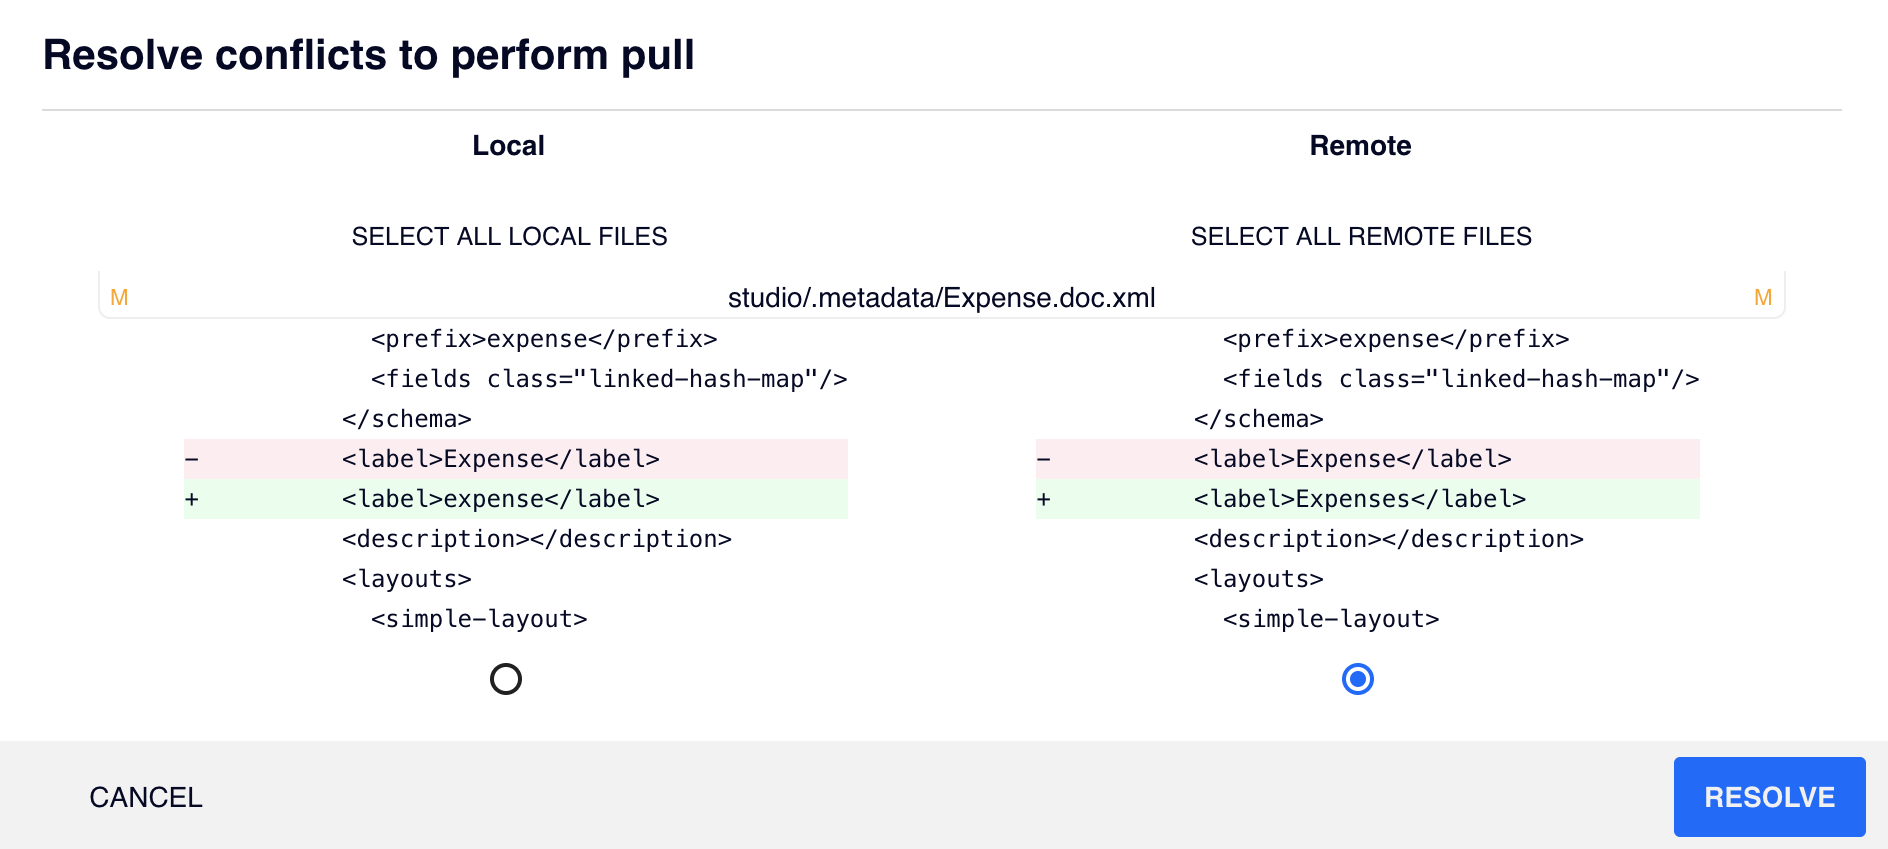
If, while you pull the content of the common branch, a conflict happens, a pop-up window appears to help you resolve it. For more information, see Handling Conflicts
Managing a Branch
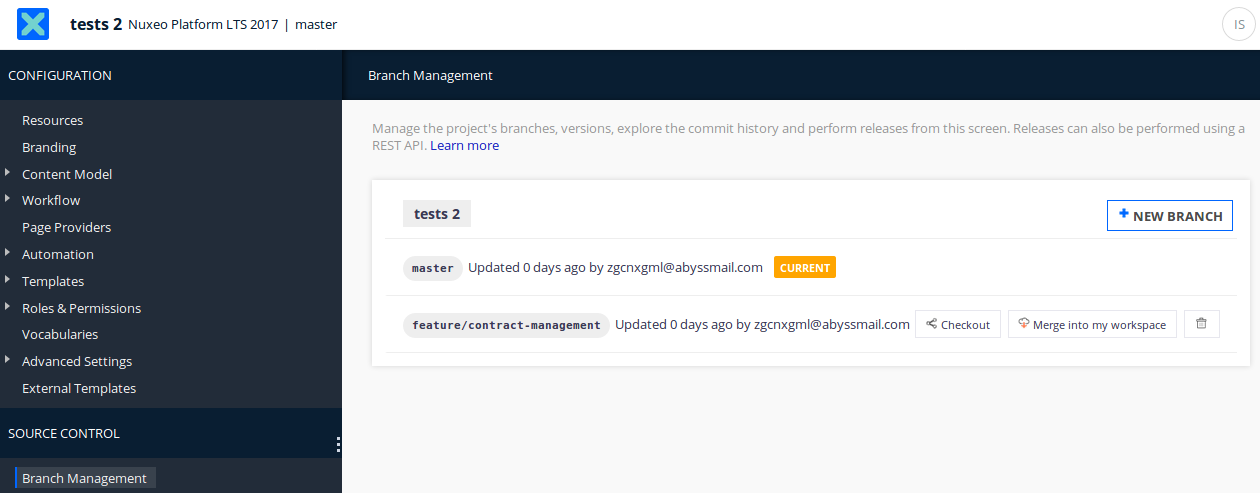
Once you have created several branches:
To work on a given branch, click the Checkout button. It creates a personal workspace based on your name and the name of the branch, on which you will save and commit your changes. Click on the Push button, to merge the content of the checked-out branch with the content of the common branch from which it was created.
To merge the changes of other branches on your current workspace, click the Merge into my workspace button. It includes committed features, the current target platform and version. Once you have merged into your workspace, you can test that the merge did not break any existing feature. You can then Push the merge to the common branch to share it.
To remove the corresponding branch, click the Delete button.
Handling Conflicts
A conflict happens when two users work in the same version and made different changes on the same data (feature, file, application dependencies...).
The conflict can happen when you get some changes from the common branch, by performing a Pull.
When a conflict is detected, a pop-up window appears. You can select for each file affected by the conflict to keep your changes or the changes from the common branch. You can go back to your work without resolving conflicts by clicking Cancel.
After resolving all the conflicts, a push on the common branch might be necessary (depending on when the conflict occurred).
Reviewing Branch Commits History
When you click on the name of one of the branches, the list of commits of this branch is displayed. For each commit entry you can:
Commit Details
Click on the commit to display added, updated and removed configuration including number of "files" (one file = one feature instance of the Studio project).
Tag
Creates a tag from that commit. A tag doesn't produce a snapshot package that could be installed on a Nuxeo Platform instance.
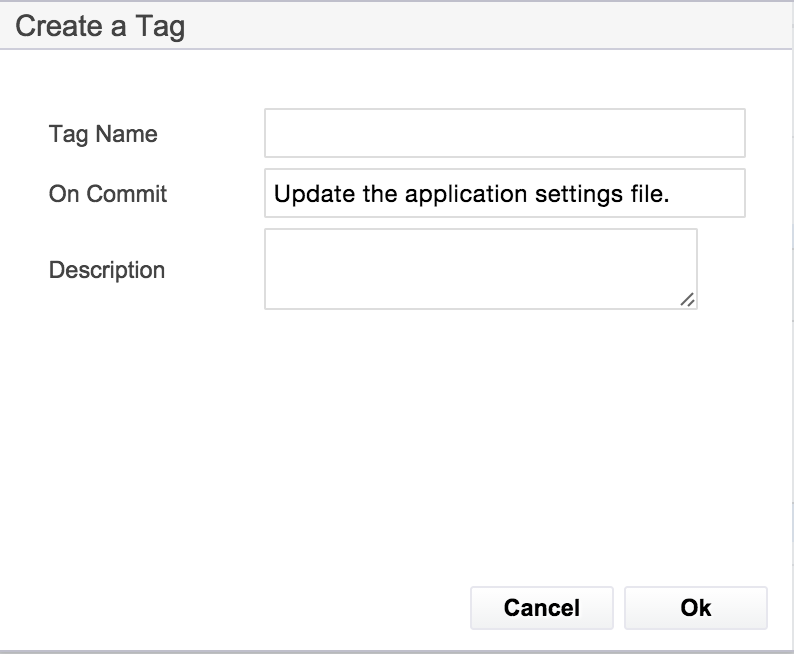
| Tag Options | |
|---|---|
| Tag Name | The name of your tag. |
| On Commit | Read-only and automatically filled, name of the tag where the release will be done. |
| Description | The description of the tag. This description is here for information purpose. |
Release
Creates a release from that commit. When performing a release, a package is built and sent to the marketplace so as to be able to perform a re-installation of that exact same release of your project later.
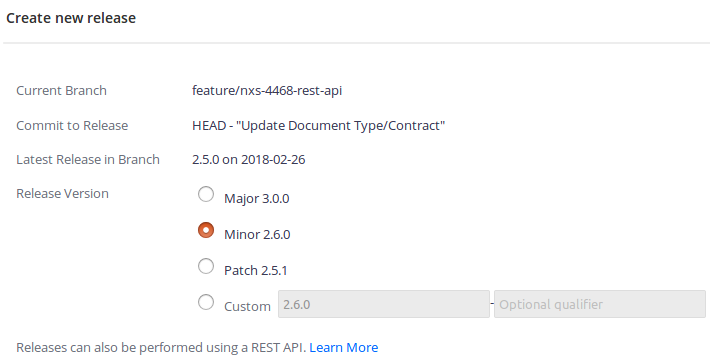
| Release Options | |
|---|---|
| Current Branch | Branch from which you are creating the release. |
| Commit to Release | Description of the commit from which the release will be done. |
| Latest Release in Branch | Indicates the last release performed from this branch. Studio will suggest a version number on this basis. |
| Release Version | Select or type the version number that you are going to release. |
| Help: Version Format | List of format rules to apply on your releases. |
Releases can also be created using a REST API.
Revert
Reverts to a specific commit. A previous state of the project is restored which inverts the set of changes made after the commit on which you selected.
The revert command preserves the history and a revert entry unlike a reset command which would remove the set of changes after the commit you may have selected (the reset command is not provided to users).
Build Automation
Nuxeo Studio acts as a Maven repository to provide a Studio project artifact for each of your branches and corresponding workspaces.