Dependent Projects
In Studio it is possible to add a project as a dependency on another.
When a dependency exists, the child Project will inherit most aspects of the dependent project, including:
- Studio Modeler side configuration and any manually added registries
- Any data and translations that are part of a Studio project
- Studio Designer front-end and branding assets
As a result, the Studio Modeler side configuration will be useable in the child project as if it was created in the child project. Assets such as front-end assets and data will be loaded onto the instance at runtime, and hence will be useable by your project.
Multi-layer
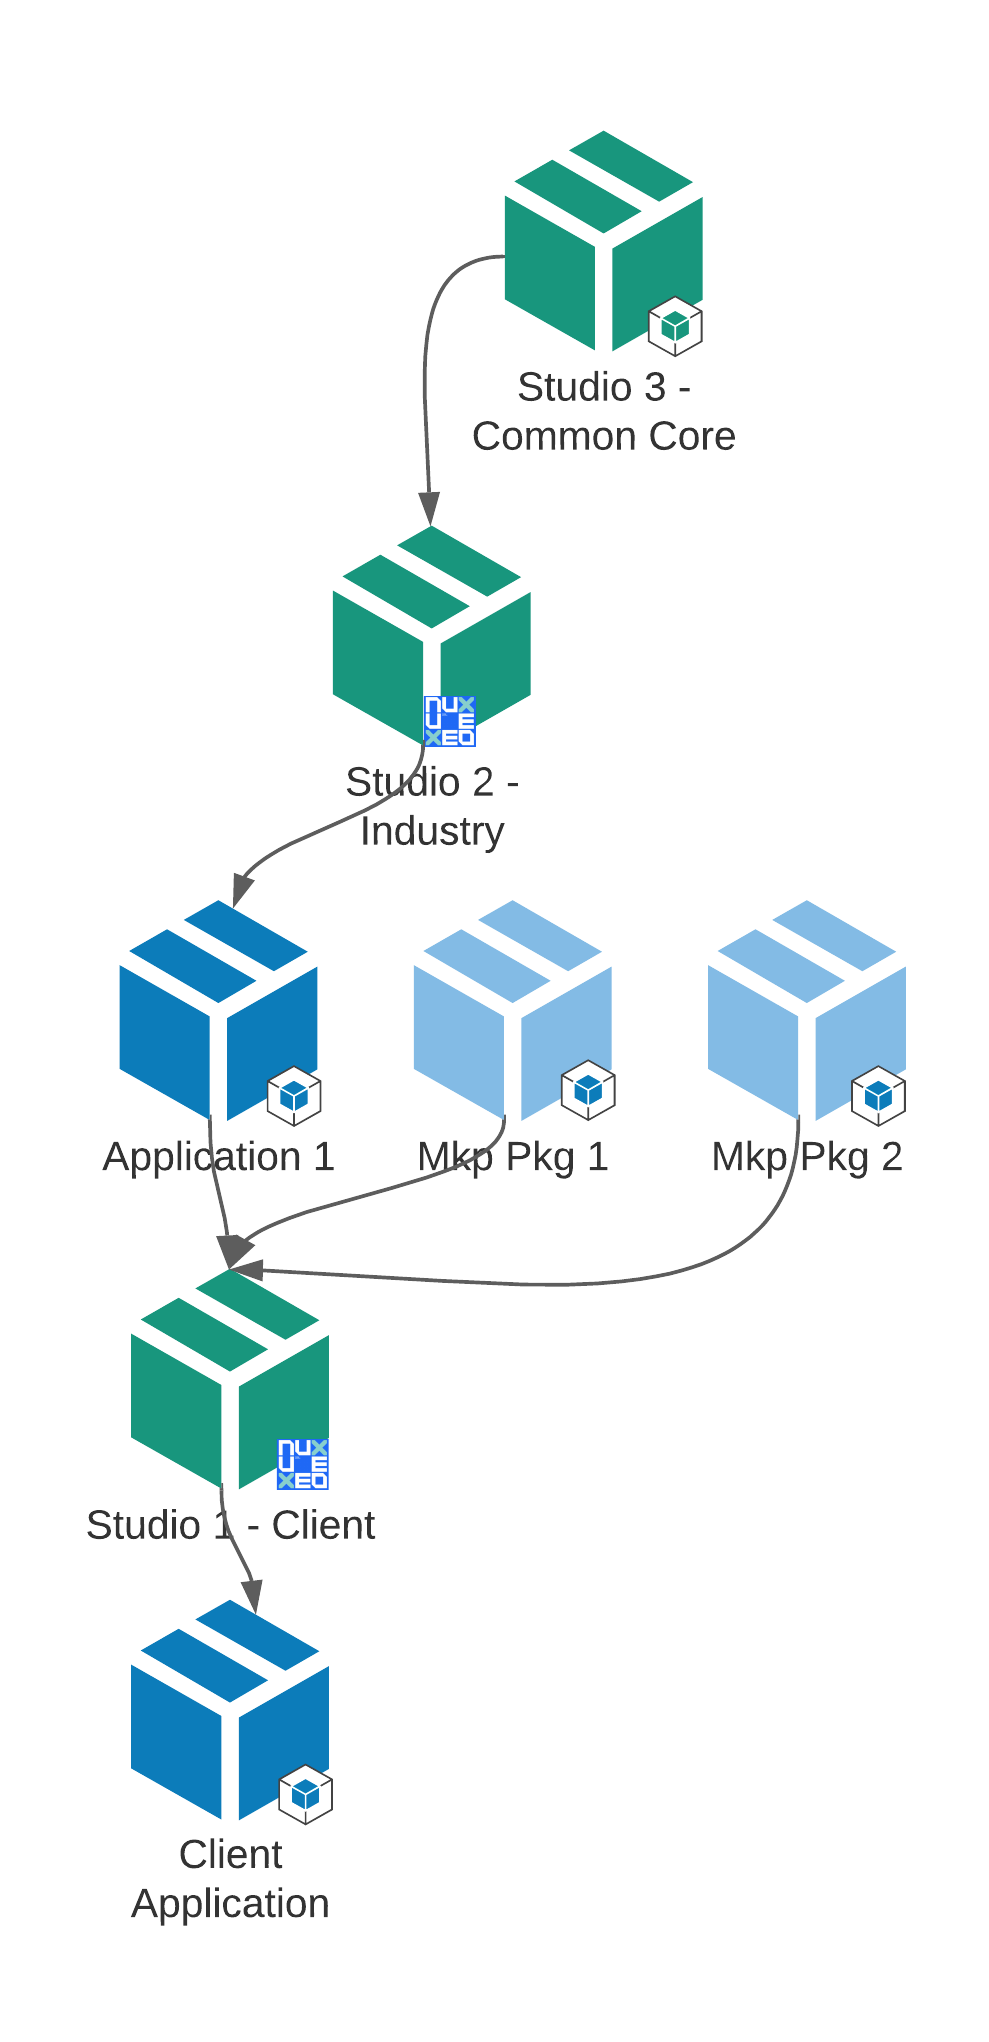
We refer to a structure of dependent projects as a multi-layer project. The structure has only the following constraints:
- Up to six levels of dependency
- An unlimited amount of Studio projects or other packages can be added at each level
Below is an example of a three-layer project.

This structure is particularly relevant to the following applications:
An organisation that creates several instances that share a similar base. A base project can be developed as an independent Studio project and added as a dependency to the final Studio project, in doing so the base project is reused. This also allows the base project to be managed and changed independently of the child projects. A good example would be an OEM workflow.
Projects that include repeating modular components. Studio projects can be developed as components, scoped to a feature and feature set, and added to other projects via dependencies. In doing so the component is reusable across different applications. This allows greater efficiency, as components do not need to be rebuilt for each project and can be managed centrally.
Key Aspects
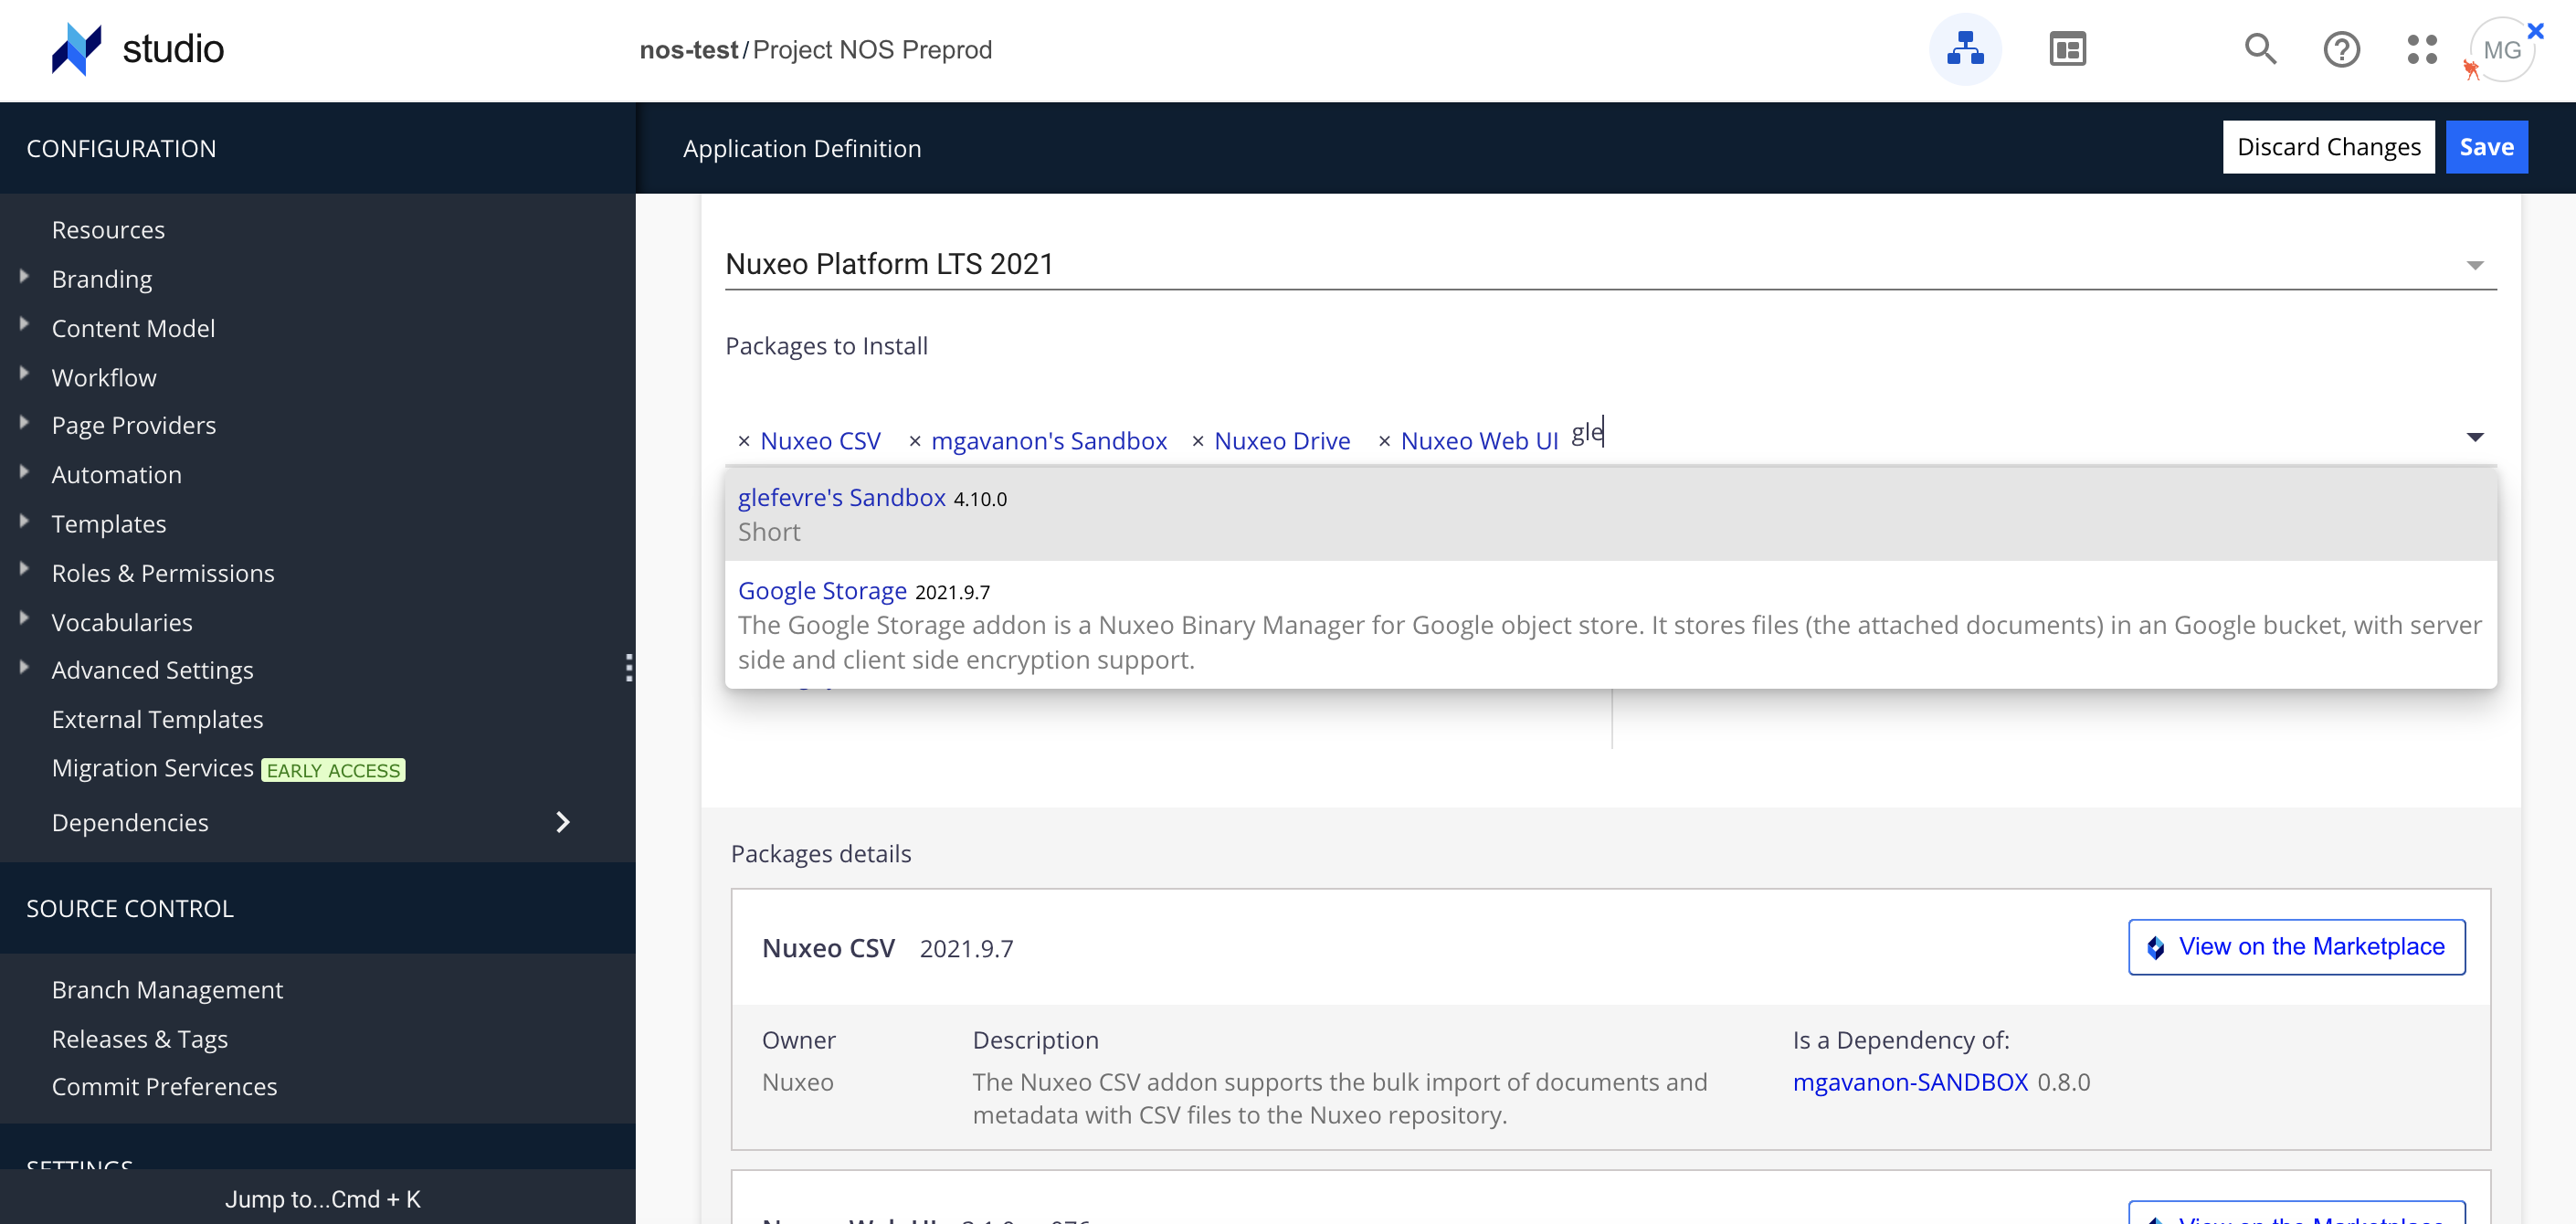
You can add a dependent Studio Project via the Application Definition section of Studio.
- You need to have access to that Studio project by being a member of that project's organisation or user group
- Search in the Application Definition search bar for the project and select it, as you would any other package
- When added, a description block will display :
→ Key information about the Studio package → Package Dependencies' will note the packages being added by that item to your project → Is a dependency of will highlight if a package is a dependency of another in your Application Definition
Note that only list first level dependencies will be displayed, not those that may be encountered at other levels. Circular dependencies are permitted, but not encouraged.
Recursive Resolution
Dependencies are added recursively, from the deepest level to the highest, and from left to right, in the order they are added. In practice, the resolution process starts with the first dependency, looks for its deepest layer, and resolves upwards. The dependency resolution order is deterministic for a given dependency tree.
If a feature has the same name at several layers, it will be overridden by the feature at the highest level of the dependency resolution order.
As all features are brought in for use into your local project, it is fully possible to use features from different dependencies together.
Dependencies Navigation
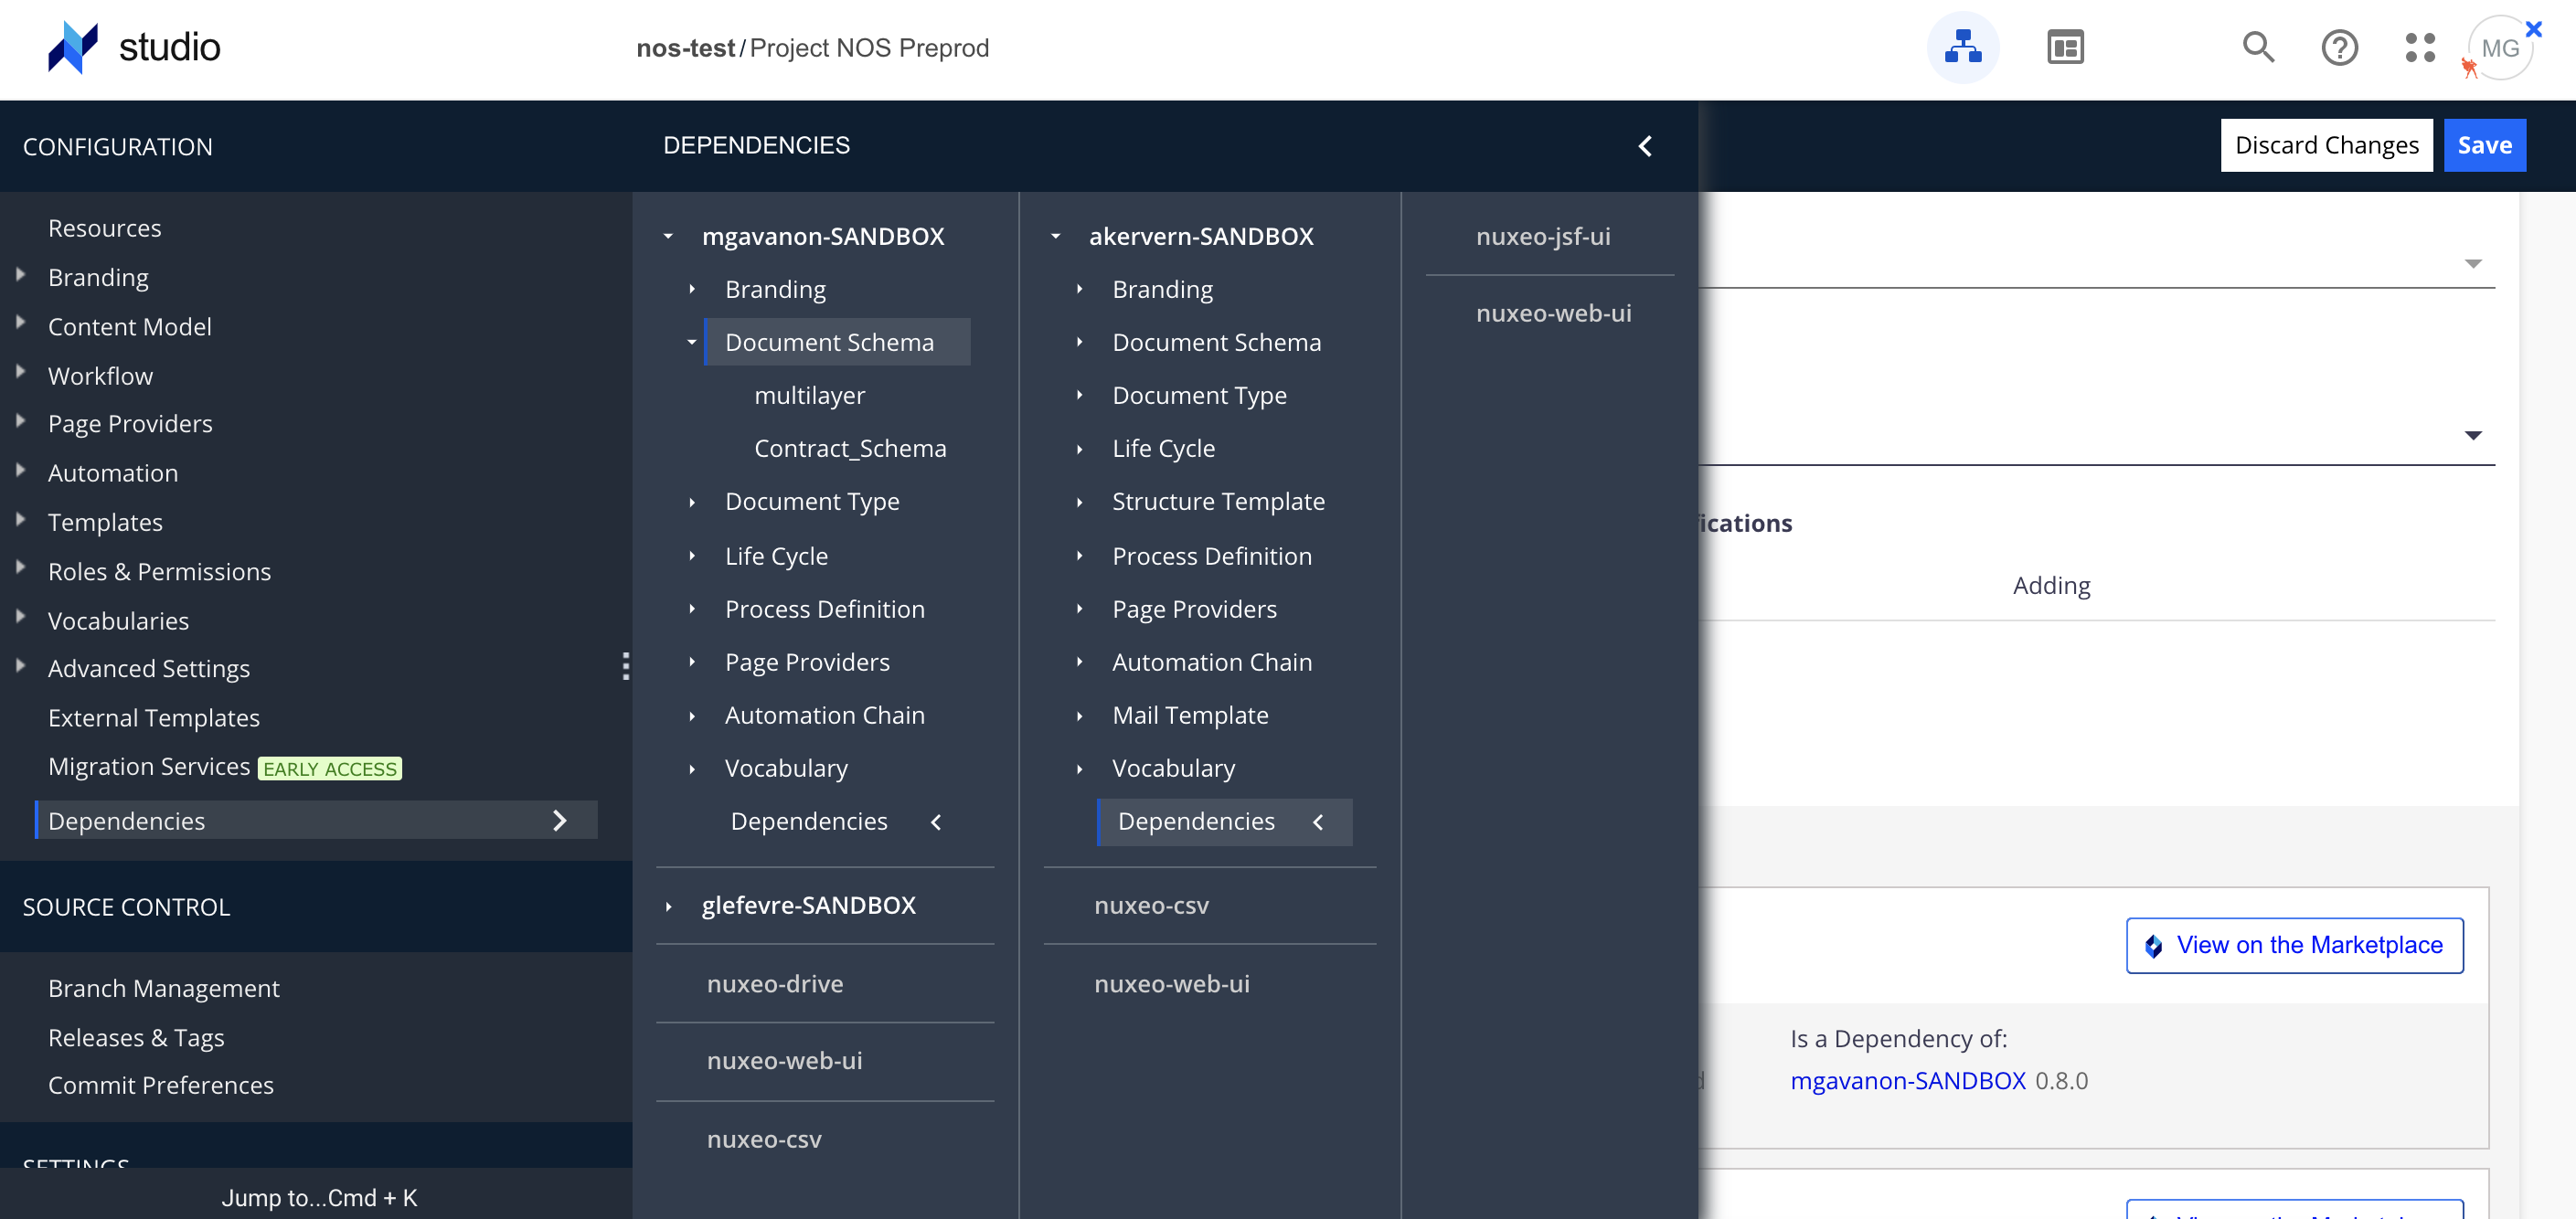
Once a Studio project is added as a dependency, you will see on Modeler side, a new menu entry Dependencies, under Configuration. It will allow you to navigate among dependencies and visualise their features. Each layer of dependency will be presented as a panel, per the Configuration menu. You cannot save these features.
Moreover, if a dependency itself has a dependency, these will be navigable.
Overriding a Feature from a Dependent Project
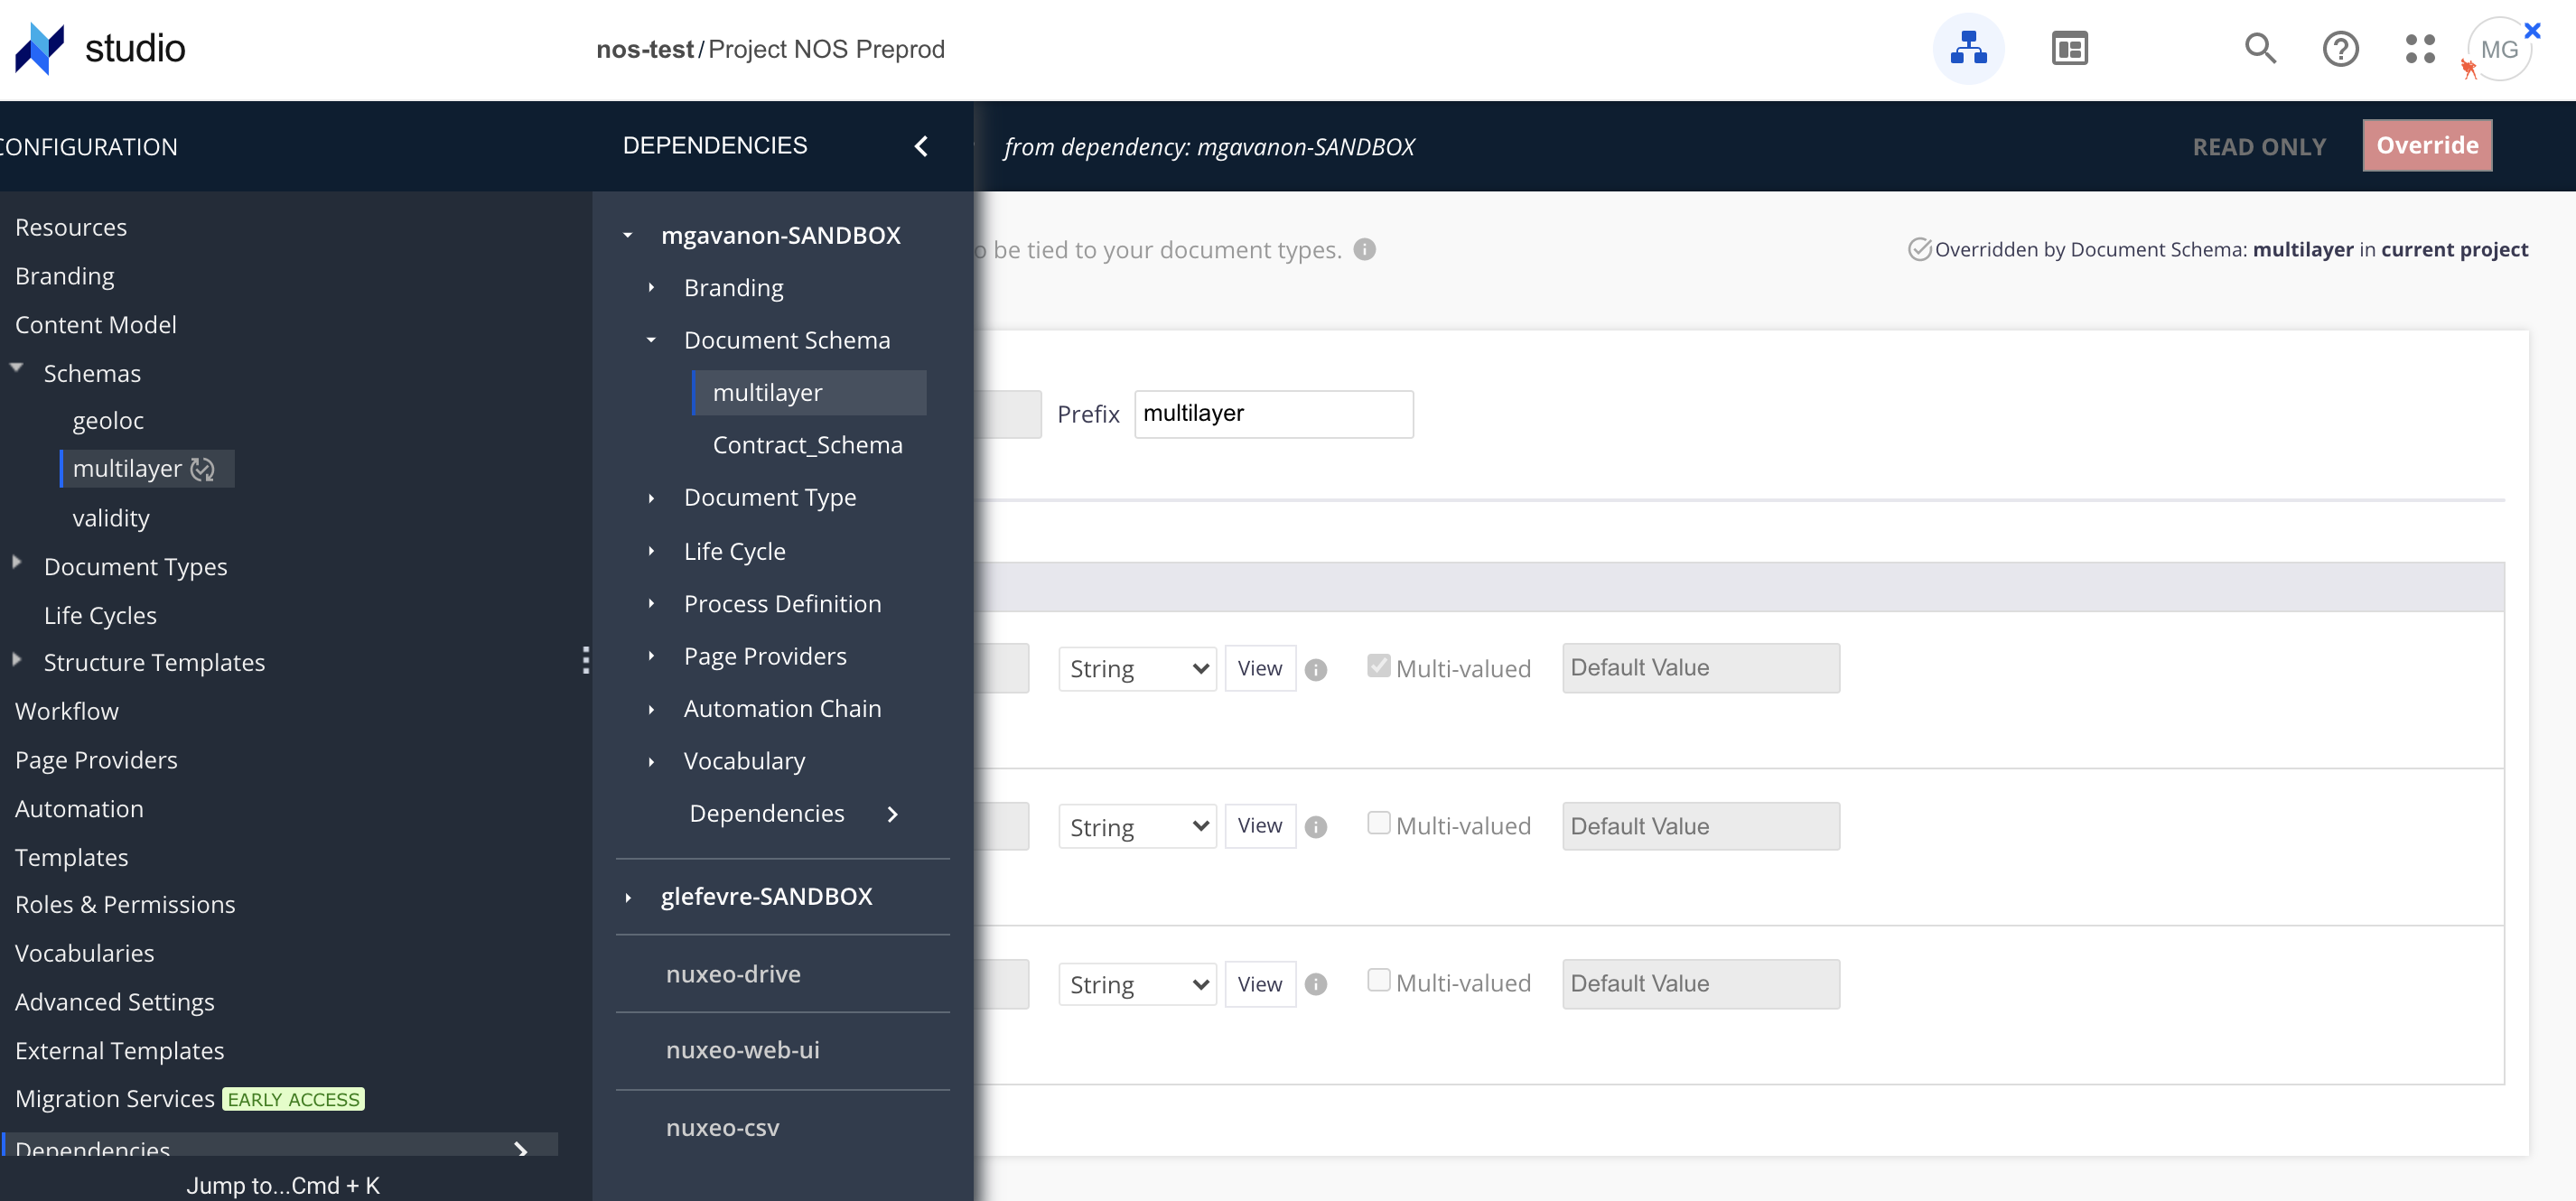
If you, as a user, wish to change a feature from a dependency, you will need to override it. Studio provides this feature. When navigating through the Dependencies panels and visualising a feature, an override button will appear in the top right.
On click, this will create a duplicate version of the feature from the dependency to your local project that will be editable and override the feature coming from the dependency. Messages will appear on both involved features to notify you that the override is occurring.
Release and Build
Once the appropriate dependencies and packages are added, and the project configured, you will need to release a version of your project. This is done normally in Branch Management.
When you install your project on an instance, at runtime the installation command will add the relevant packages and projects with the status started. The different contributions will be resolved and front-end or data assets will be added to your instance.
Lock Dependencies
Dependent Studio project are by default installed with open dependencies, this means that when the package is installed, the latest version is taken into account.
If you wish to maintain a certain configuration over time, and it not be impacted by changes in dependent Studio projects, you can lock dependencies.
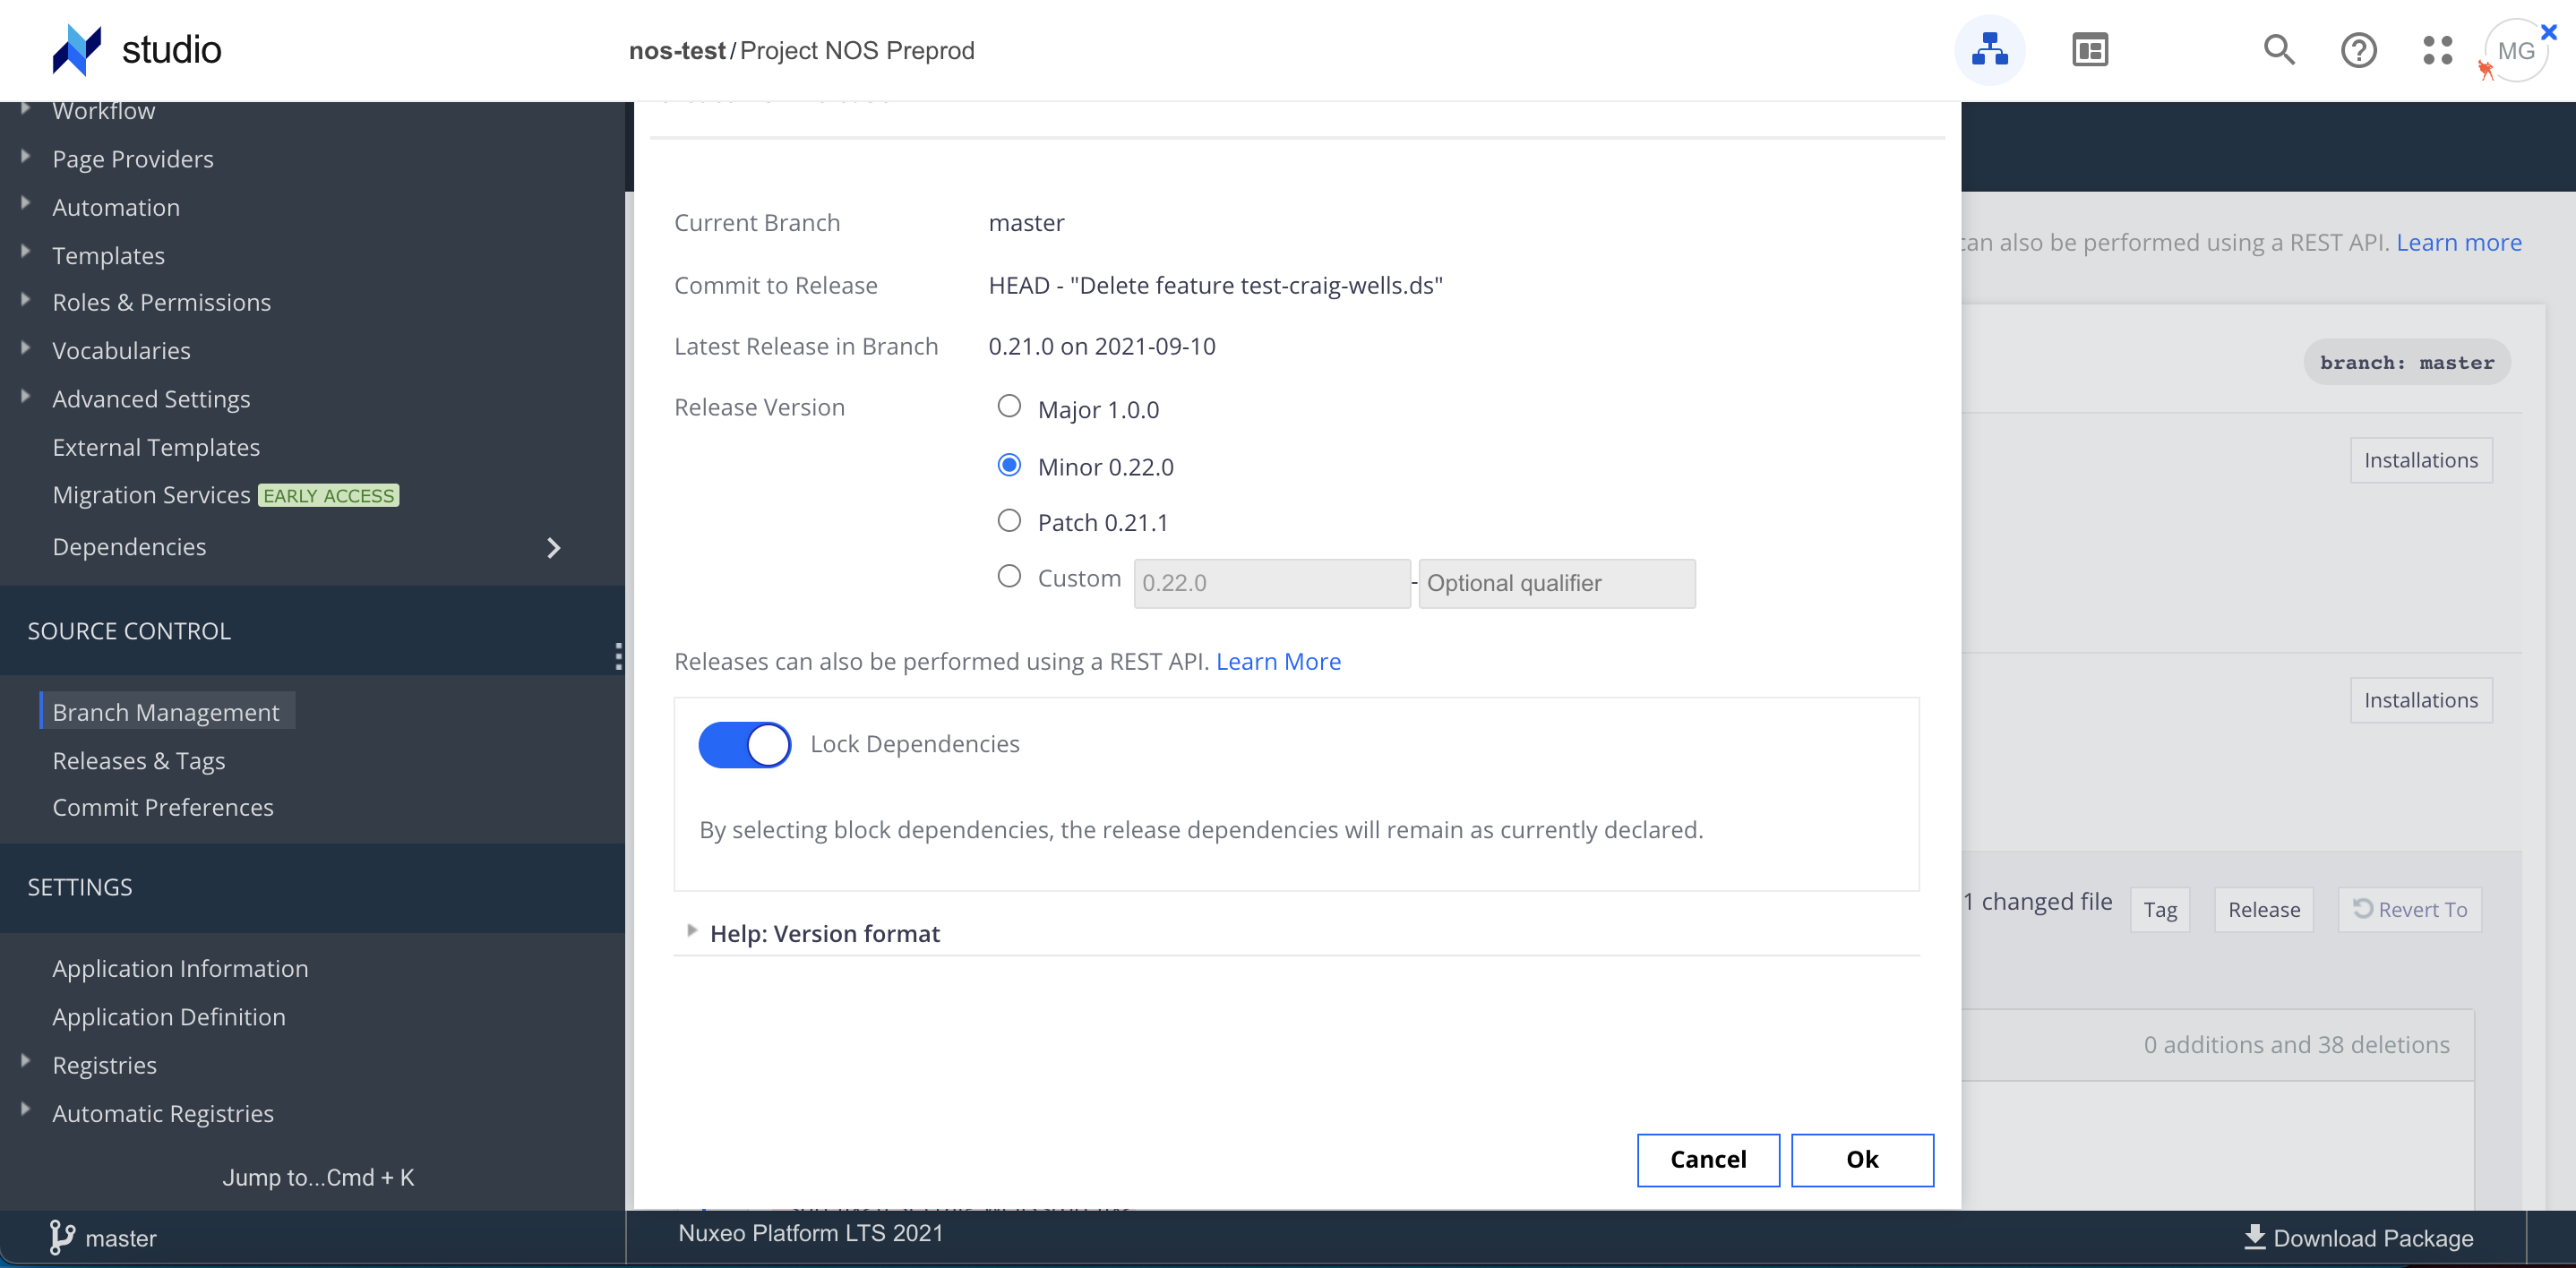
When a release is created from a branch, the release prompt will allow you to lock dependencies. If selected, all first-level dependent studio projects will remain at the version they were at the moment of release. To lock an entire multi-level dependency tree, the lock will need to be applied to each level.
This is a non-reversible lock, a new release needs to be made with unlocked dependencies to change the project’s behavior.
In Designer
As mentioned, the front-end assets from dependent packages will be added to the instance at runtime, in the same deterministic order, and will be useable by the application, this will include:
- Layouts type assets
- Layouts Blocks and Custom resources
- Web UI bundles and related configuration
- Themes and translations
Layouts
Layouts, including those associated with DocTypes, Workflows or Page Providers, from dependencies be listed under the menu Layouts from Dependencies. It will not be possible to consult these layouts, the list is indicative of those being added to the instance. The list will not distinguish 'from which' dependency the layouts is brought in by.
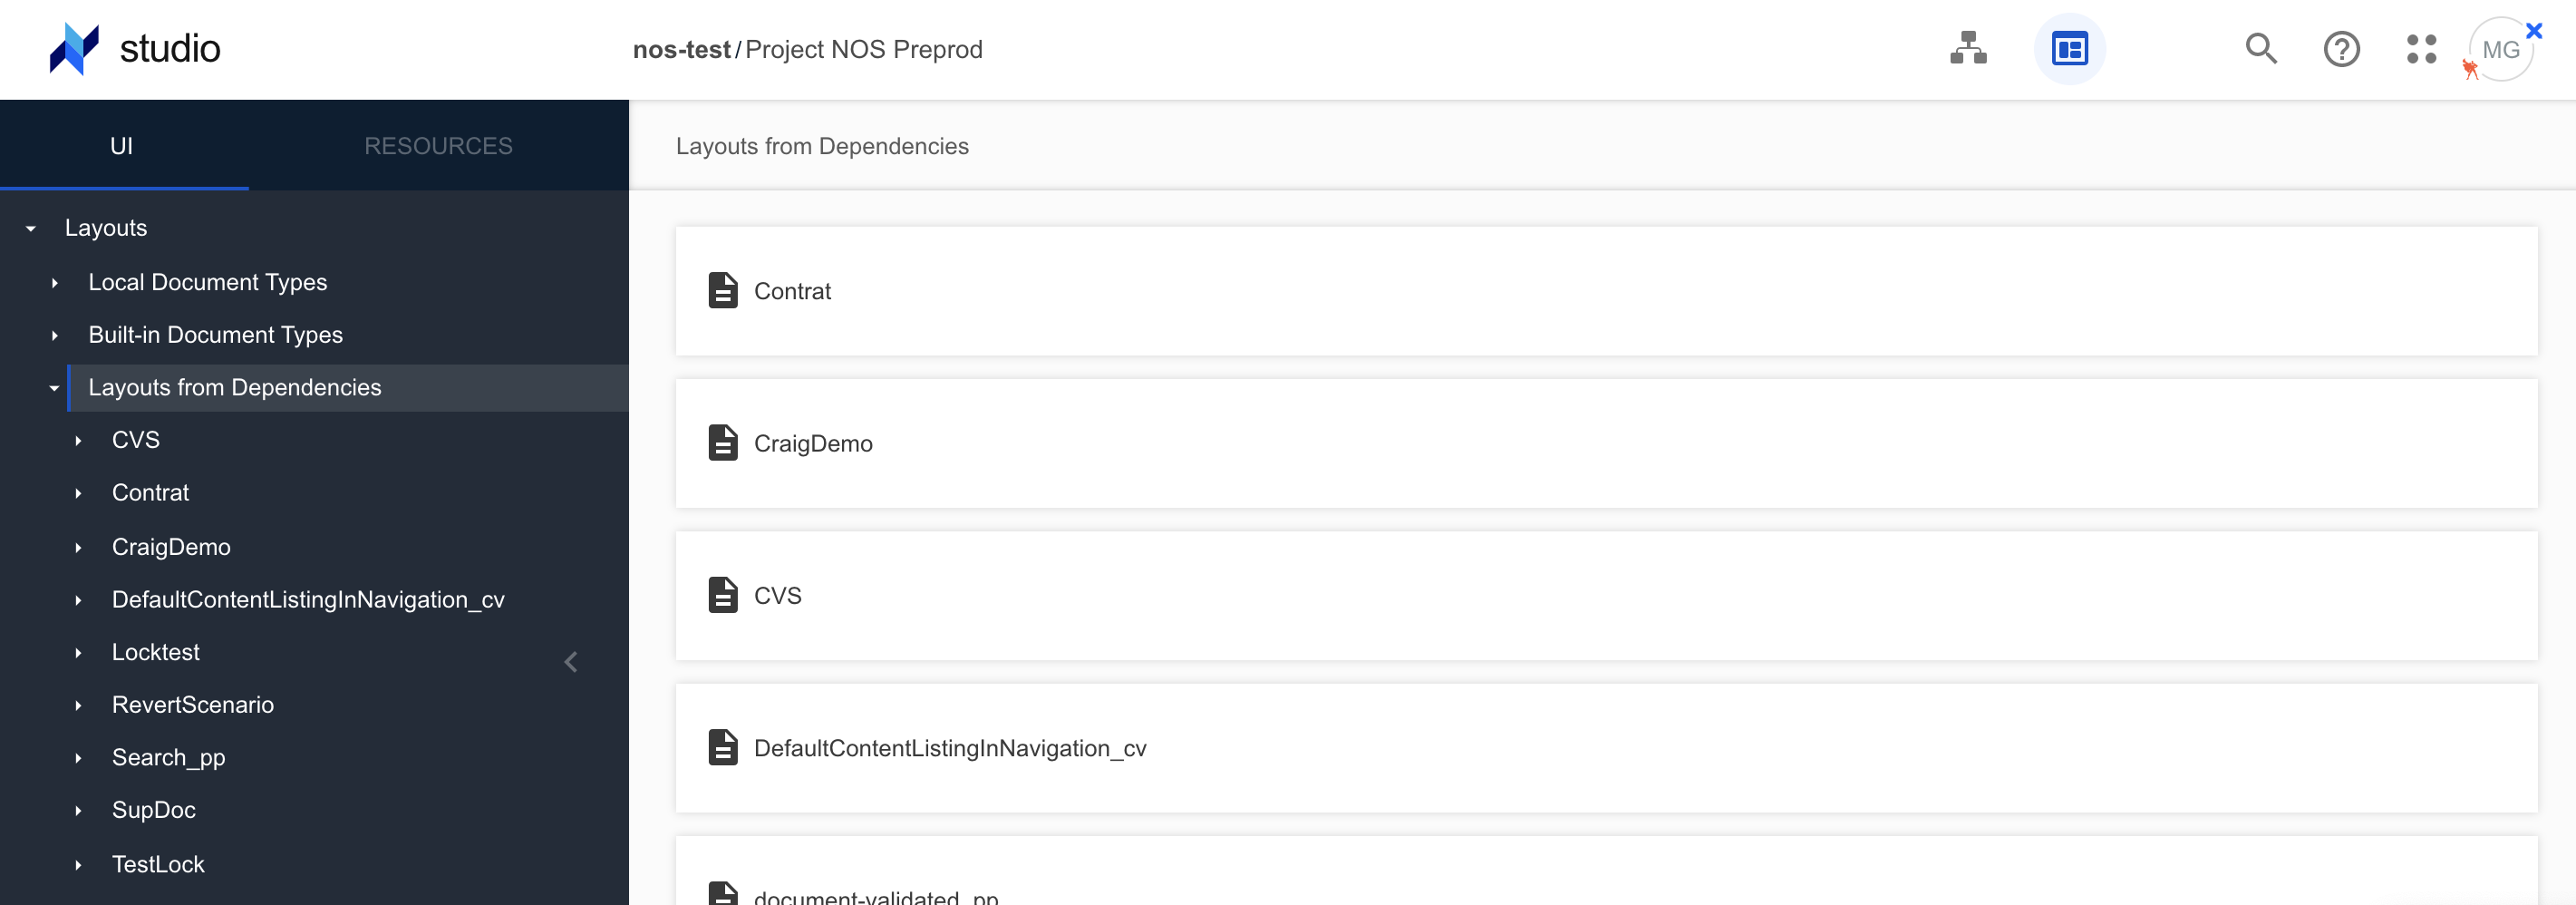
- Overriding Layouts When a layout from a dependency is selected, it will appear empty and configurable. If the layout is configured this will create a local copy which will override the layout from the dependency.
Layout blocks
When using a Layout Blocks from a dependency, these will not be loaded in the Studio Designer palette, as per local Layout Blocks. They will, however, be loaded onto the instance and will display in Web UI if used. As such, when you want to use a Layout block element in Studio Designer from a dependency, you will need to add a link to it in your relevant layout as per the following example:
- If I create a new DocType layout and want to call the product-edit.html Layout Block within it, I would add the following link in the element:
<link rel="import" href="../../forms/product-edit.html">. The link being location of the file on the instance.
The same logic applies to custom elements added to Resources in Web UI or manually to the instance.
Web UI bundles and related configuration
Configuration of the Web UI structure of a project is done through the project's bundle file, visible in Resources. Changes to Tabs, Drawers and Buttons will be recorded in the bundle file.
In a multi-layer context the bundle files are merged as per the deployment order, this includes the deletion of elements. The merged by then overrides the base Web UI configuration.
Themes and translations
Themes and translations will be added to the instance and merged normally, the element highest in the deployment order being that used by the instance.
Considerations
- Hot reload is not currently operational with multi-layer.
There is a caching mechanism in mp-install, if you are using this command remember to do an mp-update to update the cache and download the latest defined versions of the packages
- Removing a dependent Studio Project
Currently, removing a dependency in the Studio Application definition and reinstalling (mp-install) the project DOES NOT remove that dependency from an instance. In order to remove the package, you will need to use the mp-remove command for the relevant packages.
Note, this command will remove all contents except for Workflows will persist and be listed in the ‘Start Process’ list in Web UI. HTML assets will remain on the instance, however if not called, they won't be displayed.