The branding menu manages the display of the login page of an application.
To configure the login page of your application:
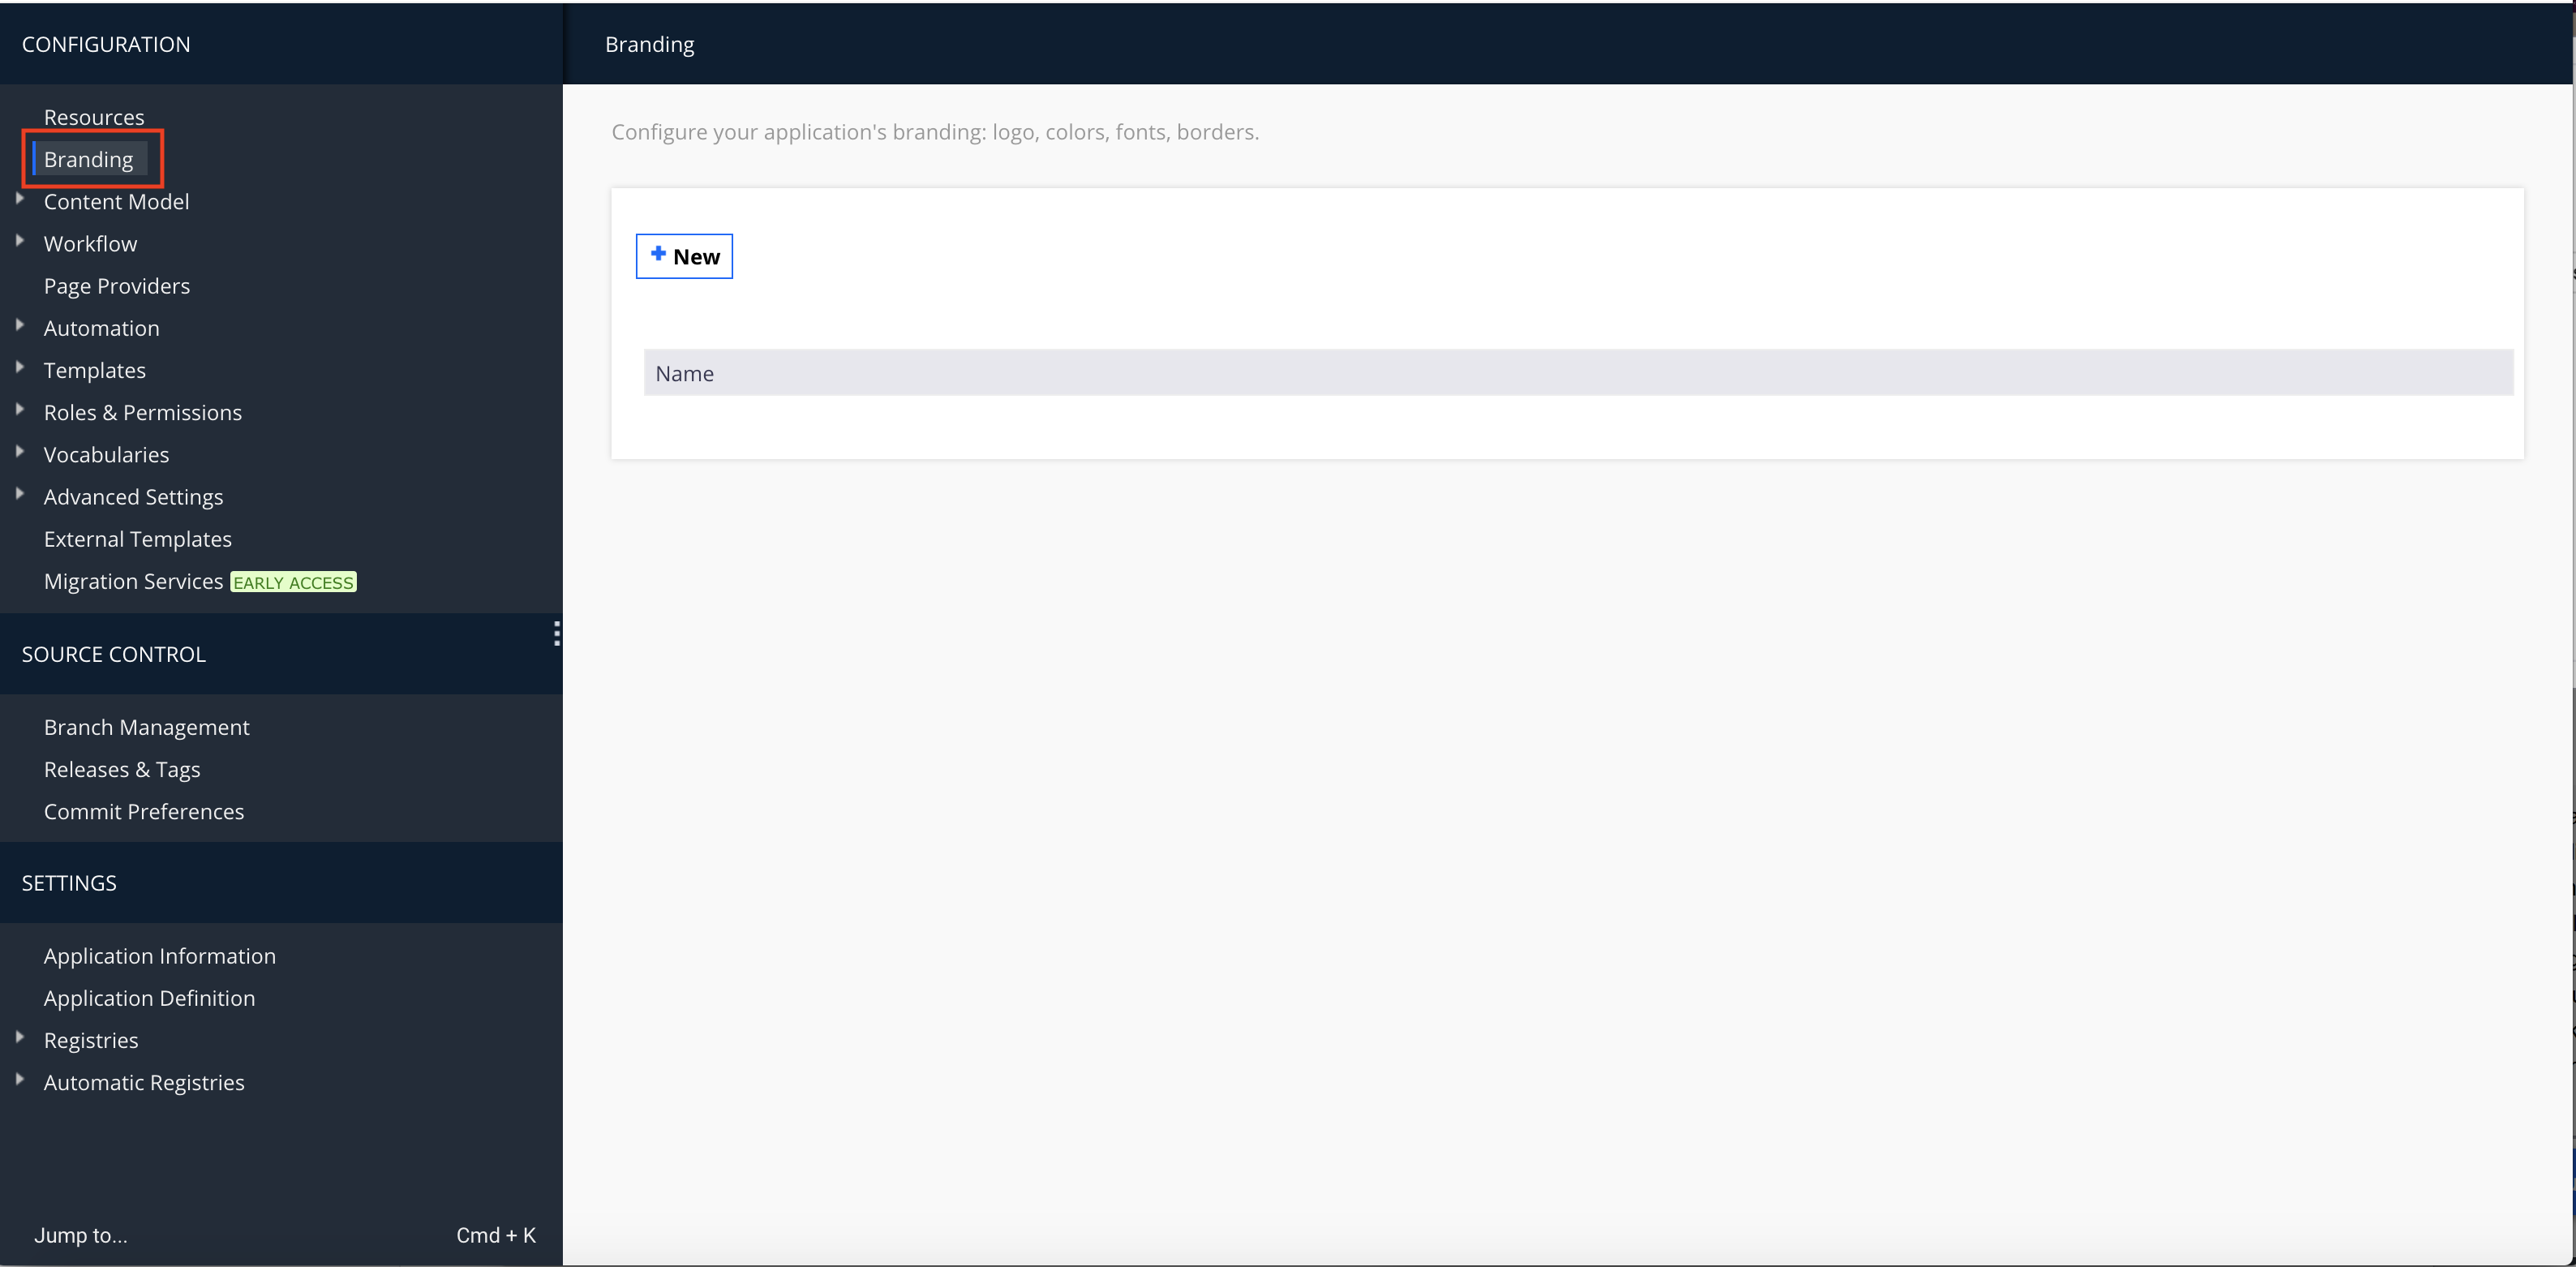
- In Configuration, go to the Branding menu.
- Click on the New button.
- Enter the name of your branding in Feature ID.
- Click OK.
Each Studio application can only display one login page, therefore only one login page branding per application can be created.

Selecting a Background
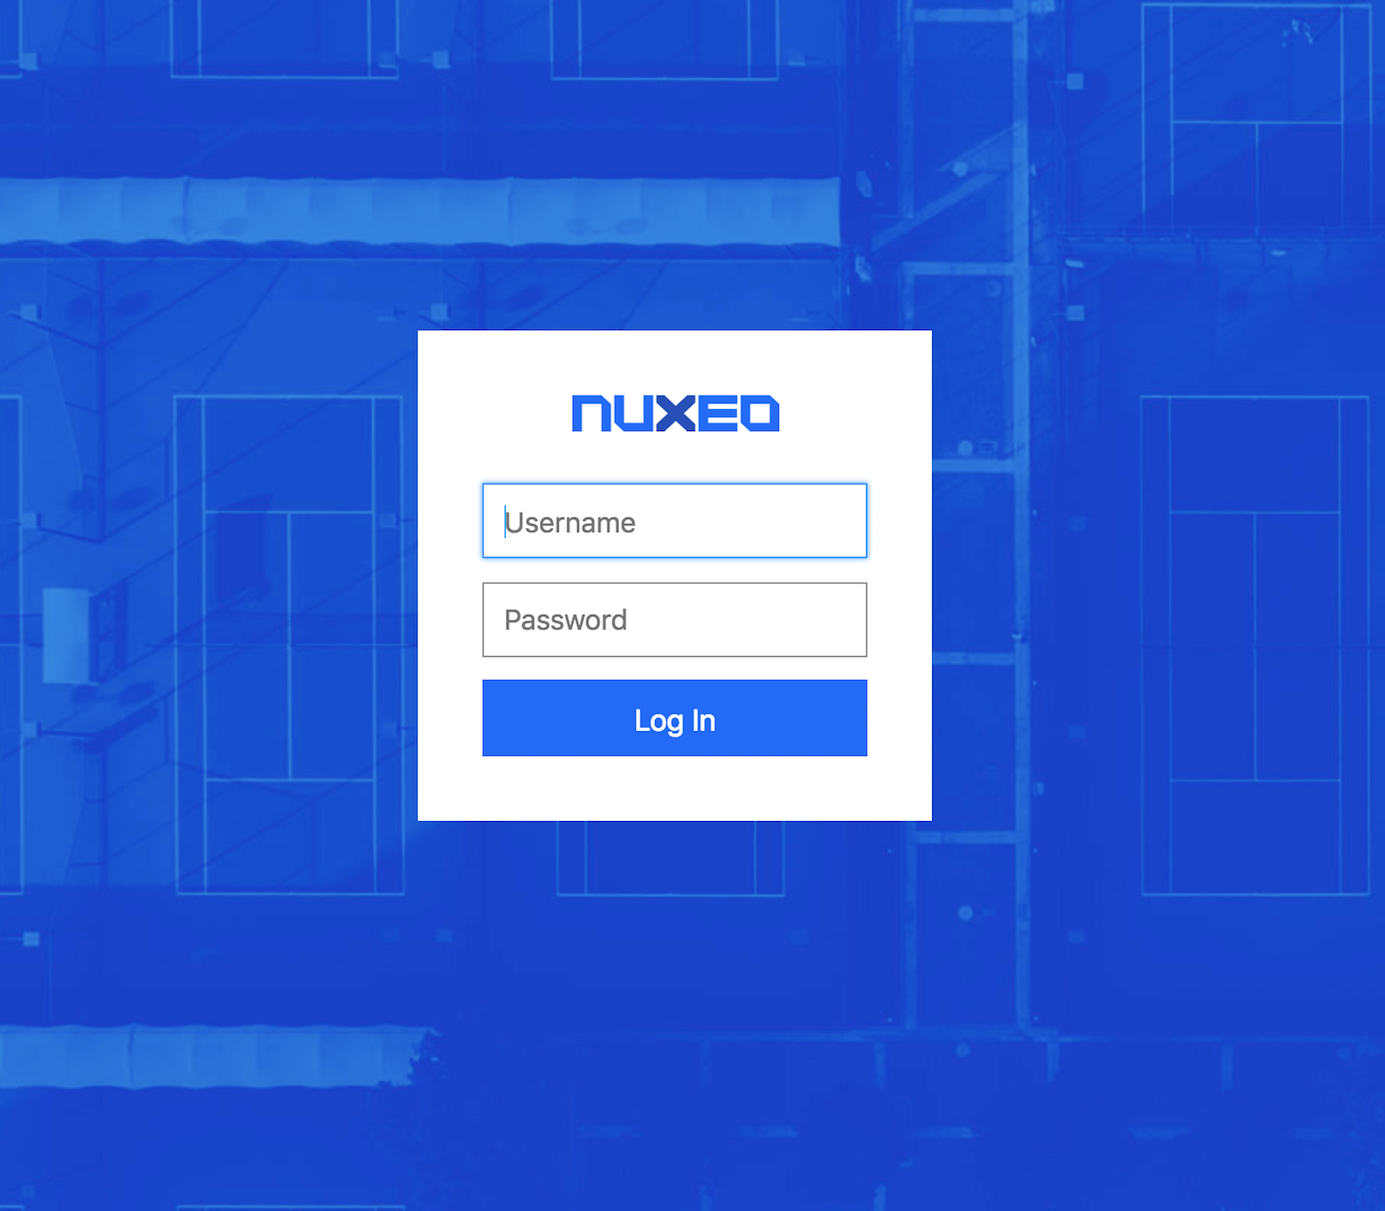
The background of your login page can be customized with your brand colors, pictures and videos.
For their login page background image, most of our customers choose either:
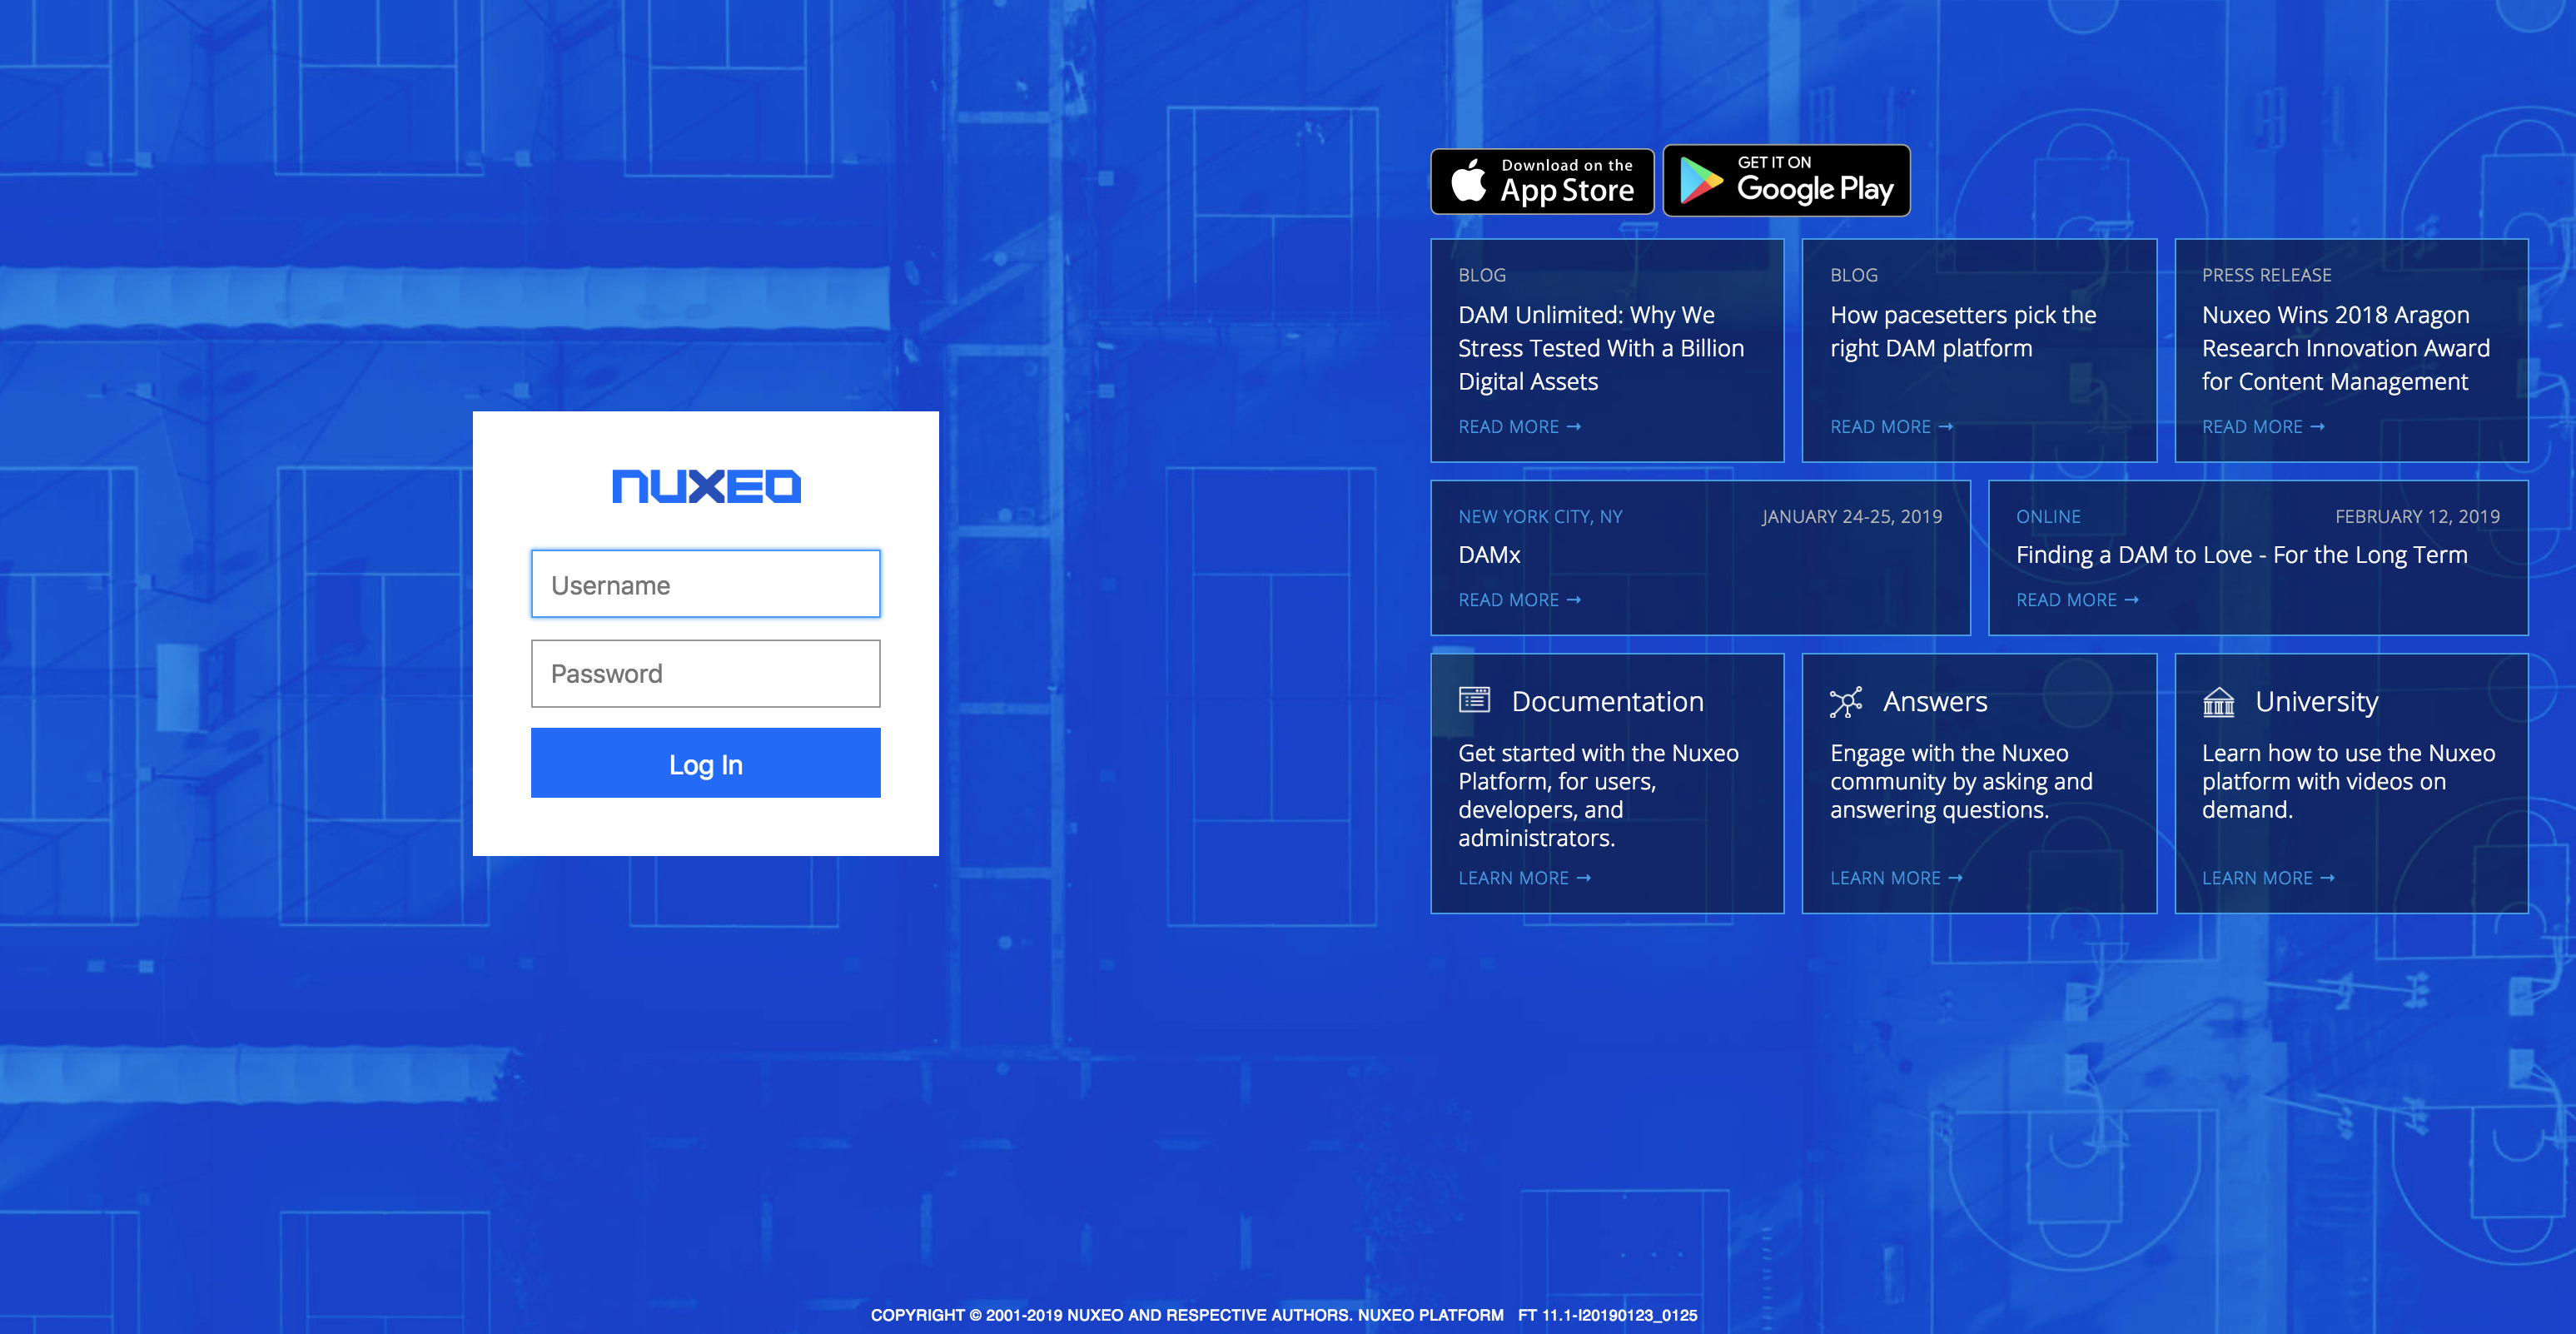
- A picture covering all the screen, this is the strategy chosen by Nuxeo.
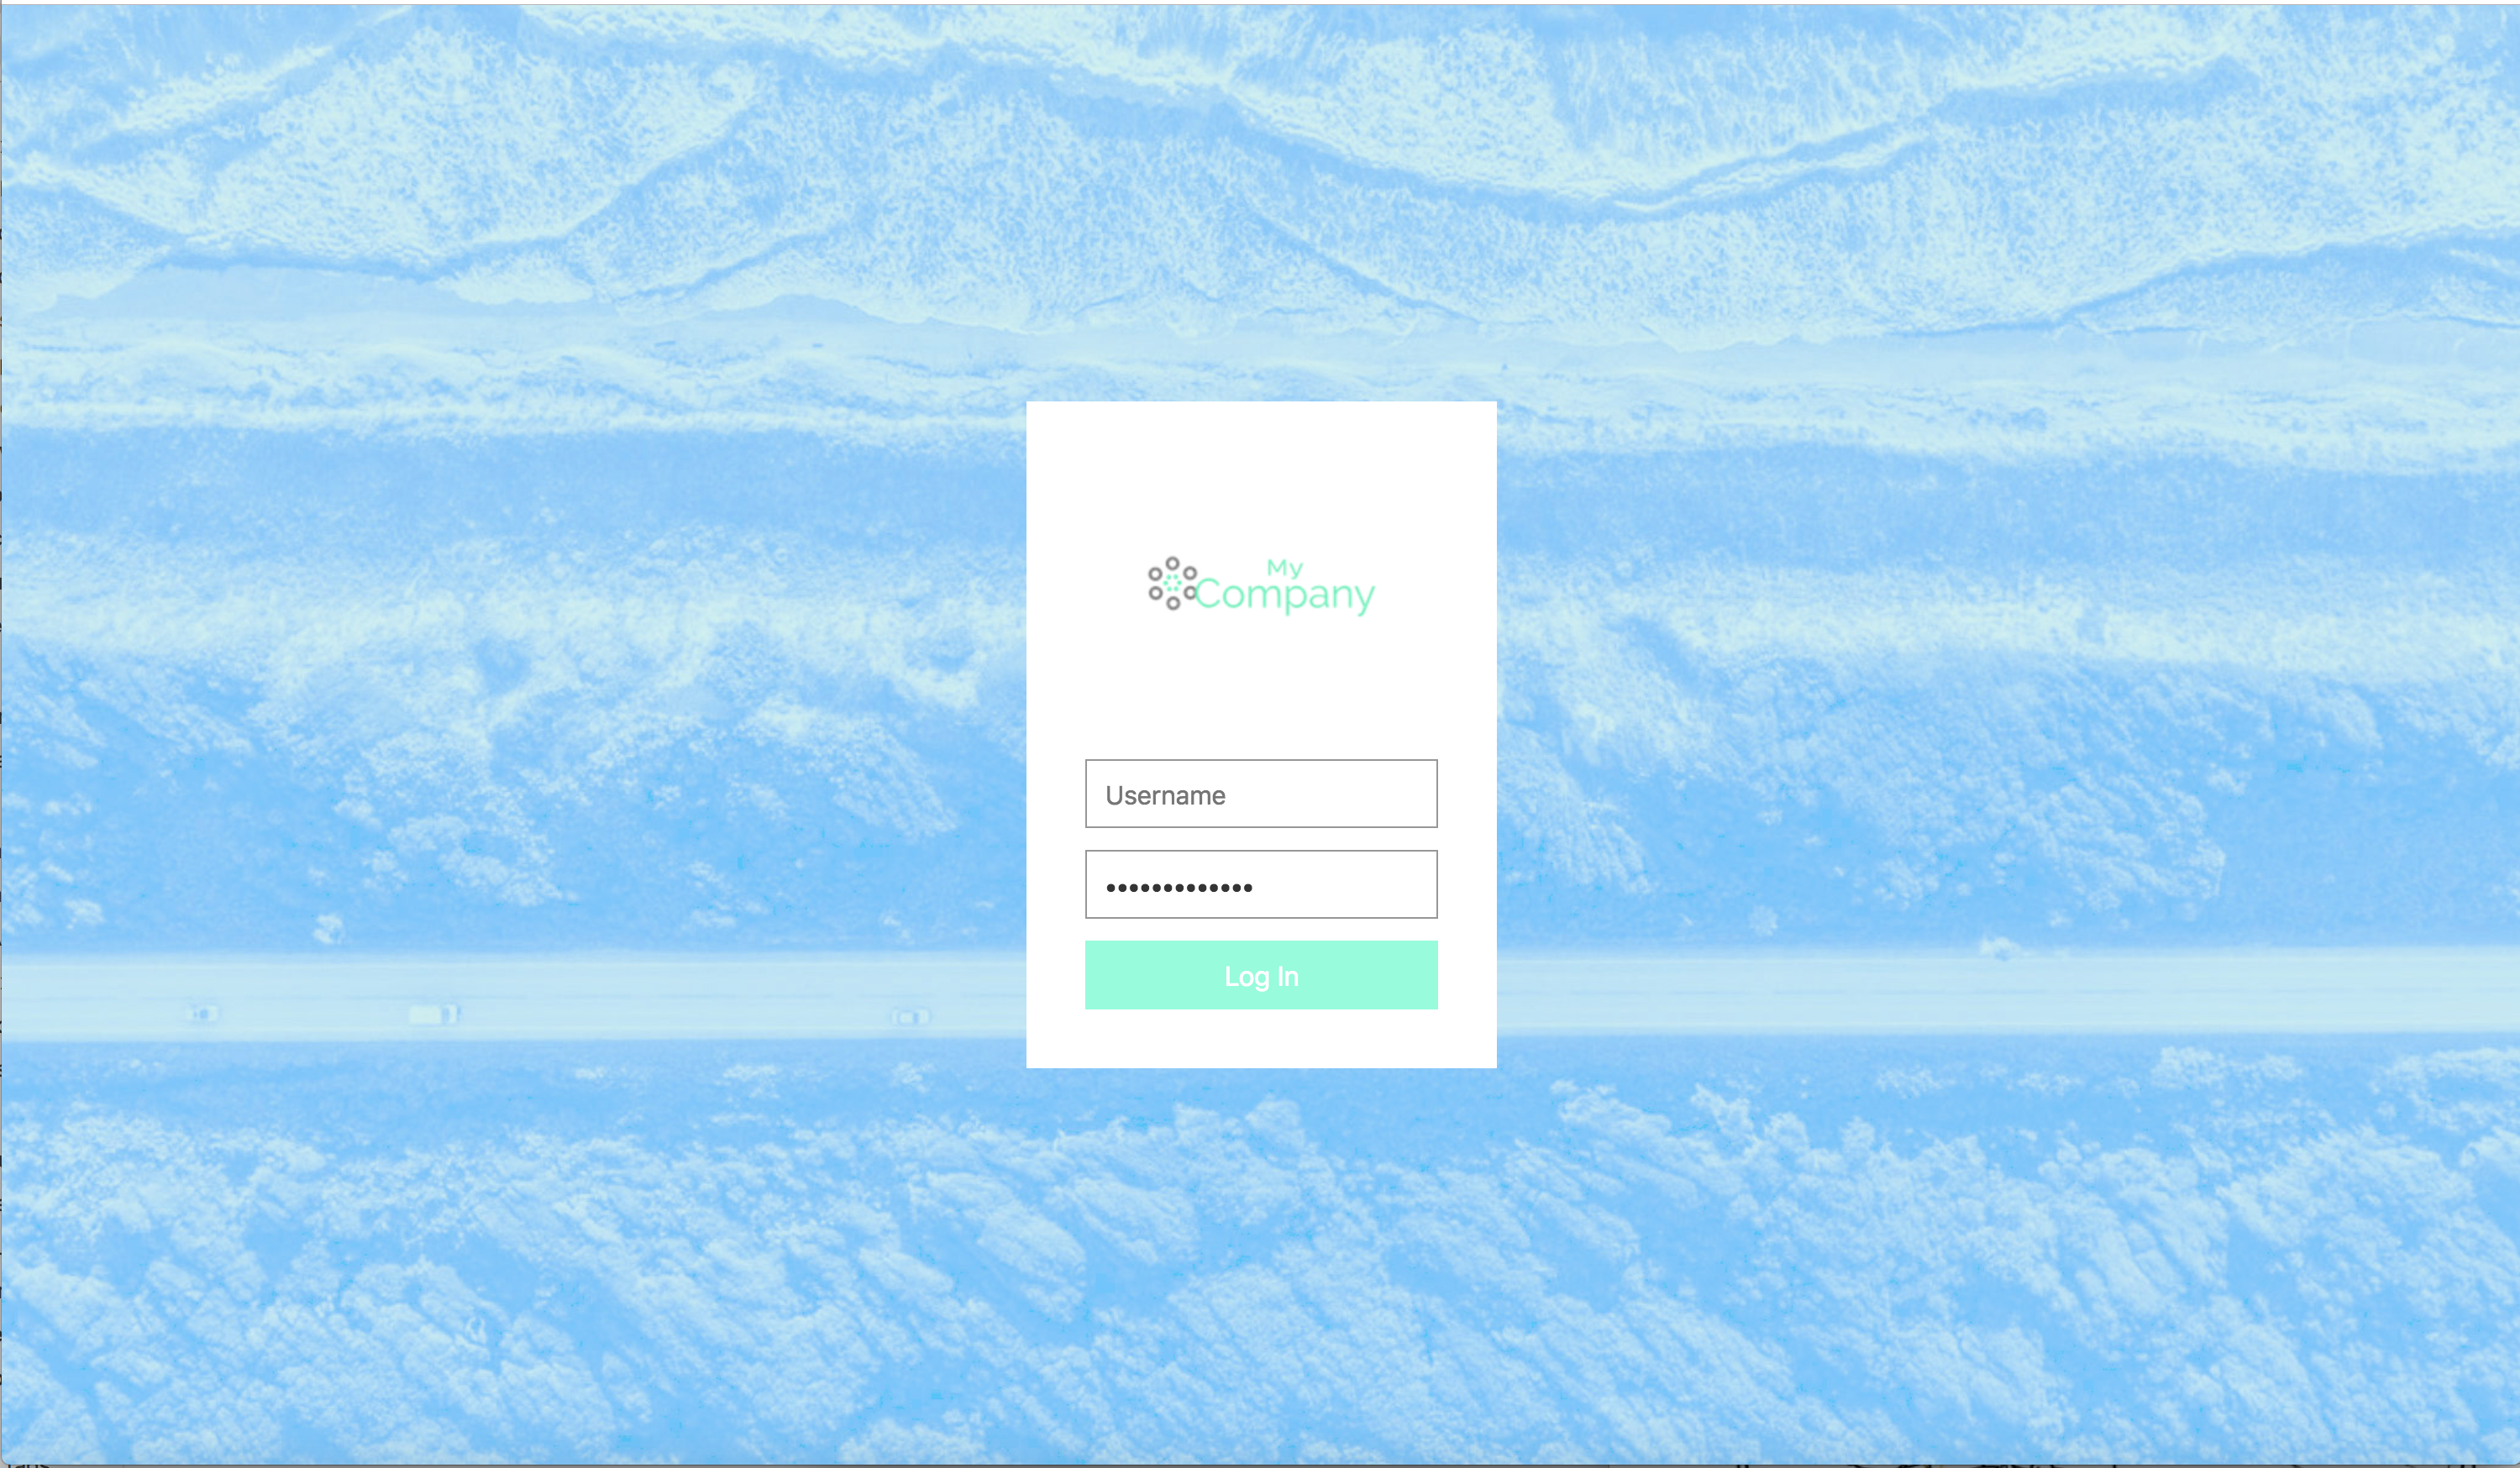
- A logo with a transparent background and a background color.
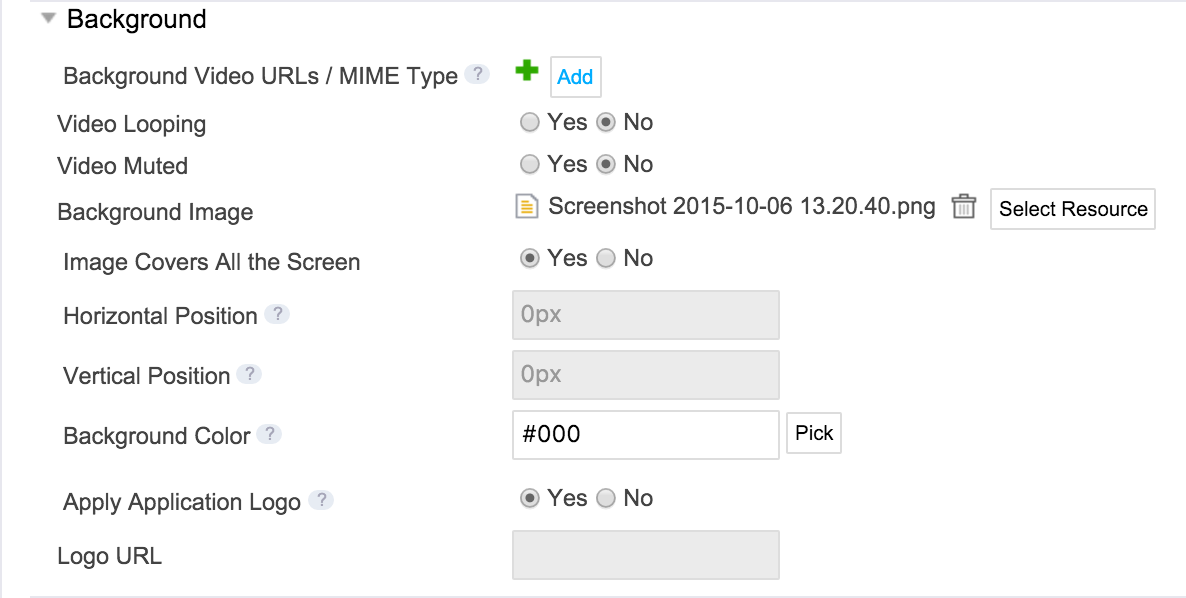
Image
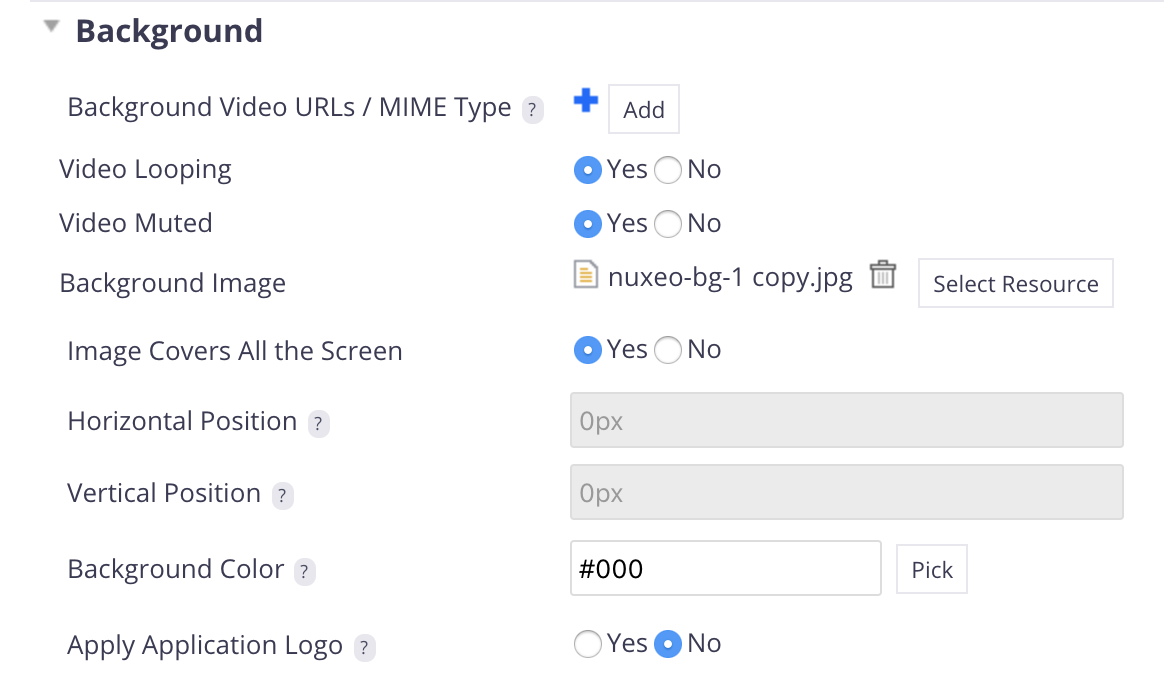
- In Background Image, click on Select Resources.
- Indicate if the background covers all the screen (with CSS3/recent browsers).
- If not, define how the image should be displayed using pixels or the position attribute.
- Pick a color to be displayed if the background image is too small to cover all the screen.
| Before | Studio Configuration | After |
|---|---|---|
|
|

|
Video
- Select a background video.
- In
Background Video URLs / MIME Type, click Add. - Enter the URLs and MIME Types of your video.
- Define the options for the video, such as looping or muting the video.
Customizing the Login Box
Selecting a Logo
The logo defined here will only be displayed on your login page, but won't be defined as your application logo.
- In the Login Logo section, click Select Resources and upload the logo image.
- Optional: Define the width and the height of the logo.
- In Logo Alt, enter a text that can be displayed if the image cannot be shown.
| Before | Studio Configuration | After |
|---|---|---|
|
|
|
|
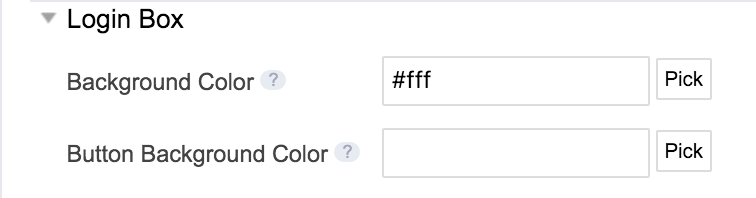
Selecting a Login Button Color
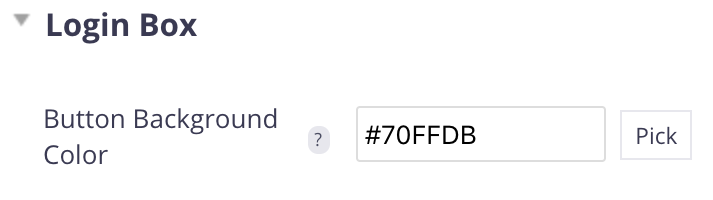
You can change the color of the Log in button.
In Button Background Color, enter the code of your color or click on Pick to select a color from the color picker.
| Before | Studio Configuration | After |
|---|---|---|
|
|
|
|
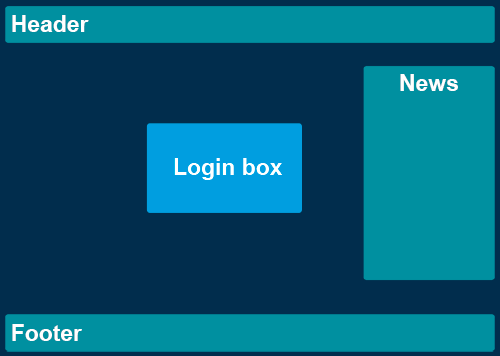
Displaying News and Footer
To customize the login page, you can also remove the news and footer boxes.
| Login page layout | Studio Configuration | After |
|---|---|---|
|

|
|
Branding Options with JSF UI
Please refer to the Web UI documentation.
If you are working with JSF UI, some branding options differ.
There are 3 steps shown by 3 tabs to brand your application:

- The Main Pages tab will let you manage the global rendering of your application
- The Login Page tab will let you manage the login page rendering
- The Custom CSS will let you define your CSS rules that will be applied on each page of Nuxeo
Main Pages Tab
The Main Pages tab is where you will specify the main elements that define a branding: the logo, the colors and the font used by the default view in Nuxeo.
Changing the Logo displayed on Header
| Before | Studio Configuration | After |
|---|---|---|
|
|
|
|
Changing the Header and Footer
| Before | Studio Configuration | After |
|---|---|---|
|

|
|
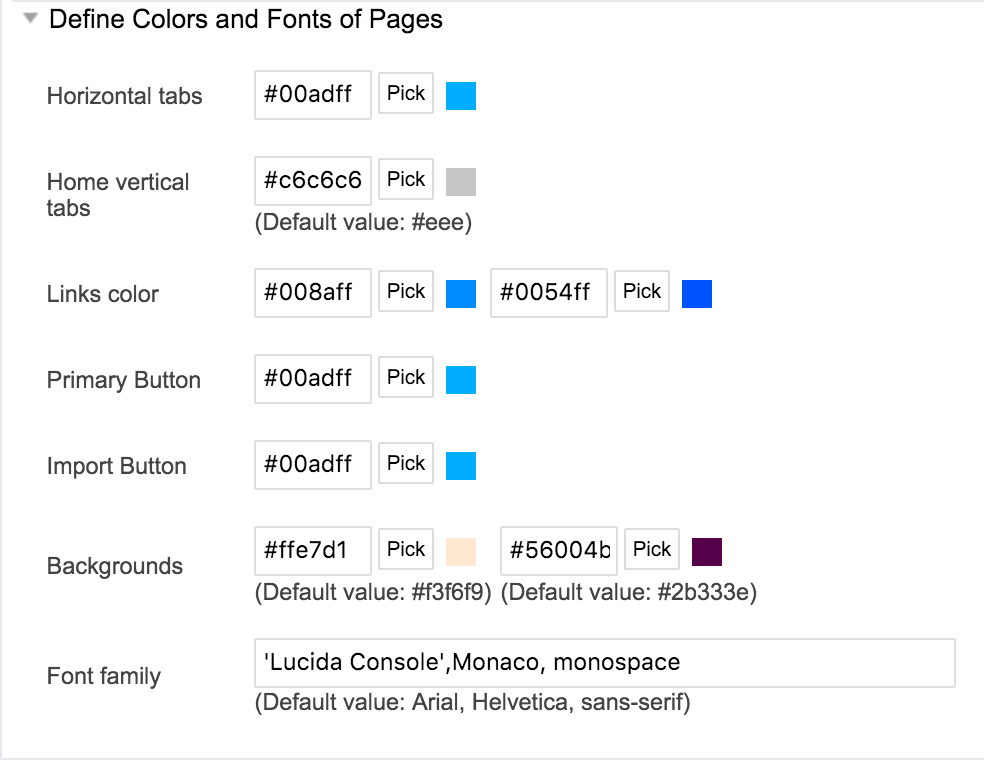
Additional Branding Elements
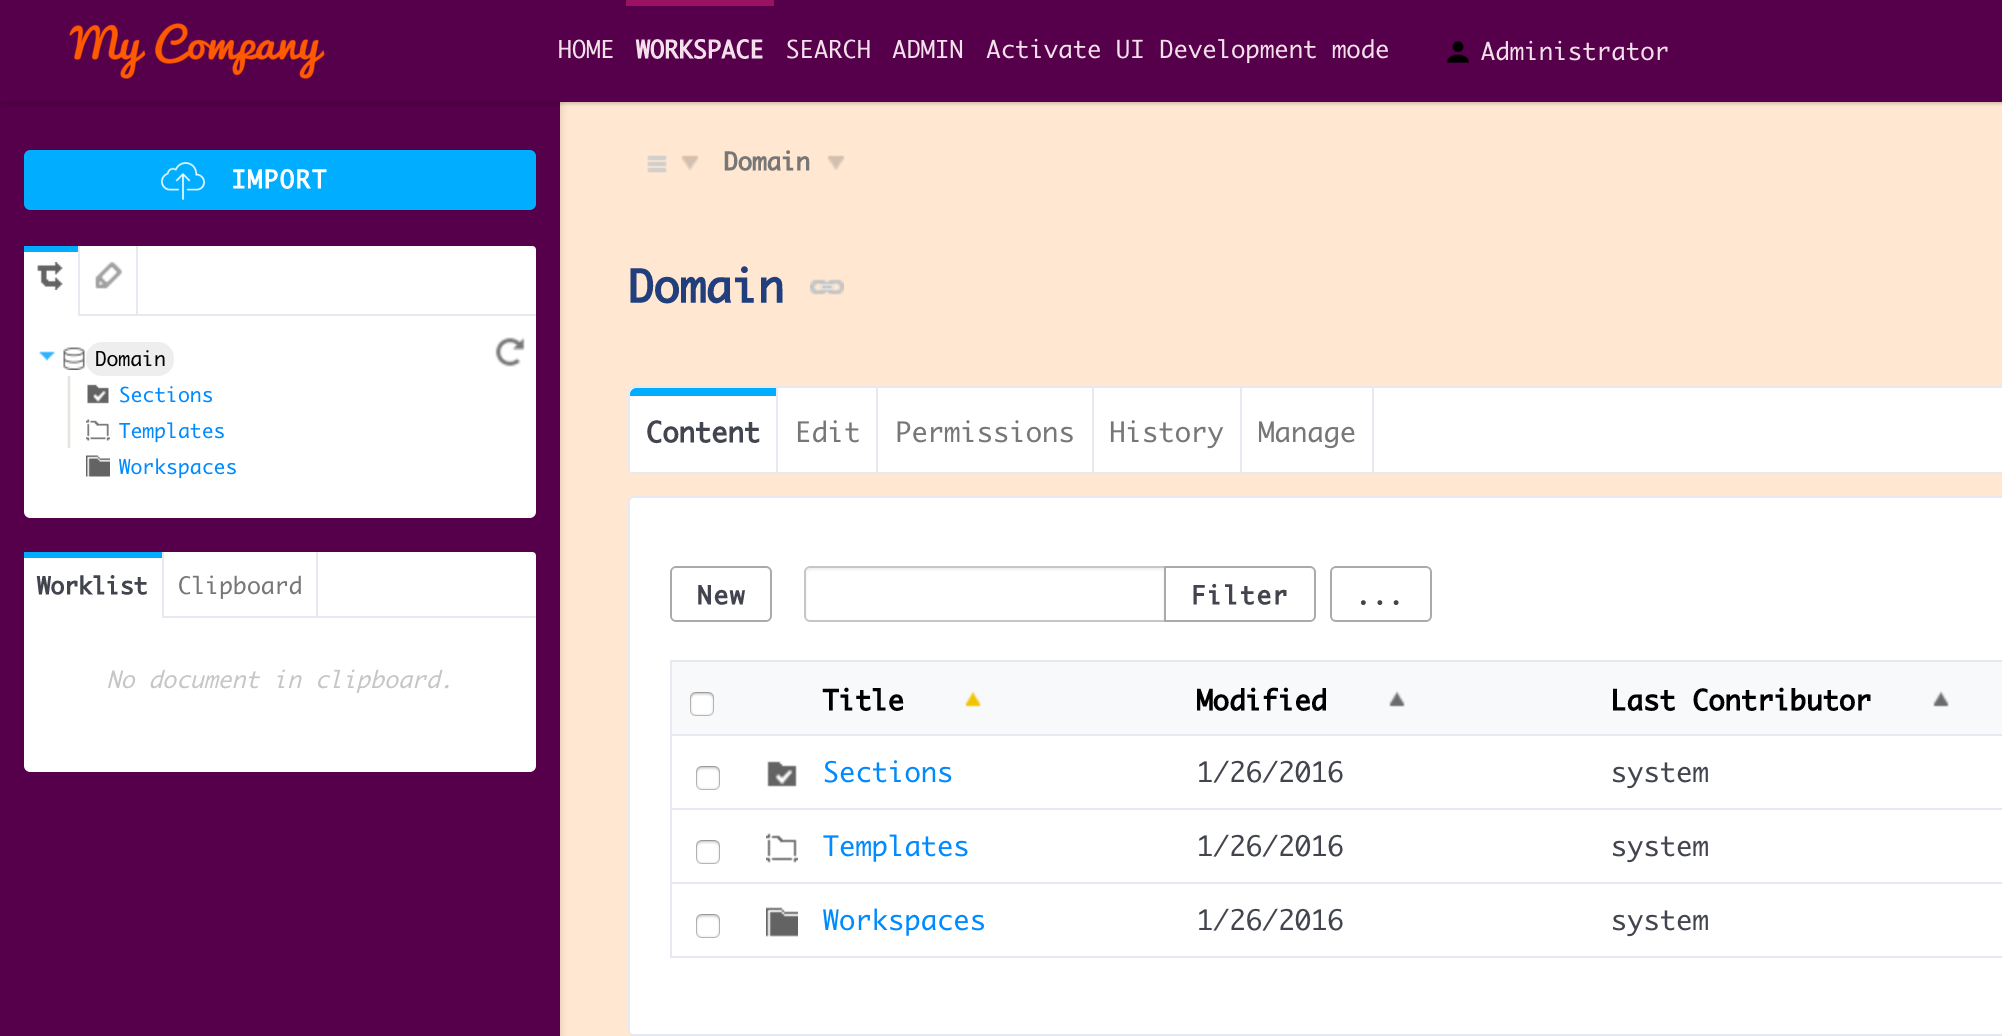
The additional branding elements section contains all the customizable elements relative to the page contents: links colors, font family used and color of backgrounds and buttons.
| Studio Configuration | Result | |
|---|---|---|
|
| |
Login Page Tab
This tab will let you manage the customization of the login page view.
Common Changes
Basic Studio Configuration:
- Select a background video or a background image. Be careful not to use an image too heavy to a quick display for the users.
- Define the options for the video or the image, for example to mute the video or the position (in pixel or position) of the image, if you know that it will be large enough for the huge screen resolutions.
- Or make the background cover all the screen (with CSS3 / recent browsers).
- Pick a color that will be displayed if the background image is too small and not covering all the screen.
That's it!
Most of our customers apply the following strategies for their login page background image:
- A picture covering all the screen. This is the strategy chosen by Nuxeo.
- Or a logo with transparency as the background image, aligned on the top left (Horizontal alignment = top, Vertical alignment = left) + a background color.
With a web designer's help, you can have many other possibilities.
Additional Options
| Login page layout | Studio Configuration | Role |
|---|---|---|
|

|
To let you customize the login screen completely, the news and footer can be removed. |
|
If you have a simple color used as the background image in the login page, you can add a color to the login box and to the button.This option must be used carefully: don't use heavy patterns or things that will make the readability difficult or hamper the interpretation. The login box style must stay very simple and light to keep the login action as a user-friendly step. |
CSS Editor Tab
The CSS Editor is dedicated to web designers who know CSS and its syntax. It's the place to declare your new CSS rules or override existing rules that will be used into the Nuxeo main tabs: Home, Document Management and Admin Center.
Have a look at the Nuxeo UI Style Guide to see all the existing CSS rules used by default in your platform, and understand more about readability, usability, layout design, and user experience.
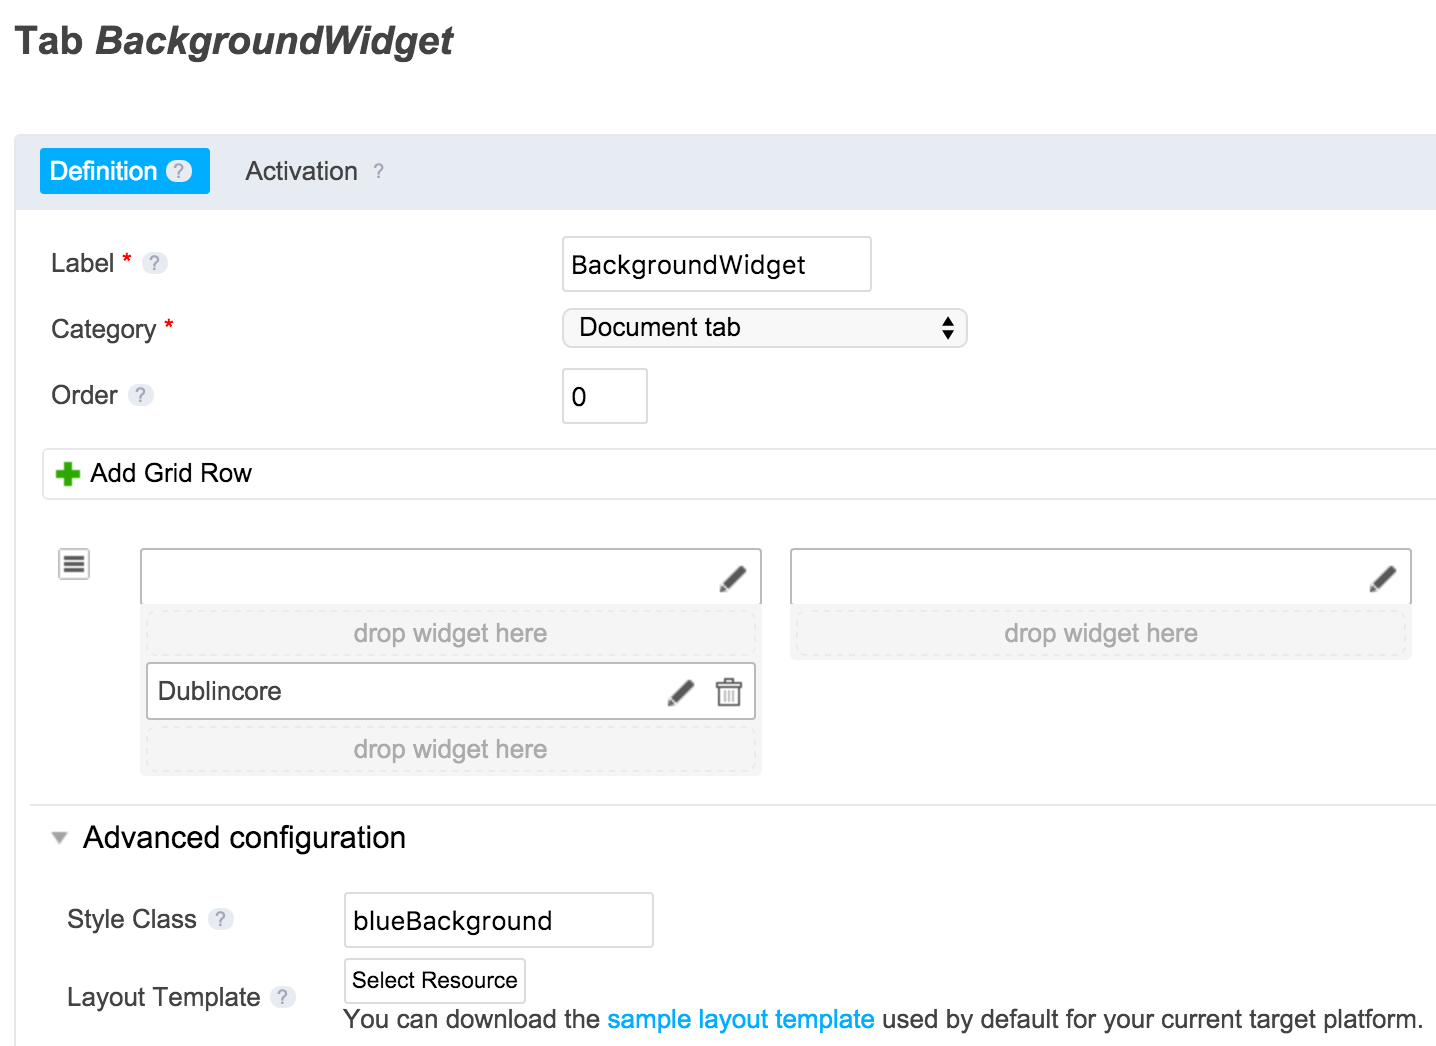
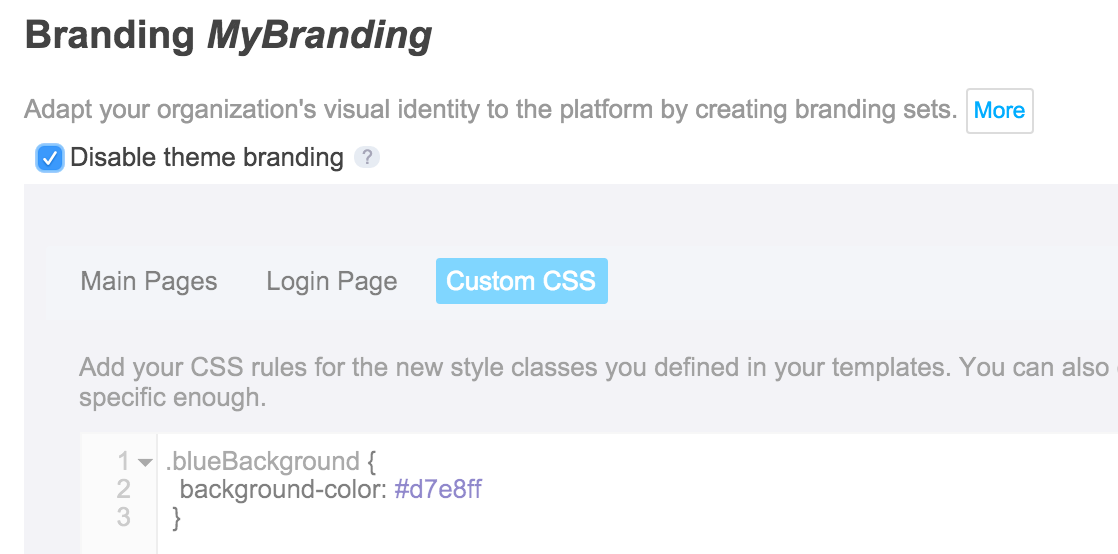
Declaring a New CSS Class and Its Rules
You can add style classes in your widgets in forms, content views, and tab layout to manage the rendering of your elements.
Let's add a background color on a widget's container:
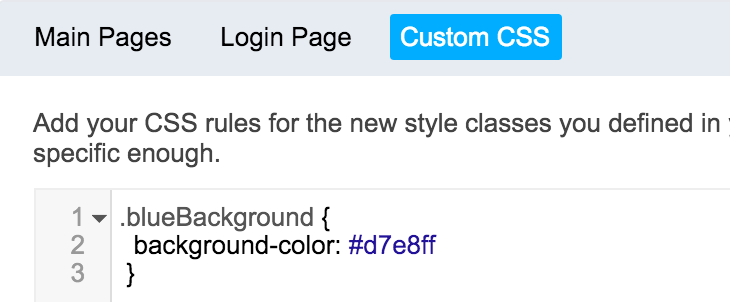
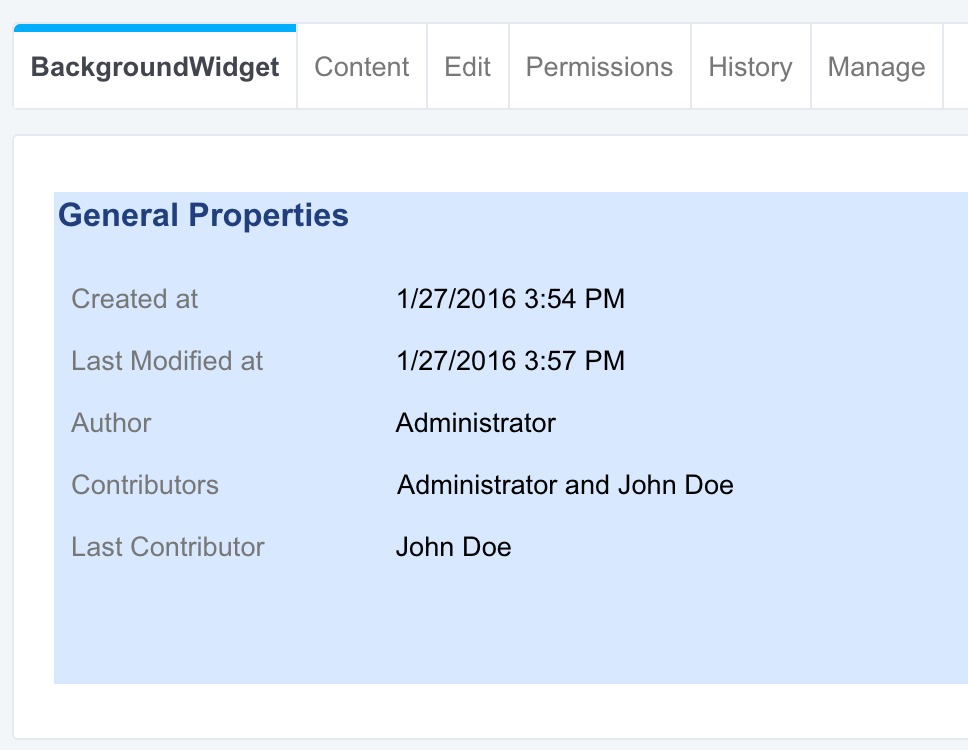
| 1. Widget Editor | 2. CSS Editor | 3. Result |
|---|---|---|
|
|
|
| Define a class in the widget editor. | Declare your blue background in the CSS Editor. | Enjoy your blue container. |
Overriding an Existing Rule
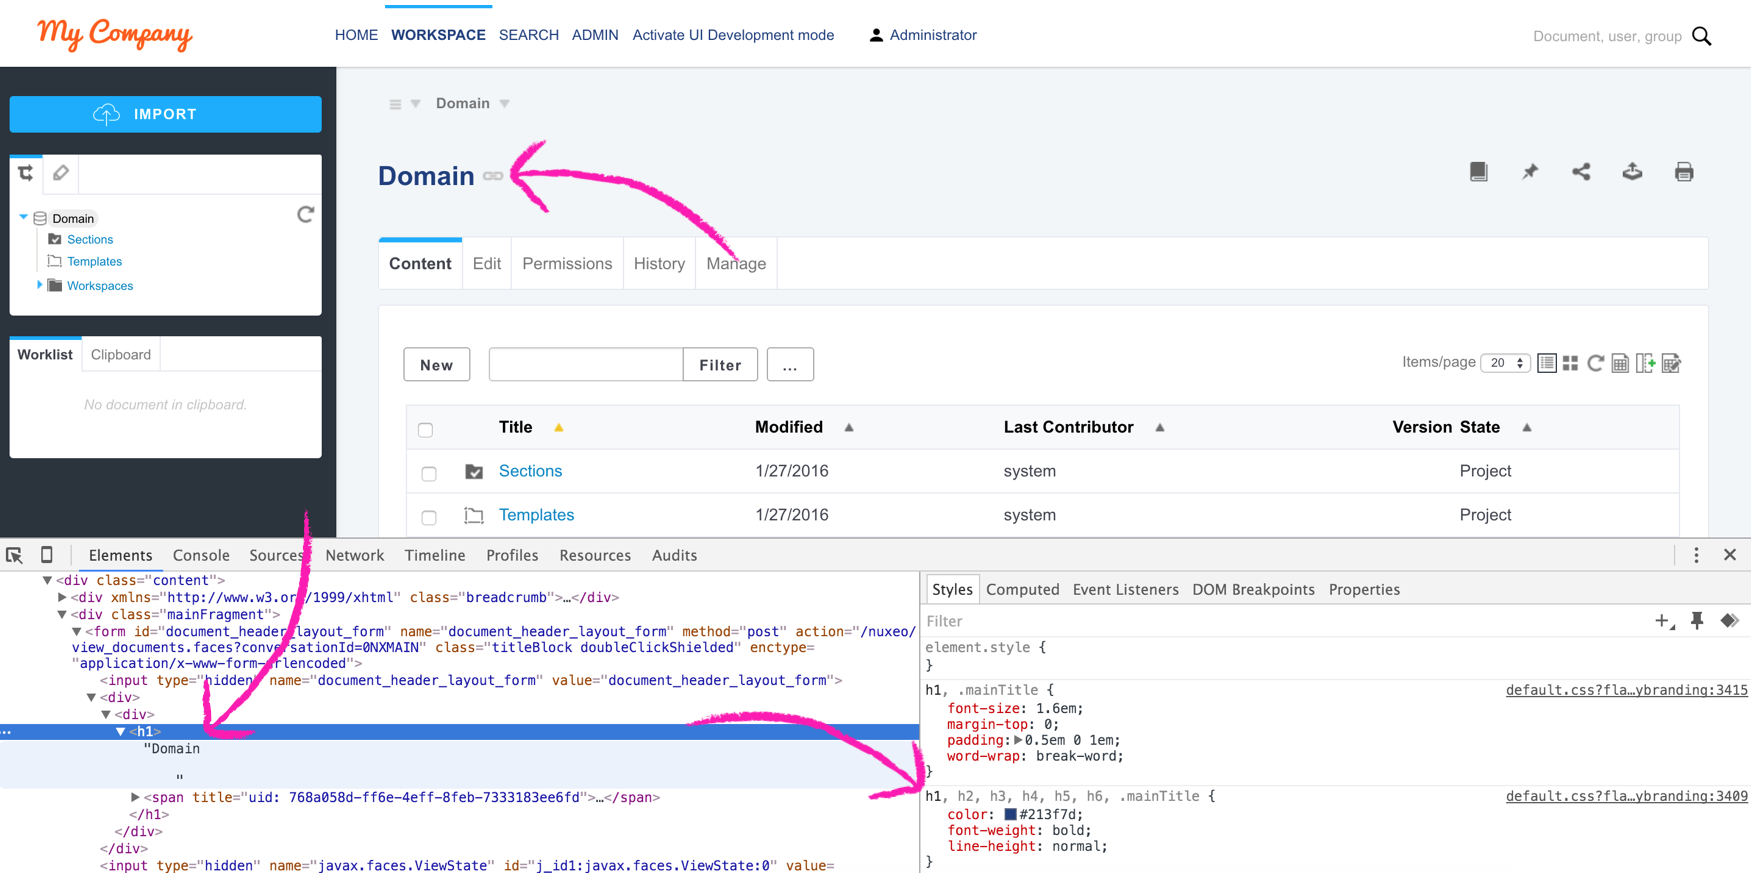
You want to change an existing style to fit your needs? In addition to the Nuxeo UI Style Guide that explains the default set of CSS existing rules, you will need to use a browser's web inspector to understand what to override.
Let's display the main title of pages in pink:
| 1. Inspect the existing style | 2. Declare your new rule | 3. See the result |
|---|---|---|
|
|
|
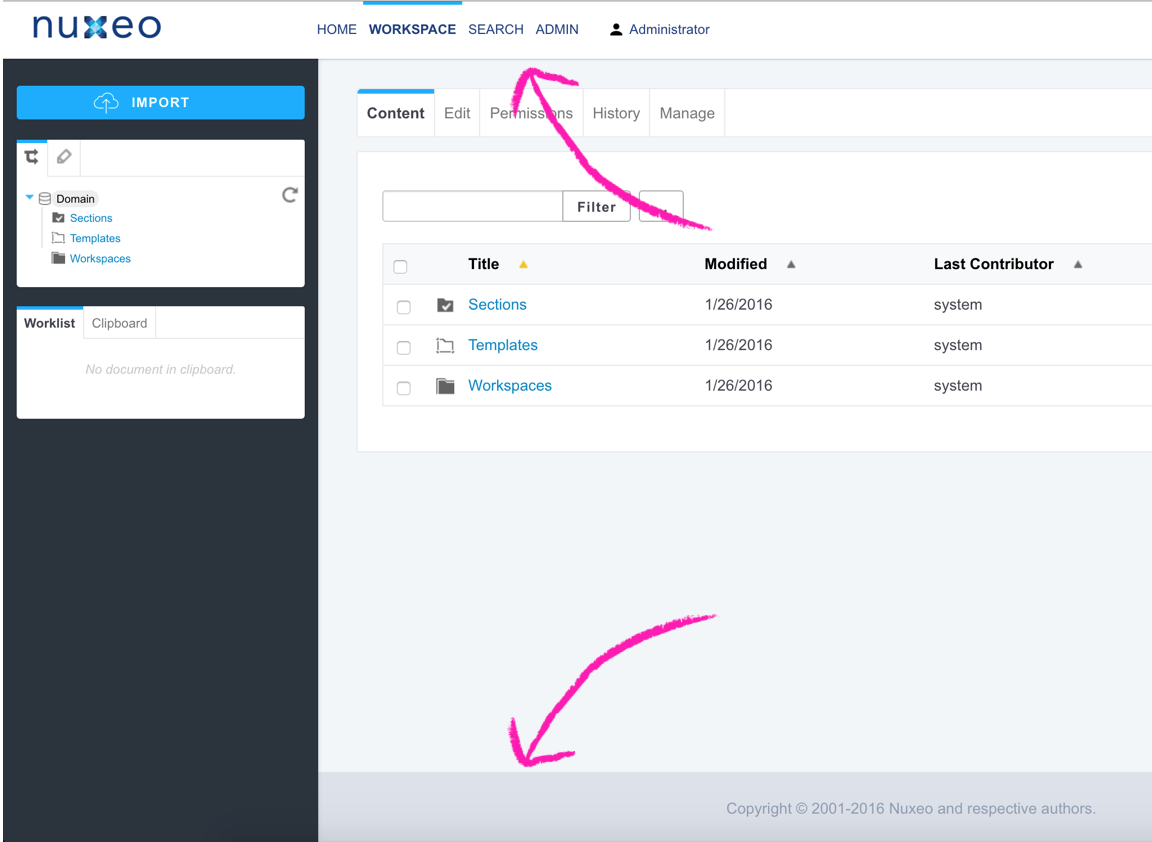
The pink arrows show the main title at the top of the page, the code and its CSS declaration are at the bottom, in the web inspector. Seeing this, you will need to override the default.CSS**** h1 rule that contains the color declaration.
You can use the parent CSS classes, underlined here in green, to have a stronger CSS selector than the default one.
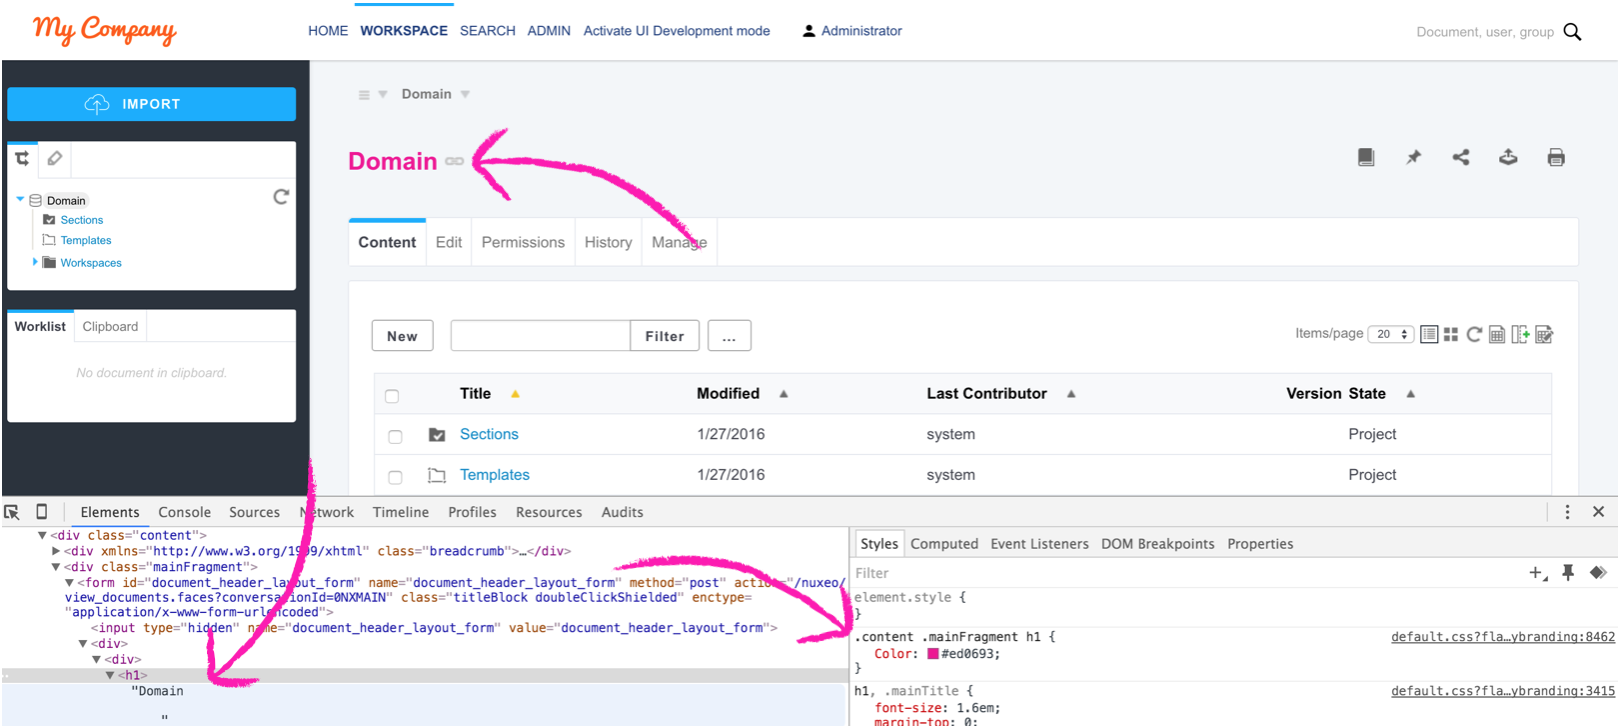
|
Your rule contains three selectors: .content, .mainFragment and h1.
That way, you're sure that your new style will be stronger than the original style declared with only two selectors: default.CSS*** and h1.
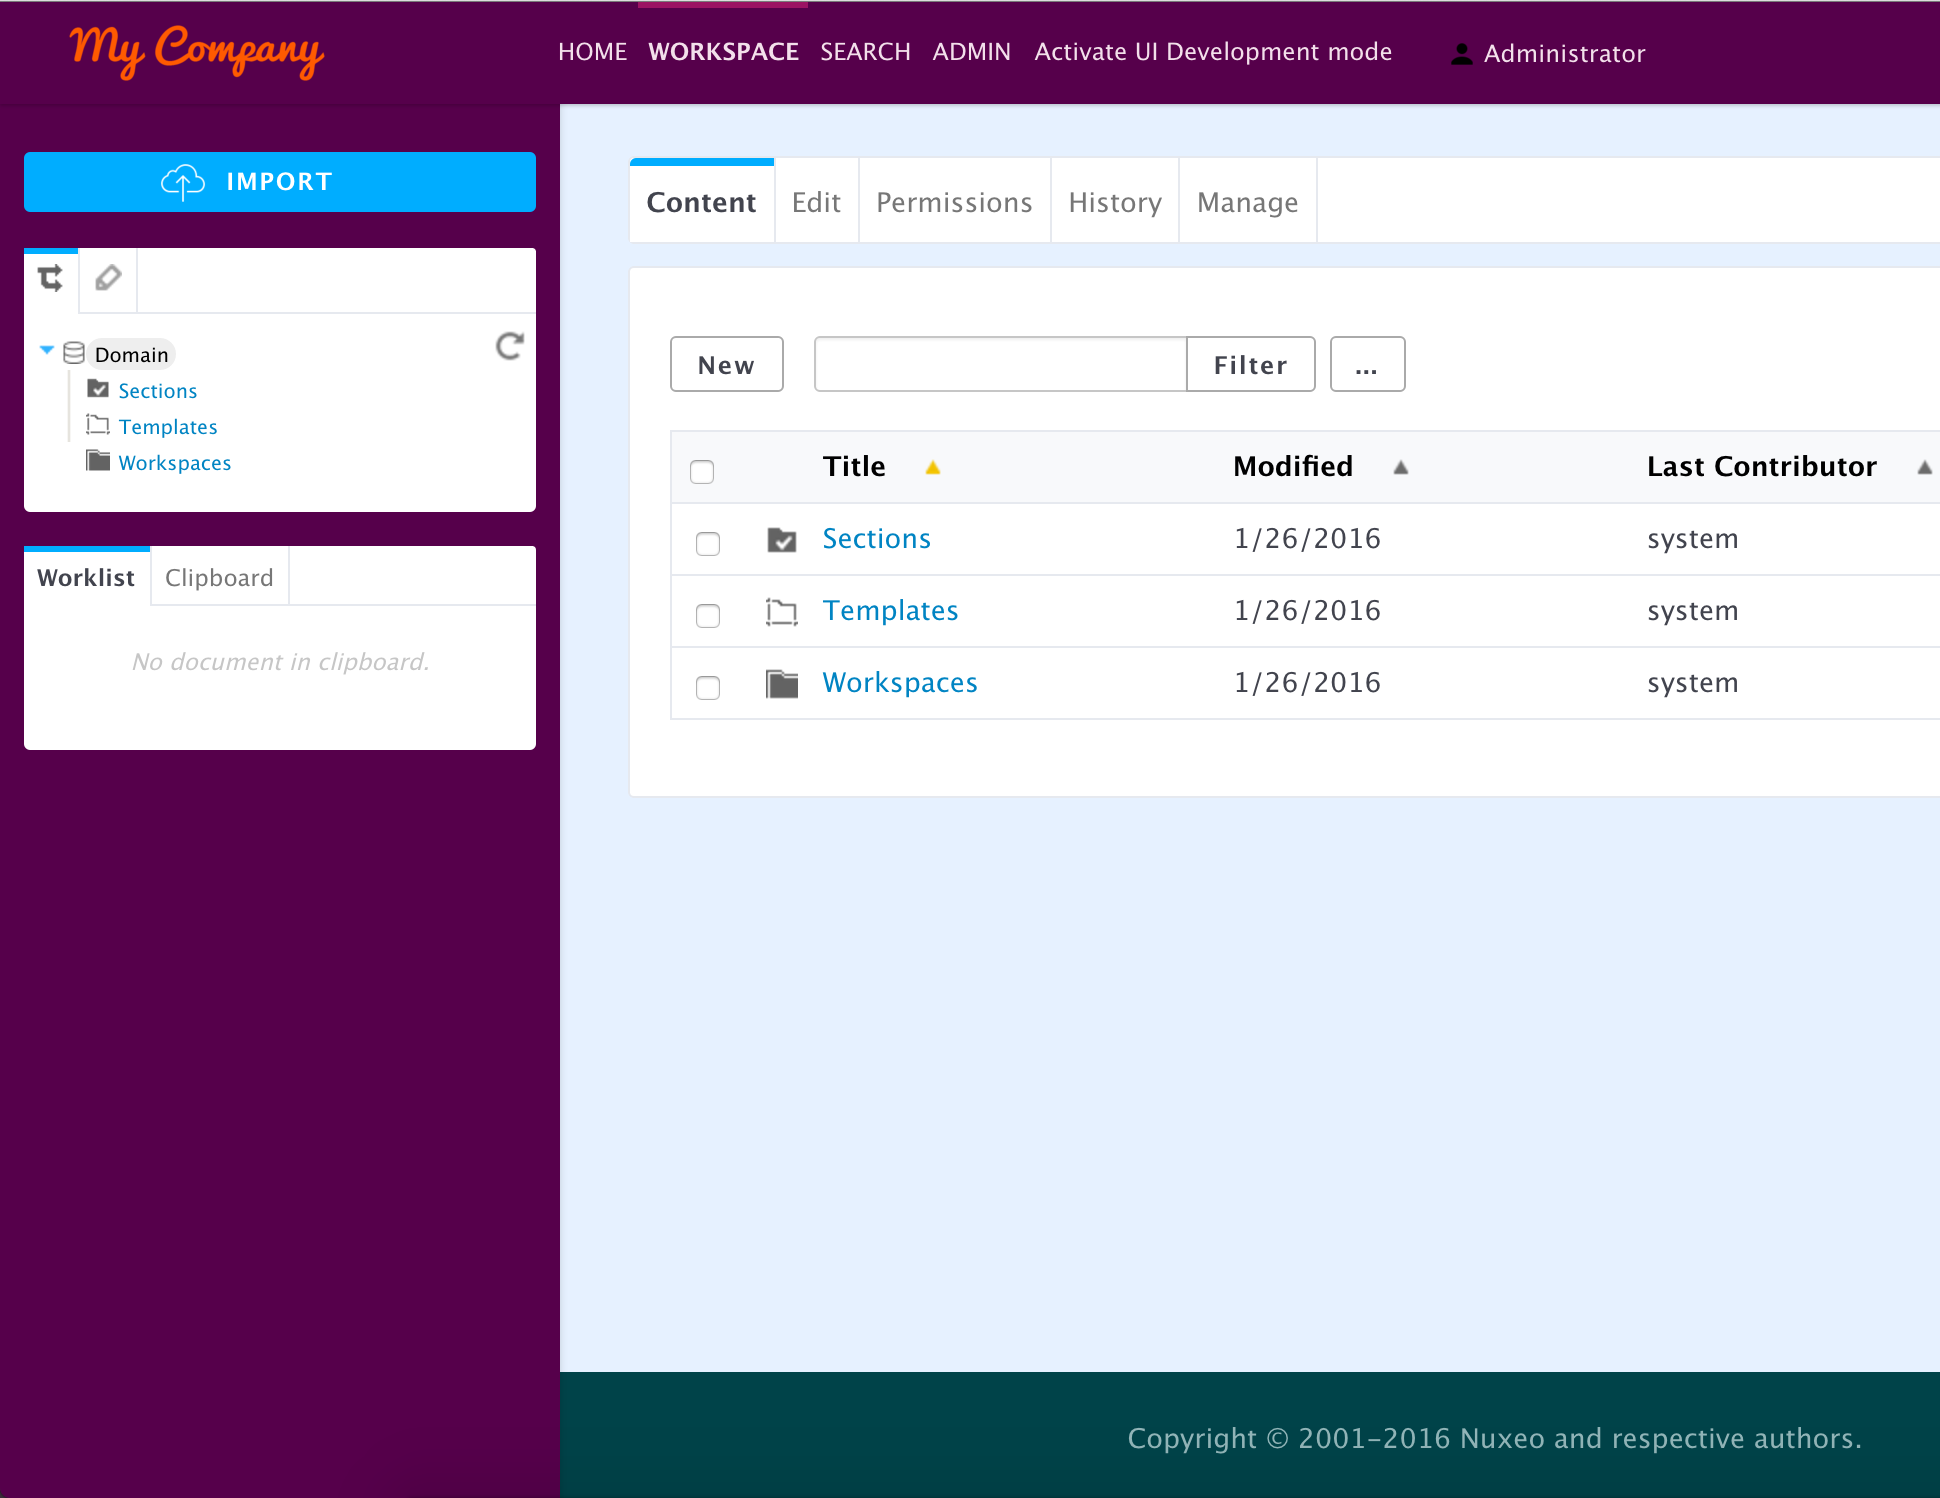
| Your title is pink now. You can see that your new rule is displayed at the top of the default one, and the original black color value is striked, so not used anymore. |