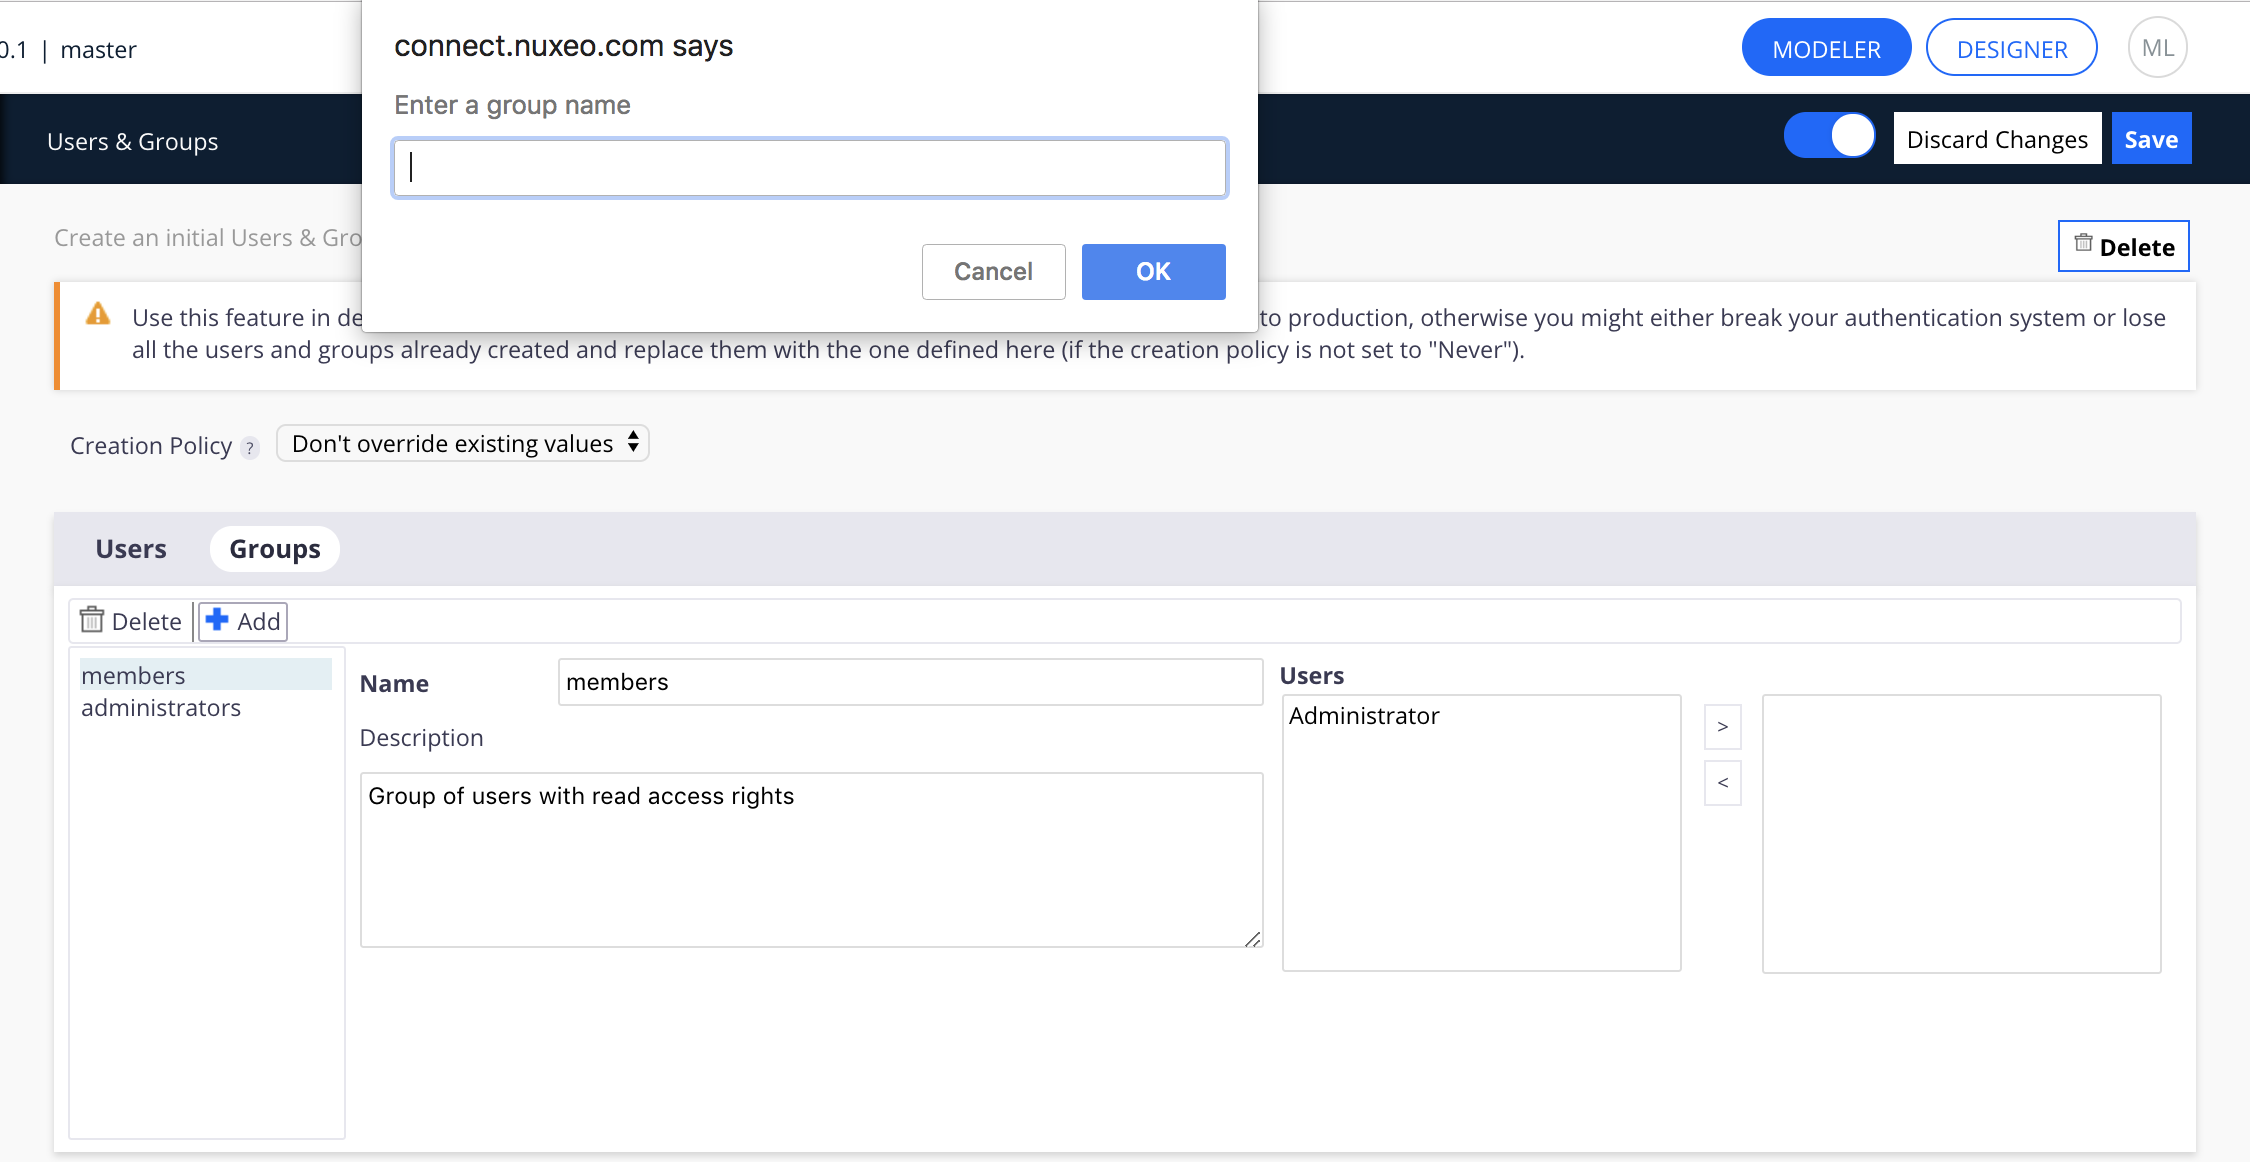
Some features in Nuxeo Platform are restricted to very specific groups or users and will need to be configured through Nuxeo Studio. To make sure that users are not blocked by a missing group that the functional administrators would have forgotten to create, Studio enables you to configure users and groups that will automatically be created by the system. The "members" and "administrators" groups are groups created by the system and used for default permissions, for instance. This feature is also very useful when you want to prepare a demo and be sure that you just need to deploy your plugin to have everything ready.
The steps to add a new user or a new group are basically the same.
To add a user or group:
In the left menu, click Roles and Permissions and Users & Groups.
If users and groups have already been created, The list of already existing users is displayed. Jump to step 3 to add new users.
If users and groups haven't been defined yet, a Create button is displayed. Continue to step 2 to create default users and groups.
If no user and group have been defined, click on the Create button. The "Administrator" user and the groups "members" and "administrators" are automatically created by the system. You can now add new default users and groups.
In the Users or Groups tab, click the Add button.
In the window that pops up, type the new user's or group's name.


Edit the user's or group properties (see below for more details).
Click Save.
When you deploy your customizations, you will need to empty your database to enable the creation of these users and groups. Until you do so, you will only have the users and groups of a default Nuxeo application.If you choose a Creation Table Policy of "Always", then at each reload or restart the Studio-defined users and groups will completely replace anything you may have changed from Nuxeo. Any updates, additions or removals done from Nuxeo will be lost.
Users properties
| Field | Description |
|---|---|
| Name | Login of the user. It can only hold alphanumeric characters. |
| Password | Type the password of the predefined user. |
| First name | Optionally type the first name of the user. |
| Last name | Optionally type the last name of the user. |
| Optionally type an email address for the user, that will be used for email alerts. | |
| Company | Optionally fill in the user's company name. |
| Groups |
Use the > and < arrows to add or remove the user from one of the predefined groups.
|
Groups properties
| Field | Description |
|---|---|
| Name | The name and ID of the group. It can only hold alphanumeric characters. |
| Description | An optional describing what the group is used for. |
| Users |
Use the > and < arrows to add or remove predefined users from the group by default.
|
user: or group: should be set to avoid confusion since a group can have the same id as a user. Indeed, whenever a schema field can store a group or user id, this persisted id should be prefixed.