Hyland University
Watch the related content in Hyland University:
Course on Content Model Design in Nuxeo Studio
Expert Session on Content Modeling Options


Concept
A schema in Nuxeo Studio is dedicated to define a list of metadata. If you are not comfortable with this typical ECM notion, please read more about documents, properties and schemas in the Essential Nuxeo Platform Terminology.
Note that schemas can be defined directly from the Documents menu. One would configure a schema here when sharing of the definition among multiple document types is known from the beginning.
disabling a feature
To disable a feature, click on the toggle button at the top-right of your screen.


Creating a Schema
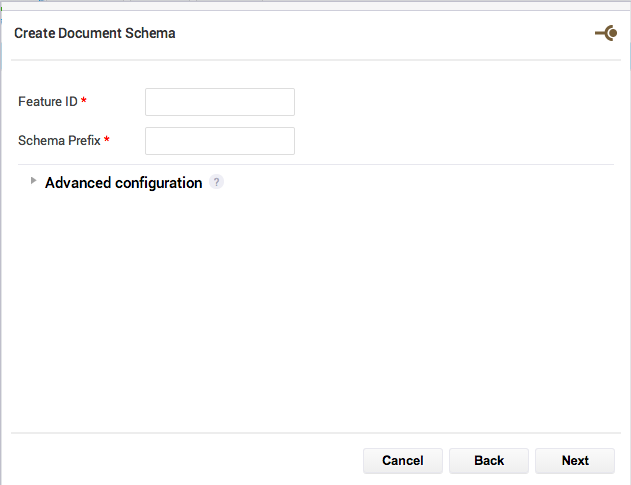
To create a schema, click on New.


- Feature ID: The id of the schema. Will be used as the technical id of the schema. It should not contain spaces or special characters.
- Schema Prefix: Prefix of the schema. Prefix is used when referencing a document property (ex:
dc:titlefor the Title property in the Dublin Core schema), for instance in an NXQL query.
Schema names and prefixes
You should carefully choose your schema names and prefixes. There will be many references to them in your project (layouts, automation, NXQL queries). Nuxeo Studio doesn't yet handle completely schema refactoring. Furthermore, once you deployed, if you change a schema name or prefix, you will have to operate a data migration.
We suggest you to use name like my_schema_name (lowercase, word separated by an underscore) for the feature id and something shorter for the prefix like msn. See the Naming Conventions page for more tips on ids and names recommendation in Nuxeo Studio.
Advanced configuration
Mode:
- Default: The schema is editable in Nuxeo Studio from scratch, with Studio capabilities
- Initialize: The schema is editable in Nuxeo Studio with Studio capabilities, and is pre-initialized from an external resource (see the Resources section)
- Import: The schema is not editable in Nuxeo Studio, it is initialized from an external resource (see the Resources section) and is deployed with your Nuxeo plugin
- Reference: The schema is not editable in Nuxeo Studio, it is initialized from an external resource (see the Resources section) and is not deployed with Nuxeo plugin. This is useful if the schema is deployed from another Nuxeo plugin but you need to refer it in your project.
- Allow nested complex types: By default, you can only choose one level of Complex type. If you select this parameter you will have the possibility to have a Complex type at each level of your schema. Make sure that this is useful for your application before choosing it.
Editing a Schema
Nuxeo Platform LTS 2015 and Later


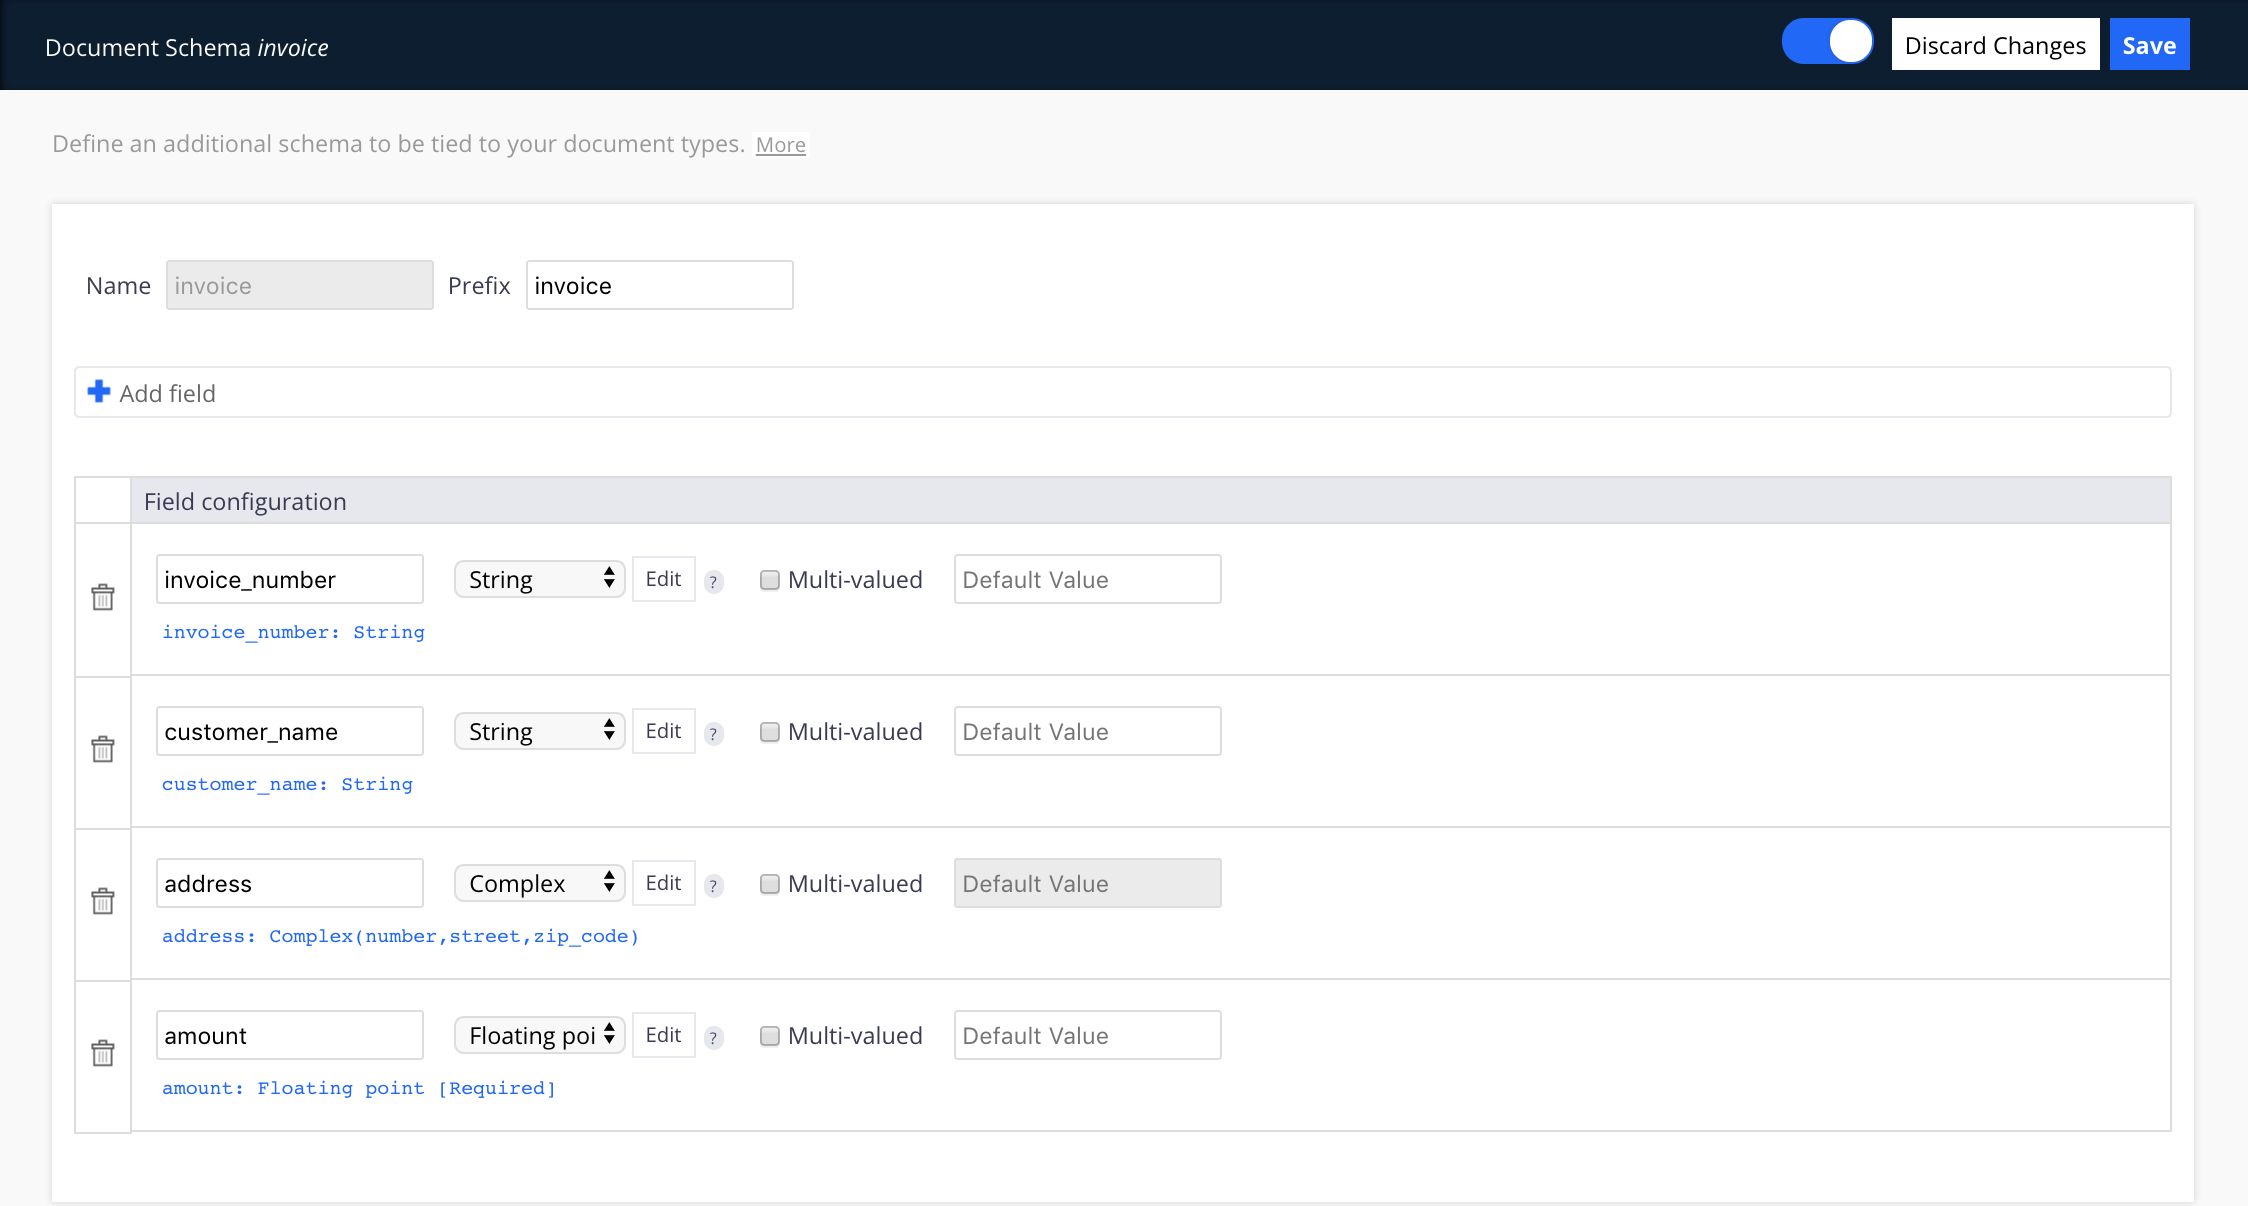
- Click on the Add field button.
- Fill in the field properties:
- Field Name: The name of the field.
You should carefully choose the field/property names, as changing them after going live requires a data migration. Furthermore, Nuxeo Studio doesn't handle property refactoring completely yet.
- Type: The type of the field. Possible types are:
- String: A string of characters
- Boolean: True or false field type
- Integer: An integer number
- Floating point: A fractional number
- Date: A date and time value
- Blob: The property will be a binary
- Complex: A complex type will let you define a complex field like an address storing street, zip code, etc... for instance.
- Directory: The values for this field will be taken from a directory.
- User/Group: The field values will be users and / or groups.
- Document: The field value will be the id of a document.
- Multi-valued: Check this box if you want the property to be a list (a list of blobs, a list of booleans, a list of dates, ...).
- Default Value: Sets a default value on the property at document creation time.
- Field Name: The name of the field.
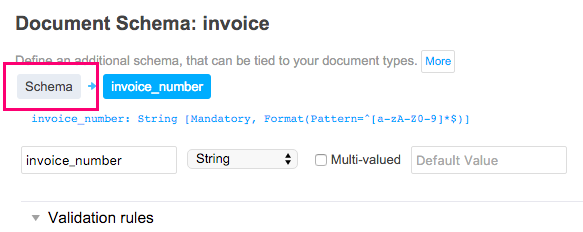
- Click on the Edit button to configure validation rules directly from the schema.
This prevents you from setting them up later from layout definition screens or automation chains for instance, possibly several times. Setting up validation rules on the schema assures you consistency.
 Depending on the type of the field, you can have different constraints available.
- Mandatory: This field will be be required to create or update the document.
- Text format : Indicate if the value for this field should respect a pattern. You can select a predefined pattern in the drop down list (not empty, email address pattern, etc.).
- Text length: Indicate the minimum and maximum numbers of characters the value must have for this field.
- Numeric range: Indicate the minimum and maximum numeric value for this field.To know more about validation rules, take a look at the page Field Constraints and Validation.
- Click on Schema to go back to the schema definition.


- Add as many fields as needed.
- Save.
Nuxeo Platform 6.0 and Older


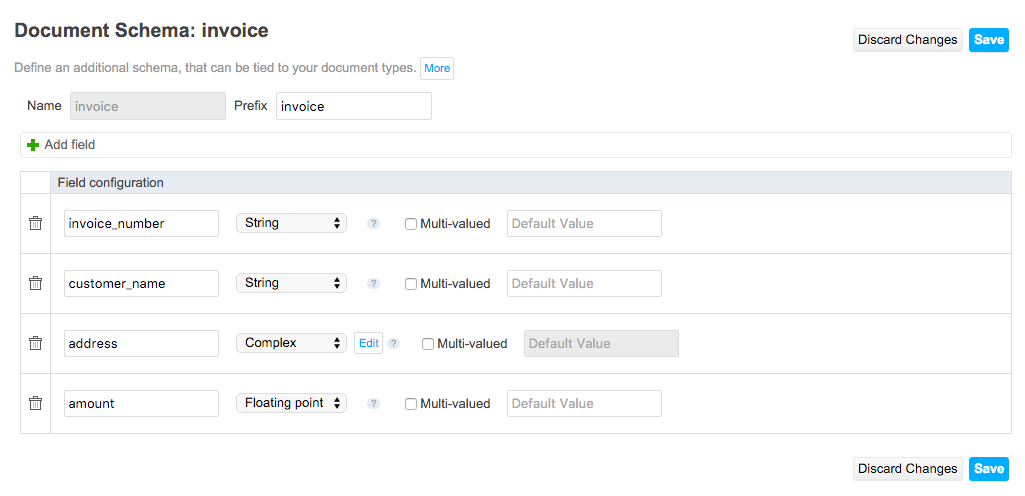
- Click on the Add field button.
Fill in the field properties:
Field Name: The name of the field.
You should carefully choose the field/property names, as changing them after going live requires a data migration. Furthermore, Nuxeo Studio doesn't handle property refactoring completely yet.- Type: The type of the field. Possible types are:
- String: A string of characters
- Boolean: True or false field type
- Integer: An integer number
- Floating point: A fractional number
- Date: A date and time value
- Blob: The property will be a binary
- Complex: A complex type will let you define a complex field like an address storing street, zip code, etc... for instance.
- Multi-valued: Check this box if you want the property to be a list (a list of blobs, a list of booleans, a list of dates, ...).
- Default Value: Sets a default value on the property at document creation time.
- Add as many fields as needed.
- Save.